Embed Size (px)
Citation preview
Copyright © by Vanja Grundmann 2014 @ AigurumiBB 1
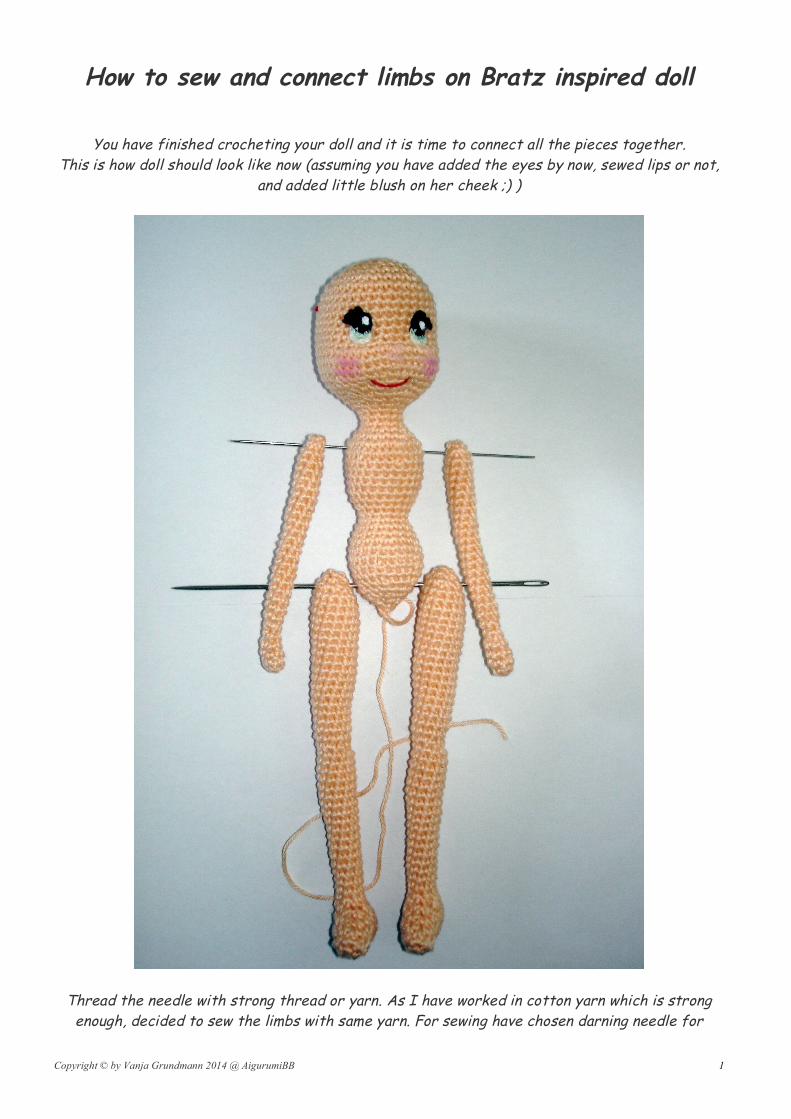
How to sew and connect limbs on Bratz inspired doll
You have finished crocheting your doll and it is time to connect all the pieces together.
This is how doll should look like now (assuming you have added the eyes by now, sewed lips or not,
and added little blush on her cheek ;) )
Thread the needle with strong thread or yarn. As I have worked in cotton yarn which is strong
enough, decided to sew the limbs with same yarn. For sewing have chosen darning needle for

Copyright © by Vanja Grundmann 2014 @ AigurumiBB 2
cotton (it is thin and goes easier through strong cotton stitches I make). It is important that
your needle is long enough to fit the hand nice and easy to sew through the stuffing.
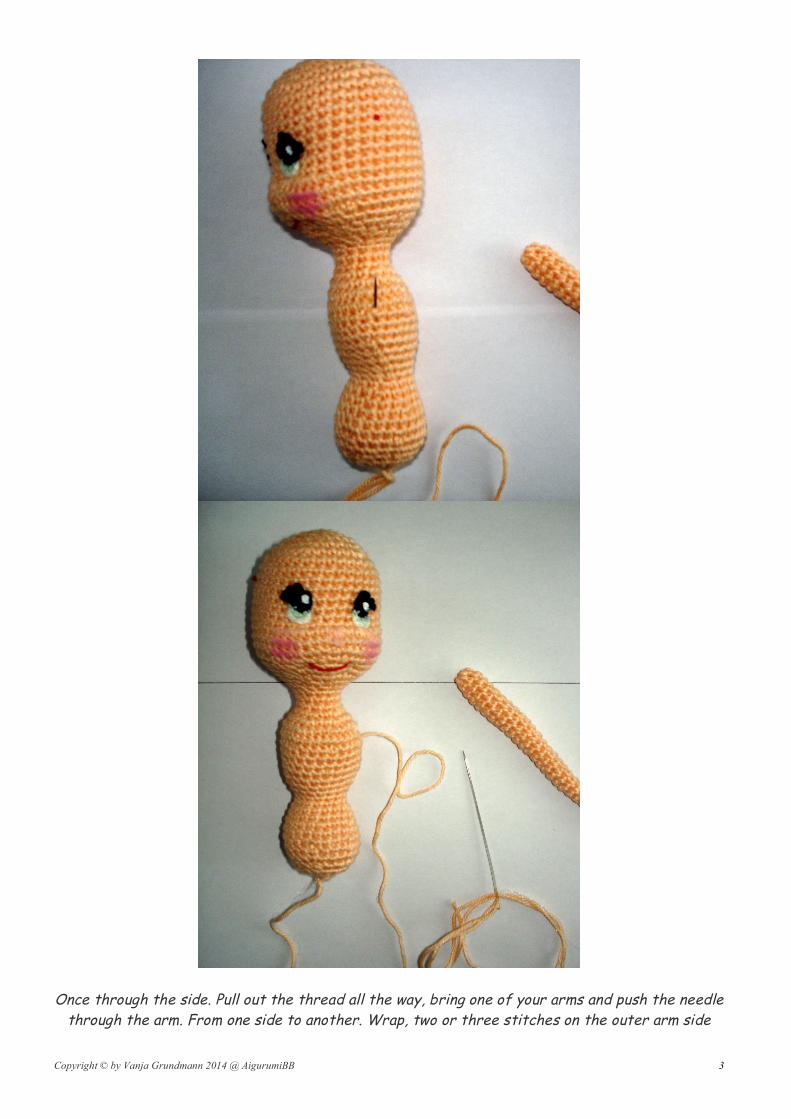
Push the needle from the bottom body opening up, towards one side where arms will be sewed.
Look photos below.
Copyright © by Vanja Grundmann 2014 @ AigurumiBB 3
Once through the side. Pull out the thread all the way, bring one of your arms and push the needle
through the arm. From one side to another. Wrap, two or three stitches on the outer arm side
Copyright © by Vanja Grundmann 2014 @ AigurumiBB 4
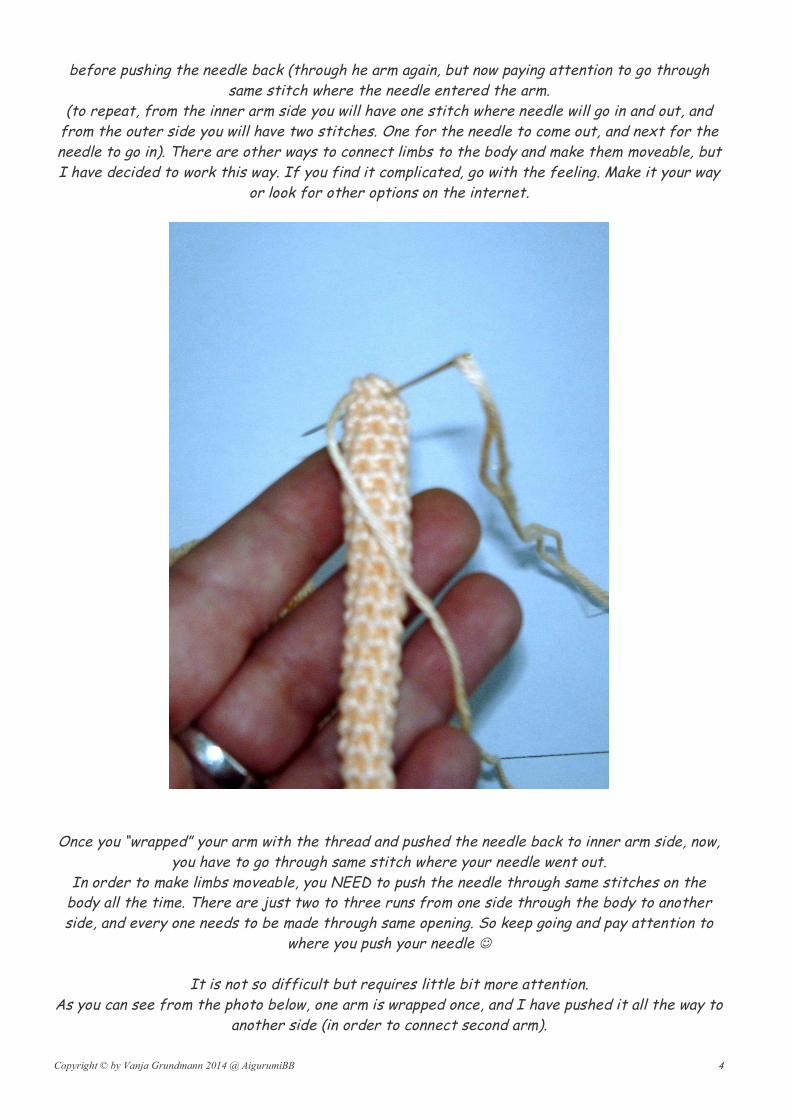
before pushing the needle back (through he arm again, but now paying attention to go through
same stitch where the needle entered the arm.
(to repeat, from the inner arm side you will have one stitch where needle will go in and out, and
from the outer side you will have two stitches. One for the needle to come out, and next for the
needle to go in). There are other ways to connect limbs to the body and make them moveable, but
I have decided to work this way. If you find it complicated, go with the feeling. Make it your way
or look for other options on the internet.
Once you “wrapped” your arm with the thread and pushed the needle back to inner arm side, now,
you have to go through same stitch where your needle went out.
In order to make limbs moveable, you NEED to push the needle through same stitches on the body all the time. There are just two to three runs from one side through the body to another
side, and every one needs to be made through same opening. So keep going and pay attention to
where you push your needle !
It is not so difficult but requires little bit more attention.
As you can see from the photo below, one arm is wrapped once, and I have pushed it all the way to
another side (in order to connect second arm).
Copyright © by Vanja Grundmann 2014 @ AigurumiBB 5
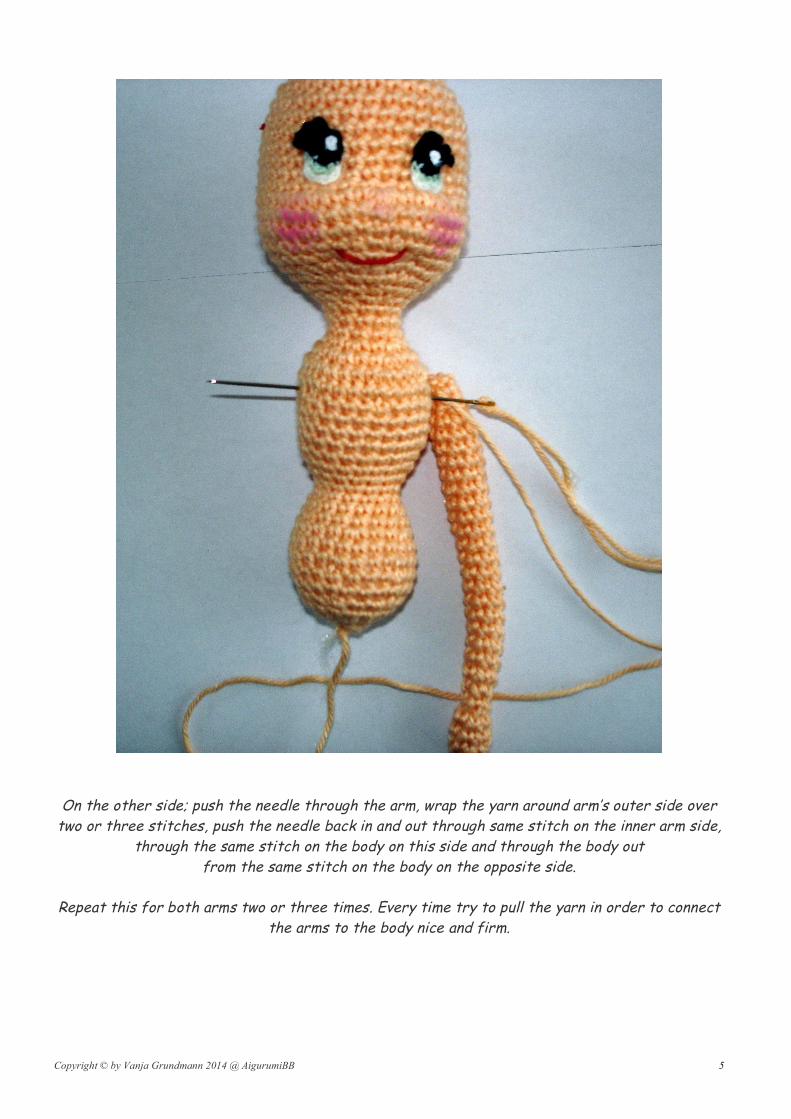
On the other side; push the needle through the arm, wrap the yarn around arm’s outer side over
two or three stitches, push the needle back in and out through same stitch on the inner arm side,
through the same stitch on the body on this side and through the body out
from the same stitch on the body on the opposite side.
Repeat this for both arms two or three times. Every time try to pull the yarn in order to connect
the arms to the body nice and firm.

Copyright © by Vanja Grundmann 2014 @ AigurumiBB 6
After done, your arms will look like this: As you can see, I have already pushed the needle towards the hips, where the legs will be added.
Pulled the yarn and arms close to the body (later will try to shape them a little better squeezing
stuffing a bit and shaping them with fingers).

Copyright © by Vanja Grundmann 2014 @ AigurumiBB 7
Photo above has showed I had everything prepared to start sewing the legs. Here it is first leg
sewed up. Same procedure as with arms (only here is little bit easier because the leg has bigger
surface).
Push the needle through the leg, wrap over three-four stitches her, back again through the leg
towards the same stitch on the inner leg part…
I think you understand how it is done by now and legs are going smooth. As you can see, I have finished connecting one leg, and my needle is pointing through other side already. Second leg is
about to be connected.

Copyright © by Vanja Grundmann 2014 @ AigurumiBB 8
Here is the second leg connected, now two more times repeating the same in order to make them
nice and firm.
Our doll is sewed. Now you can close the bottom body opening, hide all ends inside the body.

Copyright © by Vanja Grundmann 2014 @ AigurumiBB 9
Hope it wasn’t to difficult to make.
For any questions or help you can find me on
Facebook page: https://www.facebook.com/AmigurumiBB
Faecebook profile: https://www.facebook.com/fairydolls.crochet
Blog: http://amigurumibb.wordpress.com/
Or e-mail: [email protected]
!
Vanja