Embed Size (px)
Citation preview
How to install and Configure Adobe Media Live Encoder for HD broadcasting
Adobe Media Live Encoder Download:
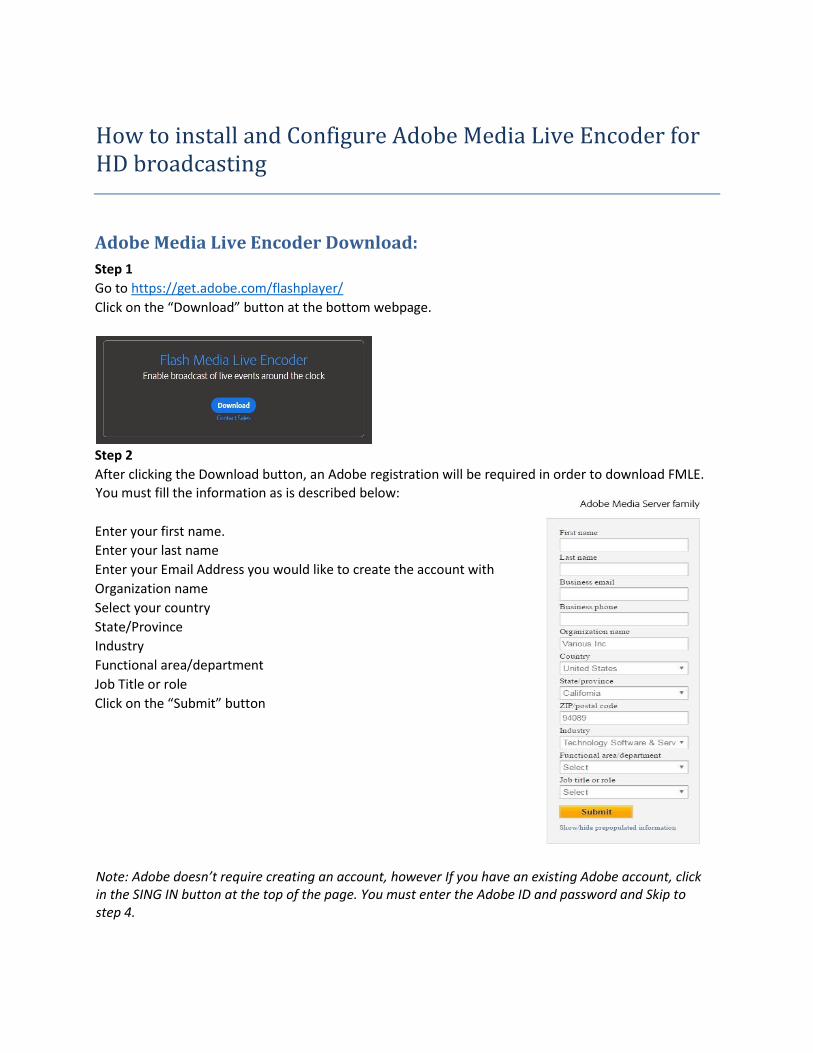
Step 1 Go to https://get.adobe.com/flashplayer/
Click on the “Download” button at the bottom webpage.
Step 2 After clicking the Download button, an Adobe registration will be required in order to download FMLE.
You must fill the information as is described below:
Enter your first name.
Enter your last name
Enter your Email Address you would like to create the account with
Organization name
Select your country
State/Province
Industry
Functional area/department
Job Title or role
Click on the “Submit” button
Note: Adobe doesn’t require creating an account, however If you have an existing Adobe account, click in the SING IN button at the top of the page. You must enter the Adobe ID and password and Skip to step 4.

Step 3 The next page displays the License Agreement. Review the license agreement then scroll to the bottom
of the page and click “I Agree”
Step 4 Download Flash Media Live Encoder 3.2 by clicking on the “Download for Windows” link or accordantly
to your operate system.
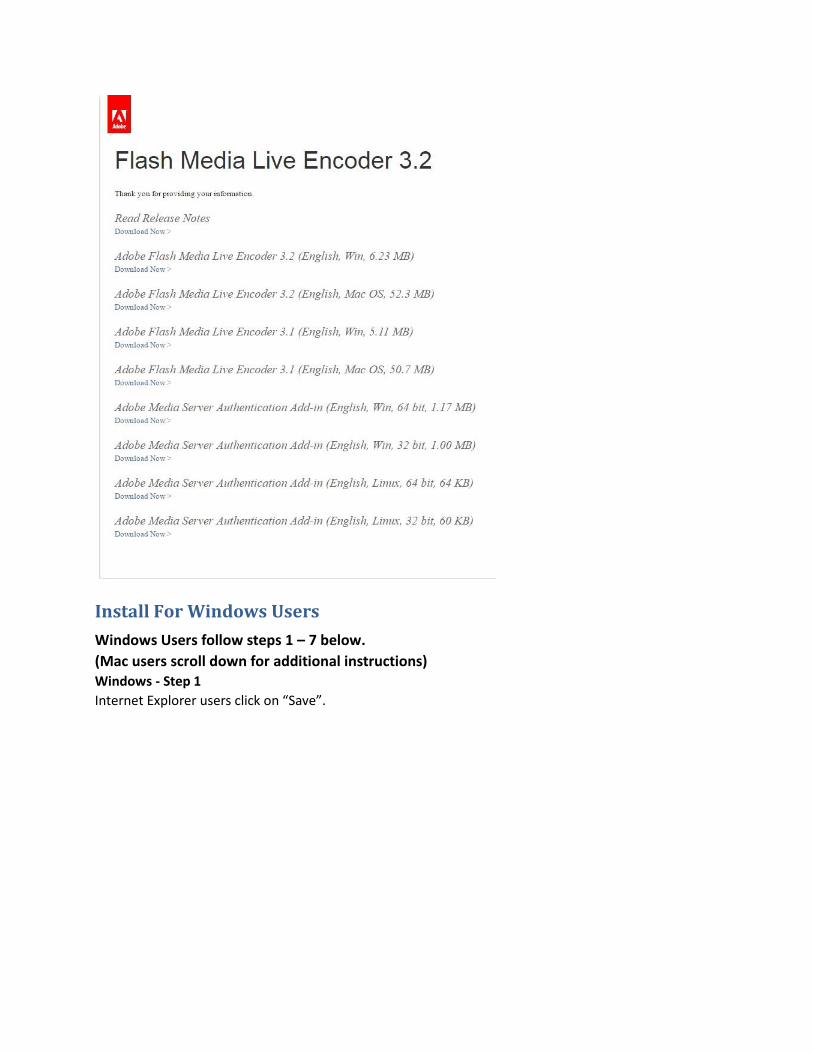
Install For Windows Users
Windows Users follow steps 1 – 7 below.
(Mac users scroll down for additional instructions) Windows - Step 1
Internet Explorer users click on “Save”.
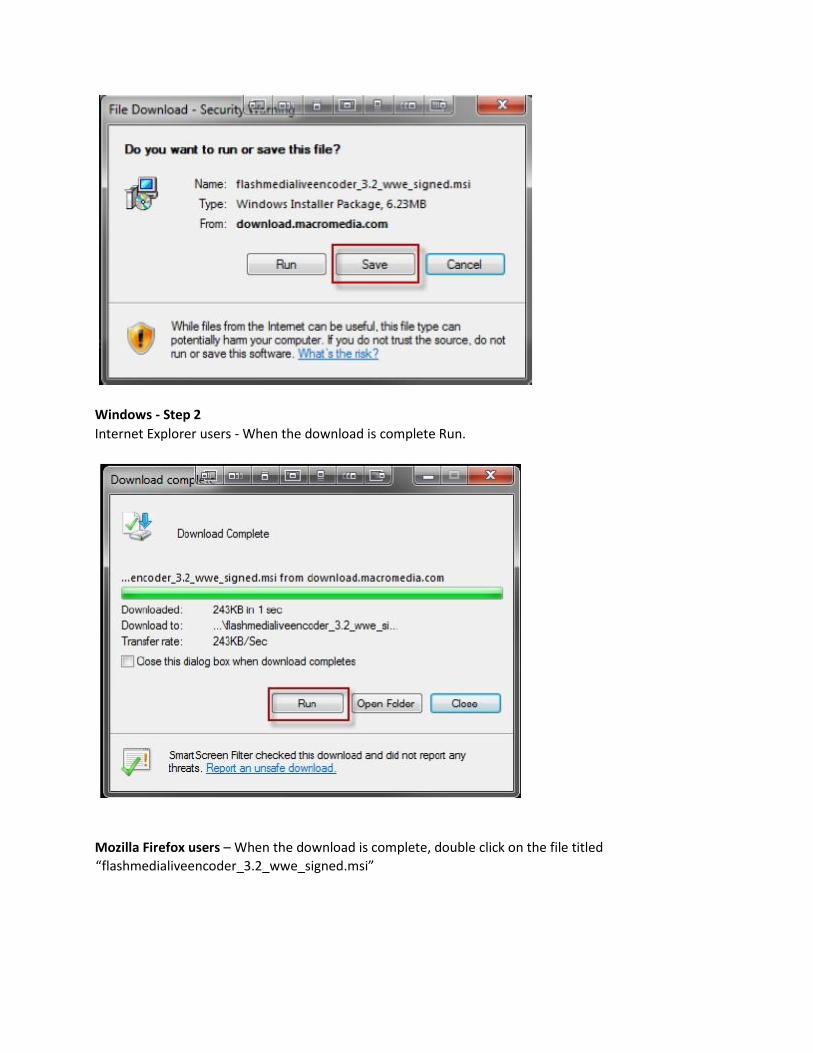
Windows - Step 2
Internet Explorer users - When the download is complete Run.
Mozilla Firefox users – When the download is complete, double click on the file titled
“flashmedialiveencoder_3.2_wwe_signed.msi”
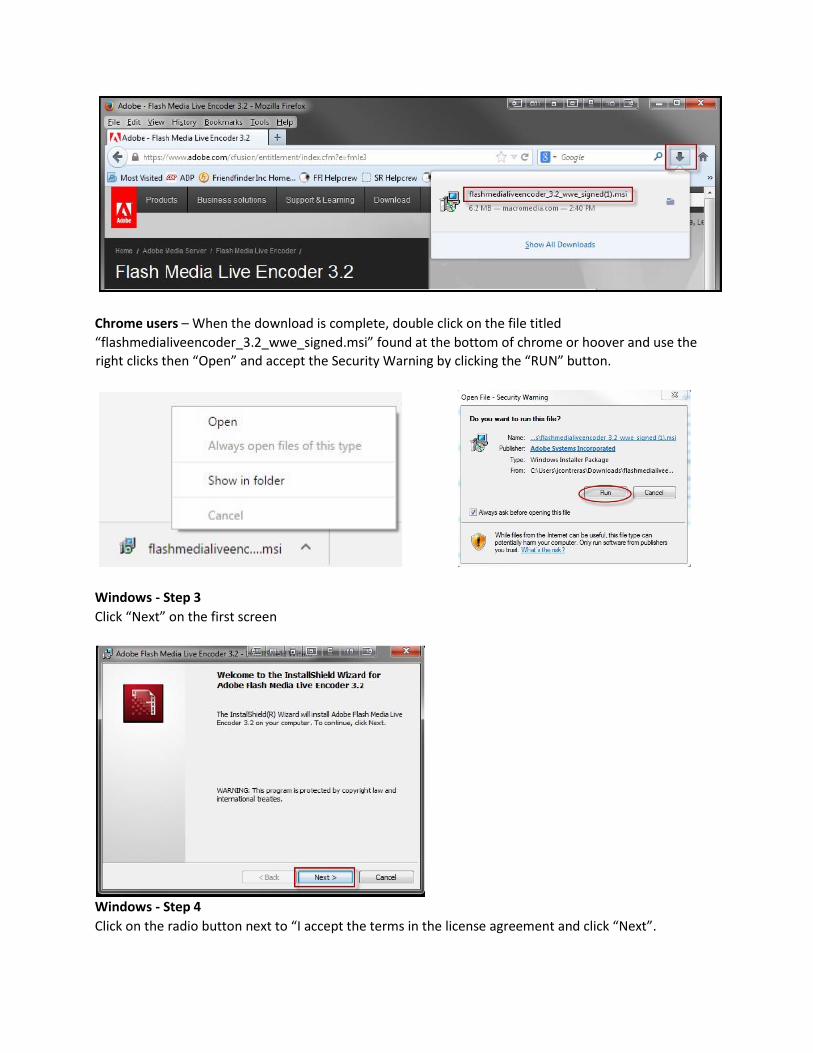
Chrome users – When the download is complete, double click on the file titled
“flashmedialiveencoder_3.2_wwe_signed.msi” found at the bottom of chrome or hoover and use the
right clicks then “Open” and accept the Security Warning by clicking the “RUN” button.
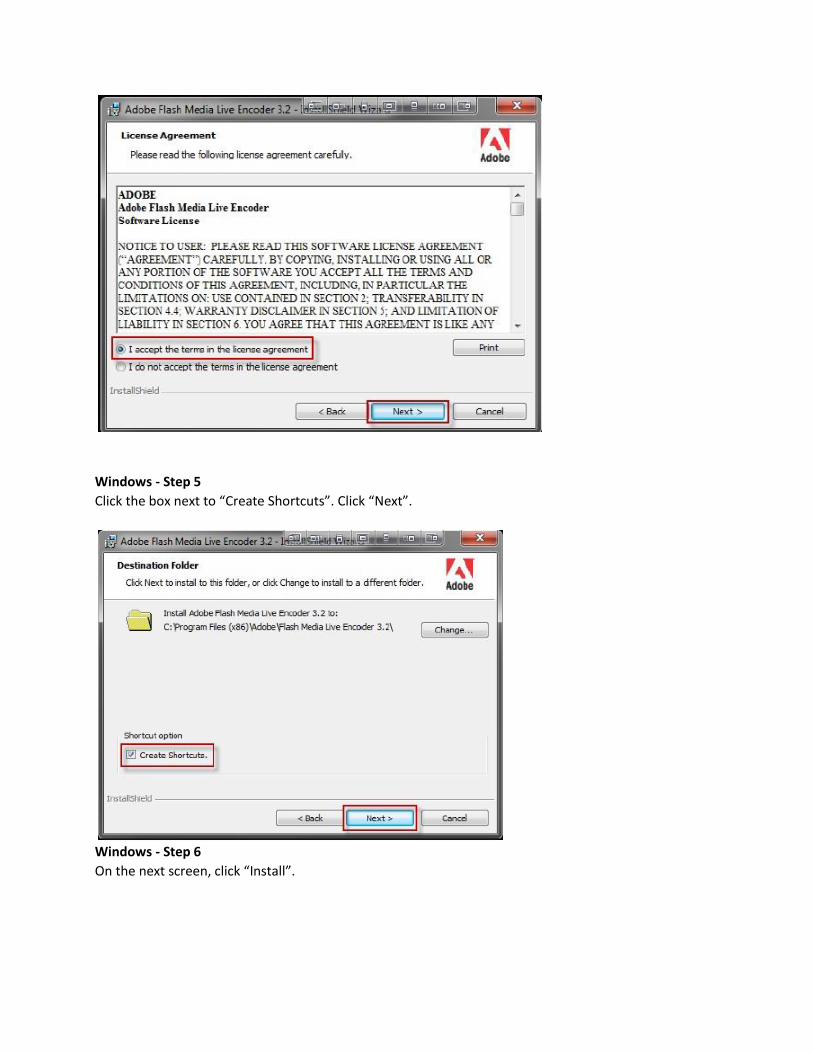
Windows - Step 3
Click “Next” on the first screen
Windows - Step 4
Click on the radio button next to “I accept the terms in the license agreement and click “Next”.
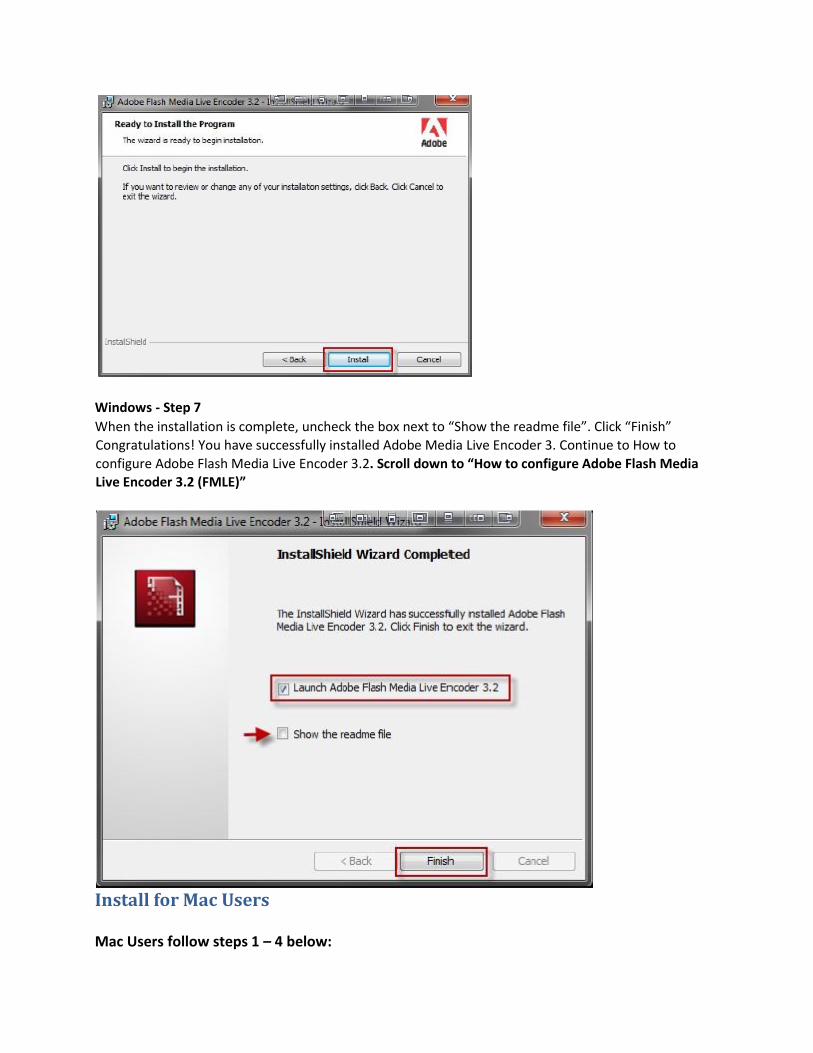
Windows - Step 5
Click the box next to “Create Shortcuts”. Click “Next”.
Windows - Step 6
On the next screen, click “Install”.
Windows - Step 7
When the installation is complete, uncheck the box next to “Show the readme file”. Click “Finish”
Congratulations! You have successfully installed Adobe Media Live Encoder 3. Continue to How to
configure Adobe Flash Media Live Encoder 3.2. Scroll down to “How to configure Adobe Flash Media Live Encoder 3.2 (FMLE)”
Install for Mac Users
Mac Users follow steps 1 – 4 below:
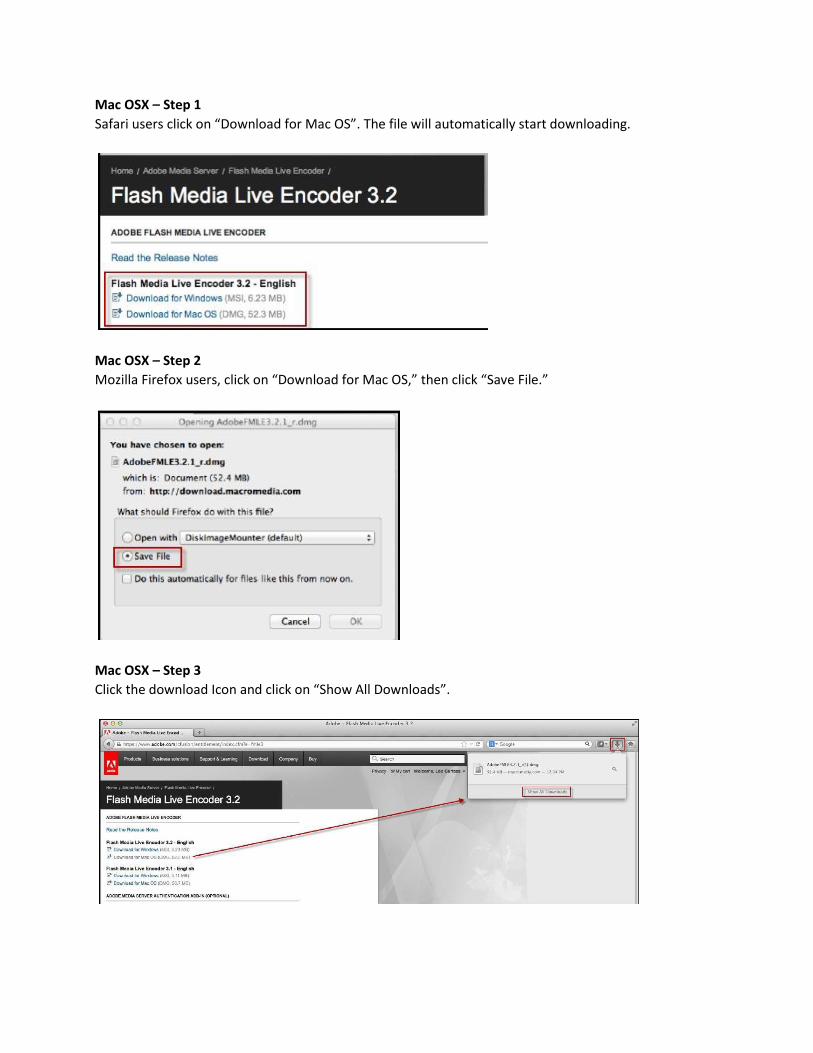
Mac OSX – Step 1
Safari users click on “Download for Mac OS”. The file will automatically start downloading.
Mac OSX – Step 2
Mozilla Firefox users, click on “Download for Mac OS,” then click “Save File.”
Mac OSX – Step 3
Click the download Icon and click on “Show All Downloads”.
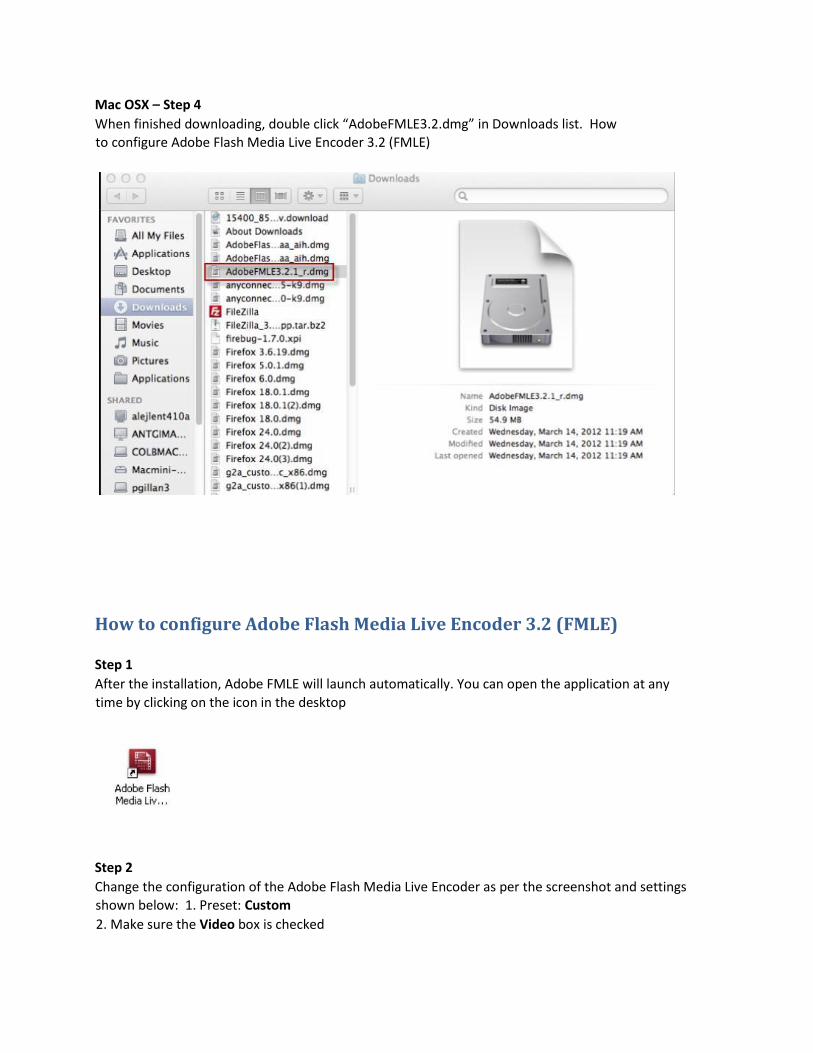
Mac OSX – Step 4
When finished downloading, double click “AdobeFMLE3.2.dmg” in Downloads list. How to configure Adobe Flash Media Live Encoder 3.2 (FMLE)
How to configure Adobe Flash Media Live Encoder 3.2 (FMLE)
Step 1
After the installation, Adobe FMLE will launch automatically. You can open the application at any
time by clicking on the icon in the desktop
Step 2
Change the configuration of the Adobe Flash Media Live Encoder as per the screenshot and settings shown below: 1. Preset: Custom
2. Make sure the Video box is checked
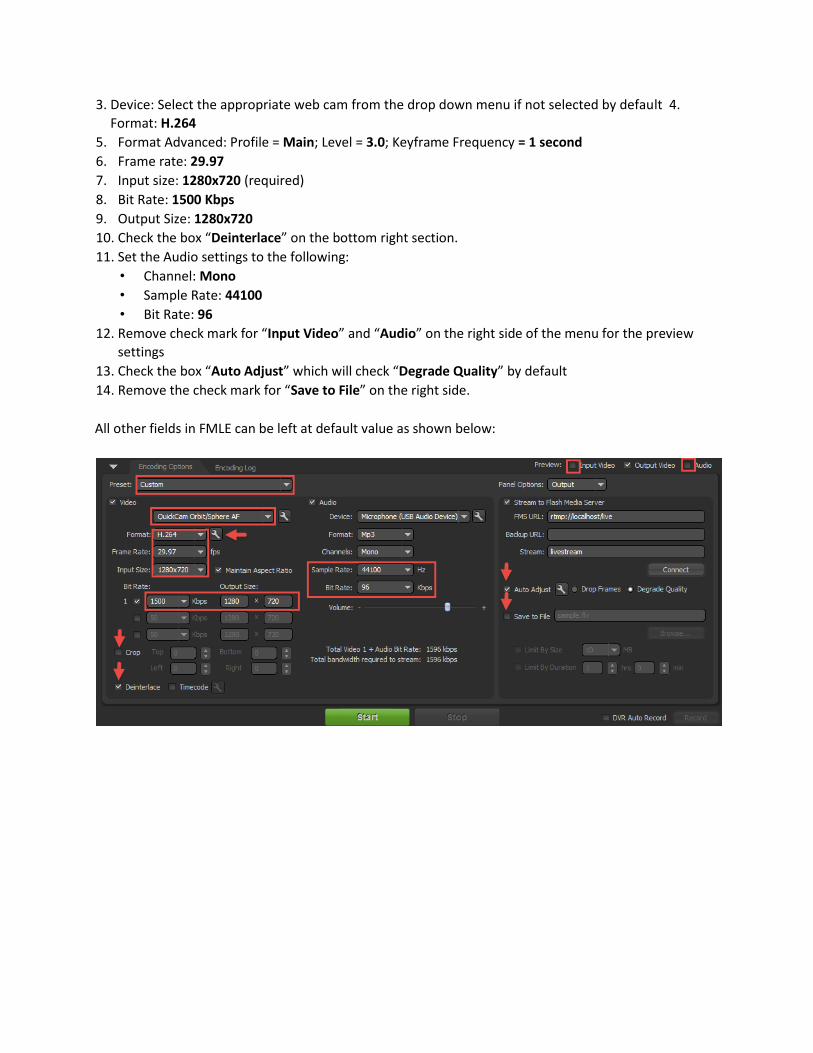
3. Device: Select the appropriate web cam from the drop down menu if not selected by default 4.
Format: H.264
5. Format Advanced: Profile = Main; Level = 3.0; Keyframe Frequency = 1 second
6. Frame rate: 29.97
7. Input size: 1280x720 (required)
8. Bit Rate: 1500 Kbps
9. Output Size: 1280x720
10. Check the box “Deinterlace” on the bottom right section.
11. Set the Audio settings to the following:
• Channel: Mono
• Sample Rate: 44100
• Bit Rate: 96
12. Remove check mark for “Input Video” and “Audio” on the right side of the menu for the preview
settings
13. Check the box “Auto Adjust” which will check “Degrade Quality” by default
14. Remove the check mark for “Save to File” on the right side.
All other fields in FMLE can be left at default value as shown below:
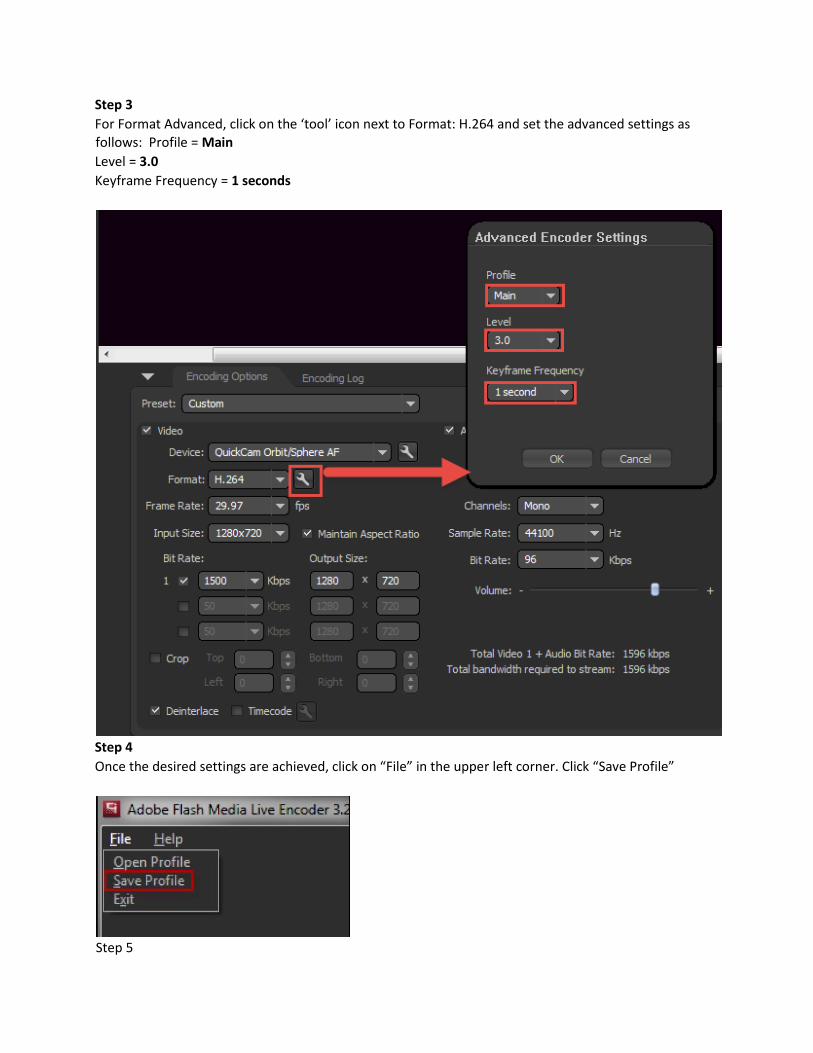
Step 3
For Format Advanced, click on the ‘tool’ icon next to Format: H.264 and set the advanced settings as follows: Profile = Main
Level = 3.0
Keyframe Frequency = 1 seconds
Step 4
Once the desired settings are achieved, click on “File” in the upper left corner. Click “Save Profile”
Step 5
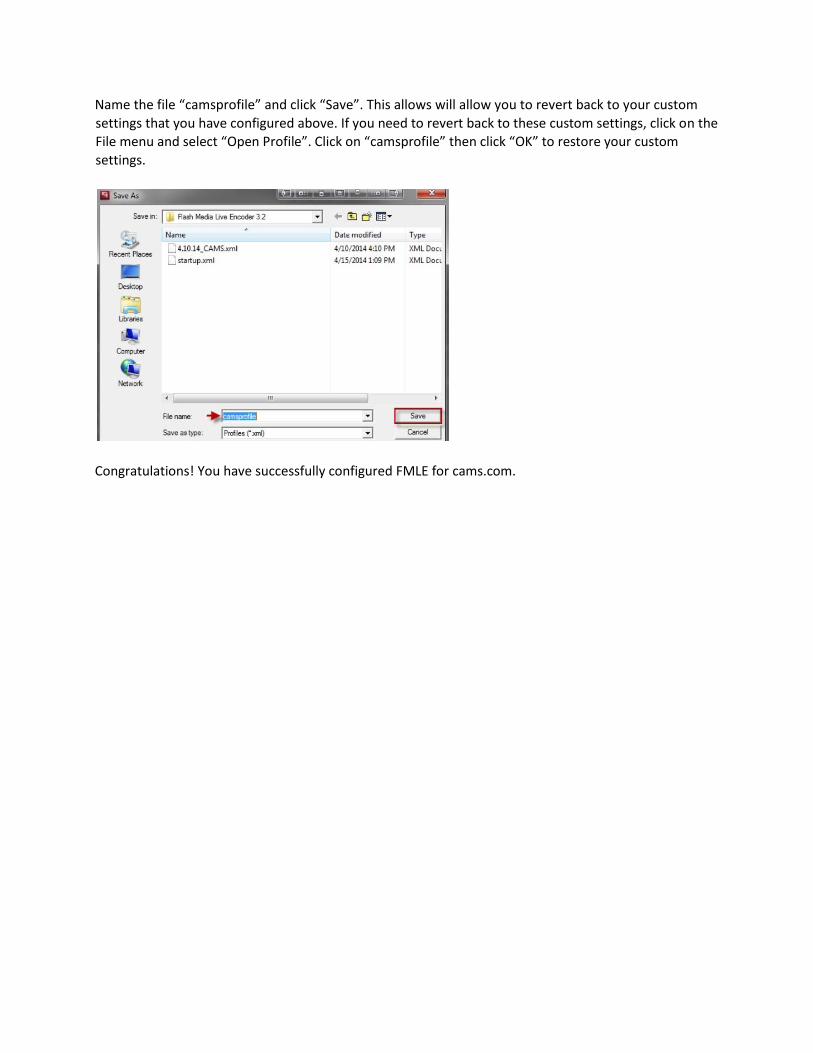
Name the file “camsprofile” and click “Save”. This allows will allow you to revert back to your custom
settings that you have configured above. If you need to revert back to these custom settings, click on the File menu and select “Open Profile”. Click on “camsprofile” then click “OK” to restore your custom
settings.
Congratulations! You have successfully configured FMLE for cams.com.
Tips
Make sure to check your CPU usage after your begin streaming. Your CPU usage should NOT exceed 80%
or your video quality will suffer. If your CPU is over 80%, lower your video Bit Rate value in the encoder
until you see the CPU below 80%.
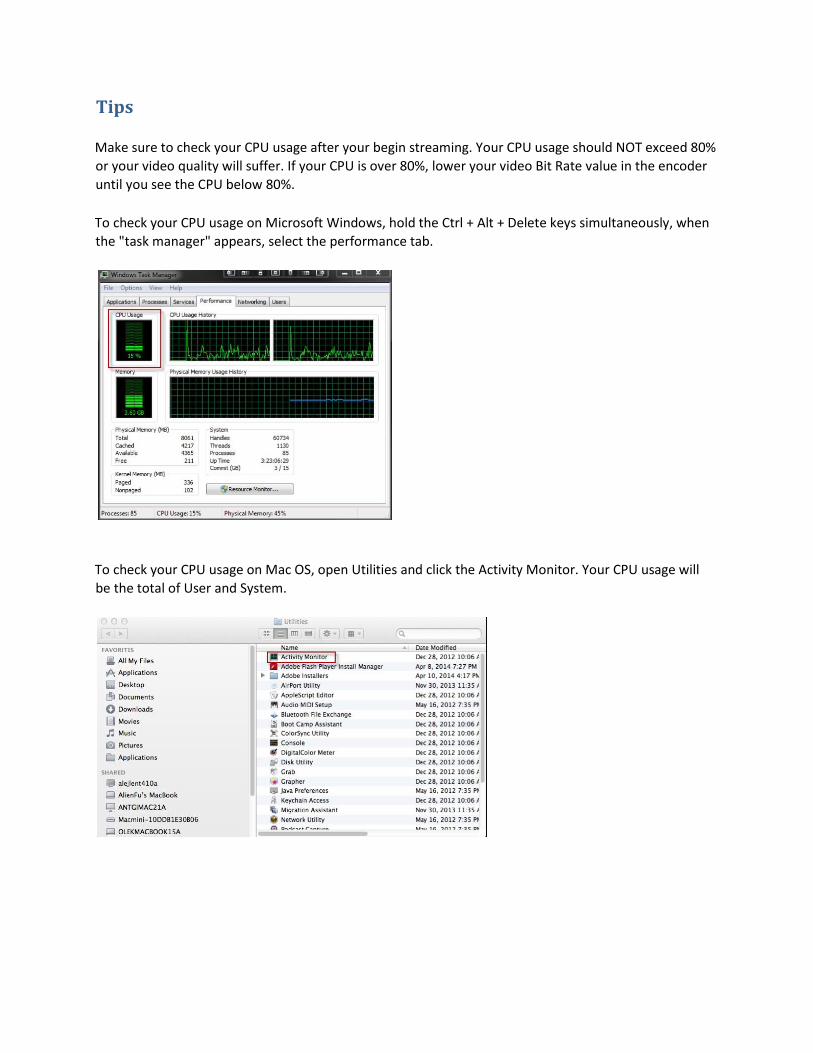
To check your CPU usage on Microsoft Windows, hold the Ctrl + Alt + Delete keys simultaneously, when
the "task manager" appears, select the performance tab.
To check your CPU usage on Mac OS, open Utilities and click the Activity Monitor. Your CPU usage will
be the total of User and System.