Embed Size (px)
Citation preview

HEMORRHAGE CONTROL FOR THE EMS PROVIDERConnecticut EMS Advisory BoardEducation and Training CommitteeJanuary 2018

Program Goals
Provide participants with current information regarding bleeding control
•Application of pressure dressings
•Wound packing techniques
•Use of tourniquets

Objectives
This program will enable participants to:
• Discuss current techniques for hemorrhage control
• Demonstrate how to apply a pressure dressing

Objectives (Con’t)
•Discuss the components of a mechanical tourniquet
•Demonstrate how to apply a mechanical tourniquet
•Demonstrate how to pack a wound

Objectives (Con’t)
•Discuss alternatives for commercially available hemorrhage control supplies
•Review the State protocol (6.17) for tourniquet application

Disclosure•This program references several commonly available products for controlling hemorrhage.
•Students should be familiar with the hemorrhage control products approved for use by their medical control.
•Use of a specific product in this program should not be construed as an endorsement of that particular product.

Types of External Hemorrhage
Bleeding can be categorized in two ways:
1. Minor bleeding that is easily controlled
2. Bleeding that is potentially life-threatening and not easily controlled

Hemorrhage Control
•Uncontrolled extremity hemorrhage is a cause of preventable death.
•A femoral artery and/or vein disruption can lead to the loss of one's complete blood volume within 3 minutes. (TECC, 2017)

Hemorrhage ControlComponents of Bleeding Control
•Direct Pressure
•Wound Packing
•Pressure Dressing
•Tourniquet Application

Personal Safety
•As with the provision of any medical care, appropriate measures should be taken to reduce provider exposure to blood.
•Appropriate PPE for the care of injured persons includes that which is necessary to adequately isolate the provider from direct contact with blood.
•Minimum PPE includes gloves and eye protection. Additional protective items may be necessary as the situation dictates.
Direct Pressure
•Use your hand or fingers - Use two hands, if at all possible
•Effective most of the time for external bleeding- Direct pressure can stop even major arterial bleeding
•To be effective, apply pressure with the victim on a firm surface to provide support
•Don’t release pressure to check the wound (Bleeding Control Basic, ACS 2017)

WOUND PACKING

Wound Packing
Some wounds are not amenable to tourniquets or pressure dressings alone
Filling the wound cavity aids in creating pressure on bleeding vessels

Critical Vascular Area Femoral Triangle

Critical Vascular AreaAnterior Triangle of the Neck
Image: C-TECC, Smith et al. 2017

Wound Packing
Gauze
Placing gauze into a wound creates pressure against bleeding vessels and
encourages clotting. Hemostatic dressings are preferred but any sterile gauze can be used for wound packing.
Images: C-TECC, Smith et al. 2017

Wound Packing
When considering wound packing:Do not pack wounds of the abdomen and chest or open skull fractures• Only for use on limbs, neck, shoulders, hips and groin.
• Use hemostatic products for wound packing if available and in accordance with manufacturers recommendations.
• Pack wound and hold direct pressure according to the manufacturer’s recommendation.

Hemostatic Agents
Chemical impregnated gauze incorporating chemicals designed to promote rapid blood coagulation.
Hemostatic agents can establish hemostasis by means of different mechanisms:
• concentrating coagulation factors• adhesion to the tissues• delivering procoagulant factors to the hemorrhage site.
(Khoshmohabat, Paydar, Kazemi, & Dalfardi, 2016)

Celox Products
Various forms
• Celox Rapid (30-45 sec)• Celox Trauma Gauze• Celox powder

QuikClot Gauze
Standard surgical gauze impregnated with Kaolin
• Promotes coagulation through coagulation cascade

Chitogauze
Chitosan based impregnated gauze

Wound Packing Procedure
Expose Wound and Identify Bleeding• Open Clothing around the wound.• Remove excess pooled blood from the wound while preserving any clots already formed in the wound.
• Locate the source of the most active bleeding.
Photo: J. Beaulieu

Wound Packing Procedure
Pack Wound Completely• Pack gauze tightly into wound and directly onto the source of bleeding.
• More than one gauze may be required.
Photo: J. Beaulieu

Wound Packing ProcedurePack Wound Completely
• Use one gloved hand to feed gauze and the other to maintain pressure and hold gauze in place
• Use gloved fingers to maintain pressure and hold gauze. Proper technique will allow for continuous pressure.
• Be cautious of sharp fracture edges and foreign bodies when packing wounds! Photo: J. Beaulieu

Wound Packing Procedure
Pack Wound Completely
2017 American College of Surgeons - Bleeding Control Basic V 1.0
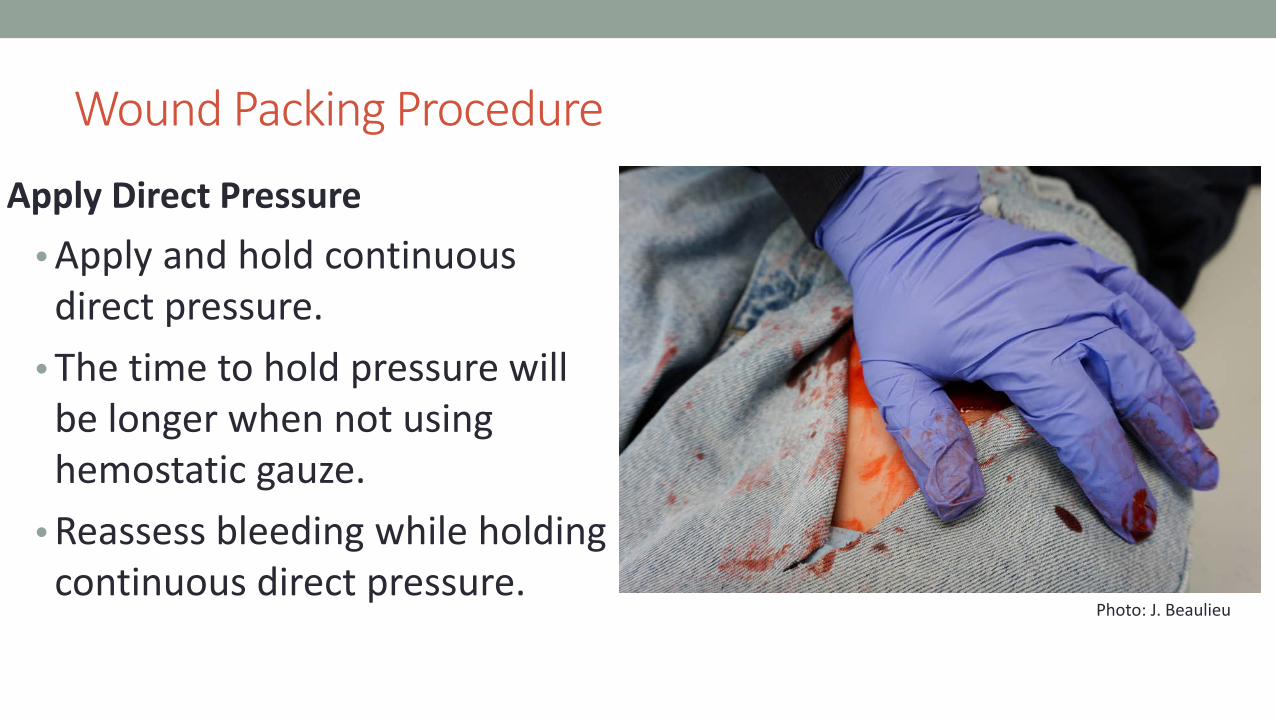
Wound Packing Procedure
Apply Direct Pressure• Apply and hold continuous direct pressure.
• The time to hold pressure will be longer when not using hemostatic gauze.
• Reassess bleeding while holding continuous direct pressure.
Photo: J. Beaulieu

Wound Packing ProcedureBandage over Gauze
• Apply a pressure dressing to provide ongoing pressure and secure the wound packing in place.
Photo: J. Beaulieu

Wound Packing ProcedureTransport and Monitor
• Do not remove the bandage or gauze
• If practical – attach gauze wrapper to pressure dressing so that the next care provider is aware gauze is in place in wound.
Photo: J. Beaulieu

Time to practice - Hands-on Session
• Put it all together (wound pack and pressure dressing)
Photo: J. Beaulieu

PRESSURE DRESSINGS.

Pressure Dressings - Indications
• Limb and torso wounds with significant bleeding
• Head wounds with significant bleeding
• As an adjunct to wound packing

Pressure Dressings – Basic Principles
• Apply pressure dressings securely enough to do the job the first time. A loosely applied pressure dressing may waste time and blood.
• Most commercial pressure dressings have a method to concentrate pressure in a specific area. This should be placed directly over the wound.

Pressure Dressings – Basic Principles
•Do not loosen a pressure dressing to check bleeding.
• If bleeding continues after applying a pressure dressing:
If on an extremity, apply a tourniquet
Apply additional pressure
Apply an additional pressure dressing

Pressure Dressings – Application Tips
• Wrap the bandage to cover the entire dressing.
• The bandage should not bunch or become rope-like when wrapped.
• Additional directed pressure to the wound can be created by adding a half or full spin to the bandage over the wound or pressure device.
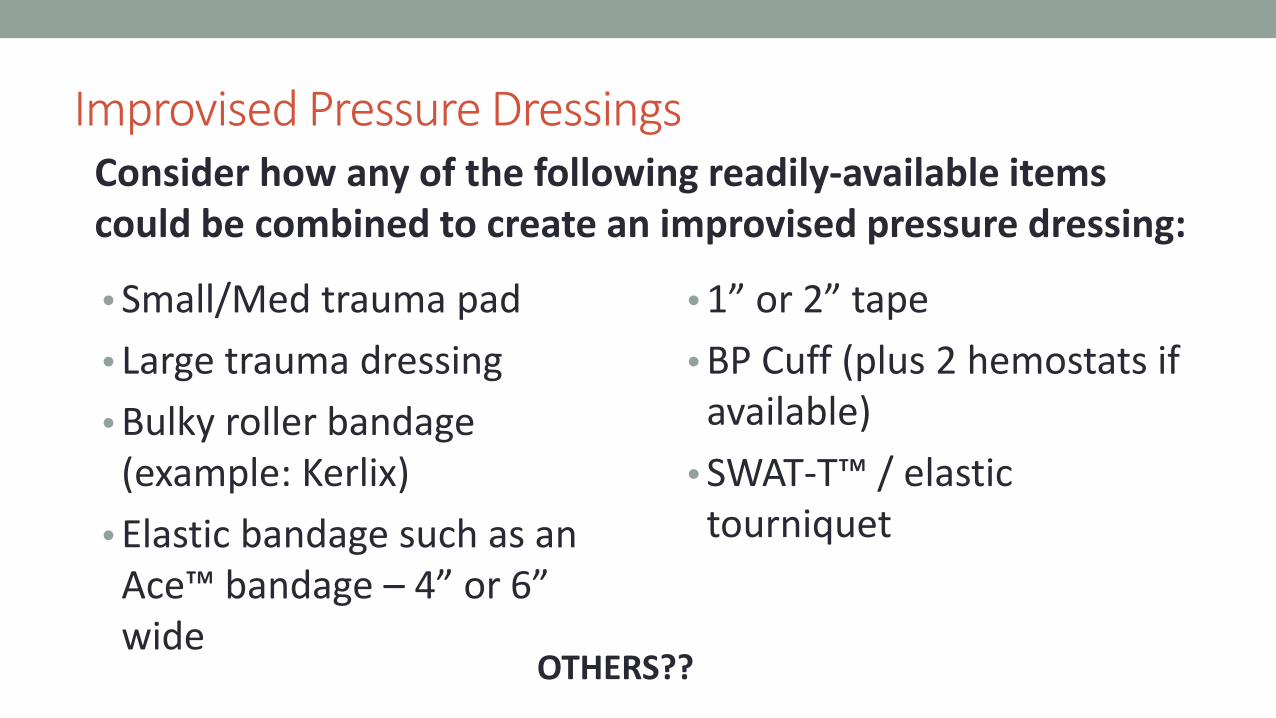
Improvised Pressure Dressings
• Small/Med trauma pad • Large trauma dressing • Bulky roller bandage (example: Kerlix)
• Elastic bandage such as an Ace™ bandage – 4” or 6” wide
• 1” or 2” tape • BP Cuff (plus 2 hemostats if available)
• SWAT-T™ / elastic tourniquet
Consider how any of the following readily-available items could be combined to create an improvised pressure dressing:
OTHERS??

Pressure Dressing Example – Distal Extremity AmputationApplication:
• Cover wound with a large trauma pad or similar dressing material.
• Place a roll of Kerlix or roller gauze over the wound.
• Bind the roller gauze to the limb with an elastic bandage.
• Continue to unroll, stretch and wrap the entire elastic bandage.
• Secure the bandage with clips or tape.

Improvised Pressure Dressing
A pressure dressing can be improvised with a trauma dressing and a strong elastic bandage.
Carefully place a trauma dressing under the injury.
If appropriate, place a sterile gauze roll in the hand to maintain a position of function.
Quickly wrap the trauma dressing around the injury.
Anchor the elastic bandage.Unroll … Stretch … WrapContinue to tightly wrap the injured area. Be sure you maintain pressure: Unroll … Stretch … Wrap
Secure the bandage.
Although clips are shown here, using tape is preferred in most cases.
Photo: D.Burich

Commercial Pressure Dressings
Most commercial pressure dressings have common features:
Bulky, sterile dressing that absorbs a large quantity of blood
Wide elastic bandage
Device to concentrate pressure to a small area
Securing mechanism

Commercial Pressure Dressing - Application
In all cases, read the manufacturers instructions and be familiar with the dressings available to you. In general:• Place the sterile dressing directly over the wound.• Unroll a few inches of the bandage, pull it tight, then wrap around the limb.
• Integrate the bandage with the pressure mechanism and secure as per the manufacturers instructions.

Pressure Dressing Example - Israeli BandageA tourniquet is not needed for this wound. Depending on the depth, the wound may, or may not need packing.
Apply this dressing with the label over the wound.
Wrap the dressing around the limb. There is no Velcro to help anchor the bandage …don’t pull hard or it may slip.
Slide the bandage into the center of the cleat.
Spread the bandage inside the cleat.
Reverse the direction of the bandage. Start to Unroll … Stretch … Wrap.
Continue to add pressure with the bandage. Unroll … Stretch … Wrap
As you wrap the bandage, you can add additional pressure to the wound by spinning the bandage directly over the cleat.
Anchor the bandage with the barrette.
Photo: D. Burich

Pressure Dressing Example - H-Bandage Apply the H-Bandage with the “H” directly over the wound.
Wrap the bandage around the limb. A strip of Velcro will help hold the bandage
Wrap the bandage around the 1st
cleat, then pull bandage snug. Support the cleat as you pull.
Wrap the bandage snug around the back of the limb.
Wrap it around the other cleat. Support the “H” as you pull tight.
Continue to apply pressure. Unroll … Stretch … Wrap
You can add more pressure to the wound by spinning the bandage on top of the “H”.
Secure the bandage with the barrette.
Photo: D. Burich

Pressure Dressing Example - Oleas Modular Bandage
Place dressing on the injury with the cup directly over the wound.
Begin wrapping the bandage around the limb. Unroll … Stretch … Wrap
Continue to wrap tightly. This dressing does not need a change in direction.
Secure with the Velcro and barrette.
Photo: D. Burich

Pressure Dressing – Practical ApplicationPlease practice on your partner…
Apply an improvised bandage to the arm or leg.
Practice with the pressure dressing you will most likely use with your agency.

TOURNIQUET USE.

Tourniquet Use
Tourniquets should be applied rapidly if extremity
bleeding cannot be controlled with direct pressure, or
if effective direct pressure is not possible.

Tourniquet Use – Junctional Tourniquets
• Junctional tourniquets are in a different category and are not addressed in this programControl bleeding by compressing vessels in areas other than extremities. Newer to the market $$$$

Tourniquet Application do’s / don’ts
•Commercial tourniquets should be applied per manufacture guidelines
• Ideally, tourniquets should be placed 2”-3” above the site of the injury.
•An acceptable alternative is to place the tourniquet as high as possible on the extremity (“Go High or Die”)

Tourniquet Application do’s/don’ts
• If bleeding won’t stop with one tourniquet, apply a second tourniquet above the first one.
• If an additional tourniquet is required and there is no room above the tourniquet, put the second tourniquet below and as close to the first one as possible.

Tourniquet Application do’s/don’ts
•Do not place a tourniquet over a joint. If the joint is the 2”-3” above the bleed, place the tourniquet above the joint.
•Placing the tourniquet in direct contact with the skin is preferred.
•Tourniquets can be placed over clothes but avoid placement over pockets containing any items.

Types of Tourniquets
There are several variations of tourniquets on the market.Mechanical tourniquets have 3 basic components:
• A wide strap• A mechanical tightening mechanism• A method for securing the tightening mechanism
Elastic tourniquets may be an acceptable alternative

Tourniquet Selection
Tourniquets should be chosen by the EMS service in cooperation and
consultation with medical control

Tourniquet Examples
Combat Action Tourniquet (C-A-T)
Special Operations Forces Tactical Tourniquet -
(SOF®TT)

Tourniquet Examples
Improvised TourniquetsSAM XT
Photo: J. Hundley

Improvised Tourniquets – CAUTION!
• Improvised tourniquets can be considered when a commercial tourniquet is not immediately available.
• Improvised tourniquets are more likely to fail than commercial tourniquets
•They should only be used when a commercial tourniquet is not available.

Improvised Tourniquets - Items Needed
• An appropriate length of material, at least 1” wide. 2”-3” width is preferred.
• A rigid item to serve as a windlass (should resist bending or breaking such as a metal bar, trauma shears, large stick) strong enough to tighten the tourniquet.
• Additional material to secure the windlass once the tourniquet is tightened.

Improvised Tourniquets
Wrap the constricting material around the limb and secure with an appropriate knot.
Constrict the limb by twisting the material with a rigid item such as a ring cutter, shears or a carabiner.
Prevent the improvised windlass from loosening by securing it with additional material.
Photos: J. Beaulieu

Improvised Tourniquets
Ring cutter as a windlass Carabiner as a windlass Shears as a windlass
Photos: J. Beaulieu

Protocols v2017.2

Protocols v2017.2

Demonstration of Tourniquet Application
•CAT
•SOFTT

AcknowledgementsThis presentation is a product of the CT EMS Advisory Board’s EMS Training and Education Committee. The committee would like to recognize the following people for their time and effort toward providing content and reviewing this presentation:Richard Kamin, MD Medical Director, CT OEMSKyle McClaine, MD Co-chair, CT EMS Medical Advisory CommitteeShea Gregg, MD Chair, CT Trauma CommitteeJoshua Beaulieu CEMSAB Ed & Training CommitteeDavid Burich CEMSAB Ed & Training CommitteeJoey Hundley CEMSAB Ed & Training Committee

ReferencesCommittee for Tactical Emergency Casualty Care. (2017). Guidelines. Retrieved from
C-TECC.org: http://www.c-tecc.org/guidelines
E. Reed Smith, M. F. (2017). Tactical Emergency Casualty Care Guidelines for High Threat Medical Response. Committee for Tactical Emergency Casualty Care.
khoshmohabat, K., Paydar, S., Kazemi, H., & Dalfardi, B. (2016, February). Overview of Agents Used for Emergency Hemostasis. Journal of Trauma and Emergency Medicine. Retrieved from https://www.ncbi.nlm.nih.gov/pmc/articles/PMC4869418/
National Association of EMTs. (2015). Bleeding Control for the Injured.
National Association of EMTs. (2016). Prehospital Trauma Life Support (8th ed.). Jones & Bartlett Learning.
The American College of Surgeons. (2017). Bleeding Control Basic (BCon) Course v1.0.
https://www.narescue.com/pre-hospital-care-ems-products/massive-hemorrhage
https://www.bleedingcontrol.org/
http://www.c-tecc.org/