Embed Size (px)
Citation preview
Guide to Powering Agent Vi Analytics on OnSSI’s Ocularis

Contents
Powering Analytics on OnSSI’s Ocularis 1 April 2020
Contents
1 Overview ........................................................................................................................ 2
1.1 About this Guide .................................................................................................................... 2
1.2 Version Compliance .............................................................................................................. 2
1.3 savVi's Prerequisites ............................................................................................................. 2
1.4 OnSSI Client Requirements .................................................................................................. 3
1.5 Enabling Procedure ............................................................................................................... 3
1.6 Optimizing savVi-Analyst and savVi-Manager Performance ............................................. 3
2 Configuring Ocularis for Interoperability with Real-Time Analytics .......................... 5
2.1 Install OnSSI’s Component for Events Transmission Integration .................................... 5
2.2 Confirm Ocularis Analytics Channel Licenses ................................................................... 6
2.3 Configure OnSSI’s Events Transmission Integration Component ................................... 7
2.4 Verify Ocularis is set for Interoperability with Real-Time Analytics ............................... 10
2.5 Configure OnSSI Ocularis Administrator .......................................................................... 12
2.5.1 Add NVR server ......................................................................................................... 12 2.5.2 Set Camera Privileges (for Ocularis 5.0 to 5.3) ......................................................... 13 2.5.3 Map savVi cameras to NVR cameras ........................................................................ 14 2.5.4 Map Cameras to Metadata Sources .......................................................................... 16 2.5.5 Create and Edit a View .............................................................................................. 18 2.5.6 Create Event Distribution Group ................................................................................ 19
2.6 Ocularis Client ...................................................................................................................... 22
2.6.1 Troubleshooting Event Overlays Display ................................................................... 23
Powering Analytics on OnSSI’s Ocularis 2 April 2020
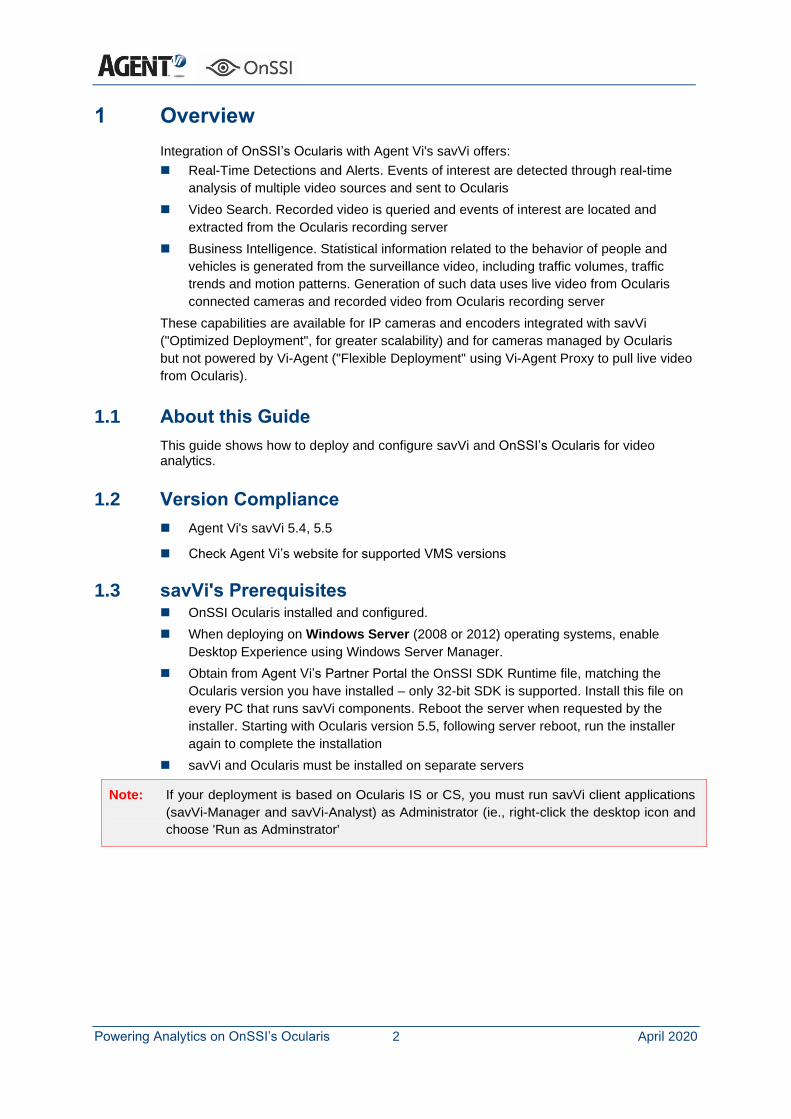
1 Overview
Integration of OnSSI’s Ocularis with Agent Vi's savVi offers:
◼ Real-Time Detections and Alerts. Events of interest are detected through real-time
analysis of multiple video sources and sent to Ocularis
◼ Video Search. Recorded video is queried and events of interest are located and
extracted from the Ocularis recording server
◼ Business Intelligence. Statistical information related to the behavior of people and
vehicles is generated from the surveillance video, including traffic volumes, traffic
trends and motion patterns. Generation of such data uses live video from Ocularis
connected cameras and recorded video from Ocularis recording server
These capabilities are available for IP cameras and encoders integrated with savVi
("Optimized Deployment", for greater scalability) and for cameras managed by Ocularis
but not powered by Vi-Agent ("Flexible Deployment" using Vi-Agent Proxy to pull live video
from Ocularis).
1.1 About this Guide
This guide shows how to deploy and configure savVi and OnSSI’s Ocularis for video analytics.
1.2 Version Compliance
◼ Agent Vi's savVi 5.4, 5.5
◼ Check Agent Vi’s website for supported VMS versions
1.3 savVi's Prerequisites ◼ OnSSI Ocularis installed and configured.
◼ When deploying on Windows Server (2008 or 2012) operating systems, enable
Desktop Experience using Windows Server Manager.
◼ Obtain from Agent Vi’s Partner Portal the OnSSI SDK Runtime file, matching the
Ocularis version you have installed – only 32-bit SDK is supported. Install this file on
every PC that runs savVi components. Reboot the server when requested by the
installer. Starting with Ocularis version 5.5, following server reboot, run the installer
again to complete the installation
◼ savVi and Ocularis must be installed on separate servers
Note: If your deployment is based on Ocularis IS or CS, you must run savVi client applications
(savVi-Manager and savVi-Analyst) as Administrator (ie., right-click the desktop icon and
choose 'Run as Adminstrator'
Powering Analytics on OnSSI’s Ocularis 3 April 2020
1.4 OnSSI Client Requirements
OnSSI minimum system requirements can be found in this link: https://onssi.com/downloads/manuals/onssi_sys_req.pdf
Minimum System Requirements for client:
CPU: Intel Core i5 or better (Intel Core i7 recommended)
RAM: Minimum 8 GB (16 GB suggested)
Operating System:
• Microsoft Windows® 7 SP1 Professional, Ultimate or Enterprise (64-bit)
• Microsoft Windows® 8.1 (Standard, Professional, Enterprise) (64-bit)
• Microsoft Windows 10 (Updates: Anniversary, Creators, Fall Creators) (Professional, Enterprise) (64-bit)
Graphics Adapter:
PCI-Express, 128 MB RAM, Direct 3D supported
Guidelines for Video RAM Requirements:
• 20 simultaneous video streams: 256MB minimum
• 50 simultaneous video streams: 512MB minimum
Software: Microsoft .NET 4.6.2 Framework
1.5 Enabling Procedure
To enable savVi in Ocularis:
1. Install savVi. For additional information, please refer to the Agent Vi Online Certification Program, Installer course, Installation and Configuration lesson.
2. Use savVi-Manager to configure the connection with Ocularis server and to add cameras. For additional information, please refer to the Agent Vi Online Certification Program, Installer course, VMS Integration lesson.
3. When deploying real-time detection and alerts, configure Ocularis to receive analytics events.
4. Ensure that all Agent Vi’s client/server machines as well as all Ocularis’ client/server machines are continuously time-synchronized by a single NTP server.
1.6 Optimizing savVi-Analyst and savVi-Manager Performance
You can configure Ocularis' recording settings for optimal savVi-Analyst and savVi-Manager performance.
➢ To optimize savVi-Analyst performance:
◼ Make sure that Ocularis recording retention time and savVi-Analyst metadata retention time are aligned, i.e., how long recordings and metadata are saved until deleted. savVi-Analyst metadata retention time must not exceed Ocularis recording retention time.
◼ When Ocularis recording settings are configured as triggered by motion detection, savVi-Analyst’s ability to present results thumbnails and playback can be compromised if motion detection is not sensitive enough. Optimize savVi-Analyst performance by adjusting the following parameters in Ocularis:
• Increase the motion sensitivity and/or-
• Increase the time before/after motion is detected and triggers recording start/stop

Powering Analytics on OnSSI’s Ocularis 4 April 2020
• Alternatively, i.e., instead of the two options above, configure Ocularis to constantly record, i.e., independent of motion detection

Powering Analytics on OnSSI’s Ocularis 5 April 2020
2 Configuring Ocularis for Interoperability with Real-Time Analytics
This section shows how to configure Ocularis for interoperability with real-time analytics. Follow this procedure:
2.1 Install OnSSI’s Component for Events Transmission Integration
➢ To install OnSSI’s component for events transmission integration:
1. For Ocularis 5.0 to 5.4:
Obtain from Agent Vi’s Partner Portal the following file: Agent Vi to Ocularis Event Service
For Ocularis 5.5 or later:
Obtain from Agent Vi’s Partner Portal the following file: SavViEventProxy
2. Install the relevant file on the savVi server
Important Notes:
1. Rules configuration changes
Following each change in savVi rules configuration (add, edit or delete), you must restart the service named: “AgentVI Ocularis EventsService”. To restart this service, launch the Services application. The following window is displayed:
Locate the service in the services list, right click and select Restart:
Powering Analytics on OnSSI’s Ocularis 6 April 2020
2. Event object overlay display
Starting with Ocularis 5.5, overlay display for event objects is supported. The overlay display is supported for real time events only (not supported for events playback)
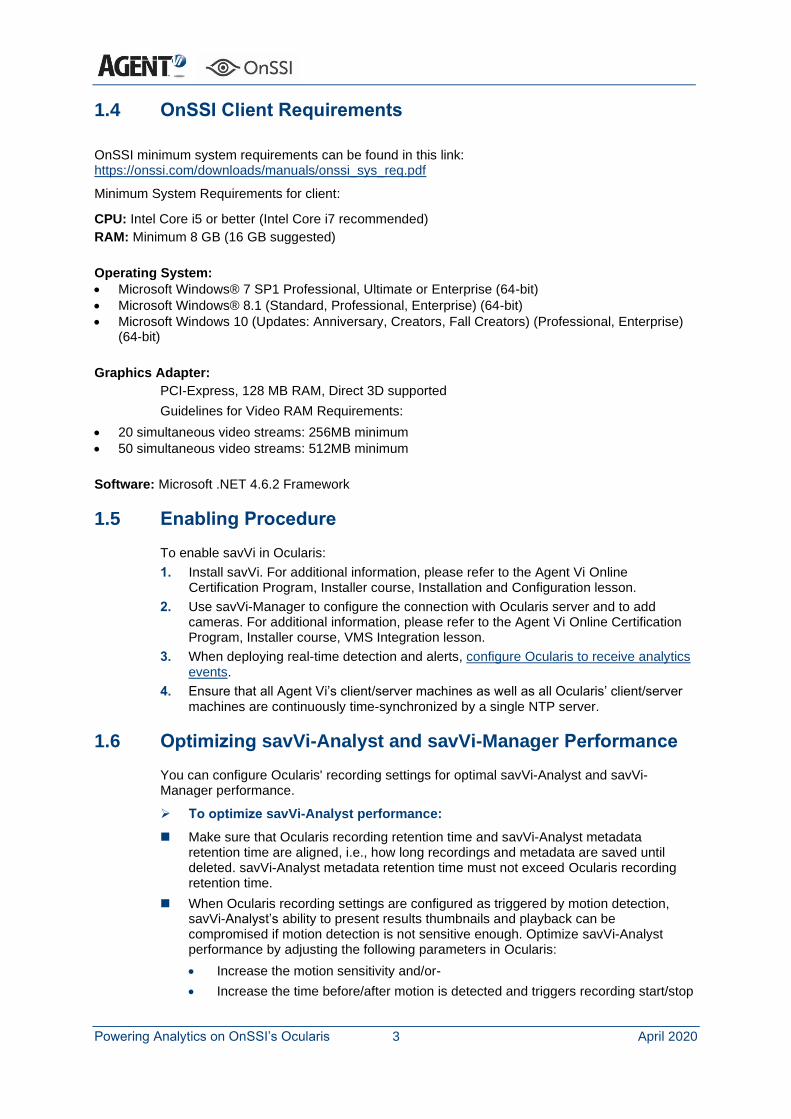
2.2 Confirm Ocularis Analytics Channel Licenses
➢ To check that there are sufficient Analytics Channel Licenses in Ocularis:
◼ Open Ocularis License Activation window and make sure that the number of
Analytics Channel Licenses matches the number of cameras configured for analytics.
◼ The analytics licenses are provided free of charge via Ocularis support team.
Powering Analytics on OnSSI’s Ocularis 7 April 2020
2.3 Configure OnSSI’s Events Transmission Integration Component
➢ To configure OnSSI’s component for events transmission integration:
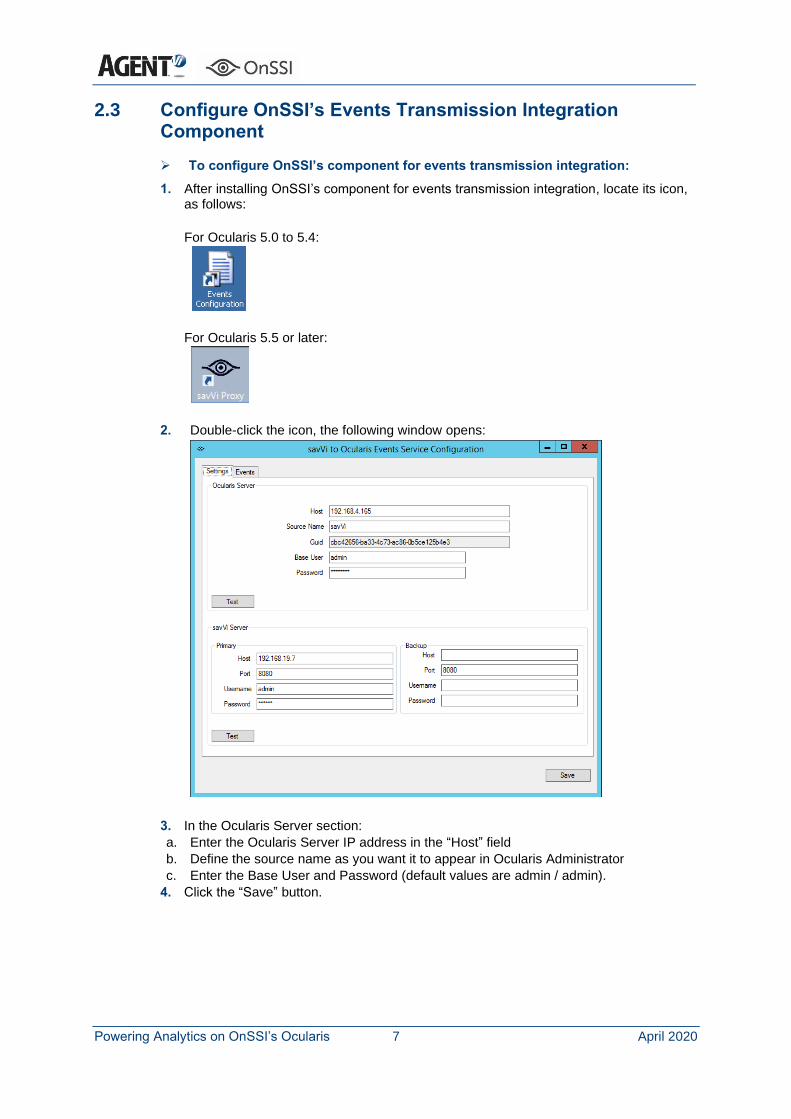
1. After installing OnSSI’s component for events transmission integration, locate its icon, as follows:
For Ocularis 5.0 to 5.4:
For Ocularis 5.5 or later:
2. Double-click the icon, the following window opens:
3. In the Ocularis Server section:
a. Enter the Ocularis Server IP address in the “Host” field
b. Define the source name as you want it to appear in Ocularis Administrator
c. Enter the Base User and Password (default values are admin / admin).
4. Click the “Save” button.
Powering Analytics on OnSSI’s Ocularis 8 April 2020
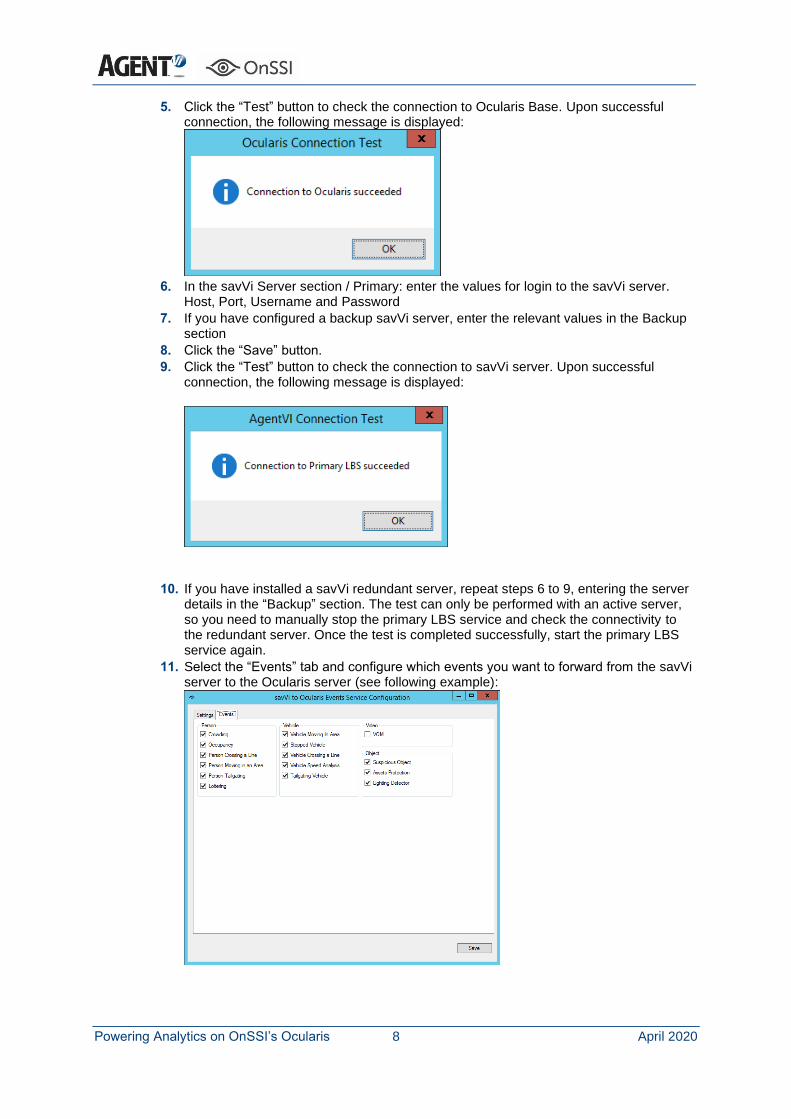
5. Click the “Test” button to check the connection to Ocularis Base. Upon successful connection, the following message is displayed:
6. In the savVi Server section / Primary: enter the values for login to the savVi server.
Host, Port, Username and Password
7. If you have configured a backup savVi server, enter the relevant values in the Backup section
8. Click the “Save” button.
9. Click the “Test” button to check the connection to savVi server. Upon successful connection, the following message is displayed:
10. If you have installed a savVi redundant server, repeat steps 6 to 9, entering the server
details in the “Backup” section. The test can only be performed with an active server, so you need to manually stop the primary LBS service and check the connectivity to the redundant server. Once the test is completed successfully, start the primary LBS service again.
11. Select the “Events” tab and configure which events you want to forward from the savVi server to the Ocularis server (see following example):
Powering Analytics on OnSSI’s Ocularis 9 April 2020
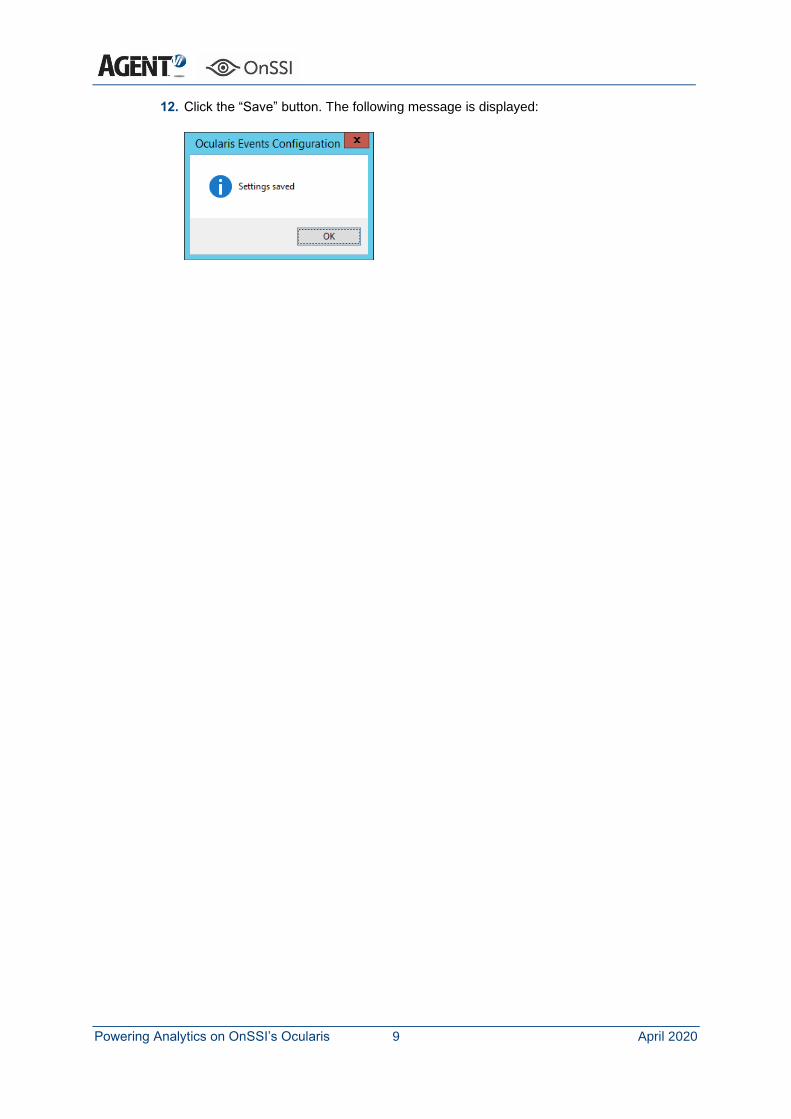
12. Click the “Save” button. The following message is displayed:
Powering Analytics on OnSSI’s Ocularis 10 April 2020
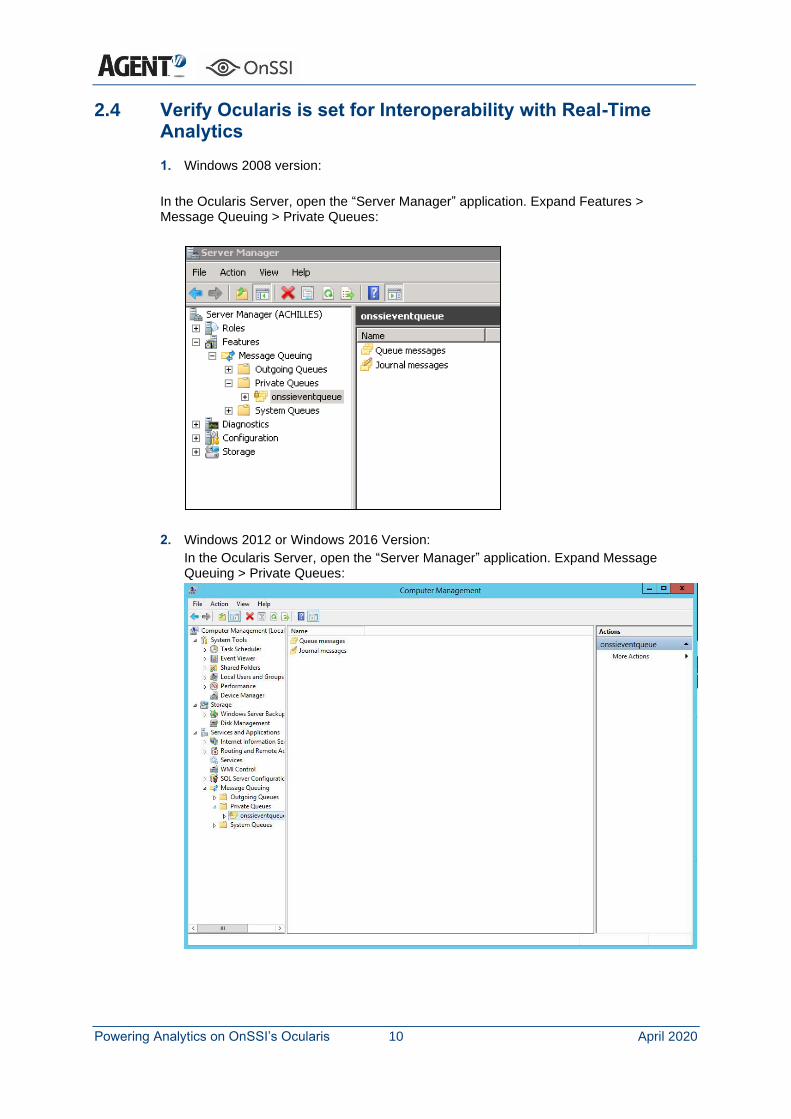
2.4 Verify Ocularis is set for Interoperability with Real-Time Analytics
1. Windows 2008 version:
In the Ocularis Server, open the “Server Manager” application. Expand Features > Message Queuing > Private Queues:
2. Windows 2012 or Windows 2016 Version:
In the Ocularis Server, open the “Server Manager” application. Expand Message Queuing > Private Queues:
Powering Analytics on OnSSI’s Ocularis 11 April 2020
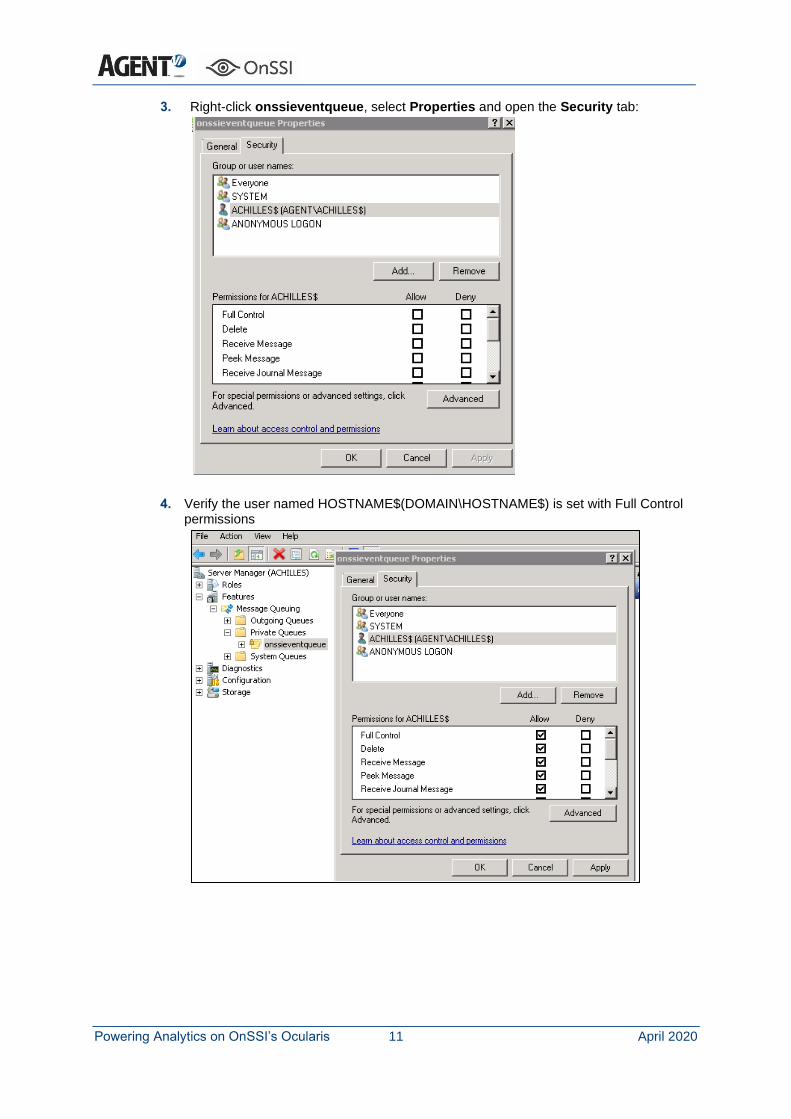
3. Right-click onssieventqueue, select Properties and open the Security tab:
4. Verify the user named HOSTNAME$(DOMAIN\HOSTNAME$) is set with Full Control permissions
Powering Analytics on OnSSI’s Ocularis 12 April 2020
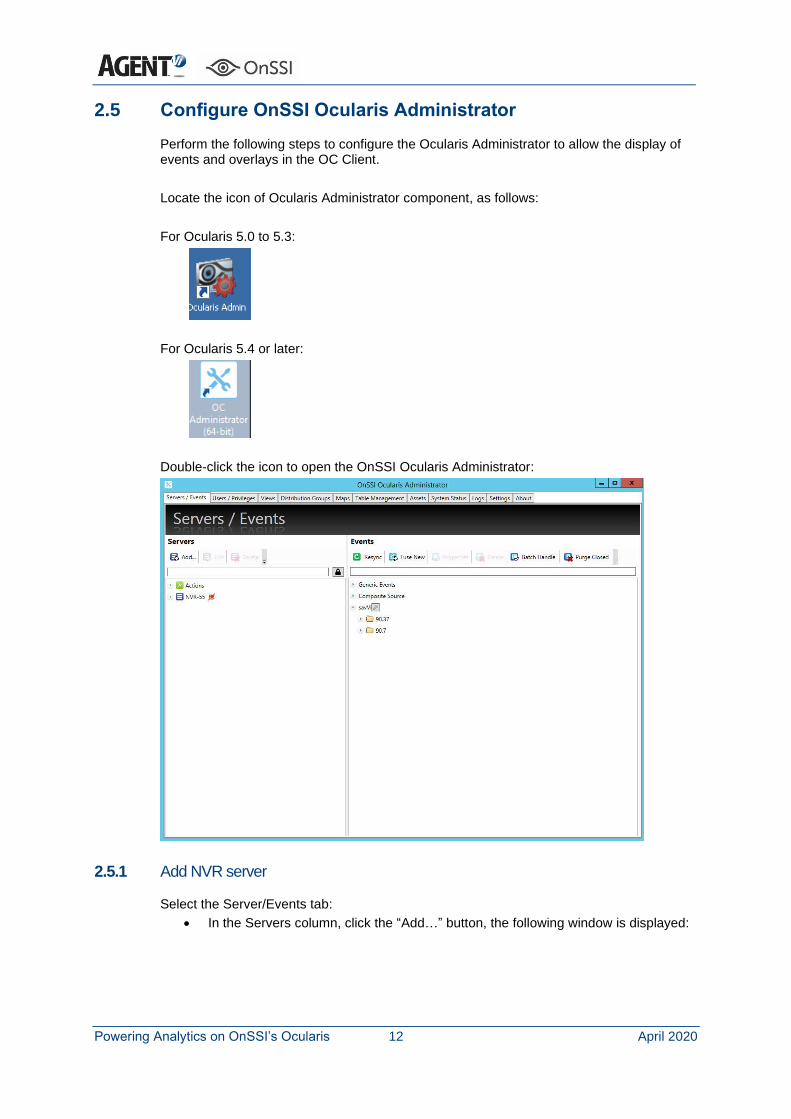
2.5 Configure OnSSI Ocularis Administrator
Perform the following steps to configure the Ocularis Administrator to allow the display of events and overlays in the OC Client.
Locate the icon of Ocularis Administrator component, as follows:
For Ocularis 5.0 to 5.3:
For Ocularis 5.4 or later:
Double-click the icon to open the OnSSI Ocularis Administrator:
2.5.1 Add NVR server
Select the Server/Events tab:
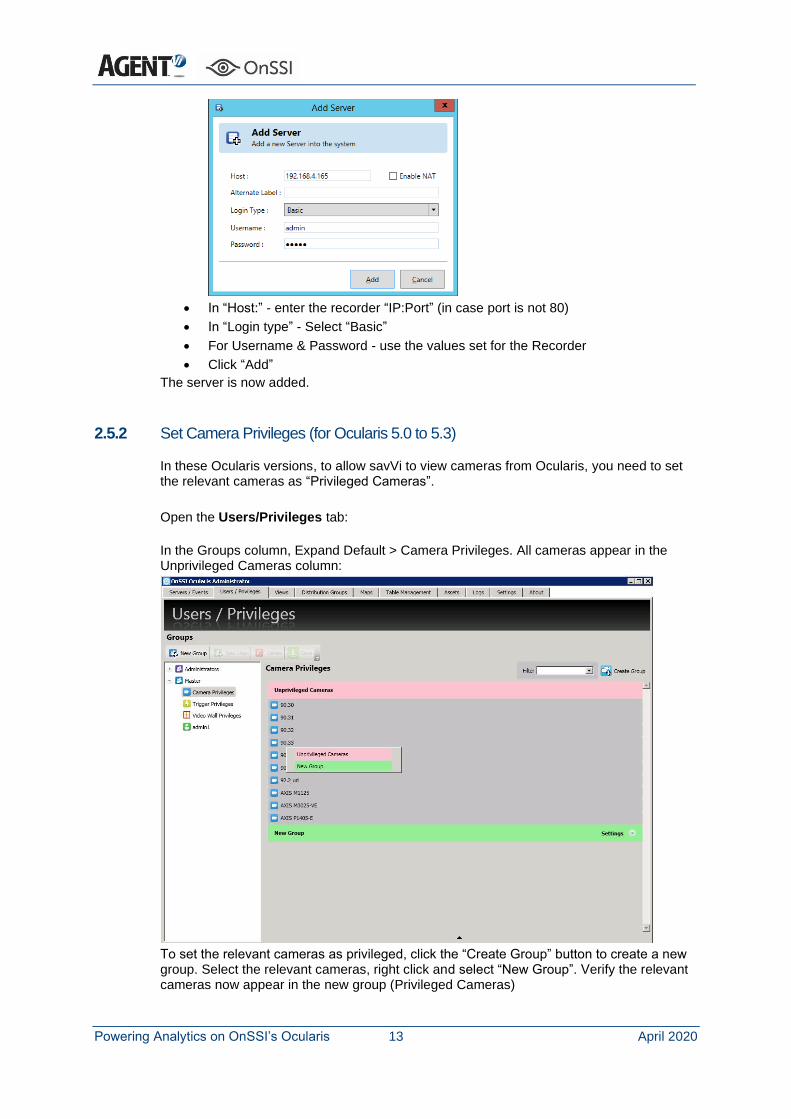
• In the Servers column, click the “Add…” button, the following window is displayed:
Powering Analytics on OnSSI’s Ocularis 13 April 2020
• In “Host:” - enter the recorder “IP:Port” (in case port is not 80)
• In “Login type” - Select “Basic”
• For Username & Password - use the values set for the Recorder
• Click “Add”
The server is now added.
2.5.2 Set Camera Privileges (for Ocularis 5.0 to 5.3)
In these Ocularis versions, to allow savVi to view cameras from Ocularis, you need to set the relevant cameras as “Privileged Cameras”.
Open the Users/Privileges tab:
In the Groups column, Expand Default > Camera Privileges. All cameras appear in the Unprivileged Cameras column:
To set the relevant cameras as privileged, click the “Create Group” button to create a new group. Select the relevant cameras, right click and select “New Group”. Verify the relevant cameras now appear in the new group (Privileged Cameras)
Powering Analytics on OnSSI’s Ocularis 14 April 2020
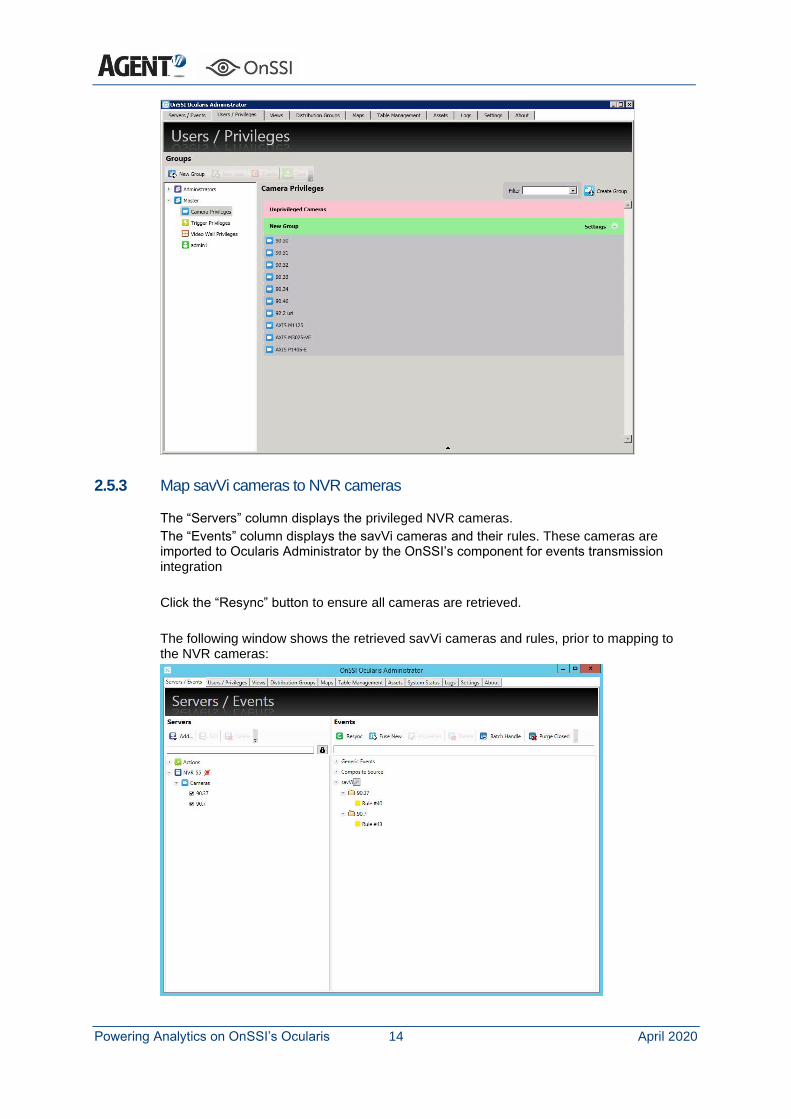
2.5.3 Map savVi cameras to NVR cameras
The “Servers” column displays the privileged NVR cameras.
The “Events” column displays the savVi cameras and their rules. These cameras are imported to Ocularis Administrator by the OnSSI’s component for events transmission integration
Click the “Resync” button to ensure all cameras are retrieved.
The following window shows the retrieved savVi cameras and rules, prior to mapping to the NVR cameras:
Powering Analytics on OnSSI’s Ocularis 15 April 2020
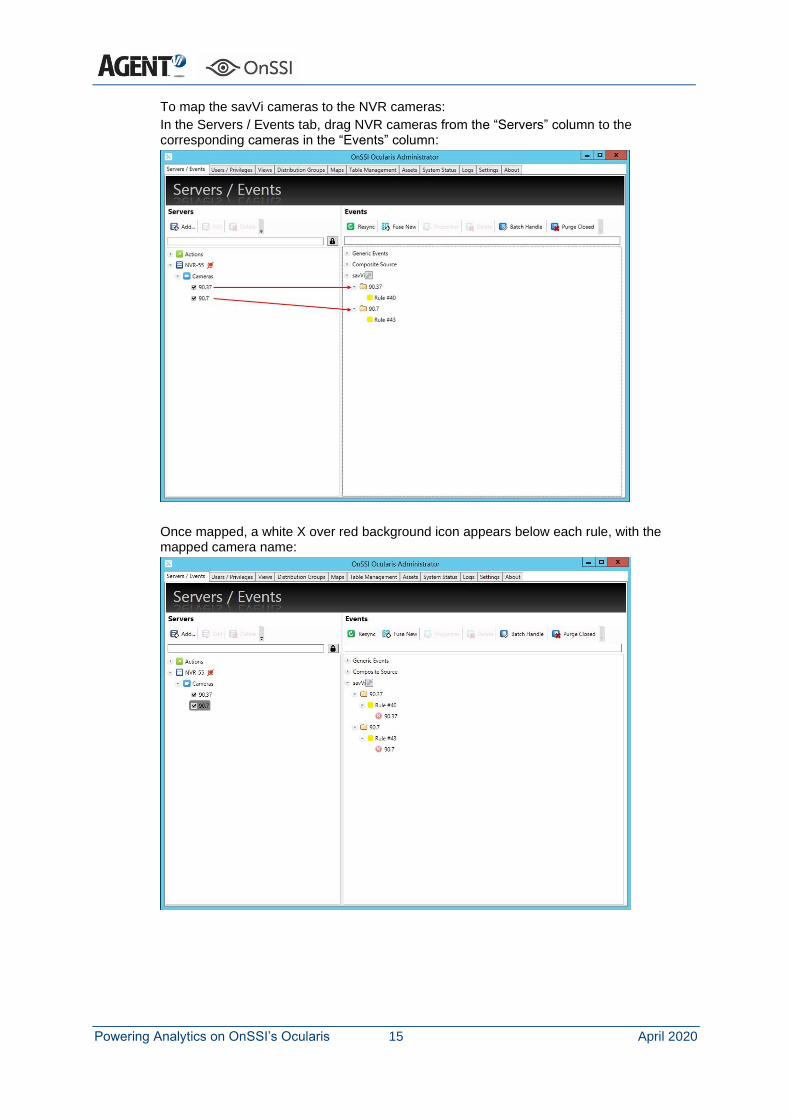
To map the savVi cameras to the NVR cameras:
In the Servers / Events tab, drag NVR cameras from the “Servers” column to the corresponding cameras in the “Events” column:
Once mapped, a white X over red background icon appears below each rule, with the mapped camera name:
Powering Analytics on OnSSI’s Ocularis 16 April 2020
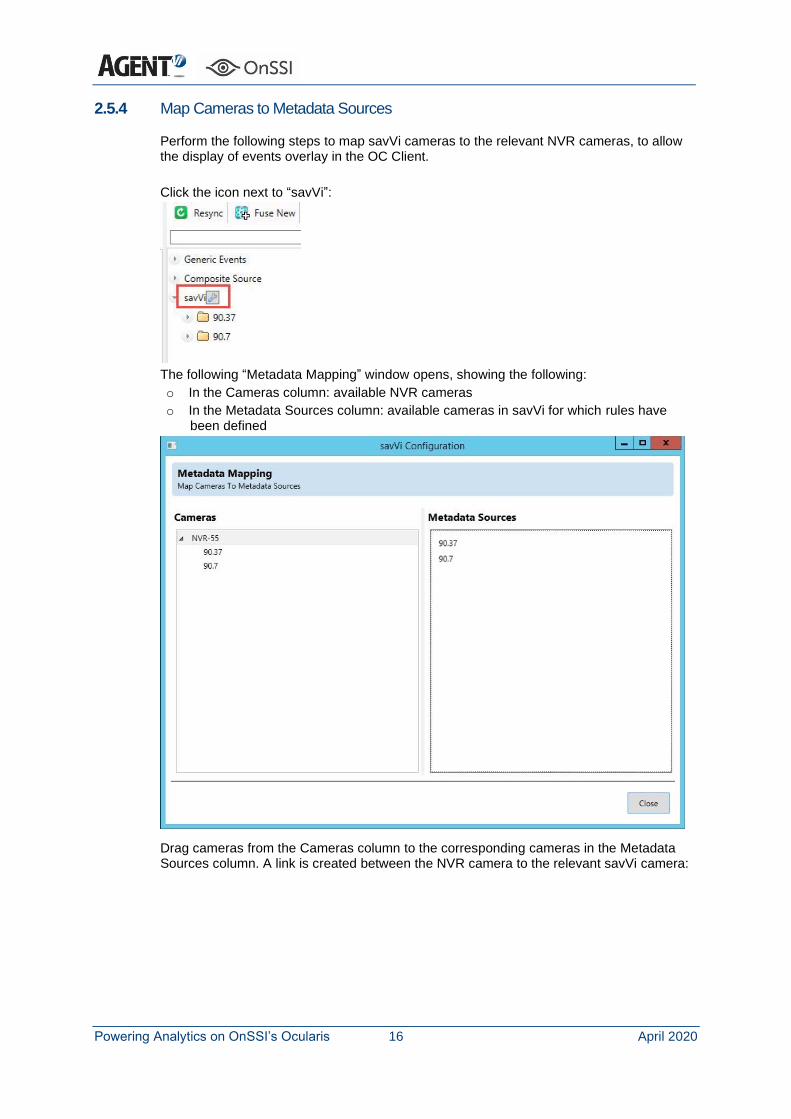
2.5.4 Map Cameras to Metadata Sources
Perform the following steps to map savVi cameras to the relevant NVR cameras, to allow the display of events overlay in the OC Client.
Click the icon next to “savVi”:
The following “Metadata Mapping” window opens, showing the following:
o In the Cameras column: available NVR cameras
o In the Metadata Sources column: available cameras in savVi for which rules have been defined
Drag cameras from the Cameras column to the corresponding cameras in the Metadata Sources column. A link is created between the NVR camera to the relevant savVi camera:

Powering Analytics on OnSSI’s Ocularis 17 April 2020
Select “Close” when done.
Powering Analytics on OnSSI’s Ocularis 18 April 2020
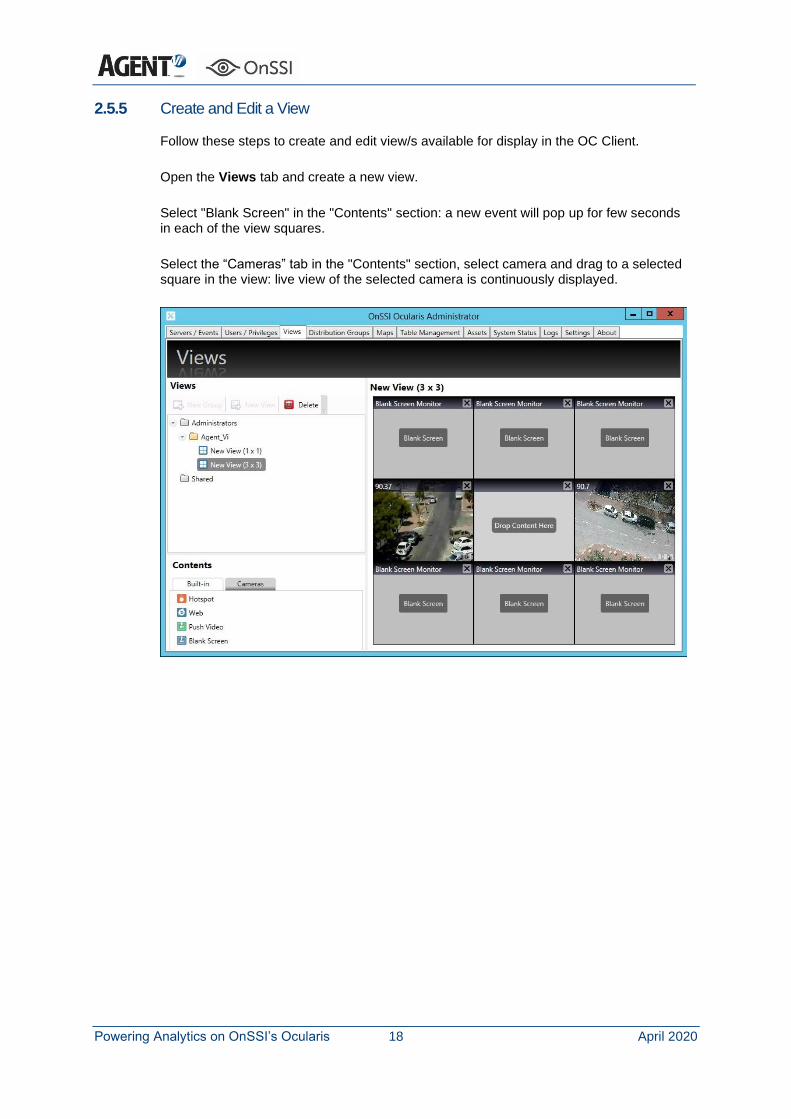
2.5.5 Create and Edit a View
Follow these steps to create and edit view/s available for display in the OC Client.
Open the Views tab and create a new view.
Select "Blank Screen" in the "Contents" section: a new event will pop up for few seconds in each of the view squares.
Select the “Cameras” tab in the "Contents" section, select camera and drag to a selected square in the view: live view of the selected camera is continuously displayed.

Powering Analytics on OnSSI’s Ocularis 19 April 2020
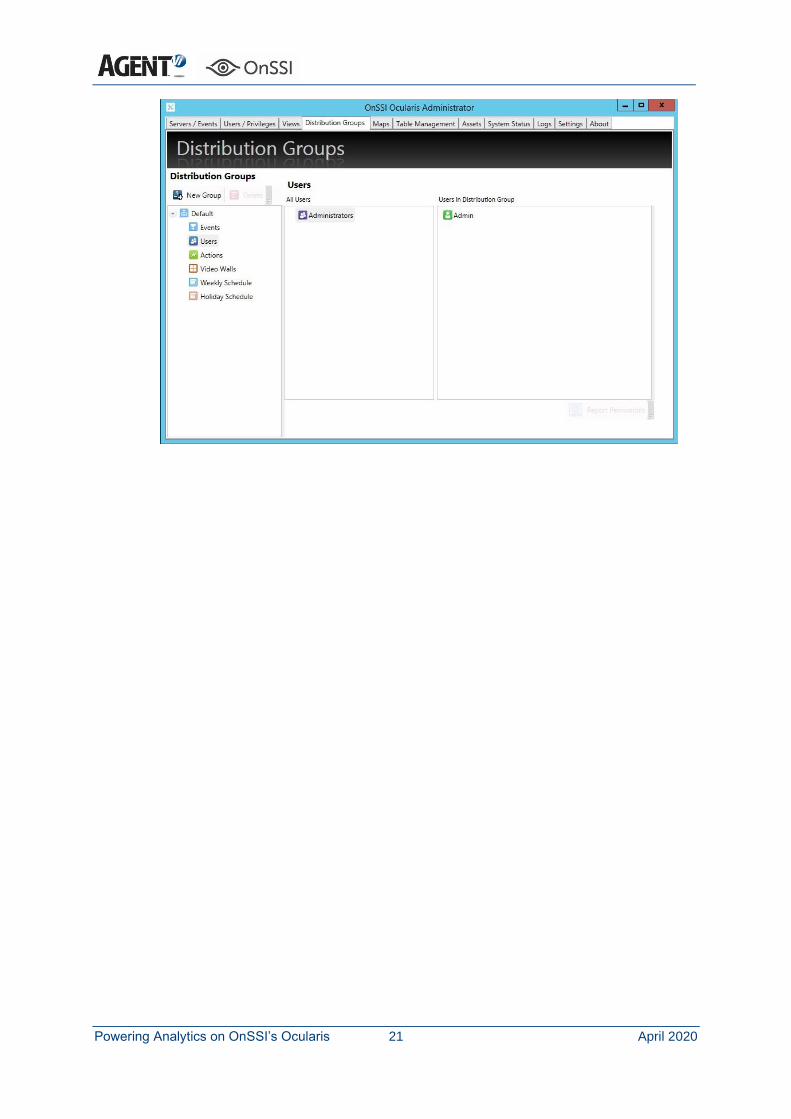
2.5.6 Create Event Distribution Group
Follow these steps to distribute savVi Events to Ocularis. These events will be viewed in the OC Client.
Open the Distribution Groups tab:
In the Events section, under the savVi branch, select the relevant rules and drag them to the “Enabled Events in this Distribution Group” column:
The following window displays the moved rule:
Powering Analytics on OnSSI’s Ocularis 20 April 2020
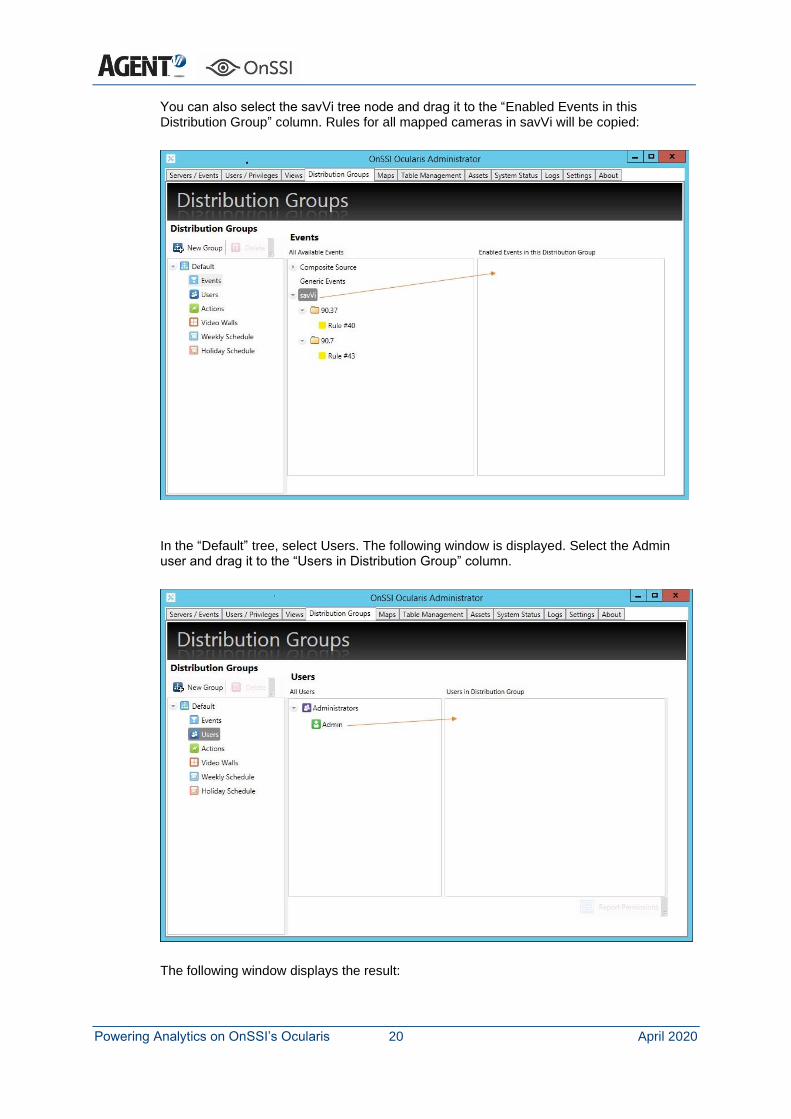
You can also select the savVi tree node and drag it to the “Enabled Events in this Distribution Group” column. Rules for all mapped cameras in savVi will be copied:
In the “Default” tree, select Users. The following window is displayed. Select the Admin user and drag it to the “Users in Distribution Group” column.
The following window displays the result:
Powering Analytics on OnSSI’s Ocularis 21 April 2020
Powering Analytics on OnSSI’s Ocularis 22 April 2020
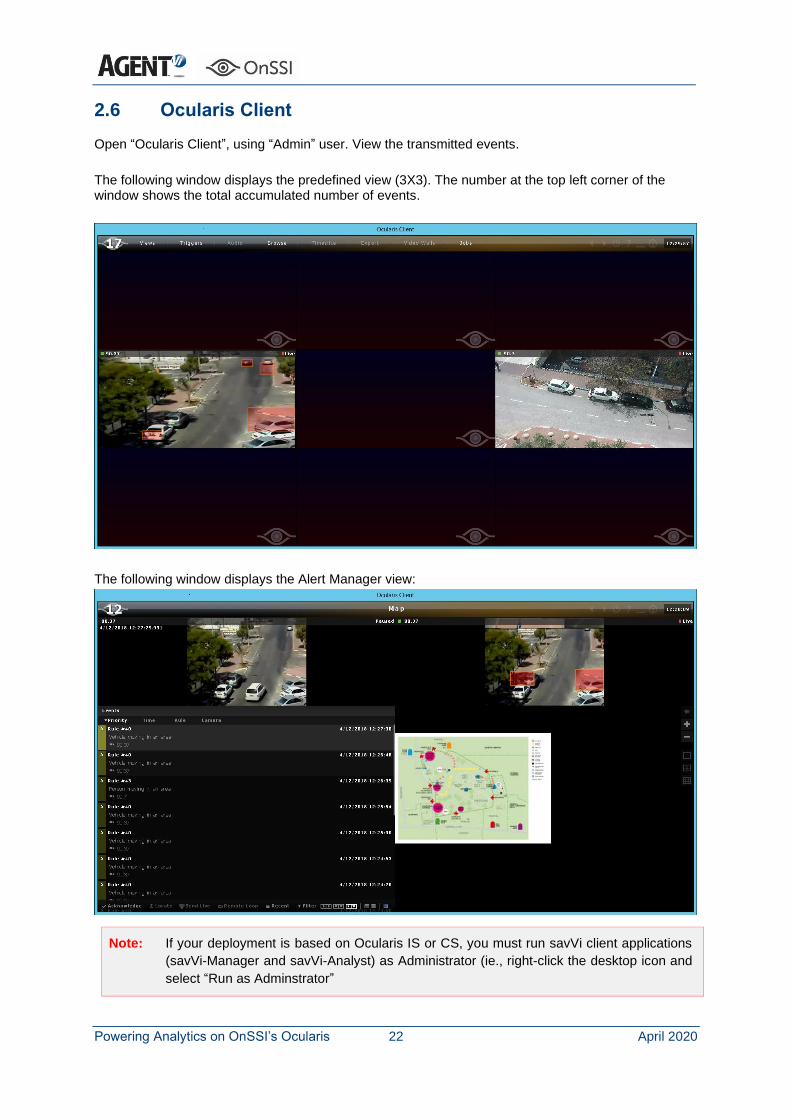
2.6 Ocularis Client
Open “Ocularis Client”, using “Admin” user. View the transmitted events.
The following window displays the predefined view (3X3). The number at the top left corner of the window shows the total accumulated number of events.
The following window displays the Alert Manager view:
Note: If your deployment is based on Ocularis IS or CS, you must run savVi client applications
(savVi-Manager and savVi-Analyst) as Administrator (ie., right-click the desktop icon and
select “Run as Adminstrator”
Powering Analytics on OnSSI’s Ocularis 23 April 2020
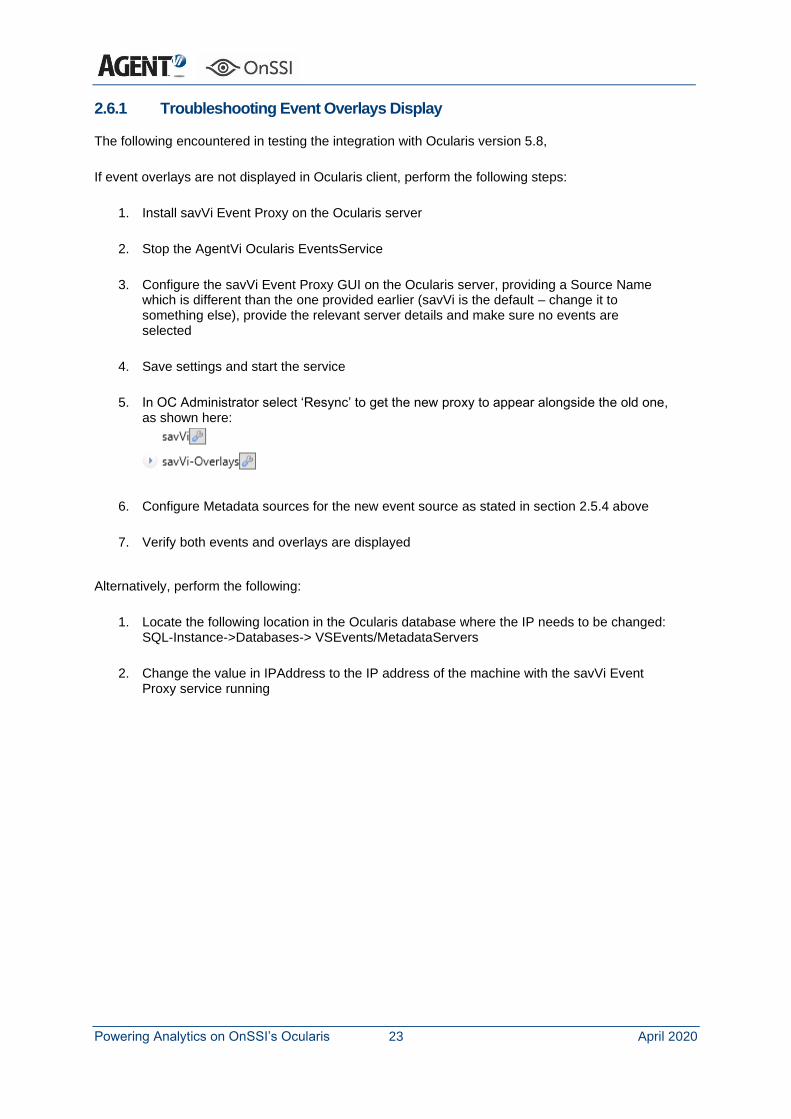
2.6.1 Troubleshooting Event Overlays Display
The following encountered in testing the integration with Ocularis version 5.8,
If event overlays are not displayed in Ocularis client, perform the following steps:
1. Install savVi Event Proxy on the Ocularis server
2. Stop the AgentVi Ocularis EventsService
3. Configure the savVi Event Proxy GUI on the Ocularis server, providing a Source Name which is different than the one provided earlier (savVi is the default – change it to something else), provide the relevant server details and make sure no events are selected
4. Save settings and start the service
5. In OC Administrator select ‘Resync’ to get the new proxy to appear alongside the old one, as shown here:
6. Configure Metadata sources for the new event source as stated in section 2.5.4 above
7. Verify both events and overlays are displayed
Alternatively, perform the following:
1. Locate the following location in the Ocularis database where the IP needs to be changed: SQL-Instance->Databases-> VSEvents/MetadataServers
2. Change the value in IPAddress to the IP address of the machine with the savVi Event Proxy service running
Notice
Copyright © 2003-2020 by Agent Video Intelligence Ltd.
Agent Video Intelligence Ltd. holds the copyright to this manual. All rights reserved. No part of this publication may be reproduced or transmitted in any form or by any means without prior written consent from Agent Video Intelligence Ltd.
Disclaimer
The information in this manual was accurate and reliable at the time of its release for this specific version. However, Agent Video Intelligence Ltd. reserves the right to change the specifications of the product described in this manual without prior notice at any time.
The customer should note that in the field of video there are a number of patents held by various parties. It is the responsibility of the user to assure that a particular implementation does not infringe on those patents. Agent Video Intelligence Ltd. does not indemnify the user from any patent or intellectual property infringement.
Trademarks
Agent Vi™, Vi™, savVi™, savVi-Analyst™, savVi-Manager™, Vi-Agent™, Vi-Agent Proxy™ and Vi-Server™ are trademarks of Agent Video Intelligence Ltd.
All other proprietary names mentioned in this manual are the trademarks of their respective owners.
www.agentvi.com


![Ocularis Kalbe Discussion Aug 21[1]](https://img.dokumen.tips/doc/110x75/554ec18ab4c9053c4b8b49c9/ocularis-kalbe-discussion-aug-211.jpg)