Embed Size (px)
Citation preview
1
GEOPHOTOGRAPHY, PART 1: RATIONALE, CURRICULAR IMPLEMENTATION, 1
AND DIGITAL CAMERA OPTIONS 2
Jerry F. Magloughlin 3
Department of Geosciences, Colorado State University 4
Fort Collins, Colorado 80523 USA 5
[email protected] 970-491-1812 6
Journal of Geoscience Education, submitted 7
ABSTRACT 8
Geoscientists do a wide variety of photographic activities as a routine part of teaching, 9
research, and other scientific activities, but there has been virtually no systematic discussion of 10
these activities collectively, and almost no consideration of the role of geophotography in, for 11
example, geoscience education. Given that photographic imagery is one of the most important 12
and objective ways that geoscientists archive and convey information, this omission is 13
perplexing. As normal photography is now completely digital from acquisition to presentation 14
and publication, and simple digital cameras very inexpensive, there are no significant hurdles to 15
including photography, and introducing successively more challenging photographic skills, at 16
many stages in the geoscience undergraduate curriculum. 17
In this paper, I review the rationale for recognizing and systematically addressing 18
geophotography as a subfield or aspect of the geosciences. Suggestions are offered on where 19
geophotography can be taught within common courses in the undergraduate curriculum, and 20
skills to be fostered. A major goal is to help bring a new focus on this important skill, and 21
prompt geoeducators to incorporate basic skills into courses and develop and share course 22
materials. Finally, to address the most common initial question from geoscientists, whether 23
2
student or professional, who are either seeking to begin geophotography or seeking to become 24
better geophotographers, a compact review of the current tiers of digital cameras is presented. 25
26
Article type: Commentary or general Instructional Approaches 27
Key words: Geoeducation, geophotography, digital photography, digital cameras 28
Date received: 29
Date accepted: 30
Short title: Geophotography, Part 131
3
INTRODUCTION 32
The term ‗geophotography‘ has been proposed as a subfield or aspect of the geosciences, in 33
recognition of the vital and varied role photography plays, and to serve as an umbrella or rubric 34
under which many different techniques and associated photographic knowledge could be 35
collected (Magloughlin, 2010, 2011, in review). A tentative definition has been proposed to 36
clarify what ought to be included, to illustrate the breadth of the field, and to separate 37
geophotography especially from non-scientific exercises: ―Geophotography normally involves 38
realistic recording (commonly using visible, UV, or IR light) and processing of images of 39
scientifically chosen natural features and processes, or the experimental equivalents of natural 40
features and processes, motivated by a scientific understanding or question, and with a specific, 41
useful goal in mind, including research, education, and illustration.‖ (Magloughlin, in review). 42
There is a close analogy to the long-recognized and long-named field of astrophotography, which 43
perhaps received its moniker much sooner and is more obviously a subfield of astronomy 44
because of the extremely common use of a telescope and motor drive for long-exposure images, 45
and, during the film era, of the many specialized techniques for dealing with reciprocity failure. 46
By the above definition, geoscientists are doing geophotography when they record images 47
with an understanding of (or question about) the geologic features and processes they are 48
recording, when they have specific purposes in mind for the image, and when they preserve the 49
veracity of the subject throughout the process. They thus must understand the science as well as 50
have technical expertise (Goetz, 2009). These criteria thus exclude casual snapshots, landscape 51
photography, and artistic photography. Included in geophotography are many methods and 52
subjects, involving natural and artificial geologic features and processes, indoor and outdoor 53
activities, virtual field trips (Schott, 2009; Piatek, 2010), IR and UV photography (e.g., Aber et 54
4
al., 2009; Furukawa, 2010; Tamburello et al., 2011), return photography (or Rephotography, e.g., 55
Munroe, 2003; Thornbush, 2010), and both still and video photography (Baldock and Hughes, 56
2006; Major et al., 2009). An important set of exercises opening up field geology to mobility-57
impaired individuals are virtual field trips (Atchison and Feig, 2011), especially with the use of 58
virtual mobility and virtual specimens (De Paor and others 2010). 59
As fundamental as photography is in many different ways and in many different 60
subdisciplines of the geosciences, and especially considering geoscientists have the pleasant task 61
of studying the most spectacular corners of the Earth, it is nonetheless obvious that most 62
geoscientists are not good photographers. This is understandable in that consistently excellent 63
photography is a technical skill requiring much practice. In short, geoscientists are usually quite 64
busy doing geoscience rather than keeping up with the latest camera and lens models, learning 65
about photographic software, and practicing composition and photograph editing. 66
However, most geoscientists can be better photographers without having to become 67
professional photographers on the side, and the whole of the geosciences would benefit from 68
better photography, whether the purpose behind the images is research, classroom instruction, 69
illustration of non-research publications, or recruitment of the next generation of geoscientists. 70
On this last point, I suspect many geoscientists can recall the powerful effect that photographs 71
played in their enthusiasm for and learning within the geosciences, and many instructors can 72
testify to captivating power of excellent images over lecture halls of students. Hoisch and Bowie 73
(2010, p.166), in assessing factors that likely influenced recruitment into the geology major from 74
the ranks of large introductory geology courses, state that influential factors included 75
―…opportunities for working outdoors, field work, observing nature, travel, and environmentally 76
5
friendly employment‖, and clearly photo-illustration of these aspects of the geosciences could be 77
influential. 78
The first goal herein is to provide information to encourage geoscience educators to make 79
training in geophotography a routine part of geoscience courses and develop discipline-specific 80
exercises, and to provide both basic information and a few suggestions on where and how to 81
begin to accomplish this. The second goal of this and follow-up papers is to compactly provide 82
information to current geoscientists in order to foster their growth as geophotographers, which, 83
just like athletic pursuits, involves a combination of improving skills and reducing errors. In this 84
paper, the discussion will be confined to an overview of the current categories of cameras. A 85
third goal, not discussed beyond this point, is to encourage experts, especially in new and ‗niche‘ 86
versions of geophotography, to contribute their expertise in order to help build a collection of 87
resources and flesh out the diversity of geophotographic pursuits. 88
A primary focus here is on general outdoor or field geophotography—the most obvious and 89
commonly practiced subcategory of geophotography—from macrophotography (close-up to 90
extreme close-up photography) to wide-angle, panoramic, 360°, and gigapixel photography. This 91
subfield involves the most general--and usually initial--choices of equipment, techniques, and, at 92
an intermediate to advanced level, can involve the widest array of equipment. 93
The process of geophotography can be divided into four parts: choice of equipment, planning 94
for a particular outing, composition and all factors manipulated on-site, and post-production. 95
This paper addresses the most fundamental part of the first of these, camera options, as a guide 96
for those who have no photographic equipment and those who have some photographic 97
equipment and want to improve their potential for taking better photographs. Such decisions are 98
obviously driven by present and future time commitments, finances, and the most common 99
6
anticipated photographic needs. With the extremely rapid pace of technological change in 100
photography, the approach here is generic and applies to current, common camera options. 101
Once the choice of equipment is made, the approach advocated here is dominantly pragmatic. 102
That is, with the available equipment, what can the geophotographer do to get the best possible 103
image under the circumstances dealt? Some photographers advise not bothering to put camera to 104
eye if the lighting conditions are not optimal. However, most geoscientists, most of the time, 105
have limited control over when they are able to take their photographs of a particular outdoor 106
subject. Geoscientists participate in pre-planned field trips, are obligated to do a hike on a 107
particular day, happen to be driving by when a roadcut attracts their attention, or happen across a 108
geologic process already in progress. The point is that very commonly, geoscientists have good 109
reason to photograph some feature, but little control over when they photograph it, and therefore 110
little control over the environmental conditions. Advance planning for outings is advantageous, 111
and, when possible, can improve the odds of being in the right place under optimal (not merely 112
lighting) conditions. But unlike the photographic greats such as Ansel Adams, who returned to 113
particular locations dozens of times in the pursuit of optimal conditions, a more pragmatic 114
approach is to prepare the geophotographer to capture the best possible image under whatever 115
conditions happen to exist. Like the practitioners of any outdoor sport, the outdoor/field 116
geophotographer needs to cope with and succeed whether the conditions prove bright or dim, wet 117
or dry, windy or calm, cold or hot, dusty or clear. Naturally, later advice pertaining to on-site 118
procedures may or may not apply depending on whether or not the requisite equipment and 119
capabilities are available; the corollary is that with more options come more capabilities and a 120
greater likelihood of obtaining high quality photographs. 121
122
7
TEACHING GEOPHOTOGRAPHY IN THE GEOSCIENCE CURRICULUM 123
Circumspect geoscience educators need to weigh many factors in tailoring courses for majors 124
within a geoscience curriculum, relative to their particular population of students. One 125
unarguable goal is the conveyance, based on the mission of preparing students for careers within 126
the geosciences, of skills they will actually use. The vast majority of geoscientists acquire, use, 127
and learn from a wide variety of photographs as a routine part of their work. It seems likely that 128
those who are better at acquiring, using, and interpreting photographs are likely to be more 129
successful geoscientists. Yet textbooks on geological field methods (Compton, 1985; Assaad et 130
al., 2004; Maley, 2005) offer little or no instruction on geologic photography, and I am not aware 131
of any available instructional resources devoted to geophotography. A webinar on 132
Geophotography is to be offered by SERC (SERC, 2013) and materials will remain available 133
thereafter. 134
What can be suggested at this early stage is that various kinds of geophotography be 135
integrated into courses taken more-or-less in succession within a typical geosciences degree. 136
Today, digital photography has virtually completely replaced film photography with only a few 137
specialist and niche applications remaining for film; thus, there are no significant barriers to 138
implementing photography within the curriculum anywhere desired. This is because even simple 139
point-and-shoot cameras are adequate (in some situations and in some respects preferred) for 140
most applications, and the very low-end of such cameras currently cost roughly one quarter to 141
one half of the price of an average college textbook. Software for basic manipulation and 142
annotation of images is included with most computer systems, is present within word processing 143
software to which students routinely have access, and more sophisticated image editing programs 144
are, at a minimum, available as freeware (Chastain, 2011; Viescas, 2011). These latter types of 145
8
programs are sophisticated enough and contain sufficient editing options that many students of 146
geophotography will never need to go further. 147
Clearly, the specifics can vary vastly depending on the nature of the curriculum, class size, 148
and so forth, but the purpose here is promoting planning and improvement. Drummond and 149
Markin (2008) surveyed institutions with geology degrees and found, among others, the 150
following courses, in rough order of a normal curricular treatment, with occurrence within the 151
curriculum ranging from 76 to 99.3%: Introductory/Physical Geology, Historical Geology, 152
Mineralogy, Petrology, Structural Geology, and Field Camp. There are natural opportunities 153
within each of these (and other) courses, and specific and increasingly challenging skills could 154
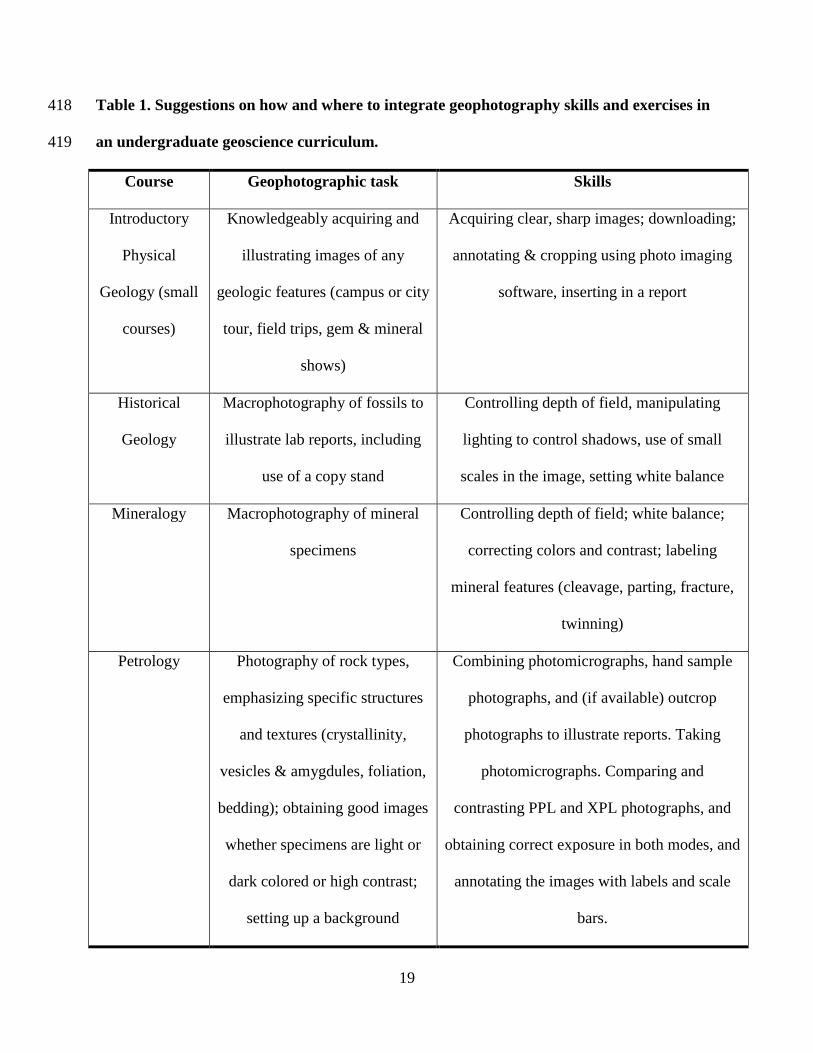
be incorporated (Table 1) with careful planning. Geophotography can be a skill developed over 155
the course of the curriculum analogous to writing, map interpretation and generation, computer 156
skills, and petrography. Where well-integrated and executed, geophotography could be a line-157
item on a geoscience graduate‘s resume. 158
CHOICE OF CAMERA 159
Four categories of cameras will be addressed here, with the provisos that there are significant 160
differences in cameras within a given category across brands, and that both technology and 161
terminology are changing rapidly. The four types are compact or ‗point and shoot‘ (P&S) 162
cameras, bridge cameras, mirrorless interchangeable-lens cameras (MILC), and digital single-163
lens reflex (DSLR) cameras. Both the initial price and potential long-term price (how much one 164
could spend, over time, on accessories) increase across the four types. While most users will pick 165
one of the four, there are good reasons to own and carry two or even three of the types. 166
Beyond financial considerations, how and where the camera is used (particularly the 167
conditions), the most common use of the images (research, teaching, non-research related 168
9
publications, temporary images), and the user‘s level of photographic expertise are the most 169
important factors to consider. Across the camera spectrum are numerous trade-offs: less versus 170
more required expertise, lower quality versus higher quality images, less weight versus more 171
weight, ceding control to the camera versus having manual controls, convenient access to the 172
camera and quick acquisition of photographs versus less convenient access and more time to 173
acquire an image, having less or more confidence on-site that an excellent photograph was 174
acquired, and many others. 175
Currently, an interesting technological-societal-generational photography phenomenon has 176
become evident to geoscience educators: use of the do-everything (poorly) smart phone. Students 177
who just a few years ago invariably carried at least a P&S camera on field trips or used one in the 178
teaching lab setting now attempt to do their photography with a smart phone or even tablet 179
computer. After a recent field trip to Yellowstone National Park, arguable one of the world‘s 180
most varied and photographable geologic landscapes, with a large number of geoscience 181
students, I received photographs from students and attempted to compile a photographic 182
presentation. Compared to just a few years ago, photographic skills of the students had taken a 183
decided step backwards, making the following discussion all the more timely. As the goal here is 184
to increase the quality of geophotography, low-pixel, low-quality, and ultracompact camera-oids, 185
particularly those embedded in electronics designed for other purposes, are not included in the 186
discussion. 187
P&S (compact) cameras 188
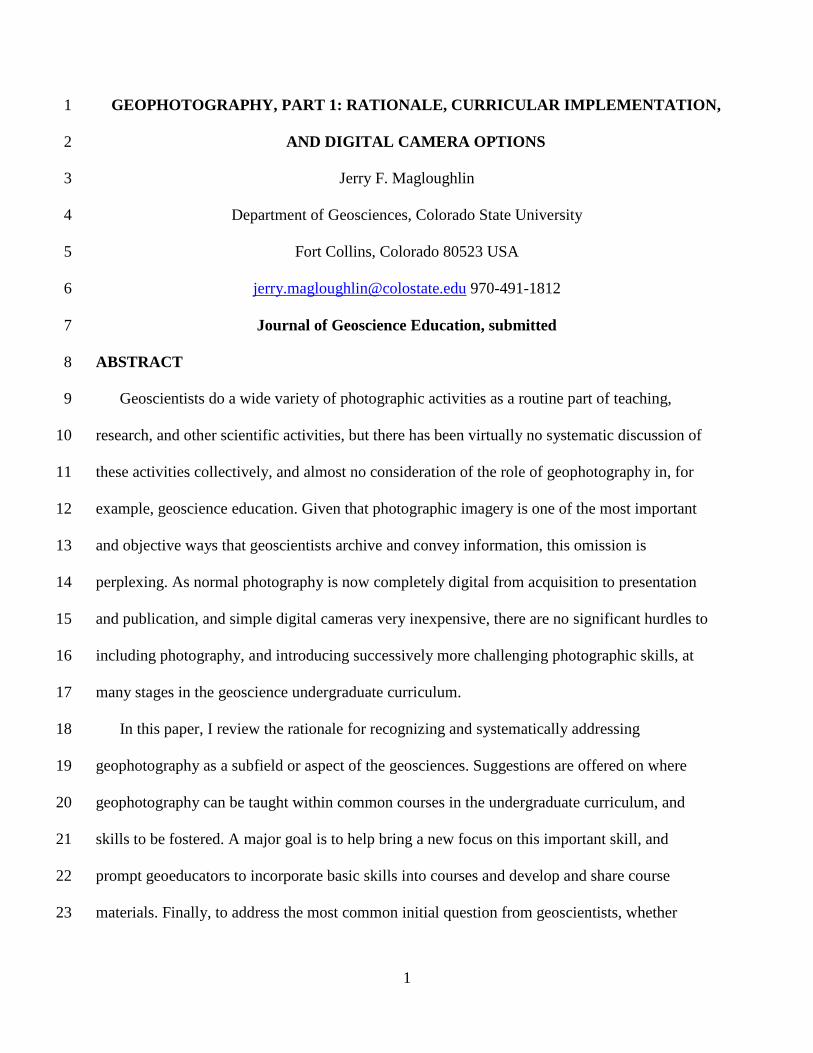
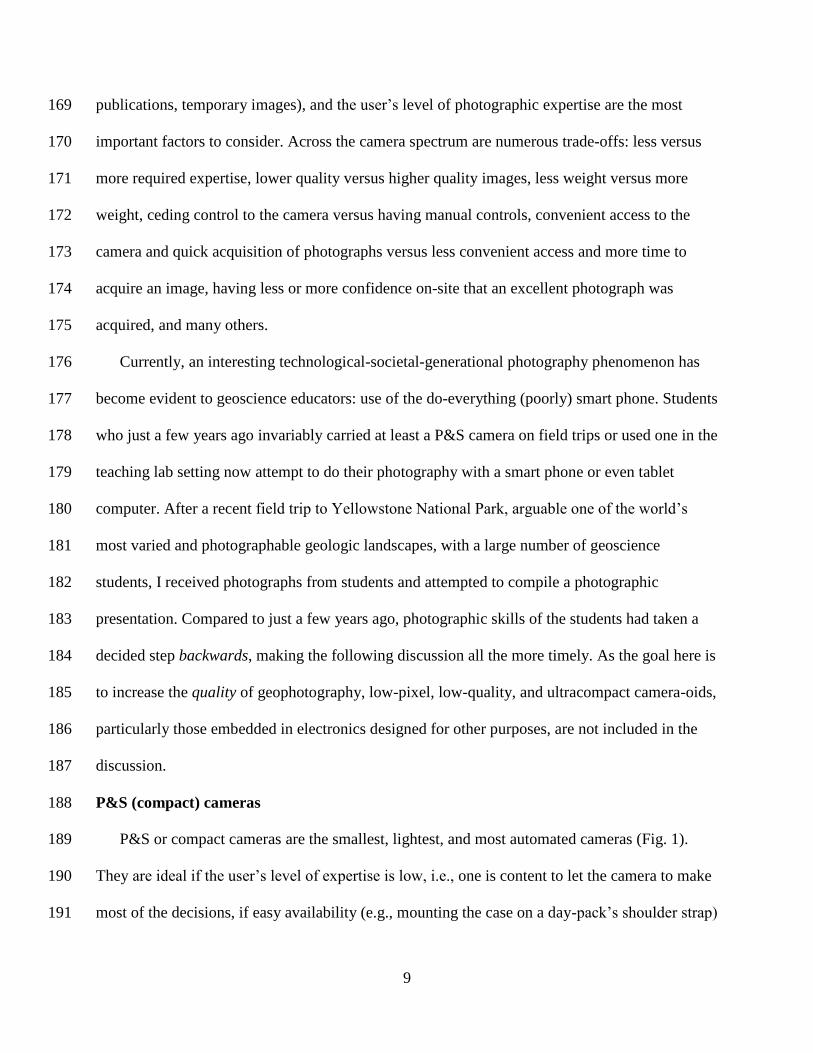
P&S or compact cameras are the smallest, lightest, and most automated cameras (Fig. 1). 189
They are ideal if the user‘s level of expertise is low, i.e., one is content to let the camera to make 190
most of the decisions, if easy availability (e.g., mounting the case on a day-pack‘s shoulder strap) 191
10
is important, if low weight is important, and if low to moderate-quality images are acceptable. As 192
desirable as high quality images are, these cameras are nonetheless good choices for wet or dusty 193
conditions, as they are much easier to protect--quick to access, quick to obtain a picture, and 194
quick to return to a protective case. A high quality lens for a DSLR can cost twenty times the 195
price of a single P&S, and thus the latter can be good choices for working around volcanic, wet, 196
and otherwise hazardous-to-equipment environments. 197
If the absolute lightest possible camera is critical, a P&S is ideal; a good DSLR with one lens 198
can weigh over 2 kg, which can be prohibitively heavy for some types of field geology. 199
The major downside of P&S cameras is that it is difficult to get excellent quality images, 200
mainly due to modest lens and sensor qualities, simpler image processing software (not 201
surprisingly, camera manufacturers save their best on-board software for their best cameras), and 202
less manual control over camera functions. Also, the viewfinder does not show exactly what the 203
camera ‗sees‘. Thus, it is more difficult to see exactly what one is photographing, and viewing 204
the digital monitor in bright sunlight makes it more difficult to ensure one has acquired a good 205
image. But these cameras can produce adequate images for a wide variety of applications, 206
however, significant enlargement of the images make the limitations obvious. 207
A final issue is that the exposed part of the lens on P&S cameras is very small. While this 208
presents a smaller target for raindrops or sharp objects, it also means a single scratch on the lens 209
will likely ruin the camera. On the other hand, P&S cameras can be the most damage-resistant, 210
and shock- and water-proof versions (Fig. 1) are available. 211
Bridge cameras 212
The term ‗bridge camera‘ has been around since the 1980s, and such intermediate-caliber 213
cameras are intended to fill the gap between P&S and DSLRs. There are many different versions, 214
11
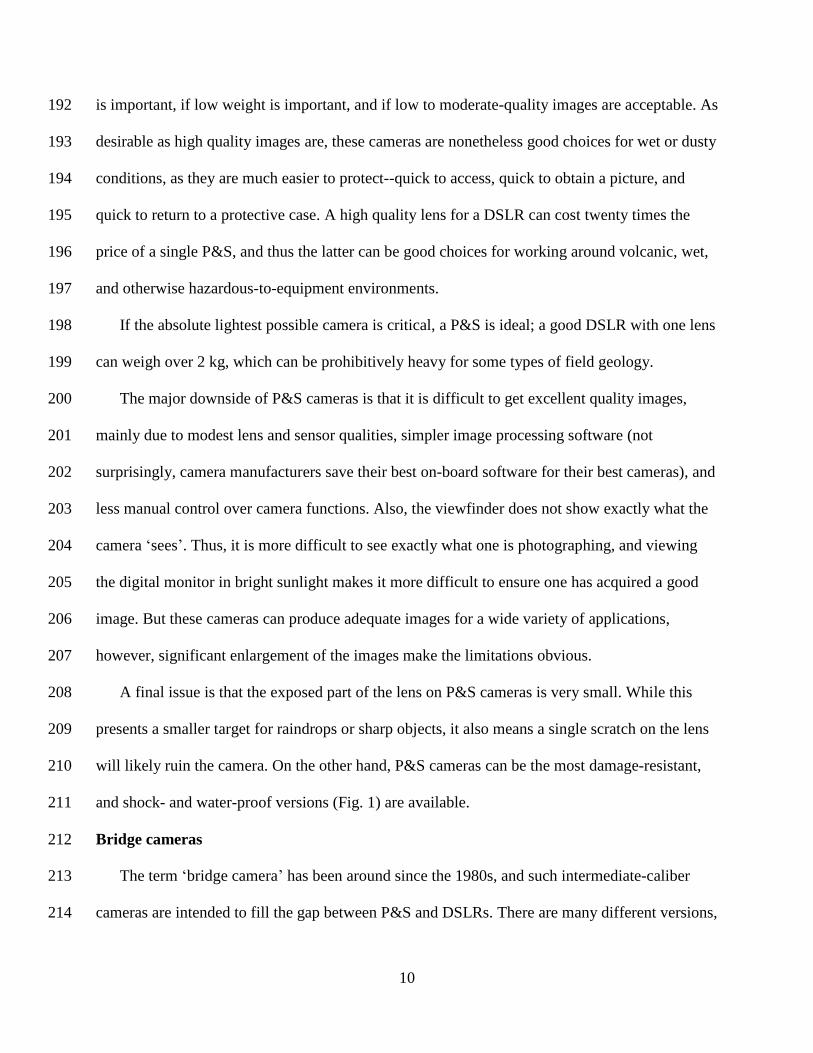
but they are generally lightweight and not much bigger than P&S cameras, and they have a 215
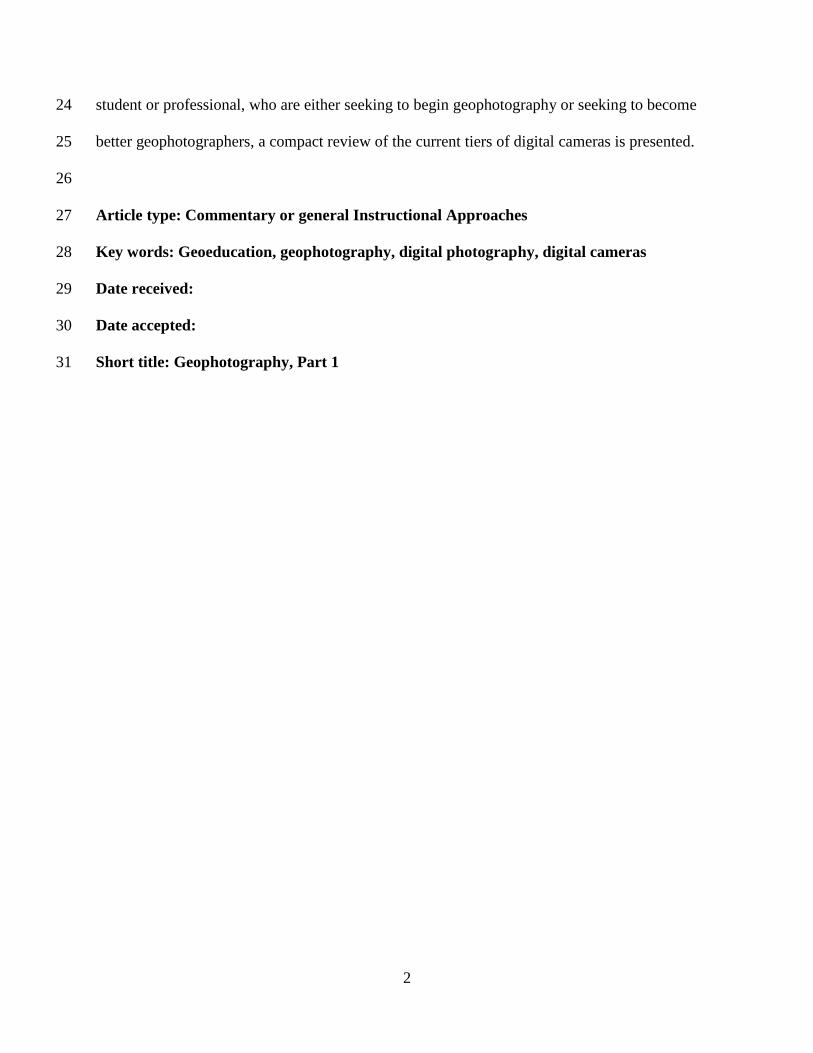
single fixed lens and relatively small sensor (Fig. 2). Many are capable of zooming to the 216
equivalent of a long telephoto and thus some are called superzoom cameras. Some accept filters, 217
which owing to their small size, are much cheaper than those for MILC and DSLR cameras. 218
These cameras preserve most of the compact nature and low weight of P&Ss while offering more 219
manual controls, and some are optically excellent. 220
For geophotographers, bridge cameras can often be a good choice. Destroying one in a field 221
accident, as with P&S cameras, is relatively non-tragic. They are hardier than higher end 222
cameras since they have a single fixed lens, and their small size makes them easier to protect in 223
adverse conditions. For those of advanced beginner to intermediate abilities, they allow filter use 224
and manipulation of numerous shooting options. If telephoto capabilities are important, they are 225
a good choice. However, their image quality is still inferior to DSLRs, and have the same 226
viewfinder drawbacks as P&S cameras. 227
MILC cameras 228
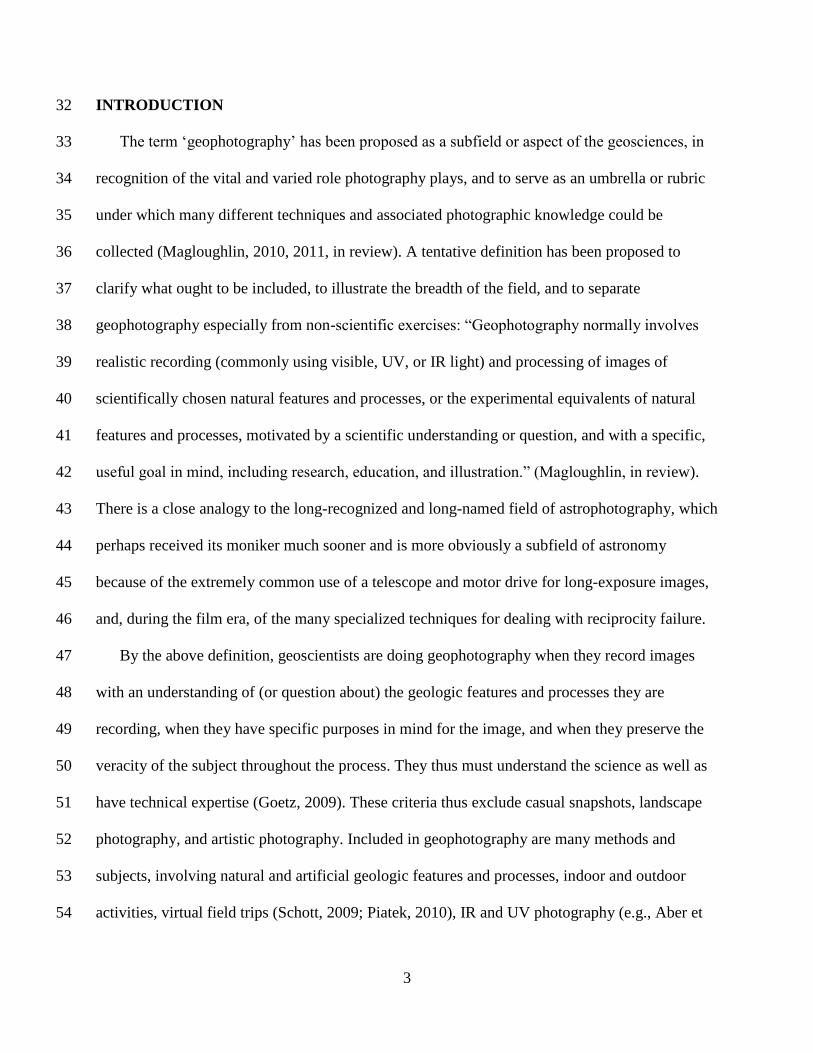
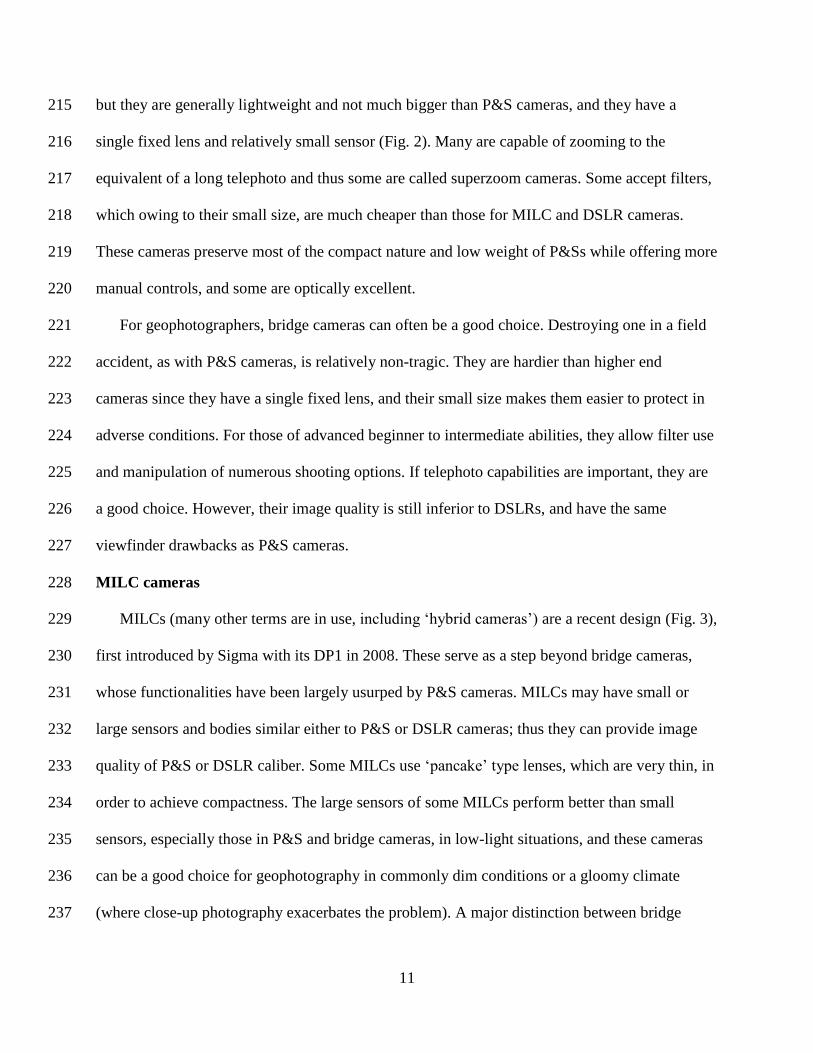
MILCs (many other terms are in use, including ‗hybrid cameras‘) are a recent design (Fig. 3), 229
first introduced by Sigma with its DP1 in 2008. These serve as a step beyond bridge cameras, 230
whose functionalities have been largely usurped by P&S cameras. MILCs may have small or 231
large sensors and bodies similar either to P&S or DSLR cameras; thus they can provide image 232
quality of P&S or DSLR caliber. Some MILCs use ‗pancake‘ type lenses, which are very thin, in 233
order to achieve compactness. The large sensors of some MILCs perform better than small 234
sensors, especially those in P&S and bridge cameras, in low-light situations, and these cameras 235
can be a good choice for geophotography in commonly dim conditions or a gloomy climate 236
(where close-up photography exacerbates the problem). A major distinction between bridge 237
12
cameras and MILCs is that the latter have interchangeable lenses, which adds versatility, but 238
increases the overall price and weight if a full set of lenses from wide angle to telephoto is 239
needed. However, the lenses are commonly much smaller than those for DSLRs, so coupled with 240
the smaller camera bodies, this accomplishes a large weight reduction. 241
MILCs have fewer parts and thus can be smaller and may be more durable than DSLRs. 242
They may or may not have optical viewfinders, and they lack the flip-up mirror of DSLRs and 243
thus do not have the through-the-lens (TTL) capability of DSLRs, which is a major distinction 244
and significant disadvantage. As a result, composing and focusing is commonly done with the 245
LCD screen—something familiar to P&S camera users but unfamiliar to DSLR users—and this 246
can be a disadvantage in bright sunlight. At present, at least one brand has a 24.3 megapixel 247
sensor—more than adequate for almost any application. Because the LCD screen is always 248
needed while the camera is on, and the batteries are smaller to help make the camera body 249
smaller, such cameras typically have a much shorter battery life than DSLRs. Another 250
consideration is the crop factor or focal length multiplier, meaning the magnification achieved 251
when the sensor is smaller than traditional 35 mm film size or an equivalent-sized sensor. This 252
turns a wide-angle lens into a neutral-magnification lens, and a telephoto into a longer focal 253
length telephoto. Crop factors currently range from approximately 1.5x to 5.5x—an important 254
consideration both for the purchase of the camera and lenses. Some systems have adapters that 255
allow the use of DSLR lenses. At present, MILCs lack the wide range of accessories of DSLRs, 256
but flash units, GPS-tagging units, and microphones are available. Because of the (in many 257
cases) good image quality and much-reduced weight, MILC cameras may decrease the demand 258
for DSLRs in the future. 259
260
13
DSLR cameras 261
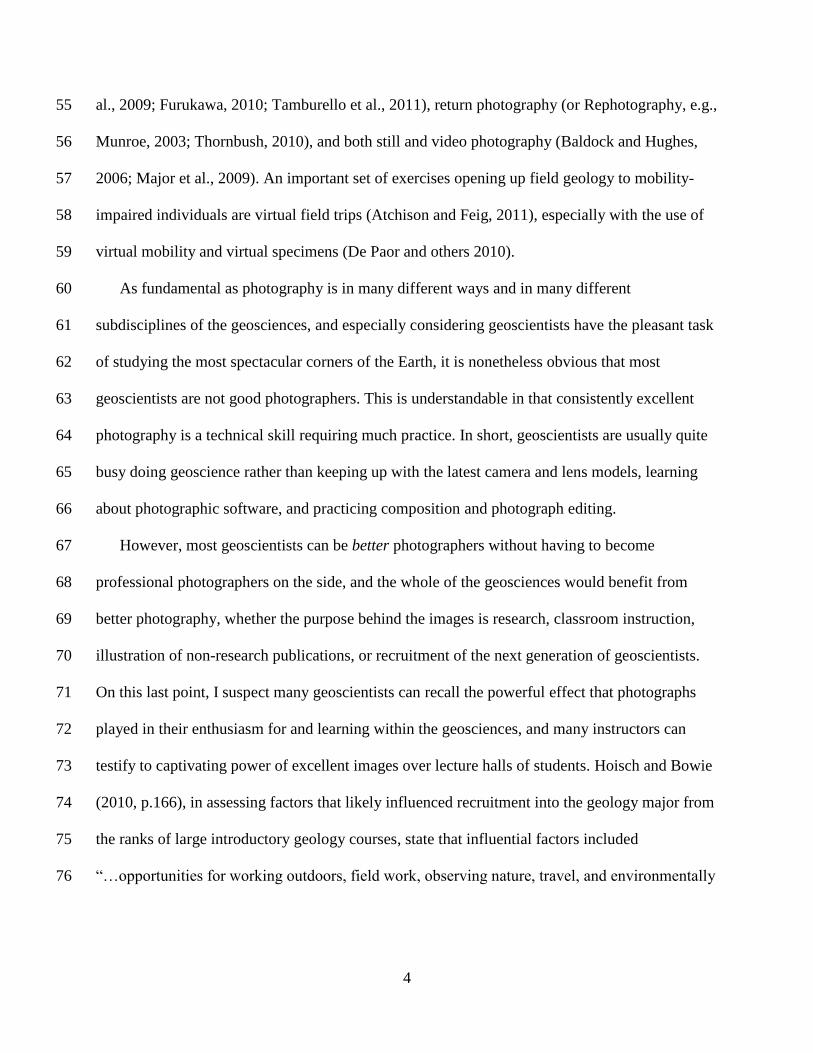
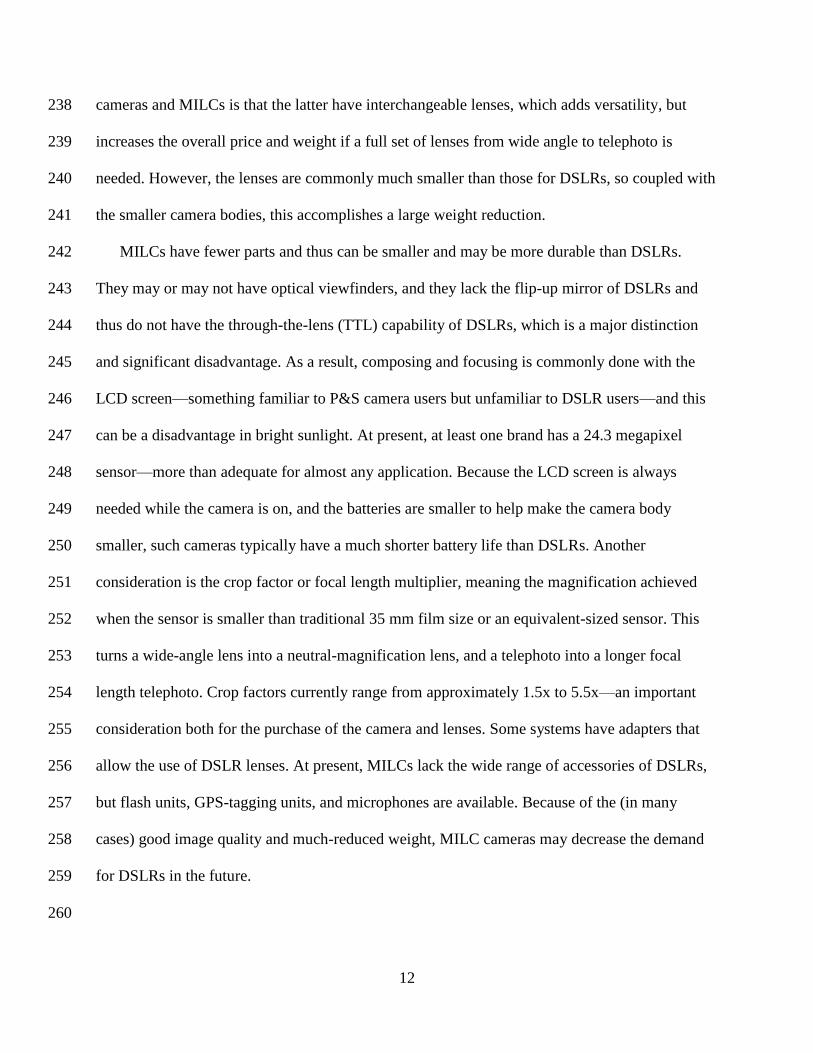
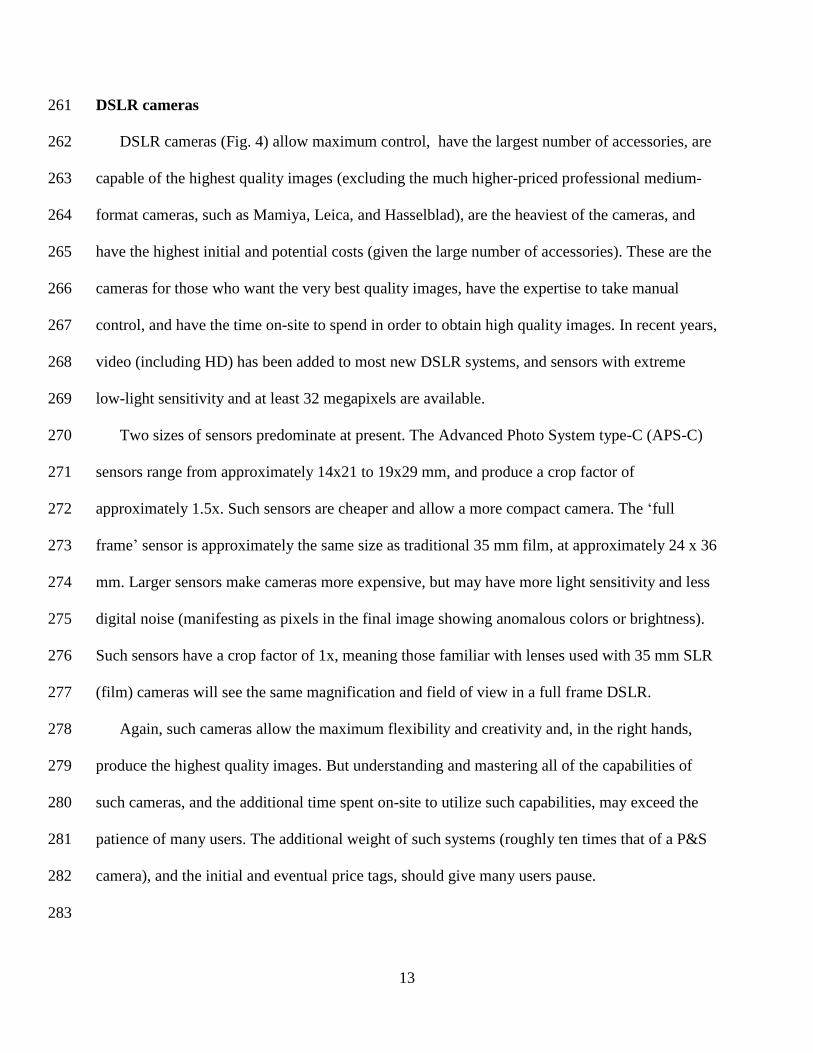
DSLR cameras (Fig. 4) allow maximum control, have the largest number of accessories, are 262
capable of the highest quality images (excluding the much higher-priced professional medium-263
format cameras, such as Mamiya, Leica, and Hasselblad), are the heaviest of the cameras, and 264
have the highest initial and potential costs (given the large number of accessories). These are the 265
cameras for those who want the very best quality images, have the expertise to take manual 266
control, and have the time on-site to spend in order to obtain high quality images. In recent years, 267
video (including HD) has been added to most new DSLR systems, and sensors with extreme 268
low-light sensitivity and at least 32 megapixels are available. 269
Two sizes of sensors predominate at present. The Advanced Photo System type-C (APS-C) 270
sensors range from approximately 14x21 to 19x29 mm, and produce a crop factor of 271
approximately 1.5x. Such sensors are cheaper and allow a more compact camera. The ‗full 272
frame‘ sensor is approximately the same size as traditional 35 mm film, at approximately 24 x 36 273
mm. Larger sensors make cameras more expensive, but may have more light sensitivity and less 274
digital noise (manifesting as pixels in the final image showing anomalous colors or brightness). 275
Such sensors have a crop factor of 1x, meaning those familiar with lenses used with 35 mm SLR 276
(film) cameras will see the same magnification and field of view in a full frame DSLR. 277
Again, such cameras allow the maximum flexibility and creativity and, in the right hands, 278
produce the highest quality images. But understanding and mastering all of the capabilities of 279
such cameras, and the additional time spent on-site to utilize such capabilities, may exceed the 280
patience of many users. The additional weight of such systems (roughly ten times that of a P&S 281
camera), and the initial and eventual price tags, should give many users pause. 282
283

14
Additional camera considerations 284
The choice of a camera for the beginner is a bit of a catch-22. Purchasing an advanced 285
camera with capabilities one does not understand allows for growth in expertise, but if one fails 286
to master these capabilities, one can be handicapped and obtain worse results than if a simpler, 287
more automated camera were used. In public places, those using tripods and long (telephoto) 288
lenses tend to attract ―how-do-I‖ interruptions, that is, requests for help from individuals using 289
more camera than they understand, and in some public places, tripods are prohibited. Before 290
purchasing a camera, it is useful to examine the owner‘s manual; one recent popular Nikon 291
DSLR manual is 452 pages long, compared to a popular P&S manual‘s 212 pages. Another 292
option is to borrow or rent a camera and lens. Many on-line companies are available for camera 293
and lens rental, including LensGiant (2012). 294
Geophotographers planning long backpacking trips or photography in cold conditions might 295
consider a camera that uses standard (disposable) batteries rather than a camera-specific battery 296
pack. The latter are usually much more expensive and if one is away from a power source for an 297
extended period, charging may be a problem, whereas a large supply of the former weigh little 298
and can be kept warm, if necessary, in a pocket. 299
Image stabilization refers to a group of methods designed to compensate for camera 300
movements during exposure. What this process is called and how it is implemented varies by 301
manufacturer (e.g., built into the camera versus the lens), but it has become extremely common. 302
One of the most important criteria for an excellent image, especially for scientific purposes, is 303
the sharpness of the image, and one of the main ways sharpness is lost is through movement of 304
the camera during exposure. Image stabilization helps preserve sharpness, especially in dim light 305
when a slow shutter speed is necessary. This technology is effective, and benefits 306
15
geophotographers working in dim light and conditions (cliff-clinging, for example) where 307
holding the camera steady is problematic. 308
The pixel count is a primary specification of a camera; currently 12-18 megapixels is 309
common. While technological advances undoubtedly will allow, and certain needs will require, 310
higher pixel counts, for the vast majority of applications, current capabilities are adequate, and 311
higher pixel counts come with various disadvantages both while shooting and for later post-312
processing and storage. In the near-term, pixel counts higher than 12-15 megapixels should not 313
necessarily be seen as a large advantage. Indeed, professional photographers consider that with a 314
high pixel count, use of a tripod becomes essentially mandatory—a major consideration if hiking 315
and back-country use are an important application. 316
Returning to the issue of how one‘s images are to be used, and under what circumstances 317
they will typically be obtained, the novice camera buyer ought to think carefully. For example, if 318
geophotography is normally done in the vicinity of a vehicle and the highest quality images is 319
required, the choice of a DSLR is clear. However, if one‘s geophotography is commonly to be 320
done in the back country, cutting weight by choosing one of the lighter types of cameras may be 321
best. In addition, having a camera compact enough to fit in a shirt pocket or stored in a case on 322
one‘s backpack strap and thus almost instantaneously available can result in a more complete 323
photographic record and more successes if dealing with transient or sudden geologic phenomena. 324
In conditions highly dangerous to the equipment (volcanic settings with blowing ash, for 325
example), using a camera that can be relatively cheaply replaced may be preferred. 326
Immediately essential additional equipment 327
Particularly for MILCs and DSLR cameras, lenses should always be protected with high-328
quality UV filters. Flying rock chips, outcrops, blowing dust, steam from fumaroles, and many 329

16
other natural hazards can destroy a lens, and filters are much cheaper to replace. Since the light 330
used in every photograph passes through the filter before passing through the (potentially very 331
expensive) lens, high quality filters are worth the extra expense. Their superior coatings make 332
them easier to clean thoroughly and more resistant to degradation from scratches. 333
Especially for heavier cameras, a comfortable neck/shoulder strap is essential, and harness 334
systems that keep the camera readily available without flopping around or bouncing are useful. A 335
polarizing filter helps capture a superior image in many situations by darkening a bright sky to a 336
level more comparable with the brightness of the subject, obtaining richer colors, and eliminating 337
reflections off of smooth or wet surfaces. 338
Memory cards with enormous storage capacity are available, and while generally very stable, 339
can and do fail. Thus, remembering the proverbial eggs-in-one-basket lesson is appropriate. In a 340
similar vein, small image storage units, which are essentially small hard drive or solid-state 341
memory devices, are essential for extended outings. The simplest allow the user to plug any of a 342
variety of memory card types into the device, which then automatically copies all images into 343
storage. Always store such devices separately from camera memory cards and the camera itself 344
to avoid a complete loss in the event of accident or theft. Uploading to on-line utilities or cloud 345
storage provides another level of protection. A cardinal rule of photography is one can never 346
obtain the same image twice, and in geophotography, even trying to do so may cost days and 347
enormous physical effort and expense. 348
349
17
REFERENCES 350 Aber, J.S., Aber, S.W., Buster, L., Jensen, W.E., and Sleezer, R.L. 2009. Challenge of infrared 351
kite aerial photography; a digital update. Transactions of the Kansas Academy of Science, 352
112:31-39. 353
Assaad, F.A., LaMoreaux, J.W., and Hughes, T., ed. 2004. Field Methods for Geologists and 354
Hydrogeologists. Berlin: Springer. p. 420. 355
Atchison, C.L. and Feig, A.D. 2011. Theoretical perspectives on constructing experience through 356
alternative field-based learning environments for students with mobility impairments. In 357
Feig, A.D. and Stokes, A., eds., Qualitative inquiry in geoscience education research. 358
Boulder, Colorado: Geological Society of America, Special Paper 474:11-21. 359
Baldock, T.E. and Hughes, M.G. 2006. Field observations of instantaneous water slopes and 360
horizontal pressure gradients in the swash-zone. Continental Shelf Research, 26:574-588. 361
Chastain, S. 2011. Top 10 Free Photo Editors for Windows. Available at 362
http://graphicssoft.about.com/od/pixelbasedwin/tp/freephotoedw.htm (accessed 26 December 363
2012). 364
Compton, R.R. 1985. Geology in the Field. New York: John Wiley & Sons. p. 416. 365
De Paor, D.G., Whitmeyer, S.J., and Beebe, M.R. 2010. Enhancing virtual geological field trips 366
with virtual vehicles and virtual specimens. Geological Society of America Abstracts with 367
Programs, 42:98. 368
Drummond, C.N. and Markin, J.M. 2008. An analysis of the Bachelor of Science in Geology 369
degree as offered in the United States. Journal of Geoscience Education, 56:113-119. 370
Furukawa, Y. 2010. Infrared thermography of the fumarole area in the active crater of the Aso 371
Volcano, Japan, using a consumer digital camera. Journal of Asian Earth Sciences, 38:283-372
288. 373
Goetz, E. 2009. The digital explosion in science education. Geological Society of America 374
Abstracts with Programs, 41:91. 375
Hoisch, T.D., and Bowie, J.I. 2010. Assessing factors that influence the recruitment of majors 376
from introductory geology classes at Northern Arizona University. Journal of Geoscience 377
Education, 58:166-176. 378
LensGiant. 2012. SLR Camera Lens Rentals. Available at http://www.lensgiant.com/ (accessed 379
26 December 2012). 380
Magloughlin, J.F. 2010. Geophotography. Geological Society of America Abstracts with 381
Programs, 42: 457. 382
Magloughlin, J.F. 2011. Geophotography as a subfield within the geosciences. Geological 383
Society of America Abstracts with Programs, 43:25. 384
Magloughlin, J.F., in review. Geophotography. Geology. 385
Major, J.J., Dzurisin, D., Schilling, S.P., and Poland, M.P. 2009. Monitoring lava-dome growth 386
during the 2004-2008 Mount St. Helens, Washington, eruption using oblique terrestrial 387
photography. Earth and Planetary Science Letters, 286:243-254. 388
Maley, T.S. 2005. Field Geology Illustrated. Boise, Idaho: Mineral Land Publications. p. 704. 389
Munroe, J.S. 2003. Estimates of Little Ice Age climate inferred through historical rephotography, 390
northern Uinta Mountains, U.S.A. Arctic, Antarctic, and Alpine Research, 35: 489-498. 391
Piatek, J.L. 2010. Creating virtual field trips with panoramic imagery. Professional Geologist, 392
48:54-57. 393
Schott, R.C. 2009. GigaGeology; virtual field trips in a Web2.0 world. Geological Society of 394
America Abstracts with Programs, 41:165. 395

18
SERC, 2013. Geophotography Webinar Series, presented by Magloughlin, J.F. et al. Available at 396
https://serc.carleton.edu/NAGTWorkshops/geophoto/workshop2013/index.html (accessed 26 397
December 2012). 398
Tamburello, G., Kantzas, E.P., McGonigle, A.J.S., Aiuppa, A. and Giudice, G. 2011. UV camera 399
measurements of fumarole field degassing (La Fossa crater, Vulcano Island). Journal of 400
Volcanology and Geothermal Research, 199:47-52. doi:10.1016/j.jvolgeores.2010.10.004 401
Thornbush, M.J. 2010. Measurements of soiling and colour change using outdoor rephotography 402
and image processing in Adobe Photoshop along the southern facade of the Ashmolean 403
Museum, Oxford. In Smith, B.J., Gomez-Heras, M., Viles, H.A., and Cassar, J., eds., 404
Limestone in the built environment; present-day challenges for the preservation of the past. 405
London: Geological Society Special Publications 331, p. 231-236. 406
Viescas, A. 2011. Picture editing Freeware. Available at 407
http://www.ehow.com/info_8100196_picture-editing-freeware.html (accessed 26 December 408
2012). 409
Yuretich, R.F., Khan, S.A., Leckie, R.M. and Clement, J.J. 2001. Active-learning methods to 410
improve student performance and scientific interest in a large introductory oceanography 411
course. Journal of Geoscience Education, 49:111–119. 412
413
414
415
416
417
19
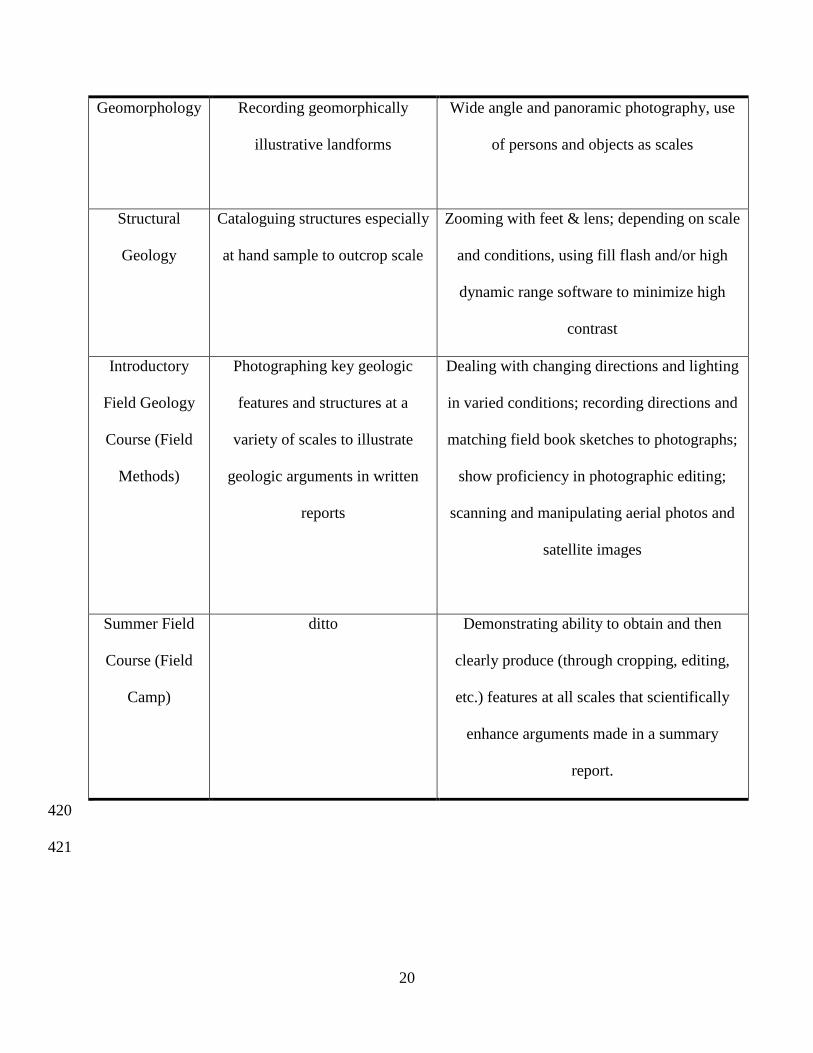
Table 1. Suggestions on how and where to integrate geophotography skills and exercises in 418
an undergraduate geoscience curriculum. 419
Course Geophotographic task Skills
Introductory
Physical
Geology (small
courses)
Knowledgeably acquiring and
illustrating images of any
geologic features (campus or city
tour, field trips, gem & mineral
shows)
Acquiring clear, sharp images; downloading;
annotating & cropping using photo imaging
software, inserting in a report
Historical
Geology
Macrophotography of fossils to
illustrate lab reports, including
use of a copy stand
Controlling depth of field, manipulating
lighting to control shadows, use of small
scales in the image, setting white balance
Mineralogy Macrophotography of mineral
specimens
Controlling depth of field; white balance;
correcting colors and contrast; labeling
mineral features (cleavage, parting, fracture,
twinning)
Petrology Photography of rock types,
emphasizing specific structures
and textures (crystallinity,
vesicles & amygdules, foliation,
bedding); obtaining good images
whether specimens are light or
dark colored or high contrast;
setting up a background
Combining photomicrographs, hand sample
photographs, and (if available) outcrop
photographs to illustrate reports. Taking
photomicrographs. Comparing and
contrasting PPL and XPL photographs, and
obtaining correct exposure in both modes, and
annotating the images with labels and scale
bars.
20
Geomorphology Recording geomorphically
illustrative landforms
Wide angle and panoramic photography, use
of persons and objects as scales
Structural
Geology
Cataloguing structures especially
at hand sample to outcrop scale
Zooming with feet & lens; depending on scale
and conditions, using fill flash and/or high
dynamic range software to minimize high
contrast
Introductory
Field Geology
Course (Field
Methods)
Photographing key geologic
features and structures at a
variety of scales to illustrate
geologic arguments in written
reports
Dealing with changing directions and lighting
in varied conditions; recording directions and
matching field book sketches to photographs;
show proficiency in photographic editing;
scanning and manipulating aerial photos and
satellite images
Summer Field
Course (Field
Camp)
ditto Demonstrating ability to obtain and then
clearly produce (through cropping, editing,
etc.) features at all scales that scientifically
enhance arguments made in a summary
report.
420
421

21
422
423
Figure 1. A P&S (point & shoot) camera. This particular model has a fast lens, full 1080p HD 424
video, a 7.62 cm OLED screen, 12.7 megapixels, and weighs 0.221 kg. OLED displays are 425
generally lighter, thinner, and have a higher contrast ratio than LCD displays. Of special interest 426
to geophotographers, it has shock-, water-, freeze-, and crush- (to 100 kg) resistant capabilities, 427
and GPS information is recorded in each image‘s metadata. 428
429
22
430
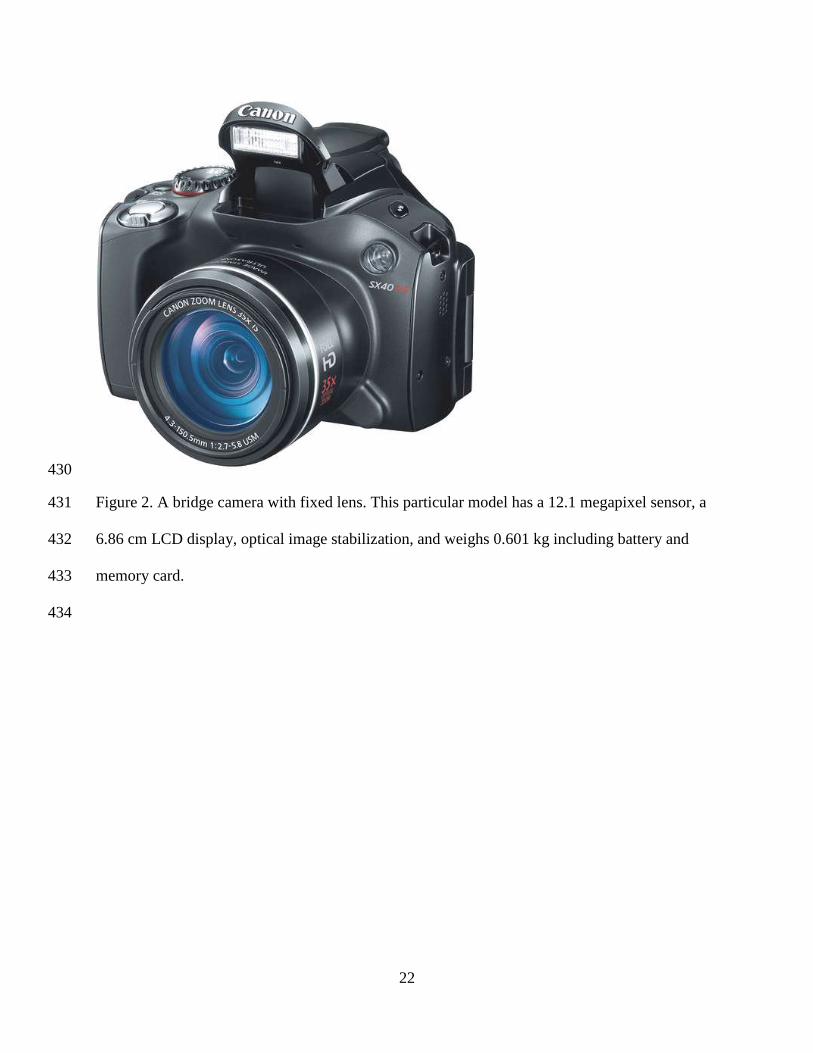
Figure 2. A bridge camera with fixed lens. This particular model has a 12.1 megapixel sensor, a 431
6.86 cm LCD display, optical image stabilization, and weighs 0.601 kg including battery and 432
memory card. 433
434
23
435
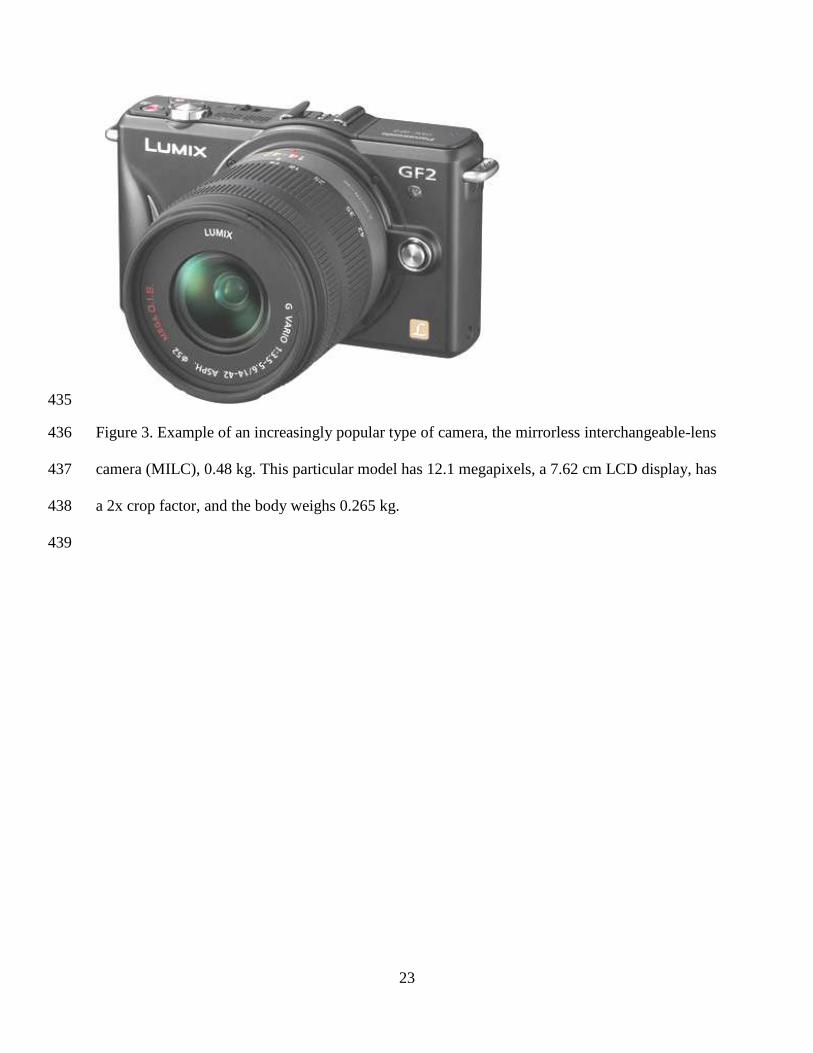
Figure 3. Example of an increasingly popular type of camera, the mirrorless interchangeable-lens 436
camera (MILC), 0.48 kg. This particular model has 12.1 megapixels, a 7.62 cm LCD display, has 437
a 2x crop factor, and the body weighs 0.265 kg. 438
439
24
440
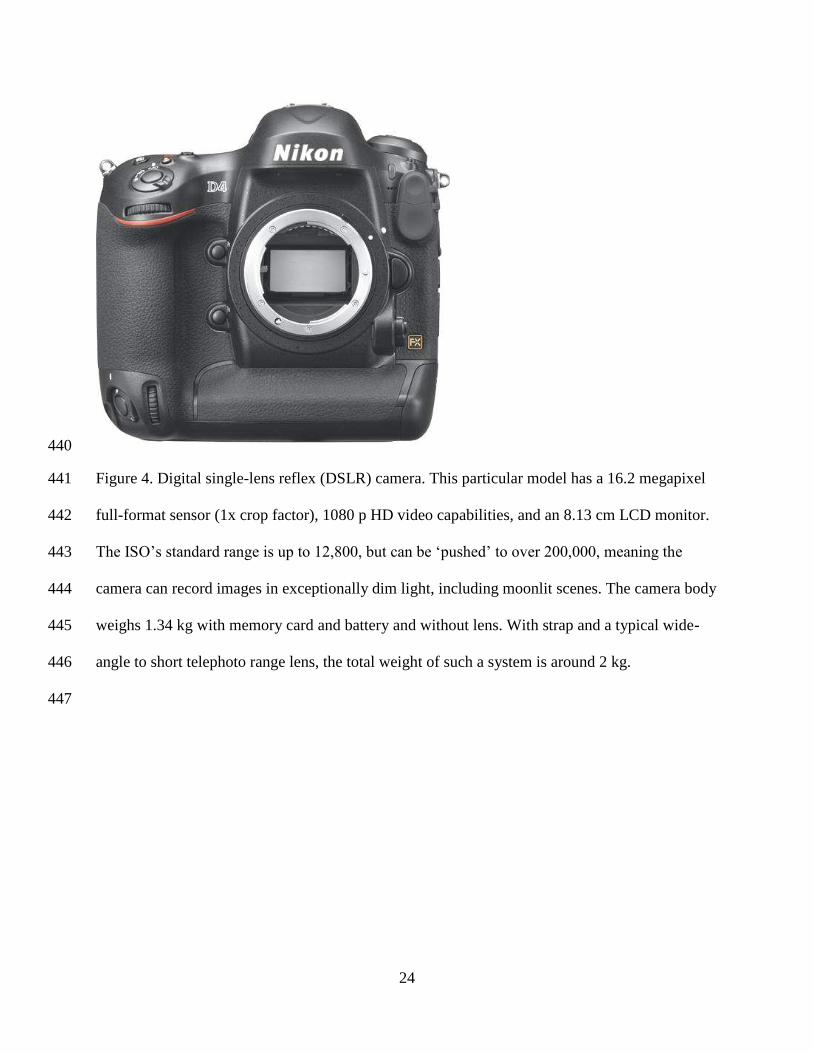
Figure 4. Digital single-lens reflex (DSLR) camera. This particular model has a 16.2 megapixel 441
full-format sensor (1x crop factor), 1080 p HD video capabilities, and an 8.13 cm LCD monitor. 442
The ISO‘s standard range is up to 12,800, but can be ‗pushed‘ to over 200,000, meaning the 443
camera can record images in exceptionally dim light, including moonlit scenes. The camera body 444
weighs 1.34 kg with memory card and battery and without lens. With strap and a typical wide-445
angle to short telephoto range lens, the total weight of such a system is around 2 kg. 446
447