Embed Size (px)
Citation preview

FreeBSD
#freebsd
Table of Contents
About 1
Chapter 1: Getting started with FreeBSD 2
Remarks 2
Versions 2
Examples 4
Installation or Setup 4
Chapter 2: Build from source 5
Introduction 5
Remarks 5
Overview of the whole process 5
Get the number of processors 5
Examples 5
Download the latest source code 5
SVN 5
Get Current 6
Get Releases 6
Tarball (http & ftp) 6
http 6
ftp 6
Git 6
GitHub 6
Configure the kernel 6
Build the world and the kernel 7
Build the world 7
Estimated time 7
Build the kernel 7
Estimated time 7
Configure the root filesystem of your new FreeBSD 7
Install the world and the kernel 8

Install the world 8
Install the kernel 8
Chapter 3: FreeBSD Jails 9
Examples 9
Deploying jail 9
Simple jail deployment from binaries 9
Simple jail deployment from source 9
Simple thin jail deployment 10
Initializing our environment 10
downloading sources 10
Initializing our thin jail 10
Networking and Jails 11
Removing network support 11
Allowing only IPv4 networking 11
Allowing only IPv6 networking 11
Dedicated network stack (VNET) 11
Chapter 4: Packages and Ports management 13
Remarks 13
Examples 13
Getting Ports tree 13
Portsnap 13
updating ports tree with portsnap 13
schedule cron job for daily updates 13
SVN 13
head 13
quaterly 13
Tarball (http or ftp) 14
Git 14
Searching software 14
keyword search 14

name search 14
Using fresports 14
Building and installing software 14
Simple build and install with manual configuration 14
Simple build and install with automatic configuration 15
Configuring software sources 15
Configuring www/apache24 15
Packaging 15
Manual packaging 15
Using poudriere 15
Installing poudriere 15
Configuring poudriere 16
Deploying poudriere jail 16
Updating poudriere jail 16
Deploying poudriere ports tree 16
Updating poudriere ports tree 16
Bulk build 16
Chapter 5: Set up the FreeBSD development environment 17
Examples 17
ctags 17
Build exctags(1) using ports 17
Download and install a prebuilt binary of Exuberant Ctags: 17
Create the tag file 17
Credits 18

About
You can share this PDF with anyone you feel could benefit from it, downloaded the latest version from: freebsd
It is an unofficial and free FreeBSD ebook created for educational purposes. All the content is extracted from Stack Overflow Documentation, which is written by many hardworking individuals at Stack Overflow. It is neither affiliated with Stack Overflow nor official FreeBSD.
The content is released under Creative Commons BY-SA, and the list of contributors to each chapter are provided in the credits section at the end of this book. Images may be copyright of their respective owners unless otherwise specified. All trademarks and registered trademarks are the property of their respective company owners.
Use the content presented in this book at your own risk; it is not guaranteed to be correct nor accurate, please send your feedback and corrections to [email protected]
https://riptutorial.com/ 1

Chapter 1: Getting started with FreeBSD
Remarks
This section provides an overview of what freebsd is, and why a developer might want to use it.
It should also mention any large subjects within freebsd, and link out to the related topics. Since the Documentation for freebsd is new, you may need to create initial versions of those related topics.
Versions
Some versions were omitted since the exact release date is unknown. See the source of this post to view the list of the omitted versions.
Version Release Date
1.0 1993-11-01
1.1 1994-05-01
2.0 1994-11-22
2.0.5 1995-06-10
2.1 1995-11-19
2.2.5 1997-10-22
2.2.6 1998-03-25
2.2.7 1998-07-22
2.2.8 1998-11-29
3.1 1999-02-15
3.2 1999-05-17
3.3 1999-09-17
3.4 1999-12-20
3.5 2000-06-24
4.0 2000-03-14
4.1 2000-07-27
https://riptutorial.com/ 2

Version Release Date
4.1.1 2000-09-27
4.2 2000-11-21
4.3 2001-04-20
4.4 2001-09-20
4.5 2002-01-29
4.6 2002-06-15
4.6.2 2002-08-15
4.7 2002-10-10
4.8 2003-04-03
4.9 2003-10-28
4.10 2004-05-27
4.11 2005-01-25
5.0 2003-01-14
5.1 2003-06-09
5.2 2004-01-09
5.2.1 2004-02-25
5.3 2004-11-06
5.4 2005-05-09
5.5 2006-05-25
6.0 2005-11-04
6.1 2006-05-08
6.2 2007-01-15
6.3 2008-01-18
6.4 2008-11-28
7.0 2008-02-27
https://riptutorial.com/ 3

Version Release Date
7.1 2009-01-04
7.2 2009-05-04
7.3 2010-03-23
7.4 2011-02-24
8.0 2009-11-25
8.1 2010-07-23
8.2 2011-02-24
8.3 2012-04-18
8.4 2013-06-07
9.0 2012-01-12
9.1 2012-12-30
9.2 2013-09-30
9.3 2014-07-16
10.0 2014-01-20
10.1 2014-11-14
10.2 2015-08-13
10.3 2016-03-28
Examples
Installation or Setup
FreeBSD is known of its well-written handbook (link). The installation process is described in detail in the Chapter 2. Installing FreeBSD.
Read Getting started with FreeBSD online: https://riptutorial.com/freebsd/topic/5708/getting-started-with-freebsd
https://riptutorial.com/ 4

Chapter 2: Build from source
Introduction
Examples below are not necessarily in the correct order. See the Remarks section below for more information on the whole process.
Remarks
Overview of the whole process
Download the latest source code.1. Configure the kernel.2. Build the world and the kernel.3. Configure the root filesystem of your new FreeBSD.4. Install the world and the kernel.5.
Get the number of processors
An easy way to speed up the process of building and installing the new system is to use more processors to increase the computational power.
To find out what's the number of the processors you have to speed up the process:
sysctl hw.ncpu
For example:
hw.ncpu: 1
Let's set the $NUMBER_OF_PROCESSORS environmental variable then:
export $NUMBER_OF_PROCESSORS=$(sysctl hw.ncpu | tr -d 'a-z.: ')
Examples
Download the latest source code
SVN
https://riptutorial.com/ 5

FreeBSD project use SVN as default SCM. Source could be download with svnlite software.
Get Current
cd /usr/src svnlite checkout https://svn.freebsd.org/base/head .
Get Releases
cd /usr/src svnlite checkout https://web.freebsd.org/base/release/11.0.0 .
Tarball (http & ftp)
You can also get source from frozen tarball with fetch command
http
cd /tmp fetch http://ftp.freebsd.org/pub/FreeBSD/releases/amd64/11.0-RELEASE/src.txz cd /usr/src tar xJvf /tmp/src.txz
ftp
cd /tmp fetch ftp://ftp.freebsd.org/pub/FreeBSD/releases/amd64/11.0-RELEASE/src.txz cd /usr/src tar xJvf /tmp/src.txz
Git
GitHub
git clone https://github.com/freebsd/freebsd freebsdsrc
Configure the kernel
Go to the directory with the source code:
cd freebsdsrc
1.
https://riptutorial.com/ 6

Go to the directory with the kernel's configuration code:
# If your system is 32-bit. cd sys/i386/conf/ # If your system is 64-bit. cd sys/amd64/conf/
2.
Get a copy of the GENERIC kernel (let's call it MODEDKERNEL). It will be the base of your customisations.
cp GENERIC MODEDKERNEL
3.
Modify the MODEDKERNEL file at your will.4.
Build the world and the kernel
Build the world
Go to the freebsdsrc/ (the root directory of the FreeBSD source tree you've already downloaded) and build the world:
sudo make -j${NUMBER_OF_PROCESSORS} buildworld KERNCONF=MODEDKERNEL -DNO_CLEAN
Estimated time
Estimated time on Hasee Q540S running on a one processor: 8 hours.•Estimated time on Dell L702X running on 8 processors: 98 minutes.•
Build the kernel
To build the kernel run:
sudo make -j${NUMBER_OF_PROCCESORS} buildkernel KERNCONF=UFFIE -DNO_CLEAN
Estimated time
Estimated time on Hasee Q540S running on a one processor: 2 hours.•Estimated time on Dell L702X running on 8 processors: 19 minutes.•
Configure the root filesystem of your new FreeBSD
Let's configure the destination directory for the root filesystem of your new FreeBSD (for example /usr/home/beastie/MODEDKERNEL).
https://riptutorial.com/ 7
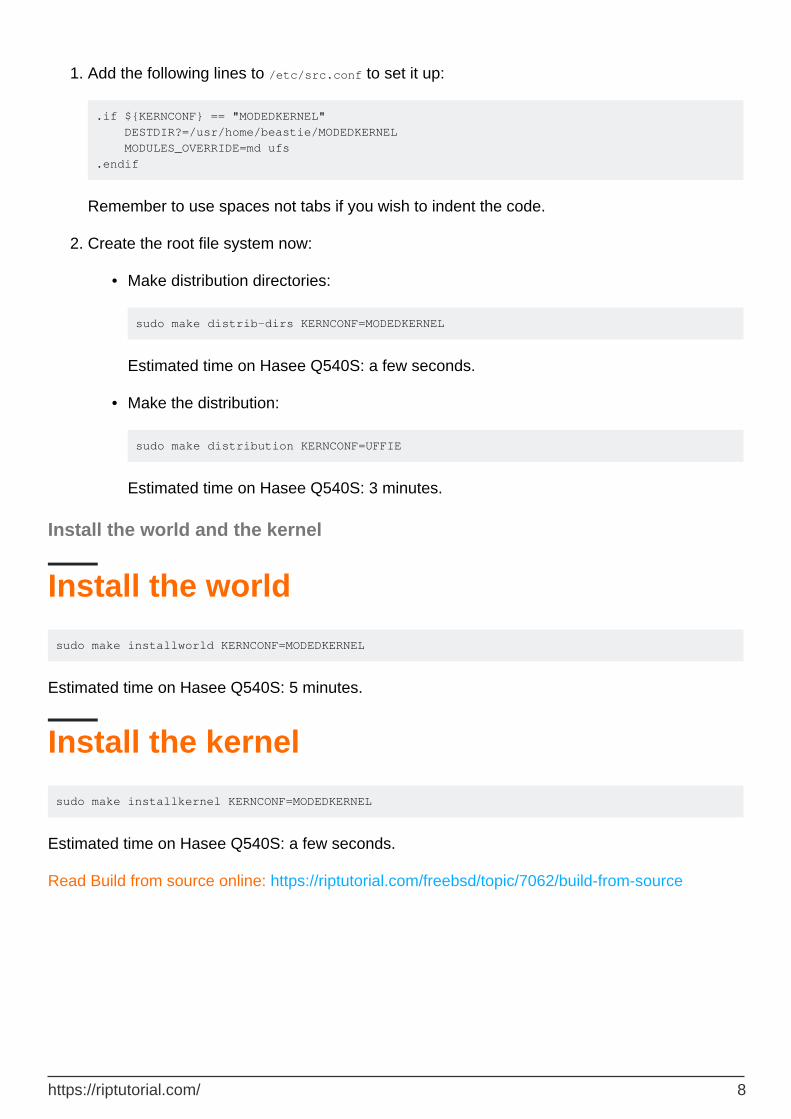
Add the following lines to /etc/src.conf to set it up:
.if ${KERNCONF} == "MODEDKERNEL" DESTDIR?=/usr/home/beastie/MODEDKERNEL MODULES_OVERRIDE=md ufs .endif
Remember to use spaces not tabs if you wish to indent the code.
1.
Create the root file system now:
Make distribution directories:
sudo make distrib-dirs KERNCONF=MODEDKERNEL
Estimated time on Hasee Q540S: a few seconds.
•
Make the distribution:
sudo make distribution KERNCONF=UFFIE
Estimated time on Hasee Q540S: 3 minutes.
•
2.
Install the world and the kernel
Install the world
sudo make installworld KERNCONF=MODEDKERNEL
Estimated time on Hasee Q540S: 5 minutes.
Install the kernel
sudo make installkernel KERNCONF=MODEDKERNEL
Estimated time on Hasee Q540S: a few seconds.
Read Build from source online: https://riptutorial.com/freebsd/topic/7062/build-from-source
https://riptutorial.com/ 8

Chapter 3: FreeBSD Jails
Examples
Deploying jail
A jail is simply a chroot with strong isolation. So, if you want to create jail, you simply need to create an alternative root and starting a new jail in it.
Simple jail deployment from binaries
# create our alternative root path JAILROOT="/path/to/my/jail" mkdir -p "${JAILROOT}" cd "${JAILROOT}" # get distribution from freebsd repository fetch http://ftp.freebsd.org/pub/FreeBSD/releases/amd64/11.0-RELEASE/base.txz # extract it in our alternative root tar xJvf base.txz # now we can launch our jail jail -c name=simplejail path=${JAILROOT} # to check if jail is up and running we use jls jls # now we can enter in our new jail jexec simplejail sh
Simple jail deployment from source
# create our alternative root path JAILROOT="/path/to/my/jail" mkdir -p "${JAILROOT}" # we need to build binaries from source... cd /usr/src make buildworld # ... and install it in our alternative path make installworld DESTDIR=${JAILROOT} # now we can launch our jail jail -c name=simplejail path=${JAILROOT} # to check if jail is up and running we use jls jls
https://riptutorial.com/ 9

# now we can enter in our new jail jexec simplejail sh
Simple thin jail deployment
Thin jail is simply a jail with shared read-only alternative root mounted with nullfs.
Initializing our environment
# making our shared alternative root SHARED_ROOT=/path/to/your/shared/root mkdir -p "${SHARED_ROOT}" # making our jail root JAIL_ROOT=/path/to/your/jail/root mkdir -p "${JAIL_ROOT}"
downloading sources
# to initialize our shared root, we can use # all method described above. Here, we will use # simple binary initialization from official # repository cd "${SHARED_ROOT}" # get distribution from freebsd repository fetch http://ftp.freebsd.org/pub/FreeBSD/releases/amd64/11.0-RELEASE/base.txz # extract it in our alternative root tar xJvf base.txz
Initializing our thin jail
# now we need to initialize our dedicated # jail root cd "${JAIL_ROOT}" mkdir base # we make symbolic link pointing to # files stored in read-only directory for link in bin boot lib libexec rescue sbin do ln -s ${link} /base/${link} done # we do same thing with directory in /usr for link in bin include lib lib32 libdata libexec sbin share do ln -s usr/${link} /base/usr/${link} done
https://riptutorial.com/ 10
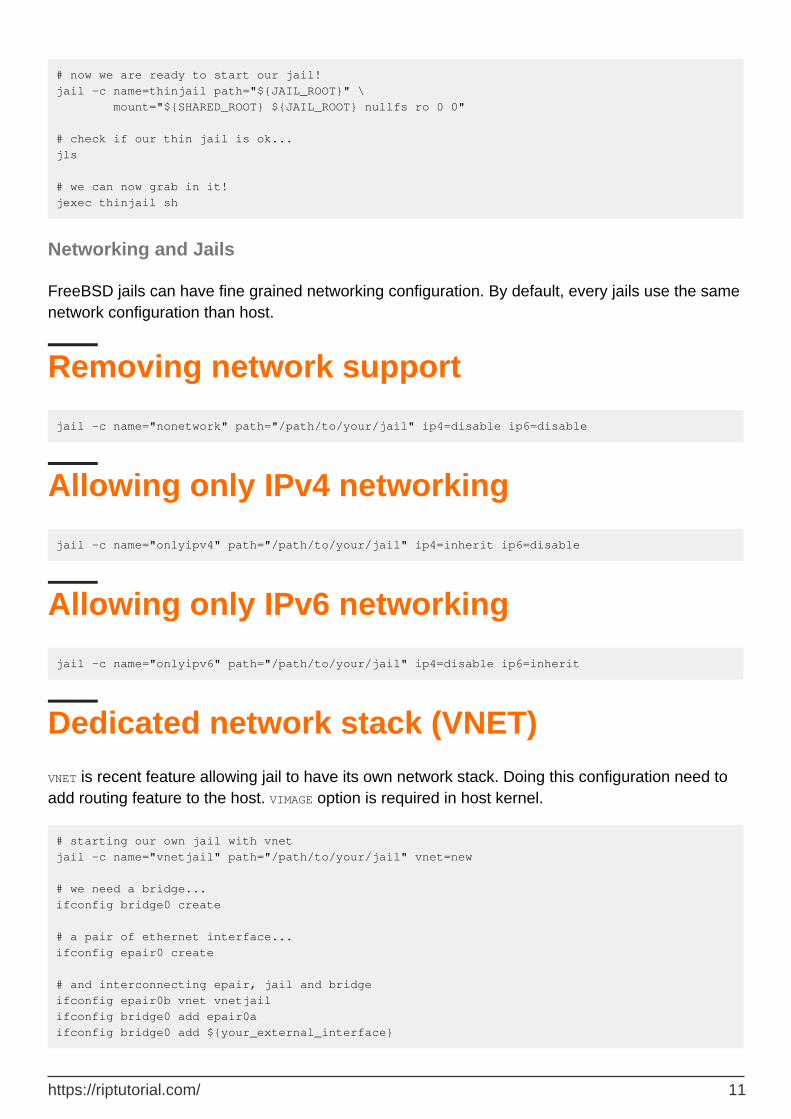
# now we are ready to start our jail! jail -c name=thinjail path="${JAIL_ROOT}" \ mount="${SHARED_ROOT} ${JAIL_ROOT} nullfs ro 0 0" # check if our thin jail is ok... jls # we can now grab in it! jexec thinjail sh
Networking and Jails
FreeBSD jails can have fine grained networking configuration. By default, every jails use the same network configuration than host.
Removing network support
jail -c name="nonetwork" path="/path/to/your/jail" ip4=disable ip6=disable
Allowing only IPv4 networking
jail -c name="onlyipv4" path="/path/to/your/jail" ip4=inherit ip6=disable
Allowing only IPv6 networking
jail -c name="onlyipv6" path="/path/to/your/jail" ip4=disable ip6=inherit
Dedicated network stack (VNET)
VNET is recent feature allowing jail to have its own network stack. Doing this configuration need to add routing feature to the host. VIMAGE option is required in host kernel.
# starting our own jail with vnet jail -c name="vnetjail" path="/path/to/your/jail" vnet=new # we need a bridge... ifconfig bridge0 create # a pair of ethernet interface... ifconfig epair0 create # and interconnecting epair, jail and bridge ifconfig epair0b vnet vnetjail ifconfig bridge0 add epair0a ifconfig bridge0 add ${your_external_interface}
https://riptutorial.com/ 11

Read FreeBSD Jails online: https://riptutorial.com/freebsd/topic/7070/freebsd-jails
https://riptutorial.com/ 12

Chapter 4: Packages and Ports management
Remarks
Tips:
Remember to always check the /usr/ports/UPDATING file before upgrading. There might be some significant changes in programs you use or in their configuration which will break your current setup.
•
Examples
Getting Ports tree
Portsnap
portsnap fetch portsnap extract
updating ports tree with portsnap
portsnap update
schedule cron job for daily updates
0 3 * * * root /usr/sbin/portsnap cron
SVN
head
cd /usr/ports svnlite checkout https://svnweb.freebsd.org/ports/head .
quaterly
FreeBSD Ports team freeze ports tree every 3 months. To get this ports tree you can use ports branches:
https://riptutorial.com/ 13

cd /usr/ports svnlite checkout https://svnweb.freebsd.org/ports/branches/2016Q4 .
Tarball (http or ftp)
cd /usr/ports fetch http://ftp.freebsd.org/pub/FreeBSD/releases/amd64/11.0-RELEASE/ports.txz tar xJvf ports.txz
Git
git clone https://github.com/freebsd/freebsd-ports
Searching software
keyword search
cd /usr/ports make search key=apache
name search
cd /usr/ports make search name=apache24
Using fresports
Official FreeBSD ports website (http://freshports.org/) give you a nice way to find ports and all information concerning it.
Building and installing software
If you have found your software in the ports tree, now its the time to build it.
Simple build and install with manual configuration
https://riptutorial.com/ 14

cd /usr/ports/www/apache24 make make install
Simple build and install with automatic configuration
cd /usr/ports/www/apache24 make BATCH=yes make install
Configuring software sources
If you want custom configuration from ports, you can configure it before building it make config. All ports configuration are stored in /var/db/ports/${CATEGORY_NAME}/options as makefile.
Configuring www/apache24
cd /usr/ports/www/apache24 make config make make install
This configuration will be saved in /var/db/ports/www_apache24/options.
Packaging
Manual packaging
You can make your own package based on ports.
cd /usr/ports/www/apache24 make package BATCH=yes
This command will store your package in /usr/ports/packages/All.
Using poudriere
poudriere is currently the official package builder for FreeBSD.
Installing poudriere
https://riptutorial.com/ 15

pkg install poudriere # or cd /usr/ports/ports-mgmt/poudriere make make install
Configuring poudriere
poudriere configuration is stored in /usr/local/etc/poudriere.conf and /usr/local/etc/poudriere.d
Deploying poudriere jail
poudriere jail -c -j myjail
Updating poudriere jail
poudriere jail -u -j myjail
Deploying poudriere ports tree
poudriere ports -c -p myports
Updating poudriere ports tree
poudriere ports -u -p myports
Bulk build
poudriere bulk -j myjail -p myports www/apache24
Read Packages and Ports management online: https://riptutorial.com/freebsd/topic/7069/packages-and-ports-management
https://riptutorial.com/ 16

Chapter 5: Set up the FreeBSD development environment
Examples
ctags
ctags is a useful utility you can use to read and move around the source code more efficiently. The built-in ctags(1) however is not the Exuberant Ctags utility you might expect.
You can install Exuberant Ctags (exctags(1)) using either ports or pkg:
Build exctags(1) using ports
cd /usr/ports/devel/ctags/ && make install clean
Download and install a prebuilt binary of Exuberant Ctags:
pkg install ctags
Create the tag file
exctags -R
Read Set up the FreeBSD development environment online: https://riptutorial.com/freebsd/topic/6136/set-up-the-freebsd-development-environment
https://riptutorial.com/ 17

Credits
S. No
Chapters Contributors
1Getting started with FreeBSD
Community, Mateusz Piotrowski
2 Build from source M. Kerjouan, Mateusz Piotrowski
3 FreeBSD Jails M. Kerjouan
4Packages and Ports management
M. Kerjouan, Mateusz Piotrowski, Michael Zhilin
5Set up the FreeBSD development environment
Mateusz Piotrowski
https://riptutorial.com/ 18