Embed Size (px)
DESCRIPTION
Basic Flash Animation Action Script 3.0 codes
Citation preview

How to Change the Size of a Movie Clip Using ActionScript 3 - Assigning AS3 instance names and modifying some AS3 movie clip properties
Think of ActionScript as the language that we use so that we can "communicate" with these objects and tell them what to do (e.g. change color, change size, change location, become clickable, etc...). We refer to each individual display object on the stage as an instance- it can be a button, a movie clip or a text field. In order to be able to "communicate" with these instances, we must give them names.
When we communicate with real people, we address them by name - "Hey, John. Can you send me that document from our previous meeting?" In ActionScript, to communicate with these instances on the stage, we must address them by their names as well. These names are referred to as instance names.
NOTE: Instances of graphic symbols and static text fields cannot be used with ActionScript, because they cannot be given instance names. But instances of movie clips and buttons, as well as text fields that are of the dynamic, input and all TLF types can be given instance names.
In the following exercise, you will learn how to assign instance names to display objects.
HOW TO GIVE OBJECTS INSTANCE NAMES1. Create a new Flash ActionScript 3 document.
2. Draw a circle on the stage.
3. Convert this circle into a movie clip symbol. You must convert the shape into a movie clip or button symbol in order to be able to give it an instance name.
NOTE: The symbol name (the one you type in the Convert to Symbol dialog box) is NOT the same as the instance name.
4. Make sure that the circle is selected, then go to the Properties Inspector.
NOTE: When selecting instances of symbols on the stage, do NOT double-click them. Double-clicking will open up symbol-editing mode. To select an instance, just click on it once using the selection tool (the black arrow).
5. Then in the properties inspector, you will see an input field for the instance name. Type circle1_mc inside the input field.
You've now given the currently selected instance the name circle1_mc. The same step is followed if you wish to give buttons or text fields instance names as well.
6. Add another instance of the circle symbol by dragging it from the library down to the stage.

7. Make sure that this second instance is selected, then go to the Properties Inspector and give it the namecircle2_mc.
You now have 2 movie clip instances on the stage, each one with a unique instance name.
And this concludes the first exercise of this lesson.
++++++
Instance names are author defined, meaning you decide what names to give them. But there are still some rules that you need to follow. Let's take a look at those rules.
RULES TO FOLLOW WHEN GIVING INSTANCE NAMES
1. Instance names must be unique. No instances within the same scope should have the same name.
2. The characters in an instance name can only be made up of: letters, numerical characters, underscores (_), and dollar signs ($). No other characters can be used.
3. The first character in an instance name can only be: a letter, an underscore (_), or a dollar sign ($). You CANNOT start an instance name with a numerical character.
4. Instance names are case-sensitive. John is different from john.
Make sure you follow these rules to help avoid some errors.
++++++
MODIFYING PROPERTIES OF AN INSTANCENow that the instances have names, you will be able to target them using ActionScript. In this exercise, you will add some ActionScript code that will modify some of the properties of the instances on the stage. You will modify the size using the scaleX and scaleY ActionScript 3 properties. You'll also modify the opacity using thealpha property.
1. Create a new layer for the ActionScript code. You can name this one Actions, but it's not required.
2. Make sure that frame 1 of the Actions layer is selected, then launch the Actions Panel by choosing Window> Actions from the main menu.
3. In the Script Pane of the Actions Panel, type in the following lines of code:
circle1_mc.scaleX = 2;circle1_mc.scaleY = 2;
These lines of code will scale up the circle1_mc instance to 2 times its original size (or 200%). The scaleXproperty controls the horizontal scaling, while the scaleY property controls the vertical scaling.
4. Then add one more line below the first 2 lines of code:
circle2_mc.alpha = .5;
This reduces the alpha property value of circle2_mc to .5. The alpha property controls the opacity.

A value of .5 brings the opacity down to 50%. You can assign a value from 0 to 1 for the alpha property. The object becomes less visible as the value approaches 0.
5. Test the movie by pressing ctrl + enter (pc) or cmd + return (mac) on your keyboard. You should see that the circle1_mc instance is now larger, and the circle2_mc instance is lighter.
What are properties?In the exercise above, you modified some properties of movie clip instances. Think of properties as characteristics that describe instances (e.g. size, color, rotation).
Some properties of MovieClip instances are:
scaleX - scales the instance horizontally by a specified number
scaleY - scales the instance vertically by a specified number
x - controls the x coordinate of the instance
y - controls the y coordinate of the instance
rotation - rotates the instance to the angle specified
width - adjusts the width of the instance
height - adjusts the height of the instance
alpha - adjusts the opacity level of the instance
To access a property, add a dot to the end of the instance name followed by the property name. Then use the equals sign to assign a property value.
Syntax:instanceName.property = value;
*This is referred to as dot syntax, because it uses dots.
Examples:circle1_mc.x = 50;circle1_mc.rotation = 45;circle2_mc.scaleY = .5;
*Each statement is ended with a semi-colon.
In summation, instance names allow us to target the instances on our stage so that we can control them using ActionScript 3. Each instance name must be unique in order to differentiate the instances from each other, therefore allowing us to target each instance individually. Once an instance has a name, it's properties can be accessed using dot syntax, and can be modified by assigning new values to these properties.
PART 1 - Creating ActionScript 3 Variables and Assigning Values to them - Introduction to Flash AS3 VariablesWhat is a variable?Think of a variable as a container. It's like a box where you can put something in. But instead of a physical object, a variable can contain information.
A variable is made up of a name and a value. The name is like the label on the box, and the value is the item inside that box.
For example:
quantity = 12
price = 1.25
Here, we have two variables. The first variable has the name quantity, and has a value of 12. And then we have another one with the name price, and a value of 1.25.
We can then use these variables in an equation. For example:
quantity * price
In this equation, the quantity and price are being multiplied. This will give us a value of 15.

Since quantity is equal to 12, and price is equal to 1.25, then 12 * 1.25 is equal to 15.
Creating Variables
Step 1
Create a new Flash ActionScript 3.0 document and type in the following lines of code in the Actions Panel:
var quantity:Number;
var price:Number;
In the first two lines, we've declared two variables - quantity and price. To declare a variable, start with thevar keyword, followed by the variable name, and then the data type.
The syntax for declaring a variable is as follows:
var variableName:dataType;
What is the data type?The data type refers to the type of value that a variable can contain. In the two examples, we've specified theNumber data type. This means that the variables can only contain numbers. If you try to assign some text as the variable's value, then that will generate an error. Specifying the data type that a variable can contain is referred to as strict data typing or strong data typing.
What are other examples of data types?Other examples of data types are the String data type and the Boolean data type. String data is made up of characters. The Boolean data type only chooses between 2 values - true or false.
Examples:
var firstName:String;
var isActive:Boolean;
Here, the firstName variable can only contain a String value such as "John" or "Mary" (String values must be enclosed in quotation marks). The isActive variable, on the other hand, can only be assigned a value of either true or false.
In the next step, let's take a look at how to assign values to our variables.
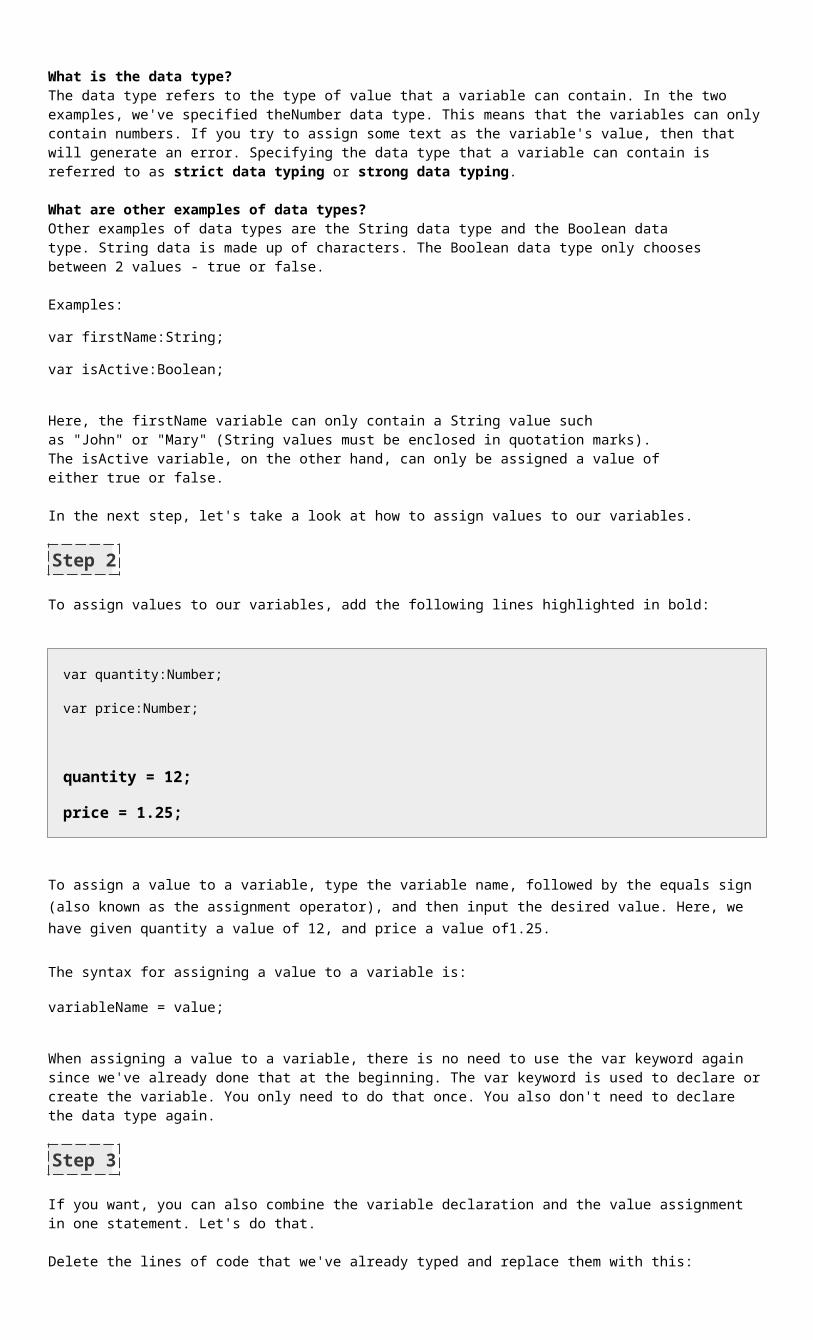
Step 2
To assign values to our variables, add the following lines highlighted in bold:
var quantity:Number;
var price:Number;
quantity = 12;
price = 1.25;
To assign a value to a variable, type the variable name, followed by the equals sign (also known as the assignment operator), and then input the desired value. Here, we have given quantity a value of 12, and price a value of1.25.
The syntax for assigning a value to a variable is:
variableName = value;
When assigning a value to a variable, there is no need to use the var keyword again since we've already done that at the beginning. The var keyword is used to declare or create the variable. You only need to do that once. You also don't need to declare the data type again.
Step 3
If you want, you can also combine the variable declaration and the value assignment in one statement. Let's do that.
Delete the lines of code that we've already typed and replace them with this:
var quantity:Number = 12;
var price:Number = 1.25;
Here, each variable is declared and assigned a value in one statement. This is pretty much the same thing, except we have fewer lines of code.
Step 4
Next, add some trace statements to verify that Flash is able to access the values assigned to the variables:
var quantity:Number = 12;
var price:Number = 1.25;
trace("The quantity is: " + quantity);
trace("The price is: " + price);
trace("The total is: " + price * quantity);
Here, the trace statements will evaluate the variables and equations, and will display their values. For example, in the first trace statement, the variable name quantity will be displayed as 12, since 12 is the current value assigned to it. In the third trace statement, price * quantity will be calculated, and based on our current values, it will result in a value of 15.
Step 5
Test the movie. You should see the output window display the following lines:
The quantity is: 12
The price is: 1.25
The total is: 15
Step 6
After assigning an initial value to a variable, you may still assign a new value afterward. Let's try that.

After the trace statements, assign new values to the variables:
var quantity:Number = 12;
var price:Number = 1.25;
trace("The quantity is: " + quantity);
trace("The price is: " + price);
trace("The total is: " + price * quantity);
quantity = 5;
price = 2.75;
So now, after the trace statements are executed, the variables will have these new values assigned to them.
Step 7
To check whether the new values have been successfully assigned, let's add another set of trace statements after the lines that assign the new values to the variables:
var quantity:Number = 12;
var price:Number = 1.25;
trace("The quantity is: " + quantity);
trace("The price is: " + price);
trace("The total is: " + price * quantity);
quantity = 5;
price = 2.75;
trace("The values have been changed.");
trace("The new quantity is now: " + quantity);
trace("The new price is now: " + price);
trace("The new total is now: " + price * quantity);
Here, when the first set of trace statements are executed, Flash will be taking a look at the original values. But after that, the variable values have been changed, so the second set of trace statements, which comes after the new values, will now use those new values instead. The FIRST set of trace statements will use the ORIGINAL values, because those trace statements were written BEFORE the values were changed.

Step 8
Test the movie. You should see the output window display the following lines:The quantity is: 12The price is: 1.25The total is: 15The values have been changed.The new quantity is now: 5The new price is now: 2.75The new total is now: 13.75
Step 9
You can also assign an equation to a variable. For example, we can get the price * quantity equation and store it in a variable like so:
var quantity:Number = 12;
var price:Number = 1.25;
var total:Number = price * quantity;
And then in the trace statements, we can replace all the instances of the price * quantity equation with thetotal variable instead:
trace("The quantity is: " + quantity);
trace("The price is: " + price);
trace("The total is: " + total);
quantity = 5;
price = 2.75;
total = price * quantity;
// You must compute for the total again in order to
// reflect the new value
trace("The values have been changed.");
trace("The new quantity is now: " + quantity);
trace("The new price is now: " + price);
trace("The new total is now: " + total);
This will give us the same result.

Variable Naming Rules and Conventions - Introduction to Flash AS3 Variables
Variable names are author-defined. This means that you, as the author of the Flash ActionScript 3.0 project, will decide which names to give your variables. But there are still some rules that you have to follow. In this part of the Introduction to Flash AS3 Variables tutorial series, we'll take a look at what those rules are. We'll also take a look at some commonly used naming conventions when it comes to working with variables.
Variable Naming Rules
Rule #1: Do not use any ActionScript 3.0 reserved words (also referred to as keywords) to name a variable.
Examples:
var var:Number;
var this:String;
var new:Boolean;
The examples above are unacceptable because var, this, and new are all ActionScript 3.0 reserved words.
Rule #2: Variable names must be unique.
The example below will generate an error message:
var myVariable:Number;
var myVariable:String;
Even if each variable is assigned a different data type, the names are the same. This will create a conflict between the two variables.
Rule #3: Variable names are case-sensitive
The following variables are considered two different variables:
var myVariable:Number;
var myvariable:Number;
In the examples above, one variable name has an uppercase V, while the other one has a lowercase v. Because of this, these two variables are considered entirely different from each other. They will not create a conflict. And it does not matter that they both have the same data type; they are still two separate variables.

Rule #4: Variable names can only use letters, numerical characters, the underscore, and the dollar sign.
The following example is unacceptable because it uses the @ sign in the variable name:
var myV@riable:String;
The underscore and the dollar sign are the only special characters that can be used when naming variables. No other special characters can be used.
Rule #5: A Variable name can only start with either a letter, an underscore or the dollar sign.
The following example is unacceptable:
var 1_variable:Number;
Although this variable name does not use any unacceptable characters, it does begin with a numerical character. Variable names can only begin with either a letter, an underscore or the dollar sign.
An acceptable version of the example above would be:
var variable_1:Number;
Here, since it does not use any unacceptable characters and it DOES NOT START with a numerical character, then the variable name is acceptable.
Rule #6: Variable names cannot contain spaces.
The following example is unacceptable because the variable name contains a space:
var my variable:Boolean;
Some Variable Naming Conventions
The following items are not rules used in naming variables, but are more of commonly-used practices and styles. You do not have to follow these suggestions, but they might help make your code more organized and easier to understand.
#1 Use variable names that are descriptive of the type of data they will hold or the purpose they will serve.
Instead of using generic variable names such as:
var string1:String = "John";
var string2:String = "Smith";

var number1:Number = 2012;
Consider using more descriptive alternatives:
var firstName:String = "John";
var lastName:String = "Smith";
var year:Number = 2012;
#2 If you want to combine different words in one variable name, you can differentiate these words by using uppercase and lowercase letters.
Instead of using:
var myvariable:Number;
Consider using:
var myVariable:Number;
This is a practice referred to as camel casing, because the visual bumps created by the uppercase letters are similar to the humps on a camel's back.
#3 You can prefix your variable names with a character that is descriptive of its data type, such as s for aString variable or n for a Number variable.
Examples:
var sTitle:String = "Learning ActionScript 3.0";
var nScore:Number = 99;
var bActive:Boolean = false;
This is a convention know as the Hungarian notation.
Fun with ActionScript 3 variables: Complete the story - Introduction to Flash AS3 VariablesCreate a new Flash ActionScript 3.0 document. Then copy the code below and paste it in the script pane of the Actions Panel. Do not read the trace statement! Just read the variables so as not to spoil the activity.
Your task is to replace the value of each variable with whatever is suggested in order to complete the story in the trace statement. Do not remove the quotation marks when you replace the values. Once all the values have been replaced, test your movie, then go to the output window to read your story. You can do this activity with a friend and try to think of funny and ridiculous values for each

variable.
var popArtist:String = "name of famous pop artist";
var cheese:String = "name of type of cheese";
var chemElement:String = "name of chemical element";
var bodyPart:String = "name of external body part";
var internalOrgan:String = "name of internal organ";
var songTitle:String = "title of cheesy love song";
var fighter:String = "name of famous martial artist or boxer";
var fungalInfection:String = "name of a type of fungal skin infection";
trace("A new superhero has been spotted around campus, leaping from building to
building. Who is he? Are you sure you wanna know?\n\nRumor has it that this superhero
is a student on campus who was bitten by a radioactive " + popArtist + ". When he woke
up, he felt very strange, but still decided to attend class. His classmates thought he
was acting strange, and they began to avoid him because he started smelling like " +
cheese + " mixed with burnt " + chemElement + ".\n\nBut things changed when a crime
occurred on campus in the afternoon of that same day. A young girl was being held at
gunpoint, and was being asked to surrender her fake " + bodyPart + ". Then out of
nowhere, a blurry figure came rushing to save the girl! It was the student who smelled
like " + cheese + " and " + chemElement + "! He was now dressed in a lovely costume
designed by " + fighter + ". With great speed, he went straight for the gunman and
kicked him right in the " + internalOrgan + ". He kicked him with such great force
that it made the gunamn scream: " + songTitle + "! And then the gunman ran away. The
young girl was safe. And the students cheered!\n\nHappy and thankful, the young girl
came up to her savior, gave him a kiss on the cheek and asked, \"What is your name,
kind sir?\" To which our brave superhero replied: I am " + fungalInfection + " Man!");
//Story credits:
//dip magazine, August 2002 issue
Expressions and Operators in ActionScript 3An expression is something that computes or evaluates into a single value. In a very simple form, a reference to a variable is already an expression. For example:
var quantity:Number = 5;
trace(quantity);
Here, the variable quantity evaluates to a value of 5.
An expression can also be made up of multiple values that are manipulated in some kind of operation. For example:

trace(10 + 5);
Here, we have two values: 10 and 5. The values in this expression are referred to as operands. These operands are going to be added together, as signified by the plus symbol. The plus symbol is referred to as the operator in this expression. Operators are special characters that are used to perform operations between values or operands. And once the operation in this example is complete, the expression evaluates to a value of 15.
Let's take a look at some of the operators you can use in ActionScript 3.
Arithmetic Operators
Plus (+)
Minus (-)
Multiply (*)
Divide (/)
Modulo (%)
Examples:
trace(10 + 5);
trace(5 - 3);
trace(2 * 2);
trace(8 / 4);
The plus, minus, multiply, and divide operators are pretty self-explanatory. As for the Modulo operator, this will return the remainder from a division operation.
Example:
trace(7 % 2);
7 divided by 2 is equal to 3 remainder 1. A modulo operation will return the remainder, so 7 % 2 will return1.
When performing an arithmetic operation on expressions that have more than two different operators, use parentheses to group the operands and operators that you would like to compute for first.
Example:
var nCompute:Number = (4 + 20) / (3 * 2);
trace(nCompute);
In this example, the operations within the parentheses will be computed first, and then the results will be divided.

Without the parentheses, the division and multiplication operations will be calculated first, followed by the addition operation, resulting in a different value.
So the following expression, which doesn't make use of parentheses, will actually have a different outcome even though it uses the same values:
var nCompute2:Number = 4 + 20 / 3 * 2;
trace(nCompute2);
Assignment Operators
Assignment (=)
Addition Assignment (+=)
Subtraction Assignment (-=)
Multiplication Assignment (*=)
Division Assignment (/=)
Let's take a look at the Assignment operator first. The Assignment operator is represented by the equals sign (=). It can be used to assign a value to an operand.
Example:
var nScore:Number = 10;
In this example, the Assignment operator is used to assign a value of 10 to the nScore variable. The operand to the right of the equals sign is assigned to the operand to the left of the equals sign.
The other assignment operators (Addition Assignment, Subtraction Assignment, Multiplication Assignment, and Division Assignment) allow you to write shorthand versions of arithmetic and assignment operations combined.
Example:
var nScore:Number = 10;
trace(nScore += 5);
// Outputs a value of 15
In this example, nScore += 5 is just the shorthand version of writing nScore = nScore + 5. This means that you are adding 5 to whatever the current value of nScore is.
Comparison Operators
Equality (==)
Inequality (!=)
Greater than (>)

Less than (<)
Greater than or equal (>=)
Less than or equal (<=)
Comparison operators are used to compare values. An expressions that uses comparison operators will evaluate to either true or false.
Examples:
trace(4 == 4);
// This expression tests if 4 is equal to 4.
// This evaluates to true since 4 really is equal to 4.
trace(6 != 6);
// This expression tests if 6 is NOT equal to 6.
// This evaluates to false since the two operands
// have the same value and are therefore equal.
trace(10 > 7);
// This expression tests if 10 is greater than 7.
// Since 10 really is greater than 7,
// then this expression evaluates to true.
Logical Operators
And (&&)
Or (||)
The And and Or logical operators allow you to combine two or more sets of comparison expressions.
If you use the And operator, the comparison expressions you are combining ALL have to be true in order for the entire expression to return a value of true.
Examples:
trace(4 == 4 && 5 == 5);
// This evaluates to true since both comparison expressions are true.
// 4 is equal to 4 AND 5 is equal to 5.
trace(4 == 4 && 5 == 6);
// This evaluates to false. Even if 4 is equal to 4,
// the second comparison expression is false;

// So the whole thing becomes false.
If you use the Or operator, only one of the expressions needs to be true in order to return a value of true.
Example:
trace(4 == 4 || 5 == 6);
// This still evaluates to true.
// Even if the second comparison expression is false,
// the first one is still true, so the whole expression
// evaluates to true.
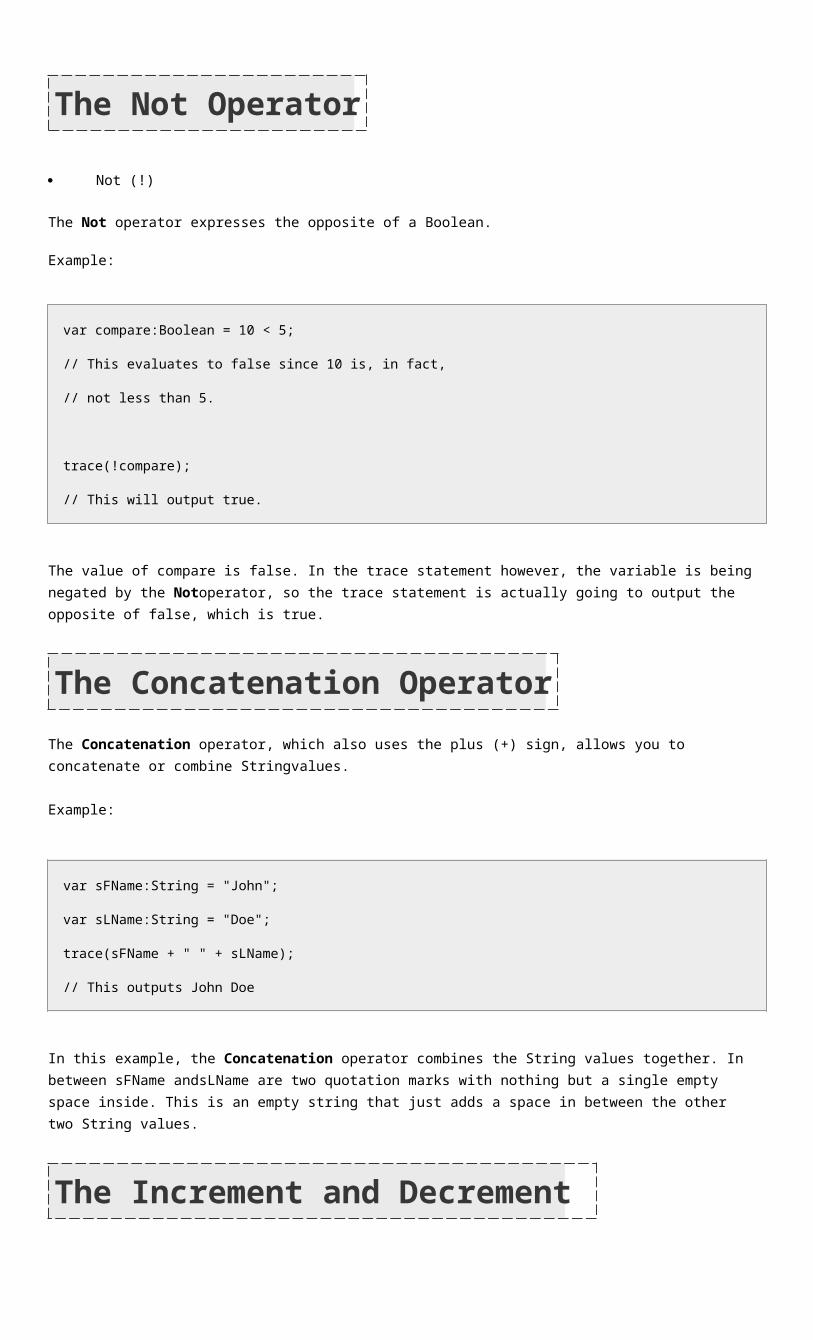
The Not Operator
Not (!)
The Not operator expresses the opposite of a Boolean.
Example:
var compare:Boolean = 10 < 5;
// This evaluates to false since 10 is, in fact,
// not less than 5.
trace(!compare);
// This will output true.
The value of compare is false. In the trace statement however, the variable is being negated by the Notoperator, so the trace statement is actually going to output the opposite of false, which is true.
The Concatenation Operator
The Concatenation operator, which also uses the plus (+) sign, allows you to concatenate or combine Stringvalues.
Example:
var sFName:String = "John";
var sLName:String = "Doe";

trace(sFName + " " + sLName);
// This outputs John Doe
In this example, the Concatenation operator combines the String values together. In between sFName andsLName are two quotation marks with nothing but a single empty space inside. This is an empty string that just adds a space in between the other two String values.
The Increment and Decrement
Operators
Increment (++)
Decrement (--)
The Increment operator increments a numeric value by one (plus 1). The Decrement operator decrements a numeric value by one (minus 1).
Example:
var nScore:Number = 10;
nScore++;
trace(nScore);
// Outputs 11 (10 + 1)
In this example, nScore++ is the same as writing nScore = nScore + 1 or nScore += 1.
NOTE: If you try to trace nScore++ immediately like so:
var nScore:Number = 10;
trace(nScore++);
This will still output a value of 10. When using the increment and decrement operators, the variable will be traced first, so the original value will come out. Only after that will it be incremented or decremented. To avoid that, you can put the operator before the variable like so:trace(++nScore);
Introduction to AS3 Event Handling - Learn All About AS3 Event Listeners
ActionScript code inside a Flash movie or application only gets executed after specific events occur. Let's say we have Event A, Event B and Event C - some parts of the code will run only after Event A happens (whatever that event may be), while other parts of the code will wait for either Event B or Event C. Now, I know the word "event" can sound a bit dramatic. Are we talking about a catastrophic event? A mysterious event? Or an explosive event, perhaps? Not really. This simply means that the various blocks of code in a Flash movie wait for specific things to happen - events - before they respond. They don't just get executed all at the same time. Let's say, for example, you have a Flash space fighter game. And in this game, your character is a small spaceship that shoots lasers, and your enemy is a giant mother ship. Your task is to keep firing at this mother ship until you break down its force field so that you can then destroy the entire mother ship altogether. Destroy the mother ship before it destroys you, and achieve this goal before your time runs out.
So in this game, you'll have some code that controls the firing of the lasers, while some other part of your code will enable the user to control the movement of your spaceship. And then you'll have more code that will control the energy of the enemy mother ship's force field, code for the game's time limit, code for the scoring, and so on... Now, obviously, you don't want all of that code to just keep running all at the same time. For instance, the code that creates the time limit should run immediately when the game begins, while the code for firing the lasers should run only when the user presses the space bar on the keyboard. Here, you see that there is an event and aresponse. An event would be something that happens while the Flash movie or application is running. That event could be anything - a user clicking on a button or an image being downloaded, for example. A responsewould be how the Flash movie or application would react after a specific event occurs. That response could be anything as well - play an audio file, go to the next frame, display some text, etc... In the 2 previous examples, the events would be: (1) the starting of the game, and (2) the user pressing the space bar key. The respective responses would be: (1) the starting of the counter for the time limit, and (2) the firing of the lasers.
Event Response
Game starts Time limit starts running
User presses space bar Lasers are fired
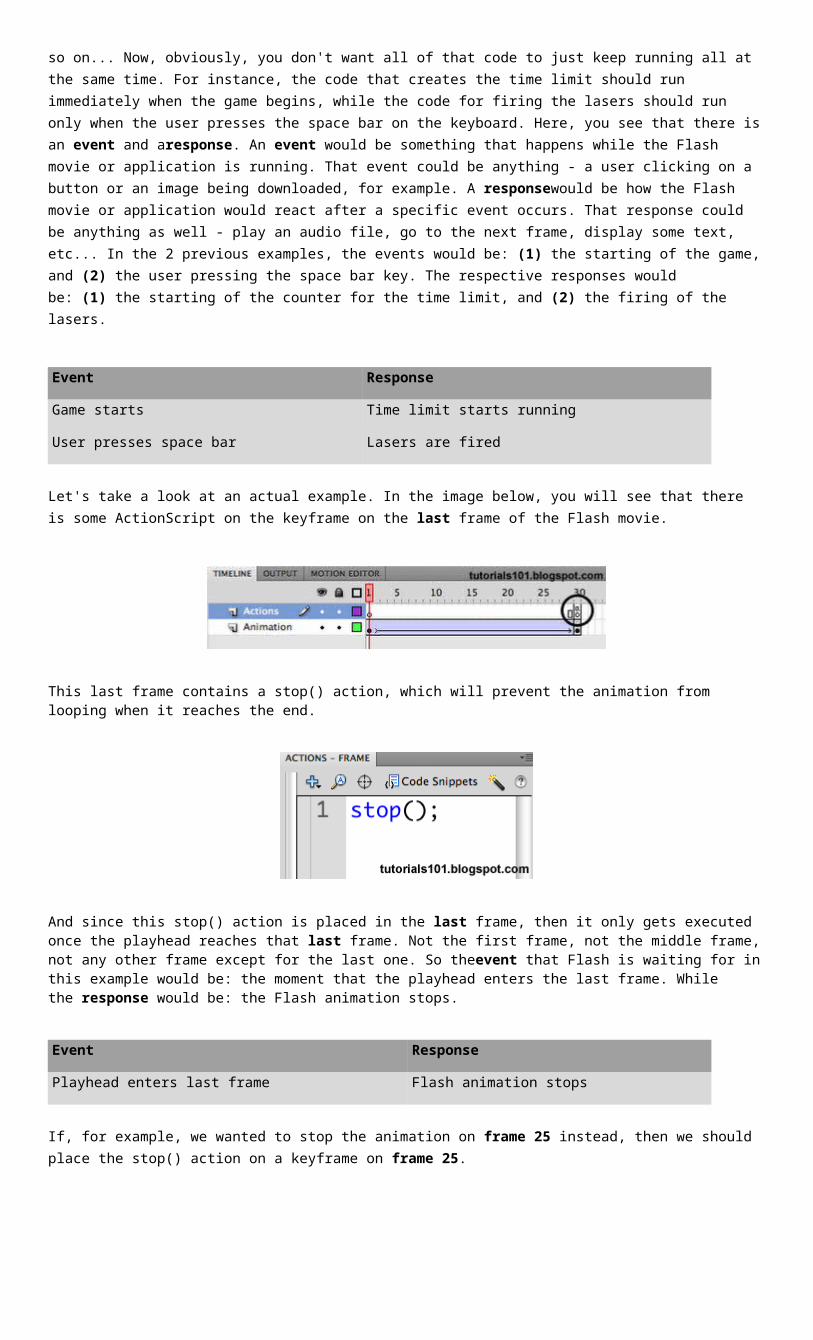
Let's take a look at an actual example. In the image below, you will see that there is some ActionScript on the keyframe on the last frame of the Flash movie.
This last frame contains a stop() action, which will prevent the animation from looping when it reaches the end.
And since this stop() action is placed in the last frame, then it only gets executed once the playhead reaches that last frame. Not the first frame, not the middle frame, not any other frame except for the last one. So theevent that Flash is waiting for in this example would be: the moment that the playhead enters the last frame. While the response would be: the Flash animation stops.
Event Response
Playhead enters last frame Flash animation stops
If, for example, we wanted to stop the animation on frame 25 instead, then we should place the stop() action on a keyframe on frame 25.

So the event that invokes the response here would be: the playhead entering frame 25 (instead of the playhead entering the last frame).
But this is a rather simple example. Here, the event that we are waiting for is simply dependent on the movement of the playhead along the frames of our animation. We just have to write the code, run the movie, and then wait for the playhead to enter the frames that contain ActionScript code.
But what about other types of events? Let's take user-based events, for example. User-based events are those that are initiated directly by the user, such as a mouse click or a keyboard press. In the space fighter game example, the user pressing the spacebar key is considered a user-based event. Whenever the user presses the spacebar, the spaceship fires its lasers. So whatever code in the Flash movie is responsible for shooting the lasers should be executed only when the user-based event of pressing the spacebar key happens. And then there are also other types of events other than user-based events that occur while the Flash movie is running. For example, when an external image is loaded into a Flash movie, the moment the loading of the image finishes can be considered as an event as well.
So how do we write ActionScript code that will allow us to identify a specific event and then tell Flash to respond only after that event occurs?The process of identifying events and telling Flash how to respond is referred to as event handling. In order for you to be able to handle events in Flash, you must write what is called an event listener. An event listener is a function that will execute only when the specified event occurs (a mouse click, a press of a keyboard key, etc...). In order for an event listener to know the right moment at which to execute, it must be registered to an event's source. It's quite common to have numerous event listeners in one Flash project in order to deal with the many different events that can happen while the Flash movie is running. This is one of the reasons why AS3 event handling is one of the most important things that you should get a good grasp of when you are starting to learn ActionScript 3.
How to Create an AS3 Event ListenerAccording to the Adobe Flash ActionScript 3 documentation, there are 3 important elements that need to be identified when working with event handling in Flash. These are: (1) the event, (2) the response, and (3) the event source. We've already introduced the concepts of events and responses in the first part of this lesson, but let's go ahead and take a look at them again with a little more detail. And then after that, let's take a look at what the event source is.
EVENT
An event refers to a specific occurrence that happens as your Flash movie runs. In ActionScript 3 event handling, events are identified by specifying the event class as well as the event constant.
Event classes can be thought of as the different groups used to classify different kinds of events. There's an event class, which is also called Event. Some events that fall under this class are the complete,deactivate, and open events. Another example is the keyboard event class, which is written asKeyboardEvent. Some events that fall under this class are the key down (i.e. when the user presses a keyboard key) and key up (i.e. when a key is released) events. There's also another class for mouse events, which is written as MouseEvent.
Event constants are specific names that refer to the events themselves. Let's consider theMouseEvent class, a few of the events that fall under this class are: mouse clicks and mouse roll overs(i.e. when the cursor hovers over a button). The constant for a mouse click is written as CLICK. For a mouse roll over, it is written as ROLL_OVER.
Once these elements have been identified, writing the event in code takes on this form:EventClass.EVENT_CONSTANT
So for example, if you were to specify a mouse click event then you would write: MouseEvent.CLICK. And if you were to specify a mouse roll over event, then you would write: MouseEvent.ROLL_OVER.
RESPONSE
A response refers to what is going to happen once Flash detects the occurrence of an event. For example, after a button is clicked (MouseEvent.CLICK), we can instruct the Flash movie to respond by playing an audio file. The response is specified as a function. This
function's body will contain the line(s) of code that will tell Flash what to do. This function, referred to as an event listener (also sometimes referred to as an event listener function or listener function), will be called immediately after the specified event is dispatched and detected.
function eventListener()
{
// response to make when the event happens
}
REMINDER: The terms event listener, event listener function and listener function all refer to the same thing - it is a function that is registered to execute when a specific event occurs.
EVENT SOURCE
An event source refers to the object that is directly related to the event. In most cases, it is the object from which the event originates from. For example, when dealing with mouse click events, the button that was clicked would be the object that the mouse click happens to, and is therefore considered as the event source. Another example would be when a URLLoader object loads an external text file. For instance, when a URLLoader finishes loading the file, this is considered as an event as well. In this case, the URLLoader is the one responsible for loading the external text file and is therefore considered as the event source. This event source can also be alternatively referred to as the event target.
After identifying these 3 elements, you bring them all together using the addEventListener() method. TheaddEventListener() method registers the event listener function with the event source so that the event listener function can "hear" when the event is announced. This is essentially what connects the event listener function to the event. Once an event listener function is registered with an event source, you can think of it as the event listener function sitting there quietly, just waiting to be told or "listening" for when the event is dispatched or announced. Once the event is announced, the event listener function will then run, enabling the Flash movie to make the appropriate response.
FLASH ACTIONSCRIPT 3 EVENT HANDLING SYNTAXThe syntax for writing event handling code would be:
eventSource.addEventListener(EventClass.EVENT_CONSTANT, eventListenerFunctionName);
function eventListenerFunctionName(e:EventClass):void
{
// code for response goes here

}
Let's create an example:
1. Create a new Flash ActionScript 3.0 document
2. Draw a shape on the stage and convert it into a Button symbol
3. Give this instance an instance name of my_btn
4. Create a new layer for the ActionScript, then select frame one of this layer
5. Go to the Actions Panel and type the following code in the Script pane:
6. my_btn.addEventListener(MouseEvent.CLICK, onClick);
7.
8. function onClick(e:MouseEvent):void
9. {
10. trace("The event handler works!");
}
You've just written some code that handles a mouse click event. Go ahead and test your movie. When you click on the button, you should see the phrase The event handler works! come out in the output window.
FLASH ACTIONSCRIPT 3 EVENT HANDLING CODE EXPLAINEDWe've learned that there are 3 important elements when it comes to working with event handling in Flash AS3 (the event, the response, and the event source). But when it comes to writing the event handling code, the code itself is made up of 2 parts: (1) the add event listener statement, and (2) the event listener function.
ADD EVENT LISTENER STATEMENT
Whenever an ActionScript 3 event happens, the event gets dispatched or announced within the Flash player. Once the event is announced, the event listener function that is registered with the event's source will execute. To register an event listener function with an event source, the addEventListener()method is used. Registering the event listener function with the event source will enable the event listener function to know when to respond.
In order for the event listener function to respond at the right time, the add event listener statement must contain the following 3 pieces of information:
1. the event source
2. the event
3. the name of the event listener function to be executed once the event is triggered
In the example we created, the add event listener statement would be:my_btn.addEventListener(MouseEvent.CLICK, onClick);
Event Source: my_btnEvent: MouseEvent.CLICK

Event Listener Function Name: onClick
THE EVENT LISTENER FUNCTION
This is the function that gets executed in response to the event. The event listener function's body will contain the lines of code that will make up whatever response we'd like the Flash movie to make whenever the event is dispatched (e.g. playing a sound when a button is clicked, displaying an image when you roll over a button, etc...). In the example that we created, the event listener function would be:
function onClick(e:MouseEvent):void
{
trace("The event handler works!");
}
The event listener knows that it is the function that needs to be executed because its name matches the event listener function name that was specified in the add event listener statement.
NOTE: You will also notice that the event listener function has a single parameter - e. We'll talk about that later.
At this point, let's take a look at a summary of the event and response process that took place in our code example:
1. User clicks on the my_btn button
2. The event (my_btn being clicked) is immediately dispatched

3. The event listener function "hears" the event being dispatched
4. The event listener function runs
So that is the basic flow of how events in AS3 are handled: (1) the event occurs, (2) it gets dispatched, (3) the event listener "hears" the event being dispatched, (4) and the event listener function runs.
Now let's go back to the event listener function and lets talk about the single parameter that it is set to accept. In our example, the parameter is named e and is of the MouseEvent data type.
function onClick(e:MouseEvent):void
{
trace("The event handler works!");
}

Every time a dispatched event triggers an event listener function to run, information gets passed to that event listener function. This information is contained in what is referred to as an event object. This parameter is what is used to accept that event object whenever it gets passed to the event listener function. Some of the information contained in this event object include: the event source and the event that occurred.
All event listener functions must always have a parameter for the event object regardless of whether or not the parameter will be used anywhere in the function body. In our example, we do not make use of the event object parameter, but if we removed that parameter, our event handler code will NOT work.
When creating the event object parameter, its data type is set to match the event class of the event that is being watched out for. In our example, the event listener is watching out for a mouse click, which is under theMouseEvent class. So the data type for the parameter should be MouseEvent as well:
myObject.addEventListener(MouseEvent.CLICK, myListenerFunction);
function myListenerFunction(e:MouseEvent):void
{
// function body
}
If we were watching out for a KeyboardEvent, then the parameter should have the KeyboardEvent data type instead:
myObject.addEventListener(KeyboardEvent.KEY_DOWN, myListenerFunction);
function myListenerFunction(e:KeyboardEvent):void
{
// function body
}
In the examples, the parameter name used is e. It's NOT a requirement that you use the name e, since parameter names are author defined. The usage of e is more of a common

convention, and is what will be used throughout this tutorial series.
The AS3 Event ObjectWhen an ActionScript 3 event occurs, an event object gets created just before the associated event listener function gets triggered. This event object contains information about the event that just occurred, and is immediately passed to the event listener function. Some of the information it contains are:
the type of event that occurred (ex. click event, key down event, etc…)
the event source (ex. in a click event, the event source would be the object that was clicked)
Think of this event object as a note that gets passed to the listener function.
The listener function can then open the note to read what's inside it, and learn more about the event that triggered it.
To be able to accept this event object, the event listener function must have a parameter for it.

All the available information contained in the event object can then be accessed within the function using this event parameter.
For example:
my_btn.addEventListener(MouseEvent.CLICK, onClick);
function onClick(e:MouseEvent):void
{
trace(e.type);
}
Here, we have e as the event parameter of the listener function. If we want to display what kind of event triggered this listener function, then we can use the type property of the event object, and trace it. The typeproperty of the event object refers to whatever event caused the listener function to get triggered. Since our parameter name is e, we will be able to access the type property using e.type. In this example, we know that we have an event handler for a click event, so when this event listener function runs (i.e. when the button is clicked), Flash will trace e.type and will display the word click in the output window.
NOTE: The event listener function must always have an event parameter, even if you don't plan on using it. Also, the event listener function can have no other parameter but this one.
Let's take a look at another simple example that illustrates how the event object can be used.
[VIEW THE EXAMPLE]Click the link to go to the sample page
Here is the code:
circle1_btn.addEventListener(MouseEvent.CLICK, onClick1);
circle2_btn.addEventListener(MouseEvent.CLICK, onClick2);
circle3_btn.addEventListener(MouseEvent.CLICK, onClick3);
function onClick1(e:MouseEvent):void

{
circle1_btn.scaleX = 2;
circle1_btn.scaleY = 2;
}
function onClick2(e:MouseEvent):void
{
circle2_btn.scaleX = 2;
circle2_btn.scaleY = 2;
}
function onClick3(e:MouseEvent):void
{
circle3_btn.scaleX = 2;
circle3_btn.scaleY = 2;
}
One thing you might have noticed is how redundant the code is. Here, you see three different listener functions that basically do the same thing - make the circle bigger. The only difference is that each listener function makes a different circle bigger. But wouldn't it be more efficient if we found a way to write just one event listener function that can figure out which circle was clicked so that it resizes the correct one? Using the event object, we will be able to do that.
We've learned that one of the pieces of information contained in the event object is the event source. In the example above, the event source will be whichever button was clicked. To be able to access this piece of information, we can use the currentTarget property of the event object. So instead of writing down 3 different functions that contain the names of each of the buttons, we can just write one function, and usee.currentTarget instead of the button instance names.
So we would have this code instead:
circle1_btn.addEventListener(MouseEvent.CLICK, onClick);
circle2_btn.addEventListener(MouseEvent.CLICK, onClick);
circle3_btn.addEventListener(MouseEvent.CLICK, onClick);
function onClick(e:MouseEvent):void
{
e.currentTarget.scaleX = 2;
e.currentTarget.scaleY = 2;
}
Here, all 3 of the add event listener statements register the same listener function. And in

that listener function, the value of e.currentTarget will change depending on which button was clicked. So if it was the circle1_btnbutton that was clicked, then it's also the circle1_btn button that will get resized, and not any of the other buttons.
See how useful the event object can be? Imagine if we had 50 buttons in this example. With the event object, we have a way to write just one listener function instead of 50, making our code much more lean and efficient.
Thank you for visiting the site and for reading this tutorial. I hope you enjoyed it and that you learned something useful. To support this site and expand your knowledge even further, please consider signing up for a lynda.com online training membership. Or you can start with a free 7-day trial so you can check out as much of the 1000+ training courses in their learning library.
The AS3 'this' keyword and how to randomize the size of a MovieClip instance on the stageIn this lesson, we'll learn about the this keyword. But before I explain what the this keyword is, let's first recall that we can put some ActionScript code on keyframes in the main timeline. But we can also put some ActionScript code on the keyframes inside MovieClip symbols as well. If we place ActionScript code on the keyframes inside of MovieClip symbols, then it means that the code is inside the MovieClip symbol's timeline, instead of being on the main timeline.
It's important to take note of this, because the this keyword references whichever object the this keyword is placed in. Is it within the code in the main timeline, or is it within the code nested inside a MovieClip symbol instead? If we placed the this keyword within the code inside one of the keyframes in the main timeline, then the this keyword will refer to the main timeline. If the this keyword was placed inside the timeline of a MovieClip symbol, then the this keyword will refer to the instance of the MovieClip symbol instead (or instances, if there are more than one). So what this is, depends on where this is.
To hopefully make things a little more clear, let's create an example.
Step 1
Create a new Flash ActionScript 3.0 document.
Step 2
Select the first keyframe of the main timeline, then open up the Actions Panel.
Step 3
In the script pane, type:
trace(this);
Let's try to trace this to see what it will output. Basically, when we create this trace statement, it's like we are asking: what is this?
And in this example, the answer to that is: the main timeline. Since we selected the first keyframe of the main timeline when we added the code, this means that our code is on the main timeline. So in this example, thisrefers to the main timeline.
Step 4
Test the movie.
In the output window, you should see the message: [object MainTimeline]. So the message in the output window confirms that the this keyword in our example refers to the main timeline. It refers to the main timeline since the this keyword was placed in one of the frames of the main timeline. When using the this keyword,this refers to wherever this is.
Step 5
Now let's try placing the this keyword inside a MovieClip symbol instead. But first, go back to the

actions panel and erase the trace statement that we placed on the main timeline so as not to make things confusing when we're trying to trace the MovieClip objects we're about to create.
Step 6
Next, let's create the symbol.
Using the oval tool, draw a circle on the stage and convert it into a MovieClip symbol named Circle.
Step 7
Then give the MovieClip instance an instance name.
Make sure that the instance on the stage is selected (do NOT double-click on it because that will bring you inside the MovieClip symbol's timeline). Once it's selected, go to the properties inspector and type circle1_mc in the instance name input field.
Step 8
Now, let's add some ActionScript inside the MovieClip symbol's timeline.
This time, you can double-click on the MovieClip instance on the stage in order to go inside the MovieClip symbol's timeline.
Step 9
Double-check that you are, in fact, inside the MovieClip symbol's timeline by looking at the edit bar. The edit bar should say Scene 1 > Circle.
Step 10
Once you've confirmed that you are inside the MovieClip symbol, add another layer on the timeline, and name itActions.
Remember: this timeline belongs to the MovieClip symbol. We are not on the main timeline.
Step 11
Then select the first keyframe of the Actions layer, then go to the actions panel and type:
trace(this.name);
Here, we are not simply referencing this, but specifically, we are tracing its name. You can use the thiskeyword to access properties and methods of objects as well. Basically, in this example, our trace statement is trying to ask: what is the name of this object?
Since the statement that contains the this keyword is inside the MovieClip symbol's timeline, it's going to outputcircle1_mc in the output window. The this keyword references objects or instances that contain it. So thethis keyword is going to refer to the specific instance of the MovieClip symbol on the stage, and not the symbol in the library. This is why it's going to output circle1_mc (which is the instance name), and not Circle (which is the symbol's name).
Step 12
Now let's go back to the main timeline by clicking on the scene 1 link.
Step 13
Once we are back on the main timeline, go to the library and drag another instance of the Circle symbol onto the stage. Give this one circle2_mc for its instance name. Since this is also an instance of the Circle symbol, it's also going to have the same trace statement inside it already. Whatever code you have inside the timeline of a MovieClip symbol will also be inside any of its instances that are on the stage. There is no need for us to add it again. So when we test the movie, Flash is also going to output the name of this second instance in the output window.
Step 14
Go ahead and test the movie.
You should see the names circle1_mc and circle2_mc displayed in the output window.
Why would we want to use the this keyword?Sometimes, you might want to place some code inside a MovieClip symbol's timeline. That way,

every single instance of the MovieClip symbol will have the same code inside it when you place it on the stage. This saves you some time, because you won't have to repeatedly type the same code over and over. You just have to put it inside the MovieClip symbol's timeline once, and then every instance of that MovieClip symbol will have the code already placed inside it. The this keyword lets us explicitly tell Flash that our code is meant for that specific instance that contains the this keyword.
Let's see this in action by adding more code to our example.
Step 15
Go back inside the Circle MovieClip's timeline by double-clicking any of the instances on the stage. Then select the first keyframe of the Actions layer and open up the Actions Panel.
Step 16
Remove the trace statement, and add these lines of code in its place:
this.scaleX = 3;
this.scaleY = 3;
Here, we've added some lines of code that will increase the size of each instance of the MovieClip symbol that we place on the stage. Basically, the code is saying: scale this to 3 times its original size. So when the Flash movie runs, the MovieClip instances on the stage will be 3 times larger.
Step 17
Go back to the main timeline, by clicking on the scene 1 link.
Step 18
From the library, add more instances of the Circle MovieClip symbol until you have ten instances on the stage.
Step 19
Test the movie.
You should see that each circle is now three times larger than its original size. Since we placed the code inside the MovieClip symbol's timeline, instead of the main timeline, then we only had to write those lines once, and each instance will have the same lines of code built-in. This is why every single instance of the Circle MovieClip became bigger.
Step 20
In this next step, we'll modify the code so that each instance of the Circle MovieClip will have a different, randomized size.
Go back to the Circle MovieClip symbol's timeline by double-clicking any of the instances on the stage. Then select the first keyframe of the Actions layer and open up the Actions Panel.
Step 21
In the script pane, replace the current code with this:
var nScale:Number = Math.random() * 3;
this.scaleX = nScale;
this.scaleY = nScale;
The first line of code creates a variable named nScale. And then to this variable, we are assigning the expressionMath.random() * 3. What this does is it generates a random number that can be anywhere between 0 and 3. If you want Flash to choose from a higher range of values, then simply replace 3 with a higher value (but don't make it too high since we are going to use it to scale the size of the objects). Then once that random number is generated, the number is assigned to the scaleX and scaleY properties. This is going to happen for each instance of the Circle MovieClip that we have on the stage. So chances

are, they'll each generate a different value, thus making them all have different sizes once the Flash movie runs.
Step 22
Test the movie and you should see your circle's all in different sizes. And since the values are generated randomly, you'll see different sizes every time you test the movie.
The Flash AS3 Tween ClassIn this tutorial, we're going to learn how to use the Flash AS3 Tween Class. The tween class lets you create tween animation using code.
Step 1
Let's first create a movie clip that we will use with our ActionScript 3 tween.
Draw a small circle and convert it into a movie clip symbol. Don't forget to give this circle an instance name. Let's name it circle_mc.
Step 2
Create a new layer for the ActionScript. Select the first frame of this layer, and then open up the Actions panel.
Step 3
We first need to import the Flash AS3 Tween class so that we will be able to use it. On the first line, type:
import fl.transitions.Tween;
Aside from the tween class, we also need to import the easing classes. So in the next line, type:
import fl.transitions.easing.*;
The easing classes allow us to specify different kinds of tween effects. There are 6 easing classes in the AS3 easing package. These are:
Back
Bounce
Elastic
None
Regular
Strong
Each easing type will apply a different effect to your tween animation.
And now that we've imported the necessary classes, let's create a tween using code.
Step 4
To create an AS3 tween object, type new Tween() and assign in to a variable. Let's name this tween tweenX. After the import statements, type:
var tweenX:Tween = new Tween();
This creates a new tween object named tweenX. Let's use this tween object to make our circle on the stage move from the left to the right. To do that, we'll need to pass a few arguments to the Tween() constructor.
The Tween() constructor needs 7 arguments. First, we need to specify the object that we want to tween. In this case, that would be circle_mc. So type in circle_mc inside the parentheses of the Tween() constructor.
var tweenX:Tween = new Tween(circle_mc);
After that, we need to specify the name of the property of the object that we would like to tween. If you wanted to create a fading animation, then you can specify the alpha property. If you wanted to create a scaling animation then you can specify the width, height, scaleX or scaleY properties. But since we want to make the circle move horizontally, then we can use the x property. So let's pass that to the Tween() constructor as well:
var tweenX:Tween = new Tween(circle_mc, "x");
The property name is a string so it should be in quotation marks.
The third argument we need to pass is the easing type that we want to use. The easing type will apply an effect to the movement in the tween. Let's try using Bounce.easeOut for this tween. This will create a bouncing effect when the circle reaches the end of the animation.
var tweenX:Tween = new Tween(circle_mc, "x", Bounce.easeOut);
The fourth argument we need to pass is for the starting value of the object's property that we are tweening. So since we are using the x property, this next argument that we pass will be for the starting x position of the circle. Let's specify a value of 100.
var tweenX:Tween = new Tween(circle_mc, "x", Bounce.easeOut, 100);
So when the tween starts, circle_mc will have a starting x position of 100.
The fifth argument we need to pass is for the ending value of the object's property. Let's specify a value of 400.
var tweenX:Tween = new Tween(circle_mc, "x", Bounce.easeOut, 100, 400);

So this means that at the end of the tween, our circle will be positioned at x = 400.
The sixth argument we need to pass is for the duration of the tween. You can specify the duration in frames or in seconds. Let's specify a duration of 3 seconds.
var tweenX:Tween = new Tween(circle_mc, "x", Bounce.easeOut, 100, 400, 3);
The seventh and last argument we need to specify is a boolean - true or false. If we specify true, then this means that the duration will be in seconds. If we specify false, then the duration will be in frames. Since we want our tween to play over a period of 3 seconds, then we should specify a value of true.
var tweenX:Tween = new Tween(circle_mc, "x", Bounce.easeOut, 100, 400, 3, true);
And now our tween is complete. Test the movie to preview the animation.
Step 5
Here is a list of all the other easing functions that you can use. Try them out to see how they look like. Simply replace the third argument in the Tween() constructor with a new easing function of your choice.
Back Bounce Elastic
Back.easeInBack.easeOutBack.easeInOut
Bounce.easeInBounce.easeOutBounce.easeInOut
Elastic.easeInElastic.easeOutElastic.easeInOut
None Regular Strong
None.easeNoneRegular.easeInRegular.easeOutRegular.easeInOut
Strong.easeInStrong.easeOutStrong.easeInOut
Step 6
If you want to tween other movie clips, then you'll have to create new tween objects for each movie clip that you want to tween. Even if you want to tween different properties of the same movie clip instance, you'll still need new tween objects for each. So if we also wanted to tween the scaleX and scaleY properties of circle_mc, then we'll need to create two more tween objects for each property.
import fl.transitions.Tween;
import fl.transitions.easing.*;
var tweenX:Tween = new Tween(circle_mc, "x", Bounce.easeOut, 100, 400, 3, true);

var tweenScaleX:Tween = new Tween(circle_mc, "scaleX", Bounce.easeOut, 1, 2, 3, true);
var tweenScaleY:Tween = new Tween(circle_mc, "scaleY", Bounce.easeOut, 1, 2, 3, true);
Here, aside from moving horizontally, the circle will also grow. We're starting out with a scaleX and scaleY of1, and moving up to a value of 2 within 3 seconds. This means that the circle will grow from 100% to 200% both horizontally and vertically within that period.
We don't need to use the same easing functions, starting values, ending values, and durations for all our tweens. Try playing around with different values, and see what you can come up with.
Flash AS3 Tween EventsIn this tutorial, we'll take a look at how to work with events related to the Flash AS3 Tween class. We'll first take a look at the AS3 tween event known as MOTION_FINISH. This event allows us to write some code that will respond when the tween animation is finished. Let's say you wanted a song to play, or an image to load when the tween finishes, then you can use this event to make that happen.
Step 1
Use the oval tool to draw a circle, and convert it into a movie clip symbol. Then place two instances of this symbol on the stage. Name them circle1_mc and circle2_mc.
Step 2
Create a new layer for the ActionScript. Select the first frame of this layer, and then open up the Actions panel.
Step 3
Add the following code:
import fl.transitions.Tween;
import fl.transitions.easing.*;
circle1_mc.y = 100;
circle2_mc.y = 250;
var c1TweenX:Tween = new Tween(circle1_mc, "x", Bounce.easeOut, 100, 400, 3, true);
var c2TweenX:Tween = new Tween(circle2_mc, "x", Bounce.easeOut, 100, 400, 6, true);
The first 2 lines import the necessary classes that will make our tween work.
The 2 lines after that will position the circles so that circle1_mc is above circle2_mc.
The last 2 lines create the tween objects that will animate each circle. The first one is named c1TweenX and animates circle1_mc, the second one is named c2TweenX and animates circle2_mc. They both create a similar animation, but circle1_mc has a duration of 3 seconds, while circle2_mc has a duration of 6 seconds.

Test the movie to preview the animation. You should see both circles move from the left to the right.
Step 4
In this next step, we'll import the TweenEvent class so that we can create TweenEvent handlers. Add the line in bold found below:
import fl.transitions.Tween;
import fl.transitions.easing.*;
import fl.transitions.TweenEvent;
circle1_mc.y = 100;
circle2_mc.y = 250;
var c1TweenX:Tween = new Tween(circle1_mc, "x", Bounce.easeOut, 100, 400, 3, true);
var c2TweenX:Tween = new Tween(circle2_mc, "x", Bounce.easeOut, 100, 400, 6, true);
Step 5
Now that we've imported the TweenEvent class, let's create an event listener function that will get called every time one of our tweens finishes. Let's name this function onMotionFinish. When this function gets called, let's tell Flash to trace the phrase "motion is finished".
import fl.transitions.Tween;
import fl.transitions.easing.*;
import fl.transitions.TweenEvent;
circle1_mc.y = 100;
circle2_mc.y = 250;
var c1TweenX:Tween = new Tween(circle1_mc, "x", Bounce.easeOut, 100, 400, 3, true);
var c2TweenX:Tween = new Tween(circle2_mc, "x", Bounce.easeOut, 100, 400, 6, true);
function onMotionFinish(e:TweenEvent):void
{
trace("motion is finished");
}

Step 6
Next, we need to register the event listener function to the tween objects so that the function will get called when a tween finishes. The event we want to specify is TweenEvent.MOTION_FINISH. This event gets announced whenever a tween finishes. When creating TweenEvent handlers, the event listener functions are added to the tween objects. So lets use the addEventListener() method to register the onMotionFinish event listener function to both of our tween objects (c1TweenX and c2TweenX).
import fl.transitions.Tween;
import fl.transitions.easing.*;
import fl.transitions.TweenEvent;
circle1_mc.y = 100;
circle2_mc.y = 250;
var c1TweenX:Tween = new Tween(circle1_mc, "x", Bounce.easeOut, 100, 400, 3, true);
var c2TweenX:Tween = new Tween(circle2_mc, "x", Bounce.easeOut, 100, 400, 6, true);
function onMotionFinish(e:TweenEvent):void
{
trace("motion is finished");
}
c1TweenX.addEventListener(TweenEvent.MOTION_FINISH, onMotionFinish);
c2TweenX.addEventListener(TweenEvent.MOTION_FINISH, onMotionFinish);
Step 7
Next, let's modify the trace statement in the event listener function so that it will also indicate which movie clip has just finished tweening. In the trace statement, add e.target.obj.name
e.target refers to the tween object (either c1TweenX or c2TweenX). Adding obj.name identifies the name of the object being tweened (either circle1_mc or circle2_mc).
Look at the code below to see the updated trace statement:
import fl.transitions.Tween;
import fl.transitions.easing.*;
import fl.transitions.TweenEvent;

circle1_mc.y = 100;
circle2_mc.y = 250;
var c1TweenX:Tween = new Tween(circle1_mc, "x", Bounce.easeOut, 100, 400, 3, true);
var c2TweenX:Tween = new Tween(circle2_mc, "x", Bounce.easeOut, 100, 400, 6, true);
function onMotionFinish(e:TweenEvent):void
{
trace(e.target.obj.name + " " + "motion is finished");
}
c1TweenX.addEventListener(TweenEvent.MOTION_FINISH, onMotionFinish);
c2TweenX.addEventListener(TweenEvent.MOTION_FINISH, onMotionFinish);
Step 8
Now, let's test the movie. Pay attention to the moving circles and the output window. You'll see the message in our trace statement come out every time one of the tweens finishes. Since c1TweenX has a shorter duration, you'll see the message "circle1_mc motion is finished" come out first, followed by "circle2_mc motion is finished".
Step 9
In this next step, we'll make the tweens start again each time it finishes.
In the event listener function, add e.target.start(); right after the trace statement.
The start() method of the Tween class will make the tween start from the beginning again. So since we are putting the call to the start() method inside the MOTION_FINISH event listener function, our tweens will start again each time they finish.
import fl.transitions.Tween;
import fl.transitions.easing.*;
import fl.transitions.TweenEvent;
circle1_mc.y = 100;
circle2_mc.y = 250;
var c1TweenX:Tween = new Tween(circle1_mc, "x", Bounce.easeOut, 100, 400, 3, true);
var c2TweenX:Tween = new Tween(circle2_mc, "x", Bounce.easeOut, 100, 400, 6, true);

function onMotionFinish(e:TweenEvent):void
{
trace(e.target.obj.name + " " + "motion is finished");
e.target.start();
}
c1TweenX.addEventListener(TweenEvent.MOTION_FINISH, onMotionFinish);
c2TweenX.addEventListener(TweenEvent.MOTION_FINISH, onMotionFinish);
So now, our tweens will just keep repeating.
Step 10
In this next step, let's change the start() method to the yoyo() method. The yoyo() method of the Tween class creates a looping effect as well. The difference is that it will alternately play the animation in reverse, just like how a yoyo toy goes down then up then down then up, and so on... So in the case of our animation, you'll see the circles yoyo back and forth from left to right and right to left.
import fl.transitions.Tween;
import fl.transitions.easing.*;
import fl.transitions.TweenEvent;
circle1_mc.y = 100;
circle2_mc.y = 250;
var c1TweenX:Tween = new Tween(circle1_mc, "x", Bounce.easeOut, 100, 400, 3, true);
var c2TweenX:Tween = new Tween(circle2_mc, "x", Bounce.easeOut, 100, 400, 6, true);
function onMotionFinish(e:TweenEvent):void
{
trace(e.target.obj.name + " " + "motion is finished");
e.target.yoyo();
}
c1TweenX.addEventListener(TweenEvent.MOTION_FINISH, onMotionFinish);
c2TweenX.addEventListener(TweenEvent.MOTION_FINISH, onMotionFinish);

So here, you've seen a demonstration of how a MOTION_FINISH event handler for Tween objects work. You can use it to tell Flash to do something whenever a tween object finishes an animation.
There are a few more events in the TweenEvent class. I've listed them below with short descriptions included.
List of events in the TweenEvent ClassMOTION_CHANGE As the tween animates, this event will constantly get dispatched. It gets triggered each time the position, size, rotation, or alpha level of the object being tweened changes.
MOTION_FINISHDispatched when a tween finishes.
MOTION_LOOPDispatched when the tween starts playing again when in looping mode. The loop property of the Tween object must be set to true in order for this event to get dispatched.
MOTION_RESUMEDispatched when a call to the resume() method of the Tween class has been made.
MOTION_STARTDispatched when a call to the start() method of the Tween class has been made.
MOTION_STOPDispatched when a call to the stop() method of the Tween class has been made.