Embed Size (px)
Citation preview
ELEMENTARY SCIENCE PROGRAM MATH, SCIENCE & TECHNOLOGY EDUCATION
A Collection of Learning Experiences
CLASSROOM PLANTS
CATTARAUGUS-ALLEGANY BOCES GRADE K

1
TABLE OF CONTENTS
Unit Overview..........................................................................................................2 Format & Background Information ..........................................................................3-13 Learning Experience 1 - Looking At Seeds .............................................................14-15 Learning Experience 2 - Investigating Seeds from Fruits and/or Vegetables ..........16 Learning Experience 3 - Germinating and Sprouting Seeds ...................................17-20 Learning Experience 4 - Growing Plants from Seeds..............................................21-22 Learning Experience 5 - Growing Plants from Seeds from the Produce Section of the Market .....................................................................................................................23-24 Learning Experience 6 - The Structures or Parts of Plants .....................................25-26 Learning Experience 7 - The Needs of Plants.........................................................27 Learning Experience 8 - Introducing the Tuber Potato............................................28 Learning Experience 9 - Growing White or Red Potatoes .......................................29-30 Learning Experience 10 - Water Rooting of Potatoes and Other Plants..................31 Learning Experience 11 - Growing Vegetable Tops................................................32-33 Learning Experience 12 - Letter Garden .................................................................34 Learning Experience 13 - Flowers...........................................................................35 More Ideas ..............................................................................................................36-38 Inquiry & Process Skills...........................................................................................39 Glossary ..................................................................................................................40-41 Teacher References................................................................................................42 Major Science Concepts .........................................................................................43
2
CLASSROOM PLANTS GRADE K
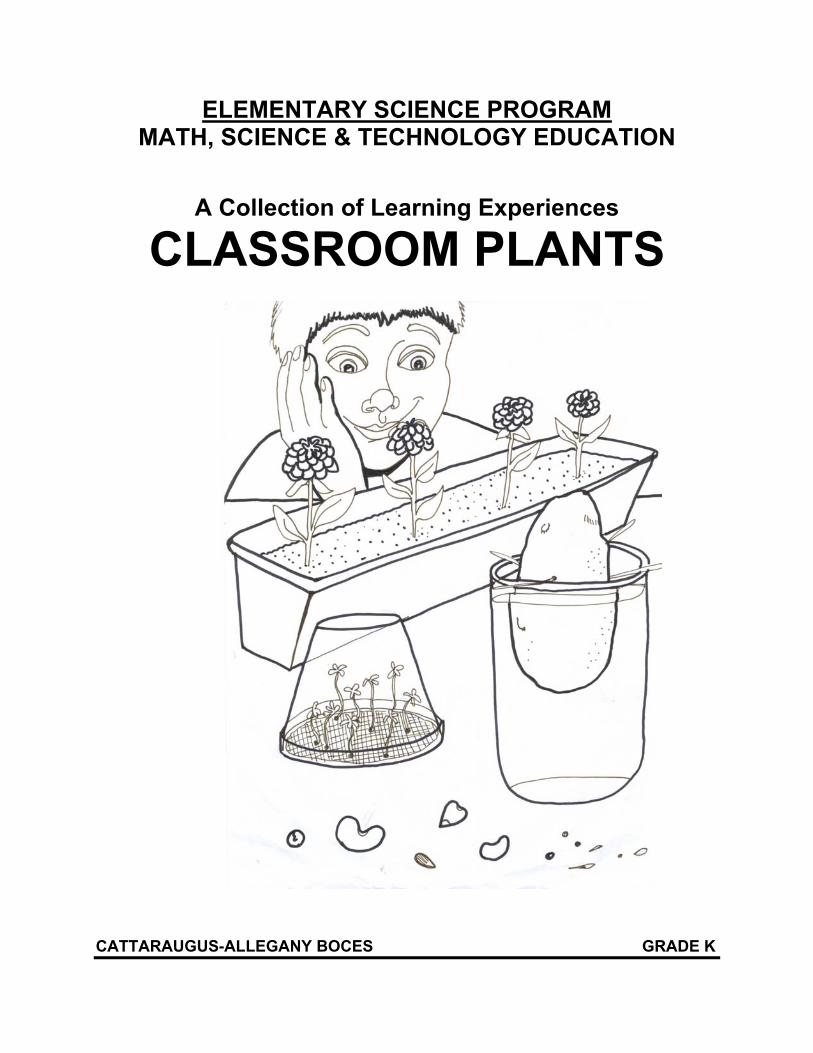
Unit Overview Classroom plants introduces elementary students to the life cycle of plants through observing, growing, and caring for common plants under a variety of conditions. Opportunities are provided for plants to be grown from seeds, cuttings, and roots.
Scheduling Many learning experiences are seasonal while others can be utilized at any time throughout the year. Classroom plants may take from five to nine weeks to complete depending upon the goals of the teacher and interests of the students. Use of the section included in this manual called More Ideas may extend the time span of this kit. Materials to be obtained locally: Please make one student activity book for each student. chart paper felt tip markers index card knife graph paper scissors water crayons paper towel drawing paper pencils cardboard gravel rubberbands trash bag newspaper plant pots egg cartons wood board string 1/2 gallon milk container flowering plant roots seeds: apple, peach, cherry, citrus, date, mango, avocado, pomegranate root vegetables: beets, carrots, radishes, parsnips, rutabaga, turnips other fruit/vegetables: winter onion, white potato or red potato, sweet potato, pineapple
Caution Remind students to wash their hands after handling any of the materials in the kit. Small objects should be handled with care.
About the Format Each learning experience is numbered and titled. Under each title is the objective for the learning experience. Each learning experience page has two columns. The column on the left side of the page lists materials, preparations, basic skill processes, evaluation strategy, and vocabulary. The evaluation strategy is for the teacher to use when judging the students' understanding of the learning experience. The right column begins with a “Focus Question” which is typed in italicized print. The purpose of the “Focus Question” is to guide the teacher’s instruction toward the main idea of the learning experience. The “Focus Question” is not to be answered by the students. The learning experience includes direction for students, illustrations, and
3
discussion questions. These discussion questions can be used as a basis for class interaction. Background Information The elementary science standards stress the use of basic science skills to explore common materials, objects, and living things. Kindergarten students are expected to begin to develop early skills in posing simple questions, sorting, classifying, appropriate measuring and communicating information about the natural world at their developmental level. The science skills are an important focus of the student's learning as students gain insight about life processes and properties of familiar materials such as water, plants and soil. Through the observation of common phenomena including plant growth, students are introduced to the concept of change. Plants Plants are living organisms that grow and reproduce. Plants are found in various habitats around the world. Green plants use light energy to change carbon dioxide and water into sugars. This process of food production is called photosynthesis. The four things needed for photosynthesis are: 1. Chlorophyll - the green material in plants. 2. Sunlight - provides energy to make the food. 3. Water - H20 4. Carbon dioxide - a gas given off by people and animals as they breathe. Generally plants need air, soil, water, space, and light to grow. Water and nutrients (minerals) are absorbed from the soil through the roots of the plant. Plants use water to carry moisture and nutrients to the leaves and food from the leaves to the other parts of the plant. Soil also supports the plant and anchors the roots. Plants need sunlight to make their own food and to grow. When we eat fruits and vegetables, we are eating plants or the parts of plants. Seeds Seeds are produced by flowering plants. The part of flowering plant that contains the seeds is the plant’s ovary or the fruit of the plant. A plant’s ovary or fruit is the place where seeds develop and are nourished by the plant. The fruit or ovary supplies food to the seeds until the seeds germinate and grow into new plants and are able to make their own food. Tomatoes, eggplants, cucumbers, and squash are each classified as the fruits of their plant. Seed Dispersal Most flowering plants produce a large number of seeds because so few seeds of a plant survive. In order for a seed to survive, it must be carried away from the parent plant. Some fruit and seeds drop from a parent plant and take root. The parent plant and the seed compete for space and light. Seed dispersal helps prevent too many seedlings from growing in a small area near the parent plant. Many seeds have wings or hairs that allow them to be carried away from the parent plant by the wind. Plants that grow along the bank of a stream or along the ocean shores often have seeds that will float in

4
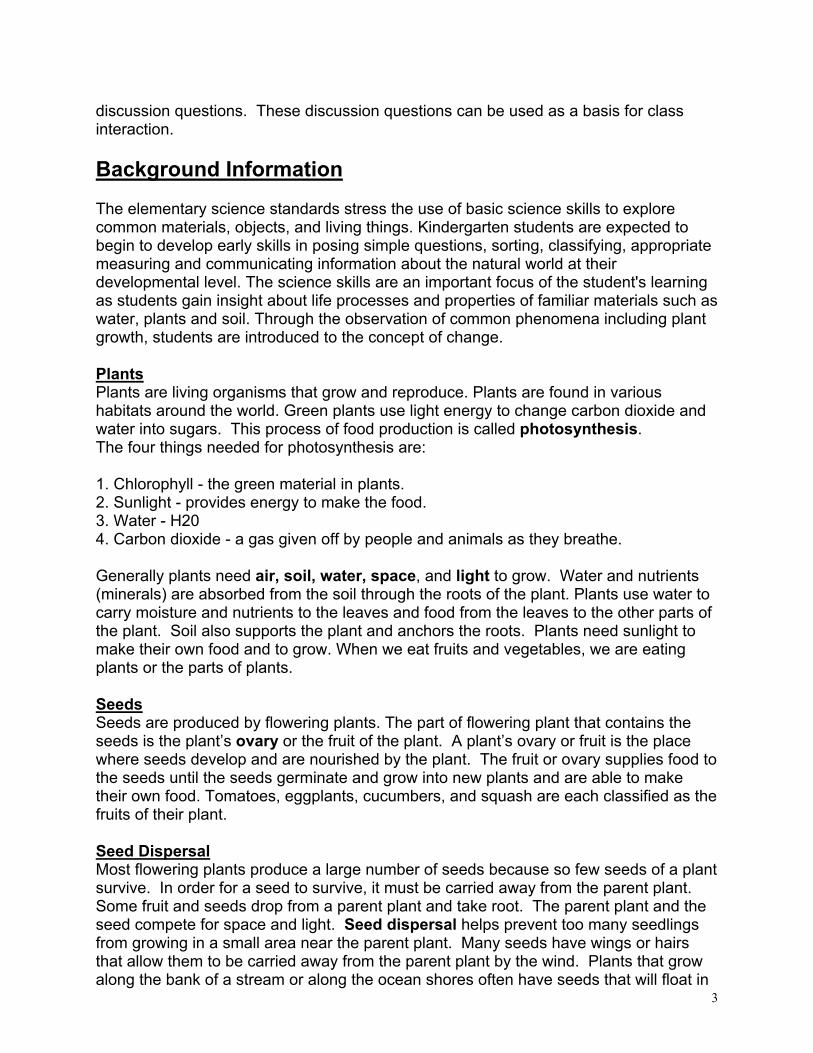
water. The seeds have tough husks and air spaces inside to help them float. A coconut is a floating seed. Other seeds have sharp hooks which stick to furry coats of animals and drop off the animal some distance away from where they originated. Animals can also help disperse seeds by eating the fruit of a plant and then passing the seed through their body and dropping the seed in a new location. Most plants reproduce with seeds produced in flowers. Often the flowers are small and/or green so they are not well noticed. Plants that produce cones do not produce flowers. These plants are called conifers and seeds are produced in the cones. Pine trees, hemlocks, and yews are examples of conifers. Fungus, mosses, ferns, reproduce with spores. Like a seed, a spore develops into an embryo. However, the spore does not contain food for the embryo to grow. The spore, therefore, does not contain a cotyledon. Plant Structures A plant has two organ systems: 1) the shoot system, and 2) the root system. The shoot system is above ground and includes the organs such as leaves, buds, stems, flowers (if the plant has any), and fruits (if the plant has any). The root system includes those parts of the plant below ground, such as the roots, tubers, and rhizomes. Seed Germination Germination begins when the seed begins to grow. A dry seed will stay dormant until it has absorbed a sufficient amount of water. The seed will then begin to germinate if other environmental conditions are met. Two that are particularly important are warmth and moisture. A seed of a plant contains the embryo, seed coat, and cotyledon. The seed coat protects the embryo and the cotyledon. The stored food (the cotyledons) provides a source of energy for the embryo or baby plant inside the seed. This stored food is energy from the sun and was stored in the seed to allow the seed to germinate. The seed is unable to produce food through photosynthesis at this time. When the seed starts to germinate, the first part that comes out is the main root. The skin starts to split and the tiny shoot straightens, carrying the cotyledons with it. The main root gets bigger, side roots form, and leaves appear. As the embryo continues to grow, the roots
Shoot System
Root System

5
grow downward and the stem grows upward. Once the stem breaks through the surface of the soil into the sunlight, the true leaves form and the plant begins to make food. If a seed does not germinate, it can be dug up out of the soil to see what happened to it. If it is rotten, it was probably over watered. If it is unchanged, it may have been under watered. Water, air, and proper temperature are necessary for seed growth. Be sure that the seeds are not being overheated, planted too deeply, or that the soil has not been pounded too hard on top of them. Most seeds will begin to germinate within four to fourteen days.
Approximate Number of Days to Germinate Under Optimum Temperature and Moisture Conditions
Bean – 6 - 10 days Corn – 6 - 10 days Pea – 6 - 8 days
Radish – 4 -5 days Squash – 4- 5 days
Bean Plant Example The life cycle of most plants can be illustrated by using a bean plant as a typical example. The flower is the reproductive structure of the plant. The bean flower has both male (sperm producing parts) and female (egg producing parts) in the same flower. (The corn plant has separate male and female flowers on the same plant.) The male anther of the bean plant produces grains of pollen, each contain a sperm cell. The ovary located at the bottom of the female pistil contains eggs inside an ovule. The pollen from the male anther must reach the top of the female pistil, the stigma. The stigmas are like doorways to the ovary. The pollen is carried by insects, winds, or water, depending upon the plant and its structure. Next, the sperm cells in the pollen grain must get to the egg cell in the ovule. The pollen grain grows a microscopic tube that bores through the pistil and carries the sperm to the egg. Most flowers contain many ovules so the number of pollen tubes growing through the pistil could be many.
Pea Corn
6
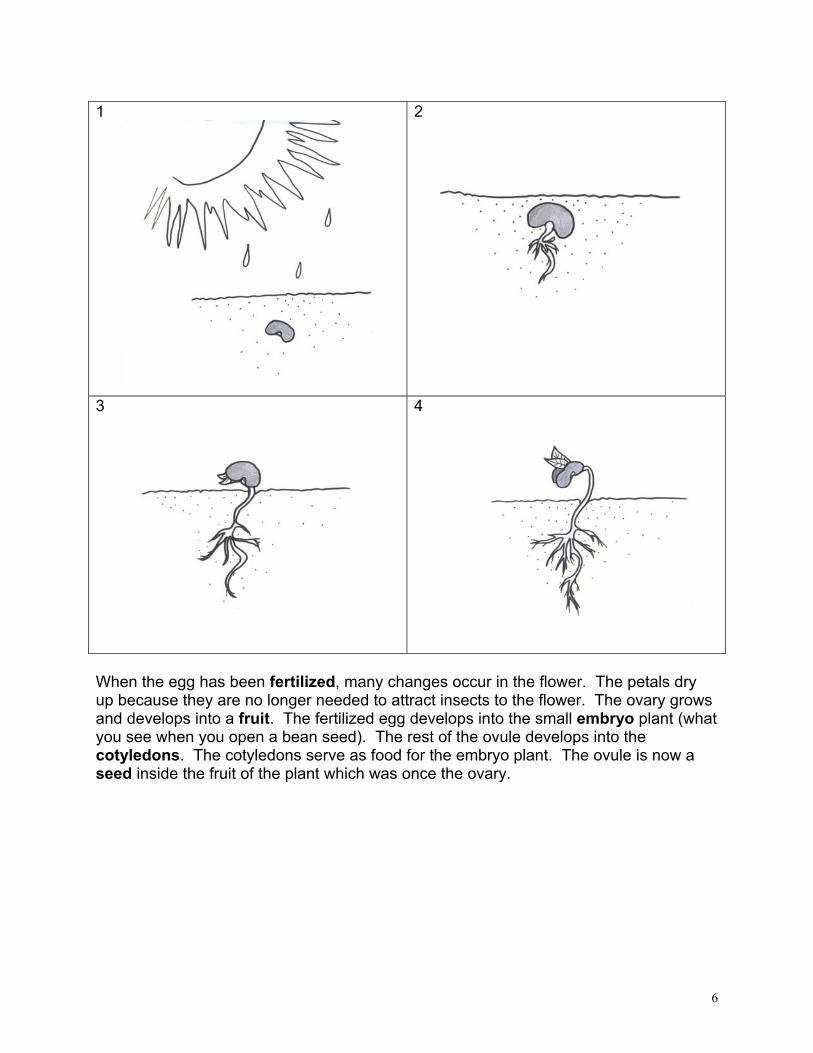
1
2
3
4
When the egg has been fertilized, many changes occur in the flower. The petals dry up because they are no longer needed to attract insects to the flower. The ovary grows and develops into a fruit. The fertilized egg develops into the small embryo plant (what you see when you open a bean seed). The rest of the ovule develops into the cotyledons. The cotyledons serve as food for the embryo plant. The ovule is now a seed inside the fruit of the plant which was once the ovary.

7
In other words, when you look at a string bean pod, you are looking at the fruit of the plant, which was once the ovary of the flower. Inside are the beans, once the ovules, which are the plant’s seeds with the embryo plant inside it and two cotyledons to nourish it. Dicot and Monocot Dicots are seeds that have two parts, like a bean seed. The outside covering of the seed is the seed coat. If you look closely at the seed coat, you can see a division going down the middle of the seed. If you opened the seed at that division, you will see the tiny plant, the embryo, and two large parts of the seed that are called cotyledons. Because the bean seed has these two parts, it is a dicotyledon or dicot for short. Monocots are seeds that have only one cotyledon, such as a corn seed or wheat grain. The corn seed will not split like the bean seeds. It stays in one piece. One cotyledon surrounds the embryo. Stratification Not all seeds are immediately ready for germination upon removal from the plant. Some have built-in blocks to germination that only allow the seed to germinate after special environmental conditions have been met. Seeds bide their time until conditions are just right for germination. By delaying germination, they will maximize their growth potential. Seeds use various chemical and mechanical means of inhibiting germination until the time is right. For example, some seeds will not germinate until they have been subjected to low temperatures. Some seed have tough seed coats that inhibit them from sprouting until weathering weakens the seed coat. But not all seeds go through a dormant period. Most seeds sold commercially through catalogs and nurseries have been hybridized for generations and will usually come up as soon as planted. In most cases, what is needed is a winter. It is not really necessary for the seed to spend the cold months in the ground, as long as it senses that it did. This deception can easily be performed by placing the seeds in a small container with moist
Embryo leaves Radicle (embryo root) Cotyledon (stored food for new plant)
Bean pod (fruit)Maturing ovules (seeds)
Ovule with egg Sperm
Root
First true leaves
Cotyledons
Flower
Ovules (eachcontain an egg
Petal Pistil (female)
Anther (male)

8
(not wet) sand, peat or vermiculite, and leaving it in a refrigerator for four to six weeks. This procedure is known as stratification. The term stratification is derived from the old practice of stimulating seeds to germinate by placing alternate layers of moist sand and seed. Stratification involves placing the seed in a moist medium to simulate the natural conditions it "expects" from its native environment. Seeds from trees that shed seeds in the early fall, for example, require a warm moist treatment to induce germination. Those that drop in the late fall or early spring respond to a cool moist treatment. Depending on when they are shed naturally, some need a combination of warm and cool treatments, others require a growing period in between to allow root and shoot development.
Seeds of most of our trees and shrubs are incapable of germinating immediately after they are harvested. Some are incomplete and require a further period to complete the development of immature parts; some have a mechanical barrier to water, which is required for germination; and many cannot germinate because of some physiological "block" that inhibits germination. For seeds that require a development period, dry storage will usually suffice. Among other methods, stratification is used to remove mechanical moisture barriers and physiological blocks.
Do-It-Yourself Stratification: Apple Seeds: Apple seeds will germinate if the fruit has been in cold storage long enough to trick the seed. Otherwise, the apple seeds will need treatment. Stratification will require cold storage at about 5 degrees C or 40 degrees F for 2 to 3 months. After planting, the temperature should simulate early spring and not exceed 22 degrees C or 75 degrees F. The seeds may return to dormancy under high temperatures before they sprout. Peach or cherry pits: Remove all flesh from the pits and rinse thoroughly. Juices from the fruit may ferment and prevent the seed from germinating. Stratification should be performed on the pits by placing them in moist peat moss at about 5 degrees C or 40 degrees F for 2 to 3 months. Seeds from the Produce Section of the Market Citrus Seeds: Students can grow an indoor tree from seeds from oranges and other citrus plants. Save seeds from oranges, grapefruit, tangerines, or other citrus fruit. Citrus seeds should be rinsed and then planted immediately after the removal from the fruit. Citrus seeds should not be allowed to dry out. Plant them in regular potting soil in a small pot (6 inches or less). Plant your seeds about 1/2 inch deep and cover with soil. Leave one inch between seeds to give plenty of room to grow. Keep the soil moist and put your plant in a warm, sunny spot. The seeds will germinate in 15 to 30 days. Once they sprout, suspend a 75 watt bulb about 30cm above the plant to stimulate growth. When the seedlings have at least four leaves, put each seedling in its own, small pot. It will need 4-5 hours of sun per day and will need water about three times per week. Watering is very important for the first six weeks since citrus trees often die from dehydration. As the plant grows, pinch back (cut or pinch off the center, tiny leaves) the tips of new growth to make it bushier.
9
Date Tree: Date pits grow best in plastic pots so that the roots never dry out. Add extra sand to the soil for a date tree. Germination takes 8 to 10 weeks, so plan on being very patient. Date trees require three hours of sun each day. Water the tree twice a week. Mango: Mango seeds are some of the most interesting seeds you will find. They’re four inches long, flat, heavy, hairy, and they have a big eye at one end. In a bowl, combine water, cracked charcoal, and the mammoth seed. Soak the seed for a week to soften the tough shell. Then in a 6” pot, plant the seed vertically with the eye pointed down in basic potting soil. Water the seed heavily. It won’t germinate for four months. Then it will need four to five hours of sunlight per day. Keep it away from cold windows and use only tepid water. It won’t need to be transplanted for a year.
Avocado: Select a ripe fruit at the store. Wash the avocado seed in tepid water. Dry the seed for a couple of days. Select a flower pot that has drainage holes. Fill the pot 3/4 full of potting soil. Place the seed, pointed end up, in the soil so that about 1/3 of the seed is exposed. Fill the remainder of the pot with washed sand. Keep the sand damp, but not wet. Germination will occur in 30-90 days. The plant will need sunlight 3-5 hours a day. Water it weekly. Pinch back the leaves and the plant will be more dense.
Another method is to drive three toothpicks into the avocado seed and suspend the broad side down over a jar. Fill the jar with tepid water to cover only half an inch of the seed. Place in a warm spot out of direct sunlight. Cover the container with foil until the roots begin to grow because daylight is apt to spoil root growth. Seed will root in two to six weeks. When the roots begin to grow down into the water and the top has grown six or eight inches, begin mixing soil with the water. After a couple of weeks of the combination of water and soil, the avocado plant should be carefully planted into a container of soil. When the stem sprouts and grows to seven inches, cut it in half (forcing the plant to branch out).
Pomegranate: These seeds will develop into a shrub and produce brilliant orange flowers. Plant them in regular potting soil in a smallish pot (6 inches or less). Plant your seeds about 1/2 inch deep and cover with soil. After the seeds germinate (in 6 to 8 weeks) transplant several seedlings into a 5” pot filled with sandy soil. The plants require 2-3 hours of partial sun and need to be watered weekly. Other Plant Information. Potatoes (not sweet potatoes) are tubers, which originally grew in the Andes Mountains of South America. There are more than 100 varieties of potatoes including early, mid-season and late varieties. Though it grows underground, it is not the root of the plant. The potato is part of the stem of the plant. The potato plant has stems, roots, leaves and flowers. In the 1500's Spanish explorers took potatoes back to Europe. The potato is part of the Nightshade family and in Europe many people would not eat them. In England, the potato was not used as a food until the 18th century. Eventually it was discovered that the potato plant was easy to grow, and it grew well in cool, moist areas. The potato became a staple crop, particularly in Ireland. White potatoes were brought to North America in the 1600's. They were not considered an important crop until the Irish immigrants brought potatoes with them in the 1700's.

10
Regular white potatoes will grow vines with dark green leaves. They are sturdy, attractive, and easy to grow. Sometimes potatoes bought at the supermarket have been sprayed with a substance to keep them from sprouting. Wash and scrub your potato well to make sure it will sprout. Fill the jar with water. Cut off one end of the potato. Stick three or four toothpicks around the middle of your potato piece to hold the top of it up out of the water. Place the potato in the jar, with the cut side in the water. There need to be some "eyes" beneath the water. Put the jar where it can receive light, but not in direct sunshine. In about a week white, stringy roots will start to grow from the bottom half of the potato. Soon after roots grow, the leaves will begin to appear on the top half of the potato. Keep the jar filled with water, changing the water if it becomes cloudy. You can move your plant to a larger jar if it grows too big for the one it is in. . Caution: The potato is a member of the nightshade family. The leaves of the potato plant are poisonous if eaten. Sweet Potatoes Unlike the "regular" white or red potato, the sweet potato is a root. Sweet potatoes in the U.S. are grown mostly in the South. They are planted in the spring by "slips." Slips are the small rooted pieces of the vine that grow from the "eyes" or buds of the potato. A sweet potato or yam makes a purple vine. To grow a sweet potato vine, place a toothpick in the sweet potato in four places. The toothpicks should set on the lid of the tumbler and allow the sweet potato to sit in the water without touching the bottom of the tumbler. The pointed end should be down in the water. In a few weeks a vine with several stems will begin to sprout. The stems are weak; tie the stems to a stake. Once the sweet potato grows roots, it can be planted in soil with only half of the sweet potato covered with soil. Sweet potatoes like a bright, sunny location and require care like green houseplants such as ivy. Fertilize about once a month. Pineapple Another interesting experiment for students to try is the growing of pineapple from the top growth. Select a pineapple with a dense set of leaves (called the crown) from the grocery store. Cut off the top growth, leaving an inch or two of the fruit attached. Expose the crown cut to the air for a couple of days to dry; a fresh, bleeding cut may cause decay. Set the crown, fruit down, on top of a pot of clean moist sand. Keep the cutting in diffused light, away from drafts, until it roots. Rooting will take six weeks or more. Once the pineapple has rooted, transfer the plant to soil. Place the plant in bright light to bring out a real sheen on the pointed leaves. Carrot Tops Cover the bottom of a plate with a layer of small pebbles. Cut off the tops of several carrots. Fat, short carrots work the best. Put the carrot tops on the pebbles, cut side down. Add enough water to cover the bottoms of the vegetables. Place the plate out of direct sunlight. Check the water level daily. If your carrots begin to shrivel, there is not enough water in the pie plate and they will not sprout. Sprouts should appear in about a week and there will be new growth everyday. The carrots will continue to sprout for about a month. Beets, radishes, parsnips, rutabaga, and turnips also can be grown this way.
11
Alfalfa Sprouts Buy alfalfa seeds at a health foods store. One ounce of seeds will give four or five crops. Use two tablespoons of seeds for each quart jar you start. Soak seeds overnight, drain well and place in a glass jar. Cover the lid with a piece of panty hose secured with a rubber band. Set the jar on its side out of direct sunlight in a warm spot. Rinse seeds with warm water two or three times a day. Drain well. Seeds will sprout in 4-5 days. Bean Sprouts Almost any variety of dried bean or pea, except split peas, will make sprouts. Soak seeds overnight in a water-filled jar. If you're sprouting different types of seed, use a separate jar for each kind. In the morning, pour off the soaking water and rinse the seeds. Cover the mouth of the jar with a piece of panty hose and secure it in place by putting a rubber band around the top of the jar. You will rinse the jarful of seeds every morning and evening. Between the rinsing, turn the jar upside down so that the water drains thoroughly from the jar. Within one to four days the beans will begin to sprout. Jar Method: Put 6-8 mung bean seeds in a small jar filled with water. Soak overnight. Line a large glass jar with construction paper. Place the bean between the jar and the paper, evenly spaced all around. Fill the center of the jar with dampened, crumpled paper towels. Keep the paper towels moistened.
Plastic Bag Method: Put 6-8 mung bean seeds in a small jar filled with water. Soak overnight. Cut and fold a paper towel to fit inside a plastic sandwich bag. Lay the towel flat to fit in the bag. Put soaked beans on the towel in a straight row. Staple the bag below the seeds, stapling through the plastic bag and the paper towel. Tack the bag to a bulletin board. Add water, pouring behind the paper towel and filling to just below the staples. Potting Soil Potting soil is a sterile growth medium. This means that no seeds, germs, mold, or fungus are present in the potting soil. Potting soil contains three chemical nutrients to stimulate and sustain healthy plant growth. Because of these chemical, hands should always be washed after handling potting soil. To prepare the potting soil, carefully scoop the amount you intend to use into a water-proof bag. Add water and allow the water to soak in for 24 hours. Repeat this process until the potting soil is about the consistency of mashed potatoes. It is not necessary to stir the water into the soil. Scoop the potting soil into the planting containers. Pack the soil until it is firm. Growing Tips for Plants 1. Plant seeds twice as deep as the seed’s diameter. 2. When multiple seeds are planted in the jars, they need to be spaced apart 3. Keep seeds constantly moist until they germinate. Covering the jars with clear
plastic or wax paper may help maintain warmth and moisture if it is a problem. Remove the coverings as seedlings sprout.

12
4. Water the plants sufficiently. Yellow leaves or brown stems on plants indicate that they are being over watered. Kindergartners enjoy “misting” their plants. Dust on houseplants blocks sunlight, and without the sunlight, plants cannot photosynthesize. Let the students spray the plants' leaves with a mister filled with lukewarm water.
5. Expose your plants to sunlight as much as possible. The plants should be on a warm window sill to provide warmth for germination. Plants should not touch the window glass. Eastern windows receive 2-4 hours of morning sun. This is the best location for radishes, lettuce, and other leafy vegetables. Western windows receive diffused light. Most vegetables will not grow very well with this exposure. A window with southern exposure is the best. If none of the windows in your room face south, plants could be placed in another room periodically. You may need to rotate plants if they begin to lean toward the light. Be careful that plants don’t dry out or get too hot.
6. Keep plants at least one foot away from the hot air ventilator so they don’t dry out. Brown leaves indicated dry air damage.
7. A 60ºF to 80ºF temperature range is adequate for indoor plants. It may be necessary to remove the plants from the window sill at night and over the weekends so plants don’t become too cold at night. Plants should be 10-15 degrees cooler at night than during the day.
8. Use the planter sticks (wooden dowels) provided in the kit to hold tall plants up. Use the twisters also provided in the kit to hold the plants to the planter sticks.
9. Over vacations, make arrangements for plant care with your custodian. Sending plants home during the vacation periods is not recommended since they are tender and tend to break in transit. Mature plants can be sent home with students. How to Keep Classroom Plants Over Vacations Everyone likes school vacations except classroom plants. The two most important factors in growing classroom plant are adequate light and the proper amount of water. Place your plants in a location where they will receive adequate light. Listed below are four methods for keeping them properly watered. 1. For small individual planters such as milk cartons, paper cups, and plastic cups
with holes in the bottom, partially bury them in a large tray with small gravel or sand to a depth of 6 cm. Add 3 cm of water.

13
For class gardens, use a wick of cotton clothesline run under the potting soil to a jar filled with water. Cover the jar with a lid or plastic wrap to cut down on evaporation. For large individual planters, cut and bend coat hangers or other wire into arches to fit the individual planters, water and cover with a plastic bag.
For class gardens, cut and bend coat hangers or other wire into arches and place in box at both ends parallel to each other. Water and cover with a large plastic bag or clear plastic sheeting.
Water
Wick
Gravel or sand
Plastic Bag
Coat hanger
Coat hanger
Plastic Bag

14
Learning Experience 1: Looking at Seeds Objective: Students will help create a word chart for some properties of seeds and classify the seeds based on their properties.
What difference can we observe about different seeds? The teacher should select the seeds for distribution to the students. Provide one of each kind of seed selected on a petri dish to each pair of students. Have students complete the activity sheet for Learning Experience #1 in the Classroom Plants Student Activity Book.
Discussion Questions: How are these seeds alike? How are they different? Can you identify what may grow from the seeds? On the activity sheet for Learning Experience #1, have students suggest and record the properties that could be used to group seeds such as: color, size, shape, or texture. Brainstorm with students some words that could be used to describe each property. Create a list on chart paper. PROPERTY WORD CHART Size Shape large small small long long wide short thin Color Texture brown smooth red bumpy black flat Discussion Questions: Can you think of other ways to group these seeds? What does this learning experience tell you about the seeds?
Materials: For each pair of students: 2 Classroom Plants Student Activity Books Petri dish One kind of each selected seed (zinnia, marigold, lima beans, squash, mustard, pea, tomato, spinach, yellow wax beans, red kidney beans, radish, and roma green bean) For the class: 7 small box magnifiers Chart paper* Felt tip markers* *provided by teacher Preparation: Read background information on page 3. It is recommended that one of each type of seed remain in its bag so the seed can be readily identified. Provide each pair of students with a petri dish. Place one of each selected seed in the petri dish. Students will share the smallbox magnifiers for observations. Seeds may be observed with the naked eye or with the small box magnifier. Instruct the students to place the small box magnifier close to their eye and bring the seed to be observed up near the lens. This learning experience may be repeated several times with different selections of seeds. The seeds include zinnia, marigold, lima beans, squash, mustard, pea, tomato, spinach, yellow wax beans, red kidney beans, radish and roma green bean. By selecting different seeds, different properties may be emphasized.

15
Learning Experience 1 continued Page 2
Ask students to classify seeds into different groups based on the properties listed. Discuss as a class some of the groups they put their seeds in and which seeds went into each group.
Basic Skills Development: Listening Speaking Questioning Observing Classifying Communicating information Evaluation Strategy: Students will determine similarities and differences among seeds based on properties such as: color, size, shape, and texture. Vocabulary: property size color texture shape

16
Learning Experience 2: Investigating Seeds from Fruits and/or Vegetables
Objective: Students will select, compare, and create drawings of seeds from a variety of fruits and vegetables.
How are the seeds of the different fruit and/ or vegetables alike or different?
Gather a selection of fruits or vegetables. Discuss with the students the importance and general purposes of seeds. Explain to students that they will be looking for seeds found in a variety of fruit or vegetable sections. Provide the students with the cut fruit sections. Have the students select, compare, and sort the seeds from the section according to size, shape, or color of the seeds. Have students draw their seeds on the activity sheet for Learning Experience #2 in the Classroom Plants Student Activity Book. Discussion Questions: Which fruit has the biggest seeds? Which seeds can you eat? What do you think seeds are for? What can happen to seeds? What can make seeds grow? How might you group the seeds based on the properties of size, shape, color or texture? Extension: Have students make a list of fruits, vegetables, or nuts they know. Have students observe the pattern of seeds in the cross section of an apple or a pear. Can students identify the “star” shape in an apple? Have students draw pictures of seed shapes. Assist the students in creating a seed graph illustrating size, shape, color, or quantities. Label seeds or pictures of seeds Combine pictures and seeds to make a fruit and seeds book for the class to read or make individual books.
Materials: For each student: Classroom Plants Student Activity Book
For the class: 7 small box magnifiers Knife* Variety of fruits and/or vegetables* Graph paper*
*provided by teacher or students
Preparation: Read background information on page 3. A variety of fruits and vegetables should be selected for use in this learning experience. For example you may wish to use an apple, tomato, peach, watermelon, grapes, grapefruit, orange, squash, cucumber, pepper. Cut cross sections of at least four different fruits or vegetables. Present the sections to the students and direct them to carefully observe some of the properties of the seeds contained in the fruits or vegetables. Seeds may be observed with the naked eye or with the small box magnifier.
Basic Skills Development: Listening Speaking Observing Classifying Communication information
Evaluation Strategy: Students will compare the seeds and fruits according to size, shape, or color. Students will recognize that different seeds come from specific plants.
Vocabulary: fruit vegetable nut shape size match grow graph

17
Learning Experience 3: Germinating and Sprouting Seeds
Objective: Student will observe the germination of seeds and the growth of plant sprouts.
What happens to seeds when they germinate and sprout? Discuss with students the things they have observed about seeds and what the seeds need to grow. Distribute large seeds to the students, lima beans, yellow wax beans, red kidney beans, and roma green beans. Ask students to observe the seeds with the small box magnifier. Show the germination chamber(s) to the students and explain that the class will observe seeds germinating and sprouting in the germination chambers over the next few weeks. Discussion Questions: Do you think that the seeds can grow in the germination chamber? What does a seed need to grow? Why do you think that seeds look so different? A large variety of seeds have been provided. Many germination chambers will be created and each germination process will be observed over time. With large seeds, only five or six will need to be placed in each chamber. Each chamber should be labeled and the date and time recorded of when they were started on an index card. Chambers may be passed around to each student. Direct the students to observe the seeds through the small box magnifier. Student should make drawings of their observations on the activity sheet for Learning Experience #3 in the Classroom Plants Student Activity Book. A large chart should be created to show the time it took for each seed to germinate and sprout.
Materials: For each student: Classroom Plants Student Activity BookFor the class: Petri dish One kind of each selected seed (zinnia, marigold, lima beans, squash, mustard, pea, tomato, spinach, yellow wax beans, red kidney beans, radish, and roma green bean) 9 oz clear plastic tumblers 7 small box magnifiers Dropper bottle Miracle Grow Eyedropper Index card* Paper towel* Scissors* Water* Chart paper* Felt tip marker* Crayons* *provided by teacher
Preparation: Read background information on pages 3 and 8. You will need to prepare germination chambers from petri dishes for each seed you select. A petri dish has a large and small section. Select the large section and use it to trace a circle on a section of the paper towel. Cut the disk out of the paper towel. The resulting paper towel disk should be placed in the larger section of the petri dish. Select the seed to be germinated. Label the petri dish with an index card. Dampen the bottom of the petri dish with an eyedropper with water until the paper towel is saturated. Distribute 10+ seeds on the surface of the towel. Place the smaller petri dish on top of the larger.

18
Learning Experience 3 continued Page 2
As the seed grows sprouts, they will grow taller than the petri dish. A clear plastic tumbler may be used to extend the growing chamber. A dropper bottle of Miracle Grow has been provided to fertilize the small plants. Plants may be transplanted into pots if desired. Discussion Questions: Where is the best place to place the growing chambers in the room? What seeds are growing? Which ones did not grow? Which ones are growing the fastest? Which ones are growing the slowest? How might you help them grow better?
Large section of petri dish.
Paper towel section
Place the germination chamber on a bright window ledge. Each type of seed will germinate at a slightly different rate. Record the date and time that the seeds were placed in the chamber. Record their development. A large variety of seeds have been provided in this kit. They include zinnia, marigold, lima beans, squash, mustard, pea, tomato, spinach, yellow wax beans, red kidney beans, radish and roma green bean. Each seed may be germinated if you choose. Miracle Grow is provided for the plant sprouts. Add only one drop after green growth is seen. Basic Skills Development: Listening Speaking Observing Graphing Communication information Evaluation Strategy: Students will compare the plants grown from seeds according to size, shape, or color. Students will recognize that seeds hold the possibility of new plant live and that different seeds produce different plants. Vocabulary: germinate sprout germination chamber Miracle Grow

19
Learning Experience 3 continued Page 3
Large section on bottom and small section on top. Mustard seeds on the paper towel in the petri dish. Mustard seeds germinating.

20
Learning Experience 3 continued Page 4
Observing seeds Seeds growing with plastic top. Beans germinating
21
Learning Experience 4: Growing Plants from Seeds Objective: Students will observe planting of seeds, growth of seedlings, and record their observations though drawings.
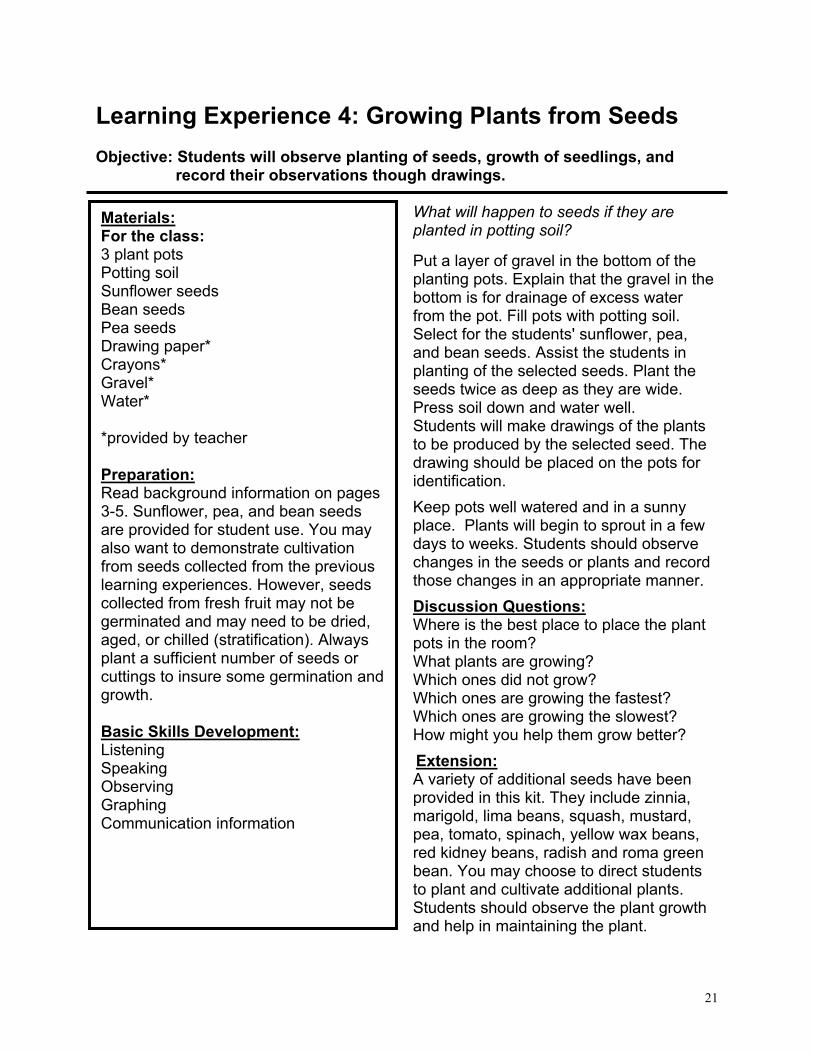
What will happen to seeds if they are planted in potting soil? Put a layer of gravel in the bottom of the planting pots. Explain that the gravel in the bottom is for drainage of excess water from the pot. Fill pots with potting soil. Select for the students' sunflower, pea, and bean seeds. Assist the students in planting of the selected seeds. Plant the seeds twice as deep as they are wide. Press soil down and water well. Students will make drawings of the plants to be produced by the selected seed. The drawing should be placed on the pots for identification.
Keep pots well watered and in a sunny place. Plants will begin to sprout in a few days to weeks. Students should observe changes in the seeds or plants and record those changes in an appropriate manner.
Discussion Questions: Where is the best place to place the plant pots in the room? What plants are growing? Which ones did not grow? Which ones are growing the fastest? Which ones are growing the slowest? How might you help them grow better?
Extension: A variety of additional seeds have been provided in this kit. They include zinnia, marigold, lima beans, squash, mustard, pea, tomato, spinach, yellow wax beans, red kidney beans, radish and roma green bean. You may choose to direct students to plant and cultivate additional plants. Students should observe the plant growth and help in maintaining the plant.
Materials: For the class: 3 plant pots Potting soil Sunflower seeds Bean seeds Pea seeds Drawing paper* Crayons* Gravel* Water* *provided by teacher Preparation: Read background information on pages 3-5. Sunflower, pea, and bean seeds are provided for student use. You may also want to demonstrate cultivation from seeds collected from the previous learning experiences. However, seeds collected from fresh fruit may not be germinated and may need to be dried, aged, or chilled (stratification). Always plant a sufficient number of seeds or cuttings to insure some germination and growth. Basic Skills Development: Listening Speaking Observing Graphing Communication information
22
Learning Experience 4 continued Page 2
Plant seed about twice as deep as the seeds are wide.
Evaluation Strategy: Students will compare the plants grown from seeds according to size, shape, or color. Students will recognize that seeds hold the possibility of new plant life and that different seeds produce different plants. Vocabulary: germinate sprout seedling

23
Learning Experience 5: Growing Plants from Seeds from the Produce Section of the Market Objective: Students will observe planting of seeds from produce, growth of seedlings, and record their observations though drawings.
What might happen to plant seeds that were obtained from the produce section of the market if they are planted? Direct the students to carefully observe the teacher in the cultivation of plants from seeds from the produce section. Students should make drawings on the activity sheet for learning experience #5 in the Classroom Plants Student Activity Book of the plant to be produced by the selected seed over time. Discussion Questions: Where is the best place to place the plant pots in the room? What plants are growing? Which ones did not grow? Which ones are growing the fastest? Which ones are growing the slowest? How might you help them grow better?
Extension: A variety of additional seeds are possible to use in this learning experience. You may choose to try different seeds at different times utilizing the instructions found in the background information section. You may choose to direct the students to plant and cultivate additional plants and help in maintaining the plant. Have students illustrate and write their class stories about seeds. Start a seed collection at school.
Materials: For each student: Classroom Plants Student Activity Book For the class: Potting soil Apple, peach, cherry, citrus, date, mango, avocado, and pomegranate* Other seeds from produce section plants* Gravel* Crayons* Extra plant pots* *provided by teacher Preparation: Read background information on pages 3, 7-9. This session involves long- term growing of unusual plants from seeds from the produce section of the market. Descriptions of the procedures for cultivation of plants from apple, peach, cherry, citrus, date, mango, avocado, and pomegranate are described in the background information. Basic Skills Development: Listening Speaking Observing Graphing Communication information Evaluation Strategy: Students will compare the plants grown from seeds according to size, shape, or color. Students will recognize that the seeds hold the possibility of a new plant life and that different seeds produce different plants.

24
Learning Experience 5 continued Page 2
Vocabulary: germinate cultivate stratification
Avocado Seed
25
Learning Experience 6: The Structures or Parts of Plants
Objective: Student will identify four parts of a flowering plant and describe the purpose of each part.
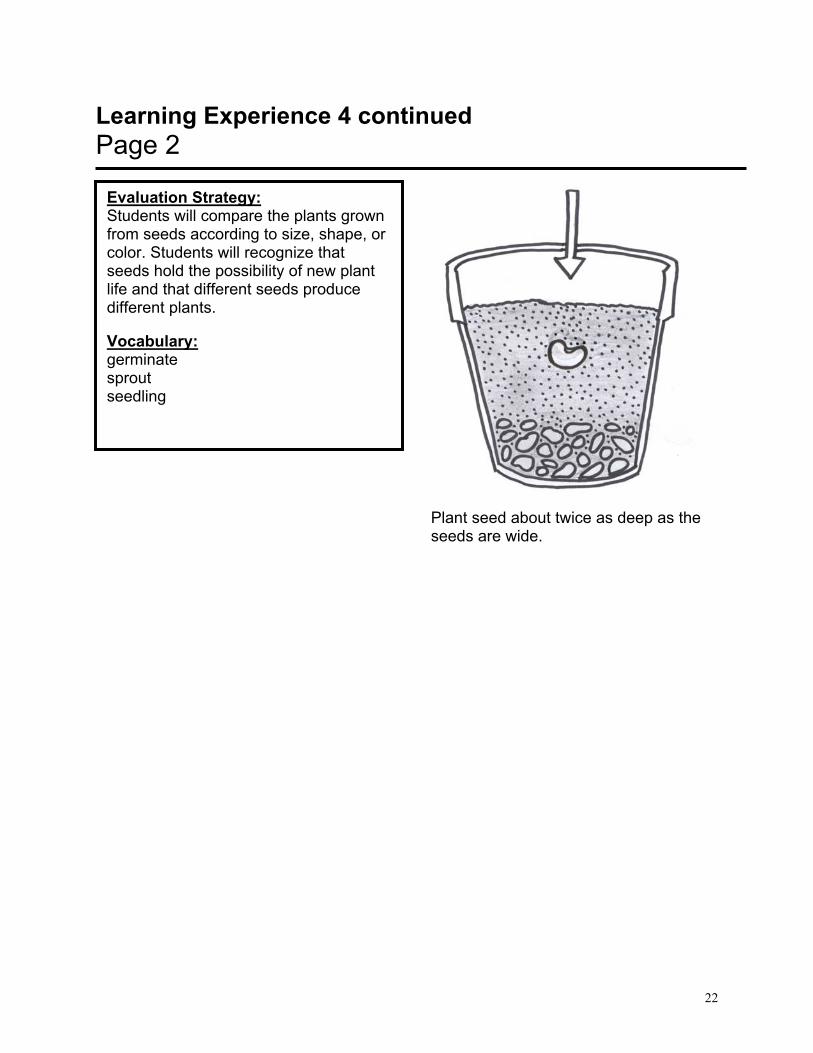
What are the major parts of flowering plants and what do they do? Explain to the students that flowering plants have four major parts. Every part has a job. Roots hold a plant in place. The roots take water and nutrients called minerals from the soil up to the rest of the plant. The stems hold up the leaves and flowers. Stems have little tubes in them that work like a straw. They take water and food to the rest of the plant. Leaves have an important job. They make food for the plant. The last part of a plant is the flowers. Flowers come in many different colors, shapes, and sizes. Most flowers are beautiful. But flowers are not just pretty. They have an important job. They make seeds for the plant.
Direct the student to observe the structural parts of the plant and make drawing of each structure on the activity sheet for Learning Experience #6 in the Classroom Plants Student Activity Book.
Discussion Questions: What is the flower's job? What is the stem's job? What is the leaf's job? What is the root's job
Extension: Press flowers with the stems, leaves, and roots. Lay a sheet of cardboard on the ground. Add two sheets of newspaper. Lay flowers separately and cover with two more sheets of newspaper. Keep adding layers and top off with another sheet of cardboard. Tie up with rubberbands or string and place under something heavy. Try to store pressed flowers in a cool, dry place. Wait ten days then take apart carefully. Label the parts of the plant.
Materials: For each student: Classroom Plants Student Activity Book For the class: Several flowering plants pulled up by the roots* Cardboard* String* Newspaper* Rubberbands* Crayons*
*provided by teacher
Preparation: Read background information on pages 3-5. Many flowering plants are needed for this learning experience. They can be any flowering plant that is able to provide examples of roots, stems, leaves, and flowers. Several drawings have been provided in the student activity book that allows the teacher to illustrate the major structural parts of flowering plants if they are not available. Basic Skills Development: Listening Speaking Observing Graphing Communication information
Evaluation Strategy: Students will be able to observe the structure of flowering plants such as the roots, stems, leaves, and flowers. Vocabulary: flower stem leaf root
26
Learning Experience 6 continued Page 2
Flower
Leaf
Stem
Roots

27
Learning Experience 7: The Needs of Plants Objective: Students will observe the effect of varying amounts of air, water and light on a plant's health.
What does a seed need to do to grow into a plant? Describe to the class that all green plants require air, water, and light to grow. If they do not get any one of these, they seldom grow very well. Over the next two weeks, the class will be observing plants closely to see how they grow and change. Divide the class into four groups. Each group should plant one planter of grass seed. Each group should place their grass planter in a different area from the others for at least two weeks and provide water as indicated below. Sunny area, plants to be watered daily. Sunny area, plants to be watered once a week. Area out of direct sunlight, plants to be watered daily. Area out of direct sunlight, no water at all. Discussion Questions: Which plant looks healthiest? What does this tell you about plant needs? Do plants need sunlight? What happens if plants do not get sunlight?
Extension: Place a wooden board on the lawn for one to two weeks. Take the wooden board off the grass. What does the grass look like? Why? How does a pet's growing needs compare with those of plants? How do your growing needs compare with those of plants?
Materials: For the class: Jar of grass seed Potting soil 2 1/2 gallon milk containers* Wood board* Scissors* Water* *provided by teacher Preparation: Read background information on page 3. Cut 2 1/2 gallon milk containers in half to make the planters. Add potting soil to the planters and then grass seed. Grass seed is suggested for its quick growth and sensitivity to light and water. Basic Skills Development: Listening Speaking Observing Graphing Making Comparisons Communicating Findings Making Inferences Drawing Conclusions Evaluation Strategy: Students will describe what a seed needs to grow into a plant. Listen as students discuss what they observed, and draw conclusions on what they think happened to plants in different situations. Vocabulary: sunlight chlorophyll experiment
28
Learning Experience 8: Introducing the Tuber Potato Objective: Students will observe and compare tuber potatoes and identify the potato's eye and skin.
Where are the parts of the potato that will grow grow into new plants?
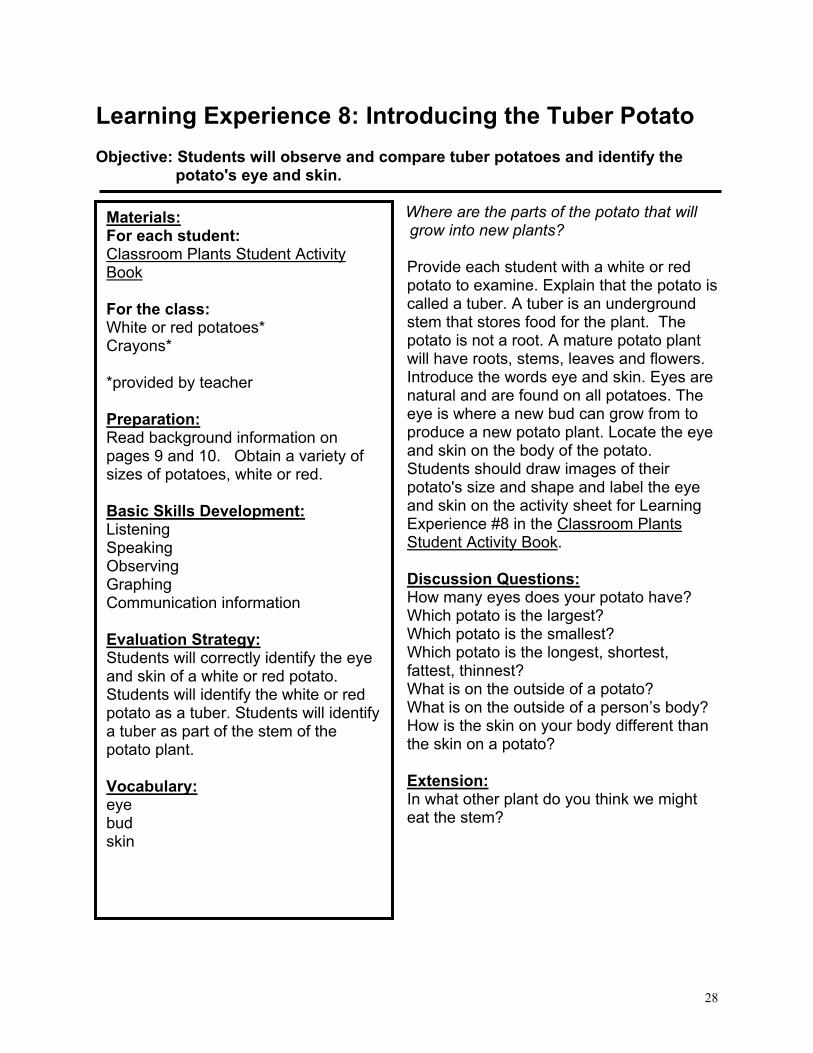
Provide each student with a white or red potato to examine. Explain that the potato is called a tuber. A tuber is an underground stem that stores food for the plant. The potato is not a root. A mature potato plant will have roots, stems, leaves and flowers. Introduce the words eye and skin. Eyes are natural and are found on all potatoes. The eye is where a new bud can grow from to produce a new potato plant. Locate the eye and skin on the body of the potato. Students should draw images of their potato's size and shape and label the eye and skin on the activity sheet for Learning Experience #8 in the Classroom Plants Student Activity Book. Discussion Questions: How many eyes does your potato have? Which potato is the largest? Which potato is the smallest? Which potato is the longest, shortest, fattest, thinnest? What is on the outside of a potato? What is on the outside of a person’s body? How is the skin on your body different than the skin on a potato? Extension: In what other plant do you think we might eat the stem?
Materials: For each student: Classroom Plants Student Activity Book For the class: White or red potatoes* Crayons* *provided by teacher Preparation: Read background information on pages 9 and 10. Obtain a variety of sizes of potatoes, white or red. Basic Skills Development: Listening Speaking Observing Graphing Communication information Evaluation Strategy: Students will correctly identify the eye and skin of a white or red potato. Students will identify the white or red potato as a tuber. Students will identify a tuber as part of the stem of the potato plant. Vocabulary: eye bud skin

29
Learning Experience 9: Growing White or Red Potatoes
Objective: Students will observe and record the growth of tuber potatoes.
What must be done to produce a new potato plant? Session 1: For the class, plant a whole white potato in soil in the plant pot. Leave one potato unplanted next to the planted one. Direct the students to observe over several weeks what happens to each potato. Direct the students to use the small box magnifiers to make some of their observations. Students should record their observations through drawings on the activity sheet for Learning Experience #9 in the Classroom Plants Student Activity Book. Discussion Questions: Are there any differences in what is observed about each potato? What happens to the eyes of the potato in each case? Are any other changes occurring? Session 2: Inform the students that potatoes are generally started from potato pieces. The "seed pieces" may be small whole potatoes or potatoes cut into 1.5 to 2 ounce pieces. Each seed piece should have at least one or two good "eyes." Plant the pieces soon after cutting in an opaque plastic trash bag. Cover each potato piece with about 10 cm of potting soil. Leave the plastic bag open. Place in a warm sunny place. Keep the soil moist but not soggy. Leave a few seed pieces unplanted. Discussion Questions: Are there any differences in what is observed about each of the seed pieces that are in the plastic bag and those that were not planted?
Materials: For each student: Classroom Plants Student Activity Book For the class: 7 small box magnifiers Plant pot Potting soil White or red potatoes* Knife* Crayons* Trash bag* *provided by teacher
Preparation: It is suggested that potatoes be purchased from a farm market or farmer. Vegetables sold in food stores may have been treated to prevent sprouting.
Session 1: Read the background information on pages 9 and 10. Select two potatoes of similar size and small enough for one to fit in the plant pot. One potato will be planted and one will not.
Session 2: When leaf growth reaches 1-15 cm, pick the biggest leaf to save, cut off the others. After 5-6 week, gently reach into the soil to find new potatoes. This learning experience will be on-going. Daily observations of all plants are recommended.

30
Learning Experience 9 continued Page 2
What happens to the eyes of the seed pieces in each case? Are any other changes occurring? Are there any sprouts? Is the whole potato needed to grow another potato plant? Extension: What are some of the uses of potatoes? Where in the world are potatoes grown?
Basic Skills Development: Listening Questioning Speaking Observing Generalizing Graphing Communication Evaluation Strategy: Students will observe the growth of a white or red potato and record changes through drawings. Students will identify that some plants can be grown from parts of the plant. In this case, only part of the potato is needed to produce a new potato plant. Vocabulary: eyes sprout seed pieces

31
Learning Experience 10: Water Rooting of Potatoes and other Plants
Objective: Students will observe and record the growth of water rooted plant.
Can plants be rooted and grown in water?
Explain to the students that you are going to try to grow a potato from a potato plant(s). Students should observe daily the development of the potato plant and add water as needed. Students should draw and label pictures of the potato, sprouts, leaves, stems and roots as they develop on their activity sheet for Learning Experience #4 in the Classroom Plants Student Activity Book.
Discussion Questions: Why do you think we need to add water to the container? What happens to the eyes of the potatoes Are any other changes occurring? Are there any sprouts? Is the whole potato needed to grow another potato plant? Why do we keep having to add water? What do you think the roots are doing for the potato plant? How does water get into the leaves of the potato plant? Extension: A sweet potato or a winter onion may be substituted for the white potato.
Materials: For each student: Classroom Plants Student Activity Book For the class: Clear plastic container Toothpicks White potato* Sweet potato (optional)* Winter onion (optional)* Knife* Crayon* Water* *provided by teacher
Preparation: Read background information on pages 9 and 10. The teacher will need to suspend a white potato in a plastic container of water. Toothpicks will need to be pushed into the potato around the middle. They will rest on the top rim of the container holding half the potato out of the water. Approximately half of the potato should be covered with water. When the potato has grown roots, the potato can be planted in soil. Cover half the original potato with soil.
Basic Skills Development: Listening Speaking Observing Graphing Communication information Inferring
Evaluation Strategy: Students will observe the growth of a white potato, sweet potato, or winter onion and identify the roots, sprouts, and leaves.
Vocabulary: suspend sprouts leaves stems roots

32
Learning Experience 11: Growing Vegetable Tops Objective: Students will observe and record the growth of vegetable tops.
What might happen if the top section of a vegetable is placed in a petri dish with water and another top section is placed in a petri dish without water? Discussion Questions: Why do you think we need to add water to the petri dish? Are any other changes occurring? Are there any sprouts? How does water get into the leaves of the plant? What happens to the water? Where does it go? What is it used for? Why do we need to give the vegetable tops more water? What is happening to the vegetable top with no water?
Extension: Growing pineapple tops is another interesting experiment for students to try. Select a pineapple with a dense set of leaves (called the crown) from the grocery store. Cut off the top growth, leaving an inch or two of the fruit attached. Expose the crown cut to the air for a couple of days to dry; a fresh, bleeding cut may cause decay. Set the top, fruit down, on top of a pot of clean moist sand. Keep the cutting in diffused light, away from drafts, until it roots. Rooting will take six weeks or more. Once the pineapple has rooted, transfer the plant to soil. Place the plant in bright light, to bring out a real sheen on the pointed leaves.
Materials: For the class: Petri dishes Selected root vegetables beets, carrots, radishes, parsnips, rutabaga or turnips* Pineapple* Plates* Knife* Gravel* Water* *provided by teacher
Preparation: Read background information on page 10. Set the section, cut side down in a petri dish. Add water so that the petri dish is nearly full. Keep water at this level. Put a cut vegetable top in a petri dish without water. Cover the bottom of a plate or petri dish with a layer of small gravel. Take a two-inch section from the top of a vegetable. Place the vegetable tops on the gravel, cut side down. Add enough water to cover the bottoms of the vegetables. Place the petri dish out of direct sunlight. Check the water level daily. If your vegetable begins to shrivel, there is not enough water in the petri dish and it will not sprout. Sprouts should appear in about a week and there will be new growth everyday. When the top sprout is 7-8 days old, place the petri dish in the sun.
Basic Skills Development: Listening Speaking Observing Graphing Communication information

33
Learning Experience 11 continued Page 2
Evaluation Strategy: Students will observe plant growth and describe the need the plant has for water. Vocabulary: beets carrots radishes parsnips rutabaga turnips
34
Learning Experience 12: Letter Garden Objective: Students will observe and record the growth of letter garden.
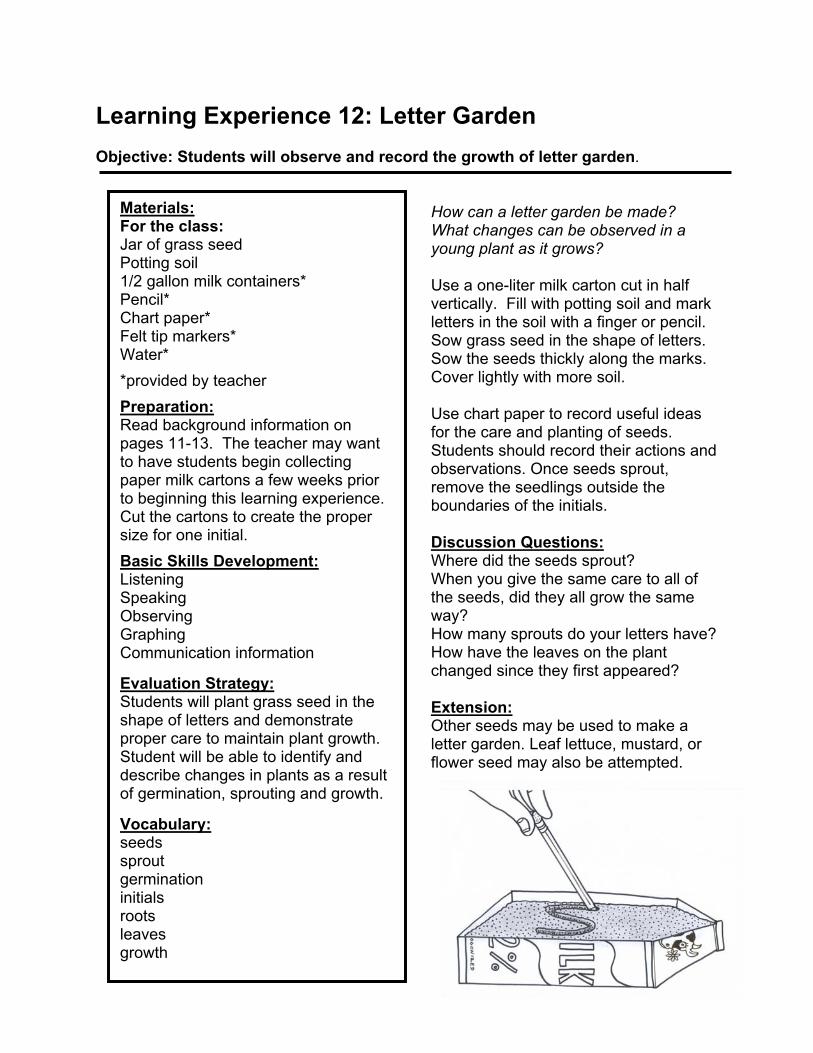
How can a letter garden be made? What changes can be observed in a young plant as it grows? Use a one-liter milk carton cut in half vertically. Fill with potting soil and mark letters in the soil with a finger or pencil. Sow grass seed in the shape of letters. Sow the seeds thickly along the marks. Cover lightly with more soil. Use chart paper to record useful ideas for the care and planting of seeds. Students should record their actions and observations. Once seeds sprout, remove the seedlings outside the boundaries of the initials. Discussion Questions: Where did the seeds sprout? When you give the same care to all of the seeds, did they all grow the same way? How many sprouts do your letters have? How have the leaves on the plant changed since they first appeared? Extension: Other seeds may be used to make a letter garden. Leaf lettuce, mustard, or flower seed may also be attempted.
Materials: For the class: Jar of grass seed Potting soil 1/2 gallon milk containers* Pencil* Chart paper* Felt tip markers* Water*
*provided by teacher
Preparation: Read background information on pages 11-13. The teacher may want to have students begin collecting paper milk cartons a few weeks prior to beginning this learning experience. Cut the cartons to create the proper size for one initial.
Basic Skills Development: Listening Speaking Observing Graphing Communication information Evaluation Strategy: Students will plant grass seed in the shape of letters and demonstrate proper care to maintain plant growth. Student will be able to identify and describe changes in plants as a result of germination, sprouting and growth. Vocabulary: seeds sprout germination initials roots leaves growth

35
Learning Experience 13: Flowers Objective: Students will observe and record the growth of flowers from seeds.
What part of the plant produces the seed?
Divide the class into four groups. Each group should count out 12 seeds. Sow single seeds in each section of an egg carton. When plants reach several inches, transplant them into large, properly drained pots. Position strings at windows for the sweet peas to climb.
Discussion Questions: What will your seeds need to grow?
What will happen if you forget something?
How many plants grew from 12 seeds? How many flowers do you have?
What happens to flowers? Where do seeds come from? Which plant grew the fastest? Which plant grew the slowest? Why did we need to transplant our plants? Why do plants generally make many seeds?
Extension: Collect wildflowers and dry flowers' heads down in two parts cornmeal and one part borax. These flowers can then be used in wreaths or arrangements.
Materials: For the class: Potting soil 6 plant pots Marigold seeds Pea seeds Bean seeds Egg cartons* String* Gravel* Water* *provided by teacher Preparation: Dwarf marigold seeds are recommended as they will sprout in less than a week and bloom in three months. Climbing Sweet Peas are recommended as they will sprout in two weeks and will climb. Students should plant just one variety and take the responsibility for caring for their own plants. Basic Skills Development: Listening Speaking Observing Graphing Communication information Evaluation Strategy: Students will grow and maintain flowering plants. Vocabulary: transplant wildflowers
36
MORE IDEAS
Language Arts ♦ Arrange a trip to a nursery. Ask the employees to show the children blooming plants.
The employees should tell why the plants bloom and what will happen to the plants after they bloom. Have the employees explain how to care for plants. You might want to buy a plant for your classroom.
♦ Show the children items that you would use for gardening. Allow them to guess the name and use of the tool. An extension of the project would be to place item in a box and have the children identify the item by just using their sense of touch to identify the item.
♦ Outdoors provide buckets, watering cans, empty seed packages, shovels, hoes etc. and have the children pretend to plant their own garden.
Book Suggestions:
The Carrot Seed by Kraus A Tree is Nice by Udry Over in the Meaqdow by Ezra, Jack Keats Planting a Rainbow by Lois Ehlert Songs Little Seed... (I'm a Little Teapot) Here's a little seed in the dark, dark ground. Out comes the warm sun, yellow and round. Down comes the rain, wet and slow. Up comes the little seed, grow, grow, grow! Flower Garden... (The Farmer In The Dell) The farmer plants the seeds The Farmer plants the seeds Hi, Ho and Cheery O The farmer plants the seeds. (Use the following verses.) The sun begins to shine... The rain begins to fall... The plants begin to grow... The flowers smile at us... This is the Way We Plant the Seeds... (Mulberry Bush) This is the way we plant the seeds, Plant the seeds, plant the seeds. This is the way we plant the seeds, Early in the springtime. Other verses:
37
This is the way we dig the hole, put in the seeds, cover the seeds, water the seeds, check the seeds. Little Wiggle Worm... The Eensy-Weensy Spider The little wiggle worm (wiggle pipe cleaner worm) Went crawling underground. (wiggle worm under hand) Down Came the rain; (wiggle fingers downward) Soon mud was all around. (open arms wide) Rain filled the tunnels (open hand; move fingers together) And pushed out the little worm. (push worm through other hand) So the puddles on the ground (make an O with hand) Were the only place to squirm. (wiggle worm into O) ♦ Provide plastic worms (found in the fishing department), and potting soil and allow
the children to play freely.
Art ♦ Have students bring in pictures of fruits and vegetables that they have cut out of
magazines. Have them paste the correct pictures on two large sheets of paper, labeled “Fruits” and “Vegetables.”
♦ Gather several types of seeds, wax paper, string, and glue in squeezable bottles. Have the children squeeze glue onto wax paper to make designs approximately 4'' to 5" long. Have them sprinkle the seeds onto the glue squiggles. Tell them to leave the extra seeds on the paper until the glue is dry and then shake the excess seeds into a bowl. Have the children gently peel their seed squiggles from the wax paper. Tie a string to each squiggle and hang from the ceiling.
♦ In a plastic bag place seeds that you'd find from various fruits and vegetables. Find and cut out all the fruits or vegetables the seeds came from out of magazines and laminate them. Have the children try and match the correct seed to it's mate. Some examples...apple seeds, orange seeds, tomato seeds, strawberry and raspberry seeds, peach pit, grape seeds, and sunflower seeds.
♦ Have the children cut their paper plate into the shape of a sunflower and then paint it yellow to make 'flowers'. When plate is dry put glue on plate and glue sunflower seeds on the middle of their plates. Attach them to green paper stems to create the leaves of the plant.
♦ Pop popcorn and place handfuls of popcorn in plastic baggies and add a different color to each bag of powdered tempera paint. Shake well to distribute paint all over the popcorn. Cut stems and leaves out of green construction paper and glue them to tagboard. Glue on the colored popcorn to make spring flowers.
Social Studies ♦ Encourage studying a particular plant of interest. Check out information about the
history of the plant, the parts of the plant, uses, where it grows, what, if any, parts we or other creatures eat. They may share their particular plants by posters, reports, or drawings.

38
Math ♦ Provide flower pots with numbers written on them. Children must "plant" correct
number of flowers. Science ♦ Have the students bring in samples of fresh fruit and vegetables from home. Two or
three samples of each kind will be adequate. Request only fruits and vegetables that are familiar to all students.
♦ Display samples of fruits and vegetables and ask the students which ones they think have seeds. Write their responses on the chalkboard. Distribute sliced fruits and vegetables to the students. It is not necessary nor desirable for students to have a slice of every sample. Students should observe the samples and discuss which samples have seeds. At this point you should establish that the parts of the plant that contain or are seeds are called fruits.
♦ Have students examine the samples of plant parts that do not have seeds. Identify the samples of plant parts that are roots, stems, leaves, or flowers. Explain that any part of a plant that humans eat, whether a leaf, stem, root, or flower, is called a vegetable.
♦ Gather a variety of roots and plant stems. Place them in cups of dyed water to observe how roots work to absorb and conduct water from the soil for a plant. Queen Anne's Lace, for example, will show evidence of water conduction as the white flower will turn the color of the water's dye. If you try dye with celery, it will work better if the stalk has some leaves; transpirational pull accelerates the process.
♦ Purchase a rain gauge from a hardware store or make one from a clear container by marking inches along the outside with a ruler and permanent marker. Place the gauge outside and support it so it will not topple. Have the children check each morning for overnight rainfall, or after a rainstorm or shower during the day. Graph the amounts of rainfall for the month.
♦ Purchase several packages of different types of seeds. Read the directions on the seed packages to the students and allow them to plant the seeds in soil-filled paper cups. Be sure to mark each cup with the type of seeds inside. Have the children observe the seeds daily and water as needed. Each day, have the children describe what they see happening to the seeds.
♦ Place several types of seeds, leaves and buds on the science table along with magnifying glasses. Allow the children to use the magnifying glasses to observe the small details of the seeds, leaves and buds. Ask them to describe the details they see.

39
INQUIRY AND PROCESS SKILLS
Classifying Arranging or distributing objects or events in classes according to some method or system.
Collecting Data Obtaining visible or measurable information which illustrates
a specific situation. Communicating Displaying or transmitting information to others. Generalizing Drawing general conclusions from information. Formulating Hypothesis Constructing a proposition or assumption of what is thought likely to be true based on reasoning, which serves as a tentative testable theory. Identifying Variables Recognizing characteristics of objects or events which are
constant or change under different conditions. Inferring Making a statement based on reasoning to explain an
observation. Interpreting Data Analyzing information that has been collected and organized
and described apparent patterns or relationships in the information.
Making Decisions Choosing an alternative from among several and basing the
judgment on defendable reasons. Manipulating Handling or treating materials, equipment, or procedures
skillfully and effectively. Measuring Making quantitative observations by comparing to standard. Observing Becoming aware of an object or event by using any of the
senses to identify properties. Predicting Making a forecast or estimate of what future events may
occur. Replicating Performing acts that duplicate demonstrated symbols or
patterns. Using Numbers Stating and applying mathematical rules or formulas to
calculate or compute quantities from basic measurements.

40
GLOSSARY Chlorophyll: the green coloring matter of leaves and plants, needed for
photosynthesis. Different: not identical in character or quality. Disease: the condition of the body in which there is incorrect function. Embryo: the part of a seed from which a plant develops (baby plant). Environment: people, animals, or objects surroundings. Fruit: the developed ovary of a seed plant. Germinate: to begin to grow or develop. Flower: the part of the plant that bears the seed and usually has
brightly colored petals; blossoms or blooms. Growth: the act or process of growing; size or stage of development. Height: the distance upward; distance between the lowest and
highest points. Leaf: any of the green parts growing from the stem of the plant. Magnify: to increase the size of an object as with a lens. Mature plant: the adult plant. Nutrients: providing nourishment. Nuts: a dry fruit consisting of a kernel that can be eaten and a
shell. Observe: to become aware of an object or event by using any of the
senses to identify properties. Photosynthesis: the process by which plants use the sunlight as the source of
energy to change water and carbon dioxide into food for the plant with the help of chlorophyll.
Plant Living thing that usually can produce its own food, reproduces, and rarely is able to move around. Many are green and have a substance called chlorophyll. Examples are vines, shrubs, flowers, trees, and bushes.

41
Property: any trait, characteristic, or essential quality of a living or non-living thing.
Root: underground part of the plant. Serves to anchor the plant
and absorb water and minerals from the soil. Seed: the part of a flowering plant that will grow into a new plant
under the right conditions. Seed coat: the skin or coating of a seed. Seedling: a plant grown from a seed; any young plant. Shape: the appearance of the figure of body of a person or object. Soil: the thin layer of the earth’s surface in which plants grow. Sprout: a new growth; to put forth buds or shoots. Stem: the main stalk or trunk of a tree, shrub, or other plant,
extending above the ground and bearing the leaves, flowers, etc.
Sunlight Light that comes from the sun. Survival: continue to live or be in existence. Taproot: A main root for some plants which grows down into the soil
vertically. Little hair-like roots, or secondary roots, grow off the taproot. A carrot is an example of a taproot as it absorbs and conducts water and minerals from the soil for the carrot plant.
Texture: the visual and tactile quality of a surface. Vegetable: the edible roots, leaves, flowers, or stems of a plant.

42
TEACHER REFERENCES Heller, Ruth. The Reason for a Flower Carle, Eric. The Tiny Seed Henkes, Kevin. Chrysanthemum Polette, Nancy. The Hole by the Apple Tree Cameron, Ann. The Seed Jordon, Helme J. How a Seed Grows Kuchalla, S. All About Seeds, Troll, 1982 Mitgutsch, A. From Seed to Pear Merrill, Clarie. A Seed is a Promise. Scholastic Book Service. Sholinsky, Jane. Growing Plants from Fruits and Vegetables. Scholastic Book Services, 1974. Media Library Call the media library to order media materials and to check on new materials that are available. The number to be reached is (716) 376-8212. Web Sites http://www.kidsgardening.com/ http://www.botany.com http://www.seedtests.com http://www.koning.ecsu.ctstateu.edu/Plants_human/seedgerm.html
43
Major Science Concepts to be Addressed Living objects, including plants and animals, live and thrive when their needs are met. Each plant has properties that enable the plant to meet its needs. The parts of plants have functions which help the plant to meet its needs. Roots help plants take in water. Leaves help plants utilize sunlight. Stems, stalks, trunks and other similar structures provide support for the plant. The parts of some plants undergo seasonal changes which enable the plant to grow. For example: Seeds germinate Leaves form and grow


![[University Prep Science and Math - Elementary]...University Prep Science & Math Elementary school is located in Lafayette Park area. We are a Science Technology Engineering Arts and](https://img.dokumen.tips/doc/110x75/602e40d06ff059519e2f94d2/university-prep-science-and-math-elementary-university-prep-science-.jpg)