Embed Size (px)
Citation preview
DESIGN CHALLENGE EXHIBIT:
CABLE-STAYED BRIDGE
Dream Big Engineering Challenge DIY Cable-Stayed Bridge — Page 2
INSTRUCTIONS FOR BUILDING THE INTERACTIVE BRIDGE MODEL
☐ Two pieces of 2 x 4 wood, each cut to 8 1/2" high (for bridge pylons) ☐ Two wooden pylon bases: 3/4" thick x 9 1/4" long x 5 1/8" wide ☐ Four wooden pylon sides: 3/4" thick x 9 1/2" tall x 1 3/8" wide ☐ “Roadway” made out of 3 mm thick Sintra plastic: 3 1/8" wide x 65" long ☐ Spring clamps (to hold pylon bases to table or countertop) ☐ Optional: string and scissors (for additional “cable” options)
Materials:
Construction:
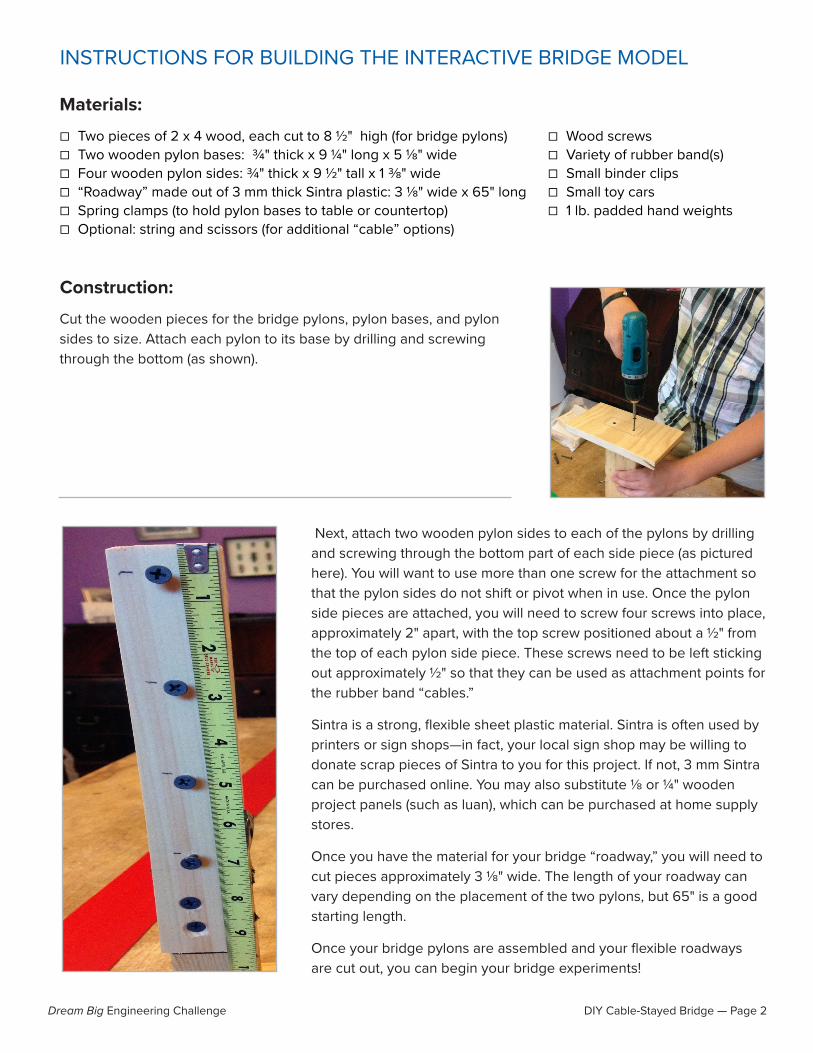
Cut the wooden pieces for the bridge pylons, pylon bases, and pylon sides to size. Attach each pylon to its base by drilling and screwing through the bottom (as shown).
Next, attach two wooden pylon sides to each of the pylons by drilling and screwing through the bottom part of each side piece (as pictured here). You will want to use more than one screw for the attachment so that the pylon sides do not shift or pivot when in use. Once the pylon side pieces are attached, you will need to screw four screws into place, approximately 2" apart, with the top screw positioned about a 1/2" from the top of each pylon side piece. These screws need to be left sticking out approximately 1/2" so that they can be used as attachment points for the rubber band “cables.”
Sintra is a strong, flexible sheet plastic material. Sintra is often used by printers or sign shops—in fact, your local sign shop may be willing to donate scrap pieces of Sintra to you for this project. If not, 3 mm Sintra can be purchased online. You may also substitute 1/8 or 1/4" wooden project panels (such as luan), which can be purchased at home supply stores.
Once you have the material for your bridge “roadway,” you will need to cut pieces approximately 3 1/8" wide. The length of your roadway can vary depending on the placement of the two pylons, but 65" is a good starting length.
Once your bridge pylons are assembled and your flexible roadways are cut out, you can begin your bridge experiments!
☐ Wood screws ☐ Variety of rubber band(s) ☐ Small binder clips ☐ Small toy cars ☐ 1 lb. padded hand weights
Dream Big Engineering Challenge DIY Cable-Stayed Bridge — Page 3
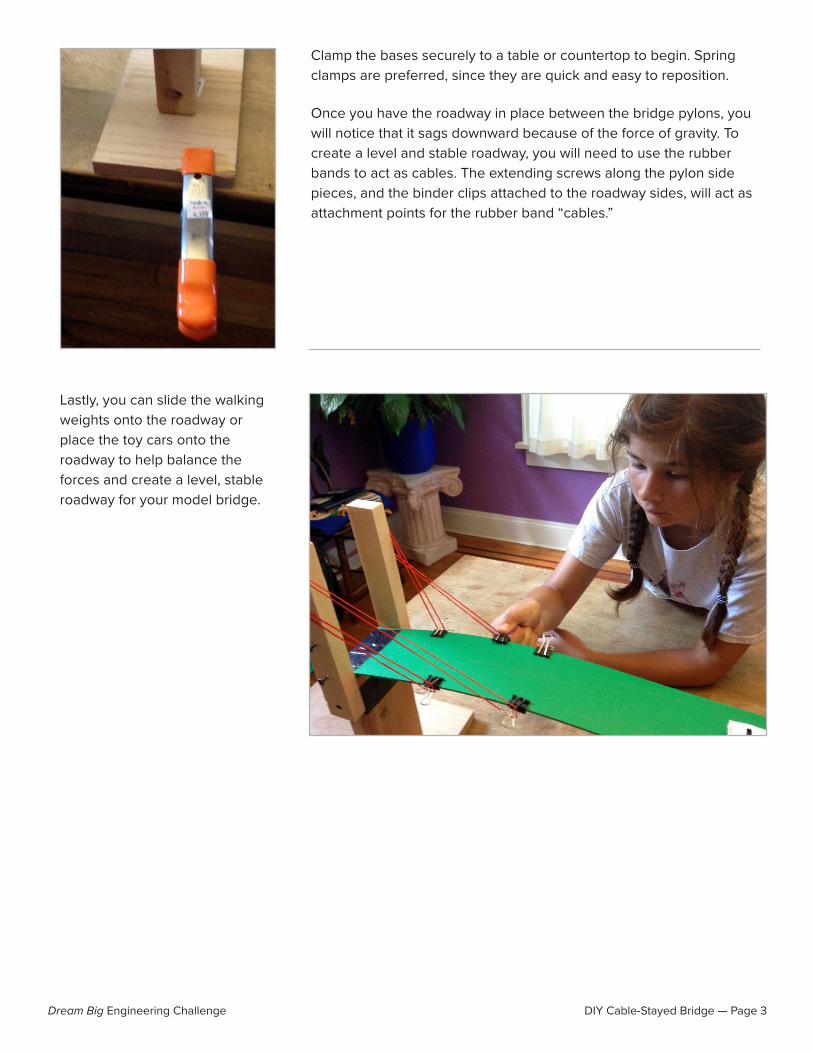
Clamp the bases securely to a table or countertop to begin. Spring clamps are preferred, since they are quick and easy to reposition.
Once you have the roadway in place between the bridge pylons, you will notice that it sags downward because of the force of gravity. To create a level and stable roadway, you will need to use the rubber bands to act as cables. The extending screws along the pylon side pieces, and the binder clips attached to the roadway sides, will act as attachment points for the rubber band “cables.”
Lastly, you can slide the walking weights onto the roadway or place the toy cars onto the roadway to help balance the forces and create a level, stable roadway for your model bridge.
Dream Big Engineering Challenge DIY Cable-Stayed Bridge — Page 4
CHALLENGE OPERATIONS
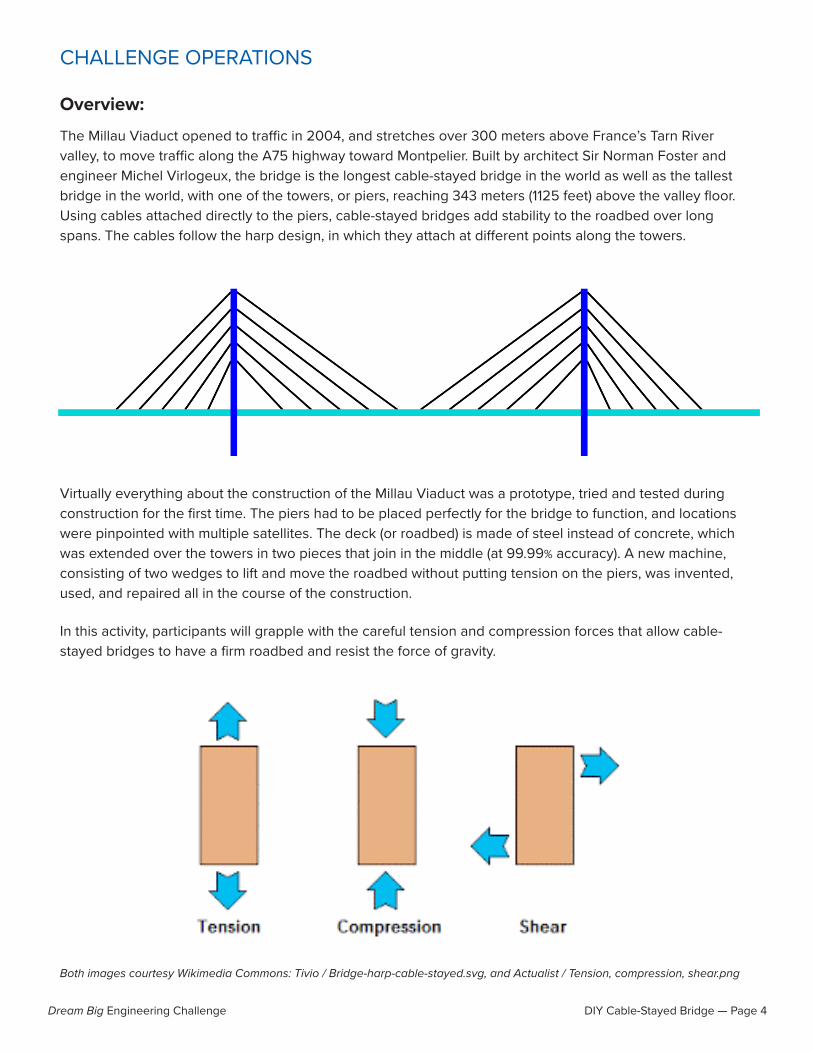
The Millau Viaduct opened to traffic in 2004, and stretches over 300 meters above France’s Tarn River valley, to move traffic along the A75 highway toward Montpelier. Built by architect Sir Norman Foster and engineer Michel Virlogeux, the bridge is the longest cable-stayed bridge in the world as well as the tallest bridge in the world, with one of the towers, or piers, reaching 343 meters (1125 feet) above the valley floor. Using cables attached directly to the piers, cable-stayed bridges add stability to the roadbed over long spans. The cables follow the harp design, in which they attach at different points along the towers.
Virtually everything about the construction of the Millau Viaduct was a prototype, tried and tested during construction for the first time. The piers had to be placed perfectly for the bridge to function, and locations were pinpointed with multiple satellites. The deck (or roadbed) is made of steel instead of concrete, which was extended over the towers in two pieces that join in the middle (at 99.99% accuracy). A new machine, consisting of two wedges to lift and move the roadbed without putting tension on the piers, was invented, used, and repaired all in the course of the construction.
In this activity, participants will grapple with the careful tension and compression forces that allow cable-stayed bridges to have a firm roadbed and resist the force of gravity.
Overview:
Both images courtesy Wikimedia Commons: Tivio / Bridge-harp-cable-stayed.svg, and Actualist / Tension, compression, shear.png
Dream Big Engineering Challenge DIY Cable-Stayed Bridge — Page 5
Program Goals:
Materials Needed:
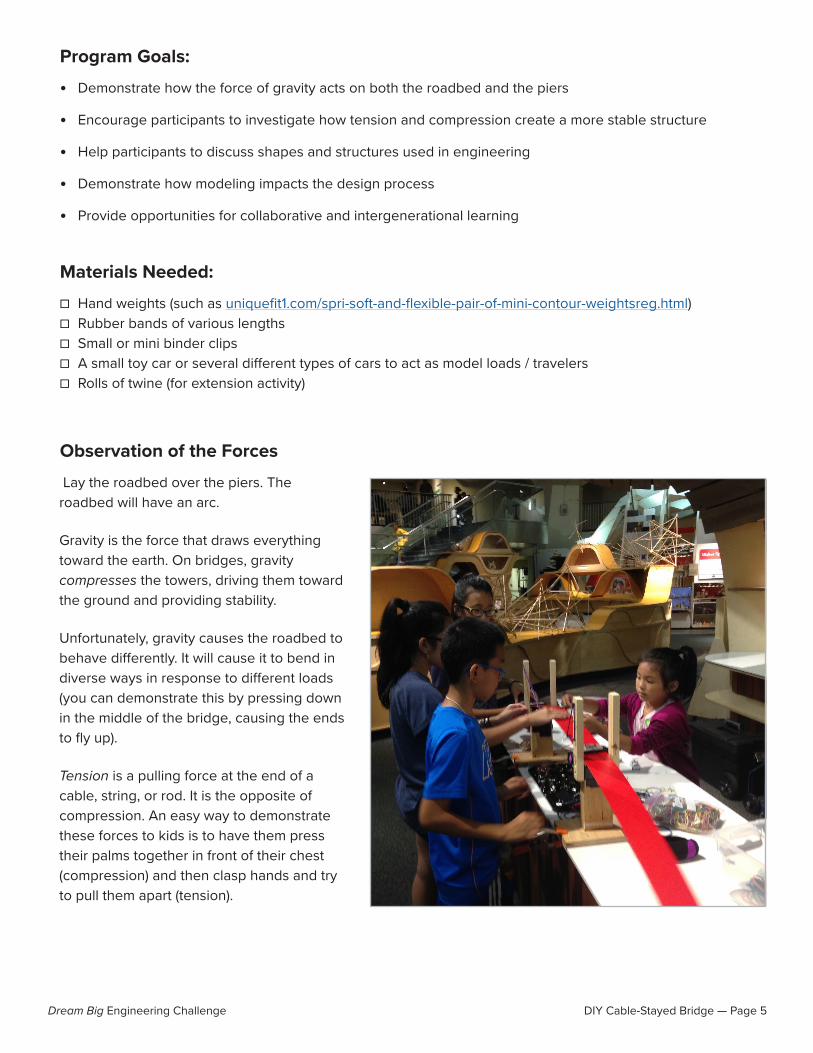
Observation of the Forces
• Demonstrate how the force of gravity acts on both the roadbed and the piers
• Encourage participants to investigate how tension and compression create a more stable structure
• Help participants to discuss shapes and structures used in engineering
• Demonstrate how modeling impacts the design process
• Provide opportunities for collaborative and intergenerational learning
☐ Hand weights (such as uniquefit1.com/spri-soft-and-flexible-pair-of-mini-contour-weightsreg.html) ☐ Rubber bands of various lengths ☐ Small or mini binder clips ☐ A small toy car or several different types of cars to act as model loads / travelers ☐ Rolls of twine (for extension activity)
Lay the roadbed over the piers. The roadbed will have an arc.
Gravity is the force that draws everything toward the earth. On bridges, gravity compresses the towers, driving them toward the ground and providing stability.
Unfortunately, gravity causes the roadbed to behave differently. It will cause it to bend in diverse ways in response to different loads (you can demonstrate this by pressing down in the middle of the bridge, causing the ends to fly up).
Tension is a pulling force at the end of a cable, string, or rod. It is the opposite of compression. An easy way to demonstrate these forces to kids is to have them press their palms together in front of their chest (compression) and then clasp hands and try to pull them apart (tension).
Dream Big Engineering Challenge DIY Cable-Stayed Bridge — Page 6
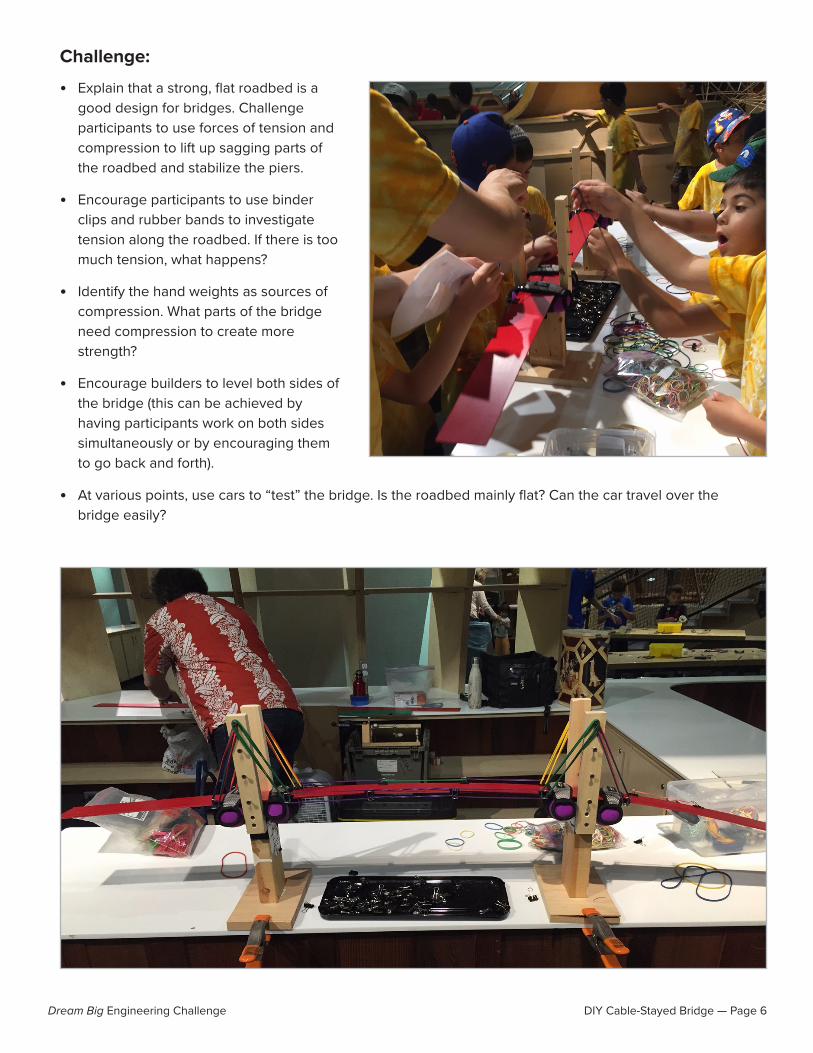
Challenge:
• Explain that a strong, flat roadbed is a good design for bridges. Challenge participants to use forces of tension and compression to lift up sagging parts of the roadbed and stabilize the piers.
• Encourage participants to use binder clips and rubber bands to investigate tension along the roadbed. If there is too much tension, what happens?
• Identify the hand weights as sources of compression. What parts of the bridge need compression to create more strength?
• Encourage builders to level both sides of the bridge (this can be achieved by having participants work on both sides simultaneously or by encouraging them to go back and forth).
• At various points, use cars to “test” the bridge. Is the roadbed mainly flat? Can the car travel over the bridge easily?

Educational Resources:
Content Resources:
Discovery Education on stable and unstable structures (lesson plans for teachers): discoveryeducation.com/teachers/free-lesson-plans/stable-and-unstable-structures.cfm
PBS’s Building Big lessons “Bridges” and “Forces”: pbs.org/wgbh/buildingbig/bridge/index.html pbs.org/wgbh/buildingbig/lab/forces.html
American Society for Engineering Education’s lessons and resources on bridge design: teachers.egfi-k12.org/tag/bridge-design/
Science and Engineering in the Lives of Students provides several lessons on tension and compression: theselsproject.org/activities-tension-and-compression/
How flowers help us understand why bridges collapse: gizmodo.com/how-flowers-help-us-understand-why-bridges-collapse-1775500894
Interactive comparison of several notable bridges: upload.wikimedia.org/wikipedia/commons/3/37/Comparison_of_notable_bridges_SMIL.svg
Foster and Partners on the Millau Viaduct: fosterandpartners.com/projects/millau-viaduct/
Design Challenge Exhibit designed by Alchemy Studio for the American Society of Civil Engineers. All rights reserved.
Extension Activities:
Use string rather than rubber bands to secure the lengths of the bridge. As the number of cables increases, the cables already in place may have to be adjusted as the tension on each specific length of cable changes in relation to the others.
Use two equal-size roadbeds, which must meet in the middle (akin to the Millau Viaduct). Can participants get them to meet with a good degree of accuracy? This is an advanced challenge!
ACKNOWLEDGMENTS