Embed Size (px)
Citation preview
User manual www.alientek.com
i i
User
Manual
User
Manual
User Manual
D8 Smart Digital Amplifier &DAC
D8-AMP&DAC User Manual
ALIENTEK
D8 Smart Digital Amplifier &DAC
User manual www.alientek.com
ii ii
D8-AMP&DAC User Manual
Contents
1. Product Overview ...................................................................................................... 1
2. Precautions ................................................................................................................. 1
3. Packing list ................................................................................................................. 2
4. Specifications ............................................................................................................. 2
5. Parts description ......................................................................................................... 3
6. Speaker wiring ........................................................................................................... 4
7. Remote controller ....................................................................................................... 5
8. Driver and software installation ................................................................................. 6
8.1. D8 USB Driver installation ....................................................................................................... 6
8.2. Foobar 2000 installation ............................................................................................................ 8
8.3. Using of Foobar 2000 .............................................................................................................. 10
9. D8 instruction ........................................................................................................... 15
9.1. Main interface ......................................................................................................................... 15
9.2. Menu setting interface ............................................................................................................. 19
10. Warranty items ....................................................................................................... 23
11. Others ..................................................................................................................... 23

ALIENTEK
D8 Smart Digital Amplifier &DAC
User manual www.alientek.com
D8-AMP&DAC User Manual
1. Product Overview
D8 is a professionally designed smart and multi-function digital amplifier with a built-in
DAC, launched by “Guangzhou Xingyi Electronic and Technology Co.,Ltd” recently. It’s mainly
characteristics are as follows:
Support optical input, coaxial input, USB input and analog input, optical, coaxial, USB
support up to 192K, 24bit sampling rate, sampling rate automatic detection;
Support amplifier and headphone output, amplifier output up to 80Wx2 @ 4Ω, headphone
amplifier can direct push 600Ω headphone;
Employ 1.3-inch OLED cold screen, support waveform and spectrum display;
Supports 14 kinds of EQ modes, as well as Treble and Bass adjustment from -12dB to
+12dB;
Support automatic startup and automatic shutdown;
Support automatic output protection;
Support remote control and rotary encoder control;
2. Precautions
1. To avoid insecurity, we should follow some basic safety precautions when using D8.
2. Read the instructions carefully and follow the operating instructions.
3. Be sure to check whether the power adapter is DC12V ~ DC32V output before power on,
mismatched power adapter may cause damage to the equipment, such cases is not covered by
the warranty terms.
4. To reduce the risk of fire or electric shock, do not expose the unit in wet, overheated or
non-ventilated environment.
5. Do not disassemble, modify or repair the machine in any way privately, damage caused by
which to the machine is not covered under warranty terms.
6. Do not drop or heavily impact of the machine.
7. If there is any abnormal phenomenon, unplug the machine power immediately and stop using
the machine. Such as: smoking, abnormal sound or smell.
ALIENTEK
D8 Smart Digital Amplifier &DAC
User manual www.alientek.com
D8-AMP&DAC User Manual
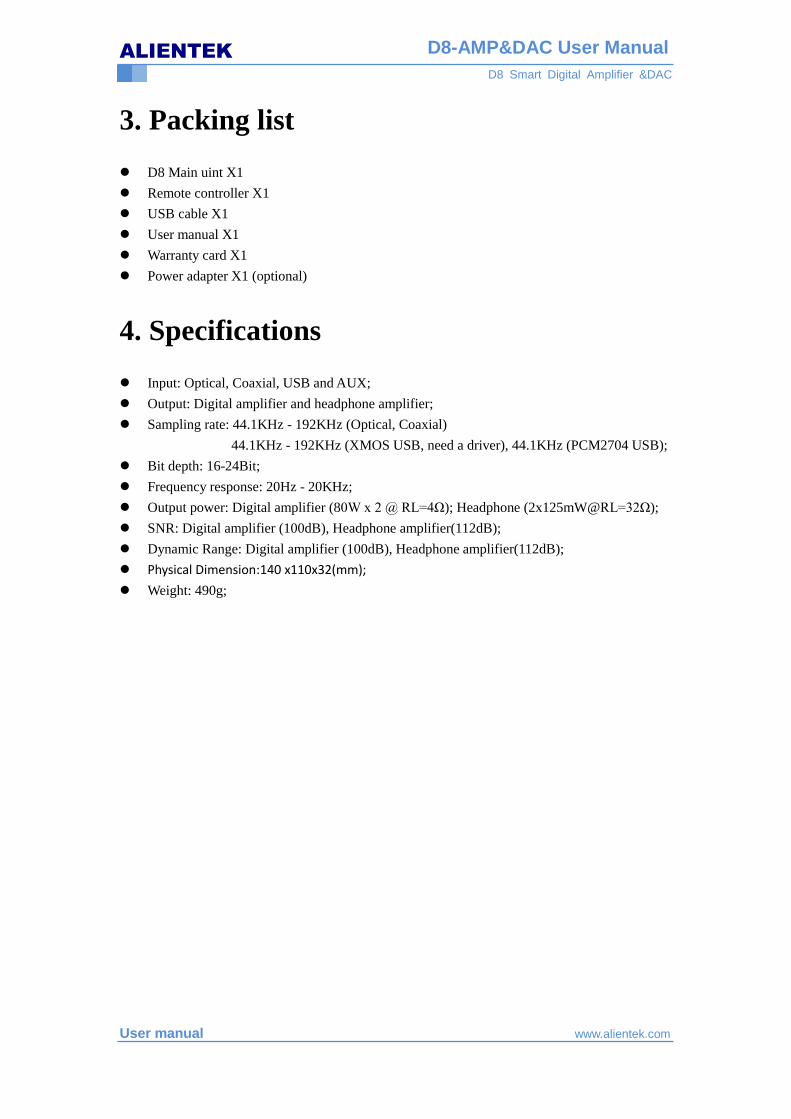
3. Packing list
D8 Main uint X1
Remote controller X1
USB cable X1
User manual X1
Warranty card X1
Power adapter X1 (optional)
4. Specifications
Input: Optical, Coaxial, USB and AUX;
Output: Digital amplifier and headphone amplifier;
Sampling rate: 44.1KHz - 192KHz (Optical, Coaxial)
44.1KHz - 192KHz (XMOS USB, need a driver), 44.1KHz (PCM2704 USB);
Bit depth: 16-24Bit;
Frequency response: 20Hz - 20KHz;
Output power: Digital amplifier (80W x 2 @ RL=4Ω); Headphone (2x125mW@RL=32Ω);
SNR: Digital amplifier (100dB), Headphone amplifier(112dB);
Dynamic Range: Digital amplifier (100dB), Headphone amplifier(112dB);
Physical Dimension:140 x110x32(mm);
Weight: 490g;

ALIENTEK
D8 Smart Digital Amplifier &DAC
User manual www.alientek.com
D8-AMP&DAC User Manual
5. Parts description
A: Professional headphone output jack(Can promote 600Ω headphones, a headset adapter is
required when using ordinary headphones)
B: OLED information display area (including spectrum waveform, input channels, sampling
rate, volume, EQ and menu settings, etc.)
C: Remote receiver window
D: Rotary encoder (left rotate to decrease volume, right rotate to increase volume; click to
Switch input channels; double-click to enter the menu settings; long press to turn ON or OFF)
Double-click to enter the menu settings: Includes Display effect, Input channel,
Equalizer, Bass set, Treble set, Mute related, Language, Auto backlight, Auto shutdown,
Auto power ON, Reset and Exit 12 setting options. Left-handed or right-handed to
select the desired option being set, and then click to enter settings, detailed settings see
Chapter 9, D8 operating instructions.
E: USB Input J: Right speaker output +
F: Optical Input K: Right speaker output -
G: Coaxial Input L: Left speaker output -
H: Right Aux Input M: Left speaker output +
I: Left Aux Input N: Power Input(DC12V ~ DC32V)
ALIENTEK
D8 Smart Digital Amplifier &DAC
User manual www.alientek.com
D8-AMP&DAC User Manual
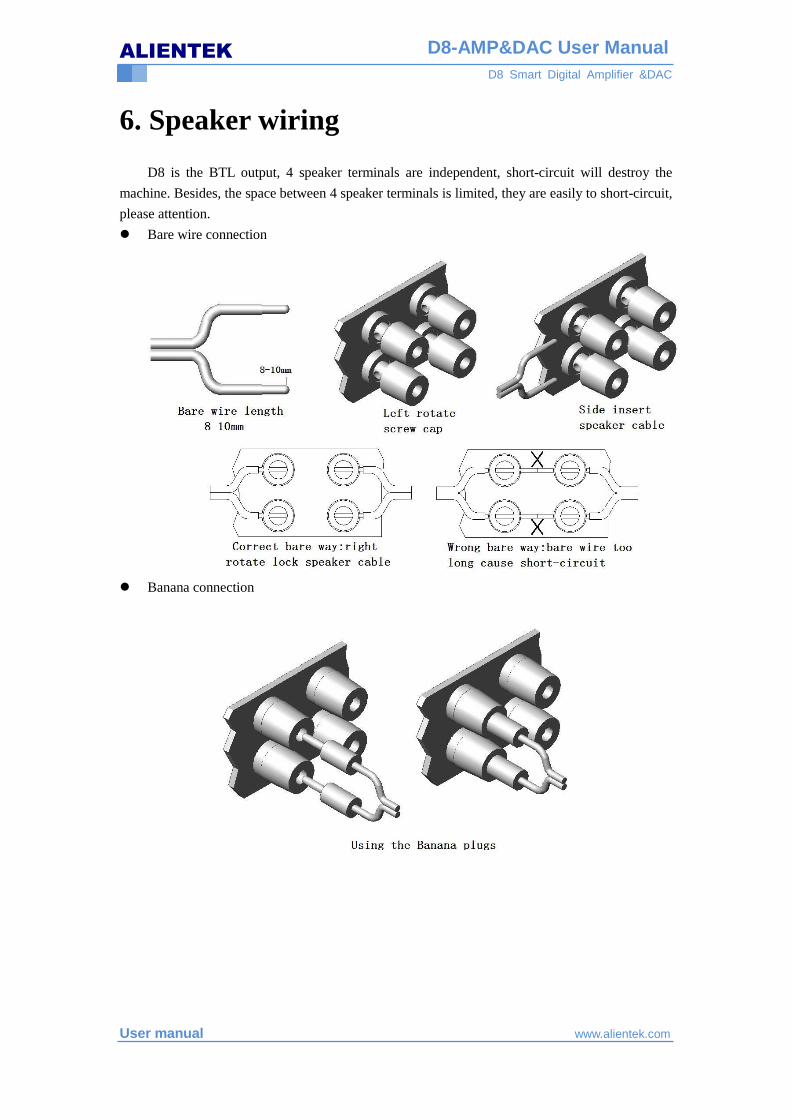
6. Speaker wiring
D8 is the BTL output, 4 speaker terminals are independent, short-circuit will destroy the
machine. Besides, the space between 4 speaker terminals is limited, they are easily to short-circuit,
please attention.
Bare wire connection
Banana connection
ALIENTEK
D8 Smart Digital Amplifier &DAC
User manual www.alientek.com
D8-AMP&DAC User Manual
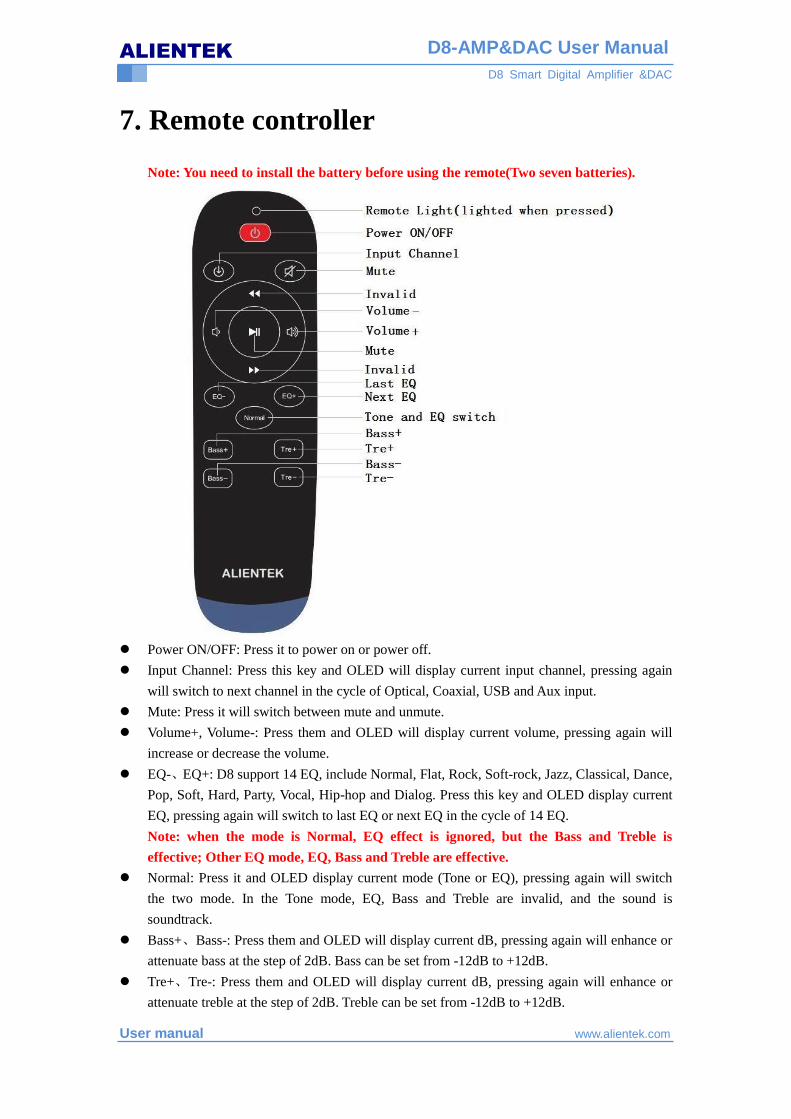
7. Remote controller
Note: You need to install the battery before using the remote(Two seven batteries).
Power ON/OFF: Press it to power on or power off.
Input Channel: Press this key and OLED will display current input channel, pressing again
will switch to next channel in the cycle of Optical, Coaxial, USB and Aux input.
Mute: Press it will switch between mute and unmute.
Volume+, Volume-: Press them and OLED will display current volume, pressing again will
increase or decrease the volume.
EQ-、EQ+: D8 support 14 EQ, include Normal, Flat, Rock, Soft-rock, Jazz, Classical, Dance,
Pop, Soft, Hard, Party, Vocal, Hip-hop and Dialog. Press this key and OLED display current
EQ, pressing again will switch to last EQ or next EQ in the cycle of 14 EQ.
Note: when the mode is Normal, EQ effect is ignored, but the Bass and Treble is
effective; Other EQ mode, EQ, Bass and Treble are effective.
Normal: Press it and OLED display current mode (Tone or EQ), pressing again will switch
the two mode. In the Tone mode, EQ, Bass and Treble are invalid, and the sound is
soundtrack.
Bass+、Bass-: Press them and OLED will display current dB, pressing again will enhance or
attenuate bass at the step of 2dB. Bass can be set from -12dB to +12dB.
Tre+、Tre-: Press them and OLED will display current dB, pressing again will enhance or
attenuate treble at the step of 2dB. Treble can be set from -12dB to +12dB.

ALIENTEK
D8 Smart Digital Amplifier &DAC
User manual www.alientek.com
D8-AMP&DAC User Manual
8. Driver and software installation
8.1. D8 USB Driver installation
D8 DVD Download address: http://www.openedv.com/posts/list/63879.htm
Note: Please disable the driver signature enforcement before the installation if your
computer system is WIN8 or above, more detail please see this link:
http://jingyan.baidu.com/article/3f16e003d1f4612591c103ce.html . Then close the computer's
the antivirus software, such as 360 antivirus, 360 security guards, etc.).
If your D8 use the XMOS module, please see this chapter 8.1 to install driver for the XMOS;
you can jump chapter 8.1 if using PCM2704, because the driver of PCM2704 is automatically
installed;
1. D8 USB Driver installation: this driver is used to support D8, so you’d better install it.
Please use the USB cable we provided to connect D8 and computer, then if your computer
automatically install driver for D8, please cancel it and install the driver manually. “Open D8
DVD 1,D8 USB Drive”, then double click and run “D8 USB Driver.exe”. See Fig 8.1.1:
Fig 8.1.1 D8 USB Driver installation
2. Follow the prompts to install the driver, click next and then select the installation path,
then click “Install” to start the installation, See Fig 8.1.2:
ALIENTEK
D8 Smart Digital Amplifier &DAC
User manual www.alientek.com
D8-AMP&DAC User Manual
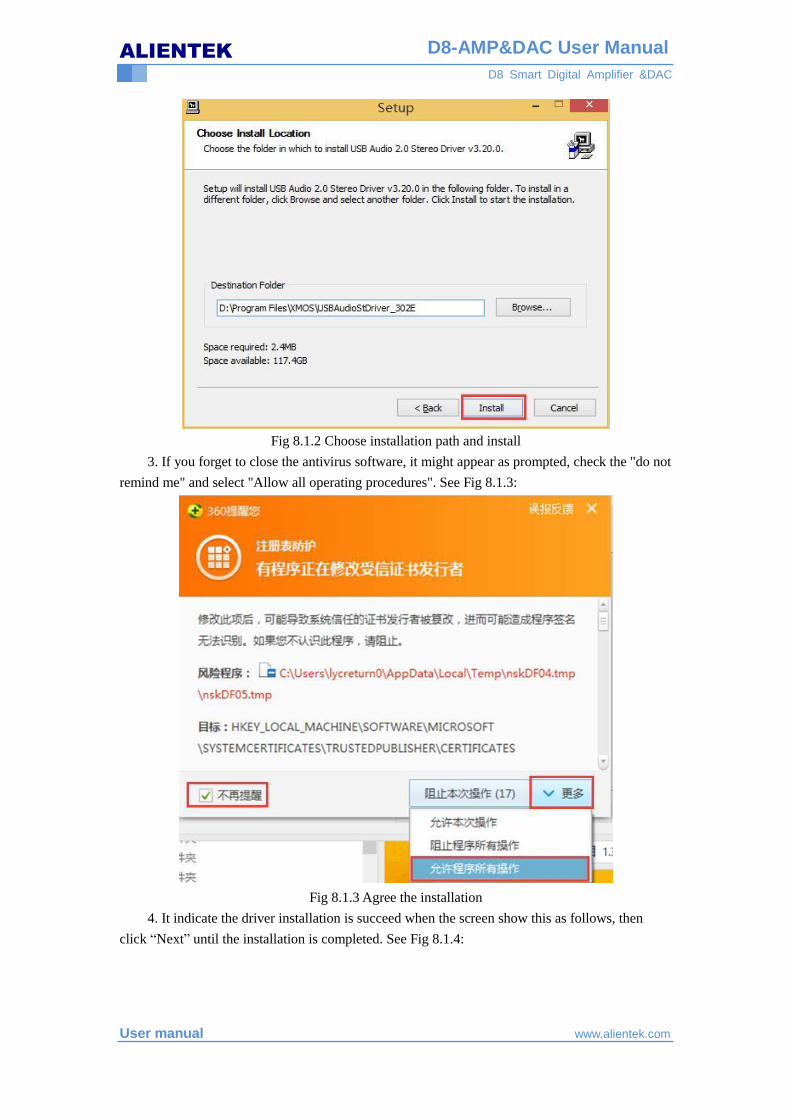
Fig 8.1.2 Choose installation path and install
3. If you forget to close the antivirus software, it might appear as prompted, check the "do not
remind me" and select "Allow all operating procedures". See Fig 8.1.3:
Fig 8.1.3 Agree the installation
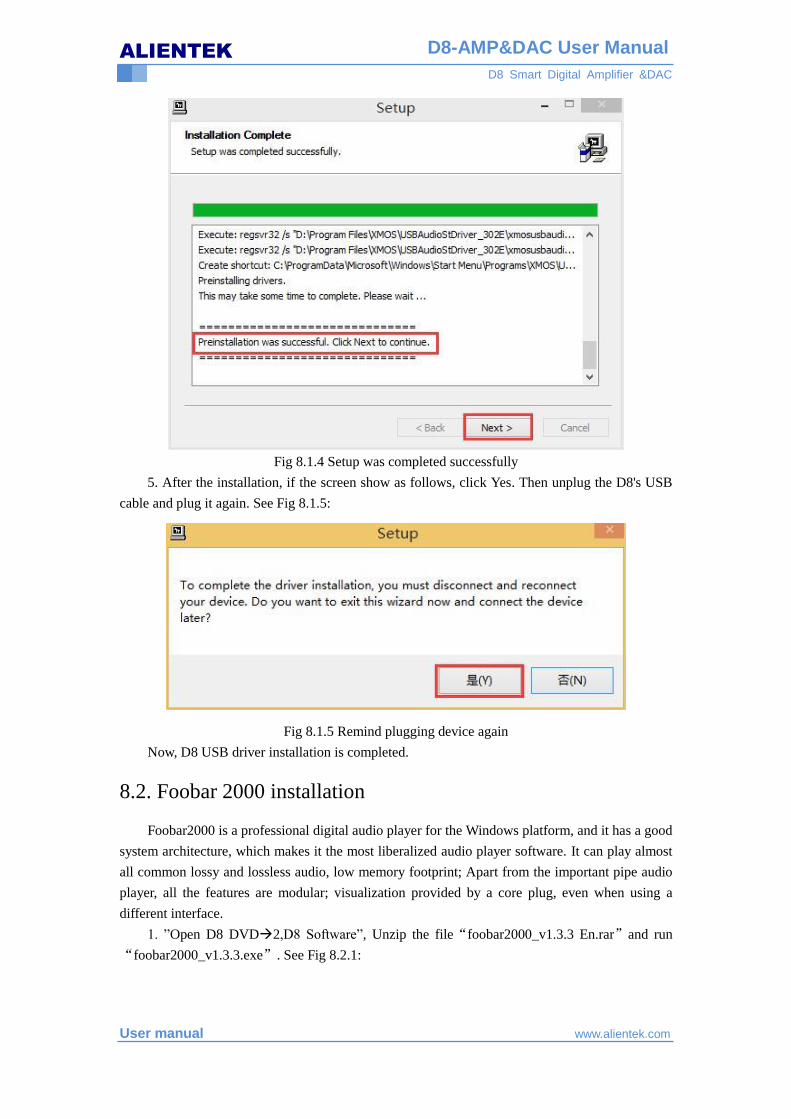
4. It indicate the driver installation is succeed when the screen show this as follows, then
click “Next” until the installation is completed. See Fig 8.1.4:
ALIENTEK
D8 Smart Digital Amplifier &DAC
User manual www.alientek.com
D8-AMP&DAC User Manual
Fig 8.1.4 Setup was completed successfully
5. After the installation, if the screen show as follows, click Yes. Then unplug the D8's USB
cable and plug it again. See Fig 8.1.5:
Fig 8.1.5 Remind plugging device again
Now, D8 USB driver installation is completed.
8.2. Foobar 2000 installation
Foobar2000 is a professional digital audio player for the Windows platform, and it has a good
system architecture, which makes it the most liberalized audio player software. It can play almost
all common lossy and lossless audio, low memory footprint; Apart from the important pipe audio
player, all the features are modular; visualization provided by a core plug, even when using a
different interface.
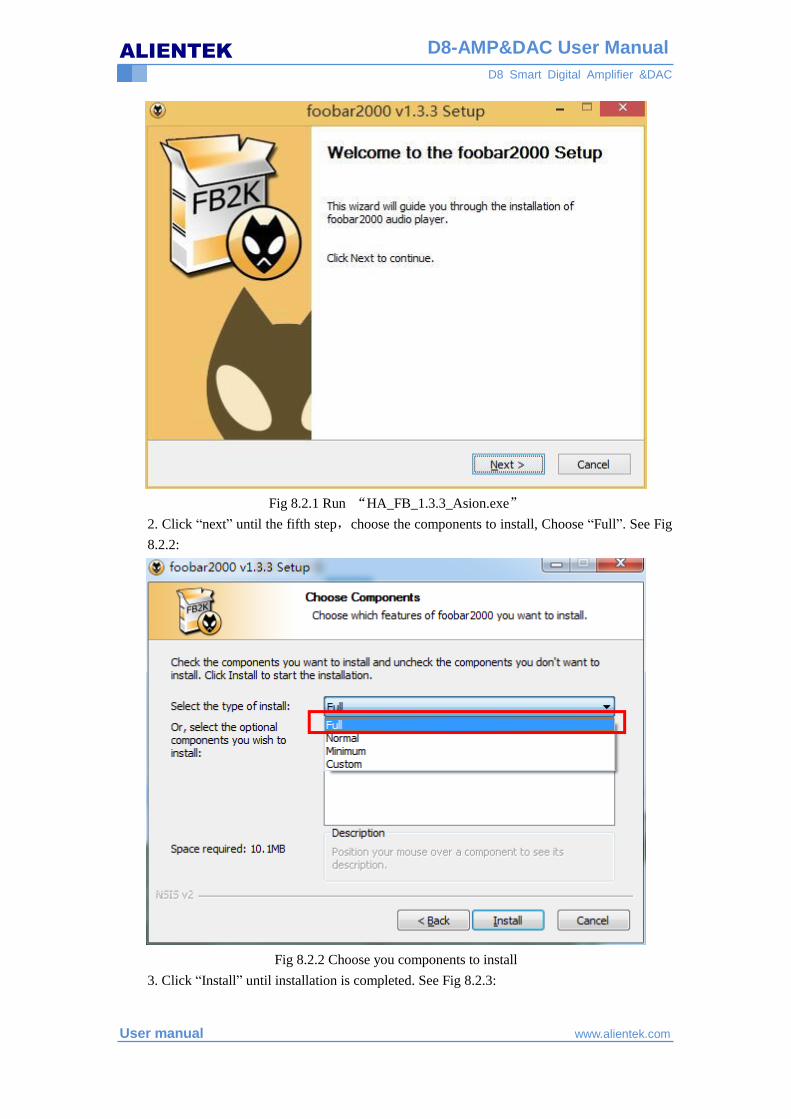
1. ”Open D8 DVD2,D8 Software”, Unzip the file“foobar2000_v1.3.3 En.rar”and run
“foobar2000_v1.3.3.exe”. See Fig 8.2.1:
ALIENTEK
D8 Smart Digital Amplifier &DAC
User manual www.alientek.com
D8-AMP&DAC User Manual
Fig 8.2.1 Run “HA_FB_1.3.3_Asion.exe”
2. Click “next” until the fifth step,choose the components to install, Choose “Full”. See Fig
8.2.2:
Fig 8.2.2 Choose you components to install
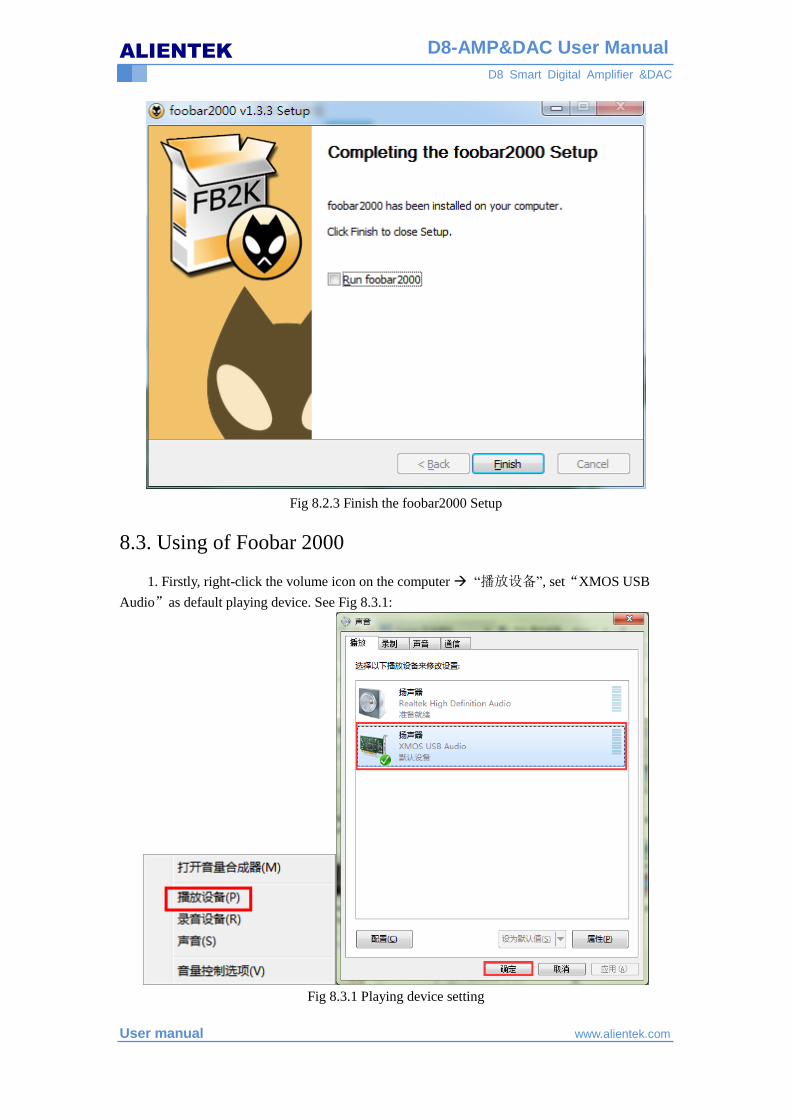
3. Click “Install” until installation is completed. See Fig 8.2.3:
ALIENTEK
D8 Smart Digital Amplifier &DAC
User manual www.alientek.com
D8-AMP&DAC User Manual
Fig 8.2.3 Finish the foobar2000 Setup
8.3. Using of Foobar 2000
1. Firstly, right-click the volume icon on the computer “播放设备”, set“XMOS USB
Audio”as default playing device. See Fig 8.3.1:
Fig 8.3.1 Playing device setting
ALIENTEK
D8 Smart Digital Amplifier &DAC
User manual www.alientek.com
D8-AMP&DAC User Manual
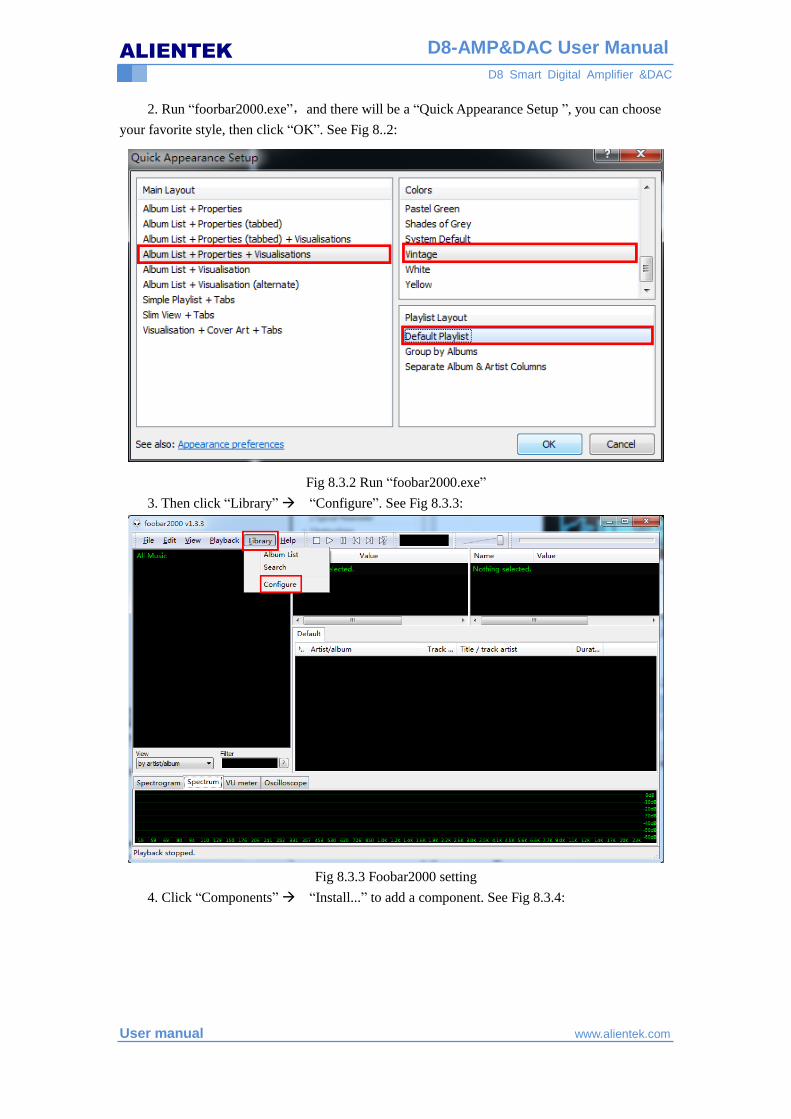
2. Run “foorbar2000.exe”,and there will be a “Quick Appearance Setup ”, you can choose
your favorite style, then click “OK”. See Fig 8..2:
Fig 8.3.2 Run “foobar2000.exe”
3. Then click “Library” “Configure”. See Fig 8.3.3:
Fig 8.3.3 Foobar2000 setting
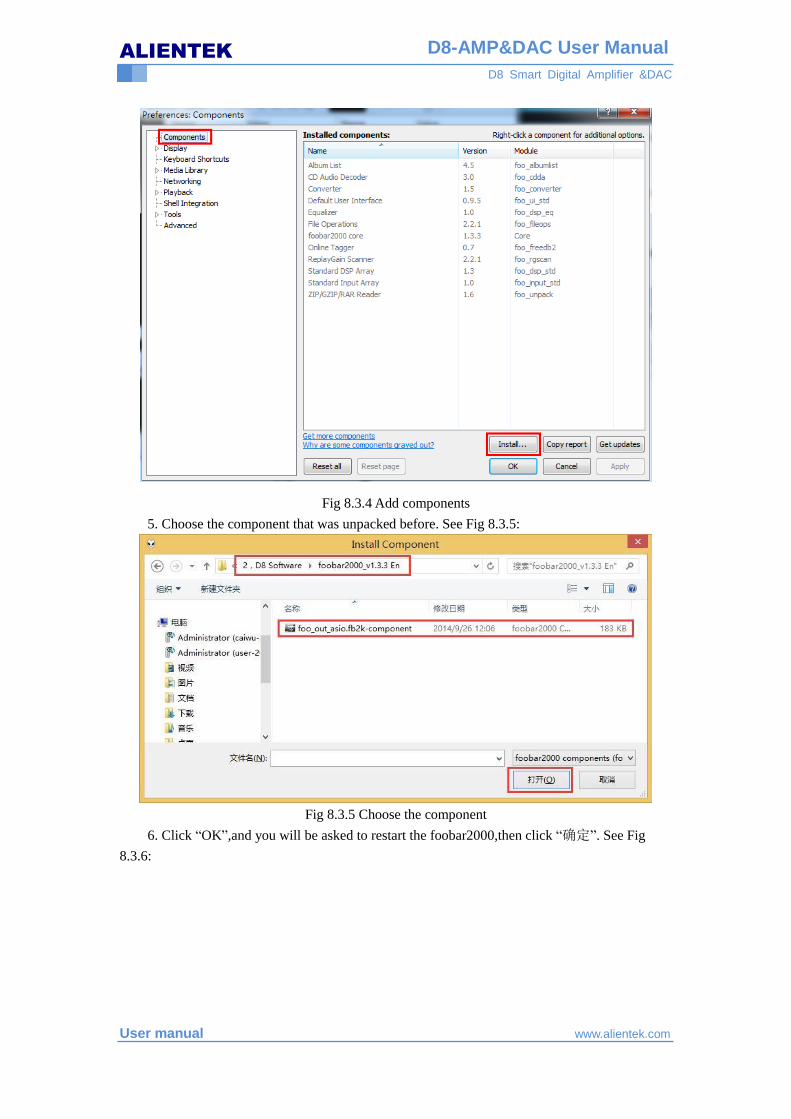
4. Click “Components” “Install...” to add a component. See Fig 8.3.4:
ALIENTEK
D8 Smart Digital Amplifier &DAC
User manual www.alientek.com
D8-AMP&DAC User Manual
Fig 8.3.4 Add components
5. Choose the component that was unpacked before. See Fig 8.3.5:
Fig 8.3.5 Choose the component
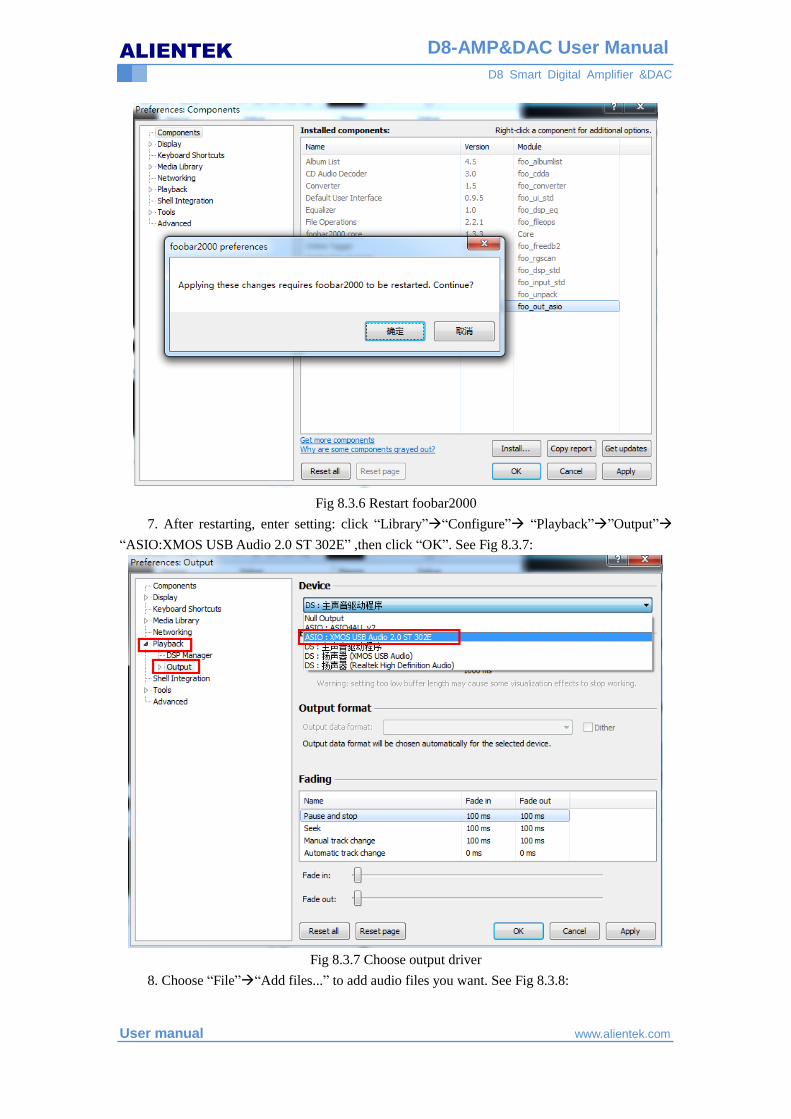
6. Click “OK”,and you will be asked to restart the foobar2000,then click “确定”. See Fig
8.3.6:
ALIENTEK
D8 Smart Digital Amplifier &DAC
User manual www.alientek.com
D8-AMP&DAC User Manual
Fig 8.3.6 Restart foobar2000
7. After restarting, enter setting: click “Library”“Configure” “Playback””Output”
“ASIO:XMOS USB Audio 2.0 ST 302E” ,then click “OK”. See Fig 8.3.7:
Fig 8.3.7 Choose output driver
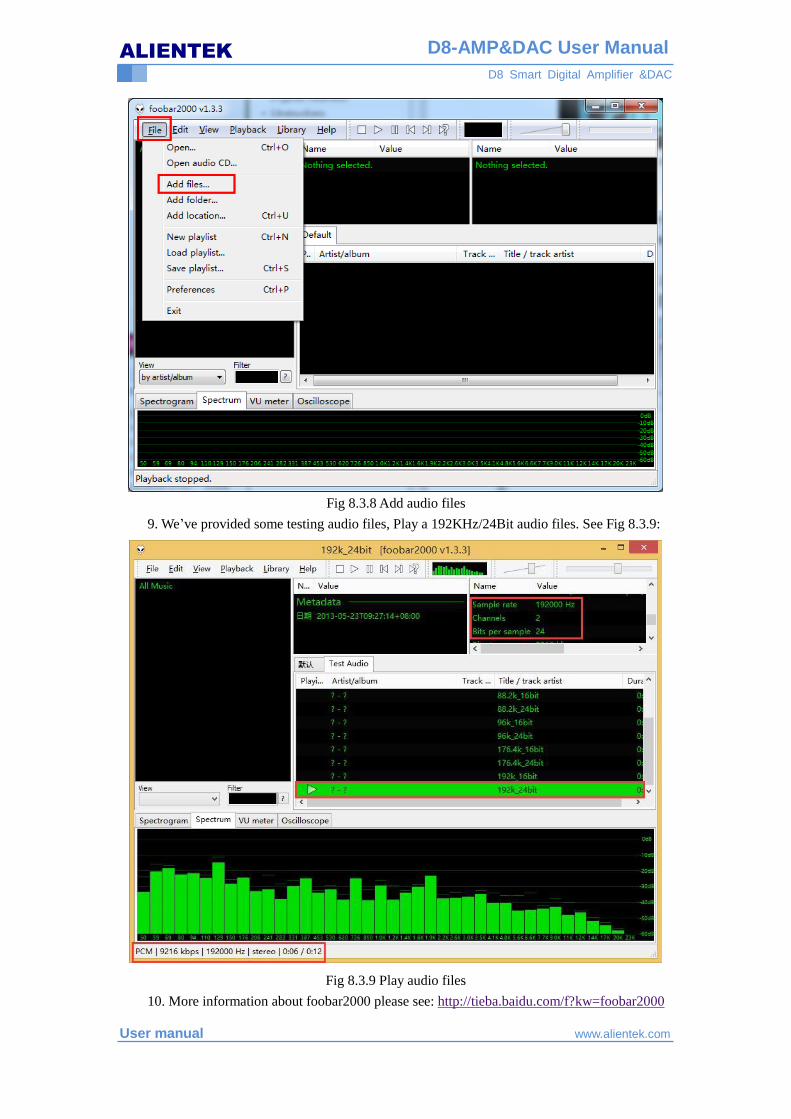
8. Choose “File”“Add files...” to add audio files you want. See Fig 8.3.8:
ALIENTEK
D8 Smart Digital Amplifier &DAC
User manual www.alientek.com
D8-AMP&DAC User Manual
Fig 8.3.8 Add audio files
9. We’ve provided some testing audio files, Play a 192KHz/24Bit audio files. See Fig 8.3.9:
Fig 8.3.9 Play audio files
10. More information about foobar2000 please see: http://tieba.baidu.com/f?kw=foobar2000

ALIENTEK
D8 Smart Digital Amplifier &DAC
User manual www.alientek.com
D8-AMP&DAC User Manual
9. D8 instruction
9.1. Main interface
D8 support remote and rotary encoders (also called knob, the same below) operations. In the
main interface, remote controls and knobs can be used simultaneously.
1. Power ON/OFF: Press the power button on the remote controller or long press the knob to
power on or power off D8, parameters are saved automatically. See Fig 9.1.1:
Fig 9.1.1 Power ON/OFF interface 2. Volume adjustment: Press the volume+ (volume-) on the remote controller or right (left)
rotate the knob, OLED will display current volume, once more to increase or decrease the volume.
Volume range from 0 to 60, default 24, parameters are saved automatically. You can adjust the
volume to view the sampling rate and input channel. See Fig 9.1.2:
Fig 9.1.2 Volume adjustment
3. Mute: Press the mute button on the remote controller to set D8 mute or unmute. See Fig
9.1.3:
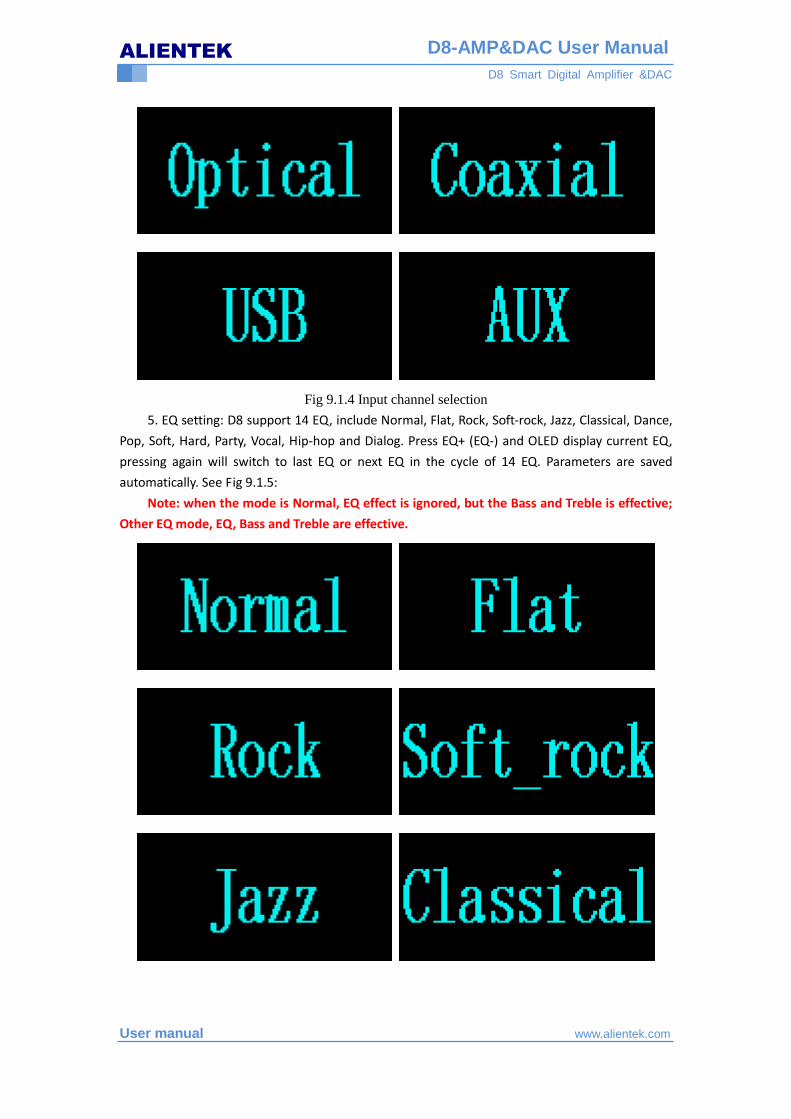
Fig 9.1.3 Mute and unmute 4. Input channel: Press the input channel button on the remote controller or press the knob,
OLED will display current input channel, once more to switch to next input channel in the cycle of
Optical, Coaxial, USB and AUX. Parameters are saved automatically. See Fig 9.1.4:
ALIENTEK
D8 Smart Digital Amplifier &DAC
User manual www.alientek.com
D8-AMP&DAC User Manual
Fig 9.1.4 Input channel selection
5. EQ setting: D8 support 14 EQ, include Normal, Flat, Rock, Soft-rock, Jazz, Classical, Dance,
Pop, Soft, Hard, Party, Vocal, Hip-hop and Dialog. Press EQ+ (EQ-) and OLED display current EQ,
pressing again will switch to last EQ or next EQ in the cycle of 14 EQ. Parameters are saved
automatically. See Fig 9.1.5:
Note: when the mode is Normal, EQ effect is ignored, but the Bass and Treble is effective;
Other EQ mode, EQ, Bass and Treble are effective.
ALIENTEK
D8 Smart Digital Amplifier &DAC
User manual www.alientek.com
D8-AMP&DAC User Manual
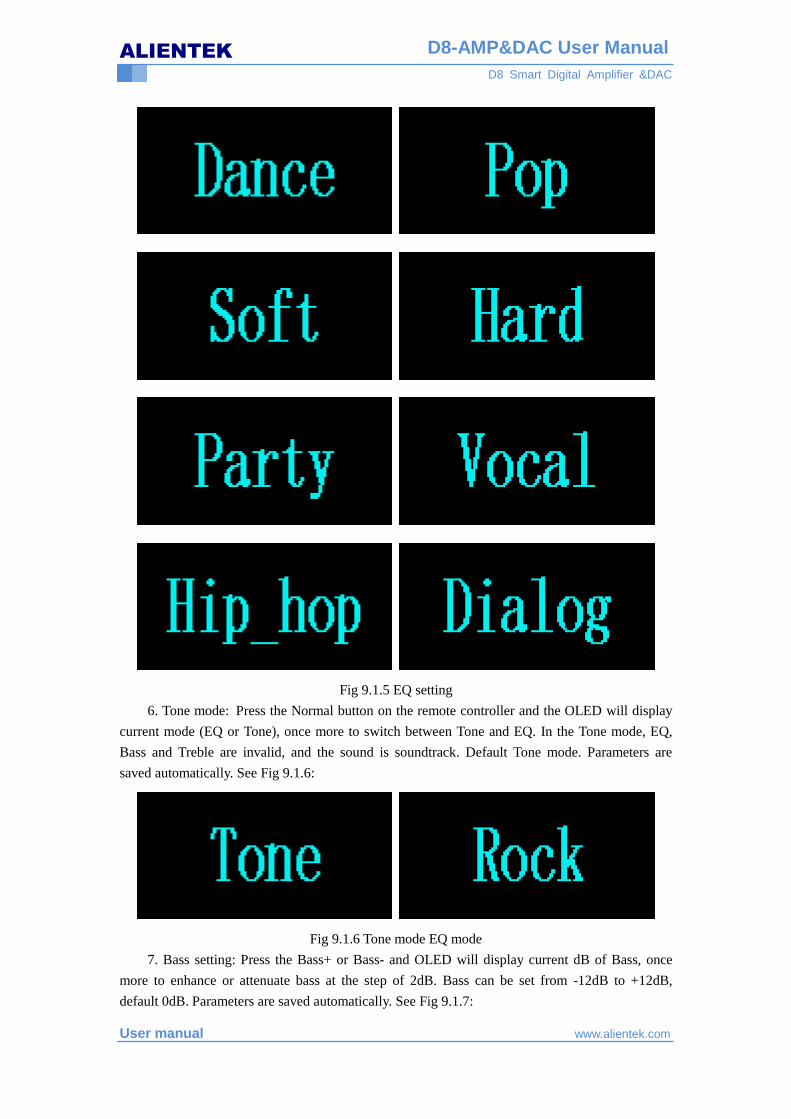
Fig 9.1.5 EQ setting
6. Tone mode: Press the Normal button on the remote controller and the OLED will display
current mode (EQ or Tone), once more to switch between Tone and EQ. In the Tone mode, EQ,
Bass and Treble are invalid, and the sound is soundtrack. Default Tone mode. Parameters are
saved automatically. See Fig 9.1.6:
Fig 9.1.6 Tone mode EQ mode
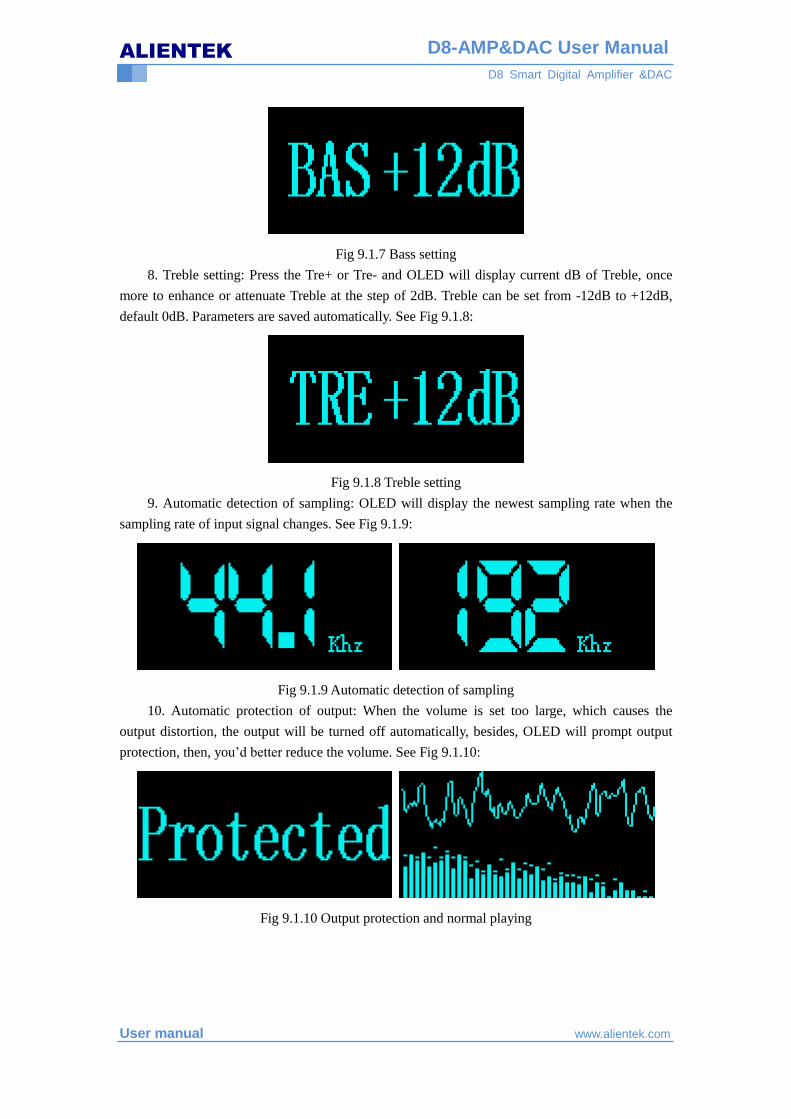
7. Bass setting: Press the Bass+ or Bass- and OLED will display current dB of Bass, once
more to enhance or attenuate bass at the step of 2dB. Bass can be set from -12dB to +12dB,
default 0dB. Parameters are saved automatically. See Fig 9.1.7:
ALIENTEK
D8 Smart Digital Amplifier &DAC
User manual www.alientek.com
D8-AMP&DAC User Manual
Fig 9.1.7 Bass setting
8. Treble setting: Press the Tre+ or Tre- and OLED will display current dB of Treble, once
more to enhance or attenuate Treble at the step of 2dB. Treble can be set from -12dB to +12dB,
default 0dB. Parameters are saved automatically. See Fig 9.1.8:
Fig 9.1.8 Treble setting
9. Automatic detection of sampling: OLED will display the newest sampling rate when the
sampling rate of input signal changes. See Fig 9.1.9:
Fig 9.1.9 Automatic detection of sampling
10. Automatic protection of output: When the volume is set too large, which causes the
output distortion, the output will be turned off automatically, besides, OLED will prompt output
protection, then, you’d better reduce the volume. See Fig 9.1.10:
Fig 9.1.10 Output protection and normal playing
ALIENTEK
D8 Smart Digital Amplifier &DAC
User manual www.alientek.com
D8-AMP&DAC User Manual
9.2. Menu setting interface
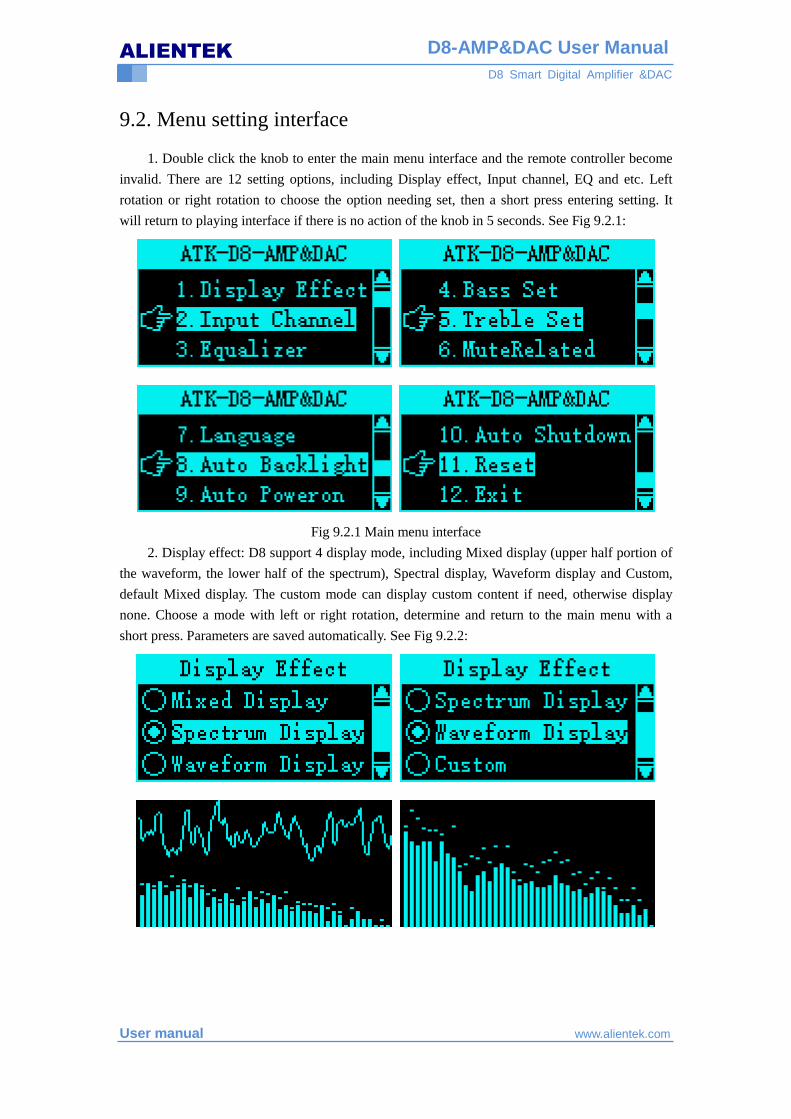
1. Double click the knob to enter the main menu interface and the remote controller become
invalid. There are 12 setting options, including Display effect, Input channel, EQ and etc. Left
rotation or right rotation to choose the option needing set, then a short press entering setting. It
will return to playing interface if there is no action of the knob in 5 seconds. See Fig 9.2.1:
Fig 9.2.1 Main menu interface
2. Display effect: D8 support 4 display mode, including Mixed display (upper half portion of
the waveform, the lower half of the spectrum), Spectral display, Waveform display and Custom,
default Mixed display. The custom mode can display custom content if need, otherwise display
none. Choose a mode with left or right rotation, determine and return to the main menu with a
short press. Parameters are saved automatically. See Fig 9.2.2:
ALIENTEK
D8 Smart Digital Amplifier &DAC
User manual www.alientek.com
D8-AMP&DAC User Manual
Fig 9.2.2 Display effect
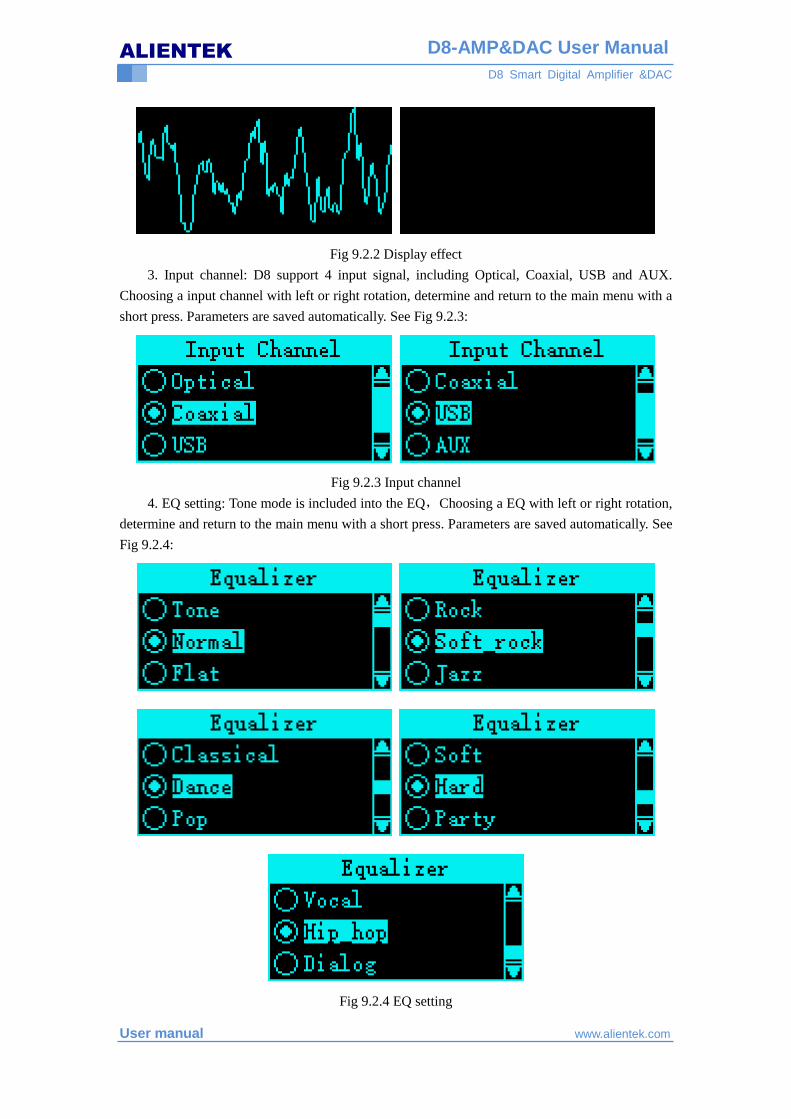
3. Input channel: D8 support 4 input signal, including Optical, Coaxial, USB and AUX.
Choosing a input channel with left or right rotation, determine and return to the main menu with a
short press. Parameters are saved automatically. See Fig 9.2.3:
Fig 9.2.3 Input channel
4. EQ setting: Tone mode is included into the EQ,Choosing a EQ with left or right rotation,
determine and return to the main menu with a short press. Parameters are saved automatically. See
Fig 9.2.4:
Fig 9.2.4 EQ setting
ALIENTEK
D8 Smart Digital Amplifier &DAC
User manual www.alientek.com
D8-AMP&DAC User Manual
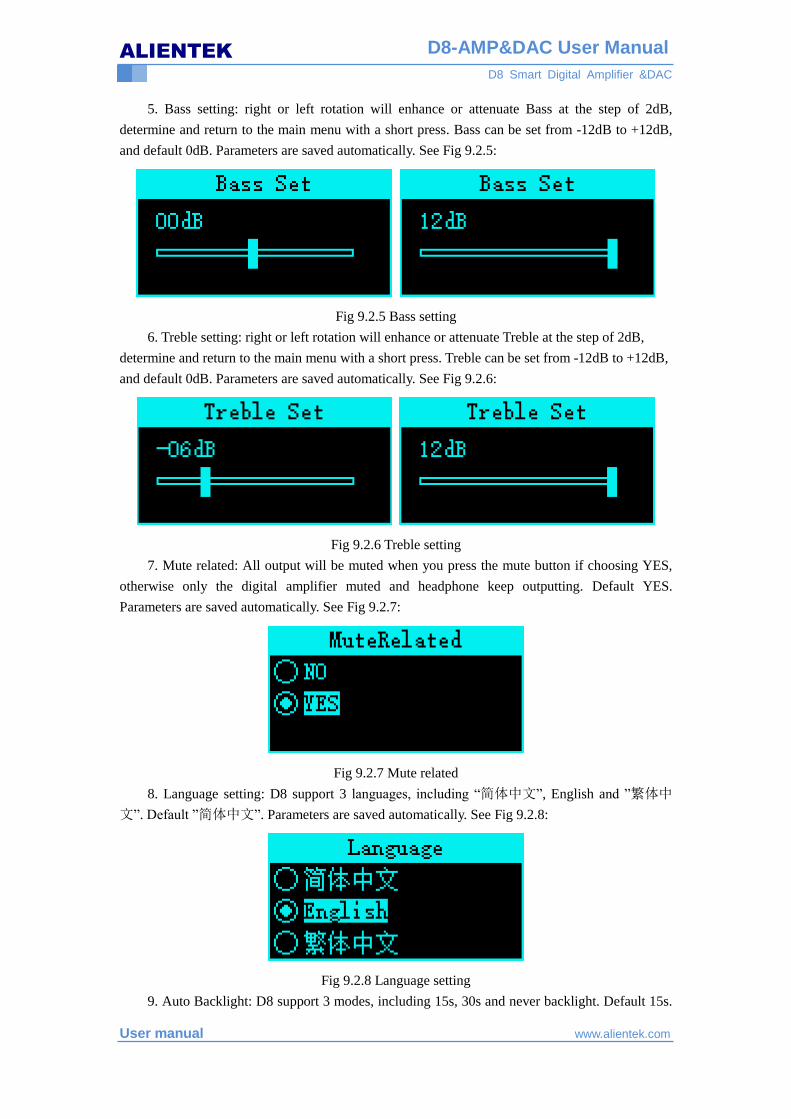
5. Bass setting: right or left rotation will enhance or attenuate Bass at the step of 2dB,
determine and return to the main menu with a short press. Bass can be set from -12dB to +12dB,
and default 0dB. Parameters are saved automatically. See Fig 9.2.5:
Fig 9.2.5 Bass setting
6. Treble setting: right or left rotation will enhance or attenuate Treble at the step of 2dB,
determine and return to the main menu with a short press. Treble can be set from -12dB to +12dB,
and default 0dB. Parameters are saved automatically. See Fig 9.2.6:
Fig 9.2.6 Treble setting
7. Mute related: All output will be muted when you press the mute button if choosing YES,
otherwise only the digital amplifier muted and headphone keep outputting. Default YES.
Parameters are saved automatically. See Fig 9.2.7:
Fig 9.2.7 Mute related
8. Language setting: D8 support 3 languages, including “简体中文”, English and ”繁体中
文”. Default ”简体中文”. Parameters are saved automatically. See Fig 9.2.8:
Fig 9.2.8 Language setting
9. Auto Backlight: D8 support 3 modes, including 15s, 30s and never backlight. Default 15s.

ALIENTEK
D8 Smart Digital Amplifier &DAC
User manual www.alientek.com
D8-AMP&DAC User Manual
Parameters are saved automatically. See Fig 9.2.9:
Note: D8 enter back-lighting if there is no operation (no operation means without any
action or audio output, the same below)
Fig 9.2.9 Auto Backlight
10. Auto Power ON: D8 will power on automatically when the input channel () received
audio signals if choosing Open. Default Close. Parameters are saved automatically. See Fig 9.2.10:
Fig 9.2.10 Auto Power ON setting
11. Auto Power OFF: Choosing Open and D8 will shut down it if there is not any
operation in 15 seconds. Default Close Parameters are saved automatically. See Fig 9.2.11:
Fig 9.2.11 Auto Power OFF setting
12. Reset: Choosing OK to set all setting default. See Fig 9.2.12:
Fig 9.2.12 Reset setting
13. Exit: Exit main menu and return to main interface.
ALIENTEK
D8 Smart Digital Amplifier &DAC
User manual www.alientek.com
D8-AMP&DAC User Manual
10. Warranty items
1. The term of service
Guangzhou Xingyi Electronic and Technology Co.,Ltd promise good quality products. If the
product is defective unit by normal use within 7 days after purchasing, the customer can
choose to return or repair warranty (doesn’t affect the secondary sales after they can return)
Faulty of normal use for free repairing within one year warranty.
2. Date of purchase is in accordance with invoice date or receipt date issued by seller. Online
shopping can cut trade shots.
3. For the following cases, we do not provide free warranty service
(1) All man-made damage, including abnormal use or do not follow the guide;
(2) Damage caused by modify or repair personally without permission.
(3) Faulty caused by accidentally beat or drop.
(4) Damage caused by using non-specified or permitted accessories.
(5) User privately disassemble, modification, maintenance.
11. Others
1、 Shopping:
Official shop: http://eboard.taobao.com
2、 Data Download
Download Address: http://www.openedv.com/posts/list/63879.htm
3、 FAE
Website: www.alientek.com
Technology Forum : www.openedv.com
Fax: 020-36773971
Phone: 020-38271790