Embed Size (px)
Citation preview
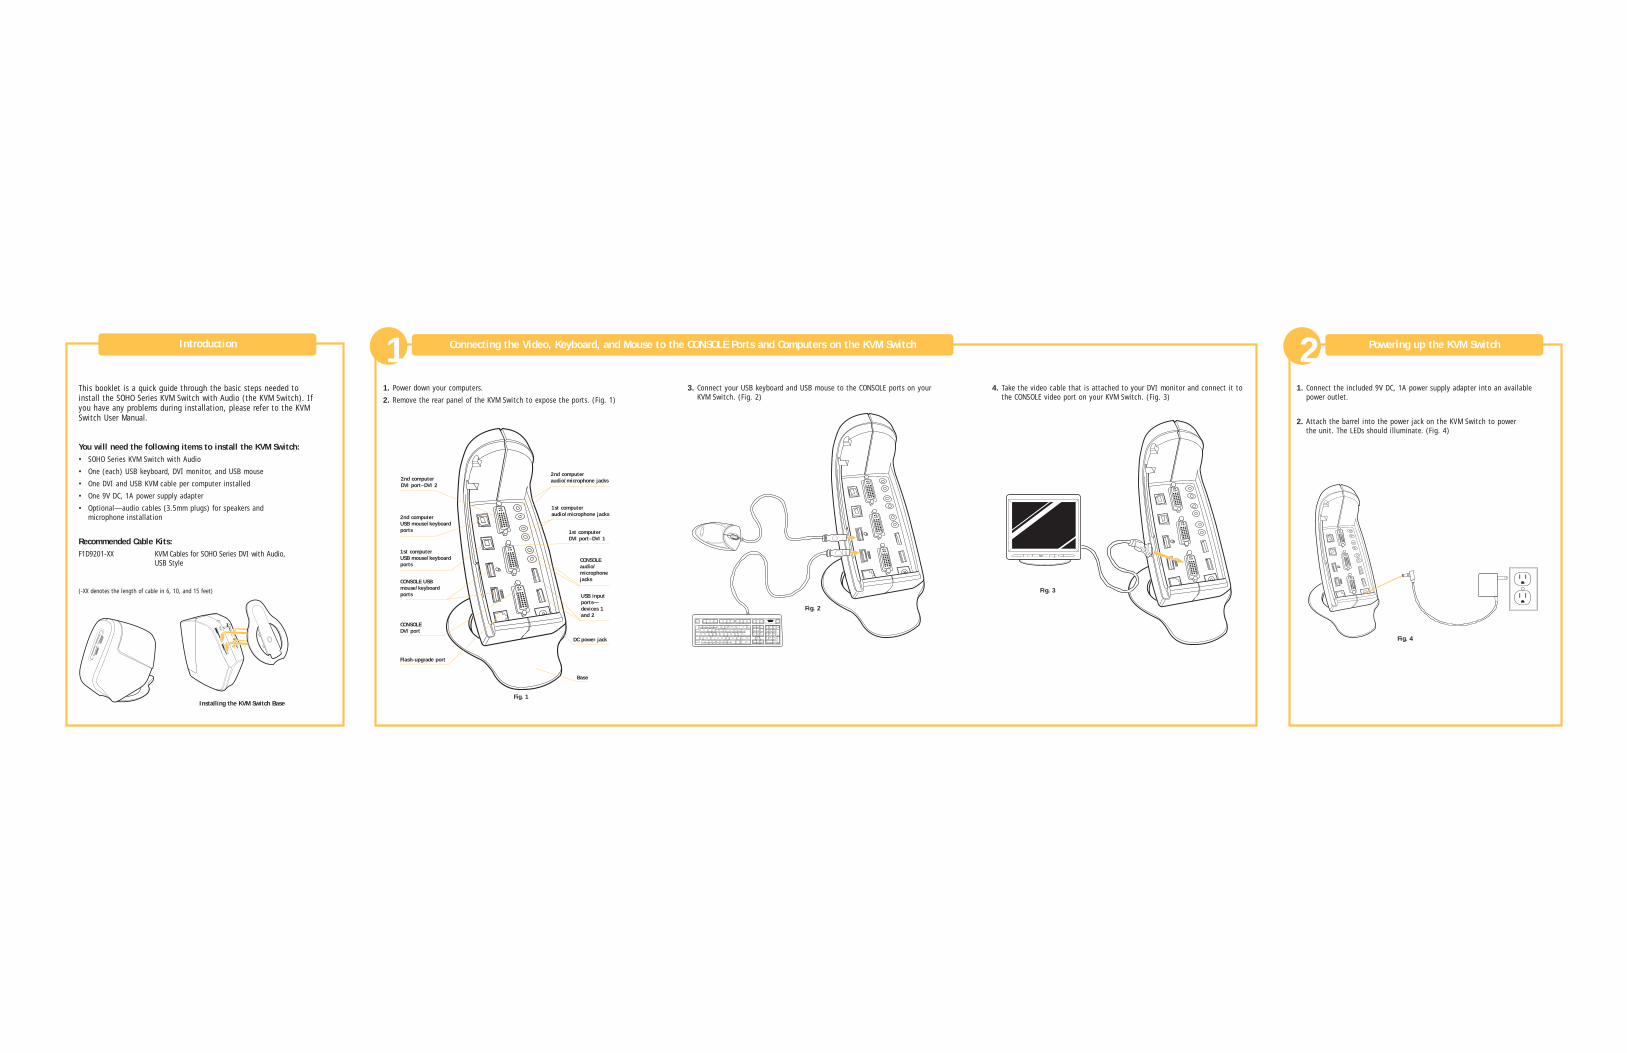
This booklet is a quick guide through the basic steps needed to install the SOHO Series KVM Switch with Audio (the KVM Switch). If you have any problems during installation, please refer to the KVMSwitch User Manual.
You will need the following items to install the KVM Switch:• SOHO Series KVM Switch with Audio
• One (each) USB keyboard, DVI monitor, and USB mouse
• One DVI and USB KVM cable per computer installed
• One 9V DC, 1A power supply adapter
• Optional—audio cables (3.5mm plugs) for speakers and microphone installation
Recommended Cable Kits:F1D9201-XX KVM Cables for SOHO Series DVI with Audio,
USB Style
(-XX denotes the length of cable in 6, 10, and 15 feet)
CONSOLE USBmouse/keyboardports
CONSOLEDVI port
1st computerUSB mouse/keyboardports
2nd computerUSB mouse/keyboardports
2nd computerDVI port–DVI 2
2nd computeraudio/microphone jacks
1st computeraudio/microphone jacks
1st computerDVI port–DVI 1
CONSOLEaudio/microphone jacks
DC power jack
Base
Fig. 1
Fig. 3
Flash-upgrade port
USB inputports—devices 1and 2
Introduction Connecting the Video, Keyboard, and Mouse to the CONSOLE Ports and Computers on the KVM Switch1 Powering up the KVM Switch21. Power down your computers.
2. Remove the rear panel of the KVM Switch to expose the ports. (Fig. 1)
3. Connect your USB keyboard and USB mouse to the CONSOLE ports on yourKVM Switch. (Fig. 2)
4. Take the video cable that is attached to your DVI monitor and connect it tothe CONSOLE video port on your KVM Switch. (Fig. 3)
1. Connect the included 9V DC, 1A power supply adapter into an availablepower outlet.
2. Attach the barrel into the power jack on the KVM Switch to power the unit. The LEDs should illuminate. (Fig. 4)
Fig. 2
Fig. 4
Installing the KVM Switch Base
OmniView™
KVM Switch with Audio
Quick Installation GuideSOHO Series
F1DD102UF1DD104U
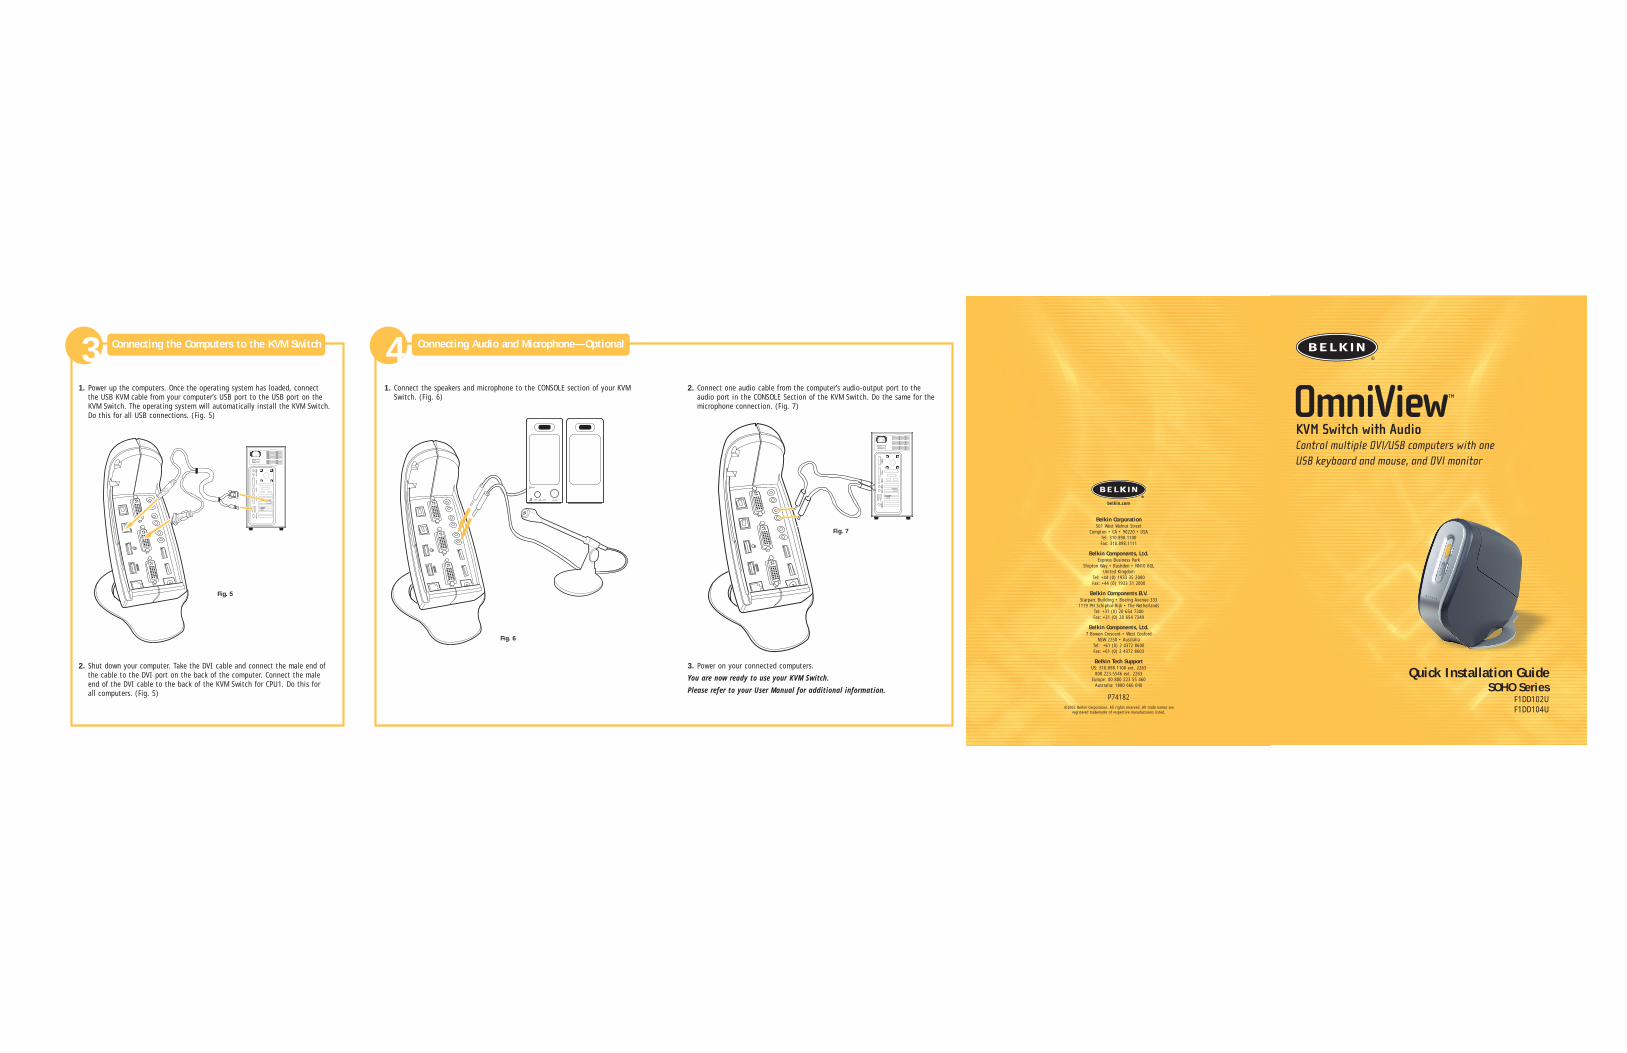
1. Connect the speakers and microphone to the CONSOLE section of your KVMSwitch. (Fig. 6)
2. Connect one audio cable from the computer’s audio-output port to theaudio port in the CONSOLE Section of the KVM Switch. Do the same for themicrophone connection. (Fig. 7)
3. Power on your connected computers.
You are now ready to use your KVM Switch.
Please refer to your User Manual for additional information.
Control multiple DVI/USB computers with oneUSB keyboard and mouse, and DVI monitor
Belkin Corporation501 West Walnut Street
Compton • CA • 90220 • USATel: 310.898.1100Fax: 310.898.1111
Belkin Components, Ltd.Express Business Park
Shipton Way • Rushden • NN10 6GLUnited Kingdom
Tel: +44 (0) 1933 35 2000Fax: +44 (0) 1933 31 2000
Belkin Components B.V.Starparc Building • Boeing Avenue 333
1119 PH Schiphol-Rijk • The NetherlandsTel: +31 (0) 20 654 7300Fax: +31 (0) 20 654 7349
Belkin Components, Ltd.7 Bowen Crescent • West Gosford
NSW 2250 • AustraliaTel: +61 (0) 2 4372 8600Fax: +61 (0) 2 4372 8603
Belkin Tech SupportUS: 310.898.1100 ext. 2263
800.223.5546 ext. 2263Europe: 00 800 223 55 460
Australia: 1800 666 040
P74182© 2002 Belkin Corporation. All rights reserved. All trade names are
registered trademarks of respective manufacturers listed.
Connecting the Computers to the KVM Switch31. Power up the computers. Once the operating system has loaded, connect
the USB KVM cable from your computer’s USB port to the USB port on theKVM Switch. The operating system will automatically install the KVM Switch.Do this for all USB connections. (Fig. 5)
2. Shut down your computer. Take the DVI cable and connect the male end ofthe cable to the DVI port on the back of the computer. Connect the maleend of the DVI cable to the back of the KVM Switch for CPU1. Do this for all computers. (Fig. 5)
Connecting Audio and Microphone—Optional4
Fig. 6
Fig. 7
Fig. 5