Embed Size (px)
Citation preview

Call Recorder Call Recorder Call Recorder Call Recorder ISDN ISDN ISDN ISDN
ManualManualManualManual Revision 2.103 08

Call Recorder PRI ISDN manual ©Vidicode 2008 2

Call Recorder PRI ISDN manual ©-Vidicode 2008 3
TheTheTheThe Call Recorder Call Recorder Call Recorder Call Recorder ISDNISDNISDNISDN –––– desktop model desktop model desktop model desktop model
1. Menu keys 2. Backlight Display 3. Function keys 4. Speaker 5. Alfa-Numerical keys 6. CryptoCard reader 7. CD Drive 8. Recorder keys 9. Speakerphone key 10. Volume adjustment
Call Recorder PRI ISDN manual ©Vidicode 2008 4
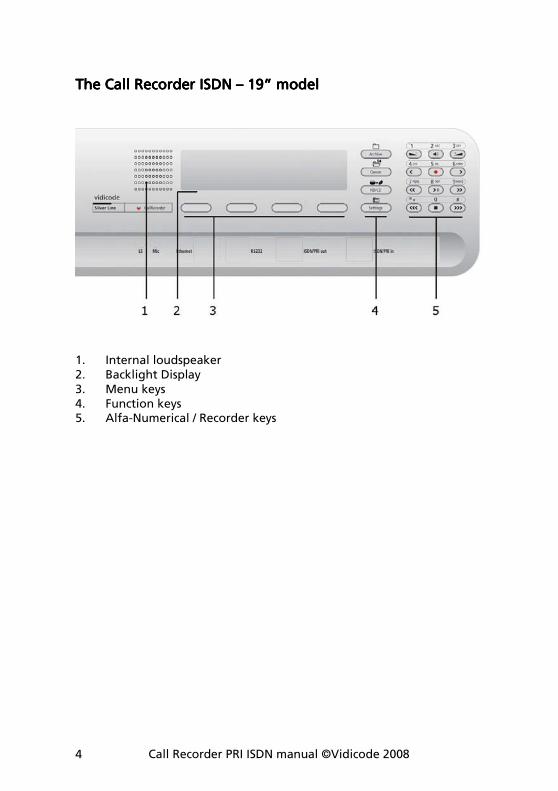
The Call Recorder The Call Recorder The Call Recorder The Call Recorder ISDN ISDN ISDN ISDN –––– 19” model 19” model 19” model 19” model
1. Internal loudspeaker 2. Backlight Display 3. Menu keys 4. Function keys 5. Alfa-Numerical / Recorder keys
Call Recorder PRI ISDN manual ©-Vidicode 2008 5
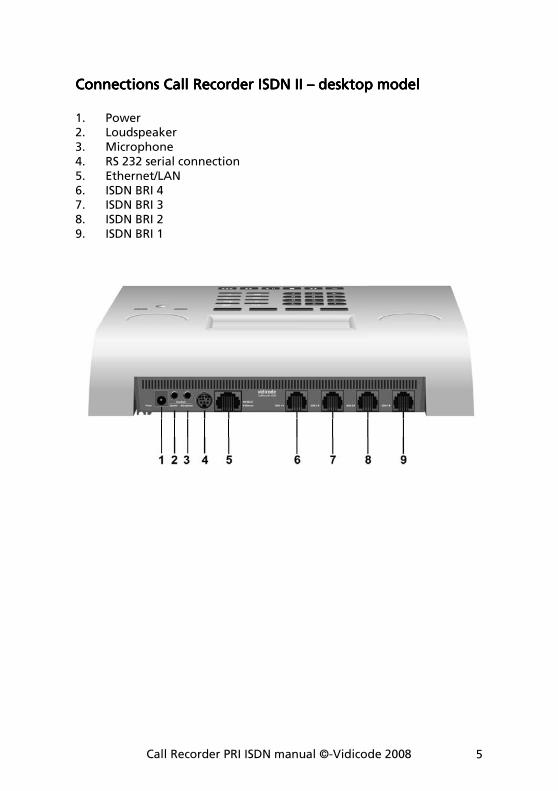
Connections Connections Connections Connections Call Recorder Call Recorder Call Recorder Call Recorder ISDN IIISDN IIISDN IIISDN II –––– desktopdesktopdesktopdesktop model model model model 1. Power 2. Loudspeaker 3. Microphone 4. RS 232 serial connection 5. Ethernet/LAN 6. ISDN BRI 4 7. ISDN BRI 3 8. ISDN BRI 2 9. ISDN BRI 1
Call Recorder PRI ISDN manual ©Vidicode 2008 6
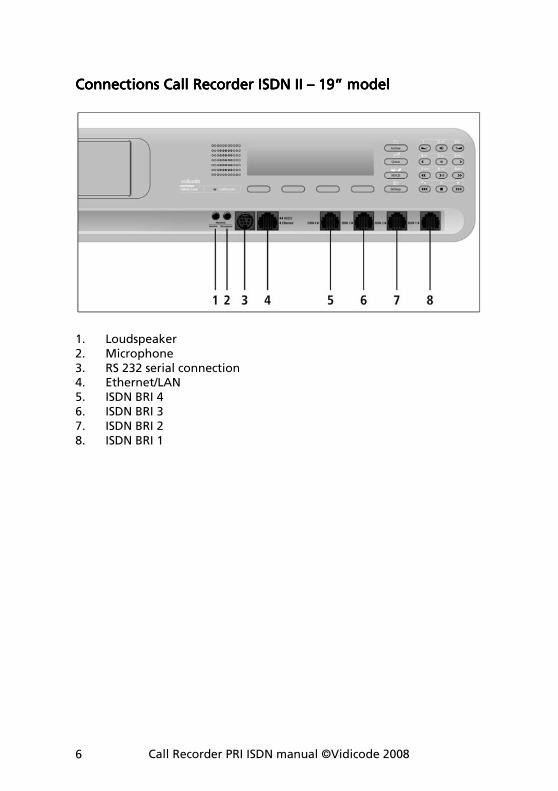
Connections Call Recorder Connections Call Recorder Connections Call Recorder Connections Call Recorder ISDN II ISDN II ISDN II ISDN II –––– 19” model 19” model 19” model 19” model
1. Loudspeaker 2. Microphone 3. RS 232 serial connection 4. Ethernet/LAN 5. ISDN BRI 4 6. ISDN BRI 3 7. ISDN BRI 2 8. ISDN BRI 1
Call Recorder PRI ISDN manual ©-Vidicode 2008 7
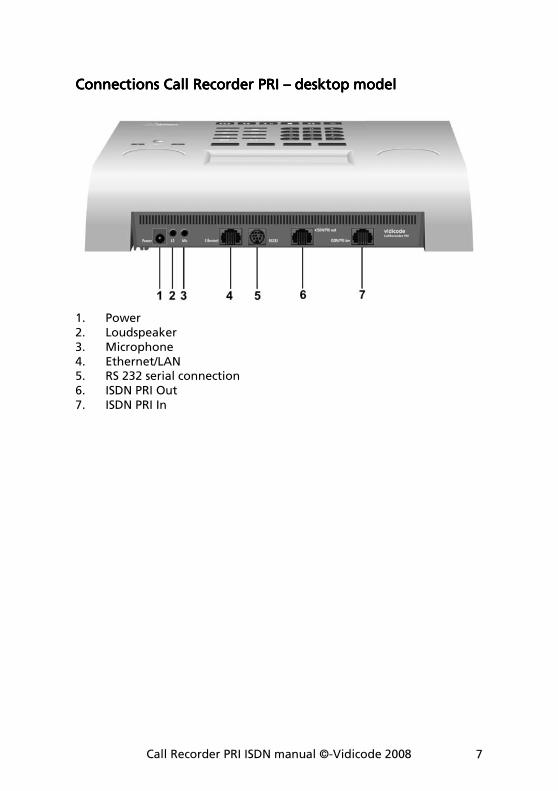
Connections Call Recorder PRIConnections Call Recorder PRIConnections Call Recorder PRIConnections Call Recorder PRI –––– desktop model desktop model desktop model desktop model
1. Power 2. Loudspeaker 3. Microphone 4. Ethernet/LAN 5. RS 232 serial connection 6. ISDN PRI Out 7. ISDN PRI In
Call Recorder PRI ISDN manual ©Vidicode 2008 8
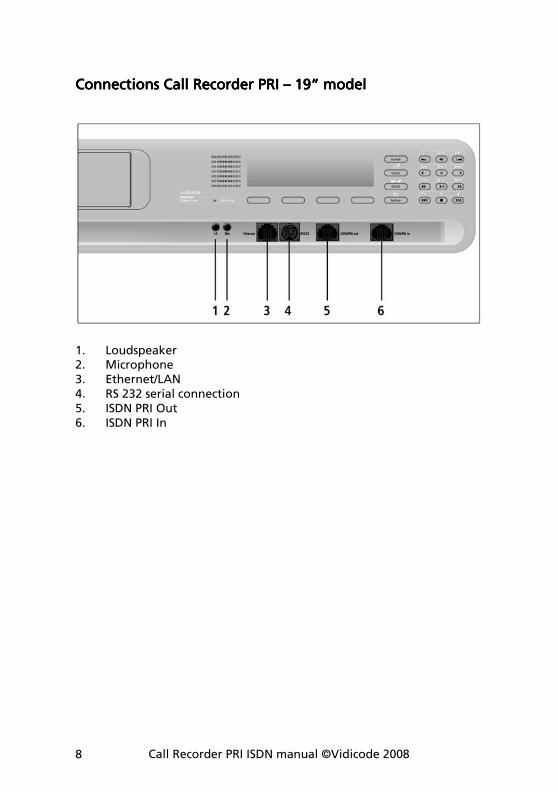
Connections Call Recorder PRIConnections Call Recorder PRIConnections Call Recorder PRIConnections Call Recorder PRI –––– 19” model 19” model 19” model 19” model
1. Loudspeaker 2. Microphone 3. Ethernet/LAN 4. RS 232 serial connection 5. ISDN PRI Out 6. ISDN PRI In
Call Recorder PRI ISDN manual ©-Vidicode 2008 9
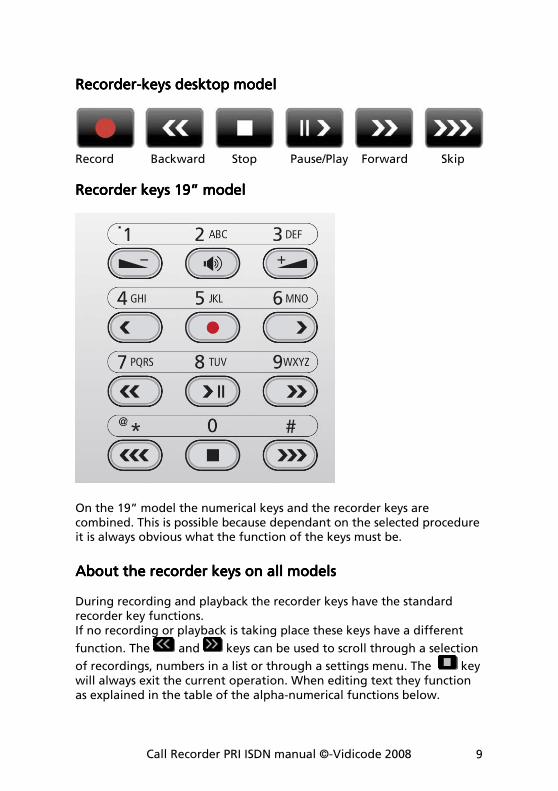
RecorderRecorderRecorderRecorder----keyskeyskeyskeys desktop model desktop model desktop model desktop model
Record Backward Stop Pause/Play Forward Skip
Recorder keys 19”Recorder keys 19”Recorder keys 19”Recorder keys 19” model model model model
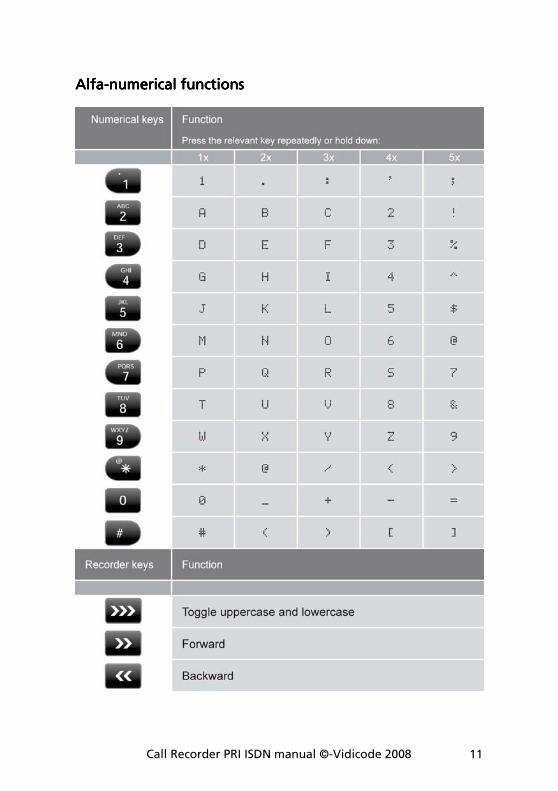
On the 19” model the numerical keys and the recorder keys are combined. This is possible because dependant on the selected procedure it is always obvious what the function of the keys must be.
AboutAboutAboutAbout the the the the recorder keys on all models recorder keys on all models recorder keys on all models recorder keys on all models During recording and playback the recorder keys have the standard recorder key functions. If no recording or playback is taking place these keys have a different
function. The and keys can be used to scroll through a selection
of recordings, numbers in a list or through a settings menu. The key will always exit the current operation. When editing text they function as explained in the table of the alpha-numerical functions below.
Call Recorder PRI ISDN manual ©Vidicode 2008 10
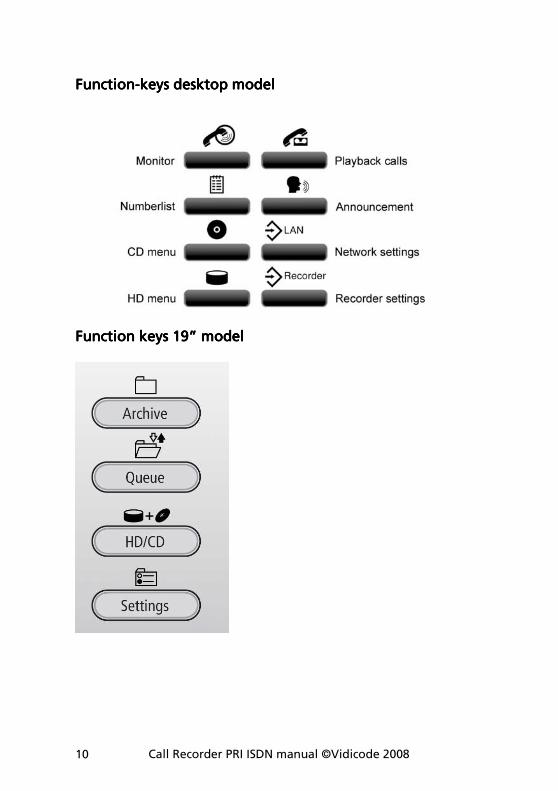
FunctionFunctionFunctionFunction----keyskeyskeyskeys desktopdesktopdesktopdesktop model model model model
Function keys 19” Function keys 19” Function keys 19” Function keys 19” modelmodelmodelmodel
Call Recorder PRI ISDN manual ©-Vidicode 2008 11
AlfaAlfaAlfaAlfa----numerical functionsnumerical functionsnumerical functionsnumerical functions
Call Recorder PRI ISDN manual ©Vidicode 2008 12
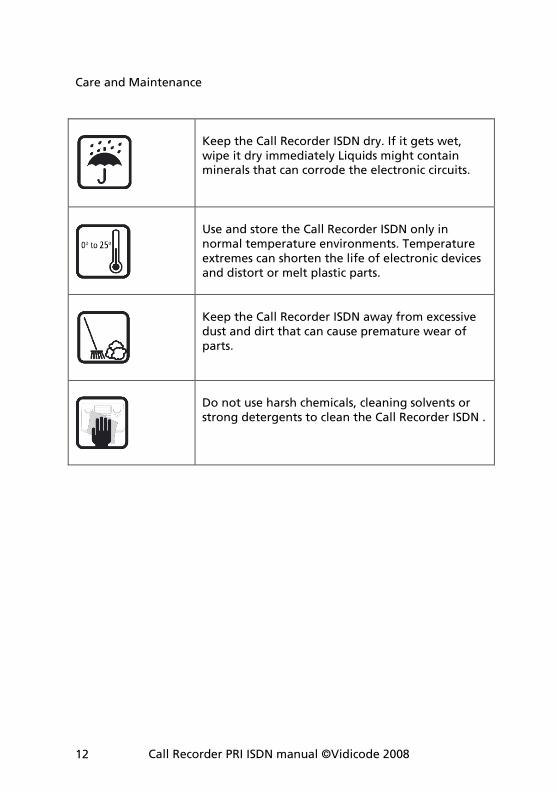
Care and Maintenance
Keep the Call Recorder ISDN dry. If it gets wet, wipe it dry immediately Liquids might contain minerals that can corrode the electronic circuits.
Use and store the Call Recorder ISDN only in normal temperature environments. Temperature extremes can shorten the life of electronic devices and distort or melt plastic parts.
Keep the Call Recorder ISDN away from excessive dust and dirt that can cause premature wear of parts.
Do not use harsh chemicals, cleaning solvents or strong detergents to clean the Call Recorder ISDN .
Call Recorder PRI ISDN manual ©-Vidicode 2008 13
ContentsContentsContentsContents
1 Introduction........................................................... 17
1.1 Several models, one manual.................................17 1.2 Basic Functions ......................................................17 1.3 Speech Compression .............................................18 1.4 Network.................................................................18 1.5 Search recordings..................................................19 1.6 Encryption .............................................................19 1.7 Pass through or passive configuration .................19 1.8 Privacy related functions.......................................20 1.9 Fax recording.........................................................20
2 The Call Recorder ISDN.......................................... 23
2.1 What's in the box..................................................23 2.2 Connecting the Power supply...............................24 2.2.1 On the desktop model.................................................24 2.2.2 On the 19” model ........................................................24
2.3 Connecting the ISDN lines ....................................25 2.3.1 Connecting to E1 Primary Rate ISDN..........................25
2.4 Connecting to basic rate ISDN ..............................27 2.4.1 Recommended way to connect ..................................27 2.4.2 Alternative way to connect.........................................28
3 Configuration and operation................................ 29
3.1 Operation basics....................................................29 3.2 Frequently used key indicators .............................30 3.3 Save Changes.........................................................30 3.4 Initializing CD........................................................30
4 Recorder settings ................................................... 33
4.1 Opening the Recorder settings menu ..................33 4.2 Speaker..................................................................33 4.3 Volume ..................................................................34 4.4 Numberlist .............................................................34 4.5 In-Line mode (pass through mode) ......................35
Call Recorder PRI ISDN manual ©Vidicode 2008 14
4.6 Notification ...........................................................35 4.7 Numberfilter..........................................................36 4.8 Replacement..........................................................37 4.9 [��] Action...........................................................38 4.10 [��] Dialing..........................................................39 4.11 Compression..........................................................41 4.12 CryptoCard ............................................................42 4.13 CD Copy .................................................................43 4.14 CD Copy time.........................................................44 4.15 Auto Delete...........................................................44 4.16 Protect the Call Recorder with a Password ..........45 4.17 Remove Password protection ...............................45 4.18 Set the Clock..........................................................46 4.19 Set the Language ..................................................46
5 Search, playback, CD copy and monitoring.......... 49
5.1 Playing the last recorded call................................49 5.2 Search stored recordings.......................................50 5.2.1 Search according to local number ..............................52 5.2.2 Search according to remote number..........................53 5.2.3 Search according to connected number ....................55 5.2.4 Refined search according to channel number ...........56
5.3 Recording information..........................................58 5.4 Copy recordings to CD ..........................................58 5.4.1 Copy a individual recording........................................58 5.4.2 Copy a selection of recordings....................................59
5.5 Line status..............................................................60 5.6 Monitoring ............................................................61 5.6.1 Monitoring on the desktop model.............................61 5.6.2 Monitoring on all models............................................63
6 Notification message and Numberlist .................. 65
6.1 Record notification message ................................65 6.2 View a numberlist .................................................66 6.3 Add a number to the list.......................................67 6.4 Remove a number from the list............................67
Call Recorder PRI ISDN manual ©-Vidicode 2008 15
6.5 The Faxlist..............................................................68 6.6 The Email list .........................................................69
7 Using the CD drive and the CD menu................... 71
7.1 The CD menu.........................................................71 7.2 Free time left on CD..............................................71 7.3 Create CD directory...............................................71 7.4 Erase CD Re-writable.............................................72 7.5 Software update ...................................................73
8 The Hard disk menu .............................................. 77
9 Encrypted recording .............................................. 79
9.1 Several types of CryptoCard .................................79 9.2 Insert CryptoCard into Call Recorder ISDN...........80 9.3 Insert CryptoCard into Call Recorder 19”.............80 9.4 The CryptoCard and its PIN and PUC code ...........81 9.5 Making an encrypted recording ...........................83 9.6 Playing an encrypted recording............................83 9.7 Using CryptoCards on a PC ...................................84
10 Configuration of the Ethernet interface.............. 85
10.1 Network active ......................................................85 10.2 FTP active...............................................................86 10.3 FTP user .................................................................86 10.4 FTP password.........................................................87 10.5 FTP server port ......................................................87 10.6 DHCP server ...........................................................88 10.7 IP address...............................................................89 10.8 IP subnet mask ......................................................90 10.9 Gateway ................................................................90 10.10 IP name...............................................................91 10.11 Email ...................................................................91 10.12 Reply address......................................................92 10.13 SMTP server IP address .......................................93 10.14 SMTP server port ................................................94
Call Recorder PRI ISDN manual ©Vidicode 2008 16
10.15 Domain name.....................................................94 10.16 DNS server ..........................................................95 10.17 NTP server...........................................................96 10.18 NTP port..............................................................96 10.19 GMT correction...................................................97 10.20 Telnet..................................................................97 10.21 Service timer.......................................................98 10.22 Monitor active ....................................................99
11 Call Recorder Quick CD Access System ............... 101
11.1 Install the software .............................................101 11.2 Start .....................................................................101 11.3 View recordings on CD........................................102 11.4 Create an archive on Hard disk...........................103 11.5 Recycle bin...........................................................104 11.6 Export recordings................................................105 11.7 On Line software update ....................................105 11.8 Search recordings................................................106 11.9 Software Settings................................................107
12 The Access software and the Monitor software 109
12.1 The Call Recorder Access System software.........109 12.1.1 Playing recordings ..................................................110 12.1.2 Queries ....................................................................110 12.1.3 Call statistics............................................................110 12.1.4 Fax viewing .............................................................111
12.2 The RTR Call Monitor software...........................111 12.2.1 The RTR Call Monitor .............................................112
13 Acknowledgements............................................. 113
13.1 Privacy..................................................................113 13.2 Guarantee............................................................113 13.3 Liability ................................................................114
14 Index..................................................................... 115
Call Recorder PRI ISDN manual ©-Vidicode 2008 17
1 Introduction
1.1 Several models, one manual
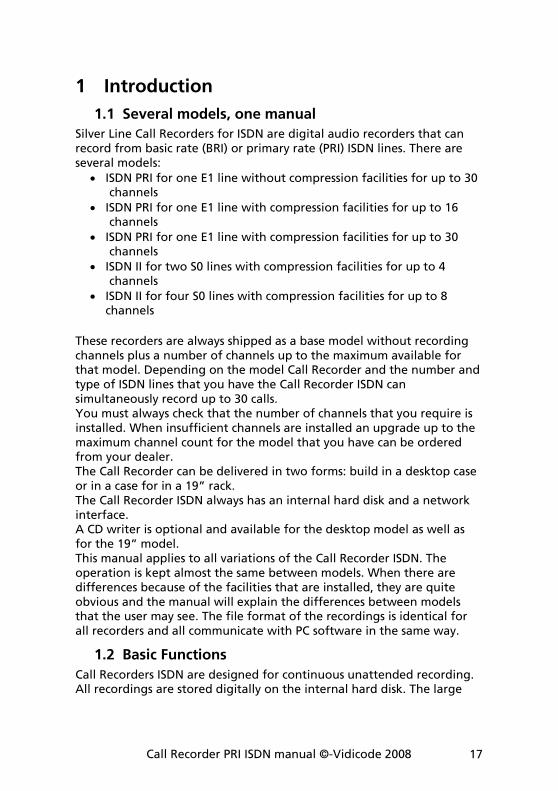
Silver Line Call Recorders for ISDN are digital audio recorders that can record from basic rate (BRI) or primary rate (PRI) ISDN lines. There are several models:
• ISDN PRI for one E1 line without compression facilities for up to 30 channels
• ISDN PRI for one E1 line with compression facilities for up to 16 channels
• ISDN PRI for one E1 line with compression facilities for up to 30 channels
• ISDN II for two S0 lines with compression facilities for up to 4 channels
• ISDN II for four S0 lines with compression facilities for up to 8 channels
These recorders are always shipped as a base model without recording channels plus a number of channels up to the maximum available for that model. Depending on the model Call Recorder and the number and type of ISDN lines that you have the Call Recorder ISDN can simultaneously record up to 30 calls. You must always check that the number of channels that you require is installed. When insufficient channels are installed an upgrade up to the maximum channel count for the model that you have can be ordered from your dealer. The Call Recorder can be delivered in two forms: build in a desktop case or in a case for in a 19” rack. The Call Recorder ISDN always has an internal hard disk and a network interface. A CD writer is optional and available for the desktop model as well as for the 19” model. This manual applies to all variations of the Call Recorder ISDN. The operation is kept almost the same between models. When there are differences because of the facilities that are installed, they are quite obvious and the manual will explain the differences between models that the user may see. The file format of the recordings is identical for all recorders and all communicate with PC software in the same way.
1.2 Basic Functions
Call Recorders ISDN are designed for continuous unattended recording. All recordings are stored digitally on the internal hard disk. The large
Call Recorder PRI ISDN manual ©Vidicode 2008 18
storage capacity of the hard disk ensures the ability of the Call Recorder ISDN of long term unattended recording. Recordings are randomly accessible. The capacity of the hard disk is in recording time at least 1380 hours uncompressed and 13800 hours with compression and therefore it takes a long time before existing recordings are wiped out by new recordings. The Call Recorder issues a warning when the hard disk is getting full. If the warning is ignored the oldest recordings will be overwritten by the newest. Stored recordings can be accessed on PC’s via the LAN using the optional Call Recorder Access System software. You can copy recordings from the hard disk to CD if your Call Recorder ISDN is equipped with a CD drive. Copying recordings to CD-recordable can be done in different ways for different purposes. It is possible to copy single recordings, copy a selection of recordings or automatically copy all new recordings. Recordings on CD can be viewed and played with the Call Recorder Quick CD Access System software that comes with the Call Recorder ISDN with CD. The Call Recorder ISDN allows the user to listen in to ongoing calls through the internal speaker; this is called the Monitor function. The volume of the internal speaker can be adjusted. The Call Recorder ISDN also allows for the connection of a headset. The headset can be used to monitor calls and to listen to recordings.
1.3 Speech Compression
Call Recorders ISDN that have compression facilities on board compress recordings according to the G.723.1 format. G.723.1 compression has a good balance between audio quality and recording size and can be reproduced on most PC’s with Microsoft Windows versions. Compressed recordings take up 1/10th of the size of uncompressed recordings. Therefore the compression has a profound effect on the storage capacity of the Call Recorder ISDN in terms of recording time. Real time compression while recording many channels requires a lot of extra processing power and therefore extra hardware in the form of very fast processors. To save cost where a large recording database is not needed, there is a model of the Call Recorder for primary rate without the extra compression facilities. This model can only store at least 1380 hours of uncompressed audio on the hard disk. This model is for applications that do not require long storage duration.
1.4 Network
The Call Recorder ISDN features an Ethernet interface. The Call Recorder ISDN can be connected to a PC or computer network through the Ethernet interface. With its own IP address the Call Recorder ISDN acts as an FTP-server from which recordings can be downloaded using any FTP
Call Recorder PRI ISDN manual ©-Vidicode 2008 19
client. The Call Recorder Access System software can be used to connect to the Call Recorder ISDN over the network to retrieve recordings and archive them on the PC. The Call Recorder Access System software has extensive archiving capabilities including the creation of special archives suited for backup on CD. A special version of the Call Recorder Access System allows for fax image recovery of recorded fax transmissions. The Call Recorder can email its status in case of a malfunction. Recordings can also be emailed according to the extension\email list. Yet another application of the Ethernet connection is Real Time Remote Call monitoring over the network. The optional RTR Call Monitor software can be used to monitor all connected telephone lines over the network.
1.5 Search recordings
The Call Recorder has its own menu driven search function to find and play specific recordings. Recordings can be searched for according to date, Called number and line number. The Call Recorder ISDN has an internal speaker for playback of recordings.
1.6 Encryption
All recordings can be encrypted. The Call Recorder ISDN uses the CryptoCard option for this feature. Playback of encrypted recordings is not possible without the CryptoCard the recording was made with. Playback of encrypted recordings on a PC is possible only with the optional CryptoCard reader in conjunction with the original or a matching CryptoCard.
1.7 Pass through or passive configuration
The Call Recorders ISDN can be connected to the line in two ways: Pass through mode – the recorder is installed between the network and the telephone system and all ISDN channels pass through the internal bus of the recorder and the recorder can take control at any time. Pass Through mode is also occasionally called In-Line mode Passive mode – the recorder is connected in parallel to the line and just passively listening on the incoming and outgoing channels of the line. The Call Recorders ISDN have been designed for pass through mode. The reason was that the recorders must comply with the regulations of most countries that – at least for some applications – require that there is some sort of notification to the caller that recording takes place. This is only possible in pass through mode. Pass through mode has several other advantages then notification to the user:
Call Recorder PRI ISDN manual ©Vidicode 2008 20
It can intercept the D-channel and therefore control signaling between the telephone system and the network. This is used to filter numbers sent by the PBX so that they are not sent to the line. It can be used to capture commands from the user to the recorder which has several applications that will be explained in this manual. Because of pass through mode the Call Recorder is equipped with loop-through relays to prevent the Call Recorder to disrupt telephone communication in case of a power failure or another malfunction. The loop-through relays then close to fall back into passive mode and ongoing telephone calls are not disconnected.
1.8 Privacy related functions
In some situations Call Recording is perceived as an intrusion of the privacy. The Call Recorder has several functions that allow the user to protect the privacy of anyone involved. In most applications the recorder is set up to record all calls automatically. The Call Recorder ISDN can however be used to record specific numbers only or can be set to exclude certain numbers from recording. For this feature the Call Recorder ISDN has a Numberlist that can be used as “blacklist” or as “whitelist”. See Chapter 6 for more details. The Call Recorder ISDN can be used as a security recorder. For this purpose the recorder has a feature where the number of day’s can be set for the recorder to keep the recordings. In case of an emergency, recordings can be accessed while daily recordings are removed after the set number of days. This is used when for matters of privacy it is not desirable to keep recordings of the people involved for a long period. See § 4.9 for details. Another option for security recording is the DTMF initiated recording. The Call Recorder can be set up so it can detect DTMF tones on the line and start and or stop recording, or label recordings so they are not deleted afterwards. The CryptoCard option can be very effective to protect privacy. When the Call Recorder ISDN is set up to record with the CryptoCard the privacy of the people involved can be guaranteed because the recordings can only be played with a card matching the card the recording was made with and the password that belongs to it. Without the CryptoCards the recordings are not accessible. There are CryptoCards that can only be used to encode and not to decode recordings, so even when the recorder is stolen the privacy of its users remains protected.
1.9 Fax recording
Individual numbers can be configured for the recording of fax traffic. The configuration for fax recording differs from the recording of

Call Recorder PRI ISDN manual ©-Vidicode 2008 21
telephone conversations in several ways. The recordings of fax traffic are not compressed, Automatic Gain Control is disabled and Notification is omitted. The original fax images of fax recordings can be recovered and viewed with a special version of the Call Recorder Access System software.

Call Recorder PRI ISDN manual ©Vidicode 2008 22
Call Recorder PRI ISDN manual ©-Vidicode 2008 23
2 The Call Recorder ISDN
2.1 What's in the box
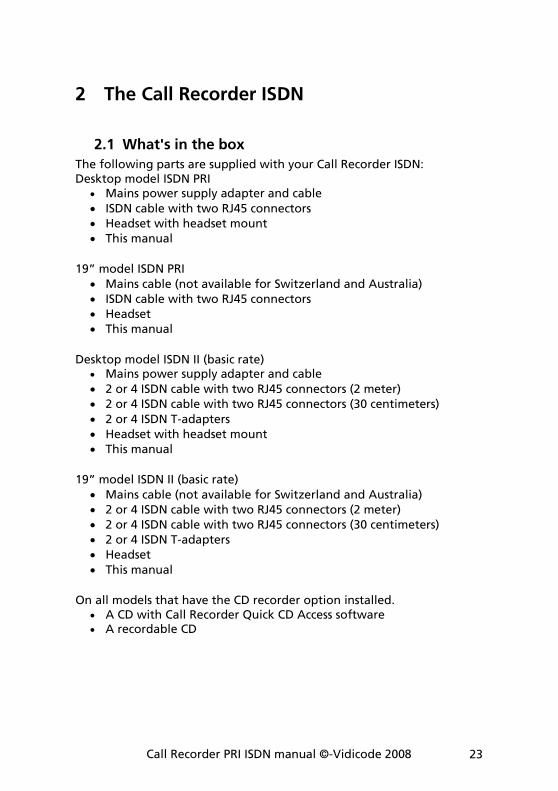
The following parts are supplied with your Call Recorder ISDN: Desktop model ISDN PRI
• Mains power supply adapter and cable
• ISDN cable with two RJ45 connectors
• Headset with headset mount
• This manual
19” model ISDN PRI
• Mains cable (not available for Switzerland and Australia)
• ISDN cable with two RJ45 connectors
• Headset
• This manual
Desktop model ISDN II (basic rate) • Mains power supply adapter and cable
• 2 or 4 ISDN cable with two RJ45 connectors (2 meter)
• 2 or 4 ISDN cable with two RJ45 connectors (30 centimeters)
• 2 or 4 ISDN T-adapters
• Headset with headset mount
• This manual
19” model ISDN II (basic rate)
• Mains cable (not available for Switzerland and Australia)
• 2 or 4 ISDN cable with two RJ45 connectors (2 meter)
• 2 or 4 ISDN cable with two RJ45 connectors (30 centimeters)
• 2 or 4 ISDN T-adapters
• Headset
• This manual
On all models that have the CD recorder option installed. • A CD with Call Recorder Quick CD Access software • A recordable CD

Call Recorder PRI ISDN manual ©Vidicode 2008 24
2.2 Connecting the Power supply
2.2.1 On the desktop model The Call Recorder ISDN desktop is powered through an AC power adapter. It does not have an On/Off switch; the Call Recorder ISDN is turned on by connecting the power supply.
2.2.2 On the 19” model Use the supplied mains cable. The recorder does not have an On/Off switch; the Call Recorder ISDN is turned on by connecting the power supply. In some countries (Switzerland, Australia) no mains cable is supplied because it cannot be bought in the country of manufacture (The Netherlands). Any standard computer mains cable will do.
Call Recorder PRI ISDN manual ©-Vidicode 2008 25
2.3 Connecting the ISDN lines
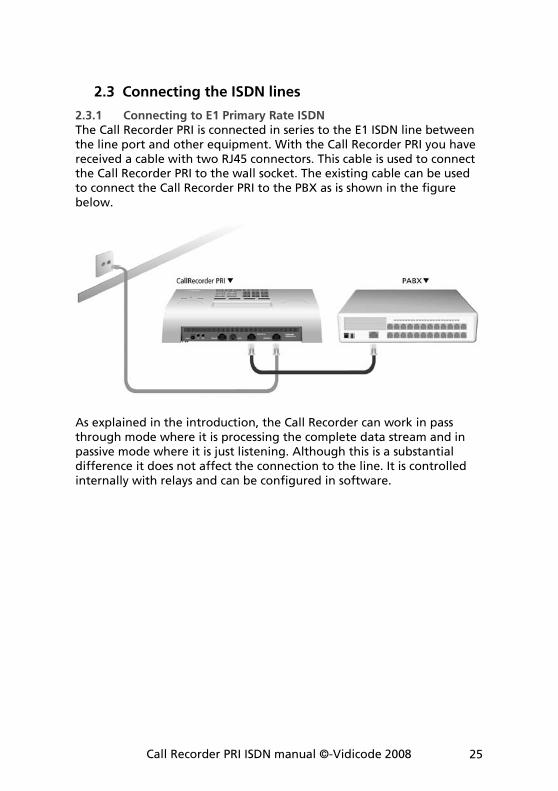
2.3.1 Connecting to E1 Primary Rate ISDN The Call Recorder PRI is connected in series to the E1 ISDN line between the line port and other equipment. With the Call Recorder PRI you have received a cable with two RJ45 connectors. This cable is used to connect the Call Recorder PRI to the wall socket. The existing cable can be used to connect the Call Recorder PRI to the PBX as is shown in the figure below.
As explained in the introduction, the Call Recorder can work in pass through mode where it is processing the complete data stream and in passive mode where it is just listening. Although this is a substantial difference it does not affect the connection to the line. It is controlled internally with relays and can be configured in software.

Call Recorder PRI ISDN manual ©Vidicode 2008 26
The figure below is an example of a possible setup of the Call Recorder using the desktop model, …
and using the 19” model.
Call Recorder PRI ISDN manual ©-Vidicode 2008 27
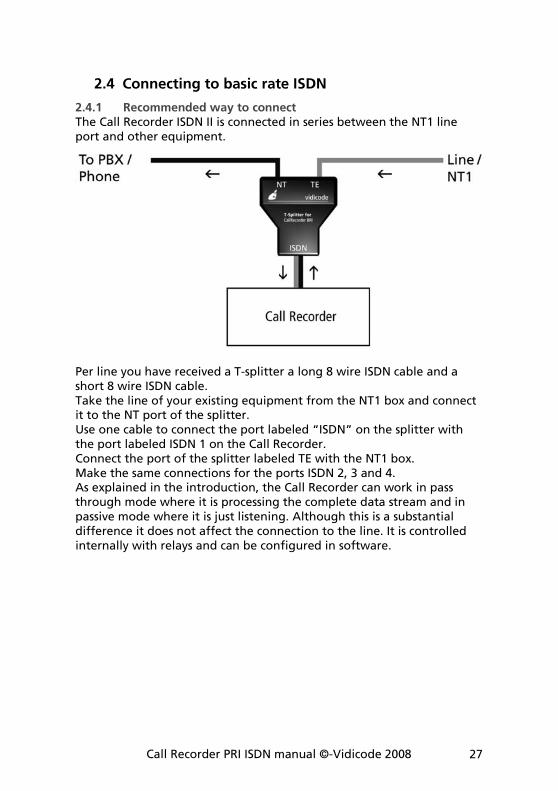
2.4 Connecting to basic rate ISDN
2.4.1 Recommended way to connect The Call Recorder ISDN II is connected in series between the NT1 line port and other equipment.
Per line you have received a T-splitter a long 8 wire ISDN cable and a short 8 wire ISDN cable. Take the line of your existing equipment from the NT1 box and connect it to the NT port of the splitter. Use one cable to connect the port labeled “ISDN” on the splitter with the port labeled ISDN 1 on the Call Recorder. Connect the port of the splitter labeled TE with the NT1 box. Make the same connections for the ports ISDN 2, 3 and 4. As explained in the introduction, the Call Recorder can work in pass through mode where it is processing the complete data stream and in passive mode where it is just listening. Although this is a substantial difference it does not affect the connection to the line. It is controlled internally with relays and can be configured in software.
Call Recorder PRI ISDN manual ©Vidicode 2008 28
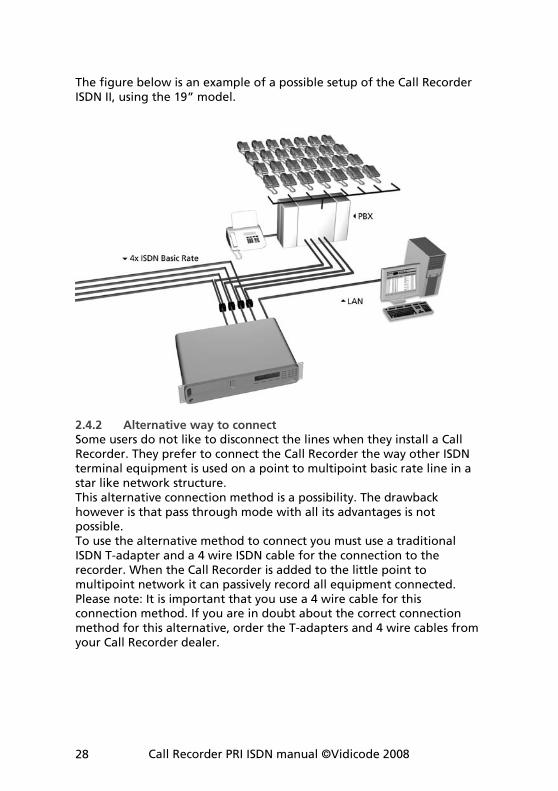
The figure below is an example of a possible setup of the Call Recorder ISDN II, using the 19” model.
2.4.2 Alternative way to connect Some users do not like to disconnect the lines when they install a Call Recorder. They prefer to connect the Call Recorder the way other ISDN terminal equipment is used on a point to multipoint basic rate line in a star like network structure. This alternative connection method is a possibility. The drawback however is that pass through mode with all its advantages is not possible. To use the alternative method to connect you must use a traditional ISDN T-adapter and a 4 wire ISDN cable for the connection to the recorder. When the Call Recorder is added to the little point to multipoint network it can passively record all equipment connected. Please note: It is important that you use a 4 wire cable for this connection method. If you are in doubt about the correct connection method for this alternative, order the T-adapters and 4 wire cables from your Call Recorder dealer.
Call Recorder PRI ISDN manual ©-Vidicode 2008 29
3 Configuration and operation
After you have connected the hardware it is time to configure and use the Call Recorder. This chapter explains you how the user interface works. In the following chapters we guide you with the configuration. You must:
• Go through the recorder settings and make changes if required
• Go through the network settings so the Call Recorder will fit in with your network
• Edit the Numberlists to enable special functions that you may want
• (Optional) Install the Call Recorder Access System software on your PC and test the connection to the recorder
3.1 Operation basics
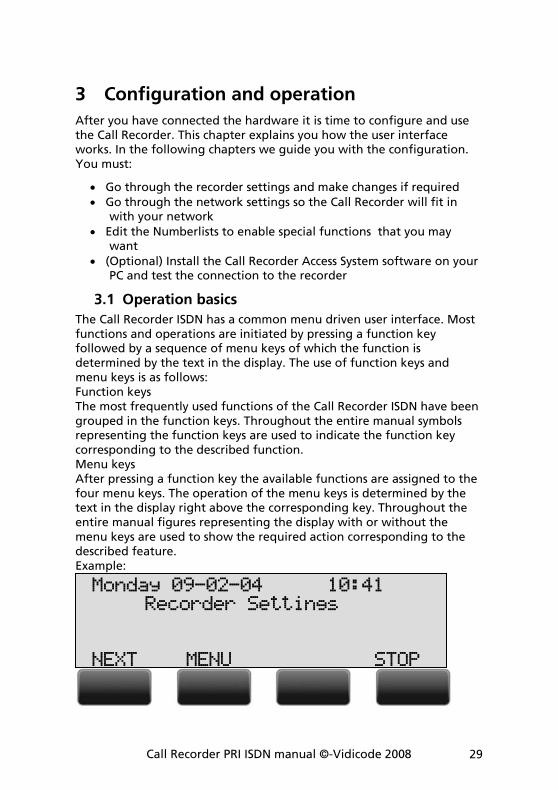
The Call Recorder ISDN has a common menu driven user interface. Most functions and operations are initiated by pressing a function key followed by a sequence of menu keys of which the function is determined by the text in the display. The use of function keys and menu keys is as follows: Function keys The most frequently used functions of the Call Recorder ISDN have been grouped in the function keys. Throughout the entire manual symbols representing the function keys are used to indicate the function key corresponding to the described function. Menu keys After pressing a function key the available functions are assigned to the four menu keys. The operation of the menu keys is determined by the text in the display right above the corresponding key. Throughout the entire manual figures representing the display with or without the menu keys are used to show the required action corresponding to the described feature. Example:
Monday 09-02-04 10:41 Recorder Settings NEXT MENU STOP
Call Recorder PRI ISDN manual ©Vidicode 2008 30
In this example you are instructed to press the menu key below the text MENU in order to open the Recorder setting menu.
3.2 Frequently used key indicators
The following menu key functions are consistently used throughout the manual. MENU in the display indicates the presence of an underlying menu Press MENU to open the underlying menu NEXT in the display indicates the presence of more menu items Press NEXT to jump to the following menu item BACK in the display indicates the presence of an embracing menu Press BACK to return to the embracing menu STOP in the display indicates the absence of an embracing menu Press STOP to return to operating mode CHANGE will toggle the item in the display between "On" and "Off" In some cases CHANGE is used to increase or decrease a value.
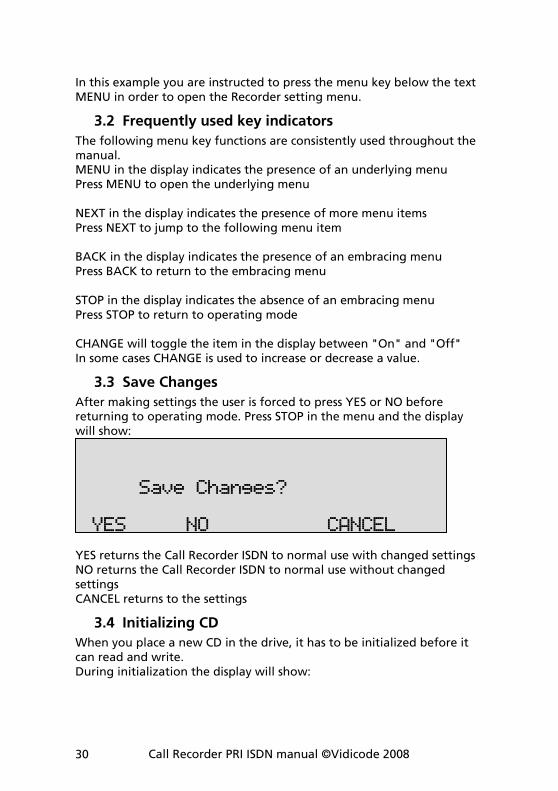
3.3 Save Changes
After making settings the user is forced to press YES or NO before returning to operating mode. Press STOP in the menu and the display will show:
YES returns the Call Recorder ISDN to normal use with changed settings NO returns the Call Recorder ISDN to normal use without changed settings CANCEL returns to the settings
3.4 Initializing CD
When you place a new CD in the drive, it has to be initialized before it can read and write. During initialization the display will show:
Save Changes? YES NO CANCEL
Call Recorder PRI ISDN manual ©-Vidicode 2008 31
At this point the Call Recorder cannot be used for any other functions. The initialization of the CD may take up to 10 seconds. Recording is not interrupted by the initialization of the new CD.
Initialising CD

Call Recorder PRI ISDN manual ©Vidicode 2008 32
Call Recorder PRI ISDN manual ©-Vidicode 2008 33
4 Recorder settings
Recorder settings of the Call Recorder ISDN consist of the default settings of the Speaker and Volume, Numberlist, In-Line mode, Notification, [��] Action, CryptoCard, Auto Delete, optionally protecting the Call Recorder with a password, setting of the Clock, and setting the Language. All Recorder settings are made in the Recorder settings menu.
4.1 Opening the Recorder settings menu
On the desktop model:
• Press the key to enter the recorder settings menu.
On the 19” model:
• Press the key
• Press SystemSystemSystemSystem to move to the recorder settings menu
The first item in the settings to appear is the loudspeaker setting.
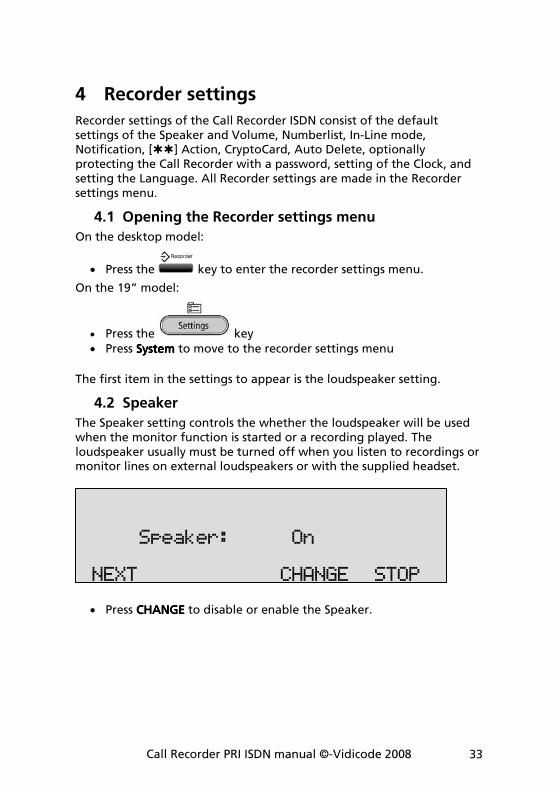
4.2 Speaker
The Speaker setting controls the whether the loudspeaker will be used when the monitor function is started or a recording played. The loudspeaker usually must be turned off when you listen to recordings or monitor lines on external loudspeakers or with the supplied headset.
• Press CHANGECHANGECHANGECHANGE to disable or enable the Speaker.
Speaker: On NEXT CHANGE STOP
Call Recorder PRI ISDN manual ©Vidicode 2008 34
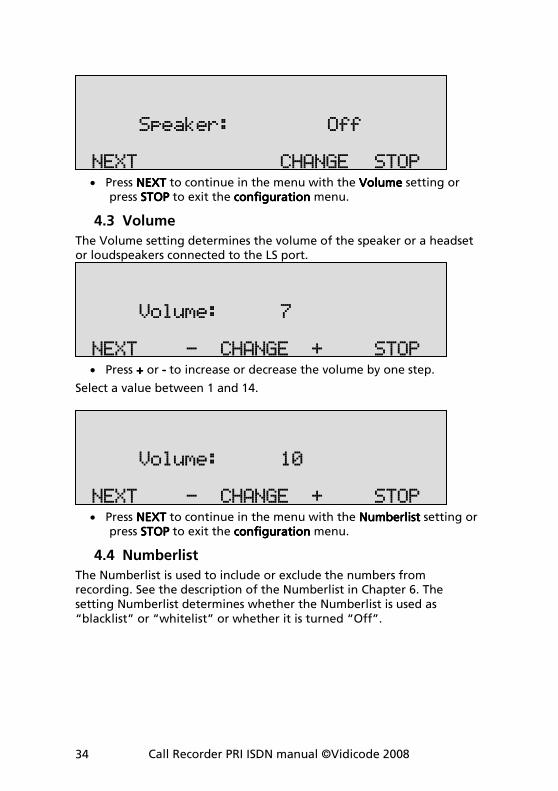
• Press NEXTNEXTNEXTNEXT to continue in the menu with the VolumeVolumeVolumeVolume setting or press STOPSTOPSTOPSTOP to exit the configurationconfigurationconfigurationconfiguration menu.
4.3 Volume
The Volume setting determines the volume of the speaker or a headset or loudspeakers connected to the LS port.
• Press ++++ or ---- to increase or decrease the volume by one step.
Select a value between 1 and 14.
• Press NEXTNEXTNEXTNEXT to continue in the menu with the NumberlistNumberlistNumberlistNumberlist setting or press STOPSTOPSTOPSTOP to exit the configurationconfigurationconfigurationconfiguration menu.
4.4 Numberlist
The Numberlist is used to include or exclude the numbers from recording. See the description of the Numberlist in Chapter 6. The setting Numberlist determines whether the Numberlist is used as “blacklist” or “whitelist” or whether it is turned “Off”.
Volume: 10 NEXT - CHANGE + STOP
Volume: 7 NEXT - CHANGE + STOP
Speaker: Off NEXT CHANGE STOP
Call Recorder PRI ISDN manual ©-Vidicode 2008 35
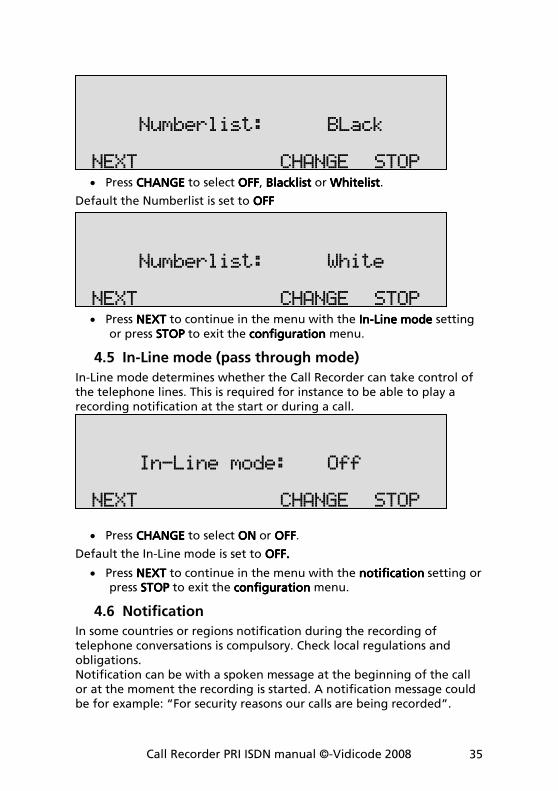
• Press CHANGECHANGECHANGECHANGE to select OFFOFFOFFOFF, BlackBlackBlackBlacklistlistlistlist or WhiteWhiteWhiteWhitelistlistlistlist.
Default the Numberlist is set to OFFOFFOFFOFF
• Press NEXTNEXTNEXTNEXT to continue in the menu with the InInInIn----Line modeLine modeLine modeLine mode setting or press STOPSTOPSTOPSTOP to exit the configurationconfigurationconfigurationconfiguration menu.
4.5 In-Line mode (pass through mode)
In-Line mode determines whether the Call Recorder can take control of the telephone lines. This is required for instance to be able to play a recording notification at the start or during a call.
• Press CHANGECHANGECHANGECHANGE to select ONONONON or OFFOFFOFFOFF.
Default the In-Line mode is set to OFF.OFF.OFF.OFF.
• Press NEXTNEXTNEXTNEXT to continue in the menu with the nnnnotificationotificationotificationotification setting or press STOPSTOPSTOPSTOP to exit the configurationconfigurationconfigurationconfiguration menu.
4.6 Notification
In some countries or regions notification during the recording of telephone conversations is compulsory. Check local regulations and obligations. Notification can be with a spoken message at the beginning of the call or at the moment the recording is started. A notification message could be for example: “For security reasons our calls are being recorded”.
In-Line mode: Off NEXT CHANGE STOP
Numberlist: White NEXT CHANGE STOP
Numberlist: BLack NEXT CHANGE STOP
Call Recorder PRI ISDN manual ©Vidicode 2008 36
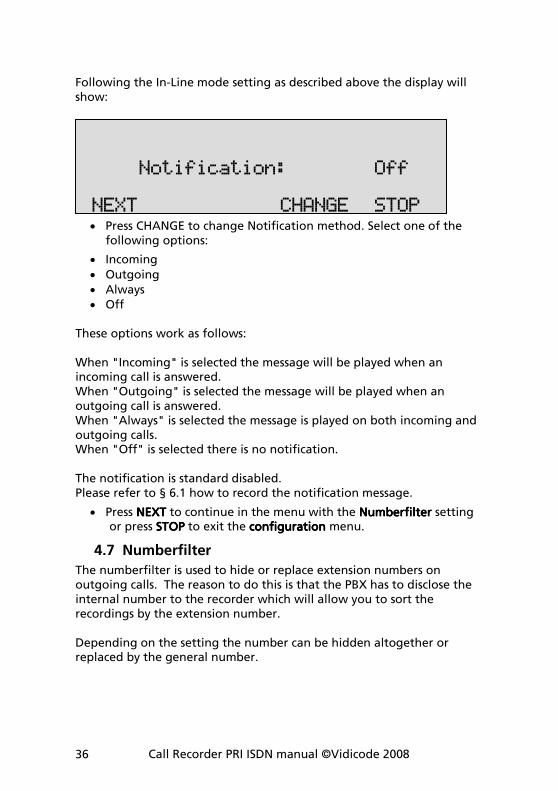
Following the In-Line mode setting as described above the display will show:
• Press CHANGE to change Notification method. Select one of the following options:
• Incoming
• Outgoing
• Always
• Off These options work as follows: When "Incoming" is selected the message will be played when an incoming call is answered. When "Outgoing" is selected the message will be played when an outgoing call is answered. When "Always" is selected the message is played on both incoming and outgoing calls. When "Off" is selected there is no notification.
The notification is standard disabled. Please refer to § 6.1 how to record the notification message.
• Press NEXTNEXTNEXTNEXT to continue in the menu with the NumberfilterNumberfilterNumberfilterNumberfilter setting or press STOPSTOPSTOPSTOP to exit the configurationconfigurationconfigurationconfiguration menu.
4.7 Numberfilter
The numberfilter is used to hide or replace extension numbers on outgoing calls. The reason to do this is that the PBX has to disclose the internal number to the recorder which will allow you to sort the recordings by the extension number. Depending on the setting the number can be hidden altogether or replaced by the general number.
Notification: Off NEXT CHANGE STOP

Call Recorder PRI ISDN manual ©-Vidicode 2008 37
• Press CHANGE to change Numberfilter method. Select one of the following options:
• Remove
• Hide
• Replace
• Off These options work as follows: When "Remove" is selected the entire number is removed from the outgoing protocol communication, your service provider will fill in the number with the general number. When “Hide" is selected the number is removed and the number is marked as restricted, the called party is not able to see your number. When "Replace" is selected the number is replaced by a replacement number that can be entered afterwards in the next menu item (only when “Replace is selected”). Please note most service providers don’t allow replacement and will correct the replacement with the general number. When "Off" is selected there is no number filtering active.
The numberfilter is standard disabled.
• Press NEXTNEXTNEXTNEXT to continue in the menu with the [[[[��]]]] Action Action Action Action setting or press STOPSTOPSTOPSTOP to exit the configurationconfigurationconfigurationconfiguration menu.
4.8 Replacement
When “Replace” is selected as action type for the numberfilter, the replacement string determines what the Call Recorder will send to the remote caller. You must fill in the number that you want the remote caller to see.
The replacement number must be a number that really belongs to the line bundle that you have, otherwise the telephone provider will filter it out. Normally the main number of the organization will be used.
Numberfilter: Off NEXT CHANGE STOP
Call Recorder PRI ISDN manual ©Vidicode 2008 38
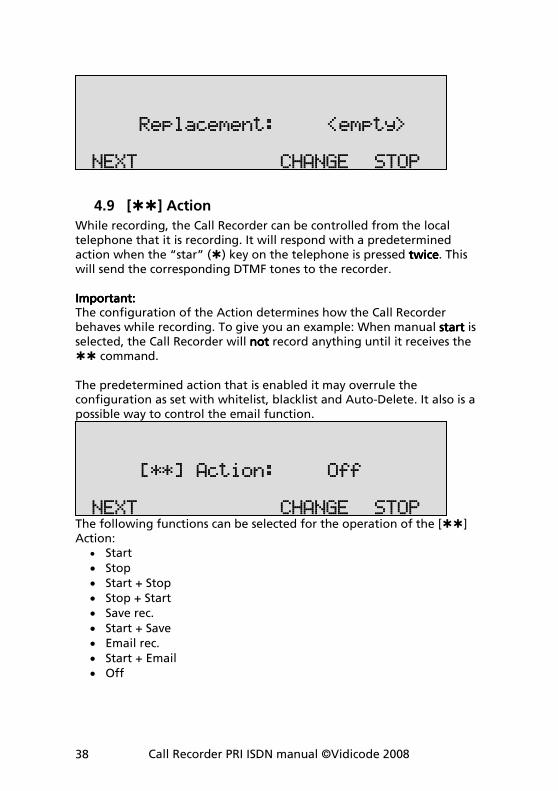
4.9 [��] Action
While recording, the Call Recorder can be controlled from the local telephone that it is recording. It will respond with a predetermined action when the “star” (�) key on the telephone is pressed twicetwicetwicetwice. This will send the corresponding DTMF tones to the recorder. Important:Important:Important:Important: The configuration of the Action determines how the Call Recorder behaves while recording. To give you an example: When manual startstartstartstart is selected, the Call Recorder will notnotnotnot record anything until it receives the �� command. The predetermined action that is enabled it may overrule the configuration as set with whitelist, blacklist and Auto-Delete. It also is a possible way to control the email function.
The following functions can be selected for the operation of the [��] Action:
• Start
• Stop
• Start + Stop
• Stop + Start
• Save rec.
• Start + Save
• Email rec.
• Start + Email
• Off
[**] Action: Off NEXT CHANGE STOP
Replacement: <empty> NEXT CHANGE STOP
Call Recorder PRI ISDN manual ©-Vidicode 2008 39
When “StartStartStartStart” is selected a recording must be started manually. It will not be started automatically unless it is on the whitelist. When the recorder was not yet recording because it was on the whitelist, the beginning of the call is not recorded. When the Notification message is enabled, a Notification will be sent to the caller. When “StopStopStopStop” is selected a recording can be stopped. When the call was being recorded, it will have been recorded from the start until it stopped recording. When “Start/StopStart/StopStart/StopStart/Stop” is selected a recording can be started and stopped must be started manually. It will not be started automatically unless it is on the whitelist. When the recorder was not yet recording because it was on the whitelist, the beginning of the call is not recorded. When a Notification message is enabled, a Notification will be sent to the caller. Note:Note:Note:Note: It is not recommended to combine this option with existence of a whitelist or a blacklist because the user may not know if the call is already recording and therefore may stop the recording by mistake if he wants to start recording. When “Stop/StartStop/StartStop/StartStop/Start” is selected a recording can be stopped and started. All calls are recorded automatically from the start. When a Notification message is enabled, a Notification will be sent to the caller. Note:Note:Note:Note: It is not recommended to combine this option with existence of a whitelist or a blacklist because the user may not know if the call is already recording and therefore may stop the recording by mistake if he wants to start recording. When “SaveSaveSaveSave” is selected in the option the current call is permanently saved and excluded from the AutoDelete function. When “EmailEmailEmailEmail” is selected the recording is Emailed according to the email-list.
• Press NEXTNEXTNEXTNEXT to continue in the menu with the [[[[��]]]] Action Action Action Action setting or press STOPSTOPSTOPSTOP to exit the configurationconfigurationconfigurationconfiguration menu.
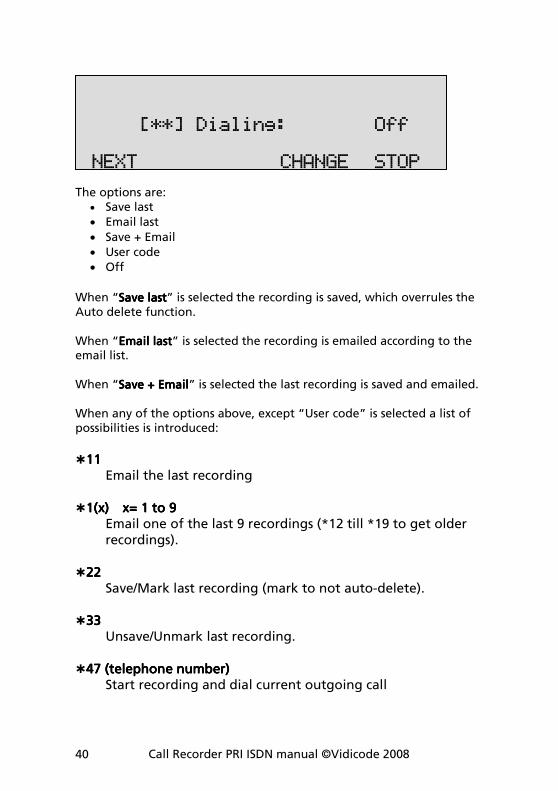
4.10 [��] Dialing
When not recording, the user can select an external line, hear a dial tone, and then send a command to the Call Recorder. The command will either be �� or � + two digits + an optional telephone number.
Call Recorder PRI ISDN manual ©Vidicode 2008 40
The options are:
• Save last
• Email last
• Save + Email
• User code
• Off
When “SSSSave lastave lastave lastave last” is selected the recording is saved, which overrules the Auto delete function. When “Email lastEmail lastEmail lastEmail last” is selected the recording is emailed according to the email list. When “Save + EmailSave + EmailSave + EmailSave + Email” is selected the last recording is saved and emailed. When any of the options above, except “User code” is selected a list of possibilities is introduced:
�11 11 11 11
Email the last recording �1111((((xxxx)))) x= 1 to 9x= 1 to 9x= 1 to 9x= 1 to 9
Email one of the last 9 recordings (*12 till *19 to get older recordings).
�22222222
Save/Mark last recording (mark to not auto-delete). �33333333
Unsave/Unmark last recording.
�47474747 (telephone number) (telephone number) (telephone number) (telephone number) Start recording and dial current outgoing call
[**] Dialing: Off NEXT CHANGE STOP
Call Recorder PRI ISDN manual ©-Vidicode 2008 41
�44444444 (telephone number)(telephone number)(telephone number)(telephone number) Start recording and save/mark current outgoing call �41414141 (telephone number)(telephone number)(telephone number)(telephone number)
Start and save/mark and Email current outgoing call.
�00000000 (tel(tel(tel(telephone number)ephone number)ephone number)ephone number) Do not record current outgoing call.
�99999999
Erase last recording (must be enabled in the hidden menu first).
�7777((((xxxx)))) x= 1 to 9x= 1 to 9x= 1 to 9x= 1 to 9 Reserved for user commands. The command is stored by the recorder and PC applications can use it.
�8888((((xxxx)))) x= 1 to 9x= 1 to 9x= 1 to 9x= 1 to 9 Reserved for answering machine functions. The option “User CodeUser CodeUser CodeUser Code” is a method for call centre employees with a variable workstation to identify themselves. It is outside the scope of this manual to explain the User Code feature in detail. Note:Note:Note:Note: It is possible that your telephone system does not allow �commands while there is no connection yet. We have not yet observed this on a PBX, but we did see it on a certain model of ISDN telephone.
• Press NEXTNEXTNEXTNEXT to continue in the menu with the next menu itemnext menu itemnext menu itemnext menu item or press STOPSTOPSTOPSTOP to exit the configurationconfigurationconfigurationconfiguration menu.
4.11 Compression
The default procedure while recording is to compress the recorded audio from aLaw to G.723.1. This is a factor 10 compression with hardly any loss of quality. It can however be disabled. The available recording time on the hard disk is calculated based on G.723.1 compression.
Call Recorder PRI ISDN manual ©Vidicode 2008 42
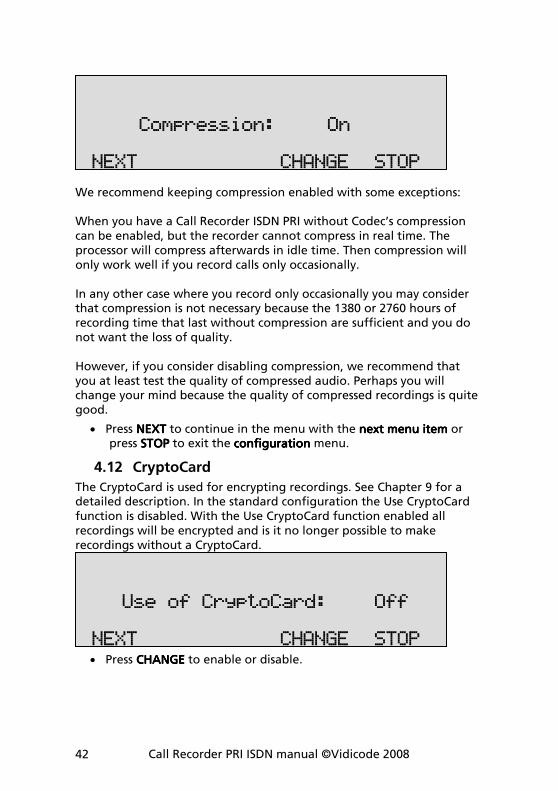
We recommend keeping compression enabled with some exceptions: When you have a Call Recorder ISDN PRI without Codec’s compression can be enabled, but the recorder cannot compress in real time. The processor will compress afterwards in idle time. Then compression will only work well if you record calls only occasionally. In any other case where you record only occasionally you may consider that compression is not necessary because the 1380 or 2760 hours of recording time that last without compression are sufficient and you do not want the loss of quality. However, if you consider disabling compression, we recommend that you at least test the quality of compressed audio. Perhaps you will change your mind because the quality of compressed recordings is quite good.
• Press NEXTNEXTNEXTNEXT to continue in the menu with the next menu itemnext menu itemnext menu itemnext menu item or press STOPSTOPSTOPSTOP to exit the configurationconfigurationconfigurationconfiguration menu.
4.12 CryptoCard
The CryptoCard is used for encrypting recordings. See Chapter 9 for a detailed description. In the standard configuration the Use CryptoCard function is disabled. With the Use CryptoCard function enabled all recordings will be encrypted and is it no longer possible to make recordings without a CryptoCard.
• Press CHANGECHANGECHANGECHANGE to enable or disable.
Use of CryptoCard: Off NEXT CHANGE STOP
Compression: On NEXT CHANGE STOP
Call Recorder PRI ISDN manual ©-Vidicode 2008 43
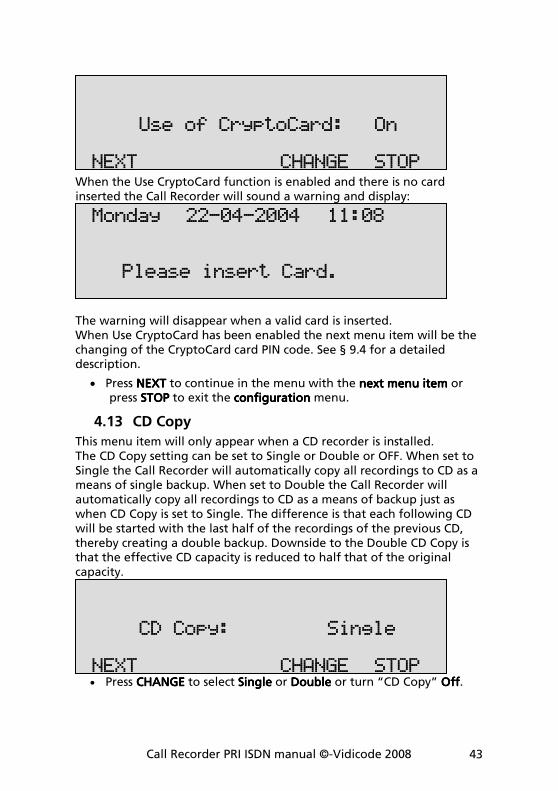
When the Use CryptoCard function is enabled and there is no card inserted the Call Recorder will sound a warning and display:
The warning will disappear when a valid card is inserted. When Use CryptoCard has been enabled the next menu item will be the changing of the CryptoCard card PIN code. See § 9.4 for a detailed description.
• Press NEXTNEXTNEXTNEXT to continue in the menu with the next menu itemnext menu itemnext menu itemnext menu item or press STOPSTOPSTOPSTOP to exit the configurationconfigurationconfigurationconfiguration menu.
4.13 CD Copy
This menu item will only appear when a CD recorder is installed. The CD Copy setting can be set to Single or Double or OFF. When set to Single the Call Recorder will automatically copy all recordings to CD as a means of single backup. When set to Double the Call Recorder will automatically copy all recordings to CD as a means of backup just as when CD Copy is set to Single. The difference is that each following CD will be started with the last half of the recordings of the previous CD, thereby creating a double backup. Downside to the Double CD Copy is that the effective CD capacity is reduced to half that of the original capacity.
• Press CHANGECHANGECHANGECHANGE to select SingleSingleSingleSingle or DoubleDoubleDoubleDouble or turn “CD Copy” OffOffOffOff.
CD Copy: Single NEXT CHANGE STOP
Monday 22-04-2004 11:08 Please insert Card.
Use of CryptoCard: On NEXT CHANGE STOP
Call Recorder PRI ISDN manual ©Vidicode 2008 44
Default CD Copy is set to OFFOFFOFFOFF. If Double is selected for the first time the first half of the first CD is filled with empty files.
• Press NEXTNEXTNEXTNEXT to continue in the menu with the CD Copy timeCD Copy timeCD Copy timeCD Copy time or Auto Auto Auto Auto DeleteDeleteDeleteDelete setting or press STOPSTOPSTOPSTOP to exit the configurationconfigurationconfigurationconfiguration menu.
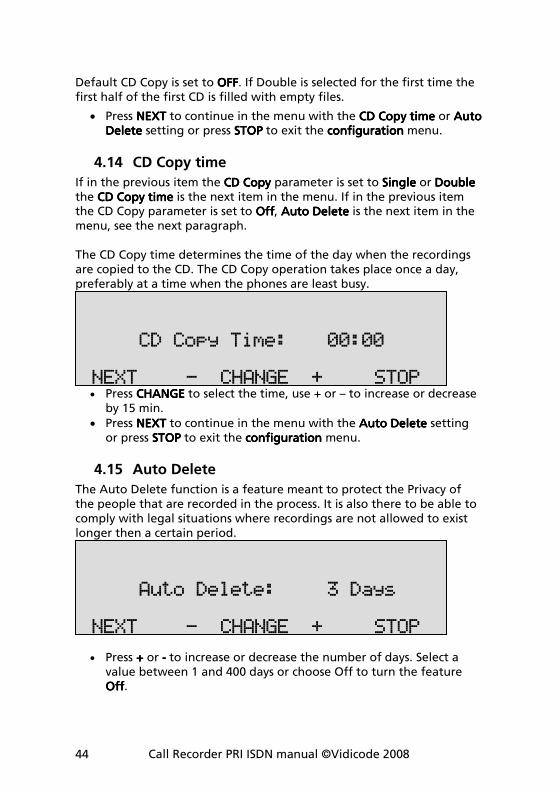
4.14 CD Copy time
If in the previous item the CD CopyCD CopyCD CopyCD Copy parameter is set to SingleSingleSingleSingle or DoubleDoubleDoubleDouble the CD Copy tiCD Copy tiCD Copy tiCD Copy timemememe is the next item in the menu. If in the previous item the CD Copy parameter is set to OffOffOffOff, Auto DeleteAuto DeleteAuto DeleteAuto Delete is the next item in the menu, see the next paragraph. The CD Copy time determines the time of the day when the recordings are copied to the CD. The CD Copy operation takes place once a day, preferably at a time when the phones are least busy.
• Press CHANGECHANGECHANGECHANGE to select the time, use + or – to increase or decrease
by 15 min.
• Press NEXTNEXTNEXTNEXT to continue in the menu with the Auto DeleAuto DeleAuto DeleAuto Deletetetete setting or press STOPSTOPSTOPSTOP to exit the configurationconfigurationconfigurationconfiguration menu.
4.15 Auto Delete
The Auto Delete function is a feature meant to protect the Privacy of the people that are recorded in the process. It is also there to be able to comply with legal situations where recordings are not allowed to exist longer then a certain period.
• Press ++++ or ---- to increase or decrease the number of days. Select a value between 1 and 400 days or choose Off to turn the feature OffOffOffOff.
Auto Delete: 3 Days NEXT - CHANGE + STOP
CD Copy Time: 00:00 NEXT - CHANGE + STOP
Call Recorder PRI ISDN manual ©-Vidicode 2008 45
• Press NEXTNEXTNEXTNEXT to continue in the menu with the PasswordPasswordPasswordPassword setting or press STOPSTOPSTOPSTOP to exit the configurationconfigurationconfigurationconfiguration menu.
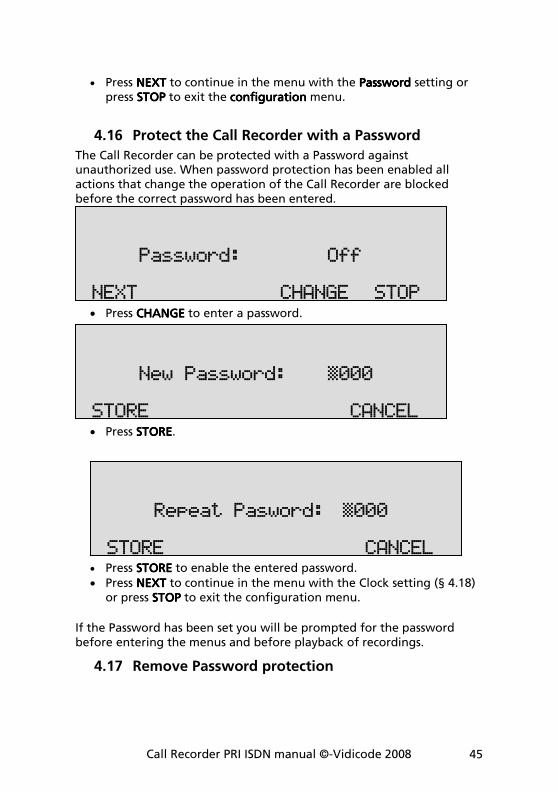
4.16 Protect the Call Recorder with a Password
The Call Recorder can be protected with a Password against unauthorized use. When password protection has been enabled all actions that change the operation of the Call Recorder are blocked before the correct password has been entered.
• Press CHANGECHANGECHANGECHANGE to enter a password.
• Press STORESTORESTORESTORE.
• Press STORESTORESTORESTORE to enable the entered password.
• Press NEXTNEXTNEXTNEXT to continue in the menu with the Clock setting (§ 4.18) or press STOPSTOPSTOPSTOP to exit the configuration menu.
If the Password has been set you will be prompted for the password before entering the menus and before playback of recordings.
4.17 Remove Password protection
Repeat Pasword: »000 STORE CANCEL
New Password: »000 STORE CANCEL
Password: Off NEXT CHANGE STOP
Call Recorder PRI ISDN manual ©Vidicode 2008 46
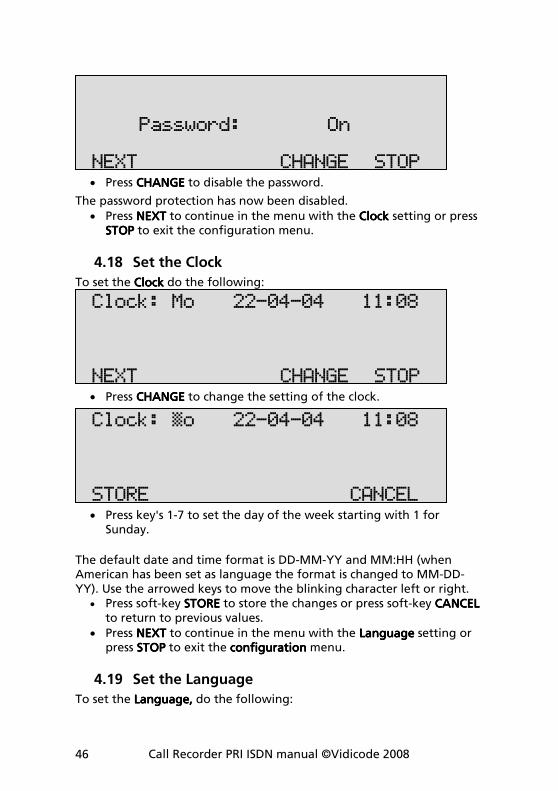
• Press CHANGECHANGECHANGECHANGE to disable the password.
The password protection has now been disabled.
• Press NEXTNEXTNEXTNEXT to continue in the menu with the ClockClockClockClock setting or press STOPSTOPSTOPSTOP to exit the configuration menu.
4.18 Set the Clock
To set the ClockClockClockClock do the following:
• Press CHANGECHANGECHANGECHANGE to change the setting of the clock.
• Press key's 1-7 to set the day of the week starting with 1 for Sunday.
The default date and time format is DD-MM-YY and MM:HH (when American has been set as language the format is changed to MM-DD-YY). Use the arrowed keys to move the blinking character left or right.
• Press soft-key STORESTORESTORESTORE to store the changes or press soft-key CANCELCANCELCANCELCANCEL to return to previous values.
• Press NEXTNEXTNEXTNEXT to continue in the menu with the LanguageLanguageLanguageLanguage setting or press STOPSTOPSTOPSTOP to exit the configurationconfigurationconfigurationconfiguration menu.
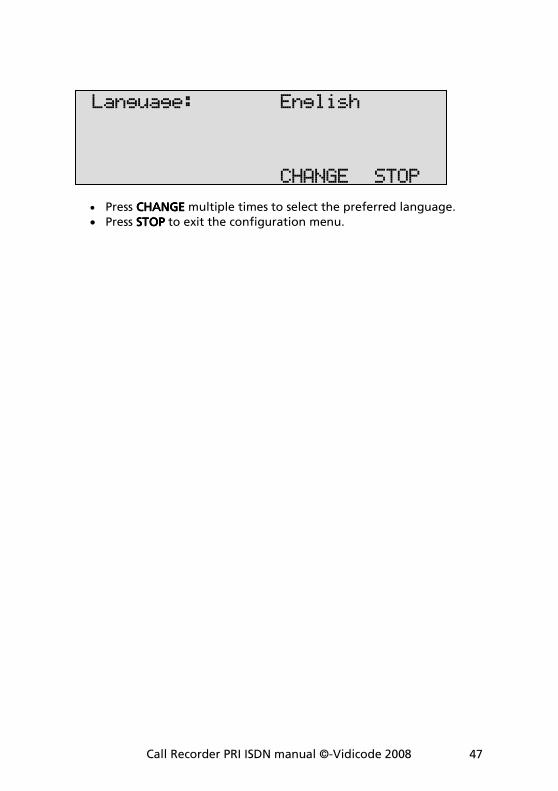
4.19 Set the Language
To set the LanguLanguLanguLanguageageageage,,,, do the following:
Clock: »o 22-04-04 11:08 STORE CANCEL
Clock: Mo 22-04-04 11:08 NEXT CHANGE STOP
Password: On NEXT CHANGE STOP
Call Recorder PRI ISDN manual ©-Vidicode 2008 47
• Press CHANGECHANGECHANGECHANGE multiple times to select the preferred language.
• Press STOPSTOPSTOPSTOP to exit the configuration menu.
Language: English CHANGE STOP

Call Recorder PRI ISDN manual ©Vidicode 2008 48
Call Recorder PRI ISDN manual ©-Vidicode 2008 49
5 Search, playback, CD copy and monitoring
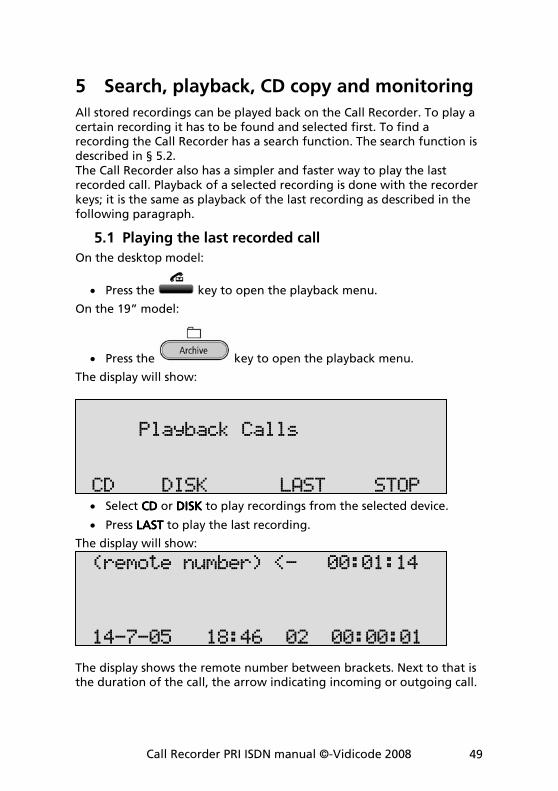
All stored recordings can be played back on the Call Recorder. To play a certain recording it has to be found and selected first. To find a recording the Call Recorder has a search function. The search function is described in § 5.2. The Call Recorder also has a simpler and faster way to play the last recorded call. Playback of a selected recording is done with the recorder keys; it is the same as playback of the last recording as described in the following paragraph.
5.1 Playing the last recorded call
On the desktop model:
• Press the key to open the playback menu.
On the 19” model:
• Press the key to open the playback menu.
The display will show:
• Select CDCDCDCD or DISKDISKDISKDISK to play recordings from the selected device.
• Press LASTLASTLASTLAST to play the last recording.
The display will show:
The display shows the remote number between brackets. Next to that is the duration of the call, the arrow indicating incoming or outgoing call.
(remote number) <- 00:01:14 14-7-05 18:46 02 00:00:01
Playback Calls CD DISK LAST STOP
Call Recorder PRI ISDN manual ©Vidicode 2008 50
Below that is the date and time of the call, the channel number and the current playback position. During playback the recorder keys have the usual recorder functions.
The and recorder keys are used to move the playback position
60 seconds backward or forward. The key is used to stop playback. For playback of older stored recordings it is required to select the recording first. Read on for an explanation how to search for the desired recording.
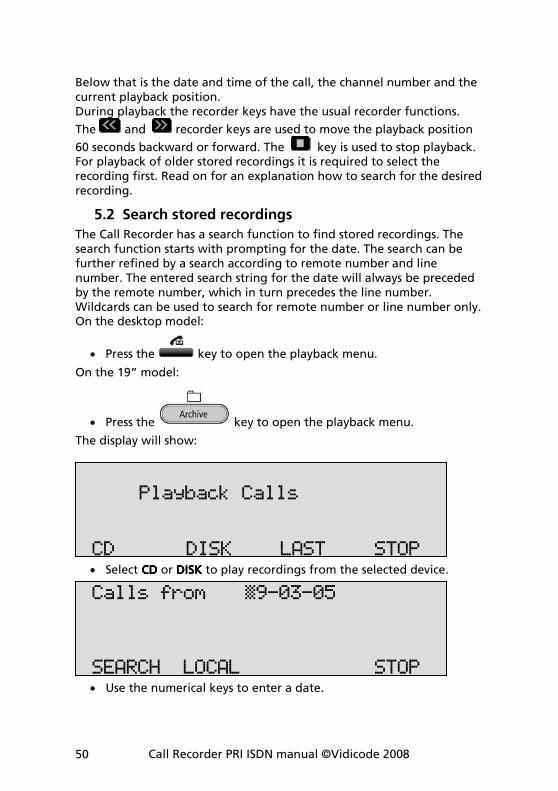
5.2 Search stored recordings
The Call Recorder has a search function to find stored recordings. The search function starts with prompting for the date. The search can be further refined by a search according to remote number and line number. The entered search string for the date will always be preceded by the remote number, which in turn precedes the line number. Wildcards can be used to search for remote number or line number only. On the desktop model:
• Press the key to open the playback menu.
On the 19” model:
• Press the key to open the playback menu.
The display will show:
• Select CDCDCDCD or DISKDISKDISKDISK to play recordings from the selected device.
• Use the numerical keys to enter a date.
Calls from »9-03-05 SEARCH LOCAL STOP
Playback Calls CD DISK LAST STOP
Call Recorder PRI ISDN manual ©-Vidicode 2008 51
Entering the date or code to search for you can use the � key as wildcard. For example enter ��:05:05 to search for all messages from
May 2005. The and are used to move the cursor left or right. It is also possible to refine the search according to remote telephone number or line number. In that case continue to read on § 5.2.1.
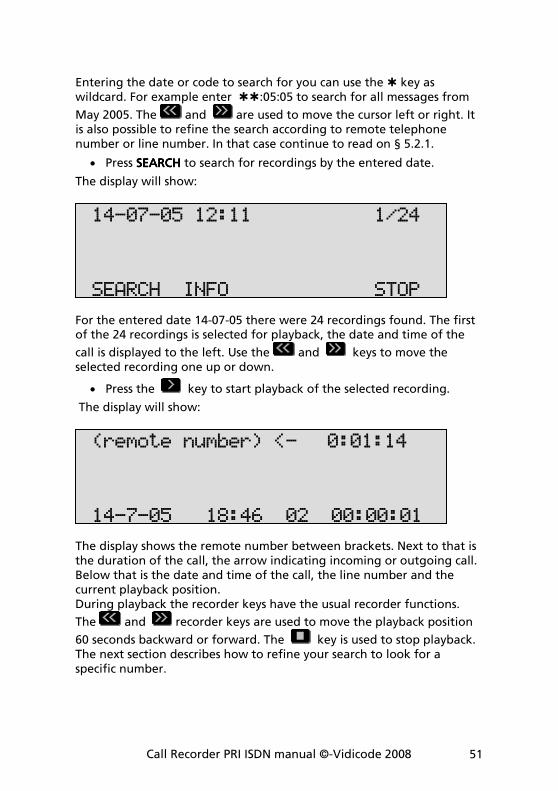
• Press SEARCHSEARCHSEARCHSEARCH to search for recordings by the entered date.
The display will show:
For the entered date 14-07-05 there were 24 recordings found. The first of the 24 recordings is selected for playback, the date and time of the
call is displayed to the left. Use the and keys to move the selected recording one up or down.
• Press the key to start playback of the selected recording.
The display will show:
The display shows the remote number between brackets. Next to that is the duration of the call, the arrow indicating incoming or outgoing call. Below that is the date and time of the call, the line number and the current playback position. During playback the recorder keys have the usual recorder functions.
The and recorder keys are used to move the playback position
60 seconds backward or forward. The key is used to stop playback. The next section describes how to refine your search to look for a specific number.
(remote number) <- 0:01:14 14-7-05 18:46 02 00:00:01
14-07-05 12:11 1/24 SEARCH INFO STOP
Call Recorder PRI ISDN manual ©Vidicode 2008 52
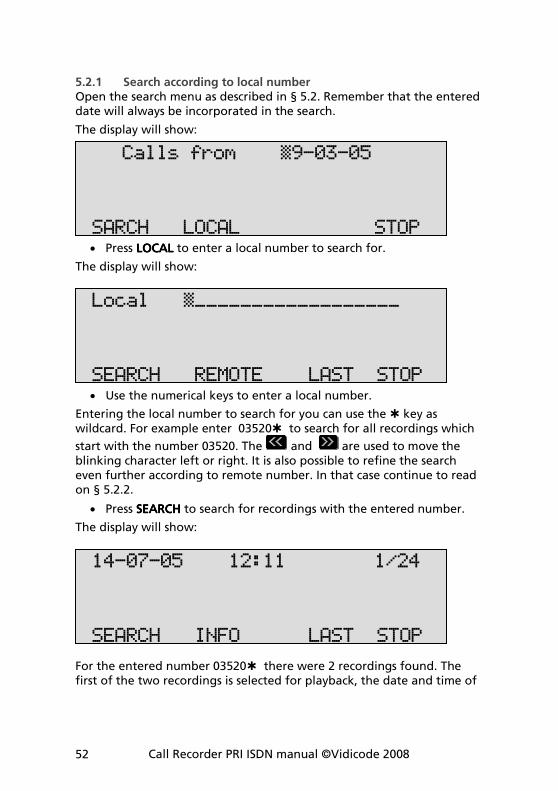
5.2.1 Search according to local number Open the search menu as described in § 5.2. Remember that the entered date will always be incorporated in the search.
The display will show:
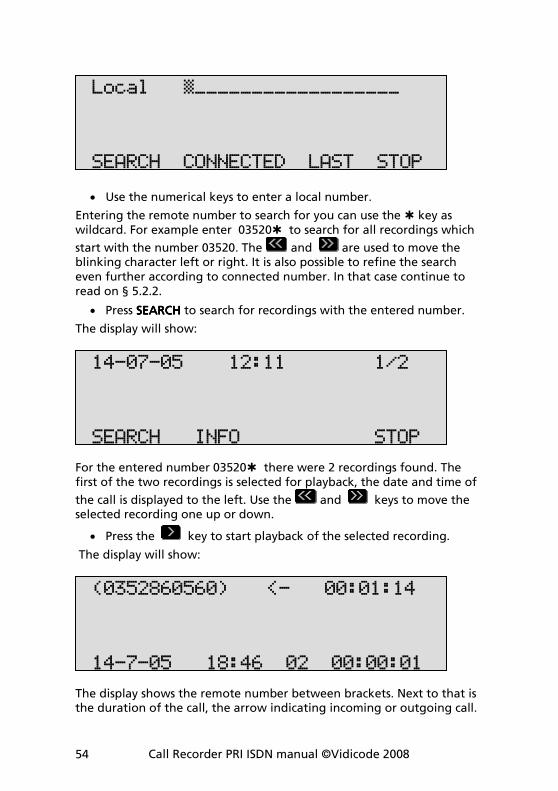
• Press LOCALLOCALLOCALLOCAL to enter a local number to search for.
The display will show:
• Use the numerical keys to enter a local number.
Entering the local number to search for you can use the � key as wildcard. For example enter 03520� to search for all recordings which
start with the number 03520. The and are used to move the blinking character left or right. It is also possible to refine the search even further according to remote number. In that case continue to read on § 5.2.2.
• Press SEARCHSEARCHSEARCHSEARCH to search for recordings with the entered number.
The display will show:
For the entered number 03520� there were 2 recordings found. The first of the two recordings is selected for playback, the date and time of
14-07-05 12:11 1/24 SEARCH INFO LAST STOP
Local »__________________ SEARCH REMOTE LAST STOP
Calls from »9-03-05 SARCH LOCAL STOP
Call Recorder PRI ISDN manual ©-Vidicode 2008 53
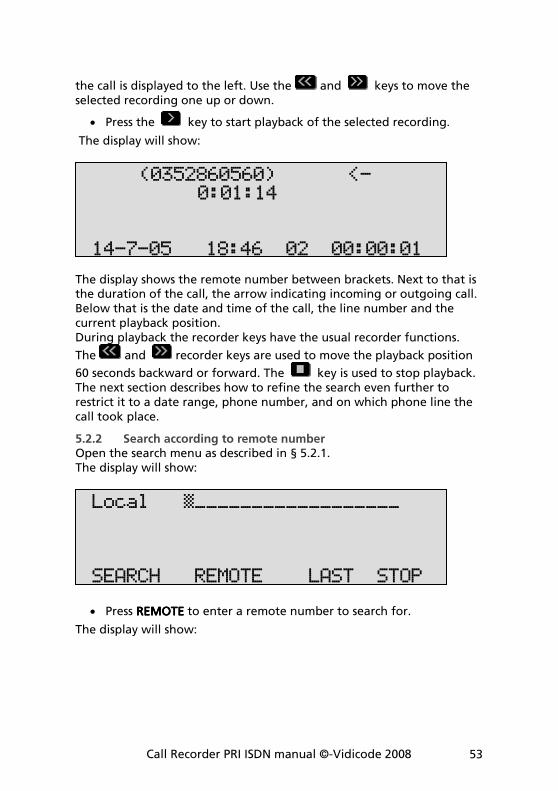
the call is displayed to the left. Use the and keys to move the selected recording one up or down.
• Press the key to start playback of the selected recording.
The display will show:
The display shows the remote number between brackets. Next to that is the duration of the call, the arrow indicating incoming or outgoing call. Below that is the date and time of the call, the line number and the current playback position. During playback the recorder keys have the usual recorder functions.
The and recorder keys are used to move the playback position
60 seconds backward or forward. The key is used to stop playback. The next section describes how to refine the search even further to restrict it to a date range, phone number, and on which phone line the call took place.
5.2.2 Search according to remote number Open the search menu as described in § 5.2.1. The display will show:
• Press REMOTEREMOTEREMOTEREMOTE to enter a remote number to search for.
The display will show:
Local »__________________ SEARCH REMOTE LAST STOP
(0352860560) <- 0:01:14 14-7-05 18:46 02 00:00:01
Call Recorder PRI ISDN manual ©Vidicode 2008 54
• Use the numerical keys to enter a local number.
Entering the remote number to search for you can use the � key as wildcard. For example enter 03520� to search for all recordings which
start with the number 03520. The and are used to move the blinking character left or right. It is also possible to refine the search even further according to connected number. In that case continue to read on § 5.2.2.
• Press SEARCHSEARCHSEARCHSEARCH to search for recordings with the entered number.
The display will show:
For the entered number 03520� there were 2 recordings found. The first of the two recordings is selected for playback, the date and time of
the call is displayed to the left. Use the and keys to move the selected recording one up or down.
• Press the key to start playback of the selected recording.
The display will show:
The display shows the remote number between brackets. Next to that is the duration of the call, the arrow indicating incoming or outgoing call.
(0352860560) <- 00:01:14 14-7-05 18:46 02 00:00:01
14-07-05 12:11 1/2 SEARCH INFO STOP
Local »__________________ SEARCH CONNECTED LAST STOP
Call Recorder PRI ISDN manual ©-Vidicode 2008 55
Below that is the date and time of the call, the line number and the current playback position. During playback the recorder keys have the usual recorder functions.
The and recorder keys are used to move the playback position
60 seconds backward or forward. The key is used to stop playback. The next section describes how to refine the search even further to restrict it to a date range, phone number, and on which phone line the call took place.
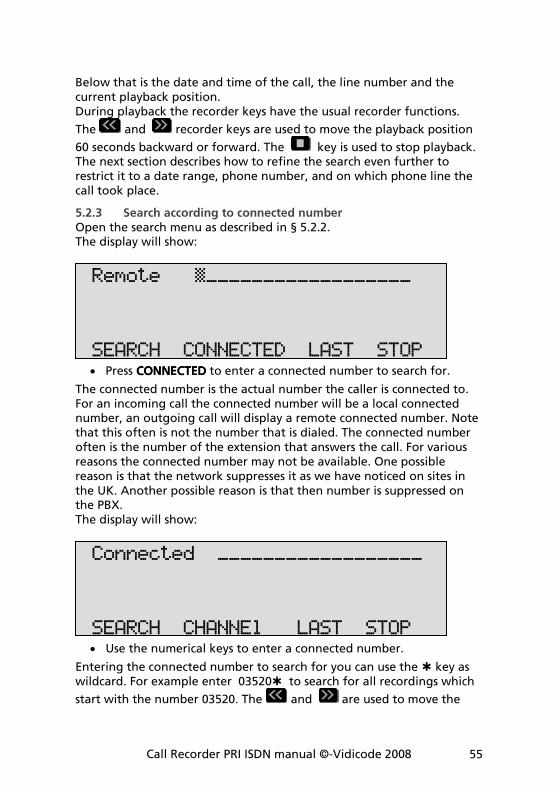
5.2.3 Search according to connected number Open the search menu as described in § 5.2.2. The display will show:
• Press CONNECTEDCONNECTEDCONNECTEDCONNECTED to enter a connected number to search for.
The connected number is the actual number the caller is connected to. For an incoming call the connected number will be a local connected number, an outgoing call will display a remote connected number. Note that this often is not the number that is dialed. The connected number often is the number of the extension that answers the call. For various reasons the connected number may not be available. One possible reason is that the network suppresses it as we have noticed on sites in the UK. Another possible reason is that then number is suppressed on the PBX. The display will show:
• Use the numerical keys to enter a connected number.
Entering the connected number to search for you can use the � key as wildcard. For example enter 03520� to search for all recordings which
start with the number 03520. The and are used to move the
Connected __________________ SEARCH CHANNEl LAST STOP
Remote »__________________ SEARCH CONNECTED LAST STOP
Call Recorder PRI ISDN manual ©Vidicode 2008 56
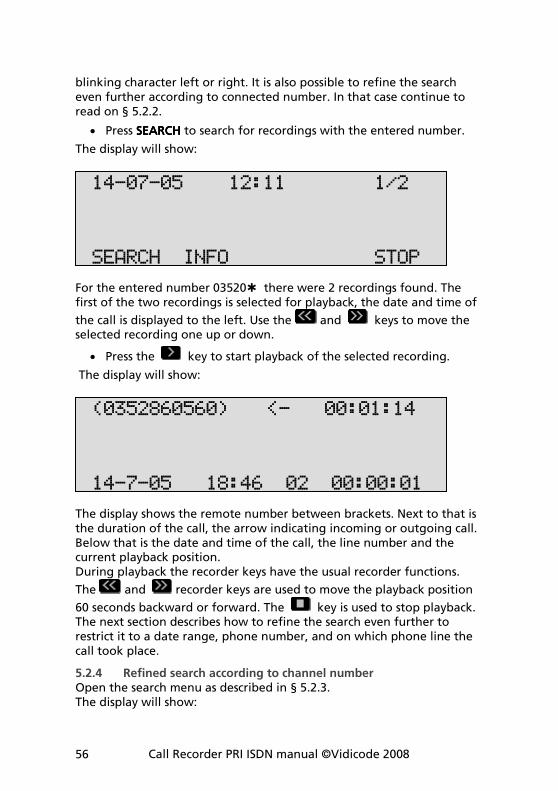
blinking character left or right. It is also possible to refine the search even further according to connected number. In that case continue to read on § 5.2.2.
• Press SEARCHSEARCHSEARCHSEARCH to search for recordings with the entered number.
The display will show:
For the entered number 03520� there were 2 recordings found. The first of the two recordings is selected for playback, the date and time of
the call is displayed to the left. Use the and keys to move the selected recording one up or down.
• Press the key to start playback of the selected recording.
The display will show:
The display shows the remote number between brackets. Next to that is the duration of the call, the arrow indicating incoming or outgoing call. Below that is the date and time of the call, the line number and the current playback position. During playback the recorder keys have the usual recorder functions.
The and recorder keys are used to move the playback position
60 seconds backward or forward. The key is used to stop playback. The next section describes how to refine the search even further to restrict it to a date range, phone number, and on which phone line the call took place.
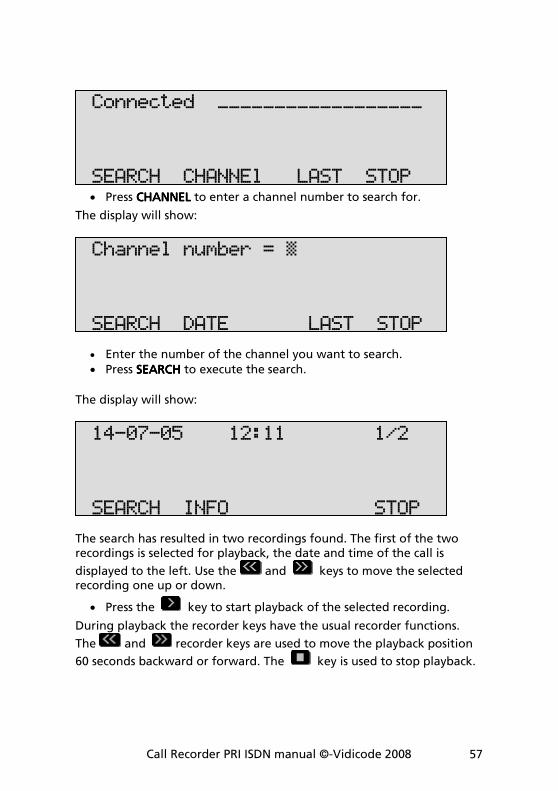
5.2.4 Refined search according to channel number Open the search menu as described in § 5.2.3. The display will show:
(0352860560) <- 00:01:14 14-7-05 18:46 02 00:00:01
14-07-05 12:11 1/2 SEARCH INFO STOP
Call Recorder PRI ISDN manual ©-Vidicode 2008 57
• Press CHANNELCHANNELCHANNELCHANNEL to enter a channel number to search for.
The display will show:
• Enter the number of the channel you want to search.
• Press SEARCHSEARCHSEARCHSEARCH to execute the search.
The display will show:
The search has resulted in two recordings found. The first of the two recordings is selected for playback, the date and time of the call is
displayed to the left. Use the and keys to move the selected recording one up or down.
• Press the key to start playback of the selected recording.
During playback the recorder keys have the usual recorder functions.
The and recorder keys are used to move the playback position
60 seconds backward or forward. The key is used to stop playback.
14-07-05 12:11 1/2 SEARCH INFO STOP
Channel number = » SEARCH DATE LAST STOP
Connected __________________ SEARCH CHANNEl LAST STOP
Call Recorder PRI ISDN manual ©Vidicode 2008 58
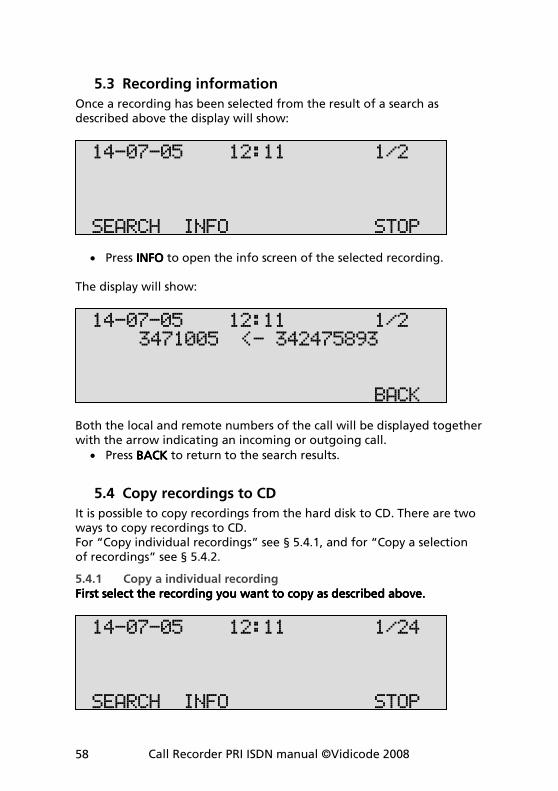
5.3 Recording information
Once a recording has been selected from the result of a search as described above the display will show:
• Press INFOINFOINFOINFO to open the info screen of the selected recording. The display will show:
Both the local and remote numbers of the call will be displayed together with the arrow indicating an incoming or outgoing call.
• Press BACKBACKBACKBACK to return to the search results.
5.4 Copy recordings to CD
It is possible to copy recordings from the hard disk to CD. There are two ways to copy recordings to CD. For “Copy individual recordings” see § 5.4.1, and for “Copy a selection of recordings” see § 5.4.2.
5.4.1 Copy a individual recording First select the recordingFirst select the recordingFirst select the recordingFirst select the recording you want to copy as described above. you want to copy as described above. you want to copy as described above. you want to copy as described above.
14-07-05 12:11 1/24 SEARCH INFO STOP
14-07-05 12:11 1/2 3471005 <- 342475893 BACK
14-07-05 12:11 1/2 SEARCH INFO STOP
Call Recorder PRI ISDN manual ©-Vidicode 2008 59
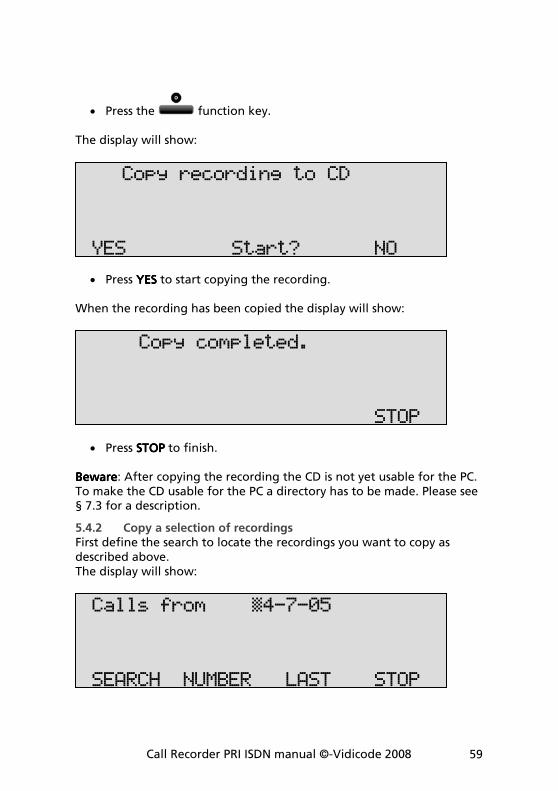
• Press the function key. The display will show:
• Press YESYESYESYES to start copying the recording. When the recording has been copied the display will show:
• Press STOPSTOPSTOPSTOP to finish. BewareBewareBewareBeware: After copying the recording the CD is not yet usable for the PC. To make the CD usable for the PC a directory has to be made. Please see § 7.3 for a description.
5.4.2 Copy a selection of recordings First define the search to locate the recordings you want to copy as described above. The display will show:
Calls from »4-7-05 SEARCH NUMBER LAST STOP
Copy completed. STOP
Copy recording to CD YES Start? NO
Call Recorder PRI ISDN manual ©Vidicode 2008 60
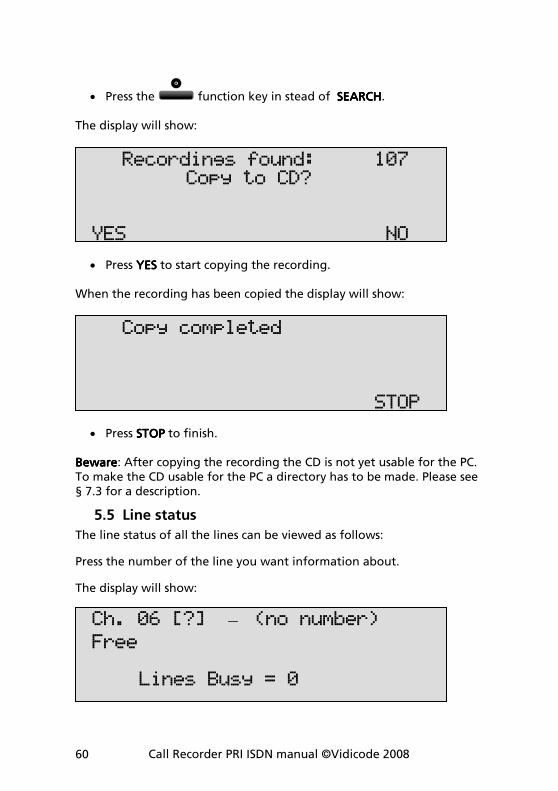
• Press the function key in stead of SEARCHSEARCHSEARCHSEARCH. The display will show:
• Press YESYESYESYES to start copying the recording. When the recording has been copied the display will show:
• Press STOPSTOPSTOPSTOP to finish. BeBeBeBewarewarewareware: After copying the recording the CD is not yet usable for the PC. To make the CD usable for the PC a directory has to be made. Please see § 7.3 for a description.
5.5 Line status
The line status of all the lines can be viewed as follows:
Press the number of the line you want information about.
The display will show:
Ch. 06 [?] – (no number)
Free Lines Busy = 0
Copy completed STOP
Recordings found: 107 Copy to CD? YES NO
Call Recorder PRI ISDN manual ©-Vidicode 2008 61
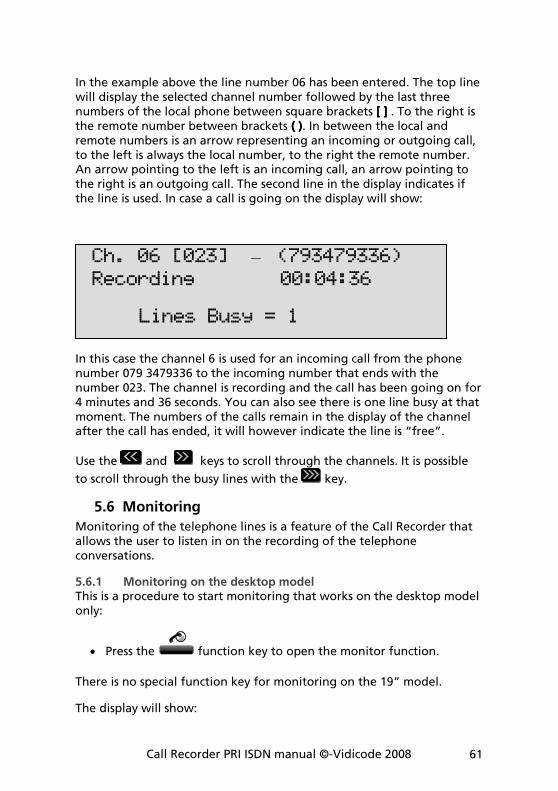
In the example above the line number 06 has been entered. The top line will display the selected channel number followed by the last three numbers of the local phone between square brackets [ ][ ][ ][ ] . To the right is the remote number between brackets ( )( )( )( ). In between the local and remote numbers is an arrow representing an incoming or outgoing call, to the left is always the local number, to the right the remote number. An arrow pointing to the left is an incoming call, an arrow pointing to the right is an outgoing call. The second line in the display indicates if the line is used. In case a call is going on the display will show:
In this case the channel 6 is used for an incoming call from the phone number 079 3479336 to the incoming number that ends with the number 023. The channel is recording and the call has been going on for 4 minutes and 36 seconds. You can also see there is one line busy at that moment. The numbers of the calls remain in the display of the channel after the call has ended, it will however indicate the line is “free”.
Use the and keys to scroll through the channels. It is possible
to scroll through the busy lines with the key.
5.6 Monitoring
Monitoring of the telephone lines is a feature of the Call Recorder that allows the user to listen in on the recording of the telephone conversations.
5.6.1 Monitoring on the desktop model This is a procedure to start monitoring that works on the desktop model only:
• Press the function key to open the monitor function.
There is no special function key for monitoring on the 19” model.
The display will show:
Ch. 06 [023] – (793479336)
Recording 00:04:36 Lines Busy = 1
Call Recorder PRI ISDN manual ©Vidicode 2008 62
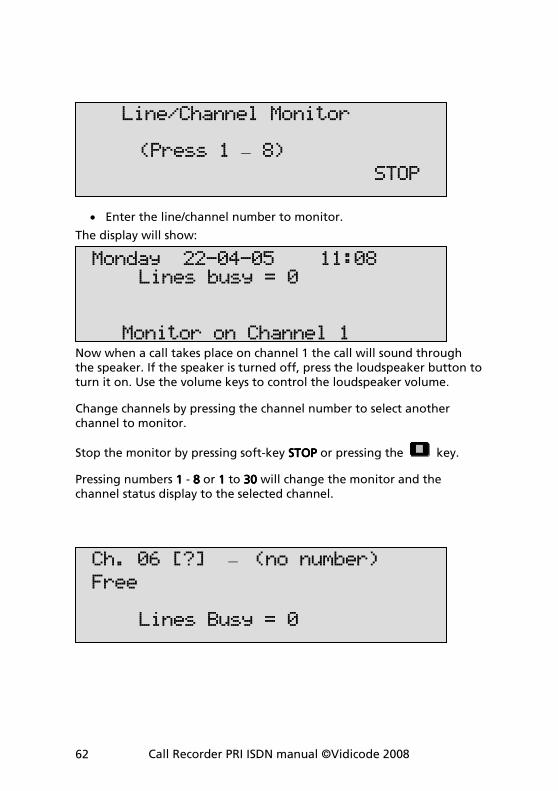
• Enter the line/channel number to monitor.
The display will show:
Now when a call takes place on channel 1 the call will sound through the speaker. If the speaker is turned off, press the loudspeaker button to turn it on. Use the volume keys to control the loudspeaker volume.
Change channels by pressing the channel number to select another channel to monitor.
Stop the monitor by pressing soft-key STOPSTOPSTOPSTOP or pressing the key.
Pressing numbers 1111 - 8888 or 1 1 1 1 to 30303030 will change the monitor and the channel status display to the selected channel.
Ch. 06 [?] – (no number)
Free Lines Busy = 0
Monday 22-04-05 11:08 Lines busy = 0 Monitor on Channel 1
Line/Channel Monitor (Press 1 – 8)
STOP
Call Recorder PRI ISDN manual ©-Vidicode 2008 63
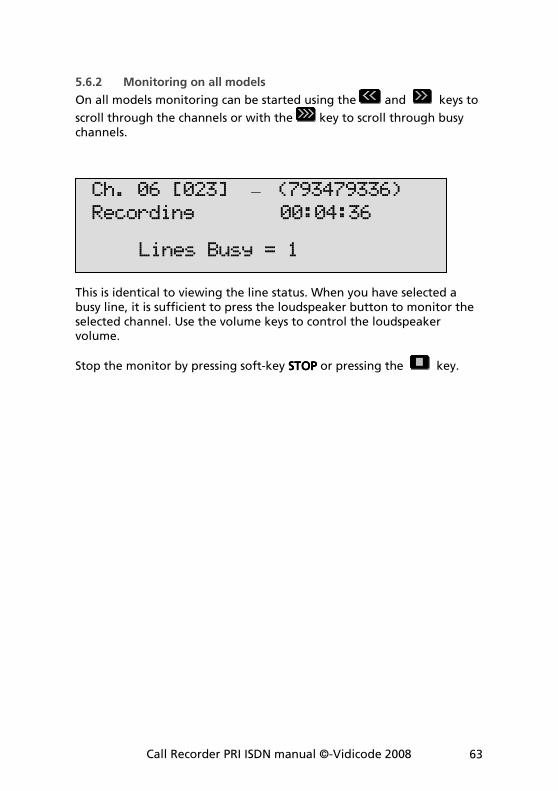
5.6.2 Monitoring on all models
On all models monitoring can be started using the and keys to
scroll through the channels or with the key to scroll through busy channels.
This is identical to viewing the line status. When you have selected a busy line, it is sufficient to press the loudspeaker button to monitor the selected channel. Use the volume keys to control the loudspeaker volume.
Stop the monitor by pressing soft-key STOPSTOPSTOPSTOP or pressing the key.
Ch. 06 [023] – (793479336)
Recording 00:04:36 Lines Busy = 1

Call Recorder PRI ISDN manual ©Vidicode 2008 64
Call Recorder PRI ISDN manual ©-Vidicode 2008 65
6 Notification message and Numberlist
In this Chapter the recording of the notification message is described and the use of the numberlist is explained. The notification message is used to announce to the remote party that the call is being recorded. The setting of the notification message is described in § 4.5. The numberlist can be used as Blacklist or Whitelist and can contain 250 numbers. Using the list as Blacklist means that the calls to or from the numbers in the list are not recorded. Conversely, when the numberlist is used as Whitelist the calls to and from the numbers in the list are recorded while the rest of the calls is not.
6.1 Record notification message
To record the notification message do the following: Connect the supplied headset. On the desktop model:
• Press the function key.
On the 19” model:
• Press the function key.
• Press NOTIF
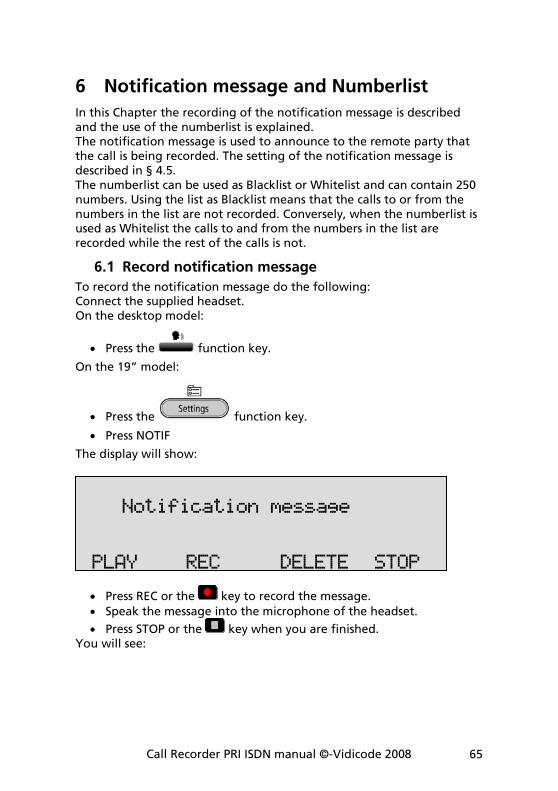
The display will show:
• Press REC or the key to record the message.
• Speak the message into the microphone of the headset.
• Press STOP or the key when you are finished. You will see:
Notification message PLAY REC DELETE STOP
Call Recorder PRI ISDN manual ©Vidicode 2008 66
Press STORE when you want to keep the message that you just recorded or CANCEL. When you have stored a message:
• Press PLAY or the key to listen to the recorded message. When you are satisfied with the recording press STOPSTOPSTOPSTOP. When you want to record again press DELETEDELETEDELETEDELETE.
6.2 View a numberlist
On the desktop model:
• Press the function key to view the numberlist. On the 19” model:
• Press the function key.
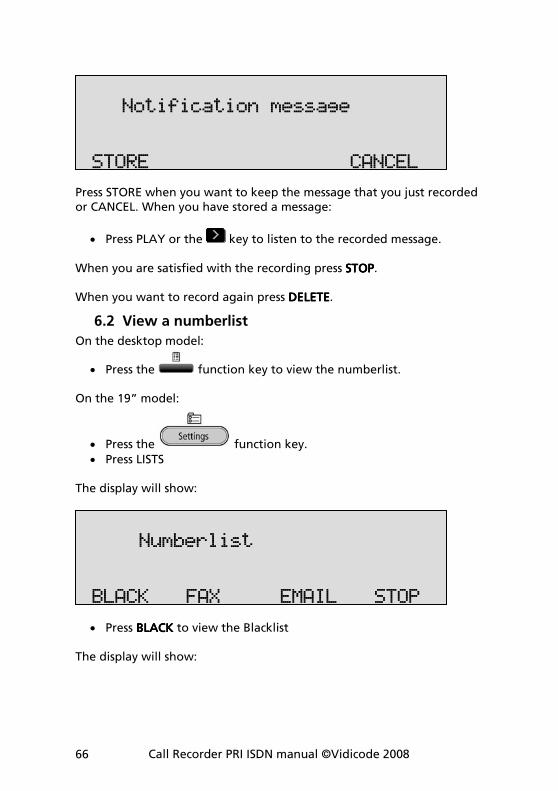
• Press LISTS The display will show:
• Press BLACKBLACKBLACKBLACK to view the Blacklist The display will show:
Numberlist
BLACK FAX EMAIL STOP
Notification message STORE CANCEL
Call Recorder PRI ISDN manual ©-Vidicode 2008 67
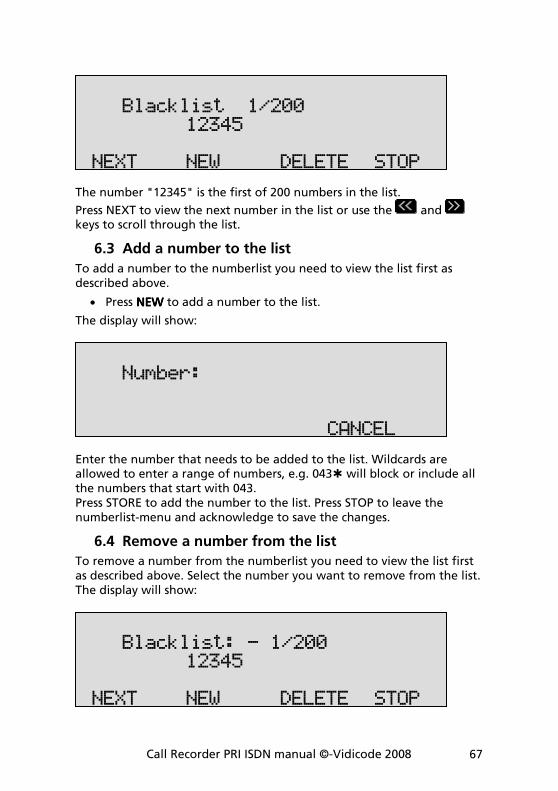
The number "12345" is the first of 200 numbers in the list.
Press NEXT to view the next number in the list or use the and keys to scroll through the list.
6.3 Add a number to the list
To add a number to the numberlist you need to view the list first as described above.
• Press NEWNEWNEWNEW to add a number to the list.
The display will show:
Enter the number that needs to be added to the list. Wildcards are allowed to enter a range of numbers, e.g. 043� will block or include all the numbers that start with 043. Press STORE to add the number to the list. Press STOP to leave the numberlist-menu and acknowledge to save the changes.
6.4 Remove a number from the list
To remove a number from the numberlist you need to view the list first as described above. Select the number you want to remove from the list. The display will show:
Blacklist: - 1/200 12345 NEXT NEW DELETE STOP
Number: CANCEL
Blacklist 1/200 12345 NEXT NEW DELETE STOP
Call Recorder PRI ISDN manual ©Vidicode 2008 68
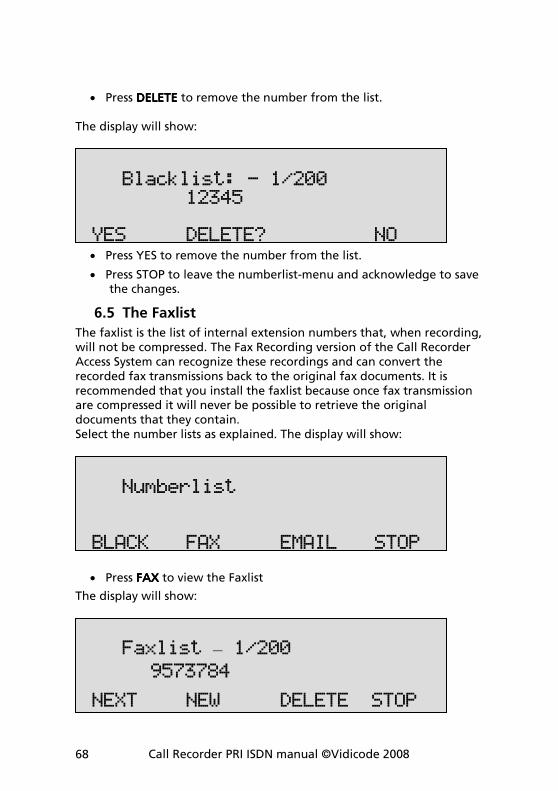
• Press DELETEDELETEDELETEDELETE to remove the number from the list. The display will show:
• Press YES to remove the number from the list.
• Press STOP to leave the numberlist-menu and acknowledge to save the changes.
6.5 The Faxlist
The faxlist is the list of internal extension numbers that, when recording, will not be compressed. The Fax Recording version of the Call Recorder Access System can recognize these recordings and can convert the recorded fax transmissions back to the original fax documents. It is recommended that you install the faxlist because once fax transmission are compressed it will never be possible to retrieve the original documents that they contain. Select the number lists as explained. The display will show:
• Press FAXFAXFAXFAX to view the Faxlist
The display will show:
Faxlist – 1/200
9573784
NEXT NEW DELETE STOP
Numberlist BLACK FAX EMAIL STOP
Blacklist: - 1/200 12345 YES DELETE? NO
Call Recorder PRI ISDN manual ©-Vidicode 2008 69
The number "9573784" is the first of 200 numbers in the list.
• Press NEXTNEXTNEXTNEXT to view the next number in the list or use the and
keys to scroll through the list.
To add or remove numbers from the list please refer to the previous two paragraphs where these functions are described for the general numberlist. The operation to add or remove numbers from the faxlist is exactly similar the general numberlist.
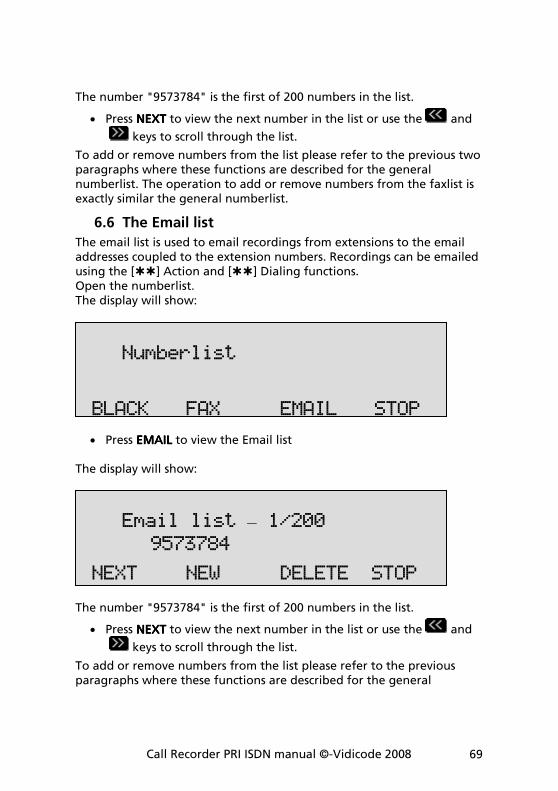
6.6 The Email list
The email list is used to email recordings from extensions to the email addresses coupled to the extension numbers. Recordings can be emailed using the [��] Action and [��] Dialing functions. Open the numberlist. The display will show:
• Press EMAILEMAILEMAILEMAIL to view the Email list The display will show:
The number "9573784" is the first of 200 numbers in the list.
• Press NEXTNEXTNEXTNEXT to view the next number in the list or use the and
keys to scroll through the list.
To add or remove numbers from the list please refer to the previous paragraphs where these functions are described for the general
Email list – 1/200
9573784
NEXT NEW DELETE STOP
Numberlist BLACK FAX EMAIL STOP
Call Recorder PRI ISDN manual ©Vidicode 2008 70
numberlist. The operation to add or remove numbers from the email list is identical. An email list can also be entered by placing a file “email.txt” onto the hard disk of the Call Recorder. This can either be done through the Ethernet connection with FTP or through the CD. The email.txt file should have the following format: ”Number\emailaddress”. For example: 793471038\[email protected] 7038793012\[email protected] etc. etc.
Call Recorder PRI ISDN manual ©-Vidicode 2008 71
7 Using the CD drive and the CD menu
The CD recordable has become popular as carrier for digital data. Most Call Recorder ISDN recorders have a CD drive. The CD drive is used to copy recordings onto recordable CD’s for backup purposes.
7.1 The CD menu
The following paragraphs describe the operation of the CD functions that are grouped in the disk menu. The disk menu is started with the Disk function key.
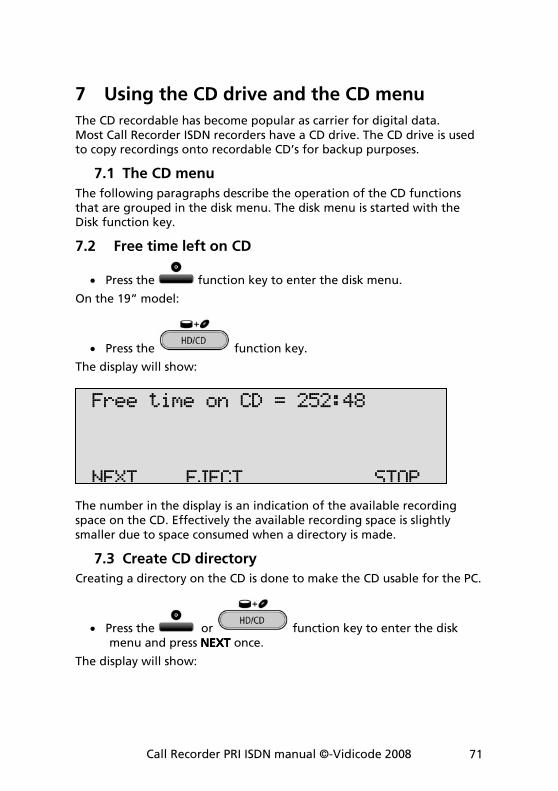
7.2 Free time left on CD
• Press the function key to enter the disk menu.
On the 19” model:
• Press the function key.
The display will show:
The number in the display is an indication of the available recording space on the CD. Effectively the available recording space is slightly smaller due to space consumed when a directory is made.
7.3 Create CD directory
Creating a directory on the CD is done to make the CD usable for the PC.
• Press the or function key to enter the disk menu and press NEXTNEXTNEXTNEXT once.
The display will show:
Free time on CD = 252:48
NEXT EJECT STOP

Call Recorder PRI ISDN manual ©Vidicode 2008 72
• Press STARTSTARTSTARTSTART to start creating a directory. The display will show:
• Press OPENOPENOPENOPEN or CLOSEDCLOSEDCLOSEDCLOSED to create an open or closed directory. An "open directory" leaves the remaining space on the CD open for recording. A "closed directory" disables the CD for further recording. Note: A CD Directory will include only the recordings that are on the CD when making the directory!
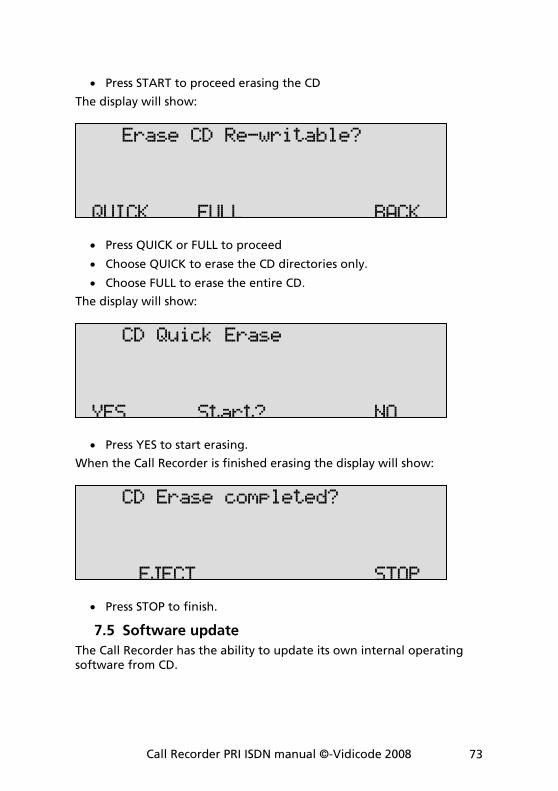
7.4 Erase CD Re-writable
If a CD-rewritable is used the recordings on the CD can be erased.
• Press the or function key to enter the disk menu and press NEXTNEXTNEXTNEXT three times.
The display will show:
Erase CD Re-writable?
NEXT EJECT START STOP
Create CD directory
OPEN CLOSE CANCEL
Create CD directory
NEXT EJECT START STOP
Call Recorder PRI ISDN manual ©-Vidicode 2008 73
• Press START to proceed erasing the CD
The display will show:
• Press QUICK or FULL to proceed
• Choose QUICK to erase the CD directories only.
• Choose FULL to erase the entire CD.
The display will show:
• Press YES to start erasing.
When the Call Recorder is finished erasing the display will show:
• Press STOP to finish.
7.5 Software update
The Call Recorder has the ability to update its own internal operating software from CD.
CD Erase completed?
EJECT STOP
CD Quick Erase
YES Start? NO
Erase CD Re-writable?
QUICK FULL BACK
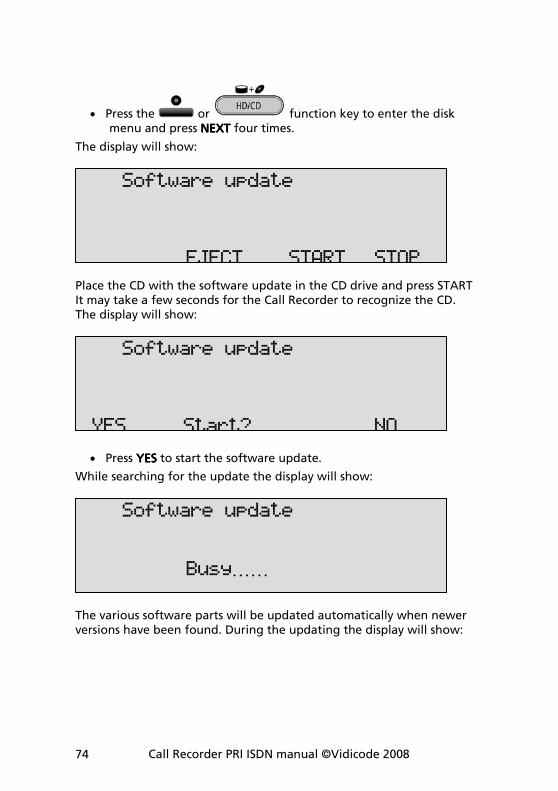
Call Recorder PRI ISDN manual ©Vidicode 2008 74
• Press the or function key to enter the disk menu and press NEXTNEXTNEXTNEXT four times.
The display will show:
Place the CD with the software update in the CD drive and press START It may take a few seconds for the Call Recorder to recognize the CD. The display will show:
• Press YESYESYESYES to start the software update.
While searching for the update the display will show:
The various software parts will be updated automatically when newer versions have been found. During the updating the display will show:
Software update
Busy……
Software update
YES Start? NO
Software update
EJECT START STOP
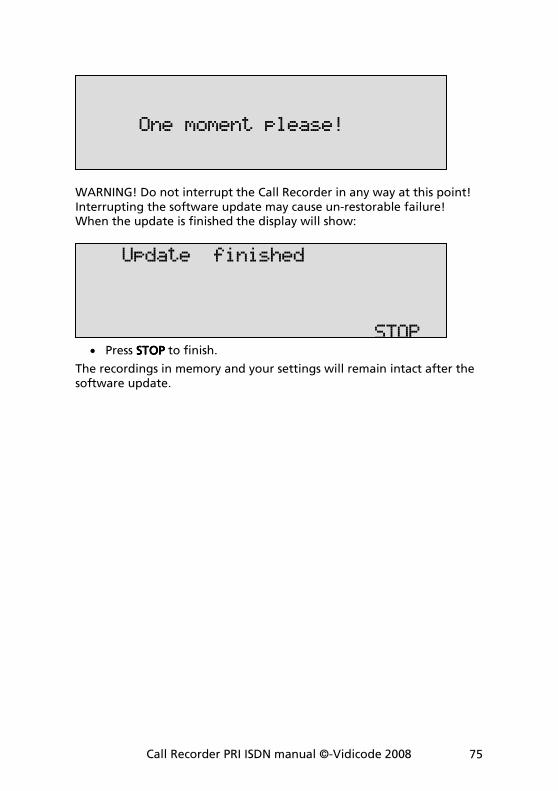
Call Recorder PRI ISDN manual ©-Vidicode 2008 75
WARNING! Do not interrupt the Call Recorder in any way at this point! Interrupting the software update may cause un-restorable failure! When the update is finished the display will show:
• Press STOPSTOPSTOPSTOP to finish.
The recordings in memory and your settings will remain intact after the software update.
Update finished
STOP
One moment please!

Call Recorder PRI ISDN manual ©Vidicode 2008 76
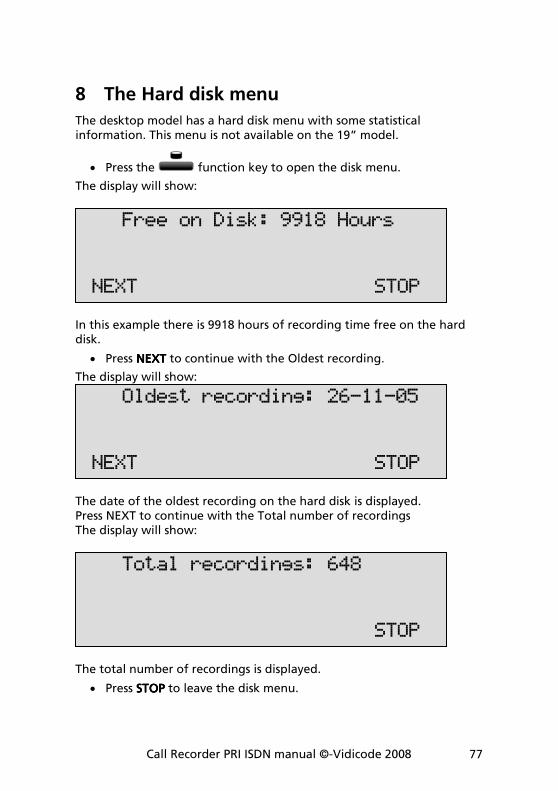
Call Recorder PRI ISDN manual ©-Vidicode 2008 77
8 The Hard disk menu
The desktop model has a hard disk menu with some statistical information. This menu is not available on the 19” model.
• Press the function key to open the disk menu.
The display will show:
In this example there is 9918 hours of recording time free on the hard disk.
• Press NEXTNEXTNEXTNEXT to continue with the Oldest recording.
The display will show:
The date of the oldest recording on the hard disk is displayed. Press NEXT to continue with the Total number of recordings The display will show:
The total number of recordings is displayed.
• Press STOPSTOPSTOPSTOP to leave the disk menu.
Total recordings: 648
STOP
Oldest recording: 26-11-05
NEXT STOP
Free on Disk: 9918 Hours
NEXT STOP

Call Recorder PRI ISDN manual ©Vidicode 2008 78
Call Recorder PRI ISDN manual ©-Vidicode 2008 79
9 Encrypted recording
Call Recorders feature a system for encrypted recording whereby IC cards called CryptoCards are used as a key. Encrypted recordings are made to prevent unauthorized playback of and listening to recordings. The system is very safe and recommended when some sort of security breach is possible. Examples of such a situation are:
• The Call Recorder is connected to a network or even internet and there are reasons to think that password security is not enough.
• The Call Recorder can be accessed and operated by persons who are not allowed to listen to all recordings and there are reasons to think that password security is not enough.
• Privacy is considered to be an issue and therefore strict procedures must be maintained around listening to the recordings.
The CryptoCard is a chip card that holds the key to the encryption and decryption. Encrypted recordings can only be played back together with the original or a matching CryptoCard and its password. The desktop model of the Call Recorder ISDN is equipped with an external card reader specifically for this purpose; it is located on the left front side of the device. The 19” model has an internal reader or SIM card reader (or both) and the case must be opened to place the card or SIM card. The idea behind this is that a recorder built into a 19” rack normally will be accessed from remote only. It is a drawback rather then an advantage when the card can easily be removed. For the 19” model the Privacy Card is recommended which means that playback on the recorder with the internal card is not possible and the recordings can only be reproduced on a PC with the matching CryptoCard. CryptoCards can be obtained from your Vidicode products supplier. The use of the CryptoCard encryption function is enabled in the Recorder settings menu. See § 4.4 to enable the use of a CryptoCard.
9.1 Several types of CryptoCard
As mentioned there are cards that can be used for recording and for playback and there are cards that can be used for recording only, the so called “Privacy Cards”. It is important to understand the difference.
• When it is important to be able to listen to recordings on the Call Recorder, use the standard CryptoCard.
• When you prefer that it is not possible to listen to recordings on the Call Recorder, use the CryptoCard Privacy card.
It is also possible to supply sets of individual cards with a “Master Card” that can be used to decode all the individual cards. The application is
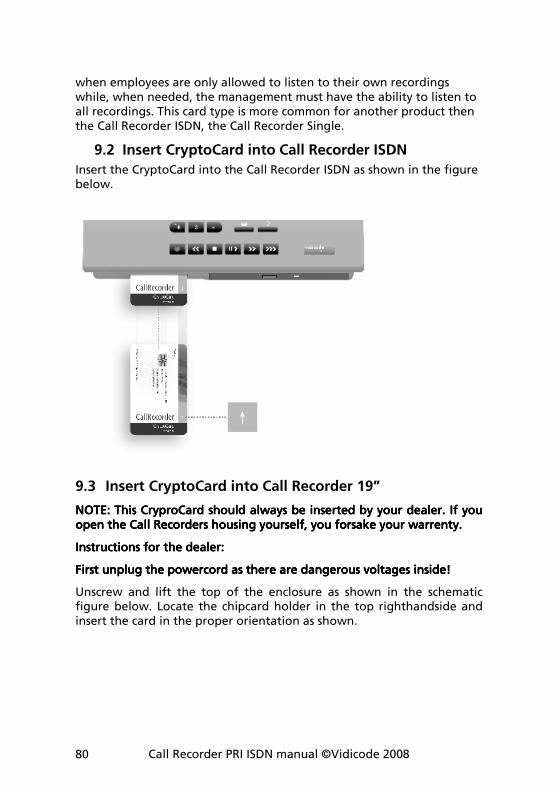
Call Recorder PRI ISDN manual ©Vidicode 2008 80
when employees are only allowed to listen to their own recordings while, when needed, the management must have the ability to listen to all recordings. This card type is more common for another product then the Call Recorder ISDN, the Call Recorder Single.
9.2 Insert CryptoCard into Call Recorder ISDN
Insert the CryptoCard into the Call Recorder ISDN as shown in the figure below.
9.3 Insert CryptoCard into Call Recorder 19”
NOTE: NOTE: NOTE: NOTE: ThisThisThisThis CryproCard should always be inserted by your dealer. If you CryproCard should always be inserted by your dealer. If you CryproCard should always be inserted by your dealer. If you CryproCard should always be inserted by your dealer. If you open the Call Recordersopen the Call Recordersopen the Call Recordersopen the Call Recorders housing housing housing housing yourself, you forsake your warrenty.yourself, you forsake your warrenty.yourself, you forsake your warrenty.yourself, you forsake your warrenty.
Instructions for the dealer:Instructions for the dealer:Instructions for the dealer:Instructions for the dealer:
First unplFirst unplFirst unplFirst unplug the powercord as there areug the powercord as there areug the powercord as there areug the powercord as there are dangerous voltages inside dangerous voltages inside dangerous voltages inside dangerous voltages inside!!!!
Unscrew and lift the top of the enclosure as shown in the schematic figure below. Locate the chipcard holder in the top righthandside and insert the card in the proper orientation as shown.
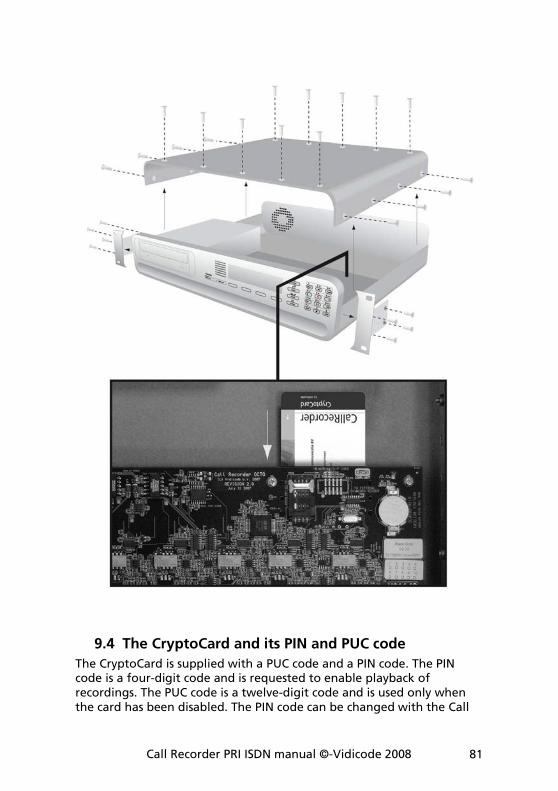
Call Recorder PRI ISDN manual ©-Vidicode 2008 81
9.4 The CryptoCard and its PIN and PUC code
The CryptoCard is supplied with a PUC code and a PIN code. The PIN code is a four-digit code and is requested to enable playback of recordings. The PUC code is a twelve-digit code and is used only when the card has been disabled. The PIN code can be changed with the Call
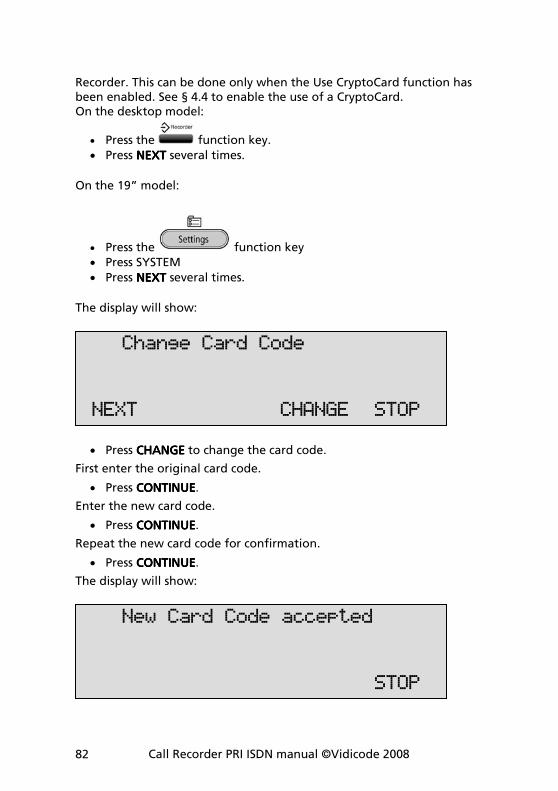
Call Recorder PRI ISDN manual ©Vidicode 2008 82
Recorder. This can be done only when the Use CryptoCard function has been enabled. See § 4.4 to enable the use of a CryptoCard. On the desktop model:
• Press the function key.
• Press NEXTNEXTNEXTNEXT several times.
On the 19” model:
• Press the function key
• Press SYSTEM
• Press NEXTNEXTNEXTNEXT several times.
The display will show:
• Press CHANGECHANGECHANGECHANGE to change the card code.
First enter the original card code.
• Press CONTINUECONTINUECONTINUECONTINUE.
Enter the new card code.
• Press CONTINUECONTINUECONTINUECONTINUE.
Repeat the new card code for confirmation.
• Press CONTINUECONTINUECONTINUECONTINUE.
The display will show:
New Card Code accepted
STOP
Change Card Code
NEXT CHANGE STOP
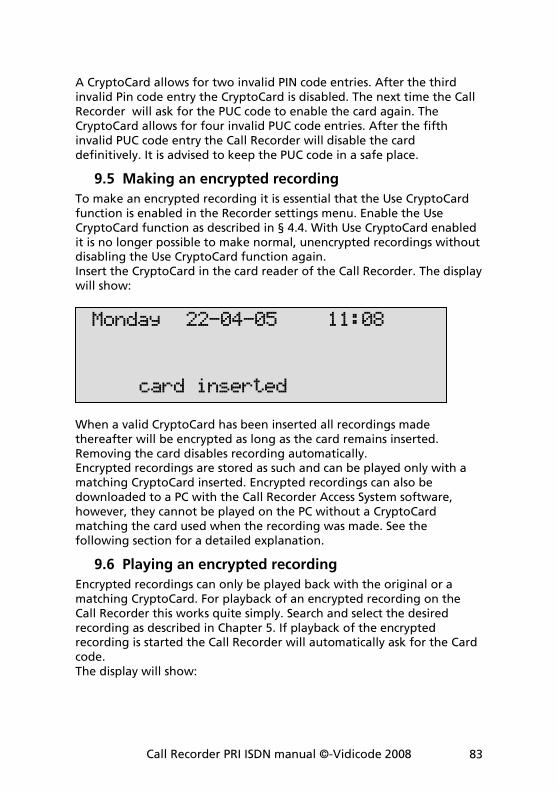
Call Recorder PRI ISDN manual ©-Vidicode 2008 83
A CryptoCard allows for two invalid PIN code entries. After the third invalid Pin code entry the CryptoCard is disabled. The next time the Call Recorder will ask for the PUC code to enable the card again. The CryptoCard allows for four invalid PUC code entries. After the fifth invalid PUC code entry the Call Recorder will disable the card definitively. It is advised to keep the PUC code in a safe place.
9.5 Making an encrypted recording
To make an encrypted recording it is essential that the Use CryptoCard function is enabled in the Recorder settings menu. Enable the Use CryptoCard function as described in § 4.4. With Use CryptoCard enabled it is no longer possible to make normal, unencrypted recordings without disabling the Use CryptoCard function again. Insert the CryptoCard in the card reader of the Call Recorder. The display will show:
When a valid CryptoCard has been inserted all recordings made thereafter will be encrypted as long as the card remains inserted. Removing the card disables recording automatically. Encrypted recordings are stored as such and can be played only with a matching CryptoCard inserted. Encrypted recordings can also be downloaded to a PC with the Call Recorder Access System software, however, they cannot be played on the PC without a CryptoCard matching the card used when the recording was made. See the following section for a detailed explanation.
9.6 Playing an encrypted recording
Encrypted recordings can only be played back with the original or a matching CryptoCard. For playback of an encrypted recording on the Call Recorder this works quite simply. Search and select the desired recording as described in Chapter 5. If playback of the encrypted recording is started the Call Recorder will automatically ask for the Card code. The display will show:
Monday 22-04-05 11:08
card inserted
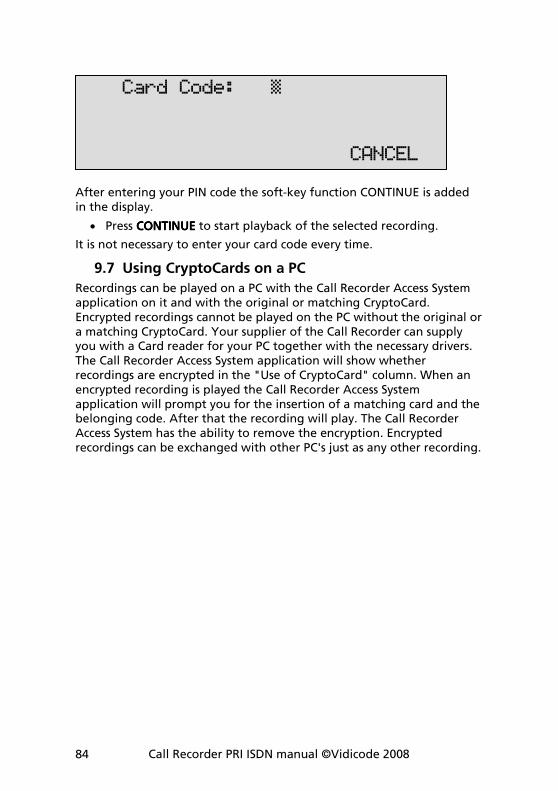
Call Recorder PRI ISDN manual ©Vidicode 2008 84
After entering your PIN code the soft-key function CONTINUE is added in the display.
• Press CONTINUECONTINUECONTINUECONTINUE to start playback of the selected recording.
It is not necessary to enter your card code every time.
9.7 Using CryptoCards on a PC
Recordings can be played on a PC with the Call Recorder Access System application on it and with the original or matching CryptoCard. Encrypted recordings cannot be played on the PC without the original or a matching CryptoCard. Your supplier of the Call Recorder can supply you with a Card reader for your PC together with the necessary drivers. The Call Recorder Access System application will show whether recordings are encrypted in the "Use of CryptoCard" column. When an encrypted recording is played the Call Recorder Access System application will prompt you for the insertion of a matching card and the belonging code. After that the recording will play. The Call Recorder Access System has the ability to remove the encryption. Encrypted recordings can be exchanged with other PC's just as any other recording.
Card Code: »
CANCEL
Call Recorder PRI ISDN manual ©-Vidicode 2008 85
10 Configuration of the Ethernet interface
The Call Recorder has an Ethernet port. The network interface supports the following protocols:
• FTP server
• SMTP client for sending email messages to a SMTP server
• Telnet for remote configuration
• NTP for automated adjustments of the system clock
• A propriety protocol for streaming audio for real time remote monitoring
FTP server is used by the Call Recorder Access System for network access to the database in the recorders and playback and archiving of recordings. It can also be used to give other (custom) applications access to the recordings (on the FTP server) in the Call Recorder. SMTP gives the recorder the ability to send emails. This has two applications. The first application is that the recorder can send recordings to users. The second is that the recorder can send status updates to the systems manager, for example a CD that becomes full. Telnet is a possibility to give a systems manager access to internal menu’s from remote. The NTP (Network Time Protocol) is a great method to provide accurate time information with your recordings. RTR monitoring is available for users of the PC software. It will be described later in this manual. We suggest that in the LAN setting you select and configure only the functions from the list above that you want to use.
10.1 Network active
To begin the network configuration on the desktop model press:
• Press the function key to enter the network settings. On the 19” model:
• Press
• Press LAN
The display will show:
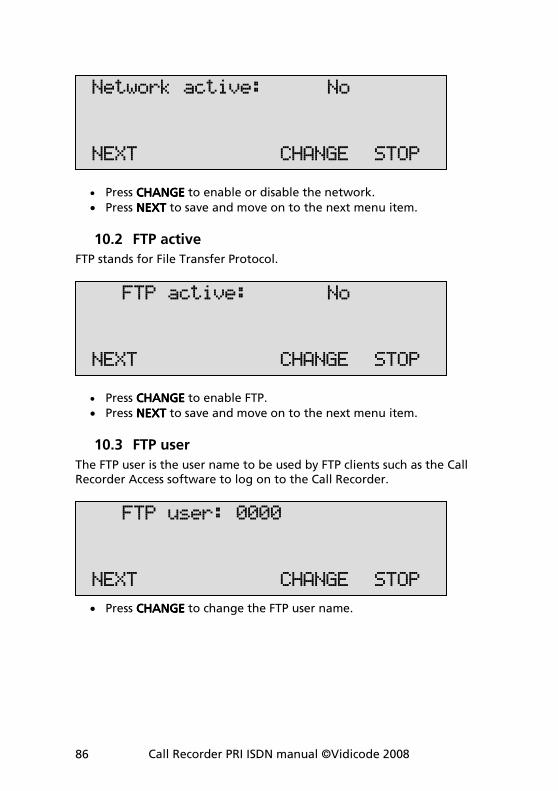
Call Recorder PRI ISDN manual ©Vidicode 2008 86
• Press CHANGECHANGECHANGECHANGE to enable or disable the network.
• Press NEXTNEXTNEXTNEXT to save and move on to the next menu item.
10.2 FTP active
FTP stands for File Transfer Protocol.
• Press CHANGECHANGECHANGECHANGE to enable FTP.
• Press NEXTNEXTNEXTNEXT to save and move on to the next menu item.
10.3 FTP user
The FTP user is the user name to be used by FTP clients such as the Call Recorder Access software to log on to the Call Recorder.
• Press CHANGECHANGECHANGECHANGE to change the FTP user name.
FTP user: 0000
NEXT CHANGE STOP
FTP active: No
NEXT CHANGE STOP
Network active: No
NEXT CHANGE STOP
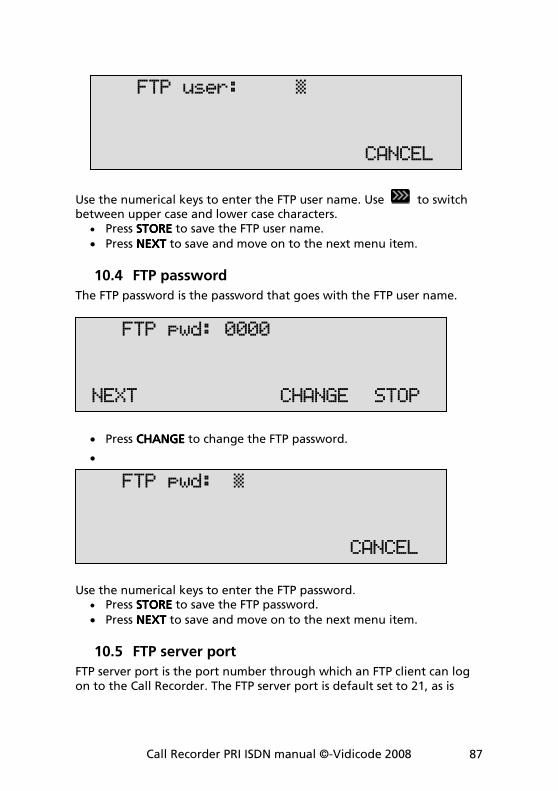
Call Recorder PRI ISDN manual ©-Vidicode 2008 87
Use the numerical keys to enter the FTP user name. Use to switch between upper case and lower case characters.
• Press STORESTORESTORESTORE to save the FTP user name.
• Press NEXTNEXTNEXTNEXT to save and move on to the next menu item.
10.4 FTP password
The FTP password is the password that goes with the FTP user name.
• Press CHANGECHANGECHANGECHANGE to change the FTP password.
•
Use the numerical keys to enter the FTP password.
• Press STORESTORESTORESTORE to save the FTP password.
• Press NEXTNEXTNEXTNEXT to save and move on to the next menu item.
10.5 FTP server port
FTP server port is the port number through which an FTP client can log on to the Call Recorder. The FTP server port is default set to 21, as is
FTP pwd: »
CANCEL
FTP pwd: 0000
NEXT CHANGE STOP
FTP user: »
CANCEL
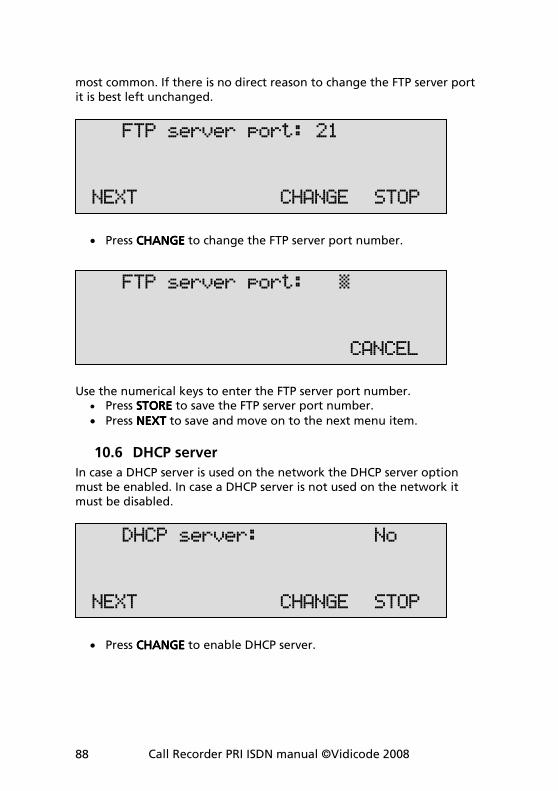
Call Recorder PRI ISDN manual ©Vidicode 2008 88
most common. If there is no direct reason to change the FTP server port it is best left unchanged.
• Press CHANGECHANGECHANGECHANGE to change the FTP server port number.
Use the numerical keys to enter the FTP server port number.
• Press STORESTORESTORESTORE to save the FTP server port number.
• Press NEXTNEXTNEXTNEXT to save and move on to the next menu item.
10.6 DHCP server
In case a DHCP server is used on the network the DHCP server option must be enabled. In case a DHCP server is not used on the network it must be disabled.
• Press CHANGECHANGECHANGECHANGE to enable DHCP server.
DHCP server: No
NEXT CHANGE STOP
FTP server port: »
CANCEL
FTP server port: 21
NEXT CHANGE STOP
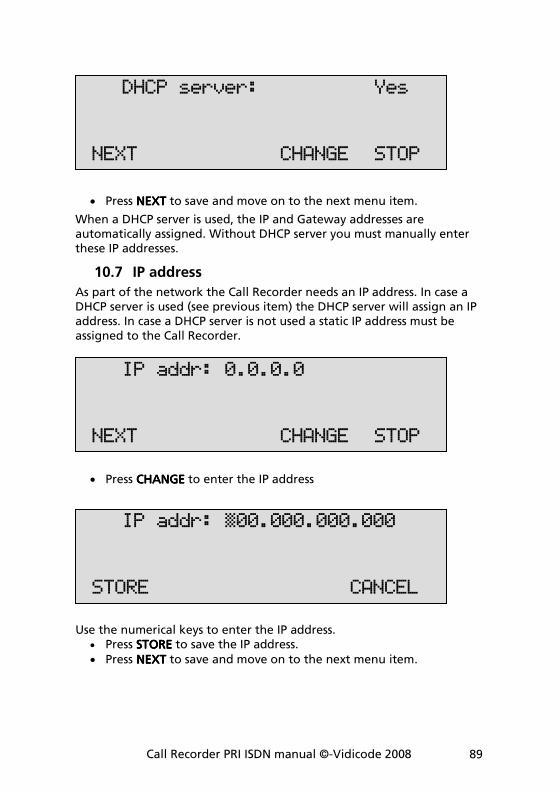
Call Recorder PRI ISDN manual ©-Vidicode 2008 89
• Press NEXTNEXTNEXTNEXT to save and move on to the next menu item.
When a DHCP server is used, the IP and Gateway addresses are automatically assigned. Without DHCP server you must manually enter these IP addresses.
10.7 IP address
As part of the network the Call Recorder needs an IP address. In case a DHCP server is used (see previous item) the DHCP server will assign an IP address. In case a DHCP server is not used a static IP address must be assigned to the Call Recorder.
• Press CHANGECHANGECHANGECHANGE to enter the IP address
Use the numerical keys to enter the IP address.
• Press STORESTORESTORESTORE to save the IP address.
• Press NEXTNEXTNEXTNEXT to save and move on to the next menu item.
IP addr: »00.000.000.000
STORE CANCEL
IP addr: 0.0.0.0
NEXT CHANGE STOP
DHCP server: Yes
NEXT CHANGE STOP
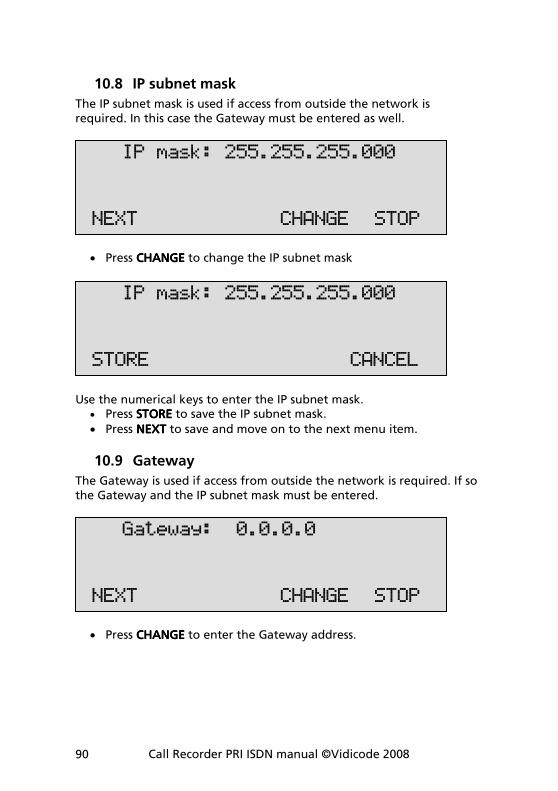
Call Recorder PRI ISDN manual ©Vidicode 2008 90
10.8 IP subnet mask
The IP subnet mask is used if access from outside the network is required. In this case the Gateway must be entered as well.
• Press CHANGECHANGECHANGECHANGE to change the IP subnet mask
Use the numerical keys to enter the IP subnet mask. • Press STORESTORESTORESTORE to save the IP subnet mask.
• Press NEXTNEXTNEXTNEXT to save and move on to the next menu item.
10.9 Gateway
The Gateway is used if access from outside the network is required. If so the Gateway and the IP subnet mask must be entered.
• Press CHANGECHANGECHANGECHANGE to enter the Gateway address.
Gateway: 0.0.0.0
NEXT CHANGE STOP
IP mask: 255.255.255.000
STORE CANCEL
IP mask: 255.255.255.000
NEXT CHANGE STOP
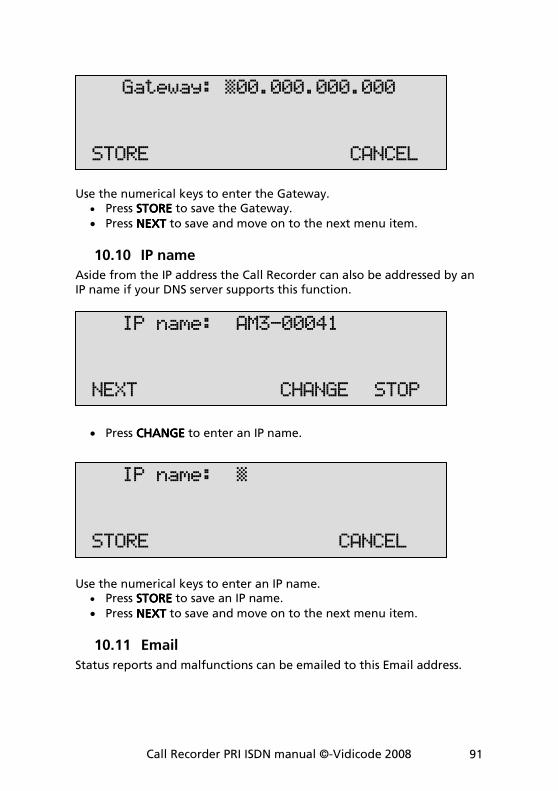
Call Recorder PRI ISDN manual ©-Vidicode 2008 91
Use the numerical keys to enter the Gateway. • Press STORESTORESTORESTORE to save the Gateway.
• Press NEXTNEXTNEXTNEXT to save and move on to the next menu item.
10.10 IP name
Aside from the IP address the Call Recorder can also be addressed by an IP name if your DNS server supports this function.
• Press CHANGECHANGECHANGECHANGE to enter an IP name.
Use the numerical keys to enter an IP name.
• Press STORESTORESTORESTORE to save an IP name.
• Press NEXTNEXTNEXTNEXT to save and move on to the next menu item.
10.11 Email
Status reports and malfunctions can be emailed to this Email address.
IP name: »
STORE CANCEL
IP name: AM3-00041
NEXT CHANGE STOP
Gateway: »00.000.000.000
STORE CANCEL
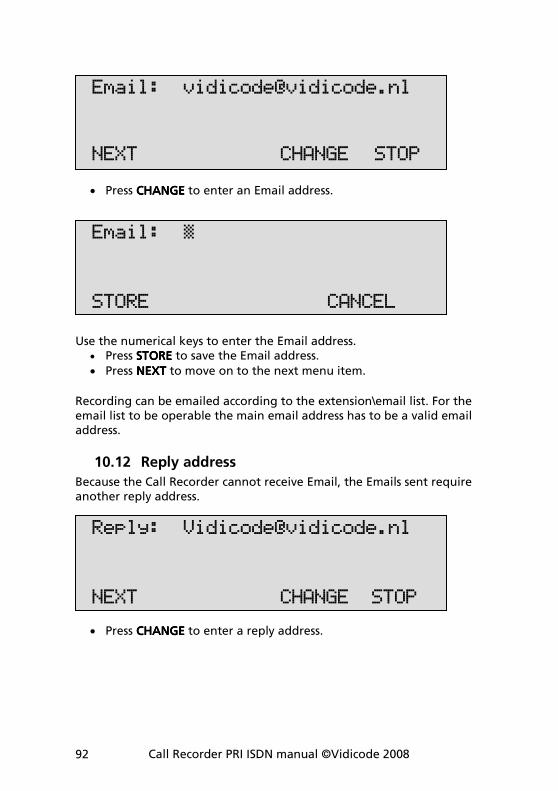
Call Recorder PRI ISDN manual ©Vidicode 2008 92
• Press CHANGECHANGECHANGECHANGE to enter an Email address.
Use the numerical keys to enter the Email address.
• Press STORESTORESTORESTORE to save the Email address.
• Press NEXTNEXTNEXTNEXT to move on to the next menu item.
Recording can be emailed according to the extension\email list. For the email list to be operable the main email address has to be a valid email address.
10.12 Reply address
Because the Call Recorder cannot receive Email, the Emails sent require another reply address.
• Press CHANGECHANGECHANGECHANGE to enter a reply address.
Reply: [email protected]
NEXT CHANGE STOP
Email: »
STORE CANCEL
Email: [email protected]
NEXT CHANGE STOP
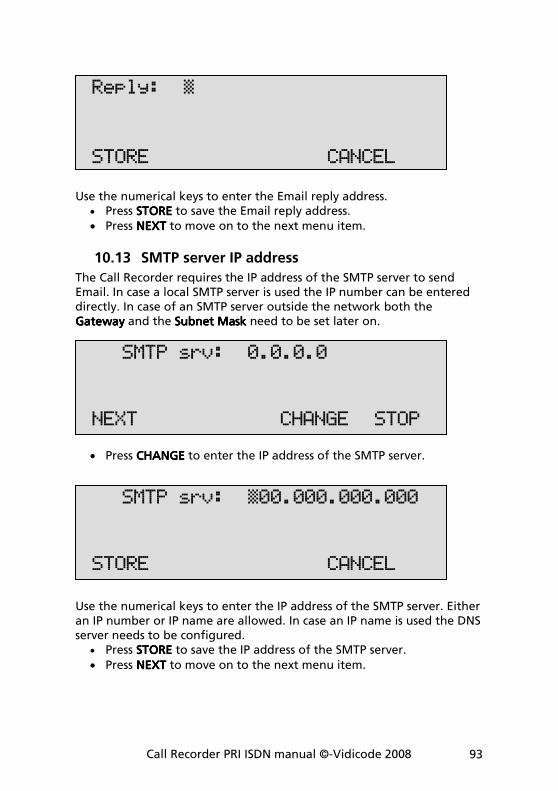
Call Recorder PRI ISDN manual ©-Vidicode 2008 93
Use the numerical keys to enter the Email reply address.
• Press STORESTORESTORESTORE to save the Email reply address.
• Press NEXTNEXTNEXTNEXT to move on to the next menu item.
10.13 SMTP server IP address
The Call Recorder requires the IP address of the SMTP server to send Email. In case a local SMTP server is used the IP number can be entered directly. In case of an SMTP server outside the network both the GatewayGatewayGatewayGateway and the Subnet MaskSubnet MaskSubnet MaskSubnet Mask need to be set later on.
• Press CHANGECHANGECHANGECHANGE to enter the IP address of the SMTP server.
Use the numerical keys to enter the IP address of the SMTP server. Either an IP number or IP name are allowed. In case an IP name is used the DNS server needs to be configured.
• Press STORESTORESTORESTORE to save the IP address of the SMTP server.
• Press NEXTNEXTNEXTNEXT to move on to the next menu item.
SMTP srv: »00.000.000.000
STORE CANCEL
SMTP srv: 0.0.0.0
NEXT CHANGE STOP
Reply: »
STORE CANCEL
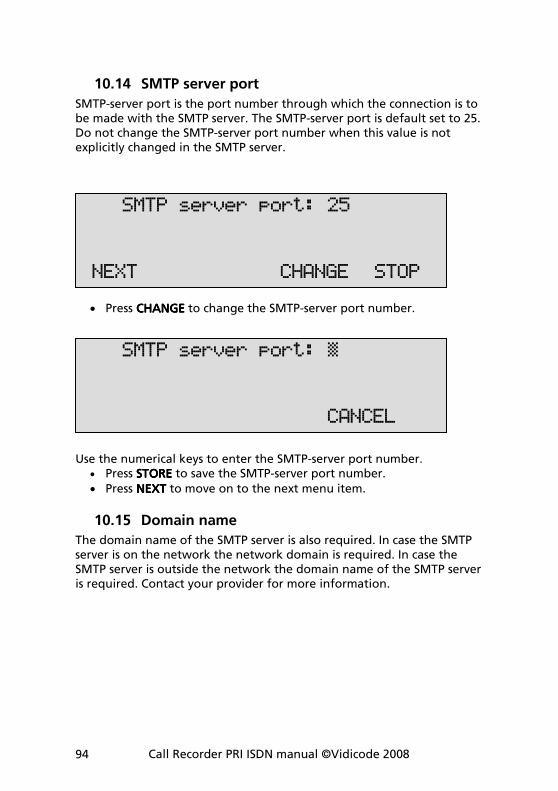
Call Recorder PRI ISDN manual ©Vidicode 2008 94
10.14 SMTP server port
SMTP-server port is the port number through which the connection is to be made with the SMTP server. The SMTP-server port is default set to 25. Do not change the SMTP-server port number when this value is not explicitly changed in the SMTP server.
• Press CHANGECHANGECHANGECHANGE to change the SMTP-server port number.
Use the numerical keys to enter the SMTP-server port number.
• Press STORESTORESTORESTORE to save the SMTP-server port number.
• Press NEXTNEXTNEXTNEXT to move on to the next menu item.
10.15 Domain name
The domain name of the SMTP server is also required. In case the SMTP server is on the network the network domain is required. In case the SMTP server is outside the network the domain name of the SMTP server is required. Contact your provider for more information.
SMTP server port: »
CANCEL
SMTP server port: 25
NEXT CHANGE STOP
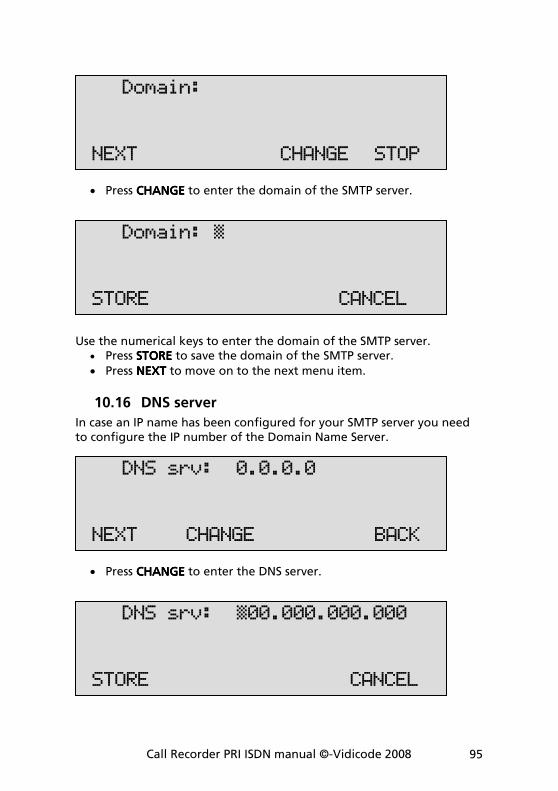
Call Recorder PRI ISDN manual ©-Vidicode 2008 95
• Press CHANGECHANGECHANGECHANGE to enter the domain of the SMTP server.
Use the numerical keys to enter the domain of the SMTP server.
• Press STORESTORESTORESTORE to save the domain of the SMTP server.
• Press NEXTNEXTNEXTNEXT to move on to the next menu item.
10.16 DNS server
In case an IP name has been configured for your SMTP server you need to configure the IP number of the Domain Name Server.
• Press CHANGECHANGECHANGECHANGE to enter the DNS server.
DNS srv: »00.000.000.000
STORE CANCEL
DNS srv: 0.0.0.0
NEXT CHANGE BACK
Domain: »
STORE CANCEL
Domain:
NEXT CHANGE STOP
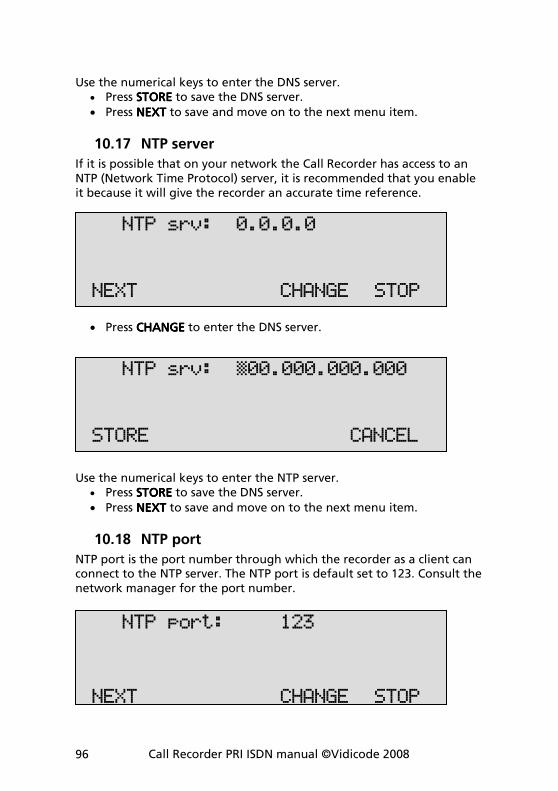
Call Recorder PRI ISDN manual ©Vidicode 2008 96
Use the numerical keys to enter the DNS server. • Press STORESTORESTORESTORE to save the DNS server.
• Press NEXTNEXTNEXTNEXT to save and move on to the next menu item.
10.17 NTP server
If it is possible that on your network the Call Recorder has access to an NTP (Network Time Protocol) server, it is recommended that you enable it because it will give the recorder an accurate time reference.
• Press CHANGECHANGECHANGECHANGE to enter the DNS server.
Use the numerical keys to enter the NTP server.
• Press STORESTORESTORESTORE to save the DNS server.
• Press NEXTNEXTNEXTNEXT to save and move on to the next menu item.
10.18 NTP port
NTP port is the port number through which the recorder as a client can connect to the NTP server. The NTP port is default set to 123. Consult the network manager for the port number.
NTP port: 123 NEXT CHANGE STOP
NTP srv: »00.000.000.000
STORE CANCEL
NTP srv: 0.0.0.0
NEXT CHANGE STOP
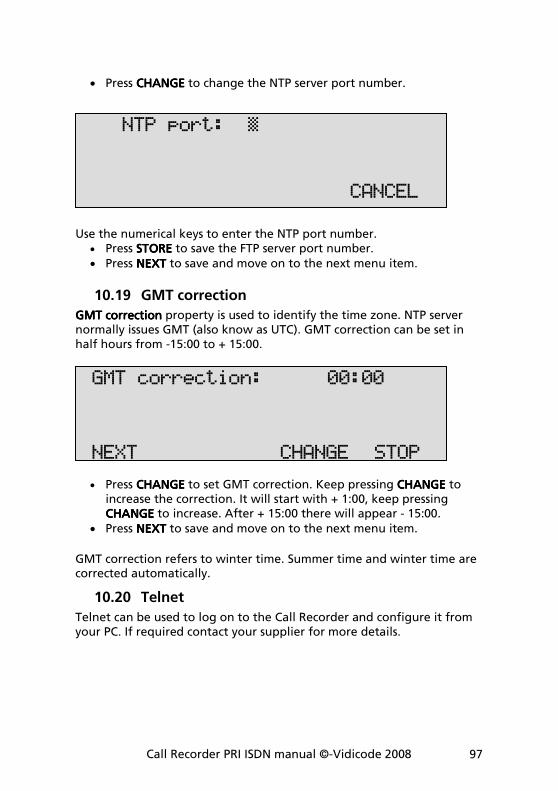
Call Recorder PRI ISDN manual ©-Vidicode 2008 97
• Press CHANGECHANGECHANGECHANGE to change the NTP server port number.
Use the numerical keys to enter the NTP port number.
• Press STORESTORESTORESTORE to save the FTP server port number.
• Press NEXTNEXTNEXTNEXT to save and move on to the next menu item.
10.19 GMT correction
GMT correctionGMT correctionGMT correctionGMT correction property is used to identify the time zone. NTP server normally issues GMT (also know as UTC). GMT correction can be set in half hours from -15:00 to + 15:00.
• Press CHANGECHANGECHANGECHANGE to set GMT correction. Keep pressing CHANGECHANGECHANGECHANGE to increase the correction. It will start with + 1:00, keep pressing CHANGECHANGECHANGECHANGE to increase. After + 15:00 there will appear - 15:00.
• Press NEXTNEXTNEXTNEXT to save and move on to the next menu item.
GMT correction refers to winter time. Summer time and winter time are corrected automatically.
10.20 Telnet
Telnet can be used to log on to the Call Recorder and configure it from your PC. If required contact your supplier for more details.
GMT correction: 00:00 NEXT CHANGE STOP
NTP port: »
CANCEL
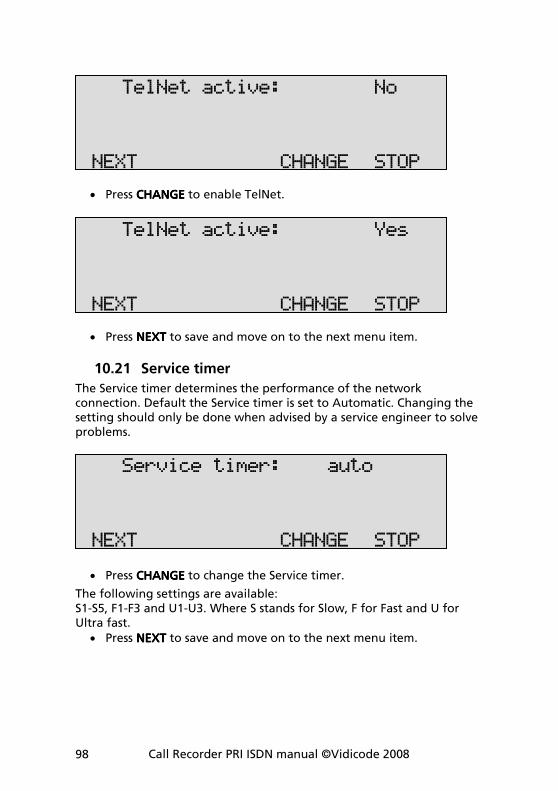
Call Recorder PRI ISDN manual ©Vidicode 2008 98
• Press CHANGECHANGECHANGECHANGE to enable TelNet.
• Press NEXTNEXTNEXTNEXT to save and move on to the next menu item.
10.21 Service timer
The Service timer determines the performance of the network connection. Default the Service timer is set to Automatic. Changing the setting should only be done when advised by a service engineer to solve problems.
• Press CHANGECHANGECHANGECHANGE to change the Service timer.
The following settings are available: S1-S5, F1-F3 and U1-U3. Where S stands for Slow, F for Fast and U for Ultra fast.
• Press NEXTNEXTNEXTNEXT to save and move on to the next menu item.
Service timer: auto NEXT CHANGE STOP
TelNet active: Yes NEXT CHANGE STOP
TelNet active: No NEXT CHANGE STOP
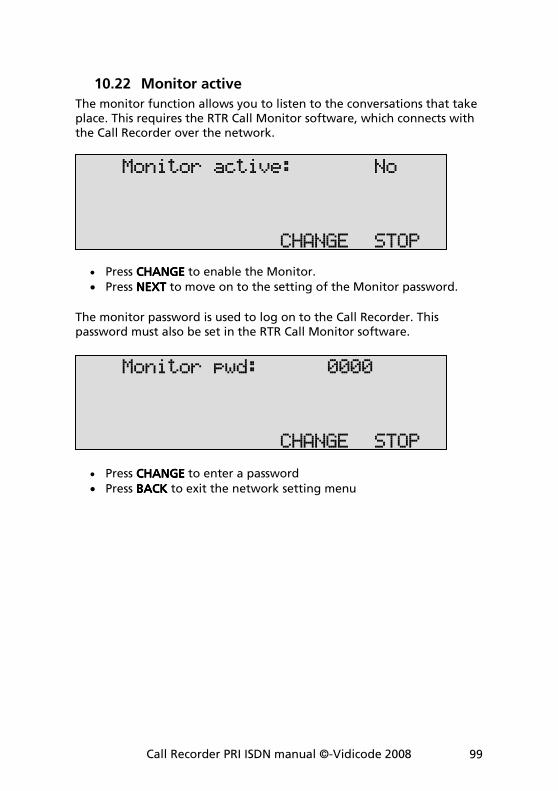
Call Recorder PRI ISDN manual ©-Vidicode 2008 99
10.22 Monitor active
The monitor function allows you to listen to the conversations that take place. This requires the RTR Call Monitor software, which connects with the Call Recorder over the network.
• Press CHANGECHANGECHANGECHANGE to enable the Monitor.
• Press NEXTNEXTNEXTNEXT to move on to the setting of the Monitor password.
The monitor password is used to log on to the Call Recorder. This password must also be set in the RTR Call Monitor software.
• Press CHANGECHANGECHANGECHANGE to enter a password
• Press BACKBACKBACKBACK to exit the network setting menu
Monitor pwd: 0000 CHANGE STOP
Monitor active: No CHANGE STOP

Call Recorder PRI ISDN manual ©Vidicode 2008 100
Call Recorder PRI ISDN manual ©-Vidicode 2008 101
11 Call Recorder Quick CD Access System
Call Recorders with a CD drive come with PC software, the “Call Recorder Quick Access System”. The purpose of the software is to be able to present the thousands of recordings on a CD as a database and to play the recordings on the PC. The database makes it possible to make queries for certain types of recordings. The software will remember the names that you give to internal extensions and external numbers which will make it easier to sort recordings. It is also possible to create an archive on your hard disk of recordings that are copied from the Call Recorder CD’s. When ever you use the software, remember that the CD first has to be made suitable for the PC by making a CD directory. The Call Recorder can do this for you.
11.1 Install the software
Placing the CD-ROM in your computer starts software installation. If the installation is not started automatically, locate the file setup.exe on the CD and start it by double-clicking. Follow the instructions on the screen. As part of the installation procedure you will be asked for the registration key. You will find the key (code) packed with the software.
11.2 Start
Click “Start“ in the lower left corner on your desktop. Go to Programs/Vidicode and click on “Call Recorder Quick CD Access System”. The application will start right away. The main dialog looks like this:
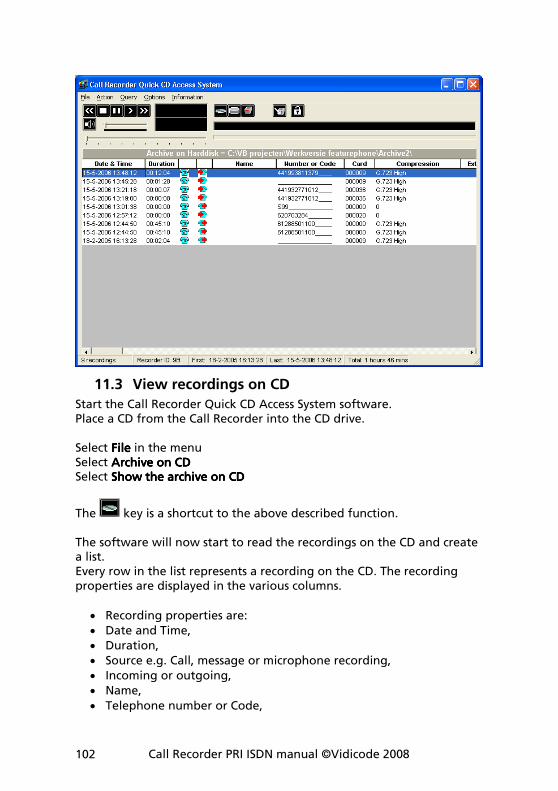
Call Recorder PRI ISDN manual ©Vidicode 2008 102
11.3 View recordings on CD
Start the Call Recorder Quick CD Access System software. Place a CD from the Call Recorder into the CD drive. Select FileFileFileFile in the menu Select Archive on CDArchive on CDArchive on CDArchive on CD Select Show the archive on CDShow the archive on CDShow the archive on CDShow the archive on CD
The key is a shortcut to the above described function. The software will now start to read the recordings on the CD and create a list. Every row in the list represents a recording on the CD. The recording properties are displayed in the various columns.
• Recording properties are:
• Date and Time,
• Duration,
• Source e.g. Call, message or microphone recording,
• Incoming or outgoing,
• Name,
• Telephone number or Code,
Call Recorder PRI ISDN manual ©-Vidicode 2008 103
• CryptoCard number,
• Compression Technique used,
• The filename. At the bottom of the application dialog other general properties of the CD are displayed like:
• Number of recordings on the CD,
• The Recorder ID
• Date and time of the first recording,
• Date and time of the last recording,
• The total recording time on the CD. To locate an archive in another location choose: File=>Archive on CD=>Path for the archive on CD.
11.4 Create an archive on Hard disk
To create an archive on your hard disk you need to view an archive on CD first as described above. Select the recordings you want to transfer to your hard disk. Select ActionActionActionAction in the menu, Select Transfer to PCTransfer to PCTransfer to PCTransfer to PC, Select Selected RecordsSelected RecordsSelected RecordsSelected Records.
The key is a shortcut to the above described function. Your selection of records will now be copied to the archive on the hard disk. Default the hard disk archive is located in the Archive folder in the directory where the program was installed. Default the program is installed in C:\Program Files\Vidicode\Quick CD Access. To view an Archive on HD: Select FileFileFileFile in the menu, Select Archive on hard diskArchive on hard diskArchive on hard diskArchive on hard disk. Select Show the current archive on hard diskShow the current archive on hard diskShow the current archive on hard diskShow the current archive on hard disk.
The key is a shortcut to the above described function.
Call Recorder PRI ISDN manual ©Vidicode 2008 104
The application will now make a list of the recordings in the default archive on your hard disk. To locate a different archive on your hard disk: Select FileFileFileFile in the menu, Select Archive on hard diskArchive on hard diskArchive on hard diskArchive on hard disk, Select Locate another archive on hard diskLocate another archive on hard diskLocate another archive on hard diskLocate another archive on hard disk. There are two tool buttons to show the archives on CD and on your hard disk:
to show the archive on CD and
to show the archive on hard disk
11.5 Recycle bin
Once an archive on hard disk has been created it is also possible to remove recordings from that archive. Select the recordings you want to remove from the archive, Select ActionActionActionAction in the menu, Select Delete SelectionDelete SelectionDelete SelectionDelete Selection.
The key is a shortcut to the above described function. The selection of recordings in now moved to the recycle bin. The recycle bin works like the standard Windows Recycle Bin. Recording removed from an archive are placed in the recycle bin. Recordings can be restored from the recycle bin. Recordings removed from the recycle bin are lost. To view recordings in the recycle bin: Select FileFileFileFile in the menu, Select Recycle binRecycle binRecycle binRecycle bin. The program will now generate a list of recordings in the recycle bin.
The key is a shortcut to the above described function. In the recycle bin recordings can be selected to be removed or restored. Both options are available in the ActionActionActionAction menu.
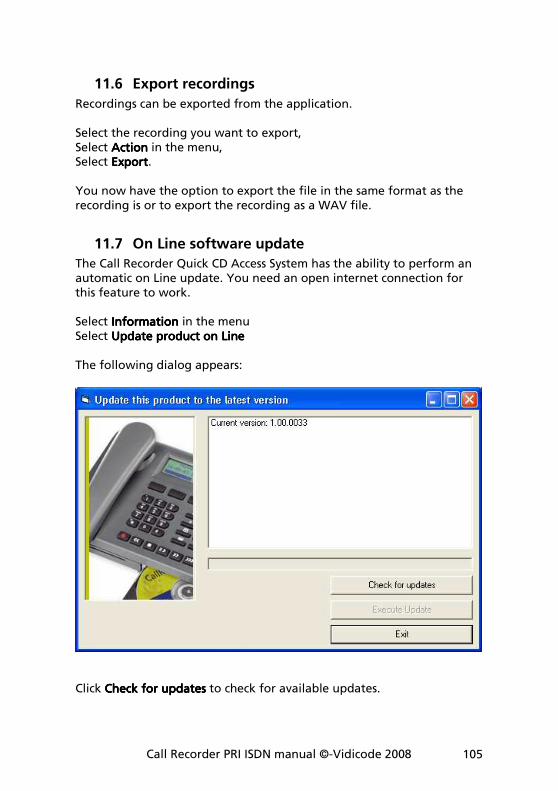
Call Recorder PRI ISDN manual ©-Vidicode 2008 105
11.6 Export recordings
Recordings can be exported from the application. Select the recording you want to export, Select ActionActionActionAction in the menu, Select ExportExportExportExport. You now have the option to export the file in the same format as the recording is or to export the recording as a WAV file.
11.7 On Line software update
The Call Recorder Quick CD Access System has the ability to perform an automatic on Line update. You need an open internet connection for this feature to work. Select InformationInformationInformationInformation in the menu Select Update product on LineUpdate product on LineUpdate product on LineUpdate product on Line The following dialog appears:
Click Check for updatesCheck for updatesCheck for updatesCheck for updates to check for available updates.
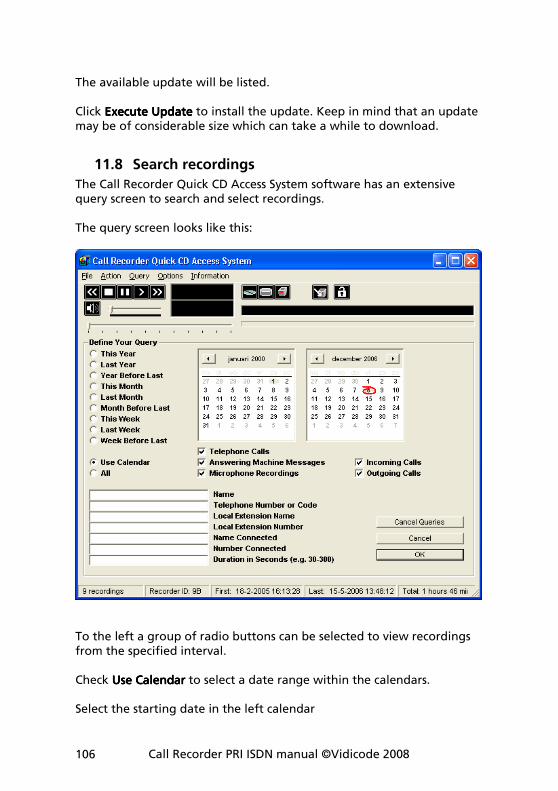
Call Recorder PRI ISDN manual ©Vidicode 2008 106
The available update will be listed. Click Execute UpdateExecute UpdateExecute UpdateExecute Update to install the update. Keep in mind that an update may be of considerable size which can take a while to download.
11.8 Search recordings
The Call Recorder Quick CD Access System software has an extensive query screen to search and select recordings. The query screen looks like this:
To the left a group of radio buttons can be selected to view recordings from the specified interval. Check Use CalendarUse CalendarUse CalendarUse Calendar to select a date range within the calendars. Select the starting date in the left calendar
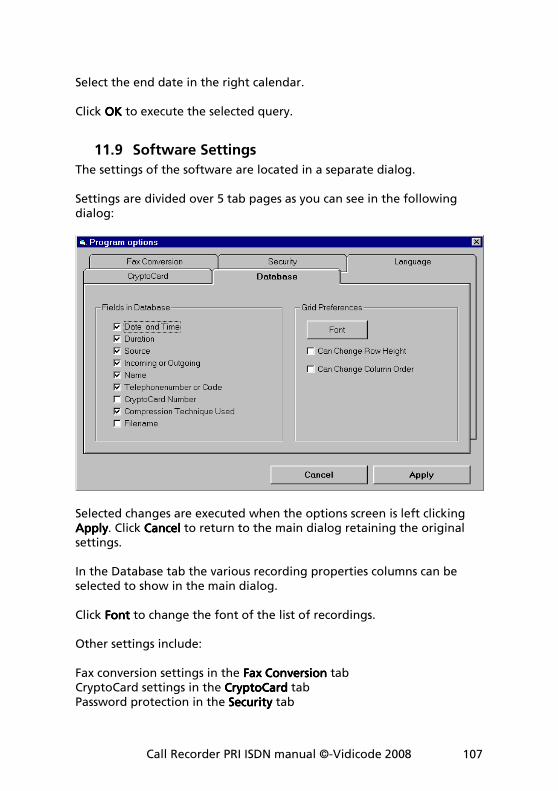
Call Recorder PRI ISDN manual ©-Vidicode 2008 107
Select the end date in the right calendar. Click OKOKOKOK to execute the selected query.
11.9 Software Settings
The settings of the software are located in a separate dialog. Settings are divided over 5 tab pages as you can see in the following dialog:
Selected changes are executed when the options screen is left clicking ApplyApplyApplyApply. Click CancelCancelCancelCancel to return to the main dialog retaining the original settings. In the Database tab the various recording properties columns can be selected to show in the main dialog. Click FontFontFontFont to change the font of the list of recordings. Other settings include: Fax conversion settings in the Fax ConversionFax ConversionFax ConversionFax Conversion tab CryptoCard settings in the CryptoCardCryptoCardCryptoCardCryptoCard tab Password protection in the SecuritySecuritySecuritySecurity tab
Call Recorder PRI ISDN manual ©Vidicode 2008 108
The LanguageLanguageLanguageLanguage tab will allow you to select a desired language. For a detailed description of the settings we refer to the help-files of the program. These are always in compliance with the software version and the available settings.
Call Recorder PRI ISDN manual ©-Vidicode 2008 109
12 The Access software and the Monitor software
The Call Recorder is equipped with an Ethernet interface that connects it to the network. This has several applications of which we mention two in this chapter. With the Call Recorder Access System it is possible to view the contents of one or several recorders on the network, play recordings and download them to a PC if required. With the RTR Call Monitor software it is possible to listen in to ongoing calls from a remote location. The software is only described superficially here because it a complete manual is supplied with the software.
12.1 The Call Recorder Access System software
The Call Recorder Access System software is a versatile system for the access to Call Recorders across the network. The software holds a list of recorders it can connect to. The Call Recorder Access System can connect to the Call Recorders over the network and retrieve a list of all the recordings in the Call Recorders. Recordings can then be selected and listened to or be downloaded from the Call Recorder. Downloaded recordings can be archived on the PC. The Call Recorder Access System is compatible with all models of Call Recorders, not just with the Call Recorders for ISDN, but also with the Call Recorders Single, Quarto and Octo.
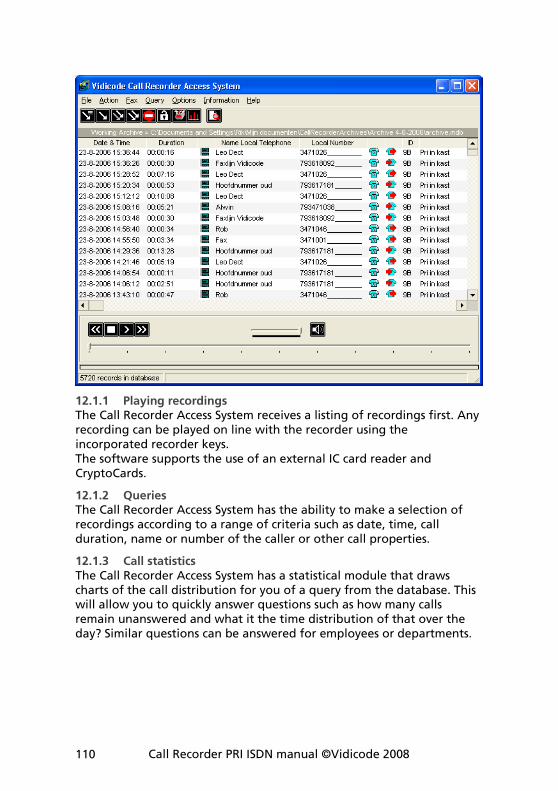
Call Recorder PRI ISDN manual ©Vidicode 2008 110
12.1.1 Playing recordings The Call Recorder Access System receives a listing of recordings first. Any recording can be played on line with the recorder using the incorporated recorder keys. The software supports the use of an external IC card reader and CryptoCards.
12.1.2 Queries The Call Recorder Access System has the ability to make a selection of recordings according to a range of criteria such as date, time, call duration, name or number of the caller or other call properties.
12.1.3 Call statistics The Call Recorder Access System has a statistical module that draws charts of the call distribution for you of a query from the database. This will allow you to quickly answer questions such as how many calls remain unanswered and what it the time distribution of that over the day? Similar questions can be answered for employees or departments.
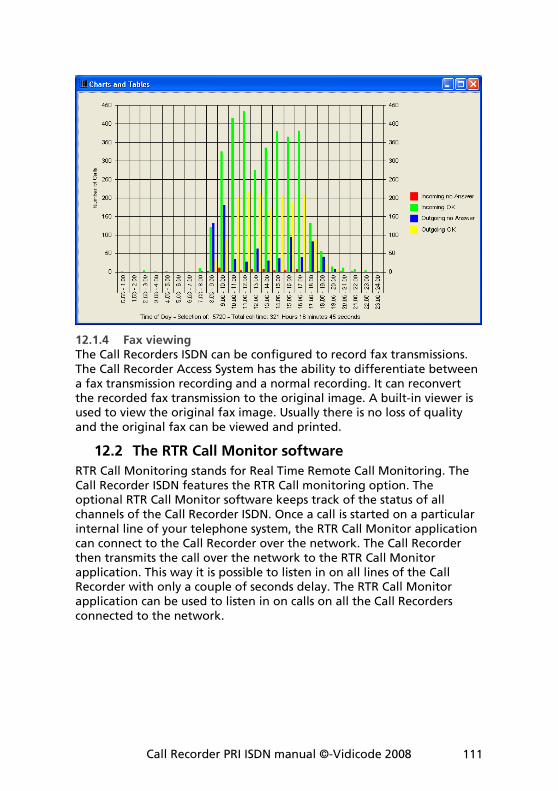
Call Recorder PRI ISDN manual ©-Vidicode 2008 111
12.1.4 Fax viewing The Call Recorders ISDN can be configured to record fax transmissions. The Call Recorder Access System has the ability to differentiate between a fax transmission recording and a normal recording. It can reconvert the recorded fax transmission to the original image. A built-in viewer is used to view the original fax image. Usually there is no loss of quality and the original fax can be viewed and printed.
12.2 The RTR Call Monitor software
RTR Call Monitoring stands for Real Time Remote Call Monitoring. The Call Recorder ISDN features the RTR Call monitoring option. The optional RTR Call Monitor software keeps track of the status of all channels of the Call Recorder ISDN. Once a call is started on a particular internal line of your telephone system, the RTR Call Monitor application can connect to the Call Recorder over the network. The Call Recorder then transmits the call over the network to the RTR Call Monitor application. This way it is possible to listen in on all lines of the Call Recorder with only a couple of seconds delay. The RTR Call Monitor application can be used to listen in on calls on all the Call Recorders connected to the network.
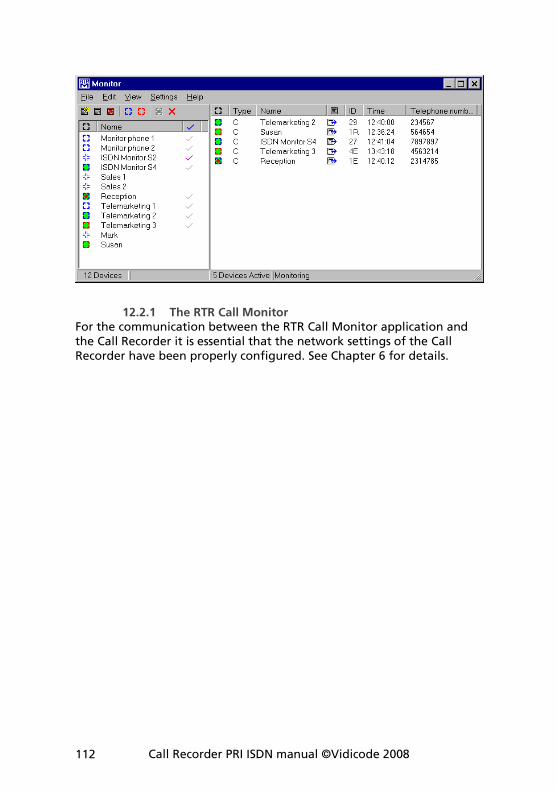
Call Recorder PRI ISDN manual ©Vidicode 2008 112
12.2.1 The RTR Call Monitor For the communication between the RTR Call Monitor application and the Call Recorder it is essential that the network settings of the Call Recorder have been properly configured. See Chapter 6 for details.
Call Recorder PRI ISDN manual ©-Vidicode 2008 113
13 Acknowledgements
13.1 Privacy
When recording telephone conversations the Privacy of your conversation partner must be considered. In some countries there is an obligation to notify your conversation partner of the recording. Check your national legal obligations on this and other issues concerning the use of the Call Recorder. In the United States, the Federal government requires that only one person involved in a conversation must know the call is being recorded. However, each state has its own legislation. The vast majority of states have laws complying with the Federal “one party” requirement. A few states, such as Florida and others, do require both parties to be aware the call is being recorded. The Call Recorder ISDN can comply both with the one party or two party requirements. One party simply means the person with the Call Recorder knows the call is being recorded. Compliance is made with two party requirements by sounding a notification tone during the call.
13.2 Guarantee
Your Call Recorder has a 12-month factory guarantee. The guarantee is effective for normal use only. We would like to emphasize that the guarantee is not valid under exceptional environmental conditions, such as extreme temperatures or humidity levels, nor in the unlikely event of a lightning strike. The guarantee is not valid if the machine has not been handled properly, for example when it has been dropped, or bumped into. In order to qualify for guarantee, you should contact your supplier, and show the receipt. If your supplier cannot help you, you should contact the manufacturer. The manufacturer reserves the right to determine the final date of the guarantee period on the basis of the date of production. Costs of transport to and from the supplier or the manufacturer are for the buyer’s account. Guarantee is for parts only and does not cover any costs resulting from the breakdown of the Call Recorder. The Call Recorder has various extra features that have not been described in this manual. Additional information about this is given in a technical information bulletin. Subjects discussed in this technical documentation are further configuration options, remote configuring, and how to update the firmware in the Call Recorder. The further configuration options concern all aspects of operation. In our experience most people are interested in configurations related to user’s access.
Call Recorder PRI ISDN manual ©Vidicode 2008 114
13.3 Liability
Correct functioning of the Call Recorder cannot be guaranteed under all conditions and thus we do not accept any liability for loss of information or other damages due to the use of the Call Recorder. Vidicode assumes no liability regarding incorrect notification of call recording. Vidicode is not a source of official interpretation of laws of any country or state and shall not be construed as a source for making decisions.
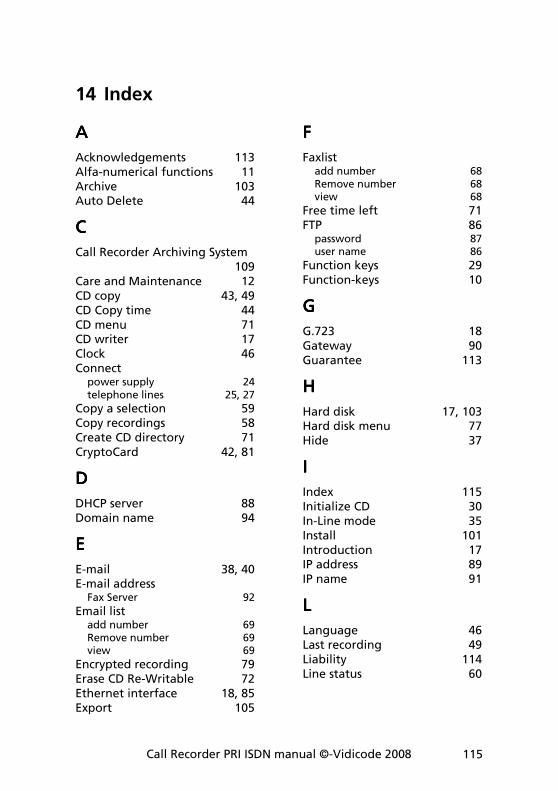
Call Recorder PRI ISDN manual ©-Vidicode 2008 115
14 Index
AAAA
Acknowledgements 113 Alfa-numerical functions 11 Archive 103 Auto Delete 44
CCCC
Call Recorder Archiving System 109
Care and Maintenance 12 CD copy 43, 49 CD Copy time 44 CD menu 71 CD writer 17 Clock 46 Connect power supply 24 telephone lines 25, 27
Copy a selection 59 Copy recordings 58 Create CD directory 71 CryptoCard 42, 81
DDDD
DHCP server 88 Domain name 94
EEEE
E-mail 38, 40 E-mail address Fax Server 92
Email list add number 69 Remove number 69 view 69
Encrypted recording 79 Erase CD Re-Writable 72 Ethernet interface 18, 85 Export 105
FFFF
Faxlist add number 68 Remove number 68 view 68
Free time left 71 FTP 86 password 87 user name 86
Function keys 29 Function-keys 10
GGGG
G.723 18 Gateway 90 Guarantee 113
HHHH
Hard disk 17, 103 Hard disk menu 77 Hide 37
IIII
Index 115 Initialize CD 30 In-Line mode 35 Install 101 Introduction 17 IP address 89 IP name 91
LLLL
Language 46 Last recording 49 Liability 114 Line status 60
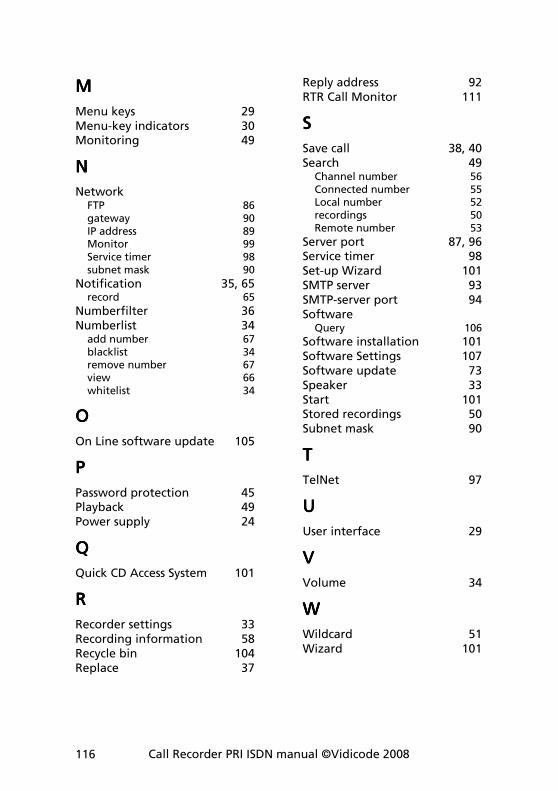
Call Recorder PRI ISDN manual ©Vidicode 2008 116
MMMM
Menu keys 29 Menu-key indicators 30 Monitoring 49
NNNN
Network FTP 86 gateway 90 IP address 89 Monitor 99 Service timer 98 subnet mask 90
Notification 35, 65 record 65
Numberfilter 36 Numberlist 34 add number 67 blacklist 34 remove number 67 view 66 whitelist 34
OOOO
On Line software update 105
PPPP
Password protection 45 Playback 49 Power supply 24
QQQQ
Quick CD Access System 101
RRRR
Recorder settings 33 Recording information 58 Recycle bin 104 Replace 37
Reply address 92 RTR Call Monitor 111
SSSS
Save call 38, 40 Search 49 Channel number 56 Connected number 55 Local number 52 recordings 50 Remote number 53
Server port 87, 96 Service timer 98 Set-up Wizard 101 SMTP server 93 SMTP-server port 94 Software Query 106
Software installation 101 Software Settings 107 Software update 73 Speaker 33 Start 101 Stored recordings 50 Subnet mask 90
TTTT
TelNet 97
UUUU
User interface 29
VVVV
Volume 34
WWWW
Wildcard 51 Wizard 101