Embed Size (px)
Citation preview
© Infobase Publishing
Topic
An autopsy can help determine cause of death.
Introduction
An autopsy or postmortem examination is a complete inspection of a corpse. Investigators often rely on an autopsy to help explain a decedent’s cause and manner of death. Pathologists are specialized doctors who usually carry out autopsies. An autopsy is required when the cause of death is suspected to be a criminal matter or when the cause of death cannot be determined medically.
The first stage of an autopsy is an external exam of the body to search for trace evidence and to identify any wounds or markings. Next, the pathologist makes a Y incision from the shoulders to the chest, then down to the pubis. The rib cage above the heart and lungs is removed so that these and other organs can be taken out of the body, examined, and weighed. Stomach contents are also inspected to find out what was consumed last and at what time it was consumed. Samples of tissues from organs are preserved and body fluids are collected. A saw is used to open the back of the skull so that the brain can be examined. Once all internal regions have been studied, the chest and abdomen are stitched up, the skull is replaced, and the scalp is sewn back in place.
In this experiment, you will play the role of a forensic pathologist by carrying out a detailed autopsy to determine the cause of death.
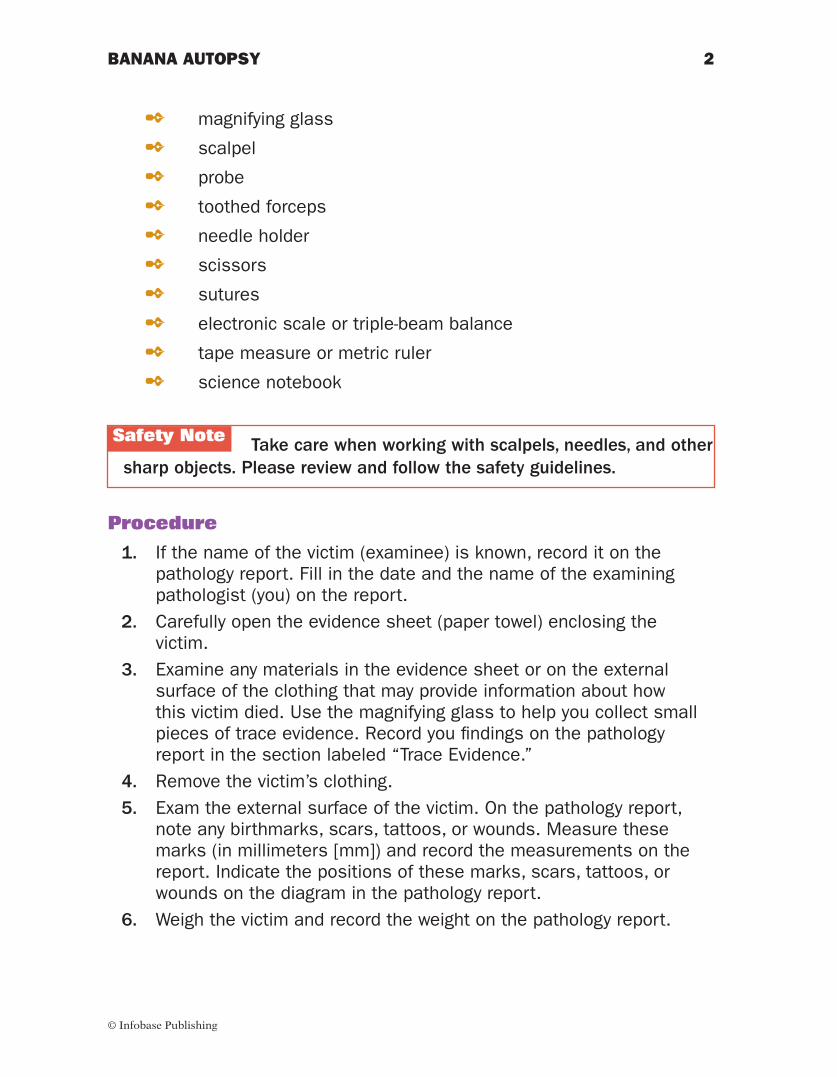
Time Required
55 minutes
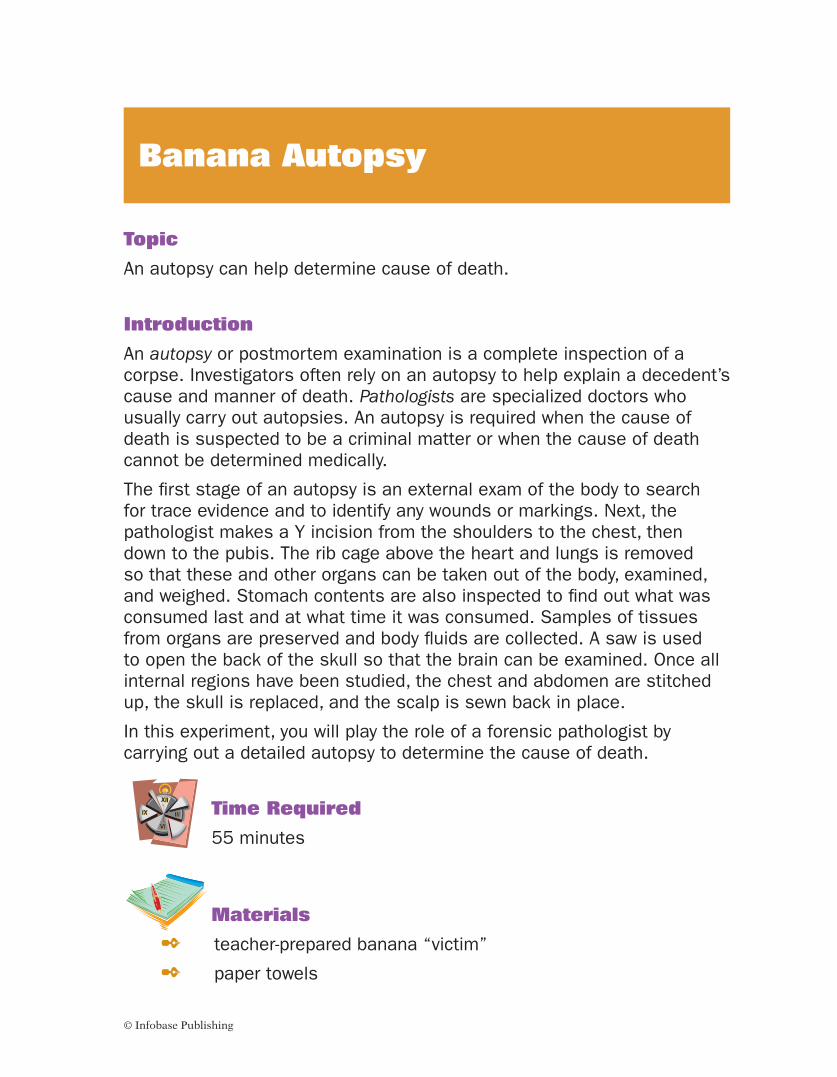
Materials
2 teacher-prepared banana “victim”
2 paper towels
Banana Autopsy
© Infobase Publishing
2 magnifying glass
2 scalpel
2 probe
2 toothed forceps
2 needle holder
2 scissors
2 sutures
2 electronic scale or triple-beam balance
2 tape measure or metric ruler
2 science notebook
Take care when working with scalpels, needles, and other sharp objects. Please review and follow the safety guidelines.
Procedure
1. If the name of the victim (examinee) is known, record it on the pathology report. Fill in the date and the name of the examining pathologist (you) on the report.
2. Carefully open the evidence sheet (paper towel) enclosing the victim.
3. Examine any materials in the evidence sheet or on the external surface of the clothing that may provide information about how this victim died. Use the magnifying glass to help you collect small pieces of trace evidence. Record you findings on the pathology report in the section labeled “Trace Evidence.”
4. Remove the victim’s clothing. 5. Exam the external surface of the victim. On the pathology report,
note any birthmarks, scars, tattoos, or wounds. Measure these marks (in millimeters [mm]) and record the measurements on the report. Indicate the positions of these marks, scars, tattoos, or wounds on the diagram in the pathology report.
6. Weigh the victim and record the weight on the pathology report.
Safety Note
Banana autopsy 2
© Infobase Publishing
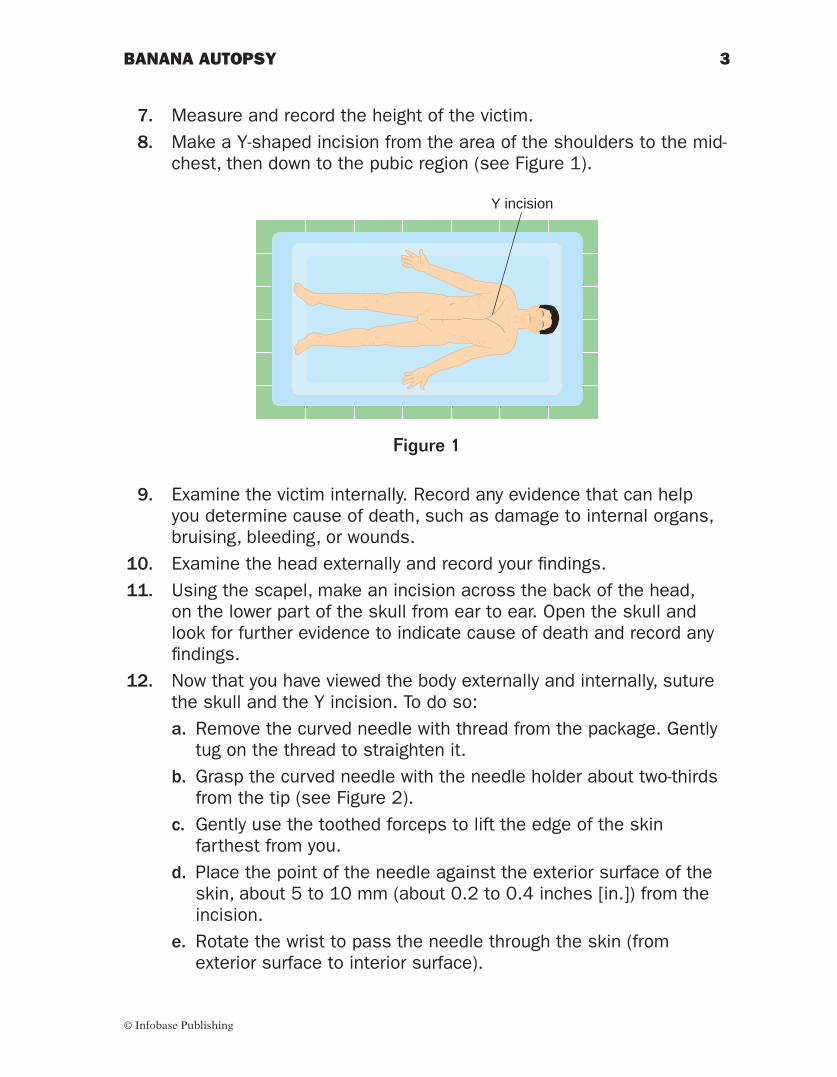
7. Measure and record the height of the victim. 8. Make a Y-shaped incision from the area of the shoulders to the mid-
chest, then down to the pubic region (see Figure 1).
Y incision
Walker/Wood Book 1 Forensics Figure 1-(1-1-1)
Figure 1
Figure 1
9. Examine the victim internally. Record any evidence that can help you determine cause of death, such as damage to internal organs, bruising, bleeding, or wounds.
10. Examine the head externally and record your findings. 11. Using the scapel, make an incision across the back of the head,
on the lower part of the skull from ear to ear. Open the skull and look for further evidence to indicate cause of death and record any findings.
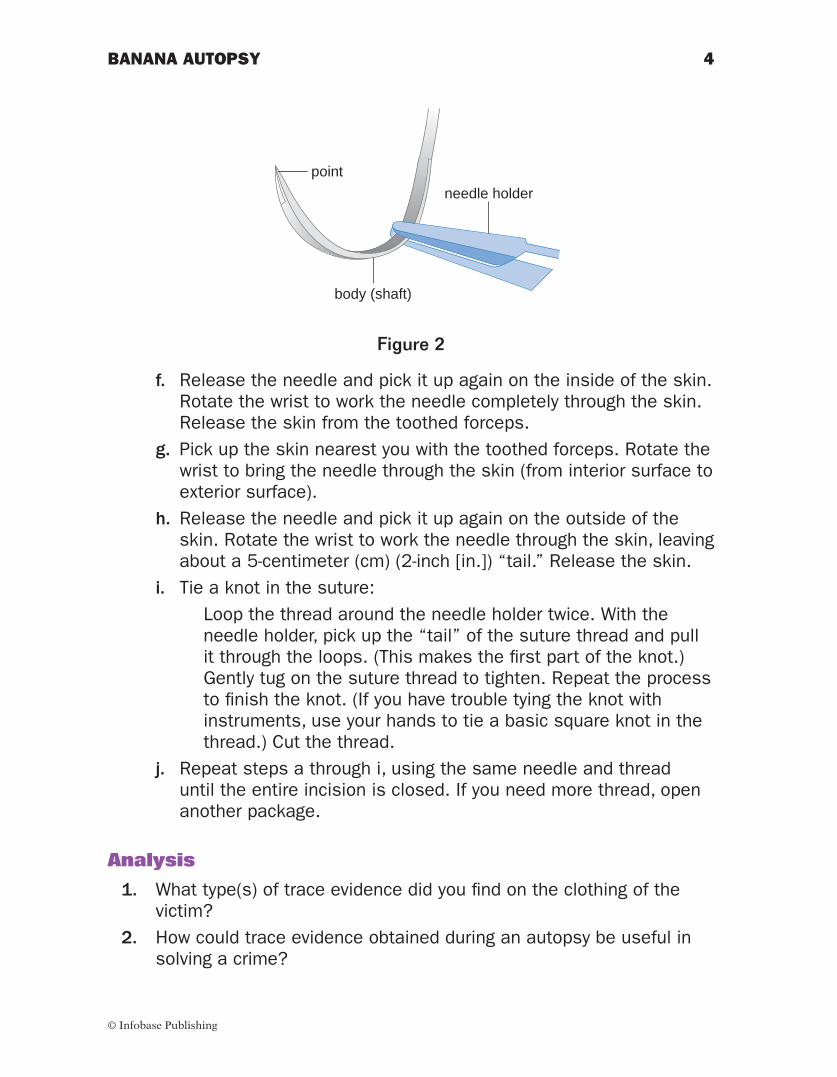
12. Now that you have viewed the body externally and internally, suture the skull and the Y incision. To do so:
a. Remove the curved needle with thread from the package. Gently tug on the thread to straighten it.
b. Grasp the curved needle with the needle holder about two-thirds from the tip (see Figure 2).
c. Gently use the toothed forceps to lift the edge of the skin farthest from you.
d. Place the point of the needle against the exterior surface of the skin, about 5 to 10 mm (about 0.2 to 0.4 inches [in.]) from the incision.
e. Rotate the wrist to pass the needle through the skin (from exterior surface to interior surface).
Banana autopsy 3
© Infobase Publishing
Walker/Wood Book 1 Forensics Figure 2-(2-1-2)
Figure 2
body (shaft)
needle holderpoint
Figure 2
f. Release the needle and pick it up again on the inside of the skin. Rotate the wrist to work the needle completely through the skin. Release the skin from the toothed forceps.
g. Pick up the skin nearest you with the toothed forceps. Rotate the wrist to bring the needle through the skin (from interior surface to exterior surface).
h. Release the needle and pick it up again on the outside of the skin. Rotate the wrist to work the needle through the skin, leaving about a 5-centimeter (cm) (2-inch [in.]) “tail.” Release the skin.
i. Tie a knot in the suture: Loop the thread around the needle holder twice. With the
needle holder, pick up the “tail” of the suture thread and pull it through the loops. (This makes the first part of the knot.) Gently tug on the suture thread to tighten. Repeat the process to finish the knot. (If you have trouble tying the knot with instruments, use your hands to tie a basic square knot in the thread.) Cut the thread.
j. Repeat steps a through i, using the same needle and thread until the entire incision is closed. If you need more thread, open another package.
Analysis
1. What type(s) of trace evidence did you find on the clothing of the victim?
2. How could trace evidence obtained during an autopsy be useful in solving a crime?
Banana autopsy 4
© Infobase Publishing
3. What kinds of marking(s) did you find on the skin of your victim? 4. How could markings on the skin such as scars or tattoos be useful
in solving a crime? 5. What did you find when you opened the body cavity of the victim? 6. What did you find when you opened the skull of the victim? 7. Based on your findings, what was the cause of death? 8. Do you think it is likely that this victim’s death is related to a crime?
Explain your reasoning.
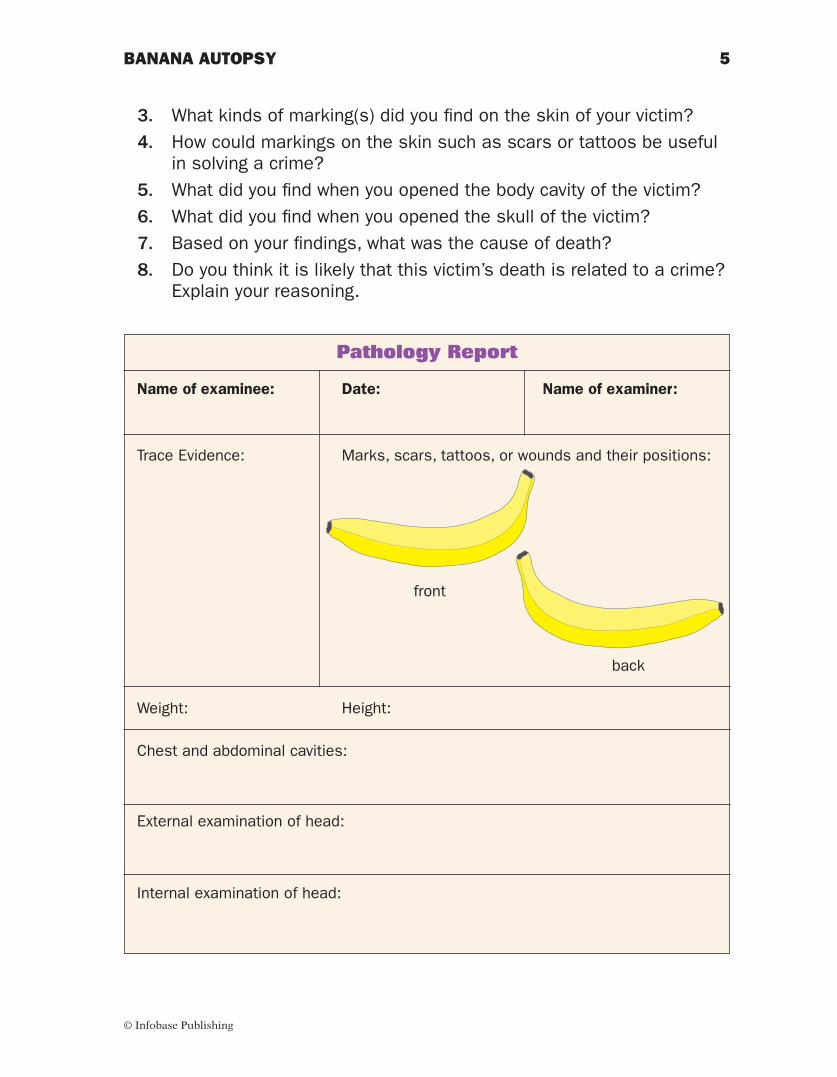
Pathology Report
Name of examinee: Date: Name of examiner:
Trace Evidence: Marks, scars, tattoos, or wounds and their positions:
front back
Weight: Height:
Chest and abdominal cavities:
External examination of head:
Internal examination of head:
Walker/Wood Book 1 Forensics Figure 1-1-3
Walker/Wood Book 1 Forensics Figure 1-1-3
Banana autopsy 5
© Infobase Publishing
What’s Going On?
During an autopsy, a pathologist has two goals: determine the manner of death and the cause of death. Manner of death falls into five categories: natural, accident, homicide, suicide, and undetermined. Cause of death refers to the injury, condition, or disease that led to death, such as puncture wound to the heart or heart failure due to heart attack.
A pathologist also tries to determine the time of death. In some cases, the time of death is very difficult to place and requires consideration of several factors. Therefore, pathologists rely on predictable changes that occur in the body after death to help estimate time of death. These changes include body temperature, lividity, rigor, and the stomach contents.
Body temperature drops at a predictable rate until it reaches air temperature. The rate at which body temperature falls depends on air temperature, wind, amount of clothing, and even the body weight of the deceased. “Lividity” refers to purplish areas that form on the body after the heart stops pumping and blood begins to settle. If a body is lying on its back at death, the back and hips develop regions of lividity. Rigor is a stiffening of the body that begins 2 to 6 hours after death, beginning at the neck and jaw. After 24 to 80 hours (depending on the environment), rigor ends and the muscles begin to relax. Examination of the gastric (stomach and intestinal) contents and their location in the digestive tract helps the pathologist decide when the last meal was eaten. All of this evidence taken together can reveal a picture that helps establish time of death.
Connections
Autopsy findings can be critical in determining cause of death. Trace evidence on the body such as human or pet hair; fibers from clothing, carpets, or cars; and soil or dust particles can indicate where a victim was located at the time of death. Injuries to the body may also help establish what caused death. Examination of organs can tell a pathologist whether death occurred from natural causes or whether foul play was involved. For example, narrowing of blood vessels around the heart and blood clots in lungs tell the examiner that the victim died from disease. Blood inside the skull may indicate a head injury. Damage to the hyoid bone, a small structure in the neck, can be an indication of strangulation. By assessing all of the clues found during autopsy, a pathologist can often determine the events that occurred in the last few hours of a person’s life.
Banana autopsy 6

© Infobase Publishing
Want to Know More?
See Our Findings.
Banana autopsy 7
© Infobase Publishing
Our Findings Banana autOpsy
idea for class discussion: Ask students to suggest definitions of the term “autopsy.” Make a list of the reasons that an autopsy might be needed.
notes to the teacher: Prepare the banana “victims” before the day of the lab. This preparation can be simple or elaborate, depending on your style. You can dress up the bananas to give them simple outfits, or you can leave them “naked.” To add trace evidence, roll some bananas in soil, pet hair, grass, dust, or other materials. You may want to make each banana victim’s cause of death unique. Some suggestions include “head” trauma, stab wounds and internal bleeding (insert red candies or a little ketchup with a hypodermic needle). Be creative and make the lab fun as well as informative.
Remind students that some directions in the procedure are a bit tongue-in-cheek. For example, there is no actual shoulder region or pubis, no skull or stomach on a banana victim. However, students are generally not bothered by these discrepancies and find the lab instructive.
analysis 1. Answers will vary but could include soil, leaves, grass, or dust.
2. Trace evidence could indicate where a person was located at the time of death or where he or she had been before death.
3. Answers will vary.
4. Identifying markings like scars, tattoos, or moles could be used to help identify an unknown victim. Other marks, such as stab wounds, could provide information about whether or not a struggle took place, the position of the victim, or even whether the perpetrator was left- or right-handed.
5. Answers will vary.
6. Answers will vary.
7. Answers will vary.
8. Answers will vary.
SAFETY PRECAUTIONSReview Before Starting Any Experiment
Each experiment includes special safety precautions that arerelevant to that particular project. These do not include all the basicsafety precautions that are necessary whenever you are working ona scientific experiment. For this reason, it is absolutely necessarythat you read and remain mindful of the General Safety Precautionsthat follow. Experimental science can be dangerous, and goodlaboratory procedure always includes following basic safety rules.Things can happen very quickly while you are performing anexperiment. Materials can spill, break, or even catch fire. There willbe no time after the fact to protect yourself. Always prepare forunexpected dangers by following the basic safety guidelines duringthe entire experiment, whether or not something seems dangerousto you at a given moment.
We have been quite sparing in prescribing safety precautions for theindividual experiments. For one reason, we want you to take veryseriously every safety precaution that is printed in this book. If yousee it written here, you can be sure that it is here because it isabsolutely critical.
Read the safety precautions here and at the beginning of eachexperiment before performing each lab activity. It is difficult toremember a long set of general rules. By rereading these generalprecautions every time you set up an experiment, you will bereminding yourself that lab safety is critically important. In addition,use your good judgment and pay close attention when performingpotentially dangerous procedures. Just because the book does notsay “Be careful with hot liquids” or “Don’t cut yourself with a knife”does not mean that you can be careless when boiling water or usinga knife to punch holes in plastic bottles. Notes in the text arespecial precautions to which you must pay special attention.
GENERAL SAFETY PRECAUTIONS
Accidents caused by carelessness, haste, insufficient knowledge, ortaking an unnecessary risk can be avoided by practicing safetyprocedures and being alert while conducting experiments. Be sure to
© Infobase Publishing
SAFETY PRECAUTIONS 2
© Infobase Publishing
check the individual experiments in this book for additional safetyregulations and adult supervision requirements. If you will beworking in a lab, do not work alone. When you are working off-site,keep in groups with a minimum of three students per groups, andfollow school rules and state legal requirements for the number ofsupervisors required. Ask an adult supervisor with basic training infirst aid to carry a small first-aid kit. Make sure everyone knowswhere this person will be during the experiment.
PREPARING
• Clear all surfaces before beginning experiments.
• Read the instructions before you start.
• Know the hazards of the experiments and anticipate dangers.
PROTECTING YOURSELF
• Follow the directions step by step.
• Do only one experiment at a time.
• Locate exits, fire blanket and extinguisher, master gas andelectricity shut-offs, eyewash, and first-aid kit.
• Make sure there is adequate ventilation.
• Do not horseplay.
• Keep floor and workspace neat, clean, and dry.
• Clean up spills immediately.
• If glassware breaks, do not clean it up; ask for teacher assistance.
• Tie back long hair.
• Never eat, drink, or smoke in the laboratory or workspace.
• Do not eat or drink any substances tested unless expresslypermitted to do so by a knowledgeable adult.
USING EQUIPMENT WITH CARE
• Set up apparatus far from the edge of the desk.
• Use knives or other sharp-pointed instruments with care.
© Infobase Publishing
SAFETY PRECAUTIONS 3
• Pull plugs, not cords, when removing electrical plugs.
• Clean glassware before and after use.
• Check glassware for scratches, cracks, and sharp edges.
• Clean up broken glassware immediately.
• Do not use reflected sunlight to illuminate your microscope.
• Do not touch metal conductors.
• Use alcohol-filled thermometers, not mercury-filledthermometers.
USING CHEMICALS
• Never taste or inhale chemicals.
• Label all bottles and apparatus containing chemicals.
• Read labels carefully.
• Avoid chemical contact with skin and eyes (wear safety glasses,lab apron, and gloves).
• Do not touch chemical solutions.
• Wash hands before and after using solutions.
• Wipe up spills thoroughly.
HEATING SUBSTANCES
• Wear safety glasses, apron, and gloves when boiling water.
• Keep your face away from test tubes and beakers.
• Use test tubes, beakers, and other glassware made of Pyrex™ glass.
• Never leave apparatus unattended.
• Use safety tongs and heat-resistant gloves.
• If your laboratory does not have heat-proof workbenches, put your Bunsen burner on a heat-proof mat before lighting it.
• Take care when lighting your Bunsen burner; light it with theairhole closed, and use a Bunsen burner lighter in preference towooden matches.
SAFETY PRECAUTIONS 4
© Infobase Publishing
• Turn off hot plates, Bunsen burners, and gas when you are done.
• Keep flammable substances away from flames and other sourcesof heat.
• Have a fire extinguisher on hand.
FINISHING UP
• Thoroughly clean your work area and any glassware used.
• Wash your hands.
• Be careful not to return chemicals or contaminated reagents tothe wrong containers.
• Do not dispose of materials in the sink unless instructed to do so.
• Clean up all residues and put them in proper containers fordisposal.
• Dispose of all chemicals according to all local, state, and federallaws.
BE SAFETY CONSCIOUS AT ALL TIMES!