Embed Size (px)
Citation preview

Document Identifier:
UG01.2.0 Effective Date:
August 2012
Covering Backbox Product Version: 2.2.8
Author: Eyal Estrin
How to configure new
device
BACKBOX K E E P I T S A F E
www.backbox.co

Copyright © 2012 Safeway. All rights reserved.
No part of this publication may be reproduced, transmitted, transcribed, stored in a retrieval system, or translated into any language, in any form or by any means, electronic, mechanical, photocopying, recording, or otherwise, without prior written permission from Safeway.
All copyright, confidential information, patents, design rights and all other intellectual property rights of whatsoever nature contained herein are and shall remain the sole and exclusive property of Safeway Ltd. The information furnished herein is believed to be accurate and reliable.
However, no responsibility is assumed by Safeway for its use, or for any infringements of patents or other rights of third parties resulting from its use.
The Safeway name and Safeway logo are trademarks or registered trademarks of Safeway Limited.
All other trademarks are the property of their respective owners.

Table of Contents
1. Introduction ........................................................................................................... 10
1.1. Purpose ......................................................................................................................................... 10
2. Adding new devices .............................................................................................. 11
2.1. 3COM 5500 Switch ....................................................................................................................... 11 2.2. Access Layers PortNox ................................................................................................................. 12
2.3. Aladdin eSafe ................................................................................................................................ 14
2.4. AlgoSec Firewall Analyzer ............................................................................................................ 15
2.5. Allot NetEnforcer ........................................................................................................................... 16
2.6. Allot NetXplorer ............................................................................................................................. 17 2.7. Aruba switch .................................................................................................................................. 18
2.8. Astaro Command Center .............................................................................................................. 19
2.9. Astaro Security Gateway .............................................................................................................. 20
2.10. AudioCodes BusinessPLUS ...................................................................................................... 21
2.11. AudioCodes Mediant 2000 ........................................................................................................ 23
2.12. AudioCodes MP-112 ................................................................................................................. 24 2.13. AudioCodes MP-114 ................................................................................................................. 25
2.14. AudioCodes MP-124 ................................................................................................................. 26
2.15. AudioCodes MSBG ................................................................................................................... 27
2.16. Avaya 5500 series ..................................................................................................................... 28
2.17. BackBox Self-Backup ................................................................................................................ 29
2.18. BackBox CIFS Export ................................................................................................................ 30 2.19. BackBox FTP Export ................................................................................................................. 31
2.20. BackBox SCP Export ................................................................................................................ 32
2.21. Barracuda Firewall .................................................................................................................... 33
2.22. Bind DNS Server ....................................................................................................................... 34
2.23. Blue Coat Proxy AV ................................................................................................................... 35 2.24. Blue Coat Proxy SG .................................................................................................................. 36
2.25. Brocade DS-490 fiber switch ..................................................................................................... 37
2.26. Brocade DS-5100 switch ........................................................................................................... 38
2.27. Centerity Monitor ....................................................................................................................... 39
2.28. CheckPoint Connectra .............................................................................................................. 40

2.29. CheckPoint Firewall – Single Gateway ..................................................................................... 41
2.30. CheckPoint Firewall – Management.......................................................................................... 42 2.31. CheckPoint Firewall (Windows) ................................................................................................. 43
2.32. CheckPoint Firewall – Module ................................................................................................... 45
2.33. CheckPoint Firewall – Provider-1 .............................................................................................. 46
2.34. CheckPoint Firewall – Provider-1 (CMA Backup) ..................................................................... 47
2.35. CheckPoint SG80 ...................................................................................................................... 48
2.36. CheckPoint Safe@Office ........................................................................................................... 49 2.37. CheckPoint VPN-1 Edge ........................................................................................................... 50
2.38. CheckPoint EndPoint Security R80 ........................................................................................... 51
2.39. Cisco ACS ................................................................................................................................. 53
2.40. Cisco Router .............................................................................................................................. 54
2.41. Cisco Router (Telnet/TFTP and SSH/TFTP) ............................................................................. 55 2.42. Cisco Switch .............................................................................................................................. 56
2.43. Cisco Switch (Telnet/TFTP and SSH/TFTP) ............................................................................. 57
2.44. Cisco Nexus 1000v switch ........................................................................................................ 58
2.45. Cisco CatOS switch ................................................................................................................... 59
2.46. Cisco MDS 9000........................................................................................................................ 60
2.47. Cisco 6500 WiSM ...................................................................................................................... 61 2.48. Cisco WLC (Wireless LAN Controller) ...................................................................................... 62
2.49. Cisco PIX (IOS 6.1) ................................................................................................................... 63
2.50. Cisco PIX (IOS 6.3 and above) ................................................................................................. 64
2.51. Cisco ASA ................................................................................................................................. 65
2.52. Cisco FWSM .............................................................................................................................. 66
2.53. Cisco IronPort Mail .................................................................................................................... 67 2.54. Cisco IronPort Management ...................................................................................................... 68
2.55. Cisco IronPort Web ................................................................................................................... 69
2.56. Cisco IP Telephony ................................................................................................................... 70
2.57. Citrix NetScaler.......................................................................................................................... 72
2.58. ClearSwift Email Appliance ....................................................................................................... 73
2.59. ClearSwift MIMEsweeper for SMTP .......................................................................................... 76 2.60. ClearSwift Web Gateway .......................................................................................................... 78
2.61. Crossbeam C series .................................................................................................................. 81
2.62. Crossbeam X series .................................................................................................................. 82
2.63. D-link Switch .............................................................................................................................. 83

2.64. Dell PowerConnect 54xx ........................................................................................................... 84
2.65. Dell PowerConnect M6xxx ........................................................................................................ 85 2.66. Enterasys switch........................................................................................................................ 86
2.67. Extreme Networks Switch ......................................................................................................... 87
2.68. Fireye ......................................................................................................................................... 88
2.69. FireMon 5.x ................................................................................................................................ 89
2.70. ForeScout CounterAct ............................................................................................................... 92
2.71. Fortinet FortiAnalyzer ................................................................................................................ 94 2.72. FortiBalancer ............................................................................................................................. 95
2.73. Fortinet FortiGate ...................................................................................................................... 96
2.74. Fortinet FortiMail........................................................................................................................ 97
2.75. Foundry FGS switch .................................................................................................................. 98
2.76. F5 BigIP ..................................................................................................................................... 99 2.77. F5 FirePass ............................................................................................................................. 100
2.78. HP ProCurve (SCP) ................................................................................................................ 102
2.79. HP ProCurve (No IP SSH Filetransfer) ................................................................................... 103
2.80. Huawei Switch ......................................................................................................................... 104
2.81. IBM DataPower SX 3.8.x ......................................................................................................... 105
2.82. Imperva SecureSphere ........................................................................................................... 106 2.83. Imprivata One-Sign ................................................................................................................. 107
2.84. Juniper ISG .............................................................................................................................. 108
2.85. Juniper NetScreen ................................................................................................................... 109
2.86. Juniper NSM 2011 ................................................................................................................... 110
2.87. Juniper Switch ......................................................................................................................... 111
2.88. Juniper Router ......................................................................................................................... 112 2.89. Juniper SRX ............................................................................................................................ 113
2.90. Juniper SSG ............................................................................................................................ 114
2.91. Juniper SA (Secure Access) ................................................................................................... 115
2.92. Juniper Unified Access Control ............................................................................................... 118
2.93. Juniper WLC ............................................................................................................................ 119
2.94. Linux Generic .......................................................................................................................... 120 2.95. Linux (Generic) IPTables ......................................................................................................... 121
2.96. Linux (Generic) Squid Proxy ................................................................................................... 122
2.97. McAfee ePO 4.x ...................................................................................................................... 123
2.98. McAfee Intrushield Management............................................................................................. 125

2.99. Microsoft ISA Server 2006 ...................................................................................................... 127
2.100. Microsoft TMG 2010 ................................................................................................................ 129 2.101. Microsoft UAG 2010 ................................................................................................................ 131
2.102. Motorola RFS 7000 ................................................................................................................. 133
2.103. NetAPP ONTAP 8.x ................................................................................................................ 134
2.104. Netgear FSM / GSM switch ..................................................................................................... 135
2.105. Nokia Crypto Cluster ............................................................................................................... 136
2.106. Nokia IPSO .............................................................................................................................. 137 2.107. Nortel 2360 Switch .................................................................................................................. 138
2.108. Nortel 460/470 Switch (Telnet) ................................................................................................ 139
2.109. Nortel 460/470 Switch (SNMPv2/TFTP) ................................................................................. 140
2.110. Nortel 460/470 Switch (All) ...................................................................................................... 141
2.111. Nortel Passport 1600 ............................................................................................................... 142 2.112. Nortel Passport 8000 (SNMP/TFTP) ....................................................................................... 143
2.113. Nortel Passport 8000 (Running-config) ................................................................................... 144
2.114. PaloAlto PA-Series .................................................................................................................. 145
2.115. PFSense Firewall .................................................................................................................... 147
PineApp Mail-SeCure ............................................................................................................................ 148
2.116. PineApp Mail-SeCure (HTTPS) ............................................................................................... 150 2.117. Radiator Radius Server ........................................................................................................... 151
Radware Alteon OS (Telnet / SSH) ....................................................................................................... 152
2.118. Radware Alteon (SNMP/TFTP) ............................................................................................... 153
2.119. Radware AppDirector (1.03) .................................................................................................... 154
2.120. Radware AppDirector (1.06 and above) .................................................................................. 155
2.121. Radware AppDirector ODS (2.x and above) ........................................................................... 156 2.122. Radware Apsolute-Vision ........................................................................................................ 157
Radware CID (1.x – 2.x) ........................................................................................................................ 158
2.123. Radware CID (3.x and above) ................................................................................................. 159
2.124. Radware DefensePro (3.x) ...................................................................................................... 160
2.125. Radware DefensePro (4.x – 6.x) ............................................................................................. 161
2.126. Radware LinkProof (4.x – 5.x) ................................................................................................. 162 2.127. Radware LinkProof (6.x and above) ........................................................................................ 163
2.128. Radware WSD ......................................................................................................................... 164
2.129. Redback RB400 ...................................................................................................................... 165
2.130. Riverbed Steelhead ................................................................................................................. 166

2.131. SkyBox (Windows) .................................................................................................................. 167
2.132. SonicWall NSA 2400 ............................................................................................................... 169 2.133. StoneSoft StoneGate Management 5.3.4 ............................................................................... 170
2.134. Symantec Brightmail Gateway 9.0 .......................................................................................... 171
2.135. Symantec Brightmail Gateway 9.0 (SCP) ............................................................................... 173
2.136. Symantec Endpoint Protection 11 ........................................................................................... 174
2.137. Tenor - Quintun ....................................................................................................................... 177
2.138. TippingPoint SMS .................................................................................................................... 178 2.139. TrendMicro IMSS 7.x (Windows) ............................................................................................. 180
2.140. TrendMicro IMSVA .................................................................................................................. 182
2.141. TrendMicro IWSS 2.2 .............................................................................................................. 183
2.142. TrendMicro IWSS 3.1 Virtual Appliance (IWSVA) ................................................................... 184
2.143. TrendMicro IWSS 5.x Virtual Appliance (IWSVA) ................................................................... 185 2.144. TrendMicro OfficeScan ............................................................................................................ 186
2.145. Tufin SecureTrack/SecureChange Workflow .......................................................................... 188
2.146. VMware ESXi 4.1 and above .................................................................................................. 189
2.147. WatchGuard XCS .................................................................................................................... 192
2.148. WatchGuard XTM .................................................................................................................... 193
2.149. Websense Content Gateway ................................................................................................... 194 2.150. Websense Content Gateway Management ............................................................................ 195
2.151. Websense Web Security 7.5 ................................................................................................... 197
2.152. Websense DLP........................................................................................................................ 199
2.153. Websense Triton 7.6 ............................................................................................................... 201

About this guide This document is divided into the following chapters:
• Chapter 1, “Introduction“, purpose of this document.
• Chapter 2, “Adding new devices”, explain how to add new devices and configure backup.
Who Should Use It
This guide is intended for all Backbox users. The 3 different types of user are:
• System Administrators - to install, configure and schedule backups.
• Backup Operators - to configure and schedule backups.
This guide assumes that you have some knowledge of the operating system.

Typographical Conventions
This document uses the following typographical conventions:
Screen names, button names, command and option names appear in bold type. The names of directories, files, machines, partitions, and volumes also appear in bold.
Variable information appears in italic type. This includes user-supplied information on command lines.
Warnings appear as follows:
Warning: Warning text.

1. Introduction
1.1. Purpose
This guide explains how to configure backup for new devices using BackBox application.

2. Adding new devices The following sections describe how to add new devices and configure backup.
2.1. 3COM 5500 Switch
Pre-requirements • Enable routing between the 3COM device and the backup device.
• Enable Telnet or SSH between the backup device and the 3COM device.
Backup configuration instructions 1. From the BackBox upper pane, click on Devices -> click on Add -> fill in the following details:
• Device Name: Put here a name to recognize the device.
• IP: Put here the IP address of the remote device to backup.
• Group: Select from the device groups drop-down list (Optional field).
• Vendor: Select 3COM, from the drop-down list.
• Product: Select Switch, from the drop-down list.
• Version: Select the relevant version, from the drop-down list.
• Backup type: Select backup type (either Pass/Ena (Telnet), User/Pass (Telnet), User/Pass (SSH), User/Pass/Super (Telnet) or User/Pass/Super (SSH)), from the drop-down list.
• Username: Put here the username for the remote device.
• Password: Put here the password for the remote server/device.
• Super Password: Put here the 3COM “enable” password (if exist on the remote server).
• Prompt after password: Change this value only if it is different than the prompt written.
• Prompt after super password: Change this value only if it is different than the prompt written.
• Port: Change this value only if it is different than the port written.
2. Click on Save.

2.2. Access Layers PortNox
Pre-requirements: • Enable routing between the Portnox server and the backup device.
• In-case the database is installed locally on the Portnox server, enable FTP access from the Portnox server to the backup device.
• In-case the database is installed on remote SQL server, enable FTP access from the Portnox SQL database server to the backup device.
Backup configuration instructions (create FTP account on the BackBox server): 1. Login to the BackBox web interface.
2. From the upper pane, click on Authentication -> Operating System Users -> supply account name and password.
3. Click Add.
Backup configuration instructions (inside the PortNox server): 1. In-case the Portnox database is installed on the same server as the Portnox server, login to the Portnox
server using administrative account.
2. In-case the Portnox database is installed on remote SQL server, login to the SQL server using administrative account.
3. Download from the Internet and install 7Zip on the server (http://www.7-zip.org)
4. Double click on “My Computer” -> double click on drive letter (for example drive C) -> right click -> New folder -> specify the name “PortnoxBackup”.
5. In-case the Portnox database is installed on the same server as the Portnox server, login to the BackBox web interface -> from the upper pane, click on Documents -> BackBox Documentation -> download the script Access Layers -> Portnox -> Local Database.
6. In-case the Portnox database is installed on remote SQL server, login to the BackBox web interface -> from the upper pane, click on Documents -> BackBox Documentation -> download the script Access Layers -> Portnox -> Remote Database.
7. Replace the value of the parameter FTPPassword with the password for the BackBox OS user “ftpbackbox” (if it is different than “backbox”)
Note: To change the “ftpbackbox” account password, login to the BackBox web interface -> Authentication -> Operating system users -> locate the account “ftpbackbox” -> click on Edit icon -> specify new password and confirm it -> click on Save.
8. Replace the value of the parameter FTPServer with the IP/hostname of the BackBox server.
9. Replace the value of the parameter ServerIP with the main IP address of the Portnox server.
10. Replace the value of the string “.\AccessLayers” with “.\” and the Portnox database server name.
11. Save the file as C:\PortnoxBackup\PortNoxBackup.bat

12. Create a schedule task to run the file bellow at regular intervals:
C:\PortnoxBackup\PortNoxBackup.bat
Backup configuration instructions (inside the BackBox web console): 1. From the BackBox upper pane, click on Devices -> click on Add -> fill in the following details:
• Device Name: Put here a name to recognize the device.
• IP: Put here the IP address of the remote device.
• Group: Select from the device groups drop-down list (Optional field).
• Vendor: Select Access Layers, from the drop-down list.
• Product: Select Portnox, from the drop-down list.
• Version: Select the relevant version, from the drop-down list.
• Backup type: Select Backup (Local), from the drop-down list.
• Username: Put here the ftpbackbox
• Password: Put here the password for the “ftpbackbox” account on the BackBox server.
2. Click on Save.

2.3. Aladdin eSafe
Pre-requirements: • Enable routing between the eSafe and the backup device.
• Enable SSH access from the backup device to the eSafe.
Backup configuration instructions: 1. From the BackBox upper pane, click on Devices -> click on Add -> fill in the following details:
• Device Name: Put here a name to recognize the device.
• IP: Put here the IP address of the remote device to backup.
• Group: Select from the device groups drop-down list (Optional field).
• Vendor: Select Aladdin, from the drop-down list.
• Product: Select eSafe, from the drop-down list.
• Version: Select the relevant version, from the drop-down list.
• Backup type: Select Backup (SSH), from the drop-down list.
• Username: Put here “root”.
• Password: Put here the password for the “root” account on the remote server/device.
• Port: Change this value only if it is different than the port written.
2. Click on Save.

2.4. AlgoSec Firewall Analyzer
Pre-requirements: • Enable routing between the AlgoSec device and the backup device.
• Enable SSH access from the backup device to the AlgoSec device.
Backup configuration instructions: 1. From the BackBox upper pane, click on Devices -> click on Add -> fill in the following details:
• Device Name: Put here a name to recognize the device.
• IP: Put here the IP address of the remote device to backup.
• Group: Select from the device groups drop-down list (Optional field).
• Vendor: Select AlgoSec, from the drop-down list.
• Product: Select Firewall Analyzer, from the drop-down list.
• Version: Select the relevant version, from the drop-down list.
• Backup type: Select Backup (SSH), from the drop-down list.
• Username: Put here “root”.
• Password: Put here the password for the “root” account on the remote server/device.
• Port: Change this value only if it is different than the port written.
2. Click on Save.

2.5. Allot NetEnforcer
Pre-requirements: • Enable routing between the NetEnforcer device and the backup device.
• Enable SSH access from the backup device to the NetEnforcer device.
Backup configuration instructions: 3. From the BackBox upper pane, click on Devices -> click on Add -> fill in the following details:
• Device Name: Put here a name to recognize the device.
• IP: Put here the IP address of the remote device to backup.
• Group: Select from the device groups drop-down list (Optional field).
• Vendor: Select Allot, from the drop-down list.
• Product: Select NetEnforcer, from the drop-down list.
• Version: Select the relevant version, from the drop-down list.
• Backup type: SSH, from the drop-down list.
• Username: Put here “root”.
• Password: Put here the password for the “root” account on the remote server/device.
• Port: Change this value only if it is different than the port written.
4. Click on Save.

2.6. Allot NetXplorer
Pre-requirements: • Enable routing between the NetXplorer device and the backup device.
• Enable SSH access from the backup device to the NetXplorer device.
Backup configuration instructions: 5. From the BackBox upper pane, click on Devices -> click on Add -> fill in the following details:
• Device Name: Put here a name to recognize the device.
• IP: Put here the IP address of the remote device to backup.
• Group: Select from the device groups drop-down list (Optional field).
• Vendor: Select Allot, from the drop-down list.
• Product: Select NetXplorer, from the drop-down list.
• Version: Select the relevant version, from the drop-down list.
• Backup type: Select SSH, from the drop-down list.
• Username: Put here “root”.
• Password: Put here the password for the “root” account on the remote server/device.
• Port: Change this value only if it is different than the port written.
6. Click on Save.

2.7. Aruba switch
Pre-requirements: • Enable routing between the Aruba switch and the backup device.
• Enable Telnet or SSH access from the backup device to the Aruba switch.
Backup configuration instructions: 1. From the BackBox upper pane, click on Devices -> click on Add -> fill in the following details:
• Device Name: Put here a name to recognize the device.
• IP: Put here the IP address of the remote device to backup.
• Group: Select from the device groups drop-down list (Optional field).
• Vendor: Select Aruba, from the drop-down list.
• Product: Select Security switch, from the drop-down list.
• Version: Select the relevant version, from the drop-down list.
• Backup type: Select Backup (Telnet) or Backup (SSH), from the drop-down list.
• Username: Put here the account for the remote account.
• Password: Put here the password for the account on the remote server/device.
• Prompt after password: Change this value only if it is different than the prompt written.
• Prompt after Enable password: Change this value only if it is different than the prompt written.
• Port: Change this value only if it is different than the port written.
2. Click on Save.

2.8. Astaro Command Center
Pre-requirements: • Enable routing between the Astaro device and the backup device.
• Enable SSH access from the backup device to the Astaro device.
Backup configuration instructions: 1. From the BackBox upper pane, click on Devices -> click on Add -> fill in the following details:
• Device Name: Put here a name to recognize the device.
• IP: Put here the IP address of the remote device to backup.
• Group: Select from the device groups drop-down list (Optional field).
• Vendor: Select Astaro, from the drop-down list.
• Product: Select Command Center, from the drop-down list.
• Version: Select the relevant version, from the drop-down list.
• Backup type: Select backup type, from the drop-down list. Available options:
• Backup (SSH) – Backup the configuration
• Backup Encrypted (SSH) – Backup the configuration in encrypted mode
• Username: Put here the account for the remote account.
• Password: Put here the password for the account on the remote server/device.
• SU Password: Put here the password for the privileged mode.
• Prompt after password: Change this value only if it is different than the prompt written.
• Prompt after SU password: Change this value only if it is different than the prompt written.
• Port: Change this value only if it is different than the port written.
2. Click on Save.

2.9. Astaro Security Gateway
Pre-requirements: • Enable routing between the Astaro device and the backup device.
• Enable SSH access from the backup device to the Astaro device.
Backup configuration instructions: 1. From the BackBox upper pane, click on Devices -> click on Add -> fill in the following details:
• Device Name: Put here a name to recognize the device.
• IP: Put here the IP address of the remote device to backup.
• Group: Select from the device groups drop-down list (Optional field).
• Vendor: Select Astaro, from the drop-down list.
• Product: Select Security Gateway, from the drop-down list.
• Version: Select the relevant version, from the drop-down list.
• Backup type: Select backup type, from the drop-down list. Available options:
• Backup (SSH) – Backup the configuration
• Backup Encrypted (SSH) – Backup the configuration in encrypted mode
• Username: Put here the account for the remote account.
• Password: Put here the password for the account on the remote server/device.
• SU Password: Put here the password for the privileged mode.
• Prompt after password: Change this value only if it is different than the prompt written.
• Prompt after SU password: Change this value only if it is different than the prompt written.
• Port: Change this value only if it is different than the port written.
2. Click on Save.

2.10. AudioCodes BusinessPLUS
Pre-requirements: • Enable routing between the AudioCodes device and the backup device.
• Enable FTP traffic from the AudioCodes device to the backup device.
Backup configuration instructions (create FTP account on the BackBox server): 1. Login to the BackBox web interface.
2. From the upper pane, click on Authentication -> Operating System Users -> supply account name and password.
3. Click Add.
Backup configuration instructions (inside the AudioCodes web console): 1. Open an internet browser and login to the address:
http://< IP_Address> 2. Supply credentials to login to the management console. 3. From the left pane, click on Configuration -> select Full. 4. Expand Backup -> click on Backup System.
• Select the days of the week and time for the backup process • Status – change to Enabled • Server address – specify here the IP address of the BackBox

• Directory – specify “/” • User name – specify the FTP account on the BackBox • Password – specify the password for the FTP account
5. Under “Advanced Settings” select which settings to backup. 6. Click on Submit.
Backup configuration instructions (inside the BackBox web console): 1. From the BackBox upper pane, click on Devices -> click on Add -> fill in the following details:
• Device Name: Put here a name to recognize the device.
• IP: Put here the IP address of the remote device to backup.
• Group: Select from the device groups drop-down list (Optional field).
• Vendor: Select AudioCodes, from the drop-down list.
• Product: Select BusinessPLUS, from the drop-down list.
• Version: Select the relevant version, from the drop-down list.
• Backup type: Select Backup (Local), from the drop-down list.
• Username: Put here the account for the remote account.
• Password: Put here the password for the account on the remote server/device.
2. Click on Save.

2.11. AudioCodes Mediant 2000
Pre-requirements: • Enable routing between the AudioCodes device and the backup device.
• Enable SSH access from the backup device to the AudioCodes device.
Backup configuration instructions: 1. From the BackBox upper pane, click on Devices -> click on Add -> fill in the following details:
• Device Name: Put here a name to recognize the device.
• IP: Put here the IP address of the remote device to backup.
• Group: Select from the device groups drop-down list (Optional field).
• Vendor: Select AudioCodes, from the drop-down list.
• Product: Select Mediant 2000, from the drop-down list.
• Version: Select the relevant version, from the drop-down list.
• Backup type: Select Backup (SSH), from the drop-down list.
• Username: Put here the account for the remote account.
• Password: Put here the password for the account on the remote server/device.
• Prompt after password: Change this value only if it is different than the prompt written.
• Port: Change this value only if it is different than the port written.
2. Click on Save.
2.12. AudioCodes MP-112
Pre-requirements: • Enable routing between the AudioCodes device and the backup device.
• Enable SSH access from the backup device to the AudioCodes device.
Backup configuration instructions: 1. From the BackBox upper pane, click on Devices -> click on Add -> fill in the following details:
• Device Name: Put here a name to recognize the device.
• IP: Put here the IP address of the remote device to backup.
• Group: Select from the device groups drop-down list (Optional field).
• Vendor: Select AudioCodes, from the drop-down list.
• Product: Select MP-112, from the drop-down list.
• Version: Select the relevant version, from the drop-down list.
• Backup type: Select Backup (SSH), from the drop-down list.
• Username: Put here the account for the remote account.
• Password: Put here the password for the account on the remote server/device.
• Prompt after password: Change this value only if it is different than the prompt written.
• Port: Change this value only if it is different than the port written.
2. Click on Save.

2.13. AudioCodes MP-114
Pre-requirements: • Enable routing between the AudioCodes device and the backup device.
• Enable Telnet access from the backup device to the AudioCodes device.
Backup configuration instructions: 1. From the BackBox upper pane, click on Devices -> click on Add -> fill in the following details:
• Device Name: Put here a name to recognize the device.
• IP: Put here the IP address of the remote device to backup.
• Group: Select from the device groups drop-down list (Optional field).
• Vendor: Select AudioCodes, from the drop-down list.
• Product: Select MP-114, from the drop-down list.
• Version: Select the relevant version, from the drop-down list.
• Backup type: Select Backup (Telnet), from the drop-down list.
• Username: Put here the account for the remote account.
• Password: Put here the password for the account on the remote server/device.
• Prompt after password: Change this value only if it is different than the prompt written.
2. Click on Save.

2.14. AudioCodes MP-124
Pre-requirements: • Enable routing between the AudioCodes device and the backup device.
• Enable SSH access from the backup device to the AudioCodes device.
Backup configuration instructions: 1. From the BackBox upper pane, click on Devices -> click on Add -> fill in the following details:
• Device Name: Put here a name to recognize the device.
• IP: Put here the IP address of the remote device to backup.
• Group: Select from the device groups drop-down list (Optional field).
• Vendor: Select AudioCodes, from the drop-down list.
• Product: Select MP-124, from the drop-down list.
• Version: Select the relevant version, from the drop-down list.
• Backup type: Select Backup (SSH), from the drop-down list.
• Username: Put here the account for the remote account.
• Password: Put here the password for the account on the remote server/device.
• Prompt after password: Change this value only if it is different than the prompt written.
• Port: Change this value only if it is different than the port written.
2. Click on Save.

2.15. AudioCodes MSBG
Pre-requirements: • Enable routing between the AudioCodes device and the backup device.
• Enable HTTPS traffic (port 8082TCP) from backup device to the AudioCodes device.
Backup configuration instructions: 1. From the BackBox upper pane, click on Devices -> click on Add -> fill in the following details:
• Device Name: Put here a name to recognize the device.
• IP: Put here the IP address of the remote device to backup.
• Group: Select from the device groups drop-down list (Optional field).
• Vendor: Select AudioCodes, from the drop-down list.
• Product: Select MSBG, from the drop-down list.
• Version: Select the relevant version, from the drop-down list.
• Backup type: Select Backup (HTTPS), from the drop-down list.
• Username: Put here the account for the remote account.
• Password: Put here the password for the account on the remote server/device.
• Port: Change this value only if it is different than the port written.
2. Click on Save.

2.16. Avaya 5500 series
Pre-requirements: • Enable routing between the Avaya switch and the backup device.
• Enable SNMP and ICMP access from the backup device to the Avaya switch (for SNMPv2/TFTP)
• Configure Read/Write SNMP version 2 community on the Avaya switch (for SNMPv2/TFTP)
• Enable TFTP access from the Avaya switch to the backup device (for SNMPv2/TFTP)
• Enable Telnet access from the backup device to the Avaya switch (for Telnet backup)
• Enable SSH access from the backup device to the Avaya switch (for SSH backup)
• Avaya firmware 5.x or above.
Backup configuration instructions: 1. From the BackBox upper pane, click on Devices -> click on Add -> fill in the following details:
• Device Name: Put here a name to recognize the device.
• IP: Put here the IP address of the remote device to backup.
• Group: Select from the device groups drop-down list (Optional field).
• Vendor: Select Avaya, from the drop-down list.
• Product: Select 5500 series, from the drop-down list.
• Version: Select the relevant version, from the drop-down list.
• Backup type: Select backup option, from the drop-down list. Available options:
• Backup (SNMPv2/TFTP) BIN - backup configuration in binary format
• Backup (SNMPv2/Telnet/TFTP) - backup configuration (ASCII + binary)
• Backup (Telnet) – backup configuration in ASCII format
• Username: Put here username to access the remote device
• Password: Put here the password for the remote device
• SNMP Community string: Put here the SNMP R/W community string for the remote device.
• Server IP: Select the relevant IP of the BackBox.
2. Click on Save.

2.17. BackBox Self-Backup
Backup configuration instructions: 1. From the BackBox upper pane, click on Devices -> click on Add -> fill in the following details:
• Device Name: Put here a name to recognize the device.
• IP: Put here the IP address of the BackBox.
• Group: Select from the device groups drop-down list (Optional field).
• Vendor: Select BackBox, from the drop-down list.
• Product: Select Self-Backup, from the drop-down list.
• Version: Select the relevant version, from the drop-down list.
• Backup type: Select Backup (SSH), from the drop-down list.
• Server IP: Select the relevant IP of the BackBox.
2. Click on Save.

2.18. BackBox CIFS Export
Pre-requirements: • Enable routing between the CIFS server (Windows, NetApp, etc) and the BackBox.
• Enable CIFS traffic (port 445TCP) from BackBox to the CIFS server.
• Account with Read/Write access on the remote storage device.
• Path to save files on the remote storage device.
Backup configuration instructions: 1. From the BackBox upper pane, click on Devices -> click on Add -> fill in the following details:
• Device Name: Put here a name to recognize the device.
• IP: Put here the IP address of the remote storage device.
• Group: Select from the device groups drop-down list (Optional field).
• Vendor: Select BackBox, from the drop-down list.
• Product: Select CIFS Export, from the drop-down list.
• Version: Select the relevant version, from the drop-down list.
• Backup type: Select Export (CIFS), from the drop-down list.
• Username: Put here the account for the remote storage device.
• Password: Put here the password for the account on the remote server/device.
• Remote Path: Specify here the path of the share on the remote storage.
• Note: Specify “/” character instead of “\” (for example: //myserver/myshare)
• Days to store: Specify here the number of days to export backups to the remote storage.
2. Click on Save.
Important note: When adding the above device to a scheduled backup job, the recommendation is to add it to a separate backup job from the rest of the devices that starts after all the other backup jobs have completed.

2.19. BackBox FTP Export
Pre-requirements: • Enable routing between the FTP server and the BackBox.
• Enable FTP traffic (port 21TCP) from BackBox to the FTP server.
• Account with Read/Write access on the remote storage device.
• Path to save files on the remote storage device.
Backup configuration instructions: 1. From the BackBox upper pane, click on Devices -> click on Add -> fill in the following details:
• Device Name: Put here a name to recognize the device.
• IP: Put here the IP address of the remote storage device.
• Group: Select from the device groups drop-down list (Optional field).
• Vendor: Select BackBox, from the drop-down list.
• Product: Select FTP Export, from the drop-down list.
• Version: Select the relevant version, from the drop-down list.
• Backup type: Select Export (FTP), from the drop-down list.
• Username: Put here the account for the remote storage device.
• Password: Put here the password for the account on the remote server/device.
• Remote Path: Specify here the path of the share on the remote storage.
• Note: For the root folder of the FTP server (or user’s home folder) specify “/” (without “”)
• Days to store: Specify here the number of days to export backups to the remote storage.
2. Click on Save.
Important note: When adding the above device to a scheduled backup job, the recommendation is to add it to a separate backup job from the rest of the devices that starts after all the other backup jobs have completed.

2.20. BackBox SCP Export
Pre-requirements: • Enable routing between the SCP server and the BackBox.
• Enable SCP traffic (port 22TCP) from BackBox to the SCP server.
• Account with Read/Write access on the remote storage device.
• Path to save files on the remote storage device.
Backup configuration instructions: 1. From the BackBox upper pane, click on Devices -> click on Add -> fill in the following details:
• Device Name: Put here a name to recognize the device.
• IP: Put here the IP address of the remote storage device.
• Group: Select from the device groups drop-down list (Optional field).
• Vendor: Select BackBox, from the drop-down list.
• Product: Select SCP Export, from the drop-down list.
• Version: Select the relevant version, from the drop-down list.
• Backup type: Select Export (SCP), from the drop-down list.
• Username: Put here the account for the remote storage device.
• Password: Put here the password for the account on the remote server/device.
• Remote Path: Specify here the path of the share on the remote storage.
• Days to store: Specify here the number of days to export backups to the remote storage.
2. Click on Save.
Important note: When adding the above device to a scheduled backup job, the recommendation is to add it to a separate backup job from the rest of the devices that starts after all the other backup jobs have completed.

2.21. Barracuda Firewall
Pre-requirements: • Enable routing between the Barrcuda device and the backup device.
• Enable SSH access from the backup device to the Barracuda device.
Backup configuration instructions: 1. From the BackBox upper pane, click on Devices -> click on Add -> fill in the following details:
• Device Name: Put here a name to recognize the device.
• IP: Put here the IP address of the remote device to backup.
• Group: Select from the device groups drop-down list (Optional field).
• Vendor: Select Barracuda, from the drop-down list.
• Product: Select Firewall, from the drop-down list.
• Version: Select the relevant version, from the drop-down list.
• Backup type: Select a backup type, from the drop-down list.
• “Backup (SSH)”
• Username: Put here “root”.
• Password: Put here the password for the “root” account on the remote server/device.
• Prompt after password: Change this value only if it is different than the prompt written.
• Port: Change this value only if it is different than the port written.
2. Click on Save.
2.22. Bind DNS Server
Pre-requirements: • Enable routing between the Bind server and the backup device.
• Enable SSH access from the backup device to the Bind server.
Backup configuration instructions: 3. From the BackBox upper pane, click on Devices -> click on Add -> fill in the following details:
• Device Name: Put here a name to recognize the device.
• IP: Put here the IP address of the remote device to backup.
• Group: Select from the device groups drop-down list (Optional field).
• Vendor: Select Bind, from the drop-down list.
• Product: Select DNS Server, from the drop-down list.
• Version: Select the relevant version, from the drop-down list.
• Backup type: Select a backup type, from the drop-down list.
• “Backup (SSH)”
• Username: Put here “root”.
• Password: Put here the password for the “root” account on the remote server/device.
• Prompt after password: Change this value only if it is different than the prompt written.
• Port: Change this value only if it is different than the port written.
4. Click on Save.

2.23. Blue Coat Proxy AV
Pre-requirements: • Enable routing between the Blue Coat and the backup device.
• Enable HTTPS access from the backup device to the Blue Coat.
Backup configuration instructions: 1. From the BackBox upper pane, click on Devices -> click on Add -> fill in the following details:
• Device Name: Put here a name to recognize the device.
• IP: Put here the IP address of the remote device to backup.
• Group: Select from the device groups drop-down list (Optional field).
• Vendor: Select Blue Coat, from the drop-down list.
• Product: Select ProxyAV, from the drop-down list.
• Version: Select the relevant version, from the drop-down list.
• Backup type: Select backup type, from the drop-down list.
• Username: Put here “admin”.
• Password: Put here the password for the “admin” account on the remote server/device.
• Port: Change this value only if it is different than the port written.
2. Click on Save.

2.24. Blue Coat Proxy SG
Pre-requirements: • Enable routing between the Blue Coat and the backup device.
• Enable SSH access (for SSH backup), from the backup device to the Blue Coat.
• Enable HTTPS access (for WGET backup), from the backup device to the Blue Coat.
Backup configuration instructions: 1. From the BackBox upper pane, click on Devices -> click on Add -> fill in the following details:
• Device Name: Put here a name to recognize the device.
• IP: Put here the IP address of the remote device to backup.
• Group: Select from the device groups drop-down list (Optional field).
• Vendor: Select Blue Coat, from the drop-down list.
• Product: Select ProxySG, from the drop-down list.
• Version: Select the relevant version, from the drop-down list.
• Backup type: Select a backup type, from the drop-down list.
• Possible options: “Backup (SSH)” and “Backup (WGET)”.
• Username: Put here “admin”.
• Password: Put here the password for the “admin” account on the remote server/device.
• Enable password: Put here the “enable” password.
• Prompt after password: Change this value only if it is different than the prompt written.
• Prompt after Enable password: Change this value only if it is different than the prompt written.
• Port: Change this value only if it is different than the port written.
2. Click on Save.

2.25. Brocade DS-490 fiber switch
Pre-requirements: • Enable routing between the Brocade switch and the backup device.
• Enable SSH access (for SSH backup), from the backup device to the Brocade switch.
• Enable Telnet access (for Telnet backup), from the backup device to the Brocade switch.
Backup configuration instructions: 1. From the BackBox upper pane, click on Devices -> click on Add -> fill in the following details:
• Device Name: Put here a name to recognize the device.
• IP: Put here the IP address of the remote device to backup.
• Group: Select from the device groups drop-down list (Optional field).
• Vendor: Select Brocade, from the drop-down list.
• Product: Select DS-490, from the drop-down list.
• Version: Select the relevant version, from the drop-down list.
• Backup type: Select a backup type, from the drop-down list.
• Possible options: “Backup (SSH)” and “Backup (Telnet)”.
• Username: Put here the username for the remote device.
• Password: Put here the password for the remote device.
• Prompt after password: Change this value only if it is different than the prompt written.
• Port: Change this value only if it is different than the port written.
2. Click on Save.

2.26. Brocade DS-5100 switch
Pre-requirements: • Enable routing between the Brocade switch and the backup device.
• Enable SSH access, from the backup device to the Brocade switch.
• Enable SCP access, from the Brocade switch to the backup device.
Backup configuration instructions: 3. From the BackBox upper pane, click on Devices -> click on Add -> fill in the following details:
• Device Name: Put here a name to recognize the device.
• IP: Put here the IP address of the remote device to backup.
• Group: Select from the device groups drop-down list (Optional field).
• Vendor: Select Brocade, from the drop-down list.
• Product: Select DS-5100, from the drop-down list.
• Version: Select the relevant version, from the drop-down list.
• Backup type: Select the backup type (SSH/SCP), from the drop-down list.
• Username: Put here the username for the remote device.
• Password: Put here the password for the remote device.
• Prompt after password: Change this value only if it is different than the prompt written.
• Port: Change this value only if it is different than the port written.
4. Click on Save.

2.27. Centerity Monitor
Pre-requirements: • Enable routing between the Centerity server and the backup device.
• Enable SSH access, from the backup device to the Centerity server.
Backup configuration instructions: 2. From the BackBox upper pane, click on Devices -> click on Add -> fill in the following details:
• Device Name: Put here a name to recognize the device.
• IP: Put here the IP address of the remote device to backup.
• Group: Select from the device groups drop-down list (Optional field).
• Vendor: Select Centerity, from the drop-down list.
• Product: Select Monitor, from the drop-down list.
• Version: Select the relevant version, from the drop-down list.
• Backup type: Select Backup (SSH), from the drop-down list.
• Username: Put here the username for the Centerity
• Password: Put here the password for the above account on the remote server/device.
• Prompt after password: Change this value only if it is different than the prompt written.
• Port: Change this value only if it is different than the port written.
3. Click on Save.

2.28. CheckPoint Connectra
Pre-requirements: • Enable routing between the CheckPoint device and the backup device.
• Enable SSH access from the backup device to the CheckPoint device.
Backup configuration instructions: 5. From the BackBox upper pane, click on Devices -> click on Add -> fill in the following details:
• Device Name: Put here a name to recognize the device.
• IP: Put here the IP address of the remote device to backup.
• Group: Select from the device groups drop-down list (Optional field).
• Vendor: Select CheckPoint, from the drop-down list.
• Product: Select Connectra, from the drop-down list.
• Version: Select the relevant version, from the drop-down list.
• Backup type: Select a backup type, from the drop-down list. Possible options:
• “CPBackup (SSH)” - Perform CPBackup
• “CPBackup & Logs (SSH)” - Perform CPBackup and collect log files.
• “Upgrade_Export (SSH)” - Perform Upgrade Export.
• Username: Put here “admin”.
• Password: Put here the password for the “admin” account on the remote server/device.
• Expert Password: Put here the CheckPoint “expert” password (if exist on the remote server).
• Prompt after password: Change this value only if it is different than the prompt written.
• Prompt after Expert password: Change this value only if it is different than the prompt written.
• Port: Change this value only if it is different than the port written.
6. Click on Save.

2.29. CheckPoint Firewall – Single Gateway
Pre-requirements: • Enable routing between the CheckPoint device and the backup device.
• Enable SSH access from the backup device to the CheckPoint device.
Backup configuration instructions: 1. From the BackBox upper pane, click on Devices -> click on Add -> fill in the following details:
• Device Name: Put here a name to recognize the device.
• IP: Put here the IP address of the remote device to backup.
• Group: Select from the device groups drop-down list (Optional field).
• Vendor: Select CheckPoint, from the drop-down list.
• Product: Select Single gateway, from the drop-down list.
• Version: Select the relevant version, from the drop-down list.
• Backup type: Select a backup type, from the drop-down list. Possible options:
• “CPBackup (SSH)” - Perform CPBackup
• “CPBackup & Logs (SSH)” - Perform CPBackup and collect log files.
• “Upgrade_Export (SSH)” - Perform Upgrade Export.
• “Migrate_Export (SSH)” - Perform Migrate Export (R71 and above).
• Username: Put here “admin”.
• Password: Put here the password for the “admin” account on the remote server/device.
• Expert Password: Put here the CheckPoint “expert” password (if exist on the remote server).
• Prompt after password: Change this value only if it is different than the prompt written.
• Prompt after Expert password: Change this value only if it is different than the prompt written.
• Port: Change this value only if it is different than the port written.
2. Click on Save.

2.30. CheckPoint Firewall – Management
Pre-requirements: • Enable routing between the CheckPoint device and the backup device.
• Enable SSH access from the backup device to the CheckPoint device.
Backup configuration instructions: 1. From the BackBox upper pane, click on Devices -> click on Add -> fill in the following details:
• Device Name: Put here a name to recognize the device.
• IP: Put here the IP address of the remote device to backup.
• Group: Select from the device groups drop-down list (Optional field).
• Vendor: Select CheckPoint, from the drop-down list.
• Product: Select Management, from the drop-down list.
• Version: Select the relevant version, from the drop-down list.
• Backup type: Select a backup type, from the drop-down list. Possible options:
• “CPBackup (SSH)” - Perform CPBackup
• “CPBackup & Logs (SSH)” - Perform CPBackup and collect log files.
• “Upgrade_Export (SSH)” - Perform Upgrade Export.
• “Migrate_Export (SSH)” - Perform Migrate Export (R71 and above).
• Username: Put here “admin”.
• Password: Put here the password for the “admin” account on the remote server/device.
• Expert Password: Put here the CheckPoint “expert” password (if exist on the remote server).
• Prompt after password: Change this value only if it is different than the prompt written.
• Prompt after Expert password: Change this value only if it is different than the prompt written.
• Port: Change this value only if it is different than the port written.
2. Click on Save.

2.31. CheckPoint Firewall (Windows)
Pre-requirements: • Enable routing between the CheckPoint server and the backup device.
• Enable FTP access from the CheckPoint server to the backup device.
Backup configuration instructions (create FTP account on the BackBox server): 1. Login to the BackBox web interface.
2. From the upper pane, click on Authentication -> Operating System Users -> supply account name and password.
3. Click Add.
Backup configuration instructions (inside the CheckPoint server): 1. Login to the Windows server using administrative account.
2. Download from the Internet and install 7Zip on the server (http://www.7-zip.org)
3. Double click on “My Computer” -> double click on drive letter (for example drive C) -> right click -> New folder -> specify the name “BackBox”.
4. Login to the BackBox web interface -> from the upper pane, click on Documents -> BackBox Documentation -> download the script CheckPoint -> Management/Single Gateway.
Note: For CheckPoint R75.20 and above, download “Management/Single Gateway (Migrate Export)”
5. Replace the value of the parameter FTPPassword with the password for the BackBox OS user “ftpbackbox” (if it is different than “backbox”)
Note: To change the “ftpbackbox” account password, login to the BackBox web interface -> Authentication -> Operating system users -> locate the account “ftpbackbox” -> click on Edit icon -> specify new password and confirm it -> click on Save.
6. Replace the value of the parameter FTPServer with the IP/hostname of the BackBox server.
7. Replace the value of the parameter ServerIP with the main IP address of the CheckPoint server.
8. Save the file as C:\BackBox\CheckPoint_Backup.bat
9. Create a schedule task to run the file bellow at regular intervals:
C:\BackBox\CheckPoint_Backup.bat

Backup configuration instructions (inside the BackBox web console): 1. From the BackBox upper pane, click on Devices -> click on Add -> fill in the following details:
• Device Name: Put here a name to recognize the device.
• IP: Put here the IP address of the remote device.
• Group: Select from the device groups drop-down list (Optional field).
• Vendor: Select CheckPoint, from the drop-down list.
• Product: Select either Management or Single Gateway, from the drop-down list.
• Version: Select the relevant version, from the drop-down list.
• Backup type: Select Upgrade Export (Windows), from the drop-down list.
• Username: Put here the ftpbackbox
• Password: Put here the password for the “ftpbackbox” account on the BackBox server.
2. Click on Save.

2.32. CheckPoint Firewall – Module
Pre-requirements: • Enable routing between the CheckPoint device and the backup device.
• Enable SSH access from the backup device to the CheckPoint device.
Backup configuration instructions: 1. From the BackBox upper pane, click on Devices -> click on Add -> fill in the following details:
• Device Name: Put here a name to recognize the device.
• IP: Put here the IP address of the remote device to backup.
• Group: Select from the device groups drop-down list (Optional field).
• Vendor: Select CheckPoint, from the drop-down list.
• Product: Select Module, from the drop-down list.
• Version: Select the relevant version, from the drop-down list.
• Backup type: Select a backup type, from the drop-down list.
• Possible options: “Conf Files (SSH)”, “CPBackup (SSH)” and “CPBackup & GateD (SSH)”
• Username: Put here “admin”.
• Password: Put here the password for the “admin” account on the remote server/device.
• Expert Password: Put here the CheckPoint “expert” password (if exist on the remote server).
• Prompt after password: Change this value only if it is different than the prompt written.
• Prompt after Expert password: Change this value only if it is different than the prompt written.
• Port: Change this value only if it is different than the port written.
2. Click on Save.

2.33. CheckPoint Firewall – Provider-1
Pre-requirements: • Enable routing between the CheckPoint device and the backup device.
• Enable SSH access from the backup device to the CheckPoint device.
Backup configuration instructions: 1. From the BackBox upper pane, click on Devices -> click on Add -> fill in the following details:
• Device Name: Put here a name to recognize the device.
• IP: Put here the IP address of the remote device to backup.
• Group: Select from the device groups drop-down list (Optional field).
• Vendor: Select CheckPoint, from the drop-down list.
• Product: Select Provider-1, from the drop-down list.
• Version: Select the relevant version, from the drop-down list.
• Backup type: Select a backup type, from the drop-down list.
• Username: Put here “admin”.
• Password: Put here the password for the “admin” account on the remote server/device.
• Expert Password: Put here the CheckPoint “expert” password (if exist on the remote server).
• Prompt after password: Change this value only if it is different than the prompt written.
• Prompt after Expert password: Change this value only if it is different than the prompt written.
• Port: Change this value only if it is different than the port written.
2. Click on Save.

2.34. CheckPoint Firewall – Provider-1 (CMA Backup)
Pre-requirements: • Enable routing between the CheckPoint CMA and the backup device.
• Enable SSH access from the backup device to the CheckPoint CMA.
Backup configuration instructions: 1. From the BackBox upper pane, click on Devices -> click on Add -> fill in the following details:
• Device Name: Put here a name to recognize the device.
• IP: Put here the IP address of the CMA to backup.
• Group: Select from the device groups drop-down list (Optional field).
• Vendor: Select CheckPoint, from the drop-down list.
• Product: Select Provider-1, from the drop-down list.
• Version: Select either R71 or R75, from the drop-down list.
• Backup type: Select CMA Backup (SSH), from the drop-down list.
• Username: Put here “admin”.
• Password: Put here the password for the “admin” account on the CMA.
• Expert Password: Put here the CheckPoint “expert” password (if exist on the remote server).
• Prompt after password: Change this value only if it is different than the prompt written.
• Prompt after Expert password: Change this value only if it is different than the prompt written.
• Port: Change this value only if it is different than the port written.
2. Click on Save.

2.35. CheckPoint SG80
Pre-requirements: • Enable routing between the CheckPoint device and the backup device.
• Enable SSH access from the backup device to the CheckPoint device.
Backup configuration instructions: 1. From the BackBox upper pane, click on Devices -> click on Add -> fill in the following details:
• Device Name: Put here a name to recognize the device.
• IP: Put here the IP address of the remote device to backup.
• Group: Select from the device groups drop-down list (Optional field).
• Vendor: Select CheckPoint, from the drop-down list.
• Product: Select SG80, from the drop-down list.
• Version: Select the relevant version, from the drop-down list.
• Backup type: Select a backup type, from the drop-down list.
• Username: Put here “admin”.
• Password: Put here the password for the “admin” account on the remote server/device.
• Port: Change this value only if it is different than the port written.
2. Click on Save.
2.36. CheckPoint Safe@Office
Pre-requirements: • Enable routing between the CheckPoint device and the backup device.
• Enable HTTPS access from the backup device to the CheckPoint device.
• Firmware version 5.0 or above.
Backup configuration instructions: 1. From the BackBox upper pane, click on Devices -> click on Add -> fill in the following details:
• Device Name: Put here a name to recognize the device.
• IP: Put here the IP address of the remote device to backup.
• Group: Select from the device groups drop-down list (Optional field).
• Vendor: Select CheckPoint, from the drop-down list.
• Product: Select Safe@Office, from the drop-down list.
• Version: Select the relevant version, from the drop-down list.
• Backup type: Select a backup type, from the drop-down list.
• Username: Put here “admin”.
• Password: Put here the password for the “admin” account on the remote server/device.
• Port: Change this value only if it is different than the port written.
2. Click on Save.

2.37. CheckPoint VPN-1 Edge
Pre-requirements: • Enable routing between the CheckPoint device and the backup device.
• Enable HTTPS access from the backup device to the CheckPoint device.
• Firmware version 5.0 or above.
Backup configuration instructions: 1. From the BackBox upper pane, click on Devices -> click on Add -> fill in the following details:
• Device Name: Put here a name to recognize the device.
• IP: Put here the IP address of the remote device to backup.
• Group: Select from the device groups drop-down list (Optional field).
• Vendor: Select CheckPoint, from the drop-down list.
• Product: Select VPN-1 Edge, from the drop-down list.
• Version: Select the relevant version, from the drop-down list.
• Backup type: Select a backup type, from the drop-down list.
• Username: Put here “admin”.
• Password: Put here the password for the “admin” account on the remote server/device.
• Port: Change this value only if it is different than the port written.
2. Click on Save.

2.38. CheckPoint EndPoint Security R80
Pre-requirements: • Enable routing between the CheckPoint server and the backup device.
• Enable FTP access from the CheckPoint server to the backup device.
Backup configuration instructions (create FTP account on the BackBox server): 1. Login to the BackBox web interface.
2. From the upper pane, click on Authentication -> Operating System Users -> supply account name and password.
3. Click Add.
Backup configuration instructions (inside the CheckPoint server): 1. Login to the Windows server using administrative account.
2. Download from the Internet and install 7Zip on the server (http://www.7-zip.org)
3. Double click on “My Computer” -> double click on drive letter (for example drive C) -> right click -> New folder -> specify the name “BackBox”.
4. Login to the BackBox web interface -> from the upper pane, click on Documents -> BackBox Documentation -> download the script CheckPoint -> Endpoint Security.
5. Replace the value of the parameter FTPPassword with the password for the BackBox OS user “ftpbackbox” (if it is different than “backbox”)
Note: To change the “ftpbackbox” account password, login to the BackBox web interface -> Authentication -> Operating system users -> locate the account “ftpbackbox” -> click on Edit icon -> specify new password and confirm it -> click on Save.
6. Replace the value of the parameter FTPServer with the IP/hostname of the BackBox server.
7. Replace the value of the parameter ServerIP with the main IP address of the CheckPoint server.
8. Save the file as C:\BackBox\CheckPoint_EPS_Backup.bat
9. Create a schedule task to run the file bellow at regular intervals:
C:\BackBox\CheckPoint_EPS_Backup.bat

Backup configuration instructions (inside the BackBox web console): 1. From the BackBox upper pane, click on Devices -> click on Add -> fill in the following details:
• Device Name: Put here a name to recognize the device.
• IP: Put here the IP address of the remote device.
• Group: Select from the device groups drop-down list (Optional field).
• Vendor: Select CheckPoint, from the drop-down list.
• Product: Select EndPoint Security, from the drop-down list.
• Version: Select R80, from the drop-down list.
• Backup type: Select Migrate Export (Windows), from the drop-down list.
• Username: Put here the ftpbackbox
• Password: Put here the password for the “ftpbackbox” account on the BackBox server.
2. Click on Save.

2.39. Cisco ACS
Pre-requirements: • Enable routing between the Cisco device and the backup device.
• Enable SSH access, from the backup device to the Cisco device.
• Enable TFTP access from the Cisco device to the backup device.
• Add the BackBox device access to Cisco ACS from the Cisco ACS web console (System Administration -> Administrators -> Settings -> Access -> click on Create)
Backup configuration instructions: 1. From the BackBox upper pane, click on Devices -> click on Add -> fill in the following details:
• Device Name: Put here a name to recognize the device.
• IP: Put here the IP address of the remote device to backup.
• Group: Select from the device groups drop-down list (Optional field).
• Vendor: Select Cisco, from the drop-down list.
• Product: Select ACS, from the drop-down list.
• Version: Select the relevant version, from the drop-down list.
• Backup type: Select a backup type, from the drop-down list.
• Username: Put here the username to access the Cisco device.
• Note: The account must have admin role on the Cisco ACS CLI.
• Password: Put here the password to access the Cisco device.
• Port: Change this value only if it is different than the port written.
2. Click on Save.

2.40. Cisco Router
Pre-requirements: • Enable routing between the Cisco device and the backup device.
• Enable Telnet access (for Telnet backup), from the backup device to the Cisco device.
• Enable SSH access (for SSH backup), from the backup device to the Cisco device.
• Enable SNMP server on the Cisco device (for SNMP backup).
• Enable SNMP and ICMP access from the backup device to the Cisco device (for SNMP backup).
• Configure Read/Write community on the Cisco device (for SNMP backup).
• Enable TFTP access from the Cisco device to the backup device (for SNMP backup).
Backup configuration instructions: 1. From the BackBox upper pane, click on Devices -> click on Add -> fill in the following details:
• Device Name: Put here a name to recognize the device.
• IP: Put here the IP address of the remote device to backup.
• Group: Select from the device groups drop-down list (Optional field).
• Vendor: Select Cisco, from the drop-down list.
• Product: Select Router, from the drop-down list.
• Version: Select the relevant version, from the drop-down list.
• Backup type: Select a backup type, from the drop-down list. Possible options:
• Pass/Ena (Telnet) – need Password and Enable password.
• User/Pass (SSH) – need Username and Password.
• User/Pass (Telnet) – need Username and Password.
• User/Pass/Ena (SSH) – need Username, Password and Enable password.
• User/Pass/Ena (Telnet) – need Username, Password and Enable password.
• Username: Put here the username to access the Cisco device (if exists).
• Password: Put here the password to access the Cisco device.
• Enable Password: Put here the Cisco “enable” password (if exist on the remote server).
• Prompt after password: Change this value only if it is different than the prompt written.
• Prompt after Enable password: Change this value only if it is different than the prompt written.
• Port: Change this value only if it is different than the port written.
2. Click on Save.

2.41. Cisco Router (Telnet/TFTP and SSH/TFTP)
Pre-requirements: • Enable routing between the Cisco device and the backup device.
• Enable Telnet access (for Telnet backup), from the backup device to the Cisco device.
• Enable SSH access (for SSH backup), from the backup device to the Cisco device.
• Enable TFTP access from the Cisco device to the backup device.
Backup configuration instructions: 1. From the BackBox upper pane, click on Devices -> click on Add -> fill in the following details:
• Device Name: Put here a name to recognize the device.
• IP: Put here the IP address of the remote device to backup.
• Group: Select from the device groups drop-down list (Optional field).
• Vendor: Select Cisco, from the drop-down list.
• Product: Select Router, from the drop-down list.
• Version: Select the relevant version, from the drop-down list.
• Backup type: Select a backup type, from the drop-down list. Possible options:
• Pass/Ena (Telnet/TFTP) – need Password and Enable password.
• User/Pass (SSH/TFTP) – need Username and Password.
• User/Pass (Telnet/TFTP) – need Username and Password.
• User/Pass/Ena (SSH/TFTP) – need Username, Password and Enable password.
• User/Pass/Ena (Telnet/TFTP) – need Username, Password and Enable password.
• Username: Put here the username to access the Cisco device (if exists).
• Password: Put here the password to access the Cisco device.
• Enable Password: Put here the Cisco “enable” password (if exist on the remote server).
• Server IP: Select the relevant IP address of the BackBox server.
2. Click on Save.

2.42. Cisco Switch
Pre-requirements: • Enable routing between the Cisco device and the backup device.
• Enable Telnet access (for Telnet backup), from the backup device to the Cisco device.
• Enable SSH access (for SSH backup), from the backup device to the Cisco device.
• Enable SNMP server on the Cisco device (for SNMP backup).
• Enable SNMP and ICMP access from the backup device to the Cisco device (for SNMP backup).
• Configure Read/Write community on the Cisco device (for SNMP backup).
• Enable TFTP access from the Cisco device to the backup device (for SNMP backup).
Backup configuration instructions: 1. From the BackBox upper pane, click on Devices -> click on Add -> fill in the following details:
• Device Name: Put here a name to recognize the device.
• IP: Put here the IP address of the remote device to backup.
• Group: Select from the device groups drop-down list (Optional field).
• Vendor: Select Cisco, from the drop-down list.
• Product: Select Switch, from the drop-down list.
• Version: Select the relevant version, from the drop-down list.
• Backup type: Select a backup type, from the drop-down list. Possible options:
• Pass/Ena (Telnet) – need Password and Enable password.
• User/Pass (SSH) – need Username and Password.
• User/Pass (Telnet) – need Username and Password.
• User/Pass/Ena (SSH) – need Username, Password and Enable password.
• User/Pass/Ena (Telnet) – need Username, Password and Enable password.
• Username: Put here the username to access the Cisco device (if exists).
• Password: Put here the password to access the Cisco device.
• Enable Password: Put here the Cisco “enable” password (if exist on the remote server).
• Prompt after password: Change this value only if it is different than the prompt written.
• Prompt after Enable password: Change this value only if it is different than the prompt written.
• Port: Change this value only if it is different than the port written.
2. Click on Save.

2.43. Cisco Switch (Telnet/TFTP and SSH/TFTP)
Pre-requirements: • Enable routing between the Cisco device and the backup device.
• Enable Telnet access (for Telnet backup), from the backup device to the Cisco device.
• Enable SSH access (for SSH backup), from the backup device to the Cisco device.
• Enable TFTP access from the Cisco device to the backup device.
Backup configuration instructions: 1. From the BackBox upper pane, click on Devices -> click on Add -> fill in the following details:
• Device Name: Put here a name to recognize the device.
• IP: Put here the IP address of the remote device to backup.
• Group: Select from the device groups drop-down list (Optional field).
• Vendor: Select Cisco, from the drop-down list.
• Product: Select Switch, from the drop-down list.
• Version: Select the relevant version, from the drop-down list.
• Backup type: Select a backup type, from the drop-down list. Possible options:
• Pass/Ena (Telnet/TFTP) – need Password and Enable password.
• User/Pass (SSH/TFTP) – need Username and Password.
• User/Pass (Telnet/TFTP) – need Username and Password.
• User/Pass/Ena (SSH/TFTP) – need Username, Password and Enable password.
• User/Pass/Ena (Telnet/TFTP) – need Username, Password and Enable password.
• Server IP: Select the relevant IP address of the BackBox server.
• Username: Put here the username to access the Cisco device (if exists).
• Password: Put here the password to access the Cisco device.
• Enable Password: Put here the Cisco “enable” password (if exist on the remote server).
• Server IP: Select the relevant IP address of the BackBox server.
2. Click on Save.

2.44. Cisco Nexus 1000v switch
Pre-requirements: • Enable routing between the Cisco device and the backup device.
• Enable Telnet access (for Telnet backup), from the backup device to the Cisco device.
• Enable SSH access (for SSH backup), from the backup device to the Cisco device.
Backup configuration instructions: 1. From the BackBox upper pane, click on Devices -> click on Add -> fill in the following details:
• Device Name: Put here a name to recognize the device.
• IP: Put here the IP address of the remote device to backup.
• Group: Select from the device groups drop-down list (Optional field).
• Vendor: Select Cisco, from the drop-down list.
• Product: Select Nexus 1000V, from the drop-down list.
• Version: Select the relevant version, from the drop-down list.
• Backup type: Select a backup type, from the drop-down list. Possible options:
• User/Pass (SSH) – need Username and Password.
• User/Pass (Telnet) – need Username and Password..
• Username: Put here the username to access the Cisco device (if exists).
• Password: Put here the password to access the Cisco device.
• Port: Change this value only if it is different than the port written.
• Prompt after password: Change this value only if it is different than the prompt written.
2. Click on Save.

2.45. Cisco CatOS switch
Pre-requirements: • Enable routing between the Cisco device and the backup device.
• Enable Telnet access (for Telnet backup), from the backup device to the Cisco device.
• Enable SSH access (for SSH backup), from the backup device to the Cisco device.
• Login to the Cisco switch using either Telnet or SSH, enter enable privileged mode, and run the commands bellow:
• set prompt SWITCHNAME> Note: Replace the value SWITCHNAME with the switch hostname.
• wr mem
Backup configuration instructions: 1. From the BackBox upper pane, click on Devices -> click on Add -> fill in the following details:
• Device Name: Put here a name to recognize the device.
• IP: Put here the IP address of the remote device to backup.
• Group: Select from the device groups drop-down list (Optional field).
• Vendor: Select Cisco, from the drop-down list.
• Product: Select CatOS Switch, from the drop-down list.
• Version: Select the relevant version, from the drop-down list.
• Backup type: Select a backup type, from the drop-down list. Possible options:
• Pass/Ena (Telnet) – need Password and Enable password.
• User/Pass (SSH) – need Username and Password.
• User/Pass (Telnet) – need Username and Password.
• User/Pass/Ena (SSH) – need Username, Password and Enable password.
• User/Pass/Ena (Telnet) – need Username, Password and Enable password.
• Username: Put here the username to access the Cisco device (if exists).
• Password: Put here the password to access the Cisco device.
• Enable Password: Put here the Cisco “enable” password (if exist on the remote server).
• Prompt after password: Change this value only if it is different than the prompt written.
• Prompt after Enable password: Change this value only if it is different than the prompt written.
• Port: Change this value only if it is different than the port written.
2. Click on Save.

2.46. Cisco MDS 9000
Pre-requirements: • Enable routing between the Cisco device and the backup device.
• Enable SSH access, from the backup device to the Cisco device.
Backup configuration instructions: 1. From the BackBox upper pane, click on Devices -> click on Add -> fill in the following details:
• Device Name: Put here a name to recognize the device.
• IP: Put here the IP address of the remote device to backup.
• Group: Select from the device groups drop-down list (Optional field).
• Vendor: Select Cisco, from the drop-down list.
• Product: Select MDS 9000, from the drop-down list.
• Version: Select the relevant version, from the drop-down list.
• Backup type: Select a backup type, from the drop-down list.
• Username: Put here the username to access the Cisco device (if exists).
• Password: Put here the password to access the Cisco device.
• Prompt after password: Change this value only if it is different than the prompt written.
• Port: Change this value only if it is different than the port written.
2. Click on Save.

2.47. Cisco 6500 WiSM
Pre-requirements: • Enable routing between the Cisco device and the backup device.
• Enable Telnet access, from the backup device to the Cisco device.
Backup configuration instructions: 1. From the BackBox upper pane, click on Devices -> click on Add -> fill in the following details:
• Device Name: Put here a name to recognize the device.
• IP: Put here the IP address of the remote device to backup.
• Group: Select from the device groups drop-down list (Optional field).
• Vendor: Select Cisco, from the drop-down list.
• Product: Select 6500 WiSM, from the drop-down list.
• Version: Select the relevant version, from the drop-down list.
• Backup type: Select Backup (Telnet), from the drop-down list.
• Username: Put here the username to access the Cisco device.
• Password: Put here the password to access the Cisco device.
• Prompt after password: Change this value only if it is different than the prompt written.
2. Click on Save.

2.48. Cisco WLC (Wireless LAN Controller)
Pre-requirements: • Enable routing between the Cisco device and the backup device.
• Enable SSH access, from the backup device to the Cisco device.
Backup configuration instructions: 1. From the BackBox upper pane, click on Devices -> click on Add -> fill in the following details:
• Device Name: Put here a name to recognize the device.
• IP: Put here the IP address of the remote device to backup.
• Group: Select from the device groups drop-down list (Optional field).
• Vendor: Select Cisco, from the drop-down list.
• Product: Select WLC, from the drop-down list.
• Version: Select the relevant version, from the drop-down list.
• Backup type: Select Backup (SSH), from the drop-down list.
• Username: Put here the username to access the Cisco device.
• Password: Put here the password to access the Cisco device.
• Port: Change this value only if it is different than the port written.
• Prompt after password: Change this value only if it is different than the prompt written.
2. Click on Save.

2.49. Cisco PIX (IOS 6.1)
Pre-requirements: • Enable routing between the Cisco device and the backup device.
• Enable Telnet access (for Telnet backup), from the backup device to the Cisco device.
Backup configuration instructions: 1. From the BackBox upper pane, click on Devices -> click on Add -> fill in the following details:
• Device Name: Put here a name to recognize the device.
• IP: Put here the IP address of the remote device to backup.
• Group: Select from the device groups drop-down list (Optional field).
• Vendor: Select Cisco, from the drop-down list.
• Product: Select PIX, from the drop-down list.
• Version: Select version 6.1, from the drop-down list.
• Backup type: Select a backup type, from the drop-down list.
• Password: Put here the password to access the Cisco device.
• Enable Password: Put here the Cisco “enable” password (if exist on the remote server).
• Prompt after password: Change this value only if it is different than the prompt written.
• Prompt after Enable password: Change this value only if it is different than the prompt written.
2. Click on Save.

2.50. Cisco PIX (IOS 6.3 and above)
Pre-requirements: • Enable routing between the Cisco device and the backup device.
• Enable Telnet access (for Telnet backup), from the backup device to the Cisco device.
• Enable SSH access (for SSH backup), from the backup device to the Cisco device.
Backup configuration instructions: 1. From the BackBox upper pane, click on Devices -> click on Add -> fill in the following details:
• Device Name: Put here a name to recognize the device.
• IP: Put here the IP address of the remote device to backup.
• Group: Select from the device groups drop-down list (Optional field).
• Vendor: Select Cisco, from the drop-down list.
• Product: Select PIX, from the drop-down list.
• Version: Select version 6.3 and above, from the drop-down list.
• Backup type: Select a backup type, from the drop-down list. Possible options:
• Pass/Ena (Telnet) – need Password and Enable password.
• User/Pass/Ena (SSH) – need Username, Password and Enable password.
• User/Pass/Ena (Telnet) – need Username, Password and Enable password.
• Username: Put here the username to access the Cisco device (if exists).
• Password: Put here the password to access the Cisco device.
• Enable Password: Put here the Cisco “enable” password (if exist on the remote server).
• Prompt after password: Change this value only if it is different than the prompt written.
• Prompt after Enable password: Change this value only if it is different than the prompt written.
• Port: Change this value only if it is different than the port written.
2. Click on Save.

2.51. Cisco ASA
Pre-requirements: • Enable routing between the Cisco device and the backup device.
• Enable Telnet access (for Telnet backup), from the backup device to the Cisco device.
• Enable SSH access (for SSH backup), from the backup device to the Cisco device.
• Enable TFTP access from the Cisco device to the backup device.
Backup configuration instructions: 1. From the BackBox upper pane, click on Devices -> click on Add -> fill in the following details:
• Device Name: Put here a name to recognize the device.
• IP: Put here the IP address of the remote device to backup.
• Group: Select from the device groups drop-down list (Optional field).
• Vendor: Select Cisco, from the drop-down list.
• Product: Select ASA, from the drop-down list.
• Version: Select the relevant version, from the drop-down list.
• Backup type: Select a backup type, from the drop-down list. Possible options:
• Pass/Ena (Telnet) – need Password and Enable password.
• User/Pass/Ena (SSH) – need Username, Password and Enable password.
• User/Pass/Ena (Telnet) – need Username, Password and Enable password.
• Username: Put here the username to access the Cisco device (if exists).
• Password: Put here the password to access the Cisco device.
• Enable Password: Put here the Cisco “enable” password (if exist on the remote server).
• Prompt after password: Change this value only if it is different than the prompt written.
• Prompt after Enable password: Change this value only if it is different than the prompt written.
• Port: Change this value only if it is different than the port written.
2. Click on Save.

2.52. Cisco FWSM
Pre-requirements: • Enable routing between the Cisco device and the backup device.
• Enable Telnet access (for Telnet backup), from the backup device to the Cisco device.
• Enable SSH access (for SSH backup), from the backup device to the Cisco device.
Backup configuration instructions: 1. From the BackBox upper pane, click on Devices -> click on Add -> fill in the following details:
• Device Name: Put here a name to recognize the device.
• IP: Put here the IP address of the remote device to backup.
• Group: Select from the device groups drop-down list (Optional field).
• Vendor: Select Cisco, from the drop-down list.
• Product: Select FWSM, from the drop-down list.
• Version: Select the relevant version, from the drop-down list.
• Backup type: Select a backup type, from the drop-down list. Possible options:
• Pass/Ena (Telnet) – need Password and Enable password.
• User/Pass/Ena (SSH) – need Username, Password and Enable password.
• User/Pass/Ena (Telnet) – need Username, Password and Enable password.
• Username: Put here the username to access the Cisco device (if exists).
• Password: Put here the password to access the Cisco device.
• Enable Password: Put here the Cisco “enable” password (if exist on the remote server).
• Prompt after password: Change this value only if it is different than the prompt written.
• Prompt after Enable password: Change this value only if it is different than the prompt written.
• Port: Change this value only if it is different than the port written.
2. Click on Save.

2.53. Cisco IronPort Mail
Pre-requirements: • Enable routing between the Cisco IronPort and the backup device.
• Enable FTP from the IronPort mail console.
• Enable FTP access from the backup device to the Cisco IronPort
• Enable SSH bi-directional from the backup device to the Cisco IronPort.
• Enable HTTPS access from the backup device to the Cisco IronPort (for Backup HTTPS only)
Backup configuration instructions: 1. From the BackBox upper pane, click on Devices -> click on Add -> fill in the following details:
• Device Name: Put here a name to recognize the device.
• IP: Put here the IP address of the remote device to backup.
• Group: Select from the device groups drop-down list (Optional field).
• Vendor: Select Cisco, from the drop-down list.
• Product: Select IronPort Mail, from the drop-down list.
• Version: Select version, from the drop-down list.
• Backup type: Select a backup type, from the drop-down list. Available options:
• Backup (SSH) – backup the current XML configuration file
• Backup (HTTPS) – backup the current XML configuration file
• Username: Put here “admin”.
• Password: Put here the password for the “admin” account on the remote server/device.
• Port: Change this value only if it is different than the port written.
2. Click on Save.

2.54. Cisco IronPort Management
Pre-requirements: • Enable routing between the Cisco IronPort and the backup device.
• Enable FTP from the IronPort mail console.
• Enable FTP access from the backup device to the Cisco IronPort
• Enable SSH bi-directional from the backup device to the Cisco IronPort.
Backup configuration instructions: 1. From the BackBox upper pane, click on Devices -> click on Add -> fill in the following details:
• Device Name: Put here a name to recognize the device.
• IP: Put here the IP address of the remote device to backup.
• Group: Select from the device groups drop-down list (Optional field).
• Vendor: Select Cisco, from the drop-down list.
• Product: Select IronPort Management, from the drop-down list.
• Version: Select version, from the drop-down list.
• Backup type: Select Backup (SSH), from the drop-down list.
• Username: Put here “admin”.
• Password: Put here the password for the “admin” account on the remote server/device.
• Port: Change this value only if it is different than the port written.
2. Click on Save.

2.55. Cisco IronPort Web
Pre-requirements: • Enable routing between the Cisco IronPort and the backup device.
• Enable FTP from the IronPort web console.
• Enable FTP access from the backup device to the Cisco IronPort.
• Enable SSH bi-directional from the backup device to the Cisco IronPort.
Backup configuration instructions: 1. From the BackBox upper pane, click on Devices -> click on Add -> fill in the following details:
• Device Name: Put here a name to recognize the device.
• IP: Put here the IP address of the remote device to backup.
• Group: Select from the device groups drop-down list (Optional field).
• Vendor: Select Cisco, from the drop-down list.
• Product: Select IronPort Web, from the drop-down list.
• Version: Select version, from the drop-down list.
• Backup type: Select a backup type, from the drop-down list. Available options:
• Backup (SSH) – backup the current XML configuration file
• Username: Put here “admin”.
• Password: Put here the password for the “admin” account on the remote server/device.
• Port: Change this value only if it is different than the port written.
2. Click on Save.

2.56. Cisco IP Telephony
Pre-requirements: • Enable routing between the Cisco device and the backup device.
• Enable SSH access (bi-directionally), from the backup device to the Cisco device.
Backup configuration instructions (create FTP account on the BackBox server): 1. Login to the BackBox web interface.
2. From the upper pane, click on Authentication -> Operating System Users -> supply account name and password.
3. Click Add.
Backup configuration instructions (from the Cisco IP Telephony web console): 1. Open the Cisco IP Telephony management interface.
2. From the upper pane -> Navigation -> select Disaster Recovery System.
3. Destination -> select Network Directory
• Host name/IP Address - specify here the hostname or the IP address of the BackBox server.
• Path name - specify here the following path:
/
Note: Make sure the above path contains the character “/” at the end of the path.
• User name - specify here the FTP account to the BackBox server.
• Password - specify here the password for the FTP account.
• Number of backups to store – change to 1.
4. Click Save.

Backup configuration instructions: 1. From the BackBox upper pane, click on Devices -> click on Add -> fill in the following details:
• Device Name: Put here a name to recognize the device.
• IP: Put here the IP address of the remote device to backup.
• Group: Select from the device groups drop-down list (Optional field).
• Vendor: Select Cisco, from the drop-down list.
• Product: Select IPT, from the drop-down list.
• Version: Select version, from the drop-down list.
• Backup type: Select Backup (Local), from the drop-down list.
• Username: Specify here the FTP account name.
• Password: Put here the password for the FTP account.
2. Click on Save.

2.57. Citrix NetScaler
Pre-requirements: • Enable routing between the Citrix NetScaler and the backup device.
• Enable SSH access from the backup device to the Citrix NetScaler.
Backup configuration instructions: 1. From the BackBox upper pane, click on Devices -> click on Add -> fill in the following details:
• Device Name: Put here a name to recognize the device.
• IP: Put here the IP address of the remote device to backup.
• Group: Select from the device groups drop-down list (Optional field).
• Vendor: Select Citrix, from the drop-down list.
• Product: Select NetScaler, from the drop-down list.
• Version: Select 9.x and above, from the drop-down list.
• Backup type: Select Backup (SSH), from the drop-down list.
• Username: Put here username for the remote device.
• Password: Put here the password for the remote server/device.
• Prompt after password: Change this value only if it is different than the prompt written.
• Port: Change this value only if it is different than the port written.
2. Click on Save.

2.58. ClearSwift Email Appliance
Pre-requirements: • Enable routing between the ClearSwift device and the backup device.
• Enable any TCP access (one direction) from the ClearSwift device to the backup device.
Note: The ClearSwift requires port 21TCP and random high port for the FTP.
Backup configuration instructions (create FTP account on the BackBox server): 1. Login to the BackBox web interface.
2. From the upper pane, click on Authentication -> Operating System Users -> supply account name and password.
3. Click Add.
Backup configuration instructions (from the ClearSwift web console): 1. Open an internet browser, and login to the address below:
https://<ClearSwift_IP_Address>
2. Supply the credentials to access the web console.
3. From the upper pane, click on System -> under Configuration, click on Backup & Restore.

4. Near FTP Settings, click on the link “Click here to change these settings”
5. Supply the following details:
• FTP Server - specify here the hostname or the IP address of the BackBox server.
• Port - 21 (leave the default)
• User name - specify here the FTP account to the BackBox server.
• Password - specify here the password for the FTP account.
• Remote folder - specify here the following path:
/
Note: Make sure the above path contains the character “/” at the end of the path.
6. Click on Save.
7. Near Backup Settings, click on the link “Click here to change these settings”

8. Select Enable system backup -> select which system areas to backup -> select schedule date and hours
-> click Save.
9. Logout of the web console.
Backup configuration instructions: 1. From the BackBox upper pane, click on Devices -> click on Add -> fill in the following details:
• Device Name: Put here a name to recognize the device.
• IP: Put here the IP address of the remote device to backup.
• Group: Select from the device groups drop-down list (Optional field).
• Vendor: Select ClearSwift, from the drop-down list.
• Product: Select Email Appliance, from the drop-down list.
• Version: Select 2.8 and above, from the drop-down list.
• Backup type: Select a backup type, from the drop-down list.
• Username: Put here the username for the “FTP account”.
• Password: Put here the password for the “FTP account” account on the remote server/device.
2. Click on Save.

2.59. ClearSwift MIMEsweeper for SMTP
Pre-requirements: • Enable routing between the MIMEsweeper server and the backup device.
• Enable FTP access from the MIMEsweeper server to the backup device.
Backup configuration instructions (create FTP account on the BackBox server): 1. Login to the BackBox web interface.
2. From the upper pane, click on Authentication -> Operating System Users -> supply account name and password.
3. Click Add.
Backup configuration instructions (inside the MIMEsweeper server): 1. Login to the MIMEsweeper server using administrative account.
2. Download from the Internet and install 7Zip on the server (http://www.7-zip.org)
3. Double click on “My Computer” -> double click on drive letter (for example drive C) -> right click -> New folder -> specify the name “MimeSweeperBackup”.
4. Login to the BackBox web interface -> from the upper pane, click on Documents -> BackBox Documentation -> download the script ClearSwift -> MIMEsweeper for SMTP.
5. Replace the value of the parameter FTPPassword with the password for the BackBox OS user “ftpbackbox” (if it is different than “backbox”)
Note: To change the “ftpbackbox” account password, login to the BackBox web interface -> Authentication -> Operating system users -> locate the account “ftpbackbox” -> click on Edit icon -> specify new password and confirm it -> click on Save.
6. Replace the value of the parameter FTPServer with the IP/hostname of the BackBox server.
7. Replace the value of the parameter ServerIP with the main IP address of the MimeSweeper server.
8. Save the file as C:\MimeSweeperBackup\MimeSweeper_Backup.bat
9. Create a schedule task to run the file bellow at regular intervals:
C:\MimeSweeperBackup\MimeSweeper_Backup.bat

Backup configuration instructions (inside the BackBox web console): 1. From the BackBox upper pane, click on Devices -> click on Add -> fill in the following details:
• Device Name: Put here a name to recognize the device.
• IP: Put here the IP address of the remote device.
• Group: Select from the device groups drop-down list (Optional field).
• Vendor: Select ClearSwift, from the drop-down list.
• Product: Select MIMEsweeper for SMTP, from the drop-down list.
• Version: Select the relevant version, from the drop-down list.
• Backup type: Select Backup (Local), from the drop-down list.
• Username: Put here the ftpbackbox
• Password: Put here the password for the “ftpbackbox” account on the BackBox server.
2. Click on Save.

2.60. ClearSwift Web Gateway
Pre-requirements: • Enable routing between the ClearSwift device and the backup device.
• Enable any TCP access (one direction) from the ClearSwift device to the backup device.
Note: The ClearSwift requires port 21TCP and random high port for the FTP.
Backup configuration instructions (create FTP account on the BackBox server): 1. Login to the BackBox web interface.
2. From the upper pane, click on Authentication -> Operating System Users -> supply account name and password.
3. Click Add.
Backup configuration instructions (from the ClearSwift web console): 1. Open an internet browser, and login to the address below:
https://<ClearSwift_IP_Address>
2. Supply the credentials to access the web console.
3. From the upper pane, click on System -> under Configuration, click on Backup & Restore.

4. Near FTP Settings, click on the link “Click here to change these settings”
5. Supply the following details:
• FTP Server - specify here the hostname or the IP address of the BackBox server.
• Port - 21 (leave the default)
• User name - specify here the FTP account to the BackBox server.
• Password - specify here the password for the FTP account.
• Remote folder - specify here the following path:
/
Note: Make sure the above path contains the character “/” at the end of the path.
6. Click on Save.
7. Near Backup Settings, click on the link “Click here to change these settings”

8. Select Enable system backup -> select which system areas to backup -> select schedule date and hours
-> click Save.
9. Logout of the web console.
Backup configuration instructions: 1. From the BackBox upper pane, click on Devices -> click on Add -> fill in the following details:
• Device Name: Put here a name to recognize the device.
• IP: Put here the IP address of the remote device to backup.
• Group: Select from the device groups drop-down list (Optional field).
• Vendor: Select ClearSwift, from the drop-down list.
• Product: Select Web Gateway, from the drop-down list.
• Version: Select 2.x, from the drop-down list.
• Backup type: Select a backup type, from the drop-down list.
• Username: Put here the username for the “FTP account”.
• Password: Put here the password for the “FTP account” account on the remote server/device.
2. Click on Save.

2.61. Crossbeam C series
Pre-requirements: • Enable routing between the Crossbeam and the backup device.
• Enable SSH access from the backup device to the Crossbeam.
Backup configuration instructions: 1. From the BackBox upper pane, click on Devices -> click on Add -> fill in the following details:
• Device Name: Put here a name to recognize the device.
• IP: Put here the IP address of the remote device to backup.
• Group: Select from the device groups drop-down list (Optional field).
• Vendor: Select Crossbeam, from the drop-down list.
• Product: Select C series, from the drop-down list.
• Version: Select the relevant version, from the drop-down list.
• Backup type: Select Backup (SSH), from the drop-down list.
• Username: Put here username for the Crossbeam
• Password: Put here the password for the above account on the remote server/device.
• SU Password: Put here the password for the expert mode.
• Port: Change this value only if it is different than the port written.
2. Click on Save.

2.62. Crossbeam X series
Pre-requirements: • Enable routing between the Crossbeam and the backup device.
• Enable SSH access from the backup device to the Crossbeam.
Backup configuration instructions: 1. From the BackBox upper pane, click on Devices -> click on Add -> fill in the following details:
• Device Name: Put here a name to recognize the device.
• IP: Put here the IP address of the remote device to backup.
• Group: Select from the device groups drop-down list (Optional field).
• Vendor: Select Crossbeam, from the drop-down list.
• Product: Select X series, from the drop-down list.
• Version: Select the relevant version, from the drop-down list.
• Backup type: Select Backup (SSH), from the drop-down list.
• Username: Put here username for the Crossbeam
• Password: Put here the password for the above account on the remote server/device.
• Port: Change this value only if it is different than the port written.
2. Click on Save.

2.63. D-link Switch
Pre-requirements: • Enable routing between the D-link switch and the backup device.
• Enable SSH access from the backup device to the D-link switch.
Backup configuration instructions: 1. From the BackBox upper pane, click on Devices -> click on Add -> fill in the following details:
• Device Name: Put here a name to recognize the device.
• IP: Put here the IP address of the remote device to backup.
• Group: Select from the device groups drop-down list (Optional field).
• Vendor: Select D-link, from the drop-down list.
• Product: Select Switch, from the drop-down list.
• Version: Select All, from the drop-down list.
• Backup type: Select Backup (SSH), from the drop-down list.
• Username: Put here username for the device
• Password: Put here the password for the above account on the remote server/device.
2. Click on Save.

2.64. Dell PowerConnect 54xx
Pre-requirements: • Enable routing between the Dell switch and the backup device.
• Enable Telnet access from the backup device to the Dell switch.
Backup configuration instructions: 3. From the BackBox upper pane, click on Devices -> click on Add -> fill in the following details:
• Device Name: Put here a name to recognize the device.
• IP: Put here the IP address of the remote device to backup.
• Group: Select from the device groups drop-down list (Optional field).
• Vendor: Select Dell, from the drop-down list.
• Product: Select PowerConnect, from the drop-down list.
• Version: Select 54xx, from the drop-down list.
• Backup type: Select Backup (Telnet), from the drop-down list.
• Username: Put here username for the device
• Password: Put here the password for the above account on the remote server/device.
4. Click on Save.

2.65. Dell PowerConnect M6xxx
Pre-requirements: • Enable routing between the Dell switch and the backup device.
• Enable Telnet access from the backup device to the Dell switch.
• Enable TFTP access from the Dell switch to the backup device.
Backup configuration instructions: 1. From the BackBox upper pane, click on Devices -> click on Add -> fill in the following details:
• Device Name: Put here a name to recognize the device.
• IP: Put here the IP address of the remote device to backup.
• Group: Select from the device groups drop-down list (Optional field).
• Vendor: Select Dell, from the drop-down list.
• Product: Select PowerConnect, from the drop-down list.
• Version: Select M6xxx, from the drop-down list.
• Backup type: Select Backup (Telnet/TFTP), from the drop-down list.
• Username: Put here username for the device
• Password: Put here the password for the above account on the remote server/device.
• Enable Password: Put here the “enable” password for the remote device.
• Server IP: Select an IP address of the BackBox server.
2. Click on Save.

2.66. Enterasys switch
Pre-requirements: • Enable routing between the switch and the backup device.
• Enable Telnet or SSH access from the backup device to the switch.
Backup configuration instructions: 1. From the BackBox upper pane, click on Devices -> click on Add -> fill in the following details:
• Device Name: Put here a name to recognize the device.
• IP: Put here the IP address of the remote device to backup.
• Group: Select from the device groups drop-down list (Optional field).
• Vendor: Select Enterasys, from the drop-down list.
• Product: Select K-Series, S-Series or N-Series, from the drop-down list.
• Version: Select version, from the drop-down list.
• Backup type: Select either Backup (Telnet) or Backup (SSH), from the drop-down list.
• Username: Put here the account to access the remote switch (super-user or read-write)
• Password: Put here the password for the above account on the remote server/device.
• Prompt after password: Change this value only if it is different than the prompt written.
• Port: Change this value only if it is different than the port written.
2. Click on Save.

2.67. Extreme Networks Switch
Pre-requirements: • Enable routing between the switch and the backup device.
• Enable Telnet access from the backup device to the switch.
Backup configuration instructions: 1. From the BackBox upper pane, click on Devices -> click on Add -> fill in the following details:
• Device Name: Put here a name to recognize the device.
• IP: Put here the IP address of the remote device to backup.
• Group: Select from the device groups drop-down list (Optional field).
• Vendor: Select Extreme Networks, from the drop-down list.
• Product: Select Switch, from the drop-down list.
• Version: Select the relevant version, from the drop-down list.
• Backup type: Select Backup (Telnet), from the drop-down list.
• Username: Put here the account to access the remote switch
• Password: Put here the password for the above account on the remote server/device.
• Prompt after password: Change this value only if it is different than the prompt written.
2. Click on Save.

2.68. Fireye
Pre-requirements: • Enable routing between the switch and the backup device.
• Enable SSH access from the backup device to the switch.
Backup configuration instructions: 3. From the BackBox upper pane, click on Devices -> click on Add -> fill in the following details:
• Device Name: Put here a name to recognize the device.
• IP: Put here the IP address of the remote device to backup.
• Group: Select from the device groups drop-down list (Optional field).
• Vendor: Select FireEye, from the drop-down list.
• Product: Select FireEye, from the drop-down list.
• Version: Select version, from the drop-down list.
• Backup type: Select Backup (SSH), from the drop-down list.
• Username: Put here the account to access the remote switch (super-user or read-write)
• Password: Put here the password for the above account on the remote server/device.
• Prompt after password: Change this value only if it is different than the prompt written.
• Port: Change this value only if it is different than the port written.
4. Click on Save.

2.69. FireMon 5.x
Pre-requirements: • Enable routing between the FireMon server and the backup device.
• Enable FTP access from the FireMon server to the backup device.
Backup configuration instructions (inside the FireMon GUI client): 1. Open FireMon Security Manager. 2. Supply the credentials to the FireMon server. 3. From the left pane, click on Administration -> Tasks.
4. From the left pane, right click on Tasks -> Schedule Backup.

5. Backup tab:
• Title: FTP Backup to BackBox • Keep Only 1 Backup • Destination: FTP • Path: /firemon_backup • FTP Server: specify here the hostname or the IP address of the BackBox server. • Port: 21 (default) • Connection: Passive (default) • User: specify here the FTP account on the BackBox server. • Password: specify here the password for the FTP account.
6. Schedule tab -> specify backup schedule interval. 7. Close the FireMon Security Manager.

Backup configuration instructions (inside the BackBox web console): 1. From the BackBox upper pane, click on Devices -> click on Add -> fill in the following details:
• Device Name: Put here a name to recognize the device.
• IP: Put here the IP address of the remote device to backup.
• Group: Select from the device groups drop-down list (Optional field).
• Vendor: Select FireMon, from the drop-down list.
• Product: Select FireMon, from the drop-down list.
• Version: Select 5.x, from the drop-down list.
• Backup type: Select Backup (Local), from the drop-down list.
• Username: Put here the username for the “FTP account”.
• Password: Put here the password for the “FTP account” account on the BackBox server.
2. Click on Save.
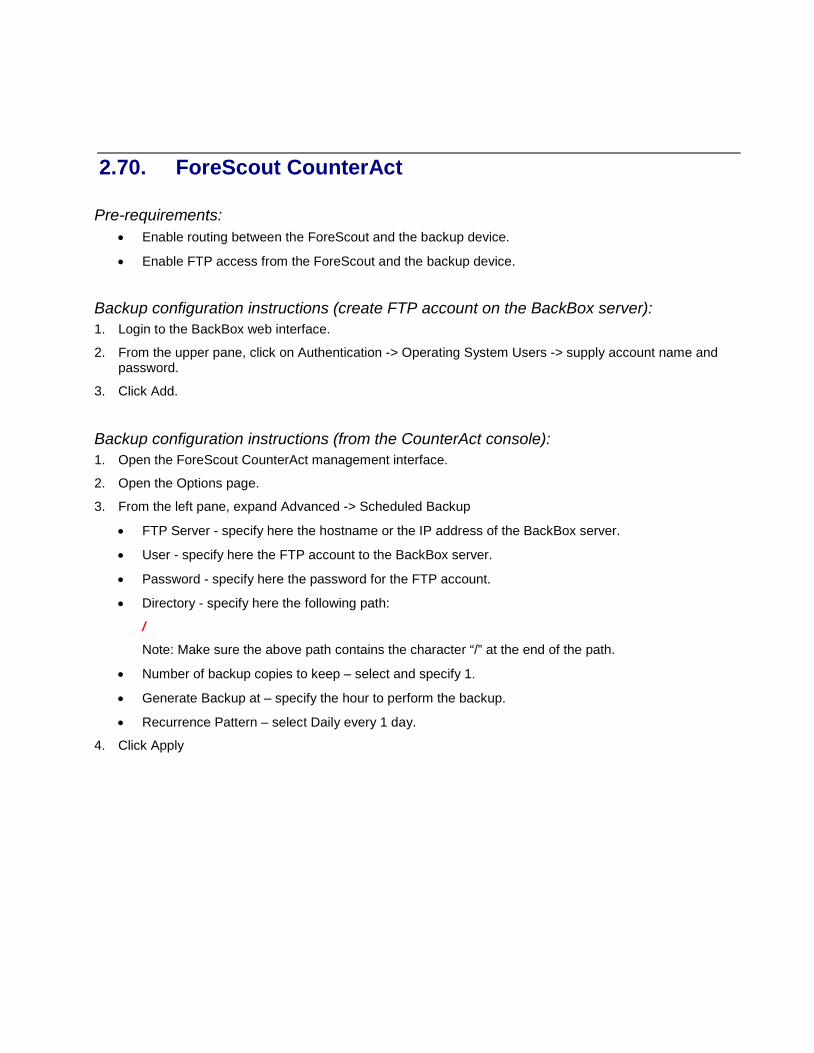
2.70. ForeScout CounterAct
Pre-requirements: • Enable routing between the ForeScout and the backup device.
• Enable FTP access from the ForeScout and the backup device.
Backup configuration instructions (create FTP account on the BackBox server): 1. Login to the BackBox web interface.
2. From the upper pane, click on Authentication -> Operating System Users -> supply account name and password.
3. Click Add.
Backup configuration instructions (from the CounterAct console): 1. Open the ForeScout CounterAct management interface.
2. Open the Options page.
3. From the left pane, expand Advanced -> Scheduled Backup
• FTP Server - specify here the hostname or the IP address of the BackBox server.
• User - specify here the FTP account to the BackBox server.
• Password - specify here the password for the FTP account.
• Directory - specify here the following path:
/
Note: Make sure the above path contains the character “/” at the end of the path.
• Number of backup copies to keep – select and specify 1.
• Generate Backup at – specify the hour to perform the backup.
• Recurrence Pattern – select Daily every 1 day.
4. Click Apply

Backup configuration instructions: 1. From the BackBox upper pane, click on Devices -> click on Add -> fill in the following details:
• Device Name: Put here a name to recognize the device.
• IP: Put here the IP address of the remote device to backup.
• Group: Select from the device groups drop-down list (Optional field).
• Vendor: Select ForeScout, from the drop-down list.
• Product: Select CounterAct, from the drop-down list.
• Version: Select the relevant version, from the drop-down list.
• Backup type: Select a backup type, from the drop-down list.
• Username: Put here the username for the “FTP account”.
• Password: Put here the password for the “FTP account” account on the remote server/device.
2. Click on Save.

2.71. Fortinet FortiAnalyzer
Pre-requirements: • Enable routing and TFTP access between the FortiAnalyzer and the backup device.
• Enable SSH access from the backup device to the FortiGate.
Backup configuration instructions: 1. From the BackBox upper pane, click on Devices -> click on Add -> fill in the following details:
• Device Name: Put here a name to recognize the device.
• IP: Put here the IP address of the remote device to backup.
• Group: Select from the device groups drop-down list (Optional field).
• Vendor: Select Fortinet, from the drop-down list.
• Product: Select FortiAnalyzer, from the drop-down list.
• Version: Select the relevant version, from the drop-down list.
• Backup type: Select a backup type, from the drop-down list.
• Username: Put here “admin”.
• Password: Put here the password for the “admin” account on the remote server/device.

2.72. FortiBalancer
Pre-requirements: • Enable routing and TFTP access between the FortiBalancer and the backup device.
• Enable SSH access from the backup device to the FortiBalancer.
Backup configuration instructions: 2. From the BackBox upper pane, click on Devices -> click on Add -> fill in the following details:
• Device Name: Put here a name to recognize the device.
• IP: Put here the IP address of the remote device to backup.
• Group: Select from the device groups drop-down list (Optional field).
• Vendor: Select Fortinet, from the drop-down list.
• Product: Select FortiBalancer, from the drop-down list.
• Version: Select the relevant version, from the drop-down list.
• Backup type: Select a backup type, from the drop-down list.
• Username: Put here “admin”.
• Password: Put here the password for the “admin” account on the remote server/device.

2.73. Fortinet FortiGate
Pre-requirements: • Enable routing between the FortiGate and the backup device.
• Enable SSH access from the backup device to the FortiGate.
• Firmware version 4.0 or above.
• Configure the FortiGate to enable SCP.
Backup configuration instructions: 3. From the BackBox upper pane, click on Devices -> click on Add -> fill in the following details:
• Device Name: Put here a name to recognize the device.
• IP: Put here the IP address of the remote device to backup.
• Group: Select from the device groups drop-down list (Optional field).
• Vendor: Select Fortinet, from the drop-down list.
• Product: Select FortiGate, from the drop-down list.
• Version: Select the relevant version, from the drop-down list.
• Backup type: Select a backup type, from the drop-down list.
• Username: Put here “admin”.
• Password: Put here the password for the “admin” account on the remote server/device.
• Port: Change this value only if it is different than the port written.
4. Click on Save.

2.74. Fortinet FortiMail
Pre-requirements: • Enable routing and TFTP access between the FortiMail and the backup device.
• Enable SSH access from the backup device to the FortiGate.
Backup configuration instructions: 5. From the BackBox upper pane, click on Devices -> click on Add -> fill in the following details:
• Device Name: Put here a name to recognize the device.
• IP: Put here the IP address of the remote device to backup.
• Group: Select from the device groups drop-down list (Optional field).
• Vendor: Select Fortinet, from the drop-down list.
• Product: Select FortiMail, from the drop-down list.
• Version: Select the relevant version, from the drop-down list.
• Backup type: Select a backup type, from the drop-down list.
• Username: Put here “admin”.
• Password: Put here the password for the “admin” account on the remote server/device.

2.75. Foundry FGS switch
Pre-requirements: • Enable routing between the Foundry switch and the backup device.
• Enable SSH access from the backup device to the Foundry switch.
• To enable SSH on the Foundry switch, run the following commands:
• ip dns domain-name domain.name
• ip ssh password-authentication yes
• crypto key generate
• Save the above configuration on the Foundry switch.
Backup configuration instructions: 1. From the BackBox upper pane, click on Devices -> click on Add -> fill in the following details:
• Device Name: Put here a name to recognize the device.
• IP: Put here the IP address of the remote device to backup.
• Group: Select from the device groups drop-down list (Optional field).
• Vendor: Select Foundry, from the drop-down list.
• Product: Select FGS, from the drop-down list.
• Version: Select the relevant version, from the drop-down list.
• Backup type: Select backup type, from the drop-down list. Available options:
• Backup (SSH) User/Pass – backup the configuration (requires username/password)
• Backup (SSH) User/Pass/Ena – backup the configuration (requires username/password/enable)
• Username: Put here username for the Foundry switch.
• Password: Put here the password for the account on the remote server/device.
• Enable password: Put here the “enable” password.
• Prompt after password: Change this value only if it is different than the prompt written.
• Prompt after Enable password: Change this value only if it is different than the prompt written.
• Port: Change this value only if it is different than the port written.
2. Click on Save.

2.76. F5 BigIP
Pre-requirements: • Enable routing between the F5 BigIP device and the backup device.
• Enable SSH access from the backup device to the F5 BigIP device.
Backup configuration instructions: 1. From the BackBox upper pane, click on Devices -> click on Add -> fill in the following details:
• Device Name: Put here a name to recognize the device.
• IP: Put here the IP address of the remote device to backup.
• Group: Select from the device groups drop-down list (Optional field).
• Vendor: Select F5, from the drop-down list.
• Product: Select a product, from the drop-down list.
• Available products: BigIP ASM, BigIP GTM, BigIP LTM
• Version: Select the relevant version, from the drop-down list.
• Backup type: Select a backup type, from the drop-down list.
• Username: Put here the username to access to remote device.
• Password: Put here the password for the account on the remote server/device.
• Prompt after password: Change this value only if it is different than the prompt written.
• Port: Change this value only if it is different than the port written.
2. Click on Save.

2.77. F5 FirePass
Pre-requirements: • Enable routing between the F5 FirePass device and the backup device.
• Enable FTP access from the F5 FirePass device to the backup device.
Backup configuration instructions (create FTP account on the BackBox server): 1. Login to the BackBox web interface.
2. From the upper pane, click on Authentication -> Operating System Users -> supply account name and password.
3. Click Add.
Backup configuration instructions (inside the F5 FirePass console): 1. Login to the FirePass management console.
2. From the left pane, click on Maintenance -> Backup/Restore.
3. From the main pane, select “Perform nightly backups, store data using”, select FTP:
• FTP server address: specify here the hostname or the IP address of the BackBox server.
• Target Directory: specify here the following path:
/
Note: Make sure the above path contains the character “/” at the end of the path.
• Username: specify here the FTP account to the BackBox server.
• Partial backup: Leave unselected
• Password: specify here the password for the FTP account.
• Confirm Password: specify here the password for the FTP account.

4. Select Save.
5. Close the management console.
Backup configuration instructions: 1. From the BackBox upper pane, click on Devices -> click on Add -> fill in the following details:
• Device Name: Put here a name to recognize the device.
• IP: Put here the IP address of the remote device to backup.
• Group: Select from the device groups drop-down list (Optional field).
• Vendor: Select F5, from the drop-down list.
• Product: Select FirePass, from the drop-down list.
• Version: Select the relevant version, from the drop-down list.
• Backup type: Select Backup (Local) FTP, from the drop-down list.
• Username: Put here the username to access to remote device.
• Password: Put here the password for the account on the remote server/device.
2. Click on Save.

2.78. HP ProCurve (SCP)
Pre-requirements: • Enable routing between the HP ProCurve switch and the backup device.
• Enable SSH access from the backup device to the HP ProCurve switch.
• Configure password for the "manager" account on the switch.
• Login to the HP ProCurve switch and run the commands bellow:
• Run the command to enter configuration mode: config
• Run the command to generate SSH key: crypto key generate ssh
• Run the command to enable access using SSH: ip ssh
• Run the command to allow SCP: ip ssh filetransfer
Backup configuration instructions: 1. From the BackBox upper pane, click on Devices -> click on Add -> fill in the following details:
• Device Name: Put here a name to recognize the device.
• IP: Put here the IP address of the remote device to backup.
• Group: Select from the device groups drop-down list (Optional field).
• Vendor: Select HP, from the drop-down list.
• Product: Select ProCurve, from the drop-down list.
• Version: Select the relevant version, from the drop-down list.
• Backup type: Select Backup (SCP), from the drop-down list.
• Username: Put here “manager”.
• Password: Put here the password for the “manager” account on the remote server/device.
• Port: Change this value only if it is different than the port written.
2. Click on Save.
2.79. HP ProCurve (No IP SSH Filetransfer)
Pre-requirements: • Enable routing between the HP ProCurve switch and the backup device.
• Enable SSH access from the backup device to the HP ProCurve switch.
• Configure password for the "manager" account on the switch.
• Login to the HP ProCurve switch and run the commands bellow:
• Run the command to enter configuration mode: config
• Run the command to generate SSH key: crypto key generate ssh
• Run the command to enable access using SSH: ip ssh
Backup configuration instructions: 1. From the BackBox upper pane, click on Devices -> click on Add -> fill in the following details:
• Device Name: Put here a name to recognize the device.
• IP: Put here the IP address of the remote device to backup.
• Group: Select from the device groups drop-down list (Optional field).
• Vendor: Select HP, from the drop-down list.
• Product: Select ProCurve, from the drop-down list.
• Version: Select the relevant version, from the drop-down list.
• Backup type: Select Backup (No Filetransfer), from the drop-down list.
• Username: Put here “manager”.
• Password: Put here the password for the “manager” account on the remote server/device.
• Prompt after password: Change this value only if it is different than the prompt written.
• Port: Change this value only if it is different than the port written.
2. Click on Save.

2.80. Huawei Switch
Pre-requirements: • Enable routing between the Huawei switch and the backup device.
• Enable Telnet access from the backup device to the Huawei switch.
Backup configuration instructions: 5. From the BackBox upper pane, click on Devices -> click on Add -> fill in the following details:
• Device Name: Put here a name to recognize the device.
• IP: Put here the IP address of the remote device to backup.
• Group: Select from the device groups drop-down list (Optional field).
• Vendor: Select Huawei, from the drop-down list.
• Product: Select switch, from the drop-down list.
• Version: Select All, from the drop-down list.
• Backup type: Select Backup (Telnet), from the drop-down list.
• Username: Put here username for the device
• Password: Put here the password for the above account on the remote server/device.
6. Click on Save.

2.81. IBM DataPower SX 3.8.x
Pre-requirements: • Enable routing between the IBM DataPower and the backup device.
• Enable SSH access (bi-directionally) from the backup device to the IBM DataPower.
Backup configuration instructions: 1. From the BackBox upper pane, click on Devices -> click on Add -> fill in the following details:
• Device Name: Put here a name to recognize the device.
• IP: Put here the IP address of the remote device to backup.
• Group: Select from the device groups drop-down list (Optional field).
• Vendor: Select IBM, from the drop-down list.
• Product: Select DataPower, from the drop-down list.
• Version: Select the relevant version, from the drop-down list.
• Backup type: Select Backup (SSH), from the drop-down list.
• Username: Put here the username to access the IBM DataPower.
• Password: Put here the password for the above account on the remote server/device.
• Server IP: Select an IP address of the BackBox server.
2. Click on Save.

2.82. Imperva SecureSphere
Pre-requirements: • Enable routing between the Imperva device and the backup device.
• Enable SSH access from the backup device to the Imperva device.
• To extract the database password, login using root account, and run the command bellow:
password_decode $(grep "name=\"db\"" /opt/SecureSphere/etc/bootstrap.xml|cut -d\" -f4)
• For Imperva SecureSphere MX build 8.5, login to the MX server console (not using SSH) and run the command bellow to enable remote SSH access from the BackBox:
impctl hardening config --root-source-ip-exception=1.1.1.1
Note: Replace 1.1.1.1 with the IP address of the BackBox
Backup configuration instructions: 1. From the BackBox upper pane, click on Devices -> click on Add -> fill in the following details:
• Device Name: Put here a name to recognize the device.
• IP: Put here the IP address of the remote device to backup.
• Group: Select from the device groups drop-down list (Optional field).
• Vendor: Select Imperva, from the drop-down list.
• Product: Select SecureSphere, from the drop-down list.
• Version: Select the relevant version, from the drop-down list.
• Backup type: Select a backup type, from the drop-down list. Available options:
• Backup (SSH) – Full database backup
• Backup No Alerts (SSH) – Configuration backup with alerts data
• Username: Put here the username to access through SSH
• Password: Put here the password for the SSH account on the remote server/device.
• Database Password: Put here the password for the Oracle database.
• Prompt after password: Change this value only if it is different than the prompt written.
• Port: Change this value only if it is different than the port written.
2. Click on Save.

2.83. Imprivata One-Sign
Pre-requirements: • Enable routing between the backup device and the Imprivata.
• Enable Port 81 access from the backup device to the Imprivata.
• Configure a daily backup to run on the Imprivata server (System -> Operations -> Backup -> Daily Backup)
Backup configuration instructions: 1. From the BackBox upper pane, click on Devices -> click on Add -> fill in the following details:
• Device Name: Put here a name to recognize the device.
• IP: Put here the IP address of the remote device to backup.
• Group: Select from the device groups drop-down list (Optional field).
• Vendor: Select Imprivata, from the drop-down list.
• Product: Select One-Sign, from the drop-down list.
• Version: Select the relevant version, from the drop-down list.
• Backup type: Select Backup (HTTPS), from the drop-down list.
• Username: Put here “admin”.
• Password: Put here the password for the “admin” account on the remote server/device.
• Prompt after password: Change this value only if it is different than the prompt written.
• Port: Change this value only if it is different than the port written.
2. Click on Save.

2.84. Juniper ISG
Pre-requirements: • Enable routing between the Juniper ISG and the backup device.
• Enable SSH access from the backup device to the Juniper ISG.
Backup configuration instructions: 3. From the BackBox upper pane, click on Devices -> click on Add -> fill in the following details:
• Device Name: Put here a name to recognize the device.
• IP: Put here the IP address of the remote device to backup.
• Group: Select from the device groups drop-down list (Optional field).
• Vendor: Select Juniper, from the drop-down list.
• Product: Select ISG, from the drop-down list.
• Version: Select the relevant version, from the drop-down list.
• Backup type: Select Backup (SSH), from the drop-down list.
• Username: Put here “admin”.
• Password: Put here the password for the “admin” account on the remote server/device.
• Prompt after password: Change this value only if it is different than the prompt written.
• Port: Change this value only if it is different than the port written.
4. Click on Save.

2.85. Juniper NetScreen
Pre-requirements: • Enable routing between the Juniper NetScreen and the backup device.
• Enable Telnet or SSH access from the backup device to the Juniper NetScreen (according to the remote device).
Backup configuration instructions: 1. From the BackBox upper pane, click on Devices -> click on Add -> fill in the following details:
• Device Name: Put here a name to recognize the device.
• IP: Put here the IP address of the remote device to backup.
• Group: Select from the device groups drop-down list (Optional field).
• Vendor: Select Juniper, from the drop-down list.
• Product: Select NetScreen, from the drop-down list.
• Version: Select the relevant version, from the drop-down list.
• Backup type: Select a backup type, from the drop-down list.
• Username: Put here “admin”.
• Password: Put here the password for the “admin” account on the remote server/device.
• Prompt after password: Change this value only if it is different than the prompt written.
• Port: Change this value only if it is different than the port written.
2. Click on Save.
2.86. Juniper NSM 2011
Pre-requirements: • Enable routing between the Juniper NSM and the backup device.
• Enable SSH access from the backup device to the Juniper NSM (according to the remote device).
Backup configuration instructions: 1. From the BackBox upper pane, click on Devices -> click on Add -> fill in the following details:
• Device Name: Put here a name to recognize the device.
• IP: Put here the IP address of the remote device to backup.
• Group: Select from the device groups drop-down list (Optional field).
• Vendor: Select Juniper, from the drop-down list.
• Product: Select NSM, from the drop-down list.
• Version: Select the relevant version, from the drop-down list.
• Backup type: Select a backup type, from the drop-down list.
• Username: Put here “root”.
• Password: Put here the password for the “root” account on the remote server/device.
• Prompt after password: Change this value only if it is different than the prompt written.
• Port: Change this value only if it is different than the port written.
2. Click on Save.
2.87. Juniper Switch
Pre-requirements: • Enable routing between the Juniper device and the backup device.
• Enable SSH access from the backup device to the Juniper device.
Backup configuration instructions: 1. From the BackBox upper pane, click on Devices -> click on Add -> fill in the following details:
• Device Name: Put here a name to recognize the device.
• IP: Put here the IP address of the remote device to backup.
• Group: Select from the device groups drop-down list (Optional field).
• Vendor: Select Juniper, from the drop-down list.
• Product: Select Switch, from the drop-down list.
• Version: Select JunOS, from the drop-down list.
• Backup type: Select backup type from the drop-down list. Available options:
• Backup (SCP) – configuration in XML format
• Backup (SSH) Root – “Show running config” (login using “root”)
• Backup (SSH) User – “Show running config” (login using user other than “root”)
• Backup (SCP+SSH) – XML format and running config
• Username: Put here “admin”.
• Password: Put here the password for the “admin” account on the remote server/device.
• Prompt after password: Change this value only if it is different than the prompt written.
• Port: Change this value only if it is different than the port written.
2. Click on Save.

2.88. Juniper Router
Pre-requirements: • Enable routing between the Juniper device and the backup device.
• Enable Telnet access from the backup device to the Juniper device.
Backup configuration instructions: 1. From the BackBox upper pane, click on Devices -> click on Add -> fill in the following details:
• Device Name: Put here a name to recognize the device.
• IP: Put here the IP address of the remote device to backup.
• Group: Select from the device groups drop-down list (Optional field).
• Vendor: Select Juniper, from the drop-down list.
• Product: Select Router, from the drop-down list.
• Version: Select JunOS, from the drop-down list.
• Backup type: Select backup type (either Backup (SCP) or Backup (SSH)), from the drop-down list.
• Username: Put here “admin”.
• Password: Put here the password for the “admin” account on the remote server/device.
• Prompt after password: Change this value only if it is different than the prompt written.
• Port: Change this value only if it is different than the port written.
2. Click on Save.

2.89. Juniper SRX
Pre-requirements: • Enable routing between the Juniper SRX and the backup device.
• Enable SSH access from the backup device to the Juniper SRX.
Backup configuration instructions: 1. From the BackBox upper pane, click on Devices -> click on Add -> fill in the following details:
• Device Name: Put here a name to recognize the device.
• IP: Put here the IP address of the remote device to backup.
• Group: Select from the device groups drop-down list (Optional field).
• Vendor: Select Juniper, from the drop-down list.
• Product: Select SRX, from the drop-down list.
• Version: Select the relevant version, from the drop-down list.
• Backup type: Select a backup type, from the drop-down list.
• Username: Put here “root”.
• Password: Put here the password for the “root” account on the remote server/device.
• Port: Change this value only if it is different than the port written.
2. Click on Save.

2.90. Juniper SSG
Pre-requirements: • Enable routing between the Juniper SSG and the backup device.
• Enable Telnet access from the backup device to the Juniper SSG.
Backup configuration instructions: 1. From the BackBox upper pane, click on Devices -> click on Add -> fill in the following details:
• Device Name: Put here a name to recognize the device.
• IP: Put here the IP address of the remote device to backup.
• Group: Select from the device groups drop-down list (Optional field).
• Vendor: Select Juniper, from the drop-down list.
• Product: Select SSG, from the drop-down list.
• Version: Select the relevant version, from the drop-down list.
• Backup type: Select a backup type, from the drop-down list.
• Username: Put here “admin”.
• Password: Put here the password for the “admin” account on the remote server/device.
• Prompt after password: Change this value only if it is different than the prompt written.
• Port: Change this value only if it is different than the port written.
2. Click on Save.

2.91. Juniper SA (Secure Access)
Pre-requirements: • Enable routing between the Juniper machine and the backup device.
• Enable SCP or FTP between the Juniper machine and the backup device.
• Enable HTTPS between the backup device and the Juniper machine (for Backup HTTPS only).
• Make sure the Juniper machine has unique hostname.
• Make sure the clock on the Juniper machine is synched or configured to sync with NTP server.
Backup configuration instructions (create FTP account on the BackBox server): 1. Login to the BackBox web interface.
2. From the upper pane, click on Authentication -> Operating System Users -> supply account name and password.
3. Click Add.
Backup configuration instructions (inside the Juniper SA web console): 1. Open an internet browser and login to the address:
https://< Address>/admin
2. Supply credentials to login to the management console.
3. From the left pane, click on Maintenance -> Archiving -> Archiving Servers
4. Under Archive Settings:

• Archive Server – specify here the hostname or the IP address of the BackBox server.
• SCP Backup
• Destination Directory – specify here the following path:
/data/External_Backup/username/
Note 1: Replace “username” with the FTP account to the BackBox server
Note 2: Make sure the above path contains the character “/” at the end of the path.
• Username – specify here the FTP account to the BackBox server.
• Password – specify here the password for the FTP account.
• Method – choose SCP.
• FTP Backup
• Destination Directory – specify here the following path:
/
Note: Make sure the above path contains the character “/” at the end of the path.
• Username – specify here the FTP account to the BackBox server.
• Password – specify here the password for the FTP account.
• Method – choose FTP.
5. Under Archive Schedule, make sure the following archive type are selected:
• Archive system configuration
• Archive user accounts
• Archive XML configuration
6. Make sure you select under each archive type, all week days -> select Specified Time, and specify the requested time (at least 10 minutes before the time you have configured in the BackBox application).
7. Make sure you specify complex password for the configuration file.
8. Click Save Changes.
9. From the left pane, click on Administrators -> Admins Realms -> Admin Realms -> from the main pane, click on the relevant Authentication Realm -> from the main pane, click on Authentication Policy tab:
• Make sure the IP Address of the BackBox appears on the list of IP addresses allowed to sign in.
• Under Administrators sign in ports, make sure the relevant interface of the Juniper SA (either Internal or External) is selected as “Enable Administrators to sign in”.
• Click on Save Changes.
10. From the upper pane, click on Sign Out.

Backup configuration instructions (inside the BackBox web console): 1. From the BackBox upper pane, click on Devices -> click on Add -> fill in the following details:
• Device Name: Put here a name to recognize the device.
• IP: Put here the IP address of the remote device.
• Group: Select from the device groups drop-down list (Optional field).
• Vendor: Select Juniper, from the drop-down list.
• Product: Select Secure Access, from the drop-down list.
• Version: Select the relevant version, from the drop-down list.
• Backup type: Select a backup type, from the drop-down list. Available options:
• Backup (Local) SCP – Backup using SCP protocol
• Backup (Local) FTP – Backup using FTP protocol
• Backup (HTTPS) – Backup using HTTPS protocol
• Backup (HTTPS) IVS – Backup (including IVS configuration) using HTTPS protocol
• Username: Put here the username for the “FTP account”.
• Password: Put here the password for the “FTP account” account on the remote server/device.
2. Click on Save.

2.92. Juniper Unified Access Control
Pre-requirements: • Enable routing between the Juniper machine and the backup device.
• Enable HTTPS between the backup device and the Juniper machine.
• Make sure the Juniper machine has unique hostname.
• Make sure the clock on the Juniper machine is synched or configured to sync with NTP server.
Backup configuration instructions (inside the Juniper UAC web console): 1. Open an internet browser and login to the address:
https://< Address>/admin
2. Supply credentials to login to the management console.
3. From the left pane, click on Administrators -> Admins Realms -> Admin Realms -> from the main pane, click on the relevant Authentication Realm -> from the main pane, click on Authentication Policy tab:
• Make sure the IP Address of the BackBox appears on the list of IP addresses allowed to sign in.
• Under Administrators sign in ports, make sure the relevant interface of the Juniper SA (either Internal or External) is selected as “Enable Administrators to sign in”.
• Click on Save Changes.
4. From the upper pane, click on Sign Out.
Backup configuration instructions (inside the BackBox web console): 1. From the BackBox upper pane, click on Devices -> click on Add -> fill in the following details:
• Device Name: Put here a name to recognize the device.
• IP: Put here the IP address of the remote device.
• Group: Select from the device groups drop-down list (Optional field).
• Vendor: Select Juniper, from the drop-down list.
• Product: Select Unified Access Control, from the drop-down list.
• Version: Select the relevant version, from the drop-down list.
• Backup type: Select a backup type.
• Username: Put here the username for the Juniper web console.
• Password: Put here the password for the account on the remote server/device.
2. Click on Save.

2.93. Juniper WLC
Pre-requirements: • Enable routing between the Juniper Device and the backup device.
• Enable SSH access from the backup device to the Juniper Device.
• Enable TFTP access from the Juniper Device to the backup device.
Backup configuration instructions: 1. From the BackBox upper pane, click on Devices -> click on Add -> fill in the following details:
• Device Name: Put here a name to recognize the device.
• IP: Put here the IP address of the remote device to backup.
• Group: Select from the device groups drop-down list (Optional field).
• Vendor: Select Juniper, from the drop-down list.
• Product: Select WLC, from the drop-down list.
• Version: Select the relevant version, from the drop-down list.
• Backup type: Select a backup type, from the drop-down list.
• Username: Put here username to access the remote device.
• Password: Put here the password for the account on the remote server/device.
2. Click on Save.

2.94. Linux Generic
Pre-requirements: • Enable routing between the Linux server and the backup device.
• Enable SSH access from the backup device to the Linux server.
Backup configuration instructions: 3. From the BackBox upper pane, click on Devices -> click on Add -> fill in the following details:
• Device Name: Put here a name to recognize the device.
• IP: Put here the IP address of the remote device to backup.
• Group: Select from the device groups drop-down list (Optional field).
• Vendor: Select Linux, from the drop-down list.
• Product: Select Generic, from the drop-down list.
• Version: Select the relevant version, from the drop-down list.
• Backup type: Select a backup type, from the drop-down list.
• Username: Put here username to access the remote device.
• Password: Put here the password for the account on the remote server/device.
• Files and Directories: Put here the files and / or directories that you want to backup. (separated by spaces)
• Prompt after password: Change this value only if it is different than the prompt written.
• Port: Change this value only if it is different than the port written.
4. Click on Save.

2.95. Linux (Generic) IPTables
Pre-requirements: • Enable routing between the Linux server and the backup device.
• Enable SSH access from the backup device to the Linux server.
Backup configuration instructions: 5. From the BackBox upper pane, click on Devices -> click on Add -> fill in the following details:
• Device Name: Put here a name to recognize the device.
• IP: Put here the IP address of the remote device to backup.
• Group: Select from the device groups drop-down list (Optional field).
• Vendor: Select Linux, from the drop-down list.
• Product: Select IPTables, from the drop-down list.
• Version: Select the relevant version, from the drop-down list.
• Backup type: Select a backup type, from the drop-down list.
• Username: Put here username to access the remote device.
• Password: Put here the password for the account on the remote server/device.
• Prompt after password: Change this value only if it is different than the prompt written.
• Port: Change this value only if it is different than the port written.
6. Click on Save.

2.96. Linux (Generic) Squid Proxy
Pre-requirements: • Enable routing between the Squid and the backup device.
• Enable SSH access from the backup device to the Squid.
Backup configuration instructions: 1. From the BackBox upper pane, click on Devices -> click on Add -> fill in the following details:
• Device Name: Put here a name to recognize the device.
• IP: Put here the IP address of the remote device to backup.
• Group: Select from the device groups drop-down list (Optional field).
• Vendor: Select Linux, from the drop-down list.
• Product: Select Squid, from the drop-down list.
• Version: Select the relevant version, from the drop-down list.
• Backup type: Select the relevant backup type, from the drop-down list.
• Username: Put here “root”.
• Password: Put here the password for the “root” account on the remote server/device.
• Prompt after password: Change this value only if it is different than the prompt written.
• Port: Change this value only if it is different than the port written.
2. Click on Save.

2.97. McAfee ePO 4.x
Pre-requirements: • Enable routing between the McAfee ePO server and the backup device.
• Enable FTP access from the McAfee ePO server to the backup device.
• Make sure the clock on the McAfee ePO server is synched or configured to sync with NTP server.
Backup configuration instructions (create FTP account on the BackBox server): 1. Login to the BackBox web interface.
2. From the upper pane, click on Authentication -> Operating System Users -> supply account name and password.
3. Click Add.
Backup configuration instructions (inside the McAfee ePO server): 1. Login to the Windows server using administrative account.
2. Download from the Internet and install 7Zip on the server (http://www.7-zip.org)
3. Double click on “My Computer” -> double click on drive letter (for example drive C) -> right click -> New folder -> specify the name “EPOBackup”.
4. Login to the BackBox web interface -> from the upper pane, click on Documents -> BackBox Documentation -> download the script McAfee -> ePolicy Orchestrator.
5. Replace the value of the parameter FTPPassword with the password for the BackBox OS user “ftpbackbox” (if it is different than “backbox”)
Note: To change the “ftpbackbox” account password, login to the BackBox web interface -> Authentication -> Operating system users -> locate the account “ftpbackbox” -> click on Edit icon -> specify new password and confirm it -> click on Save.
6. Replace the value of the parameter FTPServer with the IP/hostname of the BackBox server.
7. Replace the value of the string “.\EPOSERVER” with “.\” and the McAfee ePO server name.
8. Replace the value of the parameter ServerIP with the main IP address of the McAfee ePO server.
9. Save the file as C:\EPOBackup\EPOBackup.bat
10. Create a schedule task to run the file bellow at regular intervals:
C:\EPOBackup\EPOBackup.bat

Backup configuration instructions (inside the BackBox web console): 1. From the BackBox upper pane, click on Devices -> click on Add -> fill in the following details:
• Device Name: Put here a name to recognize the device.
• IP: Put here the IP address of the remote device.
• Group: Select from the device groups drop-down list (Optional field).
• Vendor: Select McAfee, from the drop-down list.
• Product: Select ePO, from the drop-down list.
• Version: Select the relevant version, from the drop-down list.
• Backup type: Select a backup type, from the drop-down list.
• Username: Put here the ftpbackbox
• Password: Put here the password for the “ftpbackbox” account on the BackBox server.
2. Click on Save.

2.98. McAfee Intrushield Management
Pre-requirements: • Enable routing between the McAfee Intrushield Management server and the backup device.
• Enable FTP access from the McAfee Intrushield Management server to the backup device.
• Make sure the clock on the McAfee Intrushield Management server is synched or configured to sync with NTP server.
Backup configuration instructions (create FTP account on the BackBox server): 1. Login to the BackBox web interface.
2. From the upper pane, click on Authentication -> Operating System Users -> supply account name and password.
3. Click Add.
Backup configuration instructions (inside the McAfee Intrushield Management server): 1. Login to the Windows server using administrative account.
2. Open an internet browser and login to the address below:
https://<Server_IP_Address>
3. Specify username and password for the management console.
4. From the upper pane, click on Configure.
5. From the left pane, click on Manager -> from the upper right pane, click on Backing Up -> click on Automation:
• Schedule a Backup: select Yes
• Frequency: select Daily (unselect Weekly)
• Start time: Select the requested time to perform the backup
• Type: Select from the list, which tables to backup
• Click on Save -> click OK
6. From the upper pane, click Log off.
7. Download from the Internet and install 7Zip on the server (http://www.7-zip.org)
8. Double click on “My Computer” -> double click on drive letter (for example drive C) -> right click -> New folder -> specify the name “IntrushieldBackup”.
9. Login to the BackBox web interface -> from the upper pane, click on Documents -> BackBox Documentation -> download the script McAfee -> Intrushield -> 32bit.
Note: For Windows 2008 R2, download the script McAfee -> Intrushield -> 64bit.

10. Replace the value of the parameter FTPPassword with the password for the BackBox OS user “ftpbackbox” (if it is different than “backbox”)
Note: To change the “ftpbackbox” account password, login to the BackBox web interface -> Authentication -> Operating system users -> locate the account “ftpbackbox” -> click on Edit icon -> specify new password and confirm it -> click on Save.
11. Replace the value of the parameter FTPServer with the IP/hostname of the BackBox server.
12. Replace the value of the parameter ServerIP with the main IP address of the McAfee Intrushield management server.
13. Save the file as C:\IntrushieldBackup\IntrushieldBackup.bat
14. Create a schedule task to run the file bellow at regular intervals:
C:\IntrushieldBackup\IntrushieldBackup.bat
Backup configuration instructions (inside the BackBox web console): 1. From the BackBox upper pane, click on Devices -> click on Add -> fill in the following details:
• Device Name: Put here a name to recognize the device.
• IP: Put here the IP address of the remote device.
• Group: Select from the device groups drop-down list (Optional field).
• Vendor: Select McAfee, from the drop-down list.
• Product: Select Intrushield Management, from the drop-down list.
• Version: Select the relevant version, from the drop-down list.
• Backup type: Select a backup type, from the drop-down list.
• Username: Put here the ftpbackbox
• Password: Put here the password for the “ftpbackbox” account on the BackBox server.
2. Click on Save.
2.99. Microsoft ISA Server 2006
Pre-requirements: • Enable routing between the ISA 2006 server and the backup device.
• Enable FTP access from the ISA 2006 server to the backup device.
• Enable FTP "put" from the ISA 2006 server to the backup device.
• Make sure the clock on the ISA 2006 server is synched or configured to sync with NTP server.
Backup configuration instructions (create FTP account on the BackBox server): 1. Login to the BackBox web interface.
2. From the upper pane, click on Authentication -> Operating System Users -> supply account name and password.
3. Click Add.
Backup configuration instructions (inside the ISA 2006 server): 1. Login to the Windows server using administrative account.
2. Start -> Programs -> Microsoft ISA Server -> ISA Server Management.
3. From the left pane, expand the server name -> right click on Firewall Policy -> New -> Access Rule:
4. Rule name: Allow FTP to BackBox
5. Action to take when rule conditions are met: Allow
6. This rule applies to -> Selected protocols -> Web -> FTP
7. This rule applies to traffic from these sources -> Computers -> New -> Computer -> specify the details of the ISA server
8. This rule applies to traffic sent to these destinations -> Computers -> New -> Computer -> specify the details of the BackBox server
9. Click on Apply.
10. Right click on the newly created rule -> Properties -> Protocols tab -> Filtering -> Configure FTP -> uncheck “Read Only” -> click OK twice.
11. Apply the changes to the ISA server.
12. Download from the Internet and install 7Zip on the server (http://www.7-zip.org)
13. Double click on “My Computer” -> double click on drive letter (for example drive C) -> right click -> New folder -> specify the name “ISA2006Backup”.
14. Login to the BackBox web interface -> from the upper pane, click on Documents -> BackBox Documentation -> download the script Microsoft -> ISA 2006 -> Batch file.

15. Replace the value of the parameter FTPPassword with the password for the BackBox OS user “ftpbackbox” (if it is different than “backbox”)
Note: To change the “ftpbackbox” account password, login to the BackBox web interface -> Authentication -> Operating system users -> locate the account “ftpbackbox” -> click on Edit icon -> specify new password and confirm it -> click on Save.
16. Replace the value of the parameter FTPServer with the IP/hostname of the BackBox server.
17. Replace the value of the parameter ServerIP with the main IP address of the ISA server.
18. Save the file as C:\ISA2006Backup\ISA2006Backup.bat
19. Login to the BackBox web interface -> from the upper pane, click on Documents -> BackBox Documentation -> download the script Microsoft -> ISA 2006 -> VBScript.
20. Save the file as C:\ISA2006Backup\ISA2006BackupScript.vbs
21. Create a schedule task to run the file bellow at regular intervals: C:\ISA2006Backup\ISA2006Backup.bat
Backup configuration instructions (inside the BackBox web console): 1. From the BackBox upper pane, click on Devices -> click on Add -> fill in the following details:
• Device Name: Put here a name to recognize the device.
• IP: Put here the IP address of the remote device.
• Group: Select from the device groups drop-down list (Optional field).
• Vendor: Select Microsoft, from the drop-down list.
• Product: Select ISA Server, from the drop-down list.
• Version: Select the relevant version, from the drop-down list.
• Backup type: Select a backup type, from the drop-down list.
• Username: Put here the ftpbackbox
• Password: Put here the password for the “ftpbackbox” account on the BackBox server.
2. Click on Save.

2.100. Microsoft TMG 2010
Pre-requirements: • Enable routing between the TMG 2010 server and the backup device.
• Enable SSH access from the TMG 2010 server to the backup device.
• Make sure the clock on the TMG 2010 server is synched or configured to sync with NTP server.
Backup configuration instructions (create FTP account on the BackBox server): 1. Login to the BackBox web interface.
2. From the upper pane, click on Authentication -> Operating System Users -> supply account name and password.
3. Click Add.
Backup configuration instructions (inside the TMG 2010 server): 1. Login to the Windows server using administrative account.
1. Start -> Programs -> Microsoft Forefront TMG -> Forefront TMG Management 2. From the left pane, expand the server name -> right click on Firewall Policy -> New -> Access Rule:
• Rule name: Allow SCP to BackBox • Action to take when rule conditions are met: Allow • This rule applies to -> Selected protocols -> Add -> Remote Terminal -> SSH -> Add -> Close -> click
Next • This rule applies to traffic from these sources -> Computers -> New -> Computer -> specify the
details of the TMG 2010 server -> click Add -> click Close -> click Next • This rule applies to traffic sent to these destinations -> Computers -> New -> Computer -> specify the
details of the BackBox server -> click Add -> click Close -> click Next • This rule applies to requests from the following user sets -> All Users -> click Finish.
3. Click on Apply twice. 4. Apply the changes to the TMG 2010 server. 5. Download from the Internet and install 7Zip on the server (http://www.7-zip.org) 6. Download PSCP.exe (http://www.chiark.greenend.org.uk/~sgtatham/putty/download.html) and save it
inside C:\Windows\SysWOW64 7. Double click on “My Computer” -> double click on drive letter (for example drive C) -> right click -> New
folder -> specify the name “TMGBackup”. 8. Login to the BackBox web interface -> from the upper pane, click on Documents -> BackBox
Documentation -> download the script Microsoft -> TMG 2010 -> Batch file. 9. Replace the value of the parameter FTPPassword with the password for the BackBox OS user
“ftpbackbox” (if it is different than “backbox”)

Note: To change the “ftpbackbox” account password, login to the BackBox web interface -> Authentication -> Operating system users -> locate the account “ftpbackbox” -> click on Edit icon -> specify new password and confirm it -> click on Save.
10. Replace the value of the parameter FTPServer with the IP/hostname of the BackBox server. 11. Replace the value of the parameter ServerIP with the main IP address of the TMG server. 12. Save the file as C:\TMGBackup\TMGBackup.bat 13. Login to the BackBox web interface -> from the upper pane, click on Documents -> BackBox
Documentation -> download the script Microsoft -> TMG 2010 -> VBScript. 14. Save the file as C:\TMGBackup\TMGBackupScript.vbs 15. Create a schedule task to run the file bellow at regular intervals: C:\TMGBackup\TMGBackup.bat
Backup configuration instructions (inside the BackBox web console): 1. From the BackBox upper pane, click on Devices -> click on Add -> fill in the following details:
• Device Name: Put here a name to recognize the device.
• IP: Put here the IP address of the remote device.
• Group: Select from the device groups drop-down list (Optional field).
• Vendor: Select Microsoft, from the drop-down list.
• Product: Select TMG, from the drop-down list.
• Version: Select the relevant version, from the drop-down list.
• Backup type: Select a backup type, from the drop-down list.
• Username: Put here the ftpbackbox
• Password: Put here the password for the “ftpbackbox” account on the BackBox server.
2. Click on Save.

2.101. Microsoft UAG 2010
Pre-requirements: • Enable routing between the UAG 2010 server and the backup device.
• Enable SSH access from the UAG 2010 server to the backup device.
• Make sure the clock on the UAG 2010 server is synched or configured to sync with NTP server.
Backup configuration instructions (create FTP account on the BackBox server): 1. Login to the BackBox web interface.
2. From the upper pane, click on Authentication -> Operating System Users -> supply account name and password.
3. Click Add.
Backup configuration instructions (inside the UAG 2010 server): 1. Login to the Windows server using administrative account.
2. Start -> Programs -> Microsoft Forefront TMG -> Forefront TMG Management 3. From the left pane, expand the server name -> right click on Firewall Policy -> New -> Access Rule:
• Rule name: Allow SCP to BackBox • Action to take when rule conditions are met: Allow • This rule applies to -> Selected protocols -> Add -> Remote Terminal -> SSH -> Add -> Close -> click
Next • This rule applies to traffic from these sources -> Computers -> New -> Computer -> specify the
details of the UAG 2010 server -> click Add -> click Close -> click Next • This rule applies to traffic sent to these destinations -> Computers -> New -> Computer -> specify the
details of the BackBox server -> click Add -> click Close -> click Next • This rule applies to requests from the following user sets -> All Users -> click Finish.
4. Click on Apply twice. 5. Apply the changes to the UAG 2010 server. 6. Download from the Internet and install 7Zip on the server (http://www.7-zip.org) 7. Download PSCP.exe (http://www.chiark.greenend.org.uk/~sgtatham/putty/download.html) and save it
inside C:\Windows\SysWOW64 8. Double click on “My Computer” -> double click on drive letter (for example drive C) -> right click -> New
folder -> specify the name “UAGBackup”. 9. Login to the BackBox web interface -> from the upper pane, click on Documents -> BackBox
Documentation -> download the script Microsoft -> UAG 2010 -> Batch file. 10. Replace the value of the parameter FTPPassword with the password for the BackBox OS user
“ftpbackbox” (if it is different than “backbox”)
Note: To change the “ftpbackbox” account password, login to the BackBox web interface -> Authentication -> Operating system users -> locate the account “ftpbackbox” -> click on Edit icon -> specify new password and confirm it -> click on Save.
11. Replace the value of the parameter FTPServer with the IP/hostname of the BackBox server. 12. Replace the value of the parameter ServerIP with the main IP address of the UAG server. 13. Save the file as C:\UAGBackup\UAGBackup.bat 14. Login to the BackBox web interface -> from the upper pane, click on Documents -> BackBox
Documentation -> download the script Microsoft -> UAG 2010 -> VBScript. 15. Save the file as C:\UAGBackup\TMGBackupScript.vbs 16. Create a schedule task to run the file bellow at regular intervals: C:\UAGBackup\UAGBackup.bat
Backup configuration instructions (inside the BackBox web console): 1. From the BackBox upper pane, click on Devices -> click on Add -> fill in the following details:
• Device Name: Put here a name to recognize the device.
• IP: Put here the IP address of the remote device.
• Group: Select from the device groups drop-down list (Optional field).
• Vendor: Select Microsoft, from the drop-down list.
• Product: Select UAG, from the drop-down list.
• Version: Select the relevant version, from the drop-down list.
• Backup type: Select a backup type, from the drop-down list.
• Username: Put here the ftpbackbox
• Password: Put here the password for the “ftpbackbox” account on the BackBox server.
2. Click on Save.

2.102. Motorola RFS 7000
Pre-requirements: • Enable routing between the Motorola device and the backup device.
• Enable SSH access from the backup device to the Motorola device.
Backup configuration instructions: 1. From the BackBox upper pane, click on Devices -> click on Add -> fill in the following details:
• Device Name: Put here a name to recognize the device.
• IP: Put here the IP address of the remote device to backup.
• Group: Select from the device groups drop-down list (Optional field).
• Vendor: Select Motorola, from the drop-down list.
• Product: Select FRS, from the drop-down list.
• Version: Select the relevant version, from the drop-down list.
• Backup type: Select Backup (SSH), from the drop-down list.
• Username: Put here the account to access the Motorola device
• Password: Put here the password for the above account.
2. Click on Save.

2.103. NetAPP ONTAP 8.x
Pre-requirements: • Enable routing between the NetAPP device and the backup device.
• Enable SSH access from the backup device to the NetAPP device.
• Enable FTP access from the backup device to the NetAPP device.
• Run the command below in-order to enable FTP access on the NetAPP:
options ftpd.enable on
• Run the commands below in-order to create new FTP account (Username: backbox, Password: cifs*123)
wrfile -a /etc/passwd backbox:_J9..IMv76dJgB/sqpf.:0:1::/:
wrfile -a /etc/group daemon:*:1:
• Important: Make sure there isn’t any opened SSH connection to the NetAPP prior to the backup (otherwise, the connection will fail).
Backup configuration instructions: 1. From the BackBox upper pane, click on Devices -> click on Add -> fill in the following details:
• Device Name: Put here a name to recognize the device.
• IP: Put here the IP address of the remote device to backup.
• Group: Select from the device groups drop-down list (Optional field).
• Vendor: Select NetAPP, from the drop-down list.
• Product: Select ONTAP, from the drop-down list.
• Version: Select the relevant version, from the drop-down list.
• Backup type: Select Backup (SSH), from the drop-down list.
• NetAPP Username: Put here the account to access the NetAPP device
• NetAPP Password: Put here the password for the above account.
• FTP Username: Put here backbox
• FTP Password: Put here cifs*123
• Port: Change this value only if it is different than the port written.
• Prompt after password: Change this value only if it is different than the prompt written.
2. Click on Save.

2.104. Netgear FSM / GSM switch
Pre-requirements: • Enable routing between the Netgear device and the backup device.
• Enable Telnet access, from the backup device to the Netgear device.
• Enforce "enable" password on the Netgear appliance:
• Login to the Netgear device using non-privileged account and run the command below:
enable passwd
Backup configuration instructions: 1. From the BackBox upper pane, click on Devices -> click on Add -> fill in the following details:
• Device Name: Put here a name to recognize the device.
• IP: Put here the IP address of the remote device to backup.
• Group: Select from the device groups drop-down list (Optional field).
• Vendor: Select Netgear, from the drop-down list.
• Product: Select FSM series or GSM series, from the drop-down list.
• Version: Select the relevant version, from the drop-down list.
• Backup type: Select a backup type.
• Username: Put here the username to access the remote device.
• Password: Put here the password to access the remote device.
2. Click on Save.

2.105. Nokia Crypto Cluster
Pre-requirements: • Enable routing between the Nokia device and the backup device.
• Enable SSH or Telnet access, from the backup device to the Nokia device.
Backup configuration instructions: 3. From the BackBox upper pane, click on Devices -> click on Add -> fill in the following details:
• Device Name: Put here a name to recognize the device.
• IP: Put here the IP address of the remote device to backup.
• Group: Select from the device groups drop-down list (Optional field).
• Vendor: Select Nokia, from the drop-down list.
• Product: Select Crypto Cluster, from the drop-down list.
• Version: Select the relevant version, from the drop-down list.
• Backup type: Select a backup type, from the drop-down list. Available options:
• Backup (SSH) – backup configuration using SSH protocol.
• Backup (Telnet) – backup configuration using Telnet protocol.
• Username: Put here the username to access the remote device.
• Password: Put here the password to access the remote device.
• Port: Change this value only if it is different than the port written.
• Prompt after password: Change this value only if it is different than the prompt written.
4. Click on Save.

2.106. Nokia IPSO
Pre-requirements: • Enable routing between the Nokia device and the backup device.
• Enable SSH access from the backup device to the Nokia device.
• Disable schedule backup from the Voyager web interface.
Backup configuration instructions: 1. From the BackBox upper pane, click on Devices -> click on Add -> fill in the following details:
• Device Name: Put here a name to recognize the device.
• IP: Put here the IP address of the remote device to backup.
• Group: Select from the device groups drop-down list (Optional field).
• Vendor: Select Nokia, from the drop-down list.
• Product: Select IPSO, from the drop-down list.
• Version: Select the relevant version, from the drop-down list.
• Backup type: Select Backup (SSH), from the drop-down list.
• Username: Put here the account to access the Nokia device
• Password: Put here the password for the above account.
• Prompt after password: Change this value only if it is different than the prompt written.
• Port: Change this value only if it is different than the port written.
2. Click on Save.

2.107. Nortel 2360 Switch
Pre-requirements: • Enable routing between the Nortel switch and the backup device.
• Enable Telnet access from the backup device to the Nortel switch.
Backup configuration instructions: 1. From the BackBox upper pane, click on Devices -> click on Add -> fill in the following details:
• Device Name: Put here a name to recognize the device.
• IP: Put here the IP address of the remote device to backup.
• Group: Select from the device groups drop-down list (Optional field).
• Vendor: Select Nortel, from the drop-down list.
• Product: Select 2360 Switch, from the drop-down list.
• Version: Select the relevant version, from the drop-down list.
• Backup type: Select User/Pass/Ena (Telnet), from the drop-down list.
• Username: Put here the account to access the remote device.
• Password: Put here the password for the above account.
• Enable Password: Put here the enable password.
2. Click on Save.

2.108. Nortel 460/470 Switch (Telnet)
Pre-requirements: • Enable routing between the Nortel switch and the backup device.
• Enable Telnet access from the backup device to the Nortel switch.
Backup configuration instructions: 3. From the BackBox upper pane, click on Devices -> click on Add -> fill in the following details:
• Device Name: Put here a name to recognize the device.
• IP: Put here the IP address of the remote device to backup.
• Group: Select from the device groups drop-down list (Optional field).
• Vendor: Select Nortel, from the drop-down list.
• Product: Select Switch, from the drop-down list.
• Version: Select the relevant version, from the drop-down list.
• Backup type: Select Backup (Telnet), from the drop-down list.
• Username: Put here the account to access the remote device.
• Password: Put here the password for the above account.
4. Click on Save.

2.109. Nortel 460/470 Switch (SNMPv2/TFTP)
Pre-requirements: • Enable routing between the Nortel switch and the backup device.
• Enable SNMP and ICMP access from the backup device to the Nortel switch.
• Configure Read/Write version 2 community on the Nortel switch (for SNMP backup).
• Enable TFTP access from the Nortel switch to the backup device (for SNMP backup).
Backup configuration instructions: 1. From the BackBox upper pane, click on Devices -> click on Add -> fill in the following details:
• Device Name: Put here a name to recognize the device.
• IP: Put here the IP address of the remote device to backup.
• Group: Select from the device groups drop-down list (Optional field).
• Vendor: Select Nortel, from the drop-down list.
• Product: Select Switch, from the drop-down list.
• Version: Select the relevant version, from the drop-down list.
• Backup type: Select Backup (SNMPv2/TFTP), from the drop-down list.
• SNMP Community string: Put here the SNMP R/W community string for the remote device.
• Server IP: Select the relevant IP of the BackBox.
2. Click on Save.
2.110. Nortel 460/470 Switch (All)
Pre-requirements: • Enable routing between the Nortel switch and the backup device.
• Enable Telnet access from the backup device to the Nortel switch.
• Enable TFTP access from the Nortel switch to the backup device (for Telnet/TFTP backup).
Backup configuration instructions: 1. From the BackBox upper pane, click on Devices -> click on Add -> fill in the following details:
• Device Name: Put here a name to recognize the device.
• IP: Put here the IP address of the remote device to backup.
• Group: Select from the device groups drop-down list (Optional field).
• Vendor: Select Nortel, from the drop-down list.
• Product: Select Switch, from the drop-down list.
• Version: Select version All, from the drop-down list.
• Backup type: Select backup type, from the drop-down list. Available options:
• Telnet – ASCII (No Auth) – Backup the “running config” using Telnet without authentication
• Telnet – ASCII (User/Pass) – Backup the “running config” using Telnet (User/Pass required)
• Telnet/TFTP – ASCII BIN (No Auth) – Backup the configuration (both ASCII and binary file) using Telnet without authentication
• Telnet/TFTP – ASCII BIN (User/Pass) - Backup the configuration (both ASCII and binary file) using Telnet (User/Pass required)
• Username: Put here the username for the remote device.
• Password: Put here the password for the remote device.
2. Click on Save.

2.111. Nortel Passport 1600
Pre-requirements: • Enable routing between the Nortel switch and the backup device.
• Enable Telnet access from the backup device to the Nortel switch.
• Enable TFTP access from the Nortel switch to the backup device.
Backup configuration instructions: 3. From the BackBox upper pane, click on Devices -> click on Add -> fill in the following details:
• Device Name: Put here a name to recognize the device.
• IP: Put here the IP address of the remote device to backup.
• Group: Select from the device groups drop-down list (Optional field).
• Vendor: Select Nortel, from the drop-down list.
• Product: Select Passport 1600, from the drop-down list.
• Version: Select the relevant version, from the drop-down list.
• Backup type: Select Backup (Telnet/TFTP), from the drop-down list.
• Username: Put here the username for the remote device.
• Password: Put here the password for the remote device.
• Prompt after password: Change this value only if it is different than the prompt written.
• Server IP: Select the relevant IP of the BackBox.
2. Click on Save.

2.112. Nortel Passport 8000 (SNMP/TFTP)
Pre-requirements: • Enable routing between the Nortel switch and the backup device.
• Enable SNMP and ICMP access from the backup device to the Nortel switch.
• Configure Read/Write version 2 community on the Nortel switch (for SNMP backup).
• Enable TFTP access from the Nortel switch to the backup device (for SNMP backup).
Backup configuration instructions: 1. From the BackBox upper pane, click on Devices -> click on Add -> fill in the following details:
• Device Name: Put here a name to recognize the device.
• IP: Put here the IP address of the remote device to backup.
• Group: Select from the device groups drop-down list (Optional field).
• Vendor: Select Nortel, from the drop-down list.
• Product: Select Passport 8000, from the drop-down list.
• Version: Select the relevant version, from the drop-down list.
• Backup type: Select Backup (SNMPv2/TFTP), from the drop-down list.
• SNMP Community string: Put here the SNMP R/W community string for the remote device.
• Server IP: Select the relevant IP of the BackBox.
2. Click on Save.

2.113. Nortel Passport 8000 (Running-config)
Pre-requirements: • Enable routing between the Nortel switch and the backup device.
• Enable Telnet access from the backup device to the Nortel switch.
Backup configuration instructions: 1. From the BackBox upper pane, click on Devices -> click on Add -> fill in the following details:
• Device Name: Put here a name to recognize the device.
• IP: Put here the IP address of the remote device to backup.
• Group: Select from the device groups drop-down list (Optional field).
• Vendor: Select Nortel, from the drop-down list.
• Product: Select Passport 8000, from the drop-down list.
• Version: Select the relevant version, from the drop-down list.
• Backup type: Select backup option, from the drop-down list. Available options:
• User/Pass (Telnet) – requires username and password to login
• User/Pass/Ena (Telnet) – requires username, password and enable password to login.
• Username: Put here the username for the remote device.
• Password: Put here the password for the remote device.
• Enable Password: Put here the enable password for the remote device (if required).
• Prompt after password: Change this value only if it is different than the prompt written.
• Prompt after Enable password: Change this value only if it is different than the prompt written.
2. Click on Save.

2.114. PaloAlto PA-Series
Pre-requirements: • Enable routing between the PaloAlto machine and the backup device.
• Enable SSH access (bi-directionally) from the backup device and the PaloAlto.
Backup configuration instructions (inside the PaloAlto web console): 1. Open an internet browser and login to the address:
https://< IP_Address>
2. Supply credentials to login to the management console.
3. From the upper pane, click on Device tab -> from the left pane, click on Administrators.
4. Click New -> specify the same username and password as you specified on the CreateUser.sh command on the BackBox.
5. On the role, select “Device Admin” -> Click OK.
6. From the upper pane, click on Commit.
7. Logoff the web console.

Backup configuration instructions: 1. From the BackBox upper pane, click on Devices -> click on Add -> fill in the following details:
• Device Name: Put here a name to recognize the device.
• IP: Put here the IP address of the remote device to backup.
• Group: Select from the device groups drop-down list (Optional field).
• Vendor: Select PaloAlto, from the drop-down list.
• Product: Select PA Series, from the drop-down list.
• Version: Select the relevant version, from the drop-down list.
• Backup type: Select backup type, from the drop-down list. Available options:
• Backup (SCP) – backup using the PaloAlto management interface
• Backup (SCP) No Management – backup using non PaloAlto management interface
• Backup (WGET) – backup configuration without back connection
• Username: Put here the username created on the PaloAlto device.
• Password: Put here the password for the above username.
• Prompt after password: Change this value only if it is different than the prompt written.
• Port: Change this value only if it is different than the port written.
• Server IP: Select the relevant BackBox IP address.
2. Click on Save.

2.115. PFSense Firewall
Pre-requirements: • Enable routing between the PFSense Firewall and the backup device.
• Enable HTTPS access from the backup device to the PFSense Firewall.
Backup configuration instructions: 5. From the BackBox upper pane, click on Devices -> click on Add -> fill in the following details:
• Device Name: Put here a name to recognize the device.
• IP: Put here the IP address of the remote device to backup.
• Group: Select from the device groups drop-down list (Optional field).
• Vendor: Select PFSense, from the drop-down list.
• Product: Select Firewall, from the drop-down list.
• Version: Select the relevant version, from the drop-down list.
• Backup type: Select Backup (WGET), from the drop-down list.
• Username: Put here the account to access the remote device.
• Password: Put here the password for the above account.
6. Click on Save.

PineApp Mail-SeCure
Pre-requirements: • Enable routing between the PineApp Mail-SeCure and the backup device.
• Enable FTP access from the PineApp Mail-SeCure to the backup device.
Note: The PineApp requires port 21TCP and random high port for the FTP.
• Make sure the clock on the PineApp Mail-SeCure is synched or configured to sync with NTP server.
Backup configuration instructions (create FTP account on the BackBox server): 1. Login to the BackBox web interface.
2. From the upper pane, click on Authentication -> Operating System Users -> supply account name and password.
3. Click Add.
Backup configuration instructions (inside the PineApp web console): 1. Open an internet browser and login to the address:
https://<PineApp_IP_Address>:7443
2. Supply credentials to login to the management console.
3. From the left pane, click on System -> from the upper pane, click on Backup.
4. Fill in the following details:
• Enable Backup - make sure it is selected.
• Backup type - choose either “Configuration only”, “Mailboxes only” or “Both configuration & mailboxes”
• Backup on days - select all days of the week.

• Backup hour - select specified hour (at least 10 minutes before the time you have configured in the BackBox application).
• Protocol - choose FTP
• Host/computer name or IP - specify here the hostname or the IP address of the BackBox server.
• Folder/share - specify here the following path:
/
Note: Make sure the above path contains the character “/” at the end of the path.
• Login - specify here the FTP account to the BackBox server.
• Password - specify here the password for the FTP account.
5. Click on Save Changes.
6. Click on Apply Changes.
7. Click OK
Backup configuration instructions (inside the BackBox web console): 1. From the BackBox upper pane, click on Devices -> click on Add -> fill in the following details:
• Device Name: Put here a name to recognize the device.
• IP: Put here the IP address of the remote device.
• Group: Select from the device groups drop-down list (Optional field).
• Vendor: Select PineApp, from the drop-down list.
• Product: Select Mail-SeCure, from the drop-down list.
• Version: Select the relevant version, from the drop-down list.
• Backup type: Select Backup (Local), from the drop-down list.
• Username: Put here the username for the “FTP account”.
• Password: Put here the password for the “FTP account” account on the remote server/device.
2. Click on Save.

2.116. PineApp Mail-SeCure (HTTPS)
Pre-requirements: • Enable routing between the PineApp Mail-SeCure and the backup device.
• Enable HTTPS access from the backup device to the PineApp
Backup configuration instructions (inside the BackBox web console): 1. From the BackBox upper pane, click on Devices -> click on Add -> fill in the following details:
• Device Name: Put here a name to recognize the device.
• IP: Put here the IP address of the remote device.
• Group: Select from the device groups drop-down list (Optional field).
• Vendor: Select PineApp, from the drop-down list.
• Product: Select Mail-SeCure, from the drop-down list.
• Version: Select the relevant version, from the drop-down list.
• Backup type: Select Backup (HTTPS), from the drop-down list.
• Username: Put here the username for the PineApp admin web console
• Password: Put here the password for the PineApp admin web console
2. Click on Save.

2.117. Radiator Radius Server
Pre-requirements: • Enable routing between the Radiator and the backup device.
• Enable SSH access from the backup device to the Radiator.
Backup configuration instructions (inside the BackBox web console): 3. From the BackBox upper pane, click on Devices -> click on Add -> fill in the following details:
• Device Name: Put here a name to recognize the device.
• IP: Put here the IP address of the remote device.
• Group: Select from the device groups drop-down list (Optional field).
• Vendor: Select Radiator, from the drop-down list.
• Product: Select Radius Server, from the drop-down list.
• Version: Select the relevant version, from the drop-down list.
• Backup type: Select Backup (SSH), from the drop-down list.
• Username: Put here the username for the Radiator ssh console.
• Password: Put here the password for the Radiator ssh console.
4. Click on Save.

Radware Alteon OS (Telnet / SSH)
Pre-requirements: • Enable routing between the Alteon device and the backup device.
• Enable Telnet or SSH from the backup device to the Alteon device.
Backup configuration instructions: 1. From the BackBox upper pane, click on Devices -> click on Add -> fill in the following details:
• Device Name: Put here a name to recognize the device.
• IP: Put here the IP address of the remote device to backup.
• Group: Select from the device groups drop-down list (Optional field).
• Vendor: Select Radware, from the drop-down list.
• Product: Select Alteon, from the drop-down list.
• Version: Select version from the drop-down list.
• Backup type: Select backup option from the drop-down list. Available options are:
• Backup (SSH) – configuration backup using SSH protocol (without key)
• Backup (SSH) with Key – configuration backup (with SSL key) using SSH protocol
• Backup (Telnet) – configuration backup using Telnet protocol (without key)
• Username: Put here username for the remote device.
• Password: Put here the password for the account on the remote server/device.
• Backup Password: Put here the password for the password for exporting the configuration.
• Prompt after password: Change this value only if it is different than the prompt written.
• Port: Change this value only if it is different than the port written.
2. Click on Save.

2.118. Radware Alteon (SNMP/TFTP)
Pre-requirements: • Enable routing between the Alteon device and the backup device.
• Enable SNMP traffic from the backup device to the Alteon device.
• Enable TFTP traffic from the Alteon device to the backup device.
• Enable Read/Write SNMP v2 community string on the Alteon device.
• Enable SNMP access on the management interface of the Alteon:
/c/sys/mmgmt/snmp mgmt
/c/sys/access/snmp w
• Run the commands “apply” and “save” on the Alteon device.
Backup configuration instructions: 1. From the BackBox upper pane, click on Devices -> click on Add -> fill in the following details:
• Device Name: Put here a name to recognize the device.
• IP: Put here the IP address of the remote device to backup.
• Group: Select from the device groups drop-down list (Optional field).
• Vendor: Select Radware, from the drop-down list.
• Product: Select Alteon, from the drop-down list.
• Version: Select version from the drop-down list.
• Backup type: Select Backup (SNMPv2/TFTP), from the drop-down list.
• SNMP Community string: Put here the SNMP R/W community string for the remote device.
• Server IP: Select the relevant BackBox IP address.
2. Click on Save.

2.119. Radware AppDirector (1.03)
Pre-requirements: • Enable routing between the Radware device and the backup device.
• Enable HTTPS access (for WGET backup) from the backup device to the Radware device.
Backup configuration instructions: 1. From the BackBox upper pane, click on Devices -> click on Add -> fill in the following details:
• Device Name: Put here a name to recognize the device.
• IP: Put here the IP address of the remote device to backup.
• Group: Select from the device groups drop-down list (Optional field).
• Vendor: Select Radware, from the drop-down list.
• Product: Select AppDirector, from the drop-down list.
• Version: Select version 1.03.x, from the drop-down list.
• Backup type: Select Backup BER (WGET-HTTPS), from the drop-down list.
• Username: Put here “admin”.
• Password: Put here the password for the “admin” account on the remote server/device.
• Port: Change this value only if it is different than the port written.
2. Click on Save.

2.120. Radware AppDirector (1.06 and above)
Pre-requirements: • Enable routing between the Radware device and the backup device.
• Enable HTTPS access (for WGET backup) from the backup device to the Radware device.
Backup configuration instructions: 1. From the BackBox upper pane, click on Devices -> click on Add -> fill in the following details:
• Device Name: Put here a name to recognize the device.
• IP: Put here the IP address of the remote device to backup.
• Group: Select from the device groups drop-down list (Optional field).
• Vendor: Select Radware, from the drop-down list.
• Product: Select AppDirector, from the drop-down list.
• Version: Select version 1.06.x and above, from the drop-down list.
• Backup type: Select Backup ASCII (WGET-HTTPS), from the drop-down list.
• Username: Put here “admin”.
• Password: Put here the password for the “admin” account on the remote server/device.
• Port: Change this value only if it is different than the port written.
2. Click on Save.

2.121. Radware AppDirector ODS (2.x and above)
Pre-requirements: • Enable routing between the Radware device and the backup device.
• Enable HTTPS access (for WGET backup) from the backup device to the Radware device.
Backup configuration instructions: 1. From the BackBox upper pane, click on Devices -> click on Add -> fill in the following details:
• Device Name: Put here a name to recognize the device.
• IP: Put here the IP address of the remote device to backup.
• Group: Select from the device groups drop-down list (Optional field).
• Vendor: Select Radware, from the drop-down list.
• Product: Select AppDirector ODS, from the drop-down list.
• Version: Select version 2.x and above, from the drop-down list.
• Backup type: Select Backup ASCII (WGET-HTTPS), from the drop-down list.
• Username: Put here “admin”.
• Password: Put here the password for the “admin” account on the remote server/device.
• Port: Change this value only if it is different than the port written.
2. Click on Save.

2.122. Radware Apsolute-Vision
Pre-requirements: • Enable routing between the Radware device and the backup device.
• Enable SSH access from the backup device to the Radware device.
• Enable SCP access from the Radware device to the backup device.
Backup configuration instructions: 3. From the BackBox upper pane, click on Devices -> click on Add -> fill in the following details:
• Device Name: Put here a name to recognize the device.
• IP: Put here the IP address of the remote device to backup.
• Group: Select from the device groups drop-down list (Optional field).
• Vendor: Select Radware, from the drop-down list.
• Product: Select Apsolute Vision, from the drop-down list.
• Version: Select version All, from the drop-down list.
• Backup type: Select Backup (SSH/SCP), from the drop-down list.
• Username: Put here “admin”.
• Password: Put here the password for the “admin” account on the remote server/device.
• Port: Change this value only if it is different than the port written.
4. Click on Save.

Radware CID (1.x – 2.x)
Pre-requirements: • Enable routing between the Radware device and the backup device.
• Enable HTTPS access (for WGET backup) from the backup device to the Radware device.
Backup configuration instructions: 1. From the BackBox upper pane, click on Devices -> click on Add -> fill in the following details:
• Device Name: Put here a name to recognize the device.
• IP: Put here the IP address of the remote device to backup.
• Group: Select from the device groups drop-down list (Optional field).
• Vendor: Select Radware, from the drop-down list.
• Product: Select CID, from the drop-down list.
• Version: Select version 1.x – 2.x, from the drop-down list.
• Backup type: Select a backup type, from the drop-down list. Possible options:
• Backup BER (WGET-HTTPS) – backup configuration to a binary file.
• Backup ASCII (WGET-HTTPS) – backup configuration to an ASCII file.
• Username: Put here “admin”.
• Password: Put here the password for the “admin” account on the remote server/device.
• Port: Change this value only if it is different than the port written.
2. Click on Save.

2.123. Radware CID (3.x and above)
Pre-requirements: • Enable routing between the Radware device and the backup device.
• Enable HTTPS access (for WGET backup) from the backup device to the Radware device.
Backup configuration instructions: 1. From the BackBox upper pane, click on Devices -> click on Add -> fill in the following details:
• Device Name: Put here a name to recognize the device.
• IP: Put here the IP address of the remote device to backup.
• Group: Select from the device groups drop-down list (Optional field).
• Vendor: Select Radware, from the drop-down list.
• Product: Select CID, from the drop-down list.
• Version: Select version 3.x and above, from the drop-down list.
• Backup type: Select Backup ASCII (WGET-HTTPS), from the drop-down list.
• Username: Put here “admin”.
• Password: Put here the password for the “admin” account on the remote server/device.
• Port: Change this value only if it is different than the port written.
2. Click on Save.

2.124. Radware DefensePro (3.x)
Pre-requirements: • Enable routing between the Radware device and the backup device.
• Enable HTTPS access (for WGET backup) from the backup device to the Radware device.
Backup configuration instructions: 1. From the BackBox upper pane, click on Devices -> click on Add -> fill in the following details:
• Device Name: Put here a name to recognize the device.
• IP: Put here the IP address of the remote device to backup.
• Group: Select from the device groups drop-down list (Optional field).
• Vendor: Select Radware, from the drop-down list.
• Product: Select DefensePro, from the drop-down list.
• Version: Select version 3.x, from the drop-down list.
• Backup type: Select Backup BER (WGET-HTTPS), from the drop-down list.
• Username: Put here “admin”.
• Password: Put here the password for the “admin” account on the remote server/device.
• Port: Change this value only if it is different than the port written.
2. Click on Save.

2.125. Radware DefensePro (4.x – 6.x)
Pre-requirements: • Enable routing between the Radware device and the backup device.
• Enable HTTPS access (for WGET backup) from the backup device to the Radware device.
Backup configuration instructions: 1. From the BackBox upper pane, click on Devices -> click on Add -> fill in the following details:
• Device Name: Put here a name to recognize the device.
• IP: Put here the IP address of the remote device to backup.
• Group: Select from the device groups drop-down list (Optional field).
• Vendor: Select Radware, from the drop-down list.
• Product: Select DefensePro, from the drop-down list.
• Version: Select version 4.x until 6.x, from the drop-down list.
• Backup type: Select Backup ASCII (WGET-HTTPS), from the drop-down list.
• Username: Put here “admin”.
• Password: Put here the password for the “admin” account on the remote server/device.
• Port: Change this value only if it is different than the port written.
2. Click on Save.

2.126. Radware LinkProof (4.x – 5.x)
Pre-requirements: • Enable routing between the Radware device and the backup device.
• Enable HTTPS access (for WGET backup) from the backup device to the Radware device.
Backup configuration instructions: 1. From the BackBox upper pane, click on Devices -> click on Add -> fill in the following details:
• Device Name: Put here a name to recognize the device.
• IP: Put here the IP address of the remote device to backup.
• Group: Select from the device groups drop-down list (Optional field).
• Vendor: Select Radware, from the drop-down list.
• Product: Select LinkProof, from the drop-down list.
• Version: Select version 4.x – 5.x, from the drop-down list.
• Backup type: Select Backup BER (WGET-HTTPS), from the drop-down list.
• Username: Put here “admin”.
• Password: Put here the password for the “admin” account on the remote server/device.
• Port: Change this value only if it is different than the port written.
2. Click on Save.

2.127. Radware LinkProof (6.x and above)
Pre-requirements: • Enable routing between the Radware device and the backup device.
• Enable HTTPS access (for WGET backup) from the backup device to the Radware device.
Backup configuration instructions: 1. From the BackBox upper pane, click on Devices -> click on Add -> fill in the following details:
• Device Name: Put here a name to recognize the device.
• IP: Put here the IP address of the remote device to backup.
• Group: Select from the device groups drop-down list (Optional field).
• Vendor: Select Radware, from the drop-down list.
• Product: Select LinkProof, from the drop-down list.
• Version: Select version 6.x and above, from the drop-down list.
• Backup type: Select Backup ASCII (WGET-HTTPS), from the drop-down list.
• Username: Put here “admin”.
• Password: Put here the password for the “admin” account on the remote server/device.
• Port: Change this value only if it is different than the port written.
2. Click on Save.

2.128. Radware WSD
Pre-requirements: • Enable routing between the Radware device and the backup device.
• Enable HTTPS access (for WGET backup) from the backup device to the Radware device.
Backup configuration instructions: 1. From the BackBox upper pane, click on Devices -> click on Add -> fill in the following details:
• Device Name: Put here a name to recognize the device.
• IP: Put here the IP address of the remote device to backup.
• Group: Select from the device groups drop-down list (Optional field).
• Vendor: Select Radware, from the drop-down list.
• Product: Select WSD, from the drop-down list.
• Version: Select the relevant version, from the drop-down list.
• Backup type: Select a backup type, from the drop-down list. Possible options:
• Backup BER (WGET-HTTPS) – backup configuration to a binary file.
• Backup CLI (WGET-HTTPS) – backup configuration to an ASCII file.
• Username: Put here “admin”.
• Password: Put here the password for the “admin” account on the remote server/device.
• Port: Change this value only if it is different than the port written.
2. Click on Save.

2.129. Redback RB400
Pre-requirements: • Enable routing between the Redback device and the backup device.
• Enable SSH access from the backup device to the Redback device.
Backup configuration instructions: 1. From the BackBox upper pane, click on Devices -> click on Add -> fill in the following details:
• Device Name: Put here a name to recognize the device.
• IP: Put here the IP address of the remote device to backup.
• Group: Select from the device groups drop-down list (Optional field).
• Vendor: Select Redback, from the drop-down list.
• Product: Select RB400, from the drop-down list.
• Version: Select the relevant version, from the drop-down list.
• Backup type: Select the backup type (SSH) , from the drop-down list.
• Username: Put here the username for the remove device.
• Password: Put here the password for the remote server/device.
3. Click on Save.

2.130. Riverbed Steelhead
Pre-requirements: • Enable routing between the Radware device and the backup device.
• Enable HTTPS access (for WGET backup) from the backup device to the Radware device.
Backup configuration instructions: 2. From the BackBox upper pane, click on Devices -> click on Add -> fill in the following details:
• Device Name: Put here a name to recognize the device.
• IP: Put here the IP address of the remote device to backup.
• Group: Select from the device groups drop-down list (Optional field).
• Vendor: Select Riverbed, from the drop-down list.
• Product: Select Steelhead, from the drop-down list.
• Version: Select the relevant version, from the drop-down list.
• Backup type: Select a backup type, from the drop-down list. Possible options:
• User/Pass (SSH) – backup configuration (requires username and password)
• User/Pass/Ena (SSH) – backup configuration (requires username, password, enable password)
• Username: Put here the username for the remove device.
• Password: Put here the password for the remote server/device.
• Enable Password: Put here the password for the enable command (when choosing User/Pass/Ena)
• Prompt after password: Change this value only if it is different than the prompt written.
• Prompt after Enable password: Change this value only if it is different than the prompt written.
• Port: Change this value only if it is different than the port written.
4. Click on Save.

2.131. SkyBox (Windows)
Pre-requirements: • Enable routing between the SkyBox server and the backup device.
• Enable FTP access from the SkyBox server to the backup device.
• Make sure the SkyBox server is configured to take a daily backup of the configuration.
Backup configuration instructions (create FTP account on the BackBox server): 1. Login to the BackBox web interface.
2. From the upper pane, click on Authentication -> Operating System Users -> supply account name and password.
3. Click Add.
Backup configuration instructions (inside the McAfee ePO server): 11. Login to the Windows server using administrative account.
12. Download from the Internet and install 7Zip on the server (http://www.7-zip.org)
13. Double click on “My Computer” -> double click on drive letter (for example drive C) -> right click -> New folder -> specify the name “SkyBoxBackup”.
14. Login to the BackBox web interface -> from the upper pane, click on Documents -> BackBox Documentation -> download the script SkyBox -> Windows.
15. Replace the value of the parameter FTPPassword with the password for the BackBox OS user “ftpbackbox” (if it is different than “backbox”)
Note: To change the “ftpbackbox” account password, login to the BackBox web interface -> Authentication -> Operating system users -> locate the account “ftpbackbox” -> click on Edit icon -> specify new password and confirm it -> click on Save.
16. Replace the value of the parameter FTPServer with the IP/hostname of the BackBox server.
17. Replace the value of the parameter ServerIP with the main IP address of the SkyBox server.
18. Save the file as C:\SkyBoxBackup\SkyBoxBackup.bat
19. Create a schedule task to run the file bellow at regular intervals:
C:\SkyBoxBackup\SkyBoxBackup.bat

Backup configuration instructions (inside the BackBox web console): 3. From the BackBox upper pane, click on Devices -> click on Add -> fill in the following details:
• Device Name: Put here a name to recognize the device.
• IP: Put here the IP address of the remote device.
• Group: Select from the device groups drop-down list (Optional field).
• Vendor: Select SkyBox, from the drop-down list.
• Product: Select Firewall, from the drop-down list.
• Version: Select the relevant version, from the drop-down list.
• Backup type: Select a backup type, from the drop-down list.
• Username: Put here the ftpbackbox
• Password: Put here the password for the “ftpbackbox” account on the BackBox server.
4. Click on Save.

2.132. SonicWall NSA 2400
Pre-requirements: • Enable routing between the SonicWall appliance and the backup device.
• Enable SSH access from the backup device to the Sonicwall appliance
• Enable FTP access from the Sonicwall appliance to the backup device
Backup configuration instructions: 1. From the BackBox upper pane, click on Devices -> click on Add -> fill in the following details:
• Device Name: Put here a name to recognize the device.
• IP: Put here the IP address of the remote device to backup.
• Group: Select from the device groups drop-down list (Optional field).
• Vendor: Select SonicWall, from the drop-down list.
• Product: Select NSA 2400, from the drop-down list.
• Version: Select the relevant version, from the drop-down list.
• Backup type: Select a backup type, from the drop-down list.
• Username: Put here the username for the remote device.
• Password: Put here the password for the remote server/device.
• Port: Change this value only if it is different than the port written.
2. Click on Save.

2.133. StoneSoft StoneGate Management 5.3.4
Pre-requirements: • Enable routing between the StoneSoft device and the backup device.
• Enable SSH access, from the backup device to the StoneSoft device.
Backup configuration instructions: 1. From the BackBox upper pane, click on Devices -> click on Add -> fill in the following details:
• Device Name: Put here a name to recognize the device.
• IP: Put here the IP address of the remote device to backup.
• Group: Select from the device groups drop-down list (Optional field).
• Vendor: Select StoneSoft, from the drop-down list.
• Product: Select Management Center, from the drop-down list.
• Version: Select the relevant version, from the drop-down list.
• Backup type: Select a backup type, from the drop-down list.
• Username: Put here the username to access the remote device.
• Password: Put here the password to access the remote device.
• Port: Change this value only if it is different than the port written.
• Prompt after password: Change this value only if it is different than the prompt written.
2. Click on Save.

2.134. Symantec Brightmail Gateway 9.0
Pre-requirements: • Enable routing between the Symantec Brightmail Gateway and the backup device.
• Enable FTP access from the Symantec Brightmail Gateway to the backup device.
Note: The Brightmail requires port 21TCP and random high port for the FTP.
• Make sure the clock on the Symantec Brightmail Gateway is synched or configured to sync with NTP server.
Backup configuration instructions (create FTP account on the BackBox server): 1. Login to the BackBox web interface.
2. From the upper pane, click on Authentication -> Operating System Users -> supply account name and password.
3. Click Add.
Backup configuration instructions (inside the Brightmail web console): 1. Open an internet browser and login to the address:
https://<Brightmail_IP_Address>
2. Supply credentials to login to the management console.
3. From the upper pane, click on Administration.
4. From the left pane, under Hosts, click on Version.
5. Click on Add.
6. Fill in the following details:
• Backup description - specify backup name.
• Backup Data - choose either “Full Backup”, "Backup only Configuration and Incidents" or "Backup only Configuration, Incidents, Logs and Reports".
• Generate backup at - select specified hour (at least 10 minutes before the time you have configured in the BackBox application).

7. Under Backup To, select “Store backup on a remote location using FTP
• Host/IP address - specify here the hostname or the IP address of the BackBox server.
• Path - specify here the following path:
/
Note: Make sure the above path contains the character “/” at the end of the path.
• Requires authentication - select this field.
• User name - specify here the FTP account to the BackBox server.
• Password - specify here the password for the FTP account.
8. Click on Save.
9. From the upper pane, click Log Out.
Backup configuration instructions (inside the BackBox web console): 1. From the BackBox upper pane, click on Devices -> click on Add -> fill in the following details:
• Device Name: Put here a name to recognize the device.
• IP: Put here the IP address of the remote device.
• Group: Select from the device groups drop-down list (Optional field).
• Vendor: Select Symantec, from the drop-down list.
• Product: Select Brightmail Gateway, from the drop-down list.
• Version: Select the relevant version, from the drop-down list.
• Backup type: Select Backup (Local), from the drop-down list.
• Username: Put here the username for the “FTP account”.
• Password: Put here the password for the “FTP account” account on the remote server/device.
2. Click on Save.

2.135. Symantec Brightmail Gateway 9.0 (SCP)
Pre-requirements: • Enable routing between the Symantec Brightmail and the backup device.
• Enable SSH access from the backup device to the Symantec Brightmail.
Backup configuration instructions: 1. From the BackBox upper pane, click on Devices -> click on Add -> fill in the following details:
• Device Name: Put here a name to recognize the device.
• IP: Put here the IP address of the remote device to backup.
• Group: Select from the device groups drop-down list (Optional field).
• Vendor: Select Symantec, from the drop-down list.
• Product: Select Brightmail Gateway, from the drop-down list.
• Version: Select the relevant version, from the drop-down list.
• Backup type: Select Backup (SSH), from the drop-down list.
• Username: Put here “admin”.
• Password: Put here the password for the “admin” account on the remote server/device.
• Prompt after password: Change this value only if it is different than the prompt written.
• Port: Change this value only if it is different than the port written.
2. Click on Save.

2.136. Symantec Endpoint Protection 11
Pre-requirements: • Enable routing between the SEP11 server and the backup device.
• Enable FTP access from the SEP11 server to the backup device.
• Make sure the clock on the SEP11 server is synched or configured to sync with NTP server.
Backup configuration instructions (create FTP account on the BackBox server): 1. Login to the BackBox web interface.
2. From the upper pane, click on Authentication -> Operating System Users -> supply account name and password.
3. Click Add.
Backup configuration instructions (inside the SEP11 server): 1. Login to the Windows server using administrative account.
2. Start -> Programs -> Symantec Endpoint Protection Manager -> Symantec Endpoint Protection Manager Console.
3. Supply the credentials to the console and click Log On.
4. Under View Servers, click the icon that represents the Microsoft SQL or embedded database and whose backup settings you want to change.
5. Under Tasks, click Edit Backup Settings.
6. In the Backup Site for Local Site dialog box, change number of backups to keep to 1.

7. Select Schedule backups and specify the backup frequency.
For example:
8. Click OK.
9. Close the management console.
10. Login to the Windows server using administrative account.
11. Download from the Internet and install 7Zip on the server (http://www.7-zip.org)
12. Double click on “My Computer” -> double click on drive letter (for example drive C) -> right click -> New folder -> specify the name “SEP11Backup”.
13. Login to the BackBox web interface -> from the upper pane, click on Documents -> BackBox Documentation -> download the script Symantec -> Endpoint Protection.
14. Replace the value of the parameter FTPPassword with the password for the BackBox OS user “ftpbackbox” (if it is different than “backbox”)
Note: To change the “ftpbackbox” account password, login to the BackBox web interface -> Authentication -> Operating system users -> locate the account “ftpbackbox” -> click on Edit icon -> specify new password and confirm it -> click on Save.
15. Replace the value of the parameter FTPServer with the IP/hostname of the BackBox server.
16. Replace the value of the parameter ServerIP with the main IP address of the SEP server.
17. Save the file as C:\SEP11Backup\SEP11Backup.bat
18. Create a schedule task to run the file bellow at regular intervals:
C:\SEP11Backup\SEP11Backup.bat

Backup configuration instructions (inside the BackBox web console): 1. From the BackBox upper pane, click on Devices -> click on Add -> fill in the following details:
• Device Name: Put here a name to recognize the device.
• IP: Put here the IP address of the remote device.
• Group: Select from the device groups drop-down list (Optional field).
• Vendor: Select Symantec, from the drop-down list.
• Product: Select Endpoint Protection, from the drop-down list.
• Version: Select the relevant version, from the drop-down list.
• Backup type: Select a backup type, from the drop-down list.
• Username: Put here the ftpbackbox
• Password: Put here the password for the “ftpbackbox” account on the BackBox server.
2. Click on Save.

2.137. Tenor - Quintun
Pre-requirements: • Enable routing between the Quintun server and the backup device.
• Enable FTP access from the backup device server to the Quintun.
Backup configuration instructions (inside the BackBox web console): 1. From the BackBox upper pane, click on Devices -> click on Add -> fill in the following details:
• Device Name: Put here a name to recognize the device.
• IP: Put here the IP address of the remote device.
• Group: Select from the device groups drop-down list (Optional field).
• Vendor: Select Tenor, from the drop-down list.
• Product: Select Quintun, from the drop-down list.
• Version: Select All, from the drop-down list.
• Backup type: Select Backup (Local), from the drop-down list.
• Username: Put here the username for the Quintun admin account.
• Password: Put here the password for the Quintun admin account
2. Click on Save.

2.138. TippingPoint SMS
Pre-requirements: • Enable routing between the TippingPoint SMS server and the backup device.
• Enable SCP access from the TippingPoint SMS server to the backup device.
• Make sure the clock on the TippingPoint SMS server is synched or configured to sync with NTP server.
Backup configuration instructions (create FTP account on the BackBox server): 1. Login to the BackBox web interface.
2. From the upper pane, click on Authentication -> Operating System Users -> supply account name and password.
3. Click Add.
Backup configuration instructions (inside the BackBox web console): 3. From the BackBox upper pane, click on Devices -> click on Add -> fill in the following details:
• Device Name: Put here a name to recognize the device.
• IP: Put here the IP address of the remote device.
• Group: Select from the device groups drop-down list (Optional field).
• Vendor: Select TippingPoint, from the drop-down list.
• Product: Select SMS, from the drop-down list.
• Version: Select 2.5 or above, from the drop-down list.
• Backup type: Select Backup (Local), from the drop-down list.
• Username: Put here the username for the “FTP account”.
• Password: Put here the password for the “FTP account”.
4. Click on Save.

Backup configuration instructions (inside the TippingPoint SMS Client): 1. Open TippingPoint SMS client.
2. Specify credentials to login.
3. From the upper pane, click on Admin
4. From the left pane, click on Database.
5. In the Scheduled Backups area, click New:
• Schedule Name - specify TippingPoint_Database_Backup
• Recurrence Pattern – Daily
• Every - specify the time to run the backup during non-peak hours
6. Click Next
7. Backup configuration page:
• Include 1 of the most recent Digital Vaccine(s)
• Include 0 of the most recent Device TOS package
• Unselect "Email the backup results"
8. Click Next
9. Backup location -> select SCP -> click Next
10. Remote Configuration page:
• Location: host:/data/External_Backup/username/TippingPoint_Backup.bak
• Replace "host" with the IP address of the BackBox
• Replace "username" with the username created on the BackBox for the backup process.
• Username: specify here the username created on the BackBox
• Password: specify here the password for the above account.
11. Click Next
12. Click Finish
13. Close the TippingPoint SMS client.

2.139. TrendMicro IMSS 7.x (Windows)
Pre-requirements: • Enable routing between the IMSS server and the backup device.
• Enable FTP access from the IMSS server to the backup device.
• Make sure the clock on the IMSS server is synched or configured to sync with NTP server.
Backup configuration instructions (create FTP account on the BackBox server): 1. Login to the BackBox web interface.
2. From the upper pane, click on Authentication -> Operating System Users -> supply account name and password.
3. Click Add.
Backup configuration instructions (inside the IMSS server): 1. Login to the Windows server using administrative account.
2. Double click on “My Computer” -> double click on drive letter (for example drive C) -> right click -> New folder -> specify the name “IMSSBackup”.
3. Login to the BackBox web interface -> from the upper pane, click on Documents -> BackBox Documentation -> download the script TrendMicro -> IMSS.
4. Replace the value of the parameter FTPPassword with the password for the BackBox OS user “ftpbackbox” (if it is different than “backbox”)
Note: To change the “ftpbackbox” account password, login to the BackBox web interface -> Authentication -> Operating system users -> locate the account “ftpbackbox” -> click on Edit icon -> specify new password and confirm it -> click on Save.
5. Replace the value of the parameter FTPServer with the IP/hostname of the BackBox server.
6. Replace the value of the parameter ServerIP with the main IP address of the IMSS server.
7. Save the file as C:\IMSSBackup\IMSSBackup.bat
8. Create a schedule task to run the file bellow at regular intervals:
C:\IMSSBackup\IMSSBackup.bat

Backup configuration instructions (inside the BackBox web console): 1. From the BackBox upper pane, click on Devices -> click on Add -> fill in the following details:
• Device Name: Put here a name to recognize the device.
• IP: Put here the IP address of the remote device.
• Group: Select from the device groups drop-down list (Optional field).
• Vendor: Select TrendMicro, from the drop-down list.
• Product: Select IMSS, from the drop-down list.
• Version: Select the relevant version, from the drop-down list.
• Backup type: Select a backup type, from the drop-down list.
• Username: Put here the ftpbackbox
• Password: Put here the password for the “ftpbackbox” account on the BackBox server.
2. Click on Save.

2.140. TrendMicro IMSVA
Pre-requirements: • Enable routing between the TrendMicro IMSVA and the backup device.
• Enable SSH access from the backup device to the TrendMicro IMSVA.
Backup configuration instructions: 1. From the BackBox upper pane, click on Devices -> click on Add -> fill in the following details:
• Device Name: Put here a name to recognize the device.
• IP: Put here the IP address of the remote device to backup.
• Group: Select from the device groups drop-down list (Optional field).
• Vendor: Select TrendMicro, from the drop-down list.
• Product: Select IMSVA, from the drop-down list.
• Version: Select the relevant version, from the drop-down list.
• Backup type: Select a backup type, from the drop-down list.
• Username: Put here “root”.
• Password: Put here the password for the “root” account on the remote server/device.
• Prompt after password: Change this value only if it is different than the prompt written.
• Port: Change this value only if it is different than the port written.
2. Click on Save.

2.141. TrendMicro IWSS 2.2
Pre-requirements: • Enable routing between the TrendMicro IWSS and the backup device.
• Enable SSH access from the backup device to the TrendMicro IWSS.
Backup configuration instructions: 1. From the BackBox upper pane, click on Devices -> click on Add -> fill in the following details:
• Device Name: Put here a name to recognize the device.
• IP: Put here the IP address of the remote device to backup.
• Group: Select from the device groups drop-down list (Optional field).
• Vendor: Select TrendMicro, from the drop-down list.
• Product: Select IWSS, from the drop-down list.
• Version: Select the relevant version, from the drop-down list.
• Backup type: Select a backup type, from the drop-down list.
• Username: Put here “root”.
• Password: Put here the password for the “root” account on the remote server/device.
• Prompt after password: Change this value only if it is different than the prompt written.
• Port: Change this value only if it is different than the port written.
2. Click on Save.

2.142. TrendMicro IWSS 3.1 Virtual Appliance (IWSVA)
Pre-requirements: • Enable routing between the TrendMicro IWSVA and the backup device.
• Enable SSH access from the backup device to the TrendMicro IWSVA.
• Login to the IWSVA console, and run the command: service sshd start
• Login to the IWSVA console, and run the command:
iptables -A INPUT -p tcp -s 0/0 -d 0/0 --destination-port 22 -j ACCEPT
Backup configuration instructions: 1. From the BackBox upper pane, click on Devices -> click on Add -> fill in the following details:
• Device Name: Put here a name to recognize the device.
• IP: Put here the IP address of the remote device to backup.
• Group: Select from the device groups drop-down list (Optional field).
• Vendor: Select TrendMicro, from the drop-down list.
• Product: Select IWSVA, from the drop-down list.
• Version: Select the relevant version, from the drop-down list.
• Backup type: Select a backup type, from the drop-down list.
• Username: Put here “root”.
• Password: Put here the password for the “root” account on the remote server/device.
• Prompt after password: Change this value only if it is different than the prompt written.
• Port: Change this value only if it is different than the port written.
2. Click on Save.

2.143. TrendMicro IWSS 5.x Virtual Appliance (IWSVA)
Pre-requirements: • Enable routing between the TrendMicro IWSVA and the backup device.
• Enable SSH access from the backup device to the TrendMicro IWSVA.
Backup configuration instructions: 1. From the BackBox upper pane, click on Devices -> click on Add -> fill in the following details:
• Device Name: Put here a name to recognize the device.
• IP: Put here the IP address of the remote device to backup.
• Group: Select from the device groups drop-down list (Optional field).
• Vendor: Select TrendMicro, from the drop-down list.
• Product: Select IWSVA, from the drop-down list.
• Version: Select the relevant version, from the drop-down list.
• Backup type: Select a backup type, from the drop-down list.
• Username: Put here “root”.
• Password: Put here the password for the “root” account on the remote server/device.
• Prompt after password: Change this value only if it is different than the prompt written.
• Port: Change this value only if it is different than the port written.
2. Click on Save.

2.144. TrendMicro OfficeScan
Pre-requirements: • Enable routing between the OfficeScan server and the backup device.
• Enable FTP access from the OfficeScan server to the backup device.
• Make sure the clock on the OfficeScan server is synched or configured to sync with NTP server.
Backup configuration instructions (create FTP account on the BackBox server): 1. Login to the BackBox web interface.
2. From the upper pane, click on Authentication -> Operating System Users -> supply account name and password.
3. Click Add.
Backup configuration instructions (inside the OfficeScan server): 1. Login to the Windows server using administrative account.
2. Start -> Programs -> TrendMicro OfficeScan Server -> OfficeScan Web Console (HTML).
3. Supply the credentials to login to the console.
4. From the left pane, click on Administration -> Database Backup.
5. From the database backup schedule, change the date to “Daily” and specify start time (for example 23:00).
6. Click Save.
7. Logoff the OfficeScan console.
8. Download from the Internet and install 7Zip on the server (http://www.7-zip.org)
9. Double click on “My Computer” -> double click on drive letter (for example drive C) -> right click -> New folder -> specify the name “OfficeScanBackup”.
10. Login to the BackBox web interface -> from the upper pane, click on Documents -> BackBox Documentation -> download the script TrendMicro -> OfficeScan.
11. Replace the value of the parameter FTPPassword with the password for the BackBox OS user “ftpbackbox” (if it is different than “backbox”)
Note: To change the “ftpbackbox” account password, login to the BackBox web interface -> Authentication -> Operating system users -> locate the account “ftpbackbox” -> click on Edit icon -> specify new password and confirm it -> click on Save.
12. Replace the value of the parameter FTPServer with the IP/hostname of the BackBox server.
13. Replace the value of the parameter ServerIP with the main IP address of the OfficeScan server.
14. Save the file as C:\OfficeScanBackup\OfficeScanBackup.bat

15. Create a schedule task to run the file bellow at regular intervals:
C:\OfficeScanBackup\OfficeScanBackup.bat
Backup configuration instructions (inside the BackBox web console): 1. From the BackBox upper pane, click on Devices -> click on Add -> fill in the following details:
• Device Name: Put here a name to recognize the device.
• IP: Put here the IP address of the remote device.
• Group: Select from the device groups drop-down list (Optional field).
• Vendor: Select TrendMicro, from the drop-down list.
• Product: Select OfficeScan, from the drop-down list.
• Version: Select the relevant version, from the drop-down list.
• Backup type: Select a backup type, from the drop-down list.
• Username: Put here the ftpbackbox
• Password: Put here the password for the “ftpbackbox” account on the BackBox server.
2. Click on Save.

2.145. Tufin SecureTrack/SecureChange Workflow
Pre-requirements: • Enable routing between the Tufin server and the backup device.
• Enable SSH access from the backup device to the Tufin server.
Backup configuration instructions: 1. From the BackBox upper pane, click on Devices -> click on Add -> fill in the following details:
• Device Name: Put here a name to recognize the device.
• IP: Put here the IP address of the remote device to backup.
• Group: Select from the device groups drop-down list (Optional field).
• Vendor: Select Tufin, from the drop-down list.
• Product: Select SecureTrack, from the drop-down list.
• Version: Select the relevant version, from the drop-down list.
• Backup type: Select a backup type, from the drop-down list.
• Username: Put here “root”.
• Password: Put here the password for the “root” account on the remote server/device.
• Prompt after password: Change this value only if it is different than the prompt written.
• Port: Change this value only if it is different than the port written.
2. Click on Save.

2.146. VMware ESXi 4.1 and above
Pre-requirements: • Enable routing between the VMware server and the backup device.
• Enable SSH access from the backup device to the VMware server.
Backup configuration instructions (inside the VMware server console): 1. Connect to the server console via KVM. 2. Press F2 to Customize System Settings.
3. Click on “Configure Password” -> set password for the root account. 4. Navigate to Troubleshooting Options.

5. Click on "Enable Remote Tech Support (SSH)”
6. Exit the console.

Backup configuration instructions: 1. From the BackBox upper pane, click on Devices -> click on Add -> fill in the following details:
• Device Name: Put here a name to recognize the device.
• IP: Put here the IP address of the remote device to backup.
• Group: Select from the device groups drop-down list (Optional field).
• Vendor: Select VMware, from the drop-down list.
• Product: Select ESXi, from the drop-down list.
• Version: Select the relevant version, from the drop-down list.
• Backup type: Select a backup type, from the drop-down list.
• Username: Put here “root”.
• Password: Put here the password for the “root” account on the remote server/device.
• Prompt after password: Change this value only if it is different than the prompt written.
• Port: Change this value only if it is different than the port written.
2. Click on Save.

2.147. WatchGuard XCS
Pre-requirements: • Enable routing between the WatchGuard appliance and the backup device.
• Enable HTTPS access from the backup device to the WatchGuard appliance.
Backup configuration instructions: 1. From the BackBox upper pane, click on Devices -> click on Add -> fill in the following details:
• Device Name: Put here a name to recognize the device.
• IP: Put here the IP address of the remote device to backup.
• Group: Select from the device groups drop-down list (Optional field).
• Vendor: Select WatchGuard, from the drop-down list.
• Product: Select XCS, from the drop-down list.
• Version: Select the relevant version, from the drop-down list.
• Backup type: Select a backup type, from the drop-down list.
• Username: Put here username to access the remote device
• Password: Put here the password for the account on the remote server/device.
• Port: Change this value only if it is different than the port written.
2. Click on Save.

2.148. WatchGuard XTM
Pre-requirements: • Enable routing between the WatchGuard appliance and the backup device.
• Enable SSH access (4118TCP) from the backup device to the WatchGuard appliance.
Backup configuration instructions: 1. From the BackBox upper pane, click on Devices -> click on Add -> fill in the following details:
• Device Name: Put here a name to recognize the device.
• IP: Put here the IP address of the remote device to backup.
• Group: Select from the device groups drop-down list (Optional field).
• Vendor: Select WatchGuard, from the drop-down list.
• Product: Select XTM, from the drop-down list.
• Version: Select the relevant version, from the drop-down list.
• Backup type: Select a backup type, from the drop-down list.
• Username: Put here username to access the remote device
• Password: Put here the password for the account on the remote server/device.
• Port: Change this value only if it is different than the port written.
2. Click on Save.

2.149. Websense Content Gateway
Pre-requirements: • Enable routing between the WebSense server and the backup device.
• Enable SSH access from the backup device to the WebSense server.
Backup configuration instructions: 1. From the BackBox upper pane, click on Devices -> click on Add -> fill in the following details:
• Device Name: Put here a name to recognize the device.
• IP: Put here the IP address of the remote device to backup.
• Group: Select from the device groups drop-down list (Optional field).
• Vendor: Select Websense, from the drop-down list.
• Product: Select Content Gateway, from the drop-down list.
• Version: Select the relevant version, from the drop-down list.
• Backup type: Select a backup type, from the drop-down list.
• Username: Put here “root”.
• Password: Put here the password for the “root” account on the remote server/device.
• Prompt after password: Change this value only if it is different than the prompt written.
• Port: Change this value only if it is different than the port written.
2. Click on Save.

2.150. Websense Content Gateway Management
Pre-requirements: • Enable routing between the Websense Management server and the backup device.
• Enable FTP access from the Websense Management server to the backup device.
• Make sure the clock on the Websense Management server is synched or configured to sync with NTP server.
Backup configuration instructions (create FTP account on the BackBox server): 1. Login to the BackBox web interface.
2. From the upper pane, click on Authentication -> Operating System Users -> supply account name and password.
3. Click Add.
Backup configuration instructions (inside the Websense Management server): 1. Login to the Windows server using administrative account.
2. Double click on “My Computer” -> double click on drive letter (for example drive C) -> right click -> New folder -> specify the name “WebSenseBackup”.
3. Login to the BackBox web interface -> from the upper pane, click on Documents -> BackBox Documentation -> download the script Websense -> Content Management Gateway.
4. Replace the value of the parameter FTPPassword with the password for the BackBox OS user “ftpbackbox” (if it is different than “backbox”)
Note: To change the “ftpbackbox” account password, login to the BackBox web interface -> Authentication -> Operating system users -> locate the account “ftpbackbox” -> click on Edit icon -> specify new password and confirm it -> click on Save.
5. Replace the value of the parameter FTPServer with the IP/hostname of the BackBox server.
6. Replace the value of the parameter ServerIP with the main IP address of the Websense server.
7. In-case the Websense is installed on different path, replace the string bellow accordingly:
"C:\Program Files\Websense\bin\wsbackup.exe"
8. Save the file as C:\WebSenseBackup\WebSenseManagement75Backup.bat
9. Create a schedule task to run the file bellow at regular intervals: C:\WebSenseBackup\WebSenseManagement75Backup.bat

Backup configuration instructions (inside the BackBox web console): 1. From the BackBox upper pane, click on Devices -> click on Add -> fill in the following details:
• Device Name: Put here a name to recognize the device.
• IP: Put here the IP address of the remote device.
• Group: Select from the device groups drop-down list (Optional field).
• Vendor: Select Websense, from the drop-down list.
• Product: Select Content Gateway Management, from the drop-down list.
• Version: Select the relevant version, from the drop-down list.
• Backup type: Select a backup type, from the drop-down list.
• Username: Put here the ftpbackbox
• Password: Put here the password for the “ftpbackbox” account on the BackBox server.
2. Click on Save.

2.151. Websense Web Security 7.5
Pre-requirements: • Enable routing between the Websense Web Security server and the backup device.
• Enable FTP access from the Websense Web Security server to the backup device.
• Make sure the clock on the Websense Web Security server is synched or configured to sync with NTP server.
Backup configuration instructions (create FTP account on the BackBox server): 1. Login to the BackBox web interface.
2. From the upper pane, click on Authentication -> Operating System Users -> supply account name and password.
3. Click Add.
Backup configuration instructions (inside the Websense Web Security server): 1. Login to the Windows server using administrative account.
2. Double click on “My Computer” -> double click on drive letter (for example drive C) -> right click -> New folder -> specify the name “WebSenseBackup”.
3. Login to the BackBox web interface -> from the upper pane, click on Documents -> BackBox Documentation -> download the script Websense -> Content Management Gateway.
4. Replace the value of the parameter FTPPassword with the password for the BackBox OS user “ftpbackbox” (if it is different than “backbox”)
Note: To change the “ftpbackbox” account password, login to the BackBox web interface -> Authentication -> Operating system users -> locate the account “ftpbackbox” -> click on Edit icon -> specify new password and confirm it -> click on Save.
5. Replace the value of the parameter FTPServer with the IP/hostname of the BackBox server.
6. Replace the value of the parameter ServerIP with the main IP address of the Websense server.
7. In-case the Websense is installed on different path, replace the string bellow accordingly:
"C:\Program Files\Websense\bin\wsbackup.exe"
8. Save the file as C:\WebSenseBackup\WebSenseManagement75Backup.bat
9. Create a schedule task to run the file bellow at regular intervals: C:\WebSenseBackup\WebSenseManagement75Backup.bat

Backup configuration instructions (inside the BackBox web console): 1. From the BackBox upper pane, click on Devices -> click on Add -> fill in the following details:
• Device Name: Put here a name to recognize the device.
• IP: Put here the IP address of the remote device.
• Group: Select from the device groups drop-down list (Optional field).
• Vendor: Select Websense, from the drop-down list.
• Product: Select Web Security, from the drop-down list.
• Version: Select the relevant version, from the drop-down list.
• Backup type: Select a backup type, from the drop-down list.
• Username: Put here the ftpbackbox
• Password: Put here the password for the “ftpbackbox” account on the BackBox server.
2. Click on Save.

2.152. Websense DLP
Pre-requirements: • Enable routing between the Websense DLP server and the backup device.
• Enable FTP access from the Websense DLP server to the backup device.
• Make sure the clock on the Websense DLP server is synched or configured to sync with NTP server.
Backup configuration instructions (create FTP account on the BackBox server): 1. Login to the BackBox web interface.
2. From the upper pane, click on Authentication -> Operating System Users -> supply account name and password.
3. Click Add.
Backup configuration instructions (inside the Websense DLP server): 1. Login to the Windows server using administrative account.
2. Download from the Internet and install 7Zip on the server (http://www.7-zip.org)
3. Double click on “My Computer” -> double click on drive letter (for example drive C) -> right click -> New folder -> specify the name “WebSenseDLPBackup”.
4. Login to the BackBox web interface -> from the upper pane, click on Documents -> BackBox Documentation -> download the script Websense -> DLP -> select either 7.5 or 7.6 according to the required build.
5. Replace the value of the parameter FTPPassword with the password for the BackBox OS user “ftpbackbox” (if it is different than “backbox”)
Note: To change the “ftpbackbox” account password, login to the BackBox web interface -> Authentication -> Operating system users -> locate the account “ftpbackbox” -> click on Edit icon -> specify new password and confirm it -> click on Save.
6. Replace the value of the parameter FTPServer with the IP/hostname of the BackBox server.
7. Replace the value of the parameter ServerIP with the main IP address of the Websense server.
8. In-case the Websense is installed on different path, replace the string bellow accordingly:
"C:\Program Files\Websense\Data Security\CPSBackup.vbs"
9. Save the file as C:\WebSenseDLPBackup\WebSenseDLP75Backup.bat
10. Create a schedule task to run the file bellow at regular intervals:
C:\WebSenseDLPBackup\WebSenseDLPBackup.bat

Backup configuration instructions (inside the BackBox web console): 1. From the BackBox upper pane, click on Devices -> click on Add -> fill in the following details:
• Device Name: Put here a name to recognize the device.
• IP: Put here the IP address of the remote device.
• Group: Select from the device groups drop-down list (Optional field).
• Vendor: Select Websense, from the drop-down list.
• Product: Select DLP, from the drop-down list.
• Version: Select the relevant version, from the drop-down list.
• Backup type: Select a backup type, from the drop-down list.
• Username: Put here the ftpbackbox
• Password: Put here the password for the “ftpbackbox” account on the BackBox server.
2. Click on Save.

2.153. Websense Triton 7.6
Pre-requirements: • Enable routing between the Websense server and the backup device.
• Enable FTP access from the Websense server to the backup device.
• Make sure the clock on the Websense server is synched or configured to sync with NTP server.
Backup configuration instructions (create FTP account on the BackBox server): 1. Login to the BackBox web interface.
2. From the upper pane, click on Authentication -> Operating System Users -> supply account name and password.
3. Click Add.
Backup configuration instructions (inside the Websense server): 1. Login to the Windows server using administrative account.
2. Download from the Internet and install 7Zip on the server (http://www.7-zip.org)
3. Double click on “My Computer” -> double click on drive letter (for example drive C) -> right click -> New folder -> specify the name “WebSenseTritonBackup”.
4. Login to the BackBox web interface -> from the upper pane, click on Documents -> BackBox Documentation -> download the script Websense -> Triton
5. Replace the value of the parameter FTPPassword with the password for the BackBox OS user “ftpbackbox” (if it is different than “backbox”)
Note: To change the “ftpbackbox” account password, login to the BackBox web interface -> Authentication -> Operating system users -> locate the account “ftpbackbox” -> click on Edit icon -> specify new password and confirm it -> click on Save.
6. Replace the value of the parameter FTPServer with the IP/hostname of the BackBox server.
7. Replace the value of the parameter ServerIP with the main IP address of the Websense server.
8. In-case the Websense is installed on different path, replace the string bellow accordingly:
"C:\Program Files (x86)\Websense\EIP Infra\EIPBackup.vbs"
9. Save the file as C:\WebSenseTritonBackup\WebsenseTritonBackup.bat
10. Create a schedule task to run the file bellow at regular intervals:
C:\WebSenseTritonBackup\WebsenseTritonBackup.bat

Backup configuration instructions (inside the BackBox web console): 1. From the BackBox upper pane, click on Devices -> click on Add -> fill in the following details:
• Device Name: Put here a name to recognize the device.
• IP: Put here the IP address of the remote device.
• Group: Select from the device groups drop-down list (Optional field).
• Vendor: Select Websense, from the drop-down list.
• Product: Select TRITON, from the drop-down list.
• Version: Select the relevant version, from the drop-down list.
• Backup type: Select a backup type, from the drop-down list.
• Username: Put here the ftpbackbox
• Password: Put here the password for the “ftpbackbox” account on the BackBox server.
2. Click on Save.


![How to think[box] Playbook](https://img.dokumen.tips/doc/110x75/58a2dbf91a28ab2e458b752e/how-to-thinkbox-playbook.jpg)


![[Back office services] how to empower your back office services team](https://img.dokumen.tips/doc/110x75/5480bd6ab4795946578b4788/back-office-services-how-to-empower-your-back-office-services-team.jpg)


