Embed Size (px)
Citation preview

Avaya Call Management SystemRelease 12LAN Backup User Guide
Document ID 585-215-721Issue 1.2
June 2004
© 2004 Avaya Inc.All Rights Reserved.
NoticeWhile reasonable efforts were made to ensure that the information in this document was complete and accurate at the time of printing, Avaya Inc. can assume no liability for any errors. Changes and corrections to the information in this document may be incorporated in future releases.
Documentation disclaimerAvaya Inc. is not responsible for any modifications, additions, or deletions to the original published version of this documentation unless such modifications, additions, or deletions were performed by Avaya. Customer and/or End User agree to indemnify and hold harmless Avaya, Avaya's agents, servants and employees against all claims, lawsuits, demands and judgments arising out of, or in connection with, subsequent modifications, additions or deletions to this documentation to the extent made by the Customer or End User.
Link disclaimerAvaya Inc. is not responsible for the contents or reliability of any linked Web sites and does not necessarily endorse the products, services, or information described or offered within them. We cannot guarantee that these links will work all of the time and we have no control over the availability of the linked pages.
WarrantyAvaya Inc. provides a limited warranty on this product. Refer to your sales agreement to establish the terms of the limited warranty. In addition, Avaya�s standard warranty language, as well as information regarding support for this product, while under warranty, is available through the following Web site:http://www.avaya.com/support
Preventing toll fraud"Toll fraud" is the unauthorized use of your telecommunications system by an unauthorized party (for example, anyone who is not a corporate employee, agent, subcontractor, or person working on your company's behalf). Be aware that there may be a risk of toll fraud associated with your system and that, if toll fraud occurs, it can result in substantial additional charges for your telecommunications services.
Avaya fraud interventionIf you suspect that you are being victimized by toll fraud and you need technical assistance or support, call Technical Service Center Toll Fraud Intervention Hotline at +1-800-643-2353 for the United States and Canada. For additional support telephone numbers, see the Avaya Web site:http://www.avaya.com/support
Providing telecommunications securityTelecommunications security (of voice, data, and video communications) is the prevention of any type of intrusion to (that is, either unauthorized or malicious access to or use of) your company's telecommunications equipment by some party.Your company's "telecommunications equipment" includes both this Avaya product and any other voice/data/video equipment that could be accessed via this Avaya product (that is, "networked equipment").An "outside party" is anyone who is not a corporate employee, agent, subcontractor, or person working on your company's behalf. Whereas, a "malicious party" is anyone (including someone who may be otherwise authorized) who accesses your telecommunications equipment with either malicious or mischievous intent.Such intrusions may be either to/through synchronous (time-multiplexed and/or circuit-based) or asynchronous (character-, message-, or packet-based) equipment or interfaces for reasons of:
� Use (of capabilities special to the accessed equipment)� Theft (such as, of intellectual property, financial assets, or
toll-facility access)� Eavesdropping (privacy invasions to humans)� Mischief (troubling, but apparently innocuous, tampering)� Harm (such as harmful tampering, data loss or alteration,
regardless of motive or intent)Be aware that there may be a risk of unauthorized intrusions associated with your system and/or its networked equipment. Also realize that, if such an intrusion should occur, it could result in a variety of losses to your company (including, but not limited to, human and data privacy, intellectual property, material assets, financial resources, labor costs, and legal costs).
Your responsibility for your company's telecommunications securityThe final responsibility for securing both this system and its networked equipment rests with you, an Avaya customer's system administrator, your telecommunications peers, and your managers. Base the fulfillment of your responsibility on acquired knowledge and resources from a variety of sources, including, but not limited to:
� Installation documents� System administration documents� Security documents� Hardware-/software-based security tools� Shared information between you and your peers� Telecommunications security experts
To prevent intrusions to your telecommunications equipment, you and your peers should carefully program and configure:
� Your Avaya-provided telecommunications systems and their interfaces
� Your Avaya-provided software applications, as well as their underlying hardware/software platforms and interfaces
� Any other equipment networked to your Avaya products.
TrademarksAvaya is a trademark of Avaya Inc.MultiVantage is a trademark of Avaya.Communication Manager is a trademark of Avaya.DEFINITY is a trademark of Avaya.All non-Avaya trademarks are the property of their respective owners.Document ordering information:Avaya Publications CenterVoice: +1-207-866-6701
1-800-457-1764 (Toll-free, U.S. and Canada only)
Fax: +1-207-626-72691-800-457-1764 (Toll-free, U.S. and Canada only)
Write: Globalware Solutions200 Ward Hill AvenueHaverhill, MA 01835 USAAttention: Avaya Account Manager
Web: http://www.avaya.com/support E-mail: [email protected] Order: Document No. 585-215-721, Issue 1.2
June 2004For the most current versions of documentation, go to the Avaya support Web site:http://www.avaya.com/support
Avaya supportAvaya provides a telephone number for you to use to report problems or to ask questions about your contact center. The support telephone number is 1-800-242-2121 in the United States. For additional support telephone numbers, see the Avaya Web site:http://www.avaya.com/support
Issue 1.2 June 2004 3
Preface . . . . . . . . . . . . . . . . . . . . . . . . . . . . . . . . . . . . . . . . 7Purpose . . . . . . . . . . . . . . . . . . . . . . . . . . . . . . . . . . . . . . . . 7Intended users . . . . . . . . . . . . . . . . . . . . . . . . . . . . . . . . . . . . . 8Overview . . . . . . . . . . . . . . . . . . . . . . . . . . . . . . . . . . . . . . . 8Conventions and terminology . . . . . . . . . . . . . . . . . . . . . . . . . . . . . . 9Reasons for reissue . . . . . . . . . . . . . . . . . . . . . . . . . . . . . . . . . . 9Availability . . . . . . . . . . . . . . . . . . . . . . . . . . . . . . . . . . . . . . . 10Related documentation . . . . . . . . . . . . . . . . . . . . . . . . . . . . . . . . . 11
Change description . . . . . . . . . . . . . . . . . . . . . . . . . . . . . . . . . . 11Software documents . . . . . . . . . . . . . . . . . . . . . . . . . . . . . . . . . 11Administration documents . . . . . . . . . . . . . . . . . . . . . . . . . . . . . . . 12Avaya CMS upgrade documents . . . . . . . . . . . . . . . . . . . . . . . . . . . . 12
Base load upgrades . . . . . . . . . . . . . . . . . . . . . . . . . . . . . . . . 12Platform upgrades and data migration . . . . . . . . . . . . . . . . . . . . . . . . 13Avaya Call Management System Upgrade Express (CUE) . . . . . . . . . . . . . . 13
Hardware documents . . . . . . . . . . . . . . . . . . . . . . . . . . . . . . . . . 14Communication Manager documents. . . . . . . . . . . . . . . . . . . . . . . . . . 14Documentation Web sites . . . . . . . . . . . . . . . . . . . . . . . . . . . . . . . 15
Support . . . . . . . . . . . . . . . . . . . . . . . . . . . . . . . . . . . . . . . . 16
Overview of the LAN backup feature . . . . . . . . . . . . . . . . . . . . . . . . . . . 17Required software . . . . . . . . . . . . . . . . . . . . . . . . . . . . . . . . . . . 18Required hardware . . . . . . . . . . . . . . . . . . . . . . . . . . . . . . . . . . . 18Support restrictions . . . . . . . . . . . . . . . . . . . . . . . . . . . . . . . . . . . 19General roles and responsibilities . . . . . . . . . . . . . . . . . . . . . . . . . . . . 19
Software configuration for LAN backups . . . . . . . . . . . . . . . . . . . . . . . . 21Prerequisites . . . . . . . . . . . . . . . . . . . . . . . . . . . . . . . . . . . . . . 22Initial configuration of the Avaya CMS software for LAN backup . . . . . . . . . . . . . . 23Recommended ON-Bar configurations. . . . . . . . . . . . . . . . . . . . . . . . . . 23Recommended Tivoli storage manager client configurations for Avaya CMS . . . . . . . . 25
Verifying dsm.opt . . . . . . . . . . . . . . . . . . . . . . . . . . . . . . . . . . . 25Verifying dsm.sys . . . . . . . . . . . . . . . . . . . . . . . . . . . . . . . . . . . 26Specifying the location of the XBSA library . . . . . . . . . . . . . . . . . . . . . . . 27Generating the Tivoli password file . . . . . . . . . . . . . . . . . . . . . . . . . . . 28Verifying the presence of the include and exclude list . . . . . . . . . . . . . . . . . . 29
Avaya Call Management SystemRelease 12
LAN Backup User Guide
Contents

Contents
4 LAN Backup User Guide
Recording network information . . . . . . . . . . . . . . . . . . . . . . . . . . . . . 30
Backing up and restoring data . . . . . . . . . . . . . . . . . . . . . . . . . . . . . . 31Recommendations for backing up data . . . . . . . . . . . . . . . . . . . . . . . . . 32Performing a system backup . . . . . . . . . . . . . . . . . . . . . . . . . . . . . . 33
When to perform a system backup . . . . . . . . . . . . . . . . . . . . . . . . . . . 33Setting up automated system backups . . . . . . . . . . . . . . . . . . . . . . . . . 33Backing up the system on demand. . . . . . . . . . . . . . . . . . . . . . . . . . . 34
Performing a data backup . . . . . . . . . . . . . . . . . . . . . . . . . . . . . . . 35When to perform a data backup . . . . . . . . . . . . . . . . . . . . . . . . . . . . 35Setting up automated data backups . . . . . . . . . . . . . . . . . . . . . . . . . . 35Backing up data on demand . . . . . . . . . . . . . . . . . . . . . . . . . . . . . . 35
Restoring Avaya CMS data . . . . . . . . . . . . . . . . . . . . . . . . . . . . . . . 37Restoring Avaya CMS data from a data backup. . . . . . . . . . . . . . . . . . . . . 37Restoring specific files from a data backup . . . . . . . . . . . . . . . . . . . . . . . 38
Restoring an Avaya CMS system . . . . . . . . . . . . . . . . . . . . . . . . . . . . 38Prerequisites . . . . . . . . . . . . . . . . . . . . . . . . . . . . . . . . . . . . . 38Enabling the system to boot . . . . . . . . . . . . . . . . . . . . . . . . . . . . . . 39
Booting from the Solaris software CD-ROM . . . . . . . . . . . . . . . . . . . . . 39Selecting your network settings . . . . . . . . . . . . . . . . . . . . . . . . . . . 40Configuring your Kerberos security policy . . . . . . . . . . . . . . . . . . . . . . 41Selecting your regional settings . . . . . . . . . . . . . . . . . . . . . . . . . . . 41Selecting the Solaris software packages . . . . . . . . . . . . . . . . . . . . . . . 42Configuring the disk drives . . . . . . . . . . . . . . . . . . . . . . . . . . . . . 43Assigning a root password . . . . . . . . . . . . . . . . . . . . . . . . . . . . . 45Enabling the Korn shell . . . . . . . . . . . . . . . . . . . . . . . . . . . . . . . 45
Restoring an Avaya CMS system and data . . . . . . . . . . . . . . . . . . . . . . . 45Recovering a non-mirrored system after data disk failure . . . . . . . . . . . . . . . . . 53
Prerequisites . . . . . . . . . . . . . . . . . . . . . . . . . . . . . . . . . . . . . 53Recovering a non-mirrored system. . . . . . . . . . . . . . . . . . . . . . . . . . . 53
Recovering a mirrored system after a mirrored pair of data disks fail . . . . . . . . . . . 55Platform considerations . . . . . . . . . . . . . . . . . . . . . . . . . . . . . . . . 55Prerequisites . . . . . . . . . . . . . . . . . . . . . . . . . . . . . . . . . . . . . 55Recovering a mirrored system . . . . . . . . . . . . . . . . . . . . . . . . . . . . . 56
Troubleshooting the LAN backup feature . . . . . . . . . . . . . . . . . . . . . . . . 57Basic troubleshooting. . . . . . . . . . . . . . . . . . . . . . . . . . . . . . . . . . 57Backup logs . . . . . . . . . . . . . . . . . . . . . . . . . . . . . . . . . . . . . . 58
backup.log . . . . . . . . . . . . . . . . . . . . . . . . . . . . . . . . . . . . . . 58bar_act.log . . . . . . . . . . . . . . . . . . . . . . . . . . . . . . . . . . . . . . 60dsierror.log . . . . . . . . . . . . . . . . . . . . . . . . . . . . . . . . . . . . . . 60dsmerror.log . . . . . . . . . . . . . . . . . . . . . . . . . . . . . . . . . . . . . 60restore.log . . . . . . . . . . . . . . . . . . . . . . . . . . . . . . . . . . . . . . 61
Configuring the network settings on an Avaya CMS system. . . . . . . . . . . . . . . . 63Enabling DNS on an Avaya CMS system . . . . . . . . . . . . . . . . . . . . . . . . 65Troubleshooting the include and exclude list . . . . . . . . . . . . . . . . . . . . . . . 66

Contents
Issue 1.2 June 2004 5
Storage pool variable error messages . . . . . . . . . . . . . . . . . . . . . . . . . . 68Verifying the network card settings . . . . . . . . . . . . . . . . . . . . . . . . . . . 69Checking shared memory parameters . . . . . . . . . . . . . . . . . . . . . . . . . . 71Restarting a restore after it has stopped . . . . . . . . . . . . . . . . . . . . . . . . . 73
Appendix A: Mirrored system disk pairs . . . . . . . . . . . . . . . . . . . . . . . . . 75
Appendix B: Mirror disk hardware configurations . . . . . . . . . . . . . . . . . . . 77
Appendix C: Example policy domain. . . . . . . . . . . . . . . . . . . . . . . . . . . 81
Appendix D: Example Avaya CMS scheduler policy . . . . . . . . . . . . . . . . . . 83
Glossary . . . . . . . . . . . . . . . . . . . . . . . . . . . . . . . . . . . . . . . . 87
Index . . . . . . . . . . . . . . . . . . . . . . . . . . . . . . . . . . . . . . . . 93

Contents
6 LAN Backup User Guide

Issue 1.2 June 2004 7
Preface
Avaya Call Management System (CMS) is an application for businesses and organizations that use Avaya communication servers to process large volumes of telephone calls using the Automatic Call Distribution (ACD) feature. Avaya CMS supports solutions for routing and agent selection, multi-site contact centers, remote agents, reporting, interfaces to other systems, workforce management, desktop applications, system recovery, and quality monitoring.
Avaya CMS is part of the Operational Effectiveness solution of the Avaya Customer Interaction Suite.
This section includes the following topics:
● Purpose on page 7
● Intended users on page 8
● Overview on page 8
● Conventions and terminology on page 9
● Reasons for reissue on page 9
● Availability on page 10
● Related documentation on page 11
● Support on page 16
PurposeThe purpose of this document is to describe how to use the LAN backup feature with Avaya CMS.

Preface
8 LAN Backup User Guide
Intended usersThis document is written for:
● Avaya support personnel
● Contact center administrators
● Tivoli administrators
Users of this document must be familiar with Tivoli Storage manager, Avaya CMS, and the Solaris operating system.
OverviewThis document includes the following topics:
● Overview of the LAN backup feature on page 17
Provides an overview of the supported LAN backup software, supported hardware and support information.
● Software configuration for LAN backups on page 21
Provides the LAN backup configuration procedures.
● Backing up and restoring data on page 31
Provides the file system backup procedures and recovery procedures.
● Troubleshooting the LAN backup feature on page 57
Provides information on how to fix various software - related problems.
● Appendix A: Mirrored system disk pairs on page 75
Provides the disk layout of mirrored systems.
● Appendix B: Mirror disk hardware configurations on page 77
Provides the disk drive hardware configuration of mirrored systems.
● Appendix C: Example policy domain on page 81
Provides an example of a policy domain.
● Appendix D: Example Avaya CMS scheduler policy on page 83
Provides an example of a scheduler policy.

Conventions and terminology
Issue 1.2 June 2004 9
Conventions and terminologyIf you see any of the following safety labels in this document, take careful note of the information presented.
! CAUTION:CAUTION: Caution statements call attention to situations that can result in harm to
software, loss of data, or an interruption in service.
! WARNING:WARNING: Warning statements call attention to situations that can result in harm to
hardware or equipment.
! DANGER:DANGER: Danger statements call attention to situations that can result in harm to
personnel.
! SECURITY ALERT:SECURITY ALERT: Security alert statements call attention to situations that can increase the
potential for unauthorized use of a telecommunications system.
Reasons for reissueThis document differs from the previous issue in the following ways:
● Updated Required software on page 18 with additional supported software versions.
● A general update and correction of a variety of small problems, such as typographical errors, was done.

Preface
10 LAN Backup User Guide
AvailabilityCopies of this document are available from one or both of the following sources:
Note:Note: Although there is no charge to download documents through the Avaya Web
site, documents ordered from the Avaya Publications Center must be purchased.
● The Avaya online support Web site, http://www.avayadocs.com
● The Avaya Publications Center, which you can contact by:
Voice: +1-207-866-6701+1-800-457-1764 (Toll-free, U.S. and Canada only)
Fax: +1-207-626-7269+1-800-457-1764 (Toll-free, U.S. and Canada only)
Mail: GlobalWare Solutions200 Ward Hill AvenueHaverhill, MA 01835 USAAttention: Avaya Account Manager
E-mail: [email protected]

Related documentation
Issue 1.2 June 2004 11
Related documentationYou might find the following Avaya CMS documentation useful. This section includes the following topics:
● Change description on page 11
● Software documents on page 11
● Administration documents on page 12
● Avaya CMS upgrade documents on page 12
● Hardware documents on page 14
● Communication Manager documents on page 14
● Documentation Web sites on page 15
Change descriptionFor information about the changes made in Avaya CMS R12, see:
● Avaya Call Center 2.1 and CMS Release 12 Change Description, 07-300197
Software documentsFor more information about Avaya CMS software, see:
● Avaya Call Management System Release 12 Software Installation, Maintenance, and Troubleshooting Guide, 585-215-117
● Avaya CMS Open Database Connectivity, 585-780-701
● Avaya Call Management System Release 12 LAN Backup User Guide, 585-215-721
● Avaya Call Management System Release 12 External Call History Interface, 07-300064
● Avaya CMS Custom Reports, 585-215-822
● Avaya CMS Forecast, 585-215-825
● Avaya Visual Vectors Release 12 Installation and Getting Started, 07-300069
● Avaya Visual Vectors Release 12 User Guide, 07-300200
● Avaya Business Advocate Release 12 User Guide, 07-300063
● Avaya CMS Release 12 Report Designer User Guide, 07-300068

Preface
12 LAN Backup User Guide
Administration documentsFor more information about Avaya CMS administration, see:
● Avaya Call Management System Release 12 Administration, 07-300062
● Avaya Call Management System Database Items and Calculations, 07-300011
● Avaya CMS Supervisor Release 12 Reports, 07-300012
● Avaya CMS Supervisor Release 12 Installation and Getting Started, 07-300009
● Avaya Call Management System High Availability User Guide, 07-300065
● Avaya Call Management System High Availability Connectivity, Upgrade and Administration, 07-300065
Avaya CMS upgrade documentsThere are several upgrade paths supported with Avaya CMS. There is a document designed to support each upgrade. None of the following upgrade documents are available from the publications center.
This section includes the following topics:
● Base load upgrades on page 12
● Platform upgrades and data migration on page 13
● Avaya Call Management System Upgrade Express (CUE) on page 13
Base load upgrades
Use a base load upgrade when upgrading CMS to the latest load of the same version (for example, R3V9 ak.g to R3V9 al.k). A specific set of instructions is written for the upgrade and is shipped to the customer site with the CMS software CD-ROM as part of a Quality Protection Plan Change Notice (QPPCN).
For more information about base load upgrades, see:
● Avaya CMS R12 Base Load Upgrades

Related documentation
Issue 1.2 June 2004 13
Platform upgrades and data migration
Use a platform upgrade when upgrading to a new hardware platform (for example, upgrading from a SPARCserver 5 to a Sun Blade 150). The new hardware platform is shipped from the Avaya factory with the latest CMS load. Therefore, as part of the upgrade you will have the latest CMS load (for example, R3V9 to R12 or the latest load of the same CMS version). For R12, a specific set of instructions is written for the upgrade and is shipped to the customer site with the new hardware.
For more information about platform upgrades and data migration, see:
● Avaya Call Management System Release 12 Platform Upgrade and Data Migration, 07-300067
Avaya Call Management System Upgrade Express (CUE)
Use CUE in the following conditions:
● CMS is being upgraded from an earlier version (for example R3V6) to the latest version (for example, R12).
● The hardware platform is not changing.
A specific set of upgrade instructions is written for the upgrade and is shipped to the customer site with the CUE kit.
For more information about CUE upgrades, see:
● Avaya Call Management System (CMS) Release 12 CMS Upgrade Express (CUE) Customer Requirements, 07-300010
● Avaya Call Management System Release 12 Sun Blade 100 Workstation CMS Upgrade Express
● Avaya Call Management System Release 12 Sun Blade 100 Workstation Mirrored System CMS Upgrade Express
● Avaya Call Management System Release 12 Sun Enterprise 3500 Computer CMS Upgrade Express
● Avaya Call Management System Release 12 Sun Enterprise 3500 Computer Mirrored System CMS Upgrade Express
● Avaya Call Management System Release 12 Sun Fire V880 Computer CMS Upgrade Express

Preface
14 LAN Backup User Guide
Hardware documentsFor more information about Avaya CMS hardware, see:
● Avaya Call Management System Sun Fire V880 Computer Hardware Installation, Maintenance, and Troubleshooting, 585-215-116
● Avaya Call Management System Sun Fire V880 Computer Connectivity Diagram, 585-215-612
● Avaya Call Management System Sun Blade 100/150 Computer Hardware Installation, Maintenance, and Troubleshooting, 585-310-783
● Call Management System Sun Blade 100/150 Computer Connectivity Diagram, 585-310-782
● Avaya Call Management System Sun Enterprise 3500 Computer Hardware Installation, Maintenance, and Troubleshooting, 585-215-873
● Call Management System Sun Enterprise 3500 Computer Connectivity Diagram, 585-215-877
● Avaya Call Management System Terminals, Printers, and Modems, 585-215-874
Communication Manager documentsFor more information about Avaya CMS communication servers, see:
● Avaya Call Management System Switch Connections, Administration, and Troubleshooting, 585-215-876
● Avaya Communication Manager Call Center Software - Call Vectoring and Expert Agent Selection (EAS) Guide, 07-300186
● Avaya Communication Manager Call Center Software - Automatic Call Distribution (ACD) Guide, 07-300185
● Avaya Communication Manager Call Center Software - Basic Call Management System (BCMS) Operations, 07-300061

Related documentation
Issue 1.2 June 2004 15
Documentation Web sitesFor product documentation for all Avaya products and related documentation, go to http://www.avayadocs.com. Additional information about new software or hardware updates will be contained in future issues of this book. New issues of this book will be placed on the Web site when available.
Use the following Web sites to view related support documentation:
● Information about Avaya products and service
http://www.avaya.com
● Sun hardware documentation
http://docs.sun.com
● Okidata printer documentation
http://www.okidata.com
● Informix documentation
http://www.informix.com
● Tivoli Storage Manager documentation
http://www.tivoli.com

Preface
16 LAN Backup User Guide
SupportContacting Avaya technical supportAvaya provides support telephone numbers for you to report problems or ask questions about your product.
For United States support:
1- 800- 242-2121
For international support:
See the 1-800 Support Directory listings on the Avaya Web site.
Escalating a technical support issueAvaya Global Services Escalation Management provides the means to escalate urgent service issues. For more information, see the Escalation Management listings on the Avaya Web site.

Issue 1.2 June 2004 17
Overview of the LAN backup feature
The Avaya Call Management System (CMS) LAN backup feature provides an alternative to the traditional method of backing up and restoring data. In the past, the only way to backup and restore data was to use a tape device located with the Avaya CMS system. LAN backup allows you to back up Avaya CMS data and system information over a local area network (LAN) to a storage manager. The storage manager is a software package that controls where, how, and when the data is stored.
The benefits of using the Avaya CMS LAN backup feature are:
● Automated data backups
● Centralized storage location for backing up multiple Avaya CMS servers
● Faster data backups and restores (dependent on network configuration and traffic)
This section includes the following topics:
● Required software on page 18
● Required hardware on page 18
● Support restrictions on page 19
● General roles and responsibilities on page 19

Overview of the LAN backup feature
18 LAN Backup User Guide
Required softwareThe following software is required to use the LAN backup feature:
● Storage manager client software
- Tivoli Storage Manager UNIX Backup/Archive Clients Version 5.2.0
- Tivoli Data Protection for Informix Version 4.1.3
● Tivoli storage manager server software
Note:Note: The only storage manager software packages that have been certified by
Avaya are:
● Tivoli Storage Manager (TSM) Version 5.2.0
● Tivoli Storage Manager (TSM) Version 4.2.0
● Avaya CMS R12 and any associated software
Required hardwareThe following hardware is required to use the LAN backup feature:
● A storage device that is capable of interfacing with the storage manager software
● A network server for the storage manager server software
Note:Note: An Avaya CMS system cannot be used as the storage manager server.
● Any hardware required by Avaya CMS R12

Support restrictions
Issue 1.2 June 2004 19
Support restrictionsLAN backup is not supported with:
● High Availability configurations
● Data migration
General roles and responsibilitiesThe Tivoli storage manager product is very sophisticated. You must be familiar with the Tivoli storage manager software product before using the Avaya CMS LAN backup feature. This document is not intended to replace the Tivoli storage manager documentation.
Note:Note: Some useful Tivoli Storage Manager documents are:
● Tivoli Storage Manager Installing the Clients
● Tivoli Storage Manager Quick Reference for the Backup-Archive Clients
● Tivoli Data Protection for Informix Installation and User�s Guide
A useful Informix document is:
● Informix Backup and Restore Guide
The following table summarizes the various tasks and responsibilities involved with setting up and maintaining an Avaya CMS system that is using the LAN backup feature.
Task Customer Avaya support1
Obtaining the storage manager client and server software
X N/A
Obtaining a network server for the storage manager server software
X N/A
Installing the storage manager client and server software
X N/A
Obtaining a storage device capable of interfacing with the storage manager
X N/A

Overview of the LAN backup feature
20 LAN Backup User Guide
Installing the Data Protection for Informix
X N/A
Configuring the server software for LAN backups
X N/A
Configuring the Avaya CMS system software for LAN backup
X X
Backing up Avaya CMS data X N/A
Backing up the Avaya CMS system
X N/A
Restoring Avaya CMS data X N/A
Installing new hardware N/A X
Enabling the Avaya CMS system to boot for a system restore
N/A X
Preparing the system for a restore over the LAN
X N/A
Restoring the Avaya CMS system data
X N/A
Troubleshooting the storage manager server software
X N/A
Troubleshooting the storage manager server
X N/A
Troubleshooting the LAN X N/A
Troubleshooting the storage manager client software
X N/A
1. Additional support provided by Avaya Inc. could result in additional time and material expenses.
Task Customer Avaya support1

Issue 1.2 June 2004 21
Software configuration for LAN backups
This section contains the procedures for configuring an Avaya Call Management System (CMS) for use with the LAN backup feature. The customer is responsible for the installation of the Tivoli software and the configuration of the Tivoli storage manager server software.
This section includes the following topics:
● Prerequisites on page 22
● Initial configuration of the Avaya CMS software for LAN backup on page 23
● Recommended ON-Bar configurations on page 23
● Recommended Tivoli storage manager client configurations for Avaya CMS on page 25
● Recording network information on page 30

Software configuration for LAN backups
22 LAN Backup User Guide
PrerequisitesBefore configuring any Avaya CMS software for the LAN backup, the customer must perform the following tasks:
● You must be familiar with the Tivoli storage manager software product.
● Install the Tivoli storage manager client software on the Avaya CMS system.
● Install the Tivoli storage manager server software.
● Install the Tivoli Data Protection for Informix software.
● Register the Tivoli storage manager licenses.
● Perform any customization required by the storage manager server software.
● Verify that the storage manager server can detect storage manager clients.
● Verify the node name of the server where the storage manager server software resides
● Register the client node of the Avaya CMS system with the server software.
● Obtain the password and user ID for the client node of the Avaya CMS system. This password and user ID was created when the Avaya CMS client node was registered with the server software.
● Verify that the sm_versions file contains the correct storage manager version. The file is located at $INFORMIX/etc/sm_versions
● Create a policy domain for the Avaya CMS client node.
The procedures for performing these prerequisites can be found in the Tivoli documentation. For more information about the Tivoli software installation, see Tivoli Data Protection for Informix Installation and User�s Guide, Tivoli Storage Manager Installing the Clients, Tivoli Storage Manager Quick Reference for the Backup-Archive Clients, or the appropriate Tivoli storage manager quick-start guide.

Initial configuration of the Avaya CMS software for LAN backup
Issue 1.2 June 2004 23
Initial configuration of the Avaya CMS software for LAN backup
Currently, no additional configuration of the Avaya CMS software is required to use the LAN backup feature.
Recommended ON-Bar configurationsThe ON-Bar configuration should already be correctly configured for your Avaya CMS system. Use the following procedure to check the current ON-Bar configuration and make any necessary adjustments.
To check the Informix ON-Bar configuration for use with LAN backup:
1. Set the IDS environment by entering:
. /opt/informix/bin/setenv
2. Enter:
cat /opt/informix/etc/onconfig.cms
3. Verify that the Informix configuration parameters for Avaya CMS have been set up.
For more information, see "Setting the Informix configuration parameters for Avaya CMS" in Avaya CMS R12 Software Installation, Maintenance, and Troubleshooting Guide, 585-215-117.

Software configuration for LAN backups
24 LAN Backup User Guide
4. Verify that the BAR_ACT_LOG setting is:
/cms/install/logdir/bar_act.log
Example:
5. Choose one of the following:
● If the settings are correct, go to Recommended Tivoli storage manager client configurations for Avaya CMS on page 25.
● If the settings are not correct for the Avaya CMS system:
i. Enter:
vi /opt/informix/etc/onconfig.cms
ii. Change any required settings in the onconfig.cms file.
iii. When finished press Esc. Then enter:
:wq!
iv. Go to Recommended Tivoli storage manager client configurations for Avaya CMS on page 25.
#**************************************************************************# INFORMIX SOFTWARE, INC.# Title: onconfig.cms# Description: Informix Dynamic Server Configuration Parameters for CMS#**************************************************************************..............................................................................# Backup/Restore variables
BAR_ACT_LOG /cms/install/logdir/bar_act.log BAR_MAX_BACKUP 0 BAR_RETRY 1 BAR_NB_XPORT_COUNT 10 BAR_XFER_BUF_SIZE 31 ..............................................................................JVPCLASSPATH

Recommended Tivoli storage manager client configurations for Avaya CMS
Issue 1.2 June 2004 25
Recommended Tivoli storage manager client configurations for Avaya CMS
Information on installing the Tivoli storage manager client can be found in Tivoli Storage Manager Installing the Clients or the appropriate Tivoli storage manager quick-start guide.
This section includes the following topics:
● Verifying dsm.opt on page 25
● Verifying dsm.sys on page 26
● Specifying the location of the XBSA library on page 27
● Generating the Tivoli password file on page 28
● Verifying the presence of the include and exclude list on page 29
Verifying dsm.optTo verify that the dsm.opt file has been set up correctly:
1. Enter:
cat /usr/bin/dsm.opt
2. Verify that the file contains the SErvername setting. The SErvername setting should contain the host name of the server running the storage manager server software.
Example:
3. Choose one of the following:
a. If the setting is correct, continue with Verifying dsm.sys on page 26.
b. If the setting is not correct, perform the following steps:
************************************************************************* Tivoli Storage Manager ** ** Sample Client User Options file for UNIX (dsm.opt.smp) *************************************************************************................................................* SErvername A server name defined in the dsm.sys fileSErvername server_1

Software configuration for LAN backups
26 LAN Backup User Guide
i. Enter:
vi /usr/bin/dsm.opt
ii. Change any required settings in the dsm.opt file.
iii. Press Esc. Then enter:
:wq!
iv. Continue with Verifying dsm.sys on page 26
Verifying dsm.sysTo verify that the dsm.sys file has been set up correctly:
1. Enter:
cat /usr/bin/dsm.sys
The file should contain the following settings:
● SErvername should contain the host name of the server running the storage manager server software.
● COMMmethod should be set to TCPip.
● TCPServeraddress should contain the host and domain name of the Tivoli server.
● PasswordAccess should be set to generate.
● inclexcl should contain the correct path for the include/exclude lists for the LAN backup. The path is /cms/LANbkup/incl_excl/backup_excl.tivoli
● errorlogname should contain the correct path for the Tivoli storage manager error log. The path is /cms/install/logdir/dsmerror.log
● schedlogname should contain the correct path for the Tivoli storage manager schedule log. The path is /cms/install/logdir/dsmsched.log

Recommended Tivoli storage manager client configurations for Avaya CMS
Issue 1.2 June 2004 27
● schedlogretention should be set to 60
Example:
2. Choose one of the following:
a. If the settings are correct, go to Generating the Tivoli password file on page 28.
b. If the settings are not correct, perform the following procedure:
i. Enter:
vi /usr/bin/dsm.sys
ii. Change any required settings in the dsm.sys file.
iii. Press Esc. Then enter:
:wq!
iv. Go to Specifying the location of the XBSA library on page 27.
Specifying the location of the XBSA libraryTo specify the location of the XBSA library:
1. Enter the following command:
ln -s /opt/tivoli/tsm/client/informix/bin/libTDPinf.so /opt/informix/lib/ibsad001.so
2. Go to Generating the Tivoli password file on page 28.
************************************************************************* Tivoli Storage Manager *................................................SErvername server_1 COMMmethod TCPip TCPPort 1500 TCPServeraddress server_1.domain.company.com
PasswordAccess generate
inclexcl /cms/LANbkup/incl_excl/backup_excl.tivolierrorlogname /cms/install/logdir/dsmerror.logschedlogname /cms/install/logdir/dsmsched.logschedlogretention 60

Software configuration for LAN backups
28 LAN Backup User Guide
Generating the Tivoli password fileA Tivoli password file must be generated on the Avaya CMS system. If this file is not created, system restores will fail. The password was set up when the Avaya CMS client node was registered with the storage manager server software. This password is controlled by the customer but the customer is required to provide this password to technical support personnel as needed. This password grants access to only the Avaya CMS node, not to any other client nodes. This file needs to be created only during a new client software installation, or if the storage manager client password has changed.
To generate a password file:
1. Enter:
cd /tmp
2. Access the command line mode of the storage manager by entering:
dsmc
The system displays one of the following messages depending on your TSM version:
● If your TSM is Version 4.2.0, the prompt changes to tsm>
● If your TSM is Version 5.2.0, the system attempts to query any data that is backed up, and then displays the following message:
3. Choose one of the following procedures:
● If your TSM is Version 4.2.0, perform the following procedure:
i. Enter:
query backup /
The system attempts to query any data that is backed up, and then displays the following message:
! Important:! Important:Important: Ignore any error messages about the backup.
ii. Enter the user ID.
The system displays the following message:
iii. Enter the password for the Tivoli storage manager server software.
Please enter your user ID (default):
Please enter your user ID (default):
Please enter password for user ID "default"

Recommended Tivoli storage manager client configurations for Avaya CMS
Issue 1.2 June 2004 29
iv. Verify that the password file was created by entering:
query backup /
The system should not display prompts for a user ID and password. If the system does display these prompts, repeat this procedure.
! Important:! Important:Important: Ignore any error messages about the backup.
● If your TSM is Version 5.2.0, perform the following procedure:
i. Enter the user ID.
The system displays the following message:
ii. Enter the password for the Tivoli storage manager server software.
! Important:! Important:Important: Ignore any error messages about the backup.
4. Go to Verifying the presence of the include and exclude list on page 29.
Verifying the presence of the include and exclude listTo verify the presence of the include and exclude list:
1. Enter:
cd /cms/LANbkup/incl_excl
2. Enter:
ls
The system displays the following message:
3. If the include and exclude list does not exist, contact Avaya technical support or your product representative for more information.
Please enter password for user ID "default"
backup_excl.tivoli

Software configuration for LAN backups
30 LAN Backup User Guide
Recording network informationSome networking information is specific for the individual Avaya CMS system. This information can be very helpful for technical support personnel who may be troubleshooting your system. Use the following table to record your network information:
Avaya CMS system network information
Host name
IP address
Subnet mask
IP address of the gateway (also called the default router)
IP address of the DNS server
Tivoli storage manager
Server host name
Node name(also called the host name)

Issue 1.2 June 2004 31
Backing up and restoring data
This section contains the procedures used to back up and restore data on your Avaya Call Management System (CMS). The Avaya CMS LAN backup feature works two ways, depending on the type of data to be backed up:
● Data backup - Runs through the Informix tool ON-Bar
ON-Bar interfaces with the storage manager using the X/Open Backup Services Application Programmer's Interface (XBSA interface). ON-Bar backs up the data in the Informix database and the system tables.
● System backup - Uses a storage manager to manage the backup and restore
The storage manager is either Tivoli Storage Manager (TSM) Version 4.2.0 or Tivoli Storage Manager (TSM) Version 5.2.0. The storage manager backs up the Avaya CMS operating-system files.
This section includes the following topics:
● Recommendations for backing up data on page 32
● Performing a system backup on page 33
● Performing a data backup on page 35
● Restoring Avaya CMS data on page 37
● Restoring an Avaya CMS system on page 38
● Recovering a non-mirrored system after data disk failure on page 53
● Recovering a mirrored system after a mirrored pair of data disks fail on page 55

Backing up and restoring data
32 LAN Backup User Guide
Recommendations for backing up dataAvaya recommends the following:
● Routine backups should be scheduled to occur when network traffic is low.
● Avaya CMS data should be backed up with a full backup on a weekly basis.
● Avaya CMS data should be backed up with an incremental backup on a daily basis.
● Avaya CMS system information should be backed up with a full backup on a monthly basis.
● Avaya CMS system information should be backed up with an incremental backup on a weekly basis.
● The three most recent system backups should be maintained for every Avaya CMS system.
● Schedule the Avaya CMS data backup to occur immediately after the system backup.
● A tape backup of the system is still required for data migrations.
● Create a separate policy domain for the Avaya CMS systems.
● Verify that your LAN backup is correctly backing up your data before you discontinue using a tape device for system backups.
Performing a system backup
Issue 1.2 June 2004 33
Performing a system backupThis section describes how to back up the Avaya CMS system data. The Avaya CMS system backup, is a backup option you can use instead of the CMSADM tape backup. The system backup saves all of the file systems on the computer, including:
● Solaris system files and programs
● Avaya CMS programs
The system backup does not save Avaya CMS data tables.
This section includes the following topics:
● When to perform a system backup on page 33
● Setting up automated system backups on page 33
● Backing up the system on demand on page 34
When to perform a system backupPerform the system backup:
● After the Avaya CMS is provisioned
This backup contains the Solaris system files and programs and Avaya CMS configuration data placed on the computer by TSC provisioning personnel.
● Before and after the Avaya CMS software is upgraded
● Once a month
Setting up automated system backupsSee Tivoli Storage manager Quick Reference for the Backup-Archive Clients for information on how to configure the storage manager software to automate system backups. See Recommendations for backing up data on page 32 for more information.

Backing up and restoring data
34 LAN Backup User Guide
Backing up the system on demandTo back up your Avaya CMS system data outside of the normal backup schedule:
1. Enter:
/cms/LANbkup/bin/backup.tivoli X
where X is one of the following:
● 1 for an incremental data backup
● 0 for a full data backup
Note:Note: The Tivoli documentation refers to the full data backup as a selective
backup.
2. Verify that the backup has completed successfully by entering:
cat /cms/install/logdir/backup.log
For more information, see Backup logs on page 58.
3. Perform a data backup. For more information, see Performing a data backup on page 35.
Additional referencesFor information about backing up data, see Tivoli Storage manager Quick Reference for the Backup-Archive Clients.
Performing a data backup
Issue 1.2 June 2004 35
Performing a data backupThis section describes how to backup the Avaya CMS data in the Informix database and the system tables. The Avaya CMS data backup, is a backup option you can use instead of the Avaya CMS maintenance tape backup. You can perform a full or incremental backup of the Avaya CMS data. The data backup does not back up the Avaya CMS operating system files.
This section includes the following topics:
● When to perform a data backup on page 35
● Setting up automated data backups on page 35
● Backing up data on demand on page 35
When to perform a data backupPerform the data backup:
● Immediately after a system backup
● Before and after the Avaya CMS software is upgraded
● On a daily basis
Setting up automated data backupsSee Tivoli Data Protection for Informix Installation and User�s Guide for information on how to configure the storage manager server software to automate data backups. See Recommendations for backing up data on page 32 for more information.
Backing up data on demandTo back up your Avaya CMS data outside of the normal backup schedule:
1. Enter:
/cms/LANbkup/bin/onbar_backup.tivoli X
where X is one of the following:
● 1 for an incremental data backup
● 0 for a full data backup

Backing up and restoring data
36 LAN Backup User Guide
Note:Note: The Tivoli documentation refers to the full data backup as a selective
backup.
2. Verify that the backup has completed successfully by entering the following commands:
cat /cms/install/logdir/backup.log
cat /cms/install/logdir/bar_act.log
For more information, see Backup logs on page 58.
Additional referencesFor more information about backing up data, see the Informix Backup and Restore Guide.

Restoring Avaya CMS data
Issue 1.2 June 2004 37
Restoring Avaya CMS dataUse the restore command to obtain copies of backed up files from the server. To restore the files, you must specify the correct path and directory.
This section includes the following topics:
● Restoring Avaya CMS data from a data backup on page 37
● Restoring specific files from a data backup on page 38
Restoring Avaya CMS data from a data backupTo restore all Avaya CMS data:
1. Enter:
cd /
2. Enter:
/cms/LANbkup/bin/onbar_restore.tivoli
Note:Note: If the Avaya CMS software is on, the restore script will automatically turn the
Avaya CMS software off and Informix IDS off.
The system displays the following message:
3. Enter: y
The system restores the data.
! Important:! Important:Important: Some storage devices require the media to be changed manually. It may be
necessary to have someone change the storage media.
4. Verify that the restore has completed successfully by entering:
cat /cms/install/logdir/restore.log
The system displays the Avaya CMS restore log.
For more information about restoring files, see Tivoli Data Protection for Informix Installation and User�s Guide.
Do you want to continue? (y/n)

Backing up and restoring data
38 LAN Backup User Guide
Restoring specific files from a data backupFor information about restoring specific files, see Tivoli Storage Manager for UNIX Using the Backup-Archive Clients.
Restoring an Avaya CMS systemThis section describes how to restore an entire system. A system restore will be required if:
● The boot disk fails or becomes corrupt on a non-mirrored system
● The boot disk pair fails or becomes corrupt on a mirrored system
This section includes the following topics:
● Prerequisites on page 38
● Enabling the system to boot on page 39
● Restoring an Avaya CMS system and data on page 45
PrerequisitesBefore you begin restoring the system, perform the following tasks:
● Locate the most recent system backup on the storage manager.
● Locate the most recent data backup on the storage manager.
● Obtain the Solaris 9 4/03 software.
● Perform any necessary hardware repairs.
● Obtain the storage manager client software:
- Tivoli Data Protection for Informix Version 4.1.3
- Tivoli Storage Manager UNIX Backup/Archive Clients Version 4.2

Restoring an Avaya CMS system
Issue 1.2 June 2004 39
Enabling the system to bootYou must re-enable the system to boot, and then restore the system software.
This section includes the following topics:
● Booting from the Solaris software CD-ROM on page 39
● Selecting your network settings on page 40
● Configuring your Kerberos security policy on page 41
● Selecting your regional settings on page 41
● Selecting the Solaris software packages on page 42
● Configuring the disk drives on page 43
● Assigning a root password on page 45
● Enabling the Korn shell on page 45
Booting from the Solaris software CD-ROM
To boot the system from the Solaris 9 Software CD-ROM using the local console:
1. Install the replacement disk.
Note:Note: For more information about installation of hard drives, see the appropriate
hardware installation, maintenance, and troubleshooting book for your platform.
2. Turn on the power to all of the external devices, such as disk drives and tape drives.
3. Turn on the monitor.
4. Turn on the Avaya CMS system.
Note:Note: Depending on the model, it can take several minutes for the system to boot
up.
5. As the console shows that the system is booting up, press Stop+AThe system displays an ok prompt.
Note:Note: Stop+A will not work on a Sun Fire V880 if the key switch is in the locked
position. If the key switch is in the locked position, turn the key to the unlocked position. Press Stop+A again and continue with the remainder of this procedure.
6. Load the CD-ROM, Solaris 9 Software 1 of 2 into the CD-ROM drive.

Backing up and restoring data
40 LAN Backup User Guide
7. Enter:
boot cdrom
The system boots from the CD-ROM, and displays a list of languages.
8. Select the language that is appropriate for your location, and press Enter. The system displays a list of locales.
9. Enter the number for the English (C- 7-bit ASCII) option.
The system displays the sysidtool window.
Note:Note: The sysidtool window provides useful information about how to navigate
through the Solaris installation windows. Use the arrow keys to move the cursor left, right, up, and down. Press the Enter key to select or unselect an option.
Selecting your network settings
To select your network settings:
1. Press F2 to continue.
Note:Note: The keyboard options for the Solaris installation will only function when your
mouse cursor is inside the installation window.
2. Press F2 to continue.
The system displays the Network Connectivity options.
3. Select Yes, and then press F2 to continue.
The system displays the DHCP options.
4. Select No, and then press F2 to continue.
The system displays a Host Name field.
5. Enter a host name, and then press F2 to continue.
The system displays an IP Address field.
6. Enter an IP address, and then press F2 to continue.
The system displays the Subnets options.
7. Choose one of the following steps:
● If the Avaya CMS system is on a subnet, perform the following steps:
i. Select Yes.
ii. Press F2 to continue.
The system displays a prompt for a netmask.

Restoring an Avaya CMS system
Issue 1.2 June 2004 41
iii. Enter the appropriate subnet mask. The factory default subnet mask is 255.255.255.0.
● If the Avaya CMS system is not on a subnet, select No.
8. Press F2 to continue.
The system displays the IPv6 options.
9. Select No, and then press F2 to continue.
The system displays the Set the Default Route options.
10. Choose one of the following steps:
● If the Avaya CMS system connects to the network through a router, perform the following steps:
i. Select Specify One.
ii. Press F2 to continue.
The system displays a prompt for a router IP address.
iii. Enter the appropriate IP address.
● If the Avaya CMS system is not on a subnet, select None.
11. Press F2 to continue.
The system displays your current network settings.
12. Verify that the settings are correct. If the settings are correct, press F2 to continue.
The system displays the Configure Security Policy options.
Configuring your Kerberos security policy
To configure your security policy:
1. Verify that No is selected, and then press F2 to continue.
The system displays your current security settings.
2. Verify that the settings are correct. If the settings are correct, press F2 to continue.
The system displays the Name Service options.
Selecting your regional settings
To select your regional settings:
1. Select None, and then press F2 to continue.
The system displays your current name service settings.
2. Verify that the settings are correct. If the settings are correct, press F2 to continue.
The system displays the Time Zone options.

Backing up and restoring data
42 LAN Backup User Guide
3. Select the appropriate continent or ocean, and then press F2 to continue.
The system displays the Country or Region options.
4. Select the appropriate country or region, and then press F2 to continue.
The system displays more Time Zone options.
5. Select the appropriate time zone, and then press F2 to continue.
The system displays the Date and Time options.
6. Enter the correct date and time, and then press F2 to continue.
The system displays your current regional settings.
7. Verify that the settings are correct. If the settings are correct, press F2 to continue.
The system displays a suninstall window.
Selecting the Solaris software packages
To select the Solaris software packages:
Note:Note: On some systems, the suninstall window might display information which
will require you to select the Initial option before continuing with the Solaris installation.
1. Press F2 for the Standard option.
The system displays the Select Geographic Regions options.
2. Expand the North America option list.
3. Select the following options:
● U.S.A (UTF-8)● U.S.A (en_US.ISO8859-1)
4. Press F2 to continue.
The system displays the Select Software options.
! Important:! Important:Important: On some platforms the system will display a list of 64-bit options. Select End
User System Support 64-bit.5. Press F2 to continue.
The system displays the Select Disks options.
Note:Note: If all of the disks are not displayed, contact your Avaya authorized service
representative.

Restoring an Avaya CMS system
Issue 1.2 June 2004 43
Configuring the disk drives
To configure the disk drives:
1. Verify that the correct boot device is selected and press F2 to continue.
The system displays the Preserve Data? options.
2. Press F2 to continue.
The system displays the Automatically Layout File Systems? options.
3. Press F4 to select Manual Layout.The system displays the current file system and disk layout.
4. Press F4 to select the Customize option.
The system displays the current partition information.
5. Enter the boot disk partition information according to the Boot disk partition table on page 44.
! Important:! Important:Important: No values are entered for the data disk partitions or the secondary boot disk
on a mirrored system.
Note:Note: When setting up disk partitions for mirrored Sun Blade 100, Sun Blade 150,
Sun Fire V880, or Enterprise 3500 systems, the system will use the following disks for the boot and mirrored boot devices:
● Sun Blade:
- Boot - c0t0d0
- Mirrored boot - c0t2d0
● Sun Fire V880:
- Boot - c1t0d0
- Mirrored boot - c1t3d0
● Enterprise 3500:
- Boot - c0t0d0
- Mirrored boot - c1t4d0

Backing up and restoring data
44 LAN Backup User Guide
! Important:! Important:Important: Solaris will be installed on slice four and then moved over to slice 0. The
system will panic if Solaris is installed on slice 0.
6. Verify that the correct slice name and partition size has been entered for each partition.
7. Press F2 to select OK.
The system displays the new file system layout.
8. Press F2 to continue.
The system displays a Mount Remote File Systems? option.
9. Press F2 to continue.
The system displays the current instillation profile.
10. Press F2 to continue.
The system displays an unused disk space warning.
11. Ignore the unused disk space warning and press F2 to continue.
The system displays the Reboot After Installation? options.
Boot disk partition table
Slice Slice name Partition size (MB)
0 (Leave blank) 40961
1. Some systems will automatically increase the partition size by one MB. Do not change the new partition size.
1 swap 1024
2 overlap2
2. Do not change the slice 2 value or name. If the slice 2 value or name is changed, you will have to reinstall Solaris.
(Do not change)
3 /cms 3072
4 / 2048
5 (Leave blank) (Leave blank)
6 (Leave blank) (Leave blank)
7 (Leave blank) (Leave blank)

Restoring an Avaya CMS system
Issue 1.2 June 2004 45
12. Verify that Auto reboot is selected and press F2.
The disk partitioning process begins, and the system displays the Installing Solaris Software - Progress window.
This process might take some time to complete. The actual amount of time depends on the number of disks being partitioned, the hardware platform, and the speed of your CD-ROM drive.
When the installation is finished, the system reboots and displays a prompt for a root password.
Assigning a root password
To assign a root password:
1. Enter the root password. If you do not know what root password is assigned to the system, it is recommended that you press Enter to assign a blank password.
The system displays a prompt to enter the root password again.
2. Re-enter the root password, or press Enter for a blank password.
The system displays the Specify Media window.
3. Minimize this window.
Enabling the Korn shell
To enable the Korn shell:
1. Open a terminal window.
2. From the command prompt enter:
stty erase Backspaceksh -o vi
The system displays the Backspace as ^H. On some systems Backspace will not work. If this is the case, substitute "^H" for Backspace.
Restoring an Avaya CMS system and dataTo restore the system data:
1. Install the TSM client software on the Avaya CMS system. The Tivoli Storage Manager UNIX Backup/Archive Clients CD-ROM contains the TIVsmCapi.pkg and the TIVsmCba.pkg software packages.
For more information about installing the client software, see the appropriate Tivoli quick start guide or Tivoli Storage Manager Installing the Clients.

Backing up and restoring data
46 LAN Backup User Guide
2. Perform any customization required for communication with the server software. The CMS system must be on the network. For more information, see Configuring the network settings on an Avaya CMS system on page 63 and Enabling DNS on an Avaya CMS system on page 65.
3. Enter:
vi /usr/bin/dsm.sys
The file should contain the following settings:
● SErvername should contain the host name of the server running the storage manager server software.
● COMMmethod should be set to TCPip.
● TCPServeraddress should contain the host and domain name of the Tivoli server.
● PasswordAccess should be set to generate.
Example:
4. If the settings are not correct in the dsm.sys file, make the appropriate changes.
5. Press Esc. Then enter:
:wq!
6. Enter:
vi /usr/bin/dsm.opt
The file should contain the following setting:
************************************************************************* Tivoli Storage Manager *................................................SErvername server_1 COMMmethod TCPip TCPPort 1500 TCPServeraddress server_1.domain.company.com
PasswordAccess generate

Restoring an Avaya CMS system
Issue 1.2 June 2004 47
● SErvername should contain the host name of the server running the storage manager server software.
Example:
7. If the settings are not correct in the dsm.opt file, make the appropriate changes.
8. Press Esc. Then enter:
:wq!
9. Customize any network settings for the Avaya CMS system. For more information, see Configuring the network settings on an Avaya CMS system on page 63.
10. Enter:
cd /tmp
11. Access the command line mode of the storage manager by entering:
dsmc
The system displays one of the following messages depending on your TSM version:
● If your TSM is Version 4.2.0, the prompt changes to tsm>
● If your TSM is Version 5.2.0, the system attempts to query any data that is backed up, and then displays the following message:
12. Choose one of the following procedures:
● If your TSM is Version 4.2.0, perform the following procedure:
************************************************************************* Tivoli Storage Manager ** ** Sample Client User Options file for UNIX (dsm.opt.smp) *************************************************************************
* This file contains an option you can use to specify the TSM* server to contact if more than one is defined in your client* system options file (dsm.sys). Copy dsm.opt.smp to dsm.opt.* If you enter a server name for the option below, remove the* leading asterisk (*).
************************************************************************
* SErvername A server name defined in the dsm.sys fileSErvername server_1
Please enter your user ID (default):

Backing up and restoring data
48 LAN Backup User Guide
i. Enter:
query backup /
The system attempts to query any data that is backed up, and then displays the following message:
! Important:! Important:Important: Ignore any error messages about the backup.
ii. Enter the user ID.
The system displays the following message:
iii. Enter the password for the Tivoli storage manager server software.
iv. Verify that the password file was created by entering:
query backup /
The system should not display prompts for a user ID and password. If the system does display these prompts, repeat this procedure.
! Important:! Important:Important: Ignore any error messages about the backup.
● If your TSM is Version 5.2.0, perform the following procedure:
i. Enter the user ID.
The system displays the following message:
ii. Enter the password for the Tivoli storage manager server software.
! Important:! Important:Important: Ignore any error messages about the backup.
13. Enter:
quit
14. Create a temporary error log by entering the following command on a single line at the command prompt:
dsmc restore /cms/ -subdir=yes -latest 2>&1 | tee -a /tmp/tmp.log
Please enter your user ID (default):
Please enter password for user ID "default"
Please enter password for user ID "default"

Restoring an Avaya CMS system
Issue 1.2 June 2004 49
Note:Note: You can check for error messages from the restore in /tmp/tmp.log. This log
will not be present if the system is rebooted.
15. Choose one of the following:
● If the system is not a mirrored Enterprise 3500, go to Step 16.
● If the system is a mirrored Enterprise 3500 perform the following procedure:
i. Enter:
cat /cms/install/disk_mgr/mirror/E3500
The system displays the E3500 mirroring file.
ii. Perform one of the following steps:
● If the mirror disks are on controller 1 go to Step 16.
● If the mirror disks are not on controller 1 continue with this procedure.
Example:
This example shows that the mirror disks are not on controller 1. The mirror disks are on controller 2. For more information about disk controllers, see Appendix A: Mirrored system disk pairs on page 75.
iii. Enter:
halt
The system displays the ok prompt.
! CAUTION:CAUTION: Do not continue with this procedure until the system displays the ok prompt.
Failure to do so could result in the system having to be rebuilt.
iv. Physically remove the disks that are on the secondary disk controller. These disks could be in slots 4, 5, 6, and 7.
For more information about mirror disk configurations, see Appendix B: Mirror disk hardware configurations on page 77.
v. Enter:
boot cdrom -sw
The system reboots.
vi. Log in as root.
c0t0d0 c2t4d0c0t1d0 c2t5d0c0t2d0 c2t6d0c0t3d0 c2t7d0

Backing up and restoring data
50 LAN Backup User Guide
vii. Enter:
mount /dev/dsk/c0t0d0s4 /mnt
Note:Note: If the drive does not mount, it may be necessary to enter the following
command: fsck -y /dev/rdsk/c0t0d0s4
viii. Enter:
rm -rf /mnt/dev /mnt/devices
ix. Enter:
devfsadm -r /mnt -p /mnt/etc/path_to_inst
x. Enter:
umount /mnt
xi. Enter:
halt
The system displays the ok prompt.
xii. Insert all the disks you removed in Step iv.
xiii. Enter:
boot -r
The system reboots.
xiv. Log in as root.16. Restore the system data by entering:
/cms/LANbkup/bin/restore.tivoli
! Important:! Important:Important: Some storage devices require the media to be changed manually. It may be
necessary to have someone change the storage media.
The system displays the following message:
17. Enter: y
The system restores the data and reboots.
18. Log into the system as root.19. Verify that the restore has completed successfully by entering:
cat /cms/install/logdir/restore.log
The system displays the Avaya CMS restore log.
Do you want to continue? (y/n)
Restoring an Avaya CMS system
Issue 1.2 June 2004 51
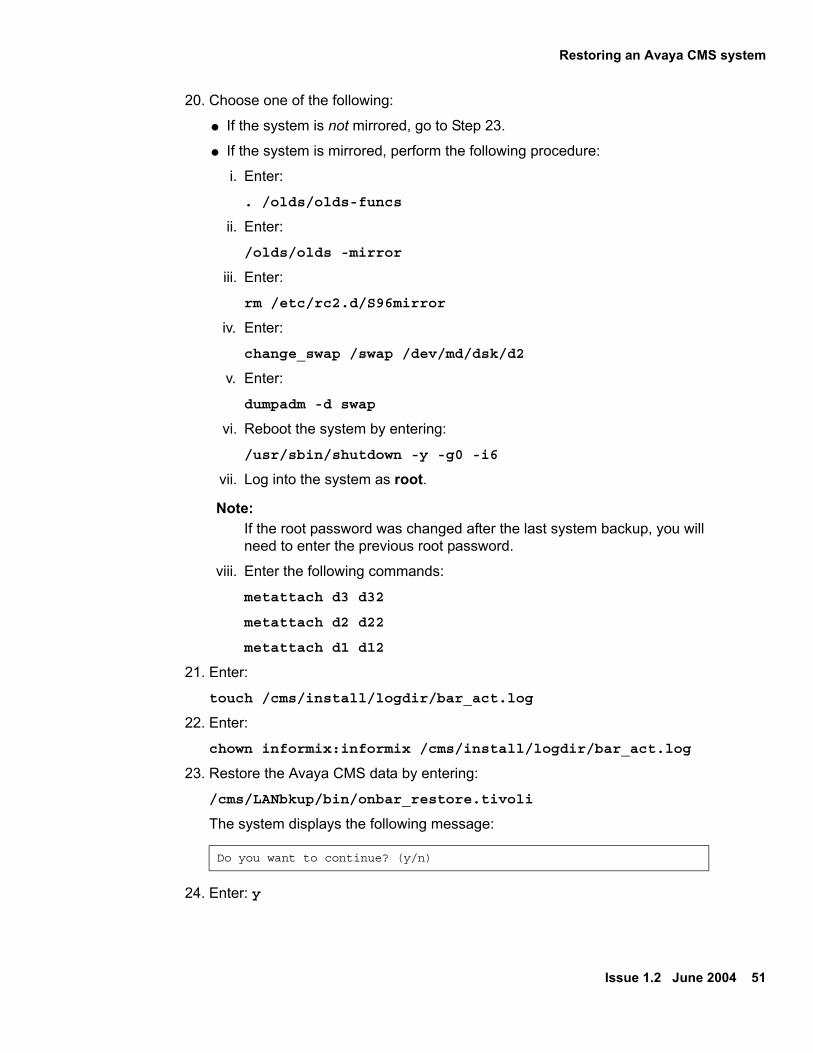
20. Choose one of the following:
● If the system is not mirrored, go to Step 23.
● If the system is mirrored, perform the following procedure:
i. Enter:
. /olds/olds-funcs
ii. Enter:
/olds/olds -mirror
iii. Enter:
rm /etc/rc2.d/S96mirror
iv. Enter:
change_swap /swap /dev/md/dsk/d2
v. Enter:
dumpadm -d swap
vi. Reboot the system by entering:
/usr/sbin/shutdown -y -g0 -i6
vii. Log into the system as root.
Note:Note: If the root password was changed after the last system backup, you will
need to enter the previous root password.
viii. Enter the following commands:
metattach d3 d32
metattach d2 d22
metattach d1 d12
21. Enter:
touch /cms/install/logdir/bar_act.log
22. Enter:
chown informix:informix /cms/install/logdir/bar_act.log
23. Restore the Avaya CMS data by entering:
/cms/LANbkup/bin/onbar_restore.tivoli
The system displays the following message:
24. Enter: y
Do you want to continue? (y/n)

Backing up and restoring data
52 LAN Backup User Guide
Note:Note: Depending on the amount of data, the data restore could take several
minutes or several hours to complete.
25. Verify that the restore has completed successfully by entering:
cat /cms/install/logdir/restore.log
The system displays the Avaya CMS restore log.
! Important:! Important:Important: Some storage devices require the media to be changed manually. It may be
necessary to have someone change the storage media.
26. Enter:
cp -p /etc/system /olds
27. Verify that the Informix configuration parameters for the Avaya CMS software are correct.
For more information, see "Setting the Informix configuration parameters for Avaya CMS" in Avaya CMS R12 Software Installation, Maintenance, and Troubleshooting Guide, 585-215-117.
28. Turn on the Avaya CMS software.
a. Enter:
cmsadm
The system displays the CMSADM menu.
b. Enter the number associated with the run_cms option.
c. Enter the number associated with the Turn on CMS option.
Additional InformationFor more information, see Tivoli Storage manager Quick Reference for the Backup-Archive Clients.

Recovering a non-mirrored system after data disk failure
Issue 1.2 June 2004 53
Recovering a non-mirrored system after data disk failure
This section contains procedures for the recovery of an Avaya CMS system after replacing a failed data disk.
! Important:! Important:Important: If the system loses the primary boot disk, the system will need to be rebuilt
to factory standards, and any data will need to be restored. See Restoring an Avaya CMS system on page 38.
This section includes the following topics:
● Prerequisites on page 53
● Recovering a non-mirrored system on page 53
PrerequisitesBefore you begin restoring the system, perform the following:
● Locate the most recent successful system and data backups on the storage manager server.
Recovering a non-mirrored systemTo recover a non-mirrored system after data disk failure:
1. Install the replacement disk.
Note:Note: For more information about installation of hard drives, see the appropriate
hardware installation, maintenance, and troubleshooting book for your platform.
2. Turn on any external devices. Then turn on the system.
The system boots into multi-user mode.

Backing up and restoring data
54 LAN Backup User Guide
! Important:! Important:Important: If the system fails to boot after installing the hard drive according to the
appropriate hardware installation, maintenance, and troubleshooting book, reboot the system from the ok prompt using boot disk. After the system reboots, log into the system as root.
3. Log on as root.4. Restore the Avaya CMS data by entering:
/cms/LANbkup/bin/onbar_restore.tivoli
The system displays the following message:
5. Enter: y
The system restores the data.
6. Verify that the restore has completed successfully by entering:
cat /cms/install/logdir/restore.log
7. Verify that the Informix configuration parameters for the Avaya CMS software are correct.
For more information, see "Setting the Informix configuration parameters for Avaya CMS" in Avaya CMS R12 Software Installation, Maintenance, and Troubleshooting Guide, 585-215-117.
8. Turn on the Avaya CMS software.
a. Enter:
cmsadm
The system displays the CMSADM menu.
b. Enter the number associated with the run_cms option.
c. Enter the number associated with the Turn on CMS option.
Do you want to continue? (y/n)

Recovering a mirrored system after a mirrored pair of data disks fail
Issue 1.2 June 2004 55
Recovering a mirrored system after a mirrored pair of data disks fail
This section contains the procedure for the recovery of a mirrored system after replacement of a mirrored disk pair. For additional disk replacement procedures, see "Recovering a mirrored system after disk failure" in the Avaya CMS R12 Software Installation, Maintenance, and Troubleshooting Guide, 585-215-117.
! Important:! Important:Important: If the system loses both the primary boot disk and the alternate boot disk,
the system will need to be rebuilt to factory standards, and any data will need to be restored. See Restoring an Avaya CMS system on page 38.
This section includes the following topics:
● Platform considerations on page 55
● Prerequisites on page 55
● Recovering a mirrored system on page 56
Platform considerationsThis procedure is only for mirrored systems.
PrerequisitesBefore you recover a mirrored system, perform the following tasks:
● Verify that the alternate boot device is set up. For more information, see "Enabling fail over of the alternate boot device" in Avaya CMS R12 Software Installation, Maintenance, and Troubleshooting Guide, 585-215-117.
● Identify the faulty disk or disks. For more information, see "Identifying a faulty disk" in Avaya CMS R12 Software Installation, Maintenance, and Troubleshooting Guide, 585-215-117.

Backing up and restoring data
56 LAN Backup User Guide
Recovering a mirrored systemTo recover a mirrored system after a mirrored pair of data disks fail:
1. Replace the faulty disk pair. For more information about installation of hard drives, see the appropriate hardware installation, maintenance, and troubleshooting book for your platform.
2. Restore the Avaya CMS data by entering:
/cms/LANbkup/bin/onbar_restore.tivoli
The system displays the following message:
3. Enter: y
The system restores the data.
! WARNING:WARNING: If the system is rebooted, enter the following commands:
. /opt/informix/bin/setenv
onstat -d | egrep "MD|PD|R|X"
to verify that the resync process is complete. If the resync process is not complete, select Sync Primary and Mirror from the disk_space option in the CMSSVC menu.
4. Verify that the restore has completed successfully by entering:
cat /cms/install/logdir/restore.log
5. Verify that the Informix configuration parameters for Avaya CMS are correct.
For more information, see "Setting the Informix configuration parameters for Avaya CMS" in Avaya CMS R12 Software Installation, Maintenance, and Troubleshooting Guide, 585-215-117.
6. Turn on the Avaya CMS software.
a. Enter:
cmsadm
The system displays the CMSADM menu.
b. Enter the number associated with the run_cms option.
c. Enter the number associated with the Turn on CMS option.
Do you want to continue? (y/n)

Issue 1.2 June 2004 57
Troubleshooting the LAN backup feature
This section provides solutions for common problems with the Avaya Call Management System (CMS) LAN backup feature.
This section includes the following topics:
● Basic troubleshooting on page 57
● Backup logs on page 58
● Configuring the network settings on an Avaya CMS system on page 63
● Enabling DNS on an Avaya CMS system on page 65
● Troubleshooting the include and exclude list on page 66
● Storage pool variable error messages on page 68
● Verifying the network card settings on page 69
● Checking shared memory parameters on page 71
● Restarting a restore after it has stopped on page 73
Basic troubleshootingWhen trying to figure out why a backup or restore is not working, there are some basic steps you should perform first:
1. Verify that the Avaya CMS system, backup server, and storage device has power and is online.
2. Verify that the appropriate storage media is loaded in the storage device.
3. Check the cabling on the Avaya CMS system. Make sure all the cables and connectors are securely attached.
4. Verify that the Avaya CMS system can detect the backup server over the network.
5. Verify that the backup server can detect the Avaya CMS system over the network.

Troubleshooting the LAN backup feature
58 LAN Backup User Guide
Backup logsThere are five backup logs that can be used to monitor the status of a backup. The backup logs are found in /cms/install/logdirThis section includes the following topics:
● backup.log on page 58
● bar_act.log on page 60
● dsierror.log on page 60
● dsmerror.log on page 60
● restore.log on page 61
For more information on error codes, see the appropriate Tivoli storage manager administrator's guide.
backup.log backup.log contains the most information about the status of backups. This log includes information on:
● When the backup started and ended
● The type of backup performed
● Connection to the storage manager server
● Level of the backup
● Files included in the backup
● Network status

Backup logs
Issue 1.2 June 2004 59
Example:
===== LAN SYSTEM BACKUP STARTED Fri Feb 15 12:16:01 MST 2002
/cms/LANbkup/bin/backup.tivoli 0Converter started Fri Feb 15 12:16:17 MST 2002Converter completed successfully Fri Feb 15 12:16:30 MST 2002Tivoli Storage Manager started Fri Feb 15 12:16:31 MST 2002Tivoli Storage ManagerCommand Line Backup Client Interface - Version 4, Release 2, Level 1.0(C) Copyright IBM Corporation, 1990, 2001, All Rights Reserved.
Node Name: GROMMITSession established with server SERVER1: Solaris 7/8 Server Version 4, Release 2, Level 1.0 Server date/time: 02/15/02 12:20:54 Last access: 02/15/02 12:09:34
Total number of objects inspected: 39,925Total number of objects backed up: 39,916Total number of objects updated: 0Total number of objects rebound: 0Total number of objects deleted: 0Total number of objects expired: 0Total number of objects failed: 0 Total number of bytes transferred: 1.15 GBData transfer time: 239.39 secNetwork data transfer rate: 5,049.49 KB/secAggregate data transfer rate: 703.47 KB/secObjects compressed by: 0%Elapsed processing time: 00:28:38
===== LAN SYSTEM BACKUP SUCCESSFULLY FINISHED Fri Feb 15 12:45:12 MST 2002
+++++ ON-Bar BACKUP STARTED Fri Feb 15 13:12:00 MST 2002
/cms/LANbkup/bin/onbar_backup.tivoli 0onbar -b -w -L 0 started Fri Feb 15 13:12:14 MST 2002...................................................Total number of bytes transferred: 19.30 MBData transfer time: 4.14 secNetwork data transfer rate: 4,768.22 KB/secAggregate data transfer rate: 1,299.32 KB/secObjects compressed by: 0%Elapsed processing time: 00:00:15
+++++ ON-Bar BACKUP SUCCESSFULLY FINISHED Fri Feb 15 13:13:10 MST 2002

Troubleshooting the LAN backup feature
60 LAN Backup User Guide
bar_act.logbar_act.log contains information about the status of the Informix On-Bar data backups. For more information, see the Informix documentation.
Example:
dsierror.logdsierror.log contains information about the communication between the X/Open Backup Services Application Programmer's Interface (XBSA interface) and On-Bar. This log may not exist on your system. The error log is created when a failure message is generated.
Example:
dsmerror.logdsmerror.log contains information about Tivoli storage manager software processes. This log provides error codes that can be used to obtain more information about any potential problems with the software. This log may not exist on your system. The error log is created when a failure message is generated.
2002-02-15 12:04:59 793 791 /opt/informix/bin/onbar_d -r -w -p2002-02-15 12:05:14 793 791 Successfully connected to Storage Manager.2002-02-15 12:05:14 793 791 Begin cold level 0 restore rootdbs (Storage Manager copy ID: 0 1423128).2002-02-15 12:05:55 793 791 Completed cold level 0 restore rootdbs.2002-02-15 12:05:55 793 791 Begin cold level 0 restore logdbs (Storage Manager copy ID: 0 1423130). ...................................................2002-02-15 13:12:53 2401 2399 /opt/informix/bin/onbar_d complete, returning 152 (0x98)
12/03/01 16:05:41 TcpOpen: TCP/IP error connecting to server.12/03/01 16:05:41 sessOpen: Failure in communications open call. rc: -5012/03/01 18:38:45 cuSignOnResp: Server rejected session; result code: 5312/03/01 18:38:45 sessOpen: Error 53 receiving SignOnResp verb from server

Backup logs
Issue 1.2 June 2004 61
Example:
To display help information on a specific client error code:
1. From the # prompt, enter:
dsmc
The system enters the storage manager command line mode and the prompt changes to tsm>.
2. Enter
help
The system displays a help menu.
3. Scroll through the help menu to find the range of error codes that the error code would fit into.
4. Enter the numeric designation for the error code range.
5. Scroll through the error code table to find the entry for the error code.
Example:
If the log displays the error code ANS1115W, enter: help
The system displays the help menu.
Scroll through the list, and find the option for the error message:
Enter: 167
The system displays a table with error codes. Scroll through the table, and locate the error message.
restore.logrestore.log contains information about the status of a data or system restore. This log is an Avaya CMS log. The other backup logs can be used to provide more detailed information about a particular backup or restore process.
03/04/02 14:07:21 TcpOpen: TCP/IP error connecting to server.03/04/02 14:07:21 sessOpen: Failure in communications open call. rc: -5003/04/02 14:07:21 ANS1017E Session rejected: TCP/IP connection failure
167 - ANS1100-ANS1119
ANS1115W File 'file-namefile-namefile-name' excluded by Include/Exclude list

Troubleshooting the LAN backup feature
62 LAN Backup User Guide
Example:
===== LAN SYSTEM RESTORE STARTED Fri Feb 15 11:18:01 MST 2002
Restore root file system, please wait...dsmc restore / /r_root -subdir=yes -preserv=complete started Fri Feb 15 11:18:07 MST 2002dsmc restore / /r_root -subdir=yes -preserv=complete finished Fri Feb 15 11:41:05 MST 2002find /devices /dev | cpio -pmudv /r_root started Fri Feb 15 11:41:05 MST 20021 blocksbuild devices tree finished Fri Feb 15 11:41:18 MST 2002fmthard: New volume table of contents now in place.
===== LAN SYSTEM RESTORE SUCCESSFULLY FINISHED Fri Feb 15 11:41:25 MST 2002
+++++ ON-Bar RESTORE STARTED Fri Feb 15 12:02:57 MST 2002
Tivoli Storage ManagerCommand Line Backup Client Interface - Version 4, Release 2, Level 1.0(C) Copyright IBM Corporation, 1990, 2001, All Rights Reserved.
Restore function invoked. Node Name: GROMMITSession established with server SERVER1: Solaris 7/8 Server Version 4, Release 2, Level 1.0 Server date/time: 02/15/02 12:07:29 Last access: 02/15/02 11:22:27
ANS1247I Waiting for files from the server...Restoring 512 /opt/informix/etc/conv [Done]Restoring 512 /opt/informix/etc/en_us [Done]...................................................Restore processing finished.
Total number of objects restored: 139Total number of objects failed: 0Total number of bytes transferred: 19.15 MBData transfer time: 1.33 secNetwork data transfer rate: 14,694.95 KB/secAggregate data transfer rate: 1,111.19 KB/sec Elapsed processing time: 00:00:17Tivoli Storage ManagerCommand Line Backup Client Interface - Version 4, Release 2, Level 1.0(C) Copyright IBM Corporation, 1990, 2001, All Rights Reserved.

Configuring the network settings on an Avaya CMS system
Issue 1.2 June 2004 63
Configuring the network settings on an Avaya CMS system
The hosts file contains the network settings for an Avaya CMS system. If the system is unable to detect the network, the network settings might be incorrect.
To configure networking:
1. Enter:
vi /etc/hosts
! Important:! Important:Important: The items in this file must be separated by tabs, not spaces, and any
comments must begin with a #. The entry for localhost must remain on line four and the entry for loghost must remain on line five.
The loghost line should contain the Avaya CMS system:
● IP address
● Host name
● Hostname.fully qualified domain name
● loghost
The fully qualified domain name is the customer domain name.
Example:
2. Add a line to this file for the router that will connect to this computer. You must enter the IP address and designate it as a router.
## Internet host table#127.0.0.1 localhost192.168.2.1 hostname hostname.company.com loghost

Troubleshooting the LAN backup feature
64 LAN Backup User Guide
3. Add a line to this file for the LAN backup server that will connect to this computer. You must enter the IP address and designate it with the host name.
This example shows the recommended default IP addressing scheme for a closed network.
4. Press Esc. Then enter:
:wq!
5. If the Avaya CMS system uses DNS, see Enabling DNS on an Avaya CMS system on page 65.
## Internet host table#127.0.0.1 localhost192.168.2.1 hostname hostname.company.com loghost192.168.2.103 router195.168.2.108 backup_server

Enabling DNS on an Avaya CMS system
Issue 1.2 June 2004 65
Enabling DNS on an Avaya CMS systemIf the system is receiving error messages pertaining to an inability to resolve a host name, DNS might be set up incorrectly.
To enable DNS:
1. Enter:
cp /etc/nsswitch.dns /etc/nsswitch.conf
2. Enter:
vi /etc/defaultrouter
The system creates the defaultrouter file.
3. On the first line, enter the IP address of the gateway.
4. Press Esc and enter:
:wq!
5. Enter:
vi /etc/resolv.conf
The system creates the resolv.conf file.
6. On the first line, enter the company domain name.
Example:
domain company.com
7. On the next line, enter the DNS IP address.
Example:
nameserver 135.9.1.39
8. Press Esc and enter:
:wq!
9. Enter:
touch /etc/norouter
10. Enter:
route add default IP_address 1
where IP_address is the IP address of the gateway.

Troubleshooting the LAN backup feature
66 LAN Backup User Guide
Troubleshooting the include and exclude listTo verify the files in the include and exclude list:
1. Enter:
cd /cms/LANbkup/incl_excl
2. Enter:
cat backup_excl.tivoli
The system displays a file similar to the following example.
Example:
3. Perform the following steps only if a modification is required for the backup_excl.tivoli file:
! CAUTION:CAUTION: Modifying this file can cause future system restores to fail. Contact Avaya
technical support or your product distributor before modifying this file.
a. Enter:
vi /cms/LANbkup/incl_excl/backup_excl.tivoli
exclude.dir /procexclude.dir /cdromexclude.dir /nexclude.dir /volexclude.dir /floppyexclude.dir /xfnexclude.dir /devexclude.dir /devicesexclude.dir /tmp/.../*exclude /tmp/*exclude.dir /var/tmp/.../*exclude /var/tmp/*exclude /.../coreexclude /etc/path_to_instexclude /etc/nologinexclude /etc/mnttabexclude.dir /var/spool/lp/tempexclude.dir /var/spool/lp/tmpexclude.dir /var/spool/lp/requestsexclude.dir /var/spool/mqueueexclude /var/spool/locks/*exclude.dir /cms/tmp/.../*exclude /cms/tmp/* exclude /.../BI/add_on/data/forwarder/*exclude.dir /INFORMIXTMP

Troubleshooting the include and exclude list
Issue 1.2 June 2004 67
b. Change any required settings in the backup_excl.tivoli file.
i. To exclude a directory from the backup, enter:
exclude.dir directory_path
where directory_path is the full path for the directory.
ii. To exclude a file from the backup, enter:
exclude file_path
where file_path is the full path for the file.
c. Press Esc. Then enter:
:wq!

Troubleshooting the LAN backup feature
68 LAN Backup User Guide
Storage pool variable error messagesThe Tivoli storage manager server software can be configured to backup data to a disk drive and then migrate the data to another type of storage media. When a predetermined threshold value is reached, a set amount of data on the disk drive is migrated to another type of storage media. This process is controlled by the highmig and lowmig storage pool variables. If the highmig and lowmig storage pool variables are incorrectly set up, then the backup will generate error messages in backup.log and bar_act.log.
backup.log displays the following error message:
bar_act.log displays the following error message:
The error messages are generated because the system is attempting to migrate only part of an ACD dbspace to the storage media. Entire ACD dbspaces must be migrated. ACD dbspaces can contain more than 2 GB of data.
Contact your Tivoli administrator if these error messages are generated. The administrator will need to adjust the highmig and lowmig storage pool variables based on the amount of data to be stored on the disk drive and the amount of data to be migrated to the storage media.
+++++ ON-Bar BACKUP FAILED Wed Feb 27 12:34:24 MST 2002
2002-02-27 12:34:17 6549 6547 XBSA Error: (BSAEndTxn) Exceeded available resources. 2002-02-27 12:34:24 6549 6547 /opt/informix/bin/onbar_d complete, returning 19 (0x13)

Verifying the network card settings
Issue 1.2 June 2004 69
Verifying the network card settingsUse the following commands to verify the network card settings:
1. Enter:
ndd -set /dev/network_interface instance number
where network_interface is either:
● hme● eri● ceand, where number is the instance of the network interface. The first instance of the primary network card is usually 0.
Note:Note: Enterprise 3500 systems use hme for their primary network interface. The
Sun Blade systems can use either eri or ce. Sun Fire V880 systems use eri.
Example:
For the first instance of the hme interface, you would enter:
ndd -set /dev/hme instance 0
2. Enter any combination of the following commands depending on the type of information you want to obtain:
● To determine the duplex setting of the network card, enter:
ndd /dev/network_interface link_mode
where network_interface is either:
● hme● eri● ceThe system displays a number representing the duplex setting for the network interface.
Number displayed Link mode
0 half
1 full

Troubleshooting the LAN backup feature
70 LAN Backup User Guide
● To determine the speed of the network connection, enter:
ndd /dev/network_interface link_speed
where network_interface is either:
● hme● eri● ceThe system displays a number representing the speed setting for the network interface.
● To determine network connectivity, enter:
ndd /dev/network_interface link_status
where network_interface is either:
● hme
● eri● ceThe system displays a number representing the status of the network interface.
Note:Note: If you need to change any network card settings, contact the National
Customer Care Center, or consult with your product distributor or representative.
Number displayed Link speed
0 10 Mbps
1 100 Mbps
Number displayed Link status
0 no link
1 link established

Checking shared memory parameters
Issue 1.2 June 2004 71
Checking shared memory parametersIf a data restore fails, check the shared memory parameters. Shared memory errors may be created if a data restore fails or is manually stopped before completion. If the shared memory errors are not removed, future restores will fail. The system may also display the following error message:
To check the shared memory:
1. Verify that the Avaya CMS software and IDS software are off.
a. Enter:
cmsadm
The system displays the CMSADM menu.
b. Enter the number associated with the run_cms option.
c. Enter the number associated with the Turn off both CMS and IDS option.
2. Determine if there are any shared memory errors by entering:
ipcs
The system displays one of the following messages:
● If there are no memory errors the system displays a message similar to the following:
oninit: Fatal error in shared memory creation
IPC status from <running system> as of Mon Mar 4 14:55:37 EST 2002T ID KEY MODE OWNER GROUPMessage Queues:Shared Memory:m 0 0x50000b2d --rw-r--r-- root rootm 4 0x50302 --rw-rw-rw- root rootm 5 0x30302 --rw-rw-rw- root rootSemaphores:s 4 0x540302 --ra-ra-ra- root root

Troubleshooting the LAN backup feature
72 LAN Backup User Guide
● If there are memory errors the system displays a message similar to the following:
3. Remove any entries that have a group of Informix by entering:
ipcrm -m ID
where ID is the ID number for the line.
Example:
ipcrm -m 1318
4. It may be necessary to repeat Step 3 several times. Remove all Informix entries under Message Queues, Shared Memory, and Semaphores.
IPC status from <running system> as of Mon Mar 4 14:41:22 EST 2002T ID KEY MODE OWNER GROUPMessage Queues:Shared Memory:m 0 0x50000b2d --rw-r--r-- root rootm 1318 0x52574801 --rw-rw---- root informixm 1319 0x52574802 --rw-rw---- root informixm 1320 0x52574803 --rw-rw-rw- root informixm 4 0x50302 --rw-rw-rw- root rootm 5 0x30302 --rw-rw-rw- root rootSemaphores:s 4 0x540302 --ra-ra-ra- root root

Restarting a restore after it has stopped
Issue 1.2 June 2004 73
Restarting a restore after it has stoppedIf a data or system restore is stopped partway through the restore process, you might receive the following error message when you attempt to restart the restore:
The system generates this message when the restore command is run. This message is displayed from the terminal window and in the dsmerror.log file. This error is generated because the Tivoli server is still attempting to execute the previous restore session.
To start a new restore session:
1. Enter:
dsmc cancel restore
The system displays a list of the restore sessions that are still running.
2. Enter the number of the session you want to cancel. It might be necessary to repeat this process several times.
3. After removing the previous restore sessions, choose one of the following commands to start a new restore process:
● Restore the system data by entering:
/cms/LANbkup/bin/restore.tivoli
● Restore the Avaya CMS data by entering:
/cms/LANbkup/bin/onbar_restore.tivoli
4. Continue with the remainder of the restore procedure you were performing.
An active restore for the same source file specification exsists.

Troubleshooting the LAN backup feature
74 LAN Backup User Guide

Issue 1.2 June 2004 75
Appendix A: Mirrored system disk pairs
Use the following tables to determine the disk layout for your mirrored system.
Note:Note: A mirrored system may occasionally display different controllers than those
shown in the following tables for the mirrored disk.
Sun Fire V880 mirrored disk pairs
Enterprise 3500 mirrored disk pairs
Sun Blade mirrored disk pairs
Primary disk Mirrored disk
c1t0d0 c1t3d0
c1t1d0 c1t4d0
c1t2d0 c1t5d0
Primary disk Mirrored disk
c0t0d0 c1t4d0
c0t1d0 c1t5d0
c0t2d0 c1t6d0
c0t3d0 c1t7d0
Primary disk Mirrored disk
c0t0d0 c0t2d0
c1t0d0 c1t2d0
c1t1d0 c1t3d0

Mirrored system disk pairs
76 LAN Backup User Guide

Issue 1.2 June 2004 77
Appendix B: Mirror disk hardware configurations
In an Enterprise 3500 computer, there are eight disk drive slots, four in each of two bays. The slots in the lower bay are labeled 0 through 3 and are on controller 0; the slots in the upper bay are numbered 4 through 7 and are on controller 1.
In a mirrored system, slots 0 through 3 are reserved for the primary disks, and slots 4 through 7 are reserved for the mirror disks.
0 1 2 3
7654
Primary bootdisk drive
(Boot Disk - Slot 0)
Mirror bootdisk drive
(Disk Mirror - Slot 4)
Blanknonboot
disk drives
3500_mir.cdr

Mirror disk hardware configurations
78 LAN Backup User Guide
In a Sun Blade computer, there are 2 internal hard drive bays, and a SCSI card that will allow up to four 18 GB external SCSI drives. This will allow up to 3 disks for each mirror. The second internal hard drive will not be used for a data disk. The second internal hard drive will only be used for the mirror boot device.
Primary Mirror
Boot disks: c0t0d0 c0t2d0
Data disks: c1t0d0 c1t2d0
c1t1d0 c1t3d0

Issue 1.2 June 2004 79
In a Sun Fire V880 computer, there are twelve disk drive slots, three in each of four bays. The slots are labeled 0 through 11 and are on controller 1. Currently, disk drives are only put in slots 0, 1, 3, and 4 for an Avaya CMS system. The Sun Fire V880 computer is only available as a mirrored system and is delivered from the factory already mirrored.
Primary disk Mirrored disk
Boot disks: c1t0d0 c1t3d0
Data disks: c1t1d0 c1t4d0
c1t2d0 c1t5d0
9 10 11
6 7 8
3 4 5
0 1 2Primary disks
Mirror disks
Not used
0. c1t0d01. c1t1d02. c1t2d0
3. c1t3d04. c1t4d05. c1t5d0
6. c1t8d07. c1t9d08. c1t10d0
9. c1t11d010. c1t12d011. c1t13d0

Mirror disk hardware configurations
80 LAN Backup User Guide

Issue 1.2 June 2004 81
Appendix C: Example policy domain
A policy domain is a group of clients that have similar requirements for backing up and archiving data. It is recommended that you create a separate policy domain for your Avaya CMS systems.The settings for your particular policy domain will vary from those given in this procedure. For guidelines on backing up an Avaya CMS system, see Recommendations for backing up data on page 32 and the appropriate Tivoli documentation.
! Important:! Important:Important: Avaya support personnel are not responsible for configuring policy domains
or providing Tivoli support.
Example procedure:
1. Enter:
dsmadmc
The system displays the following message:
2. Enter your user ID.
The system displays the following message:
3. Enter your password.
The system displays the tsm: SERVER1> prompt.
4. Perform the following procedure to configure a policy domain:
a. Create a copy of the standard policy domain by entering:
copy domain standard cmsdomain
Tivoli Storage ManagerCommand Line Administrative Interface - Version 4, Release 2, Level 1.0(C) Copyright IBM Corporation, 1990, 2001, All Rights Reserved.
Enter your user id:
Enter your password:

Example policy domain
82 LAN Backup User Guide
Note:Note: The dash (-) at the end of the following command, allows you to enter a
single large command as several smaller lines of text. The dash allows the command to continue across multiple lines.
b. Update the backup copy group by entering:
update copygroup cmsdomain standard standard standard -
type=backup verexists=4
c. Verify the policy set by entering:
validate policyset cmsdomain standard
d. Activate the policy set for the policy domain by entering:
activate policyset cmsdomain standard
Note:Note: If the node is not registered, you must register the node by entering the
following command:
register node samplenode samplepassword domain=cmsdomain -
userid=none
e. Add the node to the policy domain by entering:
update node samplenode domain=cmsdomain
Issue 1.2 June 2004 83
Appendix D: Example Avaya CMS scheduler policy
The Tivoli scheduler is used to automate your backups. This appendix shows an example of how to set up a scheduler policy. The settings for your particular scheduler policy will vary from those given in this procedure. For guidelines on backing up an Avaya CMS system, see Recommendations for backing up data on page 32 and the appropriate Tivoli documentation.
! Important:! Important:Important: Avaya support personnel are not responsible for configuring scheduler
policies or providing Tivoli support.
Example procedure:
1. On the Avaya CMS system perform the following procedure:
a. Enter:
vi /etc/inittab
The system displays the inittab file.
b. Add the following line to the end of the file:
ts::once:/usr/bin/dsmc sched > /dev/null 2>&1
c. To save and close the file press Esc. Then enter:
:wq!
d. Enter:
nohup dsmc sched > /dev/null 2>&1 &
2. Using the Tivoli Administrative interface, perform the following procedure:
a. Enter:
dsmadmc
The system displays the tsm SERVER > prompt.
Note:Note: The dash (-) at the end of the following commands, allows you to enter a
single large command as several smaller lines of text. The dash allows the command to continue across multiple lines.

Example Avaya CMS scheduler policy
84 LAN Backup User Guide
b. Define the backup schedule for the daily Avaya CMS incremental data backup by entering the following commands:
define sched cmsdomain daily_cms_backup type=client -
desc="daily CMS incremental data backup" -
action=command obj="/cms/LANbkup/bin/onbar_backup.tivoli 1" -
startdate=06/01/2002 starttime=01:00:00 dayofweek=weekday
c. Define the backup schedule for the weekly Avaya CMS incremental system and full data backups by entering the following commands:
define sched cmsdomain weekly_cms_backup type=client -
desc="weekly CMS incremental system and full data backups" -
action=command obj="/cms/LANbkup/bin/backup.tivoli 1; " -
"/cms/LANbkup/bin/onbar_backup.tivoli 0" -
startdate=06/01/2002 starttime=01:00:00 -
duration=4 durunits=hours perunits=weeks dayofweek=saturday
d. Define the backup schedule for the monthly Avaya CMS full system and incremental data backups by entering the following commands:
define sched cmsdomain monthly_cms_backup type=client -
desc="monthly CMS full system and incremental data backups" -
action=command obj="/cms/LANbkup/bin/backup.tivoli 0; " -
"/cms/LANbkup/bin/onbar_backup.tivoli 1" -
startdate=06/01/2002 starttime=01:00:00 duration=4 -
durunits=hours perunits=months dayofweek=sunday
3. Enter the following commands:
define association cmsdomain daily_cms_backup samplenode
define association cmsdomain weekly_cms_backup samplenode
define association cmsdomain monthly_cms_backup samplenode
4. On the Avaya CMS system perform the following procedure:
a. Enter:
dsmc
The system displays the tsm> prompt.

Issue 1.2 June 2004 85
b. Verify the schedule by entering:
q sched
The system displays a message similar to the following:
Node Name: samplenodeSession established with server SERVER1: Solaris 7/8 Server Version 4, Release 2, Level 1.0 Server date/time: 06/17/02 15:59:29 Last access: 06/17/02 15:58:31
Schedule Name: DAILY_CMS_BACKUP Description: daily CMS incremental data backup Action: Command Options: Objects: /cms/LANbkup/bin/onbar_backup.tivoli 1 Priority: 5 Next Execution: 9 Hours and 1 Minute Duration: 1 Hour Period: 1 Day Day of Week: Weekday Expire: Never
Schedule Name: WEEKLY_CMS_BACKUP Description: weekly CMS incremental system and fully data backups Action: Command Options: Objects: /cms/LANbkup/bin/backup.tivoli 1; /cms/LANbkup/bin/onbar_backup.tivoli 0 Priority: 5 Next Execution: 105 Hours and 1 Minute Duration: 4 Hours Period: 1 Week Day of Week: Saturday Expire: Never
Schedule Name: MONTHLY_CMS_BACKUP Description: monthly CMS full system and incremental data backups Action: Command Options: Objects: /cms/LANbkup/bin/backup.tivoli 0; /cms/LANbkup/bin/onbar_backup.tivoli 1 Priority: 5 Next Execution: 465 Hours and 1 Minute Duration: 4 Hours Period: 1 Month Day of Week: Sunday Expire: Never

Example Avaya CMS scheduler policy
86 LAN Backup User Guide

Issue 1.2 June 2004 87
Glossary
ACD See Automatic Call Distribution (ACD).
Automatic Call Distribution (ACD)
A switch feature. ACD is software that channels high-volume incoming call traffic to agent groups (splits or skills).Also an agent state where the extension is engaged in an ACD call (with the agent either talking to the caller or the call waiting on hold).
Avaya Call Management System (CMS)
A software product used by business customers that have a telecommunications switch and receive a large volume of telephone calls that are processed through the Automatic Call Distribution (ACD) feature of the switch.
Avaya CMS See Avaya Call Management System (CMS).
Data collection off Avaya CMS is not collecting ACD data. If you turn off data collection, Avaya CMS will not collect data on current call activity.
Data backup The backup that uses ON-Bar to backup the Avaya CMS Informix data.
Data restore The restore that uses ON-Bar to restore the Avaya CMS Informix data.
Database A group of files that store ACD data according to a specific time frame: current and previous intrahour real-time data and intrahour, daily, weekly, and monthly historical data.
Database item A name for a specific type of data stored in one of the Avaya CMS databases. A database item may store ACD identifiers (split numbers or names, login IDs, VDNs, and so on) or statistical data on ACD performance (number of ACD calls, wait time for calls in queue, current states of individual agents, and so on).
Database tables Tables that Avaya CMS uses to collect, store, and retrieve ACD data. Standard Avaya CMS items (database items) are names of columns in the Avaya CMS database tables.

Device
88 LAN Backup User Guide
Device The term used to refer to the peripheral itself; for example, a hard disk or a tape drive. A peripheral is sometimes referred to as a subdevice or an Logical Unit (LU).
Disk A round platter, or set of platters, coated with magnetic medium and organized into concentric tracks for storing data.
EAD See Expert Agent Distribution (EAD).
EAS See Expert Agent Selection (EAS).
Error message An error message is a response from a program indicating that a problem has arisen or something unexpected has happened, requiring your attention.
Ethernet A type of network hardware that allows communication between systems connected directly together by transceiver taps, transceiver cables, and a coaxial cable. Also implemented using twisted-pair telecommunications wire and cable.
Exception A type of activity on the ACD which falls outside of the limits the customer has defined. An exceptional condition is defined in the Avaya CMS Exceptions subsystem, and usually indicates abnormal or unacceptable performance on the ACD (by agents, splits or skills, VDNs, vectors, trunks, or trunk groups).
Expert Agent Distribution (EAD)
A call queued for a skill will go to the most idle agent (primary skill agent). Agents who are idle and have secondary agent skills will receive the call queued for a skill if there are no primary agents available.
Expert Agent Selection (EAS)
An optional feature that bases call distribution on agent skill (such as language capability). EAS matches the skills required to handle a call to an agent who has at least one of the skills required.
Forecast reports These reports display expected call traffic and agent or trunk group requirements for the customer�s call center for a particular day or period in the future.
Historical database Contains intrahour records for up to 62 days in the past, daily records for up to 5 years in the past, and weekly or monthly records for up to 10 years for each CMS-measured agent, split or skill, trunk, trunk group, vector, and VDN.
Historical reports Reports that display past ACD data for various agent, split or skill, trunk, trunk group, vector, or VDN activities.

ON-Bar
Issue 1.2 June 2004 89
Host name A name that you (or your system administrator) assign to your system unit to uniquely identify it to the Solaris operating system (and also to the network).
IDS See Informix Dynamic Server (IDS).
Informix Dynamic Server (IDS)
The relational database management system that is used with Avaya CMS Release 3 Version 9 and later.
Link A transmitter-receiver channel or system that connects two locations.
Log in The process of gaining access to a system by entering a user name and, optionally, a password.
Log out The process of exiting from a system.
Measured A term that means an ACD element (agent, split or skill, trunk, trunk group, vector, VDN) has been identified to Avaya CMS for collection of data.
Multi-user mode A mode of Avaya CMS in which any administered CMS user can log into CMS. Data continues to be collected if data collection is "on."
Network address A unique number assigned to each system on a network, consisting of the network number and the system number. Also known as Internet Address or Internet Protocol (IP) address.
Network hub Hardware that connects a computer to a Network Terminal Server (NTS).
Network Terminal Server (NTS)
A hardware terminal that connects to the network hub via cabling. The NTS provides 50-pin switch champ connectors used to attach 64 serial devices using the patch panel cables and patch panels.
Node A unique name used to identify a client to the server.
Non-Volatile Random Access Memory (NVRAM)
A random access memory (RAM) system that holds its contents when external power is lost.
NTS See Network Terminal Server (NTS).
NVRAM See Non-Volatile Random Access Memory (NVRAM).
ON-Bar An Informix IDS tool that works with a Storage Manager to backup and restore the Informix Database.

Operating system (OS)
90 LAN Backup User Guide
Operating system (OS) The software that controls and allocates the resources, such as memory, disk storage, and the screen display for the computer.
Single-user mode An Avaya CMS mode in which only one person can log into CMS. Data collection continues if data collection is "on." This mode is required to change some CMS administration.
Skill In relationship to the call center, think of skill as a specific customer need or requirement, or perhaps a business need of the call center.
SQL See Structured Query Language (SQL).
Small Computer System Interface (SCSI)
A hardware interface that allows the connection of peripheral devices (such as hard disks, tape drives and CD-ROM drives) to a computer system.
Split A group of extensions that receive special-purpose calls in an efficient, cost-effective manner. Normally, calls to a split arrive over one or a few trunk groups.
Storage device A hardware device that can receive data and retain it for subsequent retrieval. Such devices cover a wide range of capacities and speeds of access.
Storage manager A 3rd party software package that manages backups and restores. It gets the data from Avaya CMS and ON-Bar and writes it to the storage devices.
Structured Query Language (SQL)
A language used to interrogate and process data in a relational database. SQL commands can be used to interactively work with a database or can be embedded within a programming language to interface to a database.
Super-user A user with full access privileges on a system, unlike a regular user whose access to files and accounts is limited.
Switch A private switch system providing voice-only or voice and data communications services (including access to public and private networks) for a group of terminals within a customer�s premises.
System A general term for a computer and its software and data.
System backup The backup that uses a storage manager to backup the UNIX files.
System restore The restore that uses a storage manager to restore the UNIX files.

VDN
Issue 1.2 June 2004 91
TCP/IP See Transmission Control Protocol/Internet Protocol (TCP/IP).
Tivoli Storage Manager (TSM)
The Storage Manager supported in the first release of LAN Backup.
TSC Technical Service Center. The Avaya organization that provides technical support for Avaya products.
TSM See Tivoli Storage Manager (TSM).
Transmission Control Protocol/Internet Protocol (TCP/IP)
A communications protocol that provides interworking between dissimilar systems. It is the de facto standard for UNIX systems.
Trunk A telephone line that carries calls between two switches, between a Central Office (CO) and a switch, or between a CO and a phone.
Trunk group A group of trunks that are assigned the same dialing digits - either a phone number or a Direct Inward Dialing (DID) prefix.
UNIX system The operating system on the computer on which Avaya CMS runs. A user can access the UNIX system from the "Commands" SLK. SUN uses Solaris as its UNIX operating system.
User ID The login ID for an Avaya CMS user.
User name A combination of letters, and possibly numbers, that identifies a user to the system.
VDN See Vector Directory Number (VDN).

Vector
92 LAN Backup User Guide
Vector A list of steps that process calls in a user-defined manner. The steps in a vector can send calls to splits, play announcements and/or music, disconnect calls, give calls a busy signal, or route calls to other destinations. Calls enter vector processing by way of VDNs, which may have received calls from assigned trunk groups, from other vectors, or from extensions connected to the switch.
Vector Directory Number (VDN)
An extension number that is used in ACD software to permit calls to connect to a vector for processing. A VDN is not assigned an equipment location; it is assigned to a vector. A VDN can connect calls to a vector when the calls arrive over an assigned automatic-in trunk group or when calls arrive over a dial-repeating (DID) trunk group, and the final digits match the VDN. The VDN by itself may be dialed to access the vector from any extension connected to the switch.
XBSA (X/Open Backup Services Application Programmer's Interface)
An open system interface that allows ON-Bar to communicate to the Storage Manager.

Issue 1.2 June 2004 93
IndexBback.log. . . . . . . . . . . . . . . . . . . . . . 58backup
data . . . . . . . . . . . . . . . . . . . . . . 35recommendations . . . . . . . . . . . . . . . 32system . . . . . . . . . . . . . . . . . . . . 33
bar_act.log . . . . . . . . . . . . . . . . . . . . 60basic . . . . . . . . . . . . . . . . . . . . . . . 57
CCMS
data restore . . . . . . . . . . . . . . . . . . 37system restore . . . . . . . . . . . . . . . . . 38
configuringnetwork . . . . . . . . . . . . . . . . . . . . 63
configuring softwareLAN backup, initial . . . . . . . . . . . . . . . 23
Ddata backup
logs . . . . . . . . . . . . . . . . . . . . . . 58on demand . . . . . . . . . . . . . . . . . . 35performing . . . . . . . . . . . . . . . . . . . 35
disk failure . . . . . . . . . . . . . . . . . . . . 55disk pairs . . . . . . . . . . . . . . . . . . . 75, 77DNS . . . . . . . . . . . . . . . . . . . . . . . 65dsierror.log . . . . . . . . . . . . . . . . . . . . 60dsm.opt . . . . . . . . . . . . . . . . . . . . . . 25dsm.sys. . . . . . . . . . . . . . . . . . . . . . 26dsmerror.log . . . . . . . . . . . . . . . . . . . 60
Eenabling
DNS. . . . . . . . . . . . . . . . . . . . . . 65system to boot . . . . . . . . . . . . . . . . . 39
error logs . . . . . . . . . . . . . . . . . . . . . 58error messages
shared memory . . . . . . . . . . . . . . . . 71storage pool variables . . . . . . . . . . . . . 68
Ffailure
data restore . . . . . . . . . . . . . . . . 71, 73system restore . . . . . . . . . . . . . . . . . 73
Hhardware
required . . . . . . . . . . . . . . . . . . . . 18helplines. . . . . . . . . . . . . . . . . . . . . . 16
Iinclude exclude list . . . . . . . . . . . . . . . 29, 66
LLAN backup
initial software configuration . . . . . . . . . . . 23support. . . . . . . . . . . . . . . . . . . . . 19
Mmirrored system disk pairs . . . . . . . . . . . 75, 77
Nnetwork card . . . . . . . . . . . . . . . . . . . . 69network setup . . . . . . . . . . . . . . . . . . . 63
OON-Bar
recommended configurations . . . . . . . . . . 23
Rrecommended configurations
ON-Bar. . . . . . . . . . . . . . . . . . . . . 23storage manager . . . . . . . . . . . . . . . . 25
requiredhardware . . . . . . . . . . . . . . . . . . . . 18software . . . . . . . . . . . . . . . . . . . . 18
responsibilities . . . . . . . . . . . . . . . . . . . 19

94 LAN Backup User Guide
restarting a restore . . . . . . . . . . . . . . . . . 73restore
CMS data . . . . . . . . . . . . . . . . . . . 37CMS system . . . . . . . . . . . . . . . . . . 38CMS system data . . . . . . . . . . . . . . . . 45specific files . . . . . . . . . . . . . . . . . . 38
restore.log . . . . . . . . . . . . . . . . . . . . . 61restoring data
disk failure . . . . . . . . . . . . . . . . . . . 53disk replacement . . . . . . . . . . . . . . . . 53
Sshared memory . . . . . . . . . . . . . . . . . . 71software
required . . . . . . . . . . . . . . . . . . . . 18software installation
booting from the Solaris software CD-ROM . . . . 39Solaris
booting from CD-ROM . . . . . . . . . . . . . 39identifying the system . . . . . . . . . . . . . . 40
storage managerrecommended configurations . . . . . . . . . . 25
storage pool variables . . . . . . . . . . . . . . . 68system backup . . . . . . . . . . . . . . . . . . . 33
on demand . . . . . . . . . . . . . . . . . . . 34
TTivoli
password file . . . . . . . . . . . . . . . . . . 28troubleshooting . . . . . . . . . . . . . . . . . . 57
data backup log. . . . . . . . . . . . . . . . . 58include exclude list . . . . . . . . . . . . . . . 66network card . . . . . . . . . . . . . . . . . . 69
Vverifying
dsm.opt . . . . . . . . . . . . . . . . . . . . 25dsm.sys . . . . . . . . . . . . . . . . . . . . 26include exclude list . . . . . . . . . . . . . . . 29network card settings . . . . . . . . . . . . . . 69