Embed Size (px)
Citation preview

Key Words
• Antaris
• FT-NIR
• Power Outage
• Process
• Recovery
• Restart
Technical Note: 51262 Automatic Power-Outage Recovery with
an Antaris Process FT-NIR Analyzer andRESULT SoftwareJeffrey Hirsch, Ph.D., Thermo Fisher Scientific, Madison, WI, USA
One of the primary considerations in putting a Near-Infrared(NIR) analyzer online in a manufacturing process is howthe analyzer will react in the event of a power outage onthe factory grid. This document discusses the steps neededto set up an Antaris™ FT-NIR process analyzer to recoverautomatically from a power outage. Once recovered, theinstrument can be set to either begin collecting dataautomatically to monitor and record process informationas the plant recovers, or it can be left in a “ready-to-run”state until other systems come online.
The first step configures the Binary Instrument OperatingSystem (BIOS) settings of the computer attached to theinstrument to auto-launch the computer after power loss.To set the BIOS options, turn on the computer and, whenprompted to enter setup, hit the appropriate key. This willlaunch the BIOS setup utility. From there, navigate to thesection titled “Power Management” and select the “ACRecovery” option (versions of BIOS differ in the locationof this setting. If you cannot find power options contactyour IT department). Set this option to “On”. Thecomputer will now automatically power on after powerinterrupt instead of requiring an operator to press abutton. Figure 1 is a picture of how the “AC Recovery”option in the BIOS interface might look.
In highly-regulated environments, it is usually requiredthat an operator log into a workstation using either aunique password or a pass key. If login security is required,then there are two main options to accomplish a recovery,remote desktop for the workstation or a remote computer.Remote desktop is the most efficient of the two, enabling alogin by an authentic user over a network connection. Toset up this feature, Microsoft® Windows® Remote Desktopmust be enabled by going into the “System” control panel.The tab labeled “Remote” contains the activation for theRemote Desktop feature (Figure 2). This will allow aregistered user to enter the required login over a networkafter power has been disrupted. Please check with your ITdepartment to ensure compliance with company policyregarding this type of setup.
With the computer on and logged in, RESULT™
software must be automatically started. To accomplishthis task, simply place a copy of the RESULT Operationshortcut in the “Startup” folder. To get to this folder, youcan either use Windows Explorer (typically found underC:\Documents and Settings\localuser\Start Menu\Programs)or you can go in through the Start Menu Properties. The latter method is explained in detail below.
Right click on the Windows Start Menu and select“Properties.” The screen that comes up in Windows XP is shown in Figure 3a. Click “Customize” and then click“Advanced” on the next screen. You will get a WindowsExplorer screen that is defaulted to a folder called “StartMenu” (Figure 3b). Open the “Start Menu” folder, expandthe folder called “Programs”, and click once on the foldercalled “Startup.” The contents of this “Startup” folder willbe launched automatically at computer power-up. Make acopy of the RESULT Operation icon on the desktop andplace it in this folder. The next time the computer reboots,RESULT Operation will automatically launch. This sametask can be accomplished using Windows Explorer to find the same “Startup” folder and copying in the icon.
At this point, both the computer and instrument arepowered on, a legitimate user is logged in and RESULTOperation is open, all without operator interaction. The analyzer is now in a “ready-to-run” state.
Figure 1: One version of the BIOS Setup utility for a PC
Figure 2: Microsoft Windows’ Remote Desktop connection preferences
There is anotherstep that can be takento get the analyzeronline and running aspecific workflowwithout operatorinteraction. Using eitherthe IndustrialAutomation options inRESULT Operation oran OPC command, aspecific workflow can be loaded and launched.
To use the OPC option available in all configurationsof RESULT software, edit the values for the tags labeledName, WorkflowPath and RunningState (shown in Figure 4using the RESULT OPC Test Client). This will allow aremote operator to load and initiate any RESULT workflowon the local computer automatically. The only workflowsavailable to be called in this manner are the ones that alreadyexist in RESULT Operation’s “Select Workflow” menu.
After power interrupt, if a PLC line is still active, or if the PLC is already online, RESULT software can read its input and use it to do the same thing as above – loadand initiate a RESULT workflow. The settings used in this case (as opposed to the OPC case) are found in RESULT’s“Industrial Automation Options” in the “Administration”
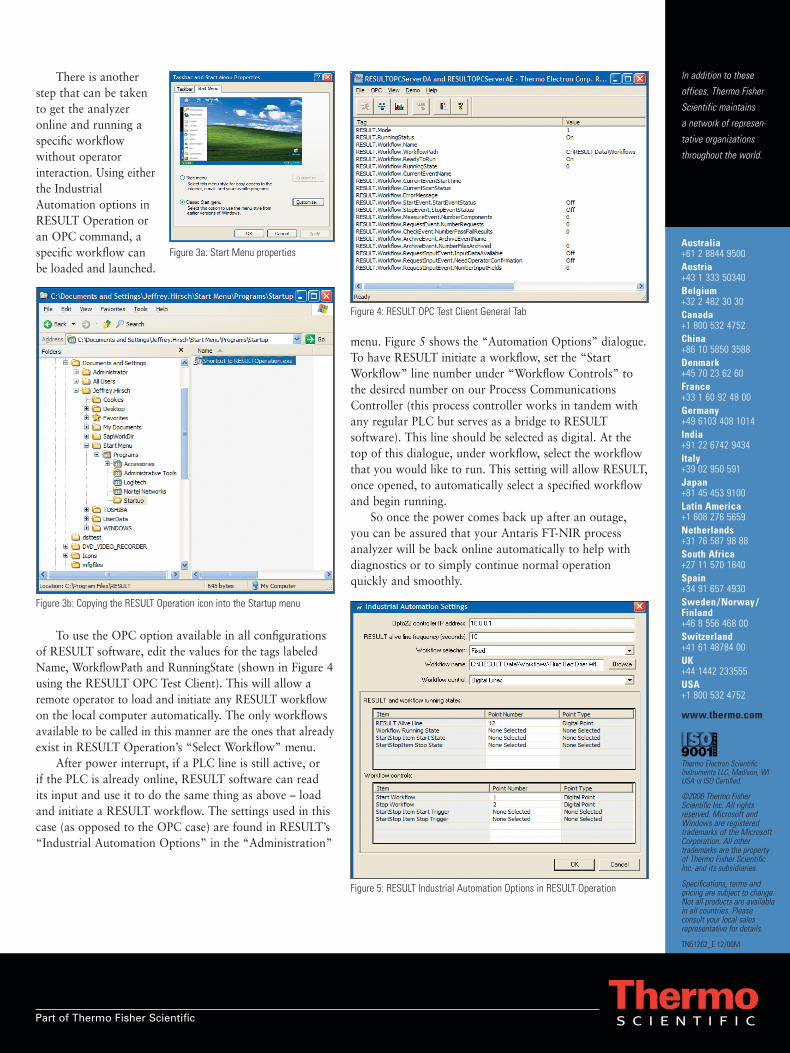
menu. Figure 5 shows the “Automation Options” dialogue.To have RESULT initiate a workflow, set the “StartWorkflow” line number under “Workflow Controls” tothe desired number on our Process CommunicationsController (this process controller works in tandem withany regular PLC but serves as a bridge to RESULTsoftware). This line should be selected as digital. At thetop of this dialogue, under workflow, select the workflowthat you would like to run. This setting will allow RESULT,once opened, to automatically select a specified workflowand begin running.
So once the power comes back up after an outage, you can be assured that your Antaris FT-NIR processanalyzer will be back online automatically to help withdiagnostics or to simply continue normal operationquickly and smoothly.
©2006 Thermo FisherScientific Inc. All rightsreserved. Microsoft andWindows are registeredtrademarks of the MicrosoftCorporation. All othertrademarks are the propertyof Thermo Fisher ScientificInc. and its subsidiaries.
Specifications, terms andpricing are subject to change.Not all products are availablein all countries. Pleaseconsult your local salesrepresentative for details.
In addition to these
offices, Thermo Fisher
Scientific maintains
a network of represen-
tative organizations
throughout the world.
Australia+61 2 8844 9500Austria+43 1 333 50340Belgium+32 2 482 30 30Canada+1 800 532 4752China+86 10 5850 3588Denmark+45 70 23 62 60 France+33 1 60 92 48 00Germany+49 6103 408 1014India+91 22 6742 9434Italy+39 02 950 591Japan+81 45 453 9100Latin America+1 608 276 5659Netherlands+31 76 587 98 88South Africa+27 11 570 1840Spain+34 91 657 4930Sweden / Norway /Finland+46 8 556 468 00Switzerland+41 61 48784 00UK+44 1442 233555USA+1 800 532 4752
www.thermo.com
TN51262_E 12/06M
Thermo Electron ScientificInstruments LLC, Madison, WIUSA is ISO Certified.
Part of Thermo Fisher Scientific
Figure 3a: Start Menu properties
Figure 3b: Copying the RESULT Operation icon into the Startup menu
Figure 4: RESULT OPC Test Client General Tab
Figure 5: RESULT Industrial Automation Options in RESULT Operation