Embed Size (px)
Citation preview
Audi B6 B7Coilover SuspensionInstallation Instructions
Proper service and repair procedures are vital to the safe, reliable operation of all motor vehicles as well as the personal safety of those performing the repairs. Standard safety procedures and precautions (including use of safety goggles and proper tools and equipment) should be followed at all times to eliminate the possibility of personal injury or improper service which could damage the vehicle or compromise its safety.
R
AUDI B6 B7 COILOVER SUSPENSION INSTALLATION INSTRUCTIONS
ECS TUNING 1000 SEVILLE RD. WADSWORTH, OH 44281 1.800.924.5172 WWW.ECSTUNING.COM 2
SOME EXPERIENCE RECOMMENDED
ADVANCED SKILLS &EXPERIENCE REQUIRED
PROFESSIONAL SKILLS & SPECIALTY TOOLS REQUIRED
SOME EXPERIENCE RECOMMENDED
ADVANCED SKILLS &EXPERIENCE REQUIRED
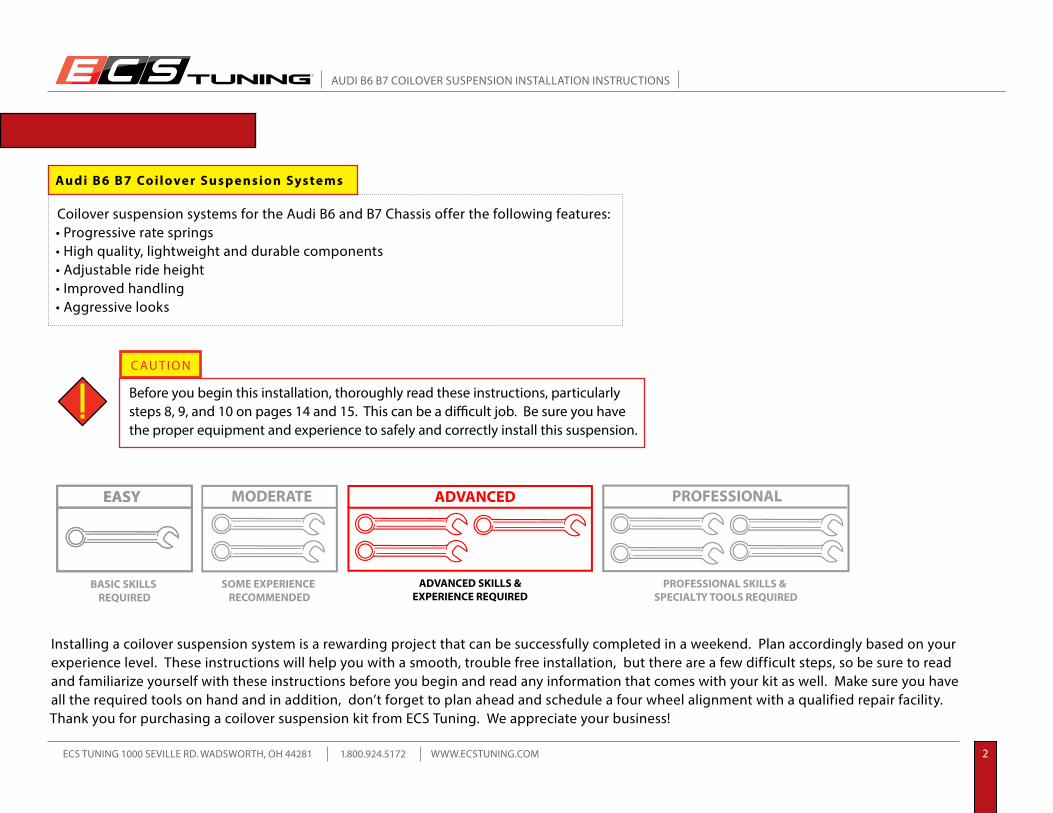
Installing a coilover suspension system is a rewarding project that can be successfully completed in a weekend. Plan accordingly based on your experience level. These instructions will help you with a smooth, trouble free installation, but there are a few difficult steps, so be sure to read and familiarize yourself with these instructions before you begin and read any information that comes with your kit as well. Make sure you have all the required tools on hand and in addition, don’t forget to plan ahead and schedule a four wheel alignment with a qualified repair facility. Thank you for purchasing a coilover suspension kit from ECS Tuning. We appreciate your business!
INTRODUCTION
Coilover suspension systems for the Audi B6 and B7 Chassis offer the following features:• Progressive rate springs• High quality, lightweight and durable components• Adjustable ride height• Improved handling• Aggressive looks
Audi B6 B7 Coilover Susp ension Systems
BASIC SKILLS REQUIRED
BASIC SKILLS REQUIRED
PROFESSIONAL SKILLS & SPECIALTY TOOLS REQUIRED
Before you begin this installation, thoroughly read these instructions, particularly steps 8, 9, and 10 on pages 14 and 15. This can be a difficult job. Be sure you have the proper equipment and experience to safely and correctly install this suspension.
CAUTION
R
AUDI B6 B7 COILOVER SUSPENSION INSTALLATION INSTRUCTIONS
ECS TUNING 1000 SEVILLE RD. WADSWORTH, OH 44281 1.800.924.5172 WWW.ECSTUNING.COM 3
TABLE OF CONTENTSCoilover Kit Contents ...................................................................................................pg.4
Installation Kits ...............................................................................................................pg.5
Required Tools and Equipment ................................................................................pg.6
Additional Recommendations for Coilover Installation ..................................pg.7
Shop Supplies and Materials .....................................................................................pg.7
Installation Notes ..........................................................................................................pg.8
Preparation and Safety ................................................................................................pg.8
Initial Procedures ...........................................................................................................pg.9
Removing the Original Front Struts ........................................................................pg.11
Disassembling the Original Front Struts ...............................................................pg.21
Assembling and Installing the New Front Coilovers.........................................pg.24
Removing the Original Rear Shocks and Springs ..............................................pg.31
Installing the New Rear Shocks and Springs .......................................................pg.35
Adjusting Ride Height .................................................................................................pg.43
Torque Specifications ...................................................................................................pg.45
We carry some of the the finest coilover suspension kits from some of the best names in the business. These instructions are intended as a guide to help you install a coilover kit on any B6 or B7 Audi Chassis. We have used an H&R coilover kit in creating these instructions. There may be some minor differences in kits from different manufacturers, but the overall installation procedures will be the same.

R
AUDI B6 B7 COILOVER SUSPENSION INSTALLATION INSTRUCTIONS
ECS TUNING 1000 SEVILLE RD. WADSWORTH, OH 44281 1.800.924.5172 WWW.ECSTUNING.COM 4
COILOVER KIT CONTENTS
Rear Shocks Front Shocks with Adjustable Spring Perches
Rear Coil Springs Front Coil Springs
Rear Spring Perches Coilover Suspension Adjustment Wrenches
Actual Kit contents may vary slightly depending on manufacturer.
NOTE
R
AUDI B6 B7 COILOVER SUSPENSION INSTALLATION INSTRUCTIONS
ECS TUNING 1000 SEVILLE RD. WADSWORTH, OH 44281 1.800.924.5172 WWW.ECSTUNING.COM 5
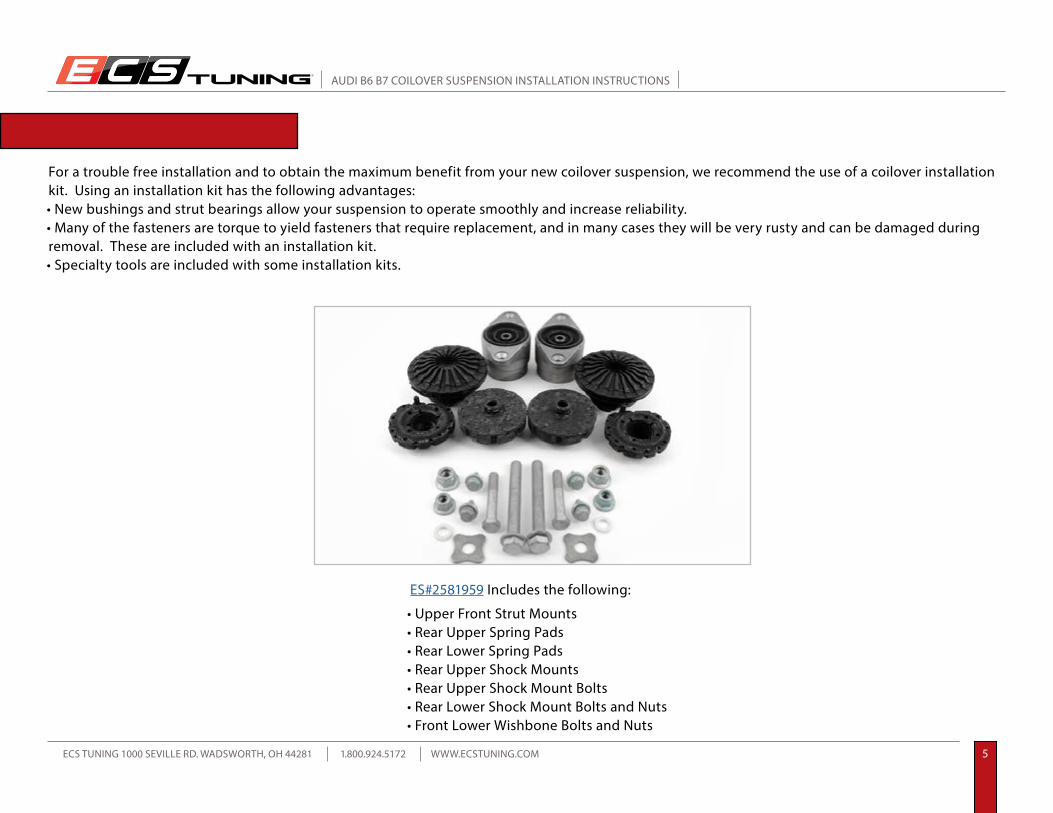
INSTALLATION KITSFor a trouble free installation and to obtain the maximum benefit from your new coilover suspension, we recommend the use of a coilover installation kit. Using an installation kit has the following advantages:• New bushings and strut bearings allow your suspension to operate smoothly and increase reliability.• Many of the fasteners are torque to yield fasteners that require replacement, and in many cases they will be very rusty and can be damaged during removal. These are included with an installation kit.• Specialty tools are included with some installation kits.
• Upper Front Strut Mounts• Rear Upper Spring Pads• Rear Lower Spring Pads• Rear Upper Shock Mounts• Rear Upper Shock Mount Bolts• Rear Lower Shock Mount Bolts and Nuts• Front Lower Wishbone Bolts and Nuts
ES#2581959 Includes the following:
R
AUDI B6 B7 COILOVER SUSPENSION INSTALLATION INSTRUCTIONS
ECS TUNING 1000 SEVILLE RD. WADSWORTH, OH 44281 1.800.924.5172 WWW.ECSTUNING.COM 6
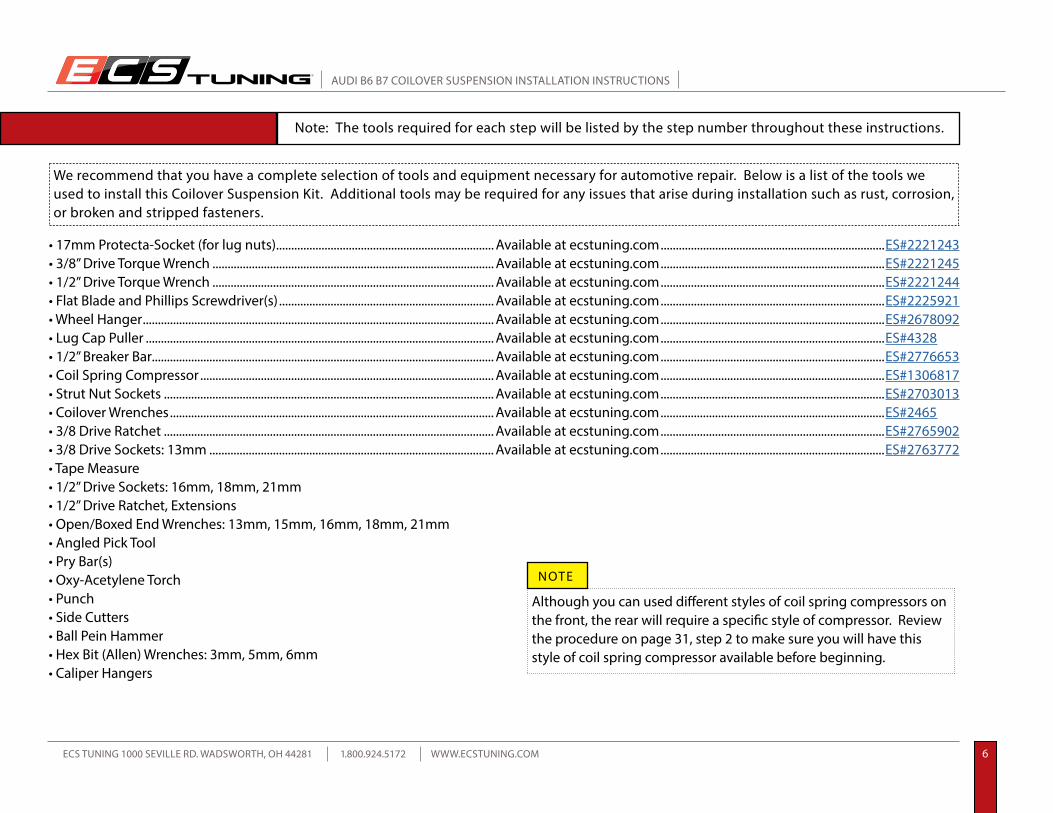
REQUIRED TOOLSWe recommend that you have a complete selection of tools and equipment necessary for automotive repair. Below is a list of the tools we used to install this Coilover Suspension Kit. Additional tools may be required for any issues that arise during installation such as rust, corrosion, or broken and stripped fasteners.
• 17mm Protecta-Socket (for lug nuts) ........................................................................ Available at ecstuning.com ..........................................................................ES#2221243• 3/8” Drive Torque Wrench ............................................................................................. Available at ecstuning.com ..........................................................................ES#2221245• 1/2” Drive Torque Wrench ............................................................................................. Available at ecstuning.com ..........................................................................ES#2221244• Flat Blade and Phillips Screwdriver(s) ....................................................................... Available at ecstuning.com ..........................................................................ES#2225921• Wheel Hanger .................................................................................................................... Available at ecstuning.com ..........................................................................ES#2678092• Lug Cap Puller ................................................................................................................... Available at ecstuning.com ..........................................................................ES#4328• 1/2” Breaker Bar................................................................................................................. Available at ecstuning.com ..........................................................................ES#2776653• Coil Spring Compressor ................................................................................................. Available at ecstuning.com ..........................................................................ES#1306817• Strut Nut Sockets ............................................................................................................. Available at ecstuning.com ..........................................................................ES#2703013• Coilover Wrenches ........................................................................................................... Available at ecstuning.com ..........................................................................ES#2465• 3/8 Drive Ratchet ............................................................................................................. Available at ecstuning.com ..........................................................................ES#2765902• 3/8 Drive Sockets: 13mm .............................................................................................. Available at ecstuning.com ..........................................................................ES#2763772• Tape Measure• 1/2” Drive Sockets: 16mm, 18mm, 21mm• 1/2” Drive Ratchet, Extensions• Open/Boxed End Wrenches: 13mm, 15mm, 16mm, 18mm, 21mm• Angled Pick Tool• Pry Bar(s)• Oxy-Acetylene Torch• Punch• Side Cutters• Ball Pein Hammer• Hex Bit (Allen) Wrenches: 3mm, 5mm, 6mm• Caliper Hangers
Note: The tools required for each step will be listed by the step number throughout these instructions.
Although you can used different styles of coil spring compressors on the front, the rear will require a specific style of compressor. Review the procedure on page 31, step 2 to make sure you will have this style of coil spring compressor available before beginning.
NOTE
R
AUDI B6 B7 COILOVER SUSPENSION INSTALLATION INSTRUCTIONS
ECS TUNING 1000 SEVILLE RD. WADSWORTH, OH 44281 1.800.924.5172 WWW.ECSTUNING.COM 7
ADDITIONAL RECOMMENDATIONS FOR COILOVER INSTALLATION
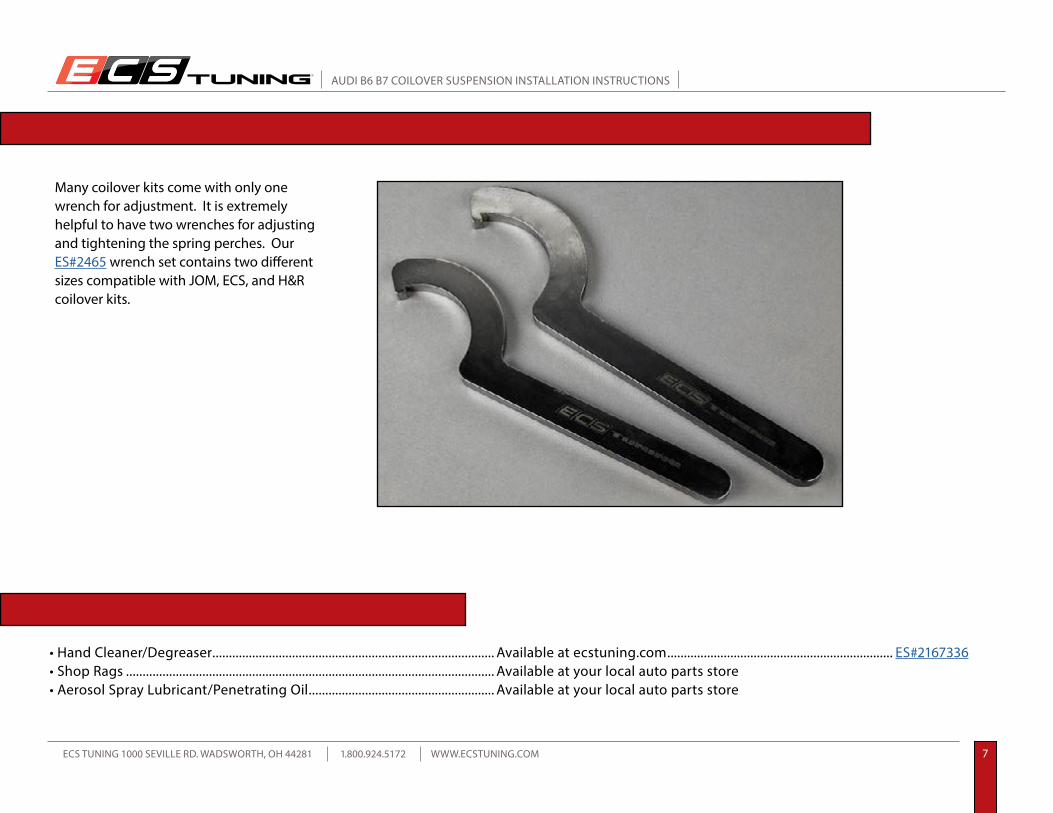
SHOP SUPPLIES AND MATERIALS• Hand Cleaner/Degreaser ..................................................................................... Available at ecstuning.com .................................................................... ES#2167336• Shop Rags ............................................................................................................... Available at your local auto parts store• Aerosol Spray Lubricant/Penetrating Oil ........................................................ Available at your local auto parts store
Many coilover kits come with only one wrench for adjustment. It is extremely helpful to have two wrenches for adjusting and tightening the spring perches. Our ES#2465 wrench set contains two different sizes compatible with JOM, ECS, and H&R coilover kits.

R
AUDI B6 B7 COILOVER SUSPENSION INSTALLATION INSTRUCTIONS
ECS TUNING 1000 SEVILLE RD. WADSWORTH, OH 44281 1.800.924.5172 WWW.ECSTUNING.COM 8
INSTALLATION NOTES• RH refers to the passenger side of the vehicle.• LH refers to the driver side of the vehicle.• Always use the proper torque specifications.• If applicable to this installation, torque specifications will be listed throughout the document and at the end as well.• Please read all of these instructions and familiarize yourself with the complete process before you begin.
Never get underneath a vehicle that is supported only by a jack. Always make sure that the vehicle is securely supported on jack stands.!
GENERAL PREPARATION AND SAFETY INFORMATION
• Park your car in a safe, well lit, level area.• Shut the engine off and remove the key from the ignition switch.• Make sure any remote start devices are properly disabled.• Always wear safety glasses.• Make sure the parking brake is applied until the vehicle is safely lifted and supported.• If using an automotive lift, be sure and utilize the factory specified lift points. Lifting a vehicle in an incorrect location can cause damage to the suspension/running gear.• When lifting a vehicle using a jack, always utilize the factory specified lift points. Lifting a vehicle in an incorrect location can cause damage to the suspension/running gear. Always support the vehicle with jack stands.• Always read and follow all safety information and warnings for the equipment you are using.
ECS Tuning cares about your health and safety. Please read the following safety information. This information pertains to automotive service in general, and while it may not pertain to every job you do, please remember and share these important safety tips.
R
AUDI B6 B7 COILOVER SUSPENSION INSTALLATION INSTRUCTIONS
ECS TUNING 1000 SEVILLE RD. WADSWORTH, OH 44281 1.800.924.5172 WWW.ECSTUNING.COM 9
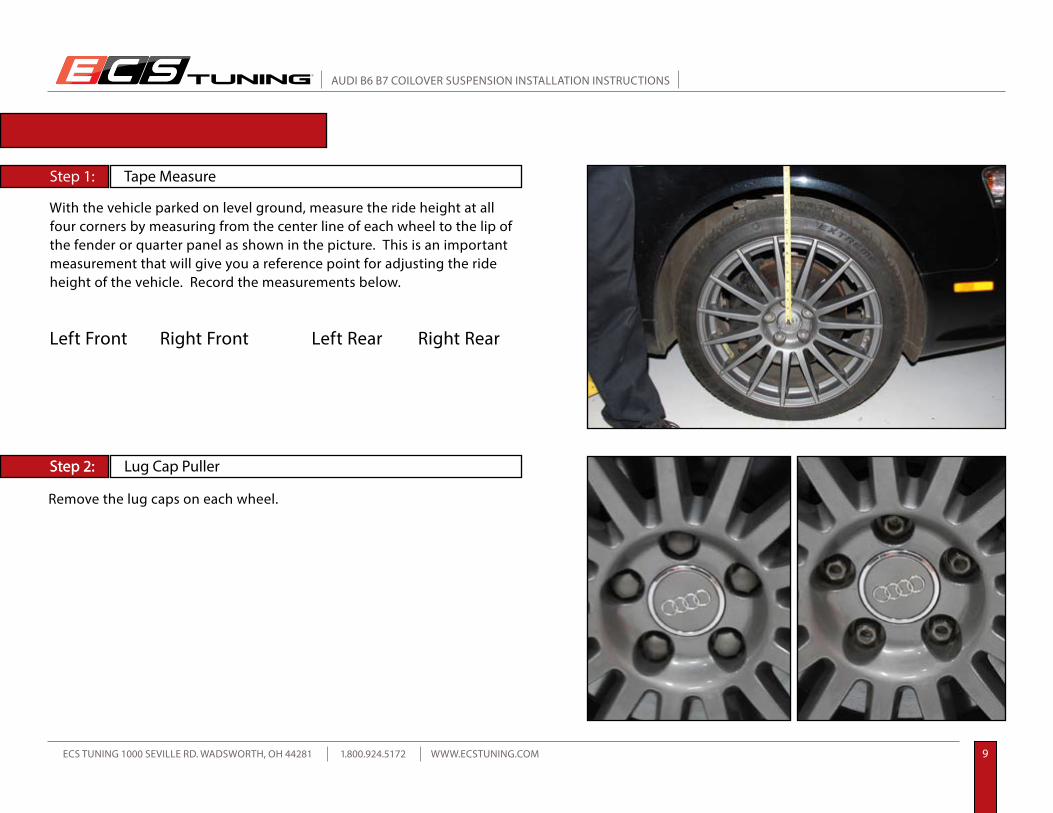
With the vehicle parked on level ground, measure the ride height at all four corners by measuring from the center line of each wheel to the lip of the fender or quarter panel as shown in the picture. This is an important measurement that will give you a reference point for adjusting the ride height of the vehicle. Record the measurements below.
INITIAL PROCEDURES
Remove the lug caps on each wheel.
Step 1:
Step 2:
Left Front Left RearRight Front Right Rear
Step 2: Lug Cap Puller
Tape Measure
R
AUDI B6 B7 COILOVER SUSPENSION INSTALLATION INSTRUCTIONS
ECS TUNING 1000 SEVILLE RD. WADSWORTH, OH 44281 1.800.924.5172 WWW.ECSTUNING.COM 10
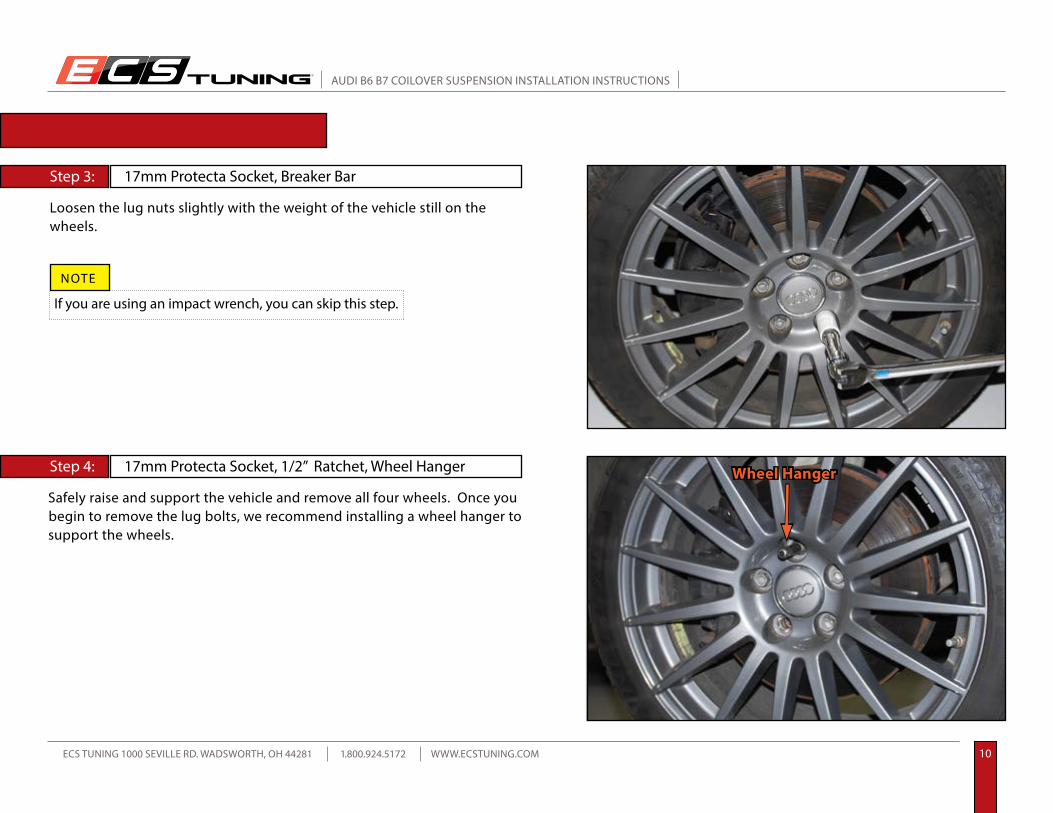
Loosen the lug nuts slightly with the weight of the vehicle still on the wheels.
Step 3:
Step 4:
Safely raise and support the vehicle and remove all four wheels. Once you begin to remove the lug bolts, we recommend installing a wheel hanger to support the wheels.
17mm Protecta Socket, 1/2” Ratchet, Wheel Hanger
17mm Protecta Socket, Breaker Bar
If you are using an impact wrench, you can skip this step.
NOTE
Wheel Hanger
INITIAL PROCEDURES

R
AUDI B6 B7 COILOVER SUSPENSION INSTALLATION INSTRUCTIONS
ECS TUNING 1000 SEVILLE RD. WADSWORTH, OH 44281 1.800.924.5172 WWW.ECSTUNING.COM 11
On the LH (Drivers) side only, locate the coupling rod for the vehicle headlight level sensor, attached to a clip on the lower front suspension link.
Pry up on the top of the clip from the back side of the suspension link. Once the clip releases, pivot it downward and remove it.
Step 1:
Step 2:Step 2: Flat Blade Screwdriver
REMOVING THE ORIGINAL FRONT STRUTS
Check to see that the ball and socket connection between the coupling rod and the clip is rotating freely. If not, spray penetrating lubricant in the connection and work it back and forth until the lubricant seeps in and frees it up.
TECH TIP
R
AUDI B6 B7 COILOVER SUSPENSION INSTALLATION INSTRUCTIONS
ECS TUNING 1000 SEVILLE RD. WADSWORTH, OH 44281 1.800.924.5172 WWW.ECSTUNING.COM 12
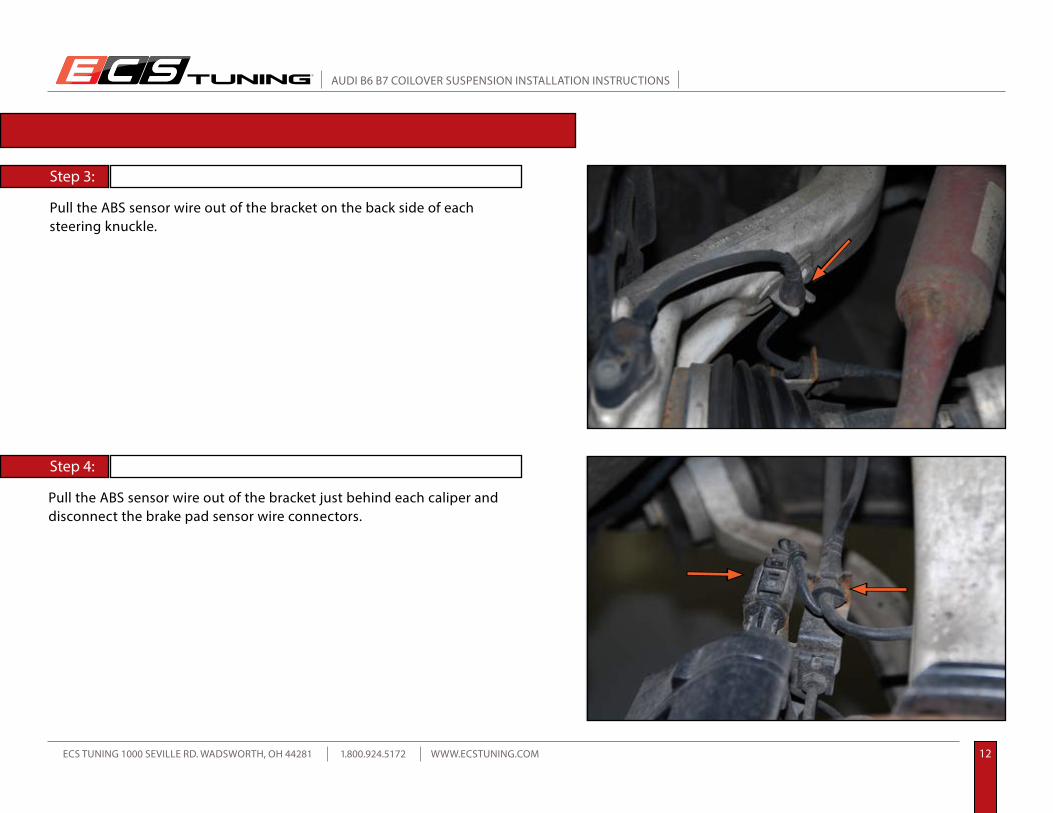
REMOVING THE ORIGINAL FRONT STRUTS
Pull the ABS sensor wire out of the bracket on the back side of each steering knuckle.
Step 3:
Step 4:
Pull the ABS sensor wire out of the bracket just behind each caliper and disconnect the brake pad sensor wire connectors.
R
AUDI B6 B7 COILOVER SUSPENSION INSTALLATION INSTRUCTIONS
ECS TUNING 1000 SEVILLE RD. WADSWORTH, OH 44281 1.800.924.5172 WWW.ECSTUNING.COM 13
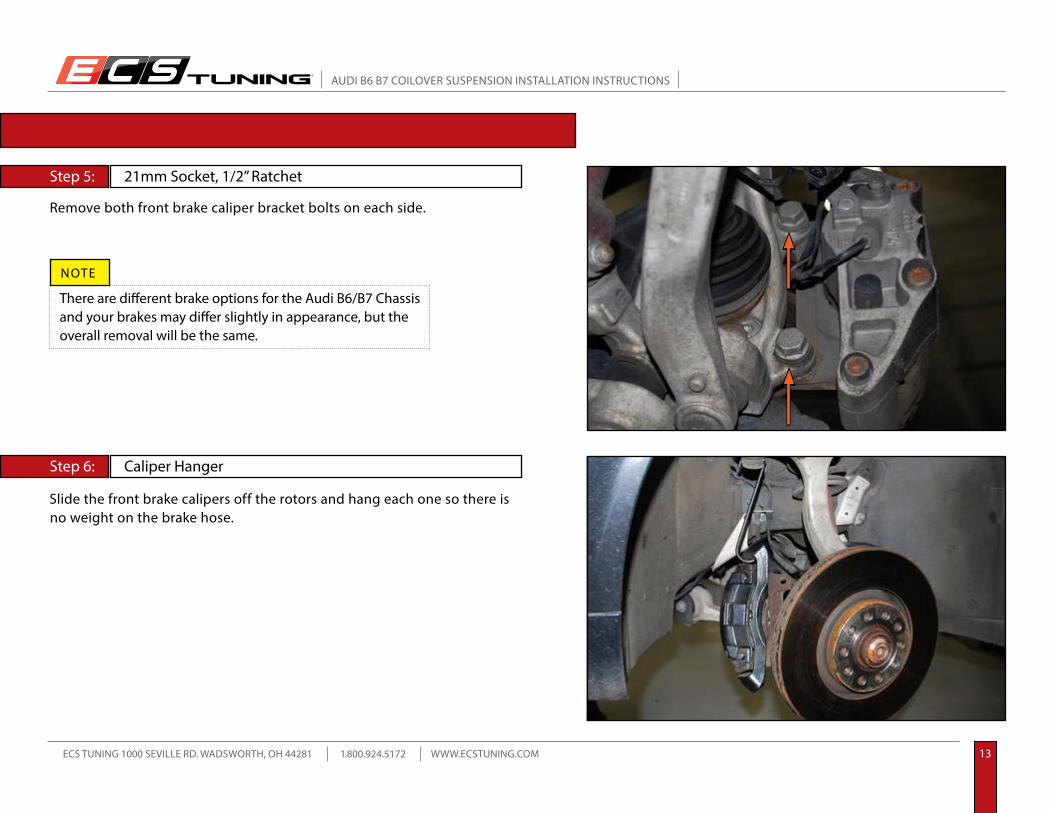
Step 6:
Step 5:
Remove both front brake caliper bracket bolts on each side.
Slide the front brake calipers off the rotors and hang each one so there is no weight on the brake hose.
REMOVING THE ORIGINAL FRONT STRUTS
Caliper Hanger
21mm Socket, 1/2” Ratchet
There are different brake options for the Audi B6/B7 Chassis and your brakes may differ slightly in appearance, but the overall removal will be the same.
NOTE

R
AUDI B6 B7 COILOVER SUSPENSION INSTALLATION INSTRUCTIONS
ECS TUNING 1000 SEVILLE RD. WADSWORTH, OH 44281 1.800.924.5172 WWW.ECSTUNING.COM 14
Step 7:
Step 8:
REMOVING THE ORIGINAL FRONT STRUTS
Locate the upper link pinch bolt. This bolt will need to be removed, and it may be difficult. Because of the aluminum steering knuckle, these bolts have a tendency to become extremely corroded and stuck in place.
Pry the clip off of the upper strut mounting plate installation pin. This clip may be discarded, you will not need to re use it.
Angled Pick Tool
R
AUDI B6 B7 COILOVER SUSPENSION INSTALLATION INSTRUCTIONS
ECS TUNING 1000 SEVILLE RD. WADSWORTH, OH 44281 1.800.924.5172 WWW.ECSTUNING.COM 15
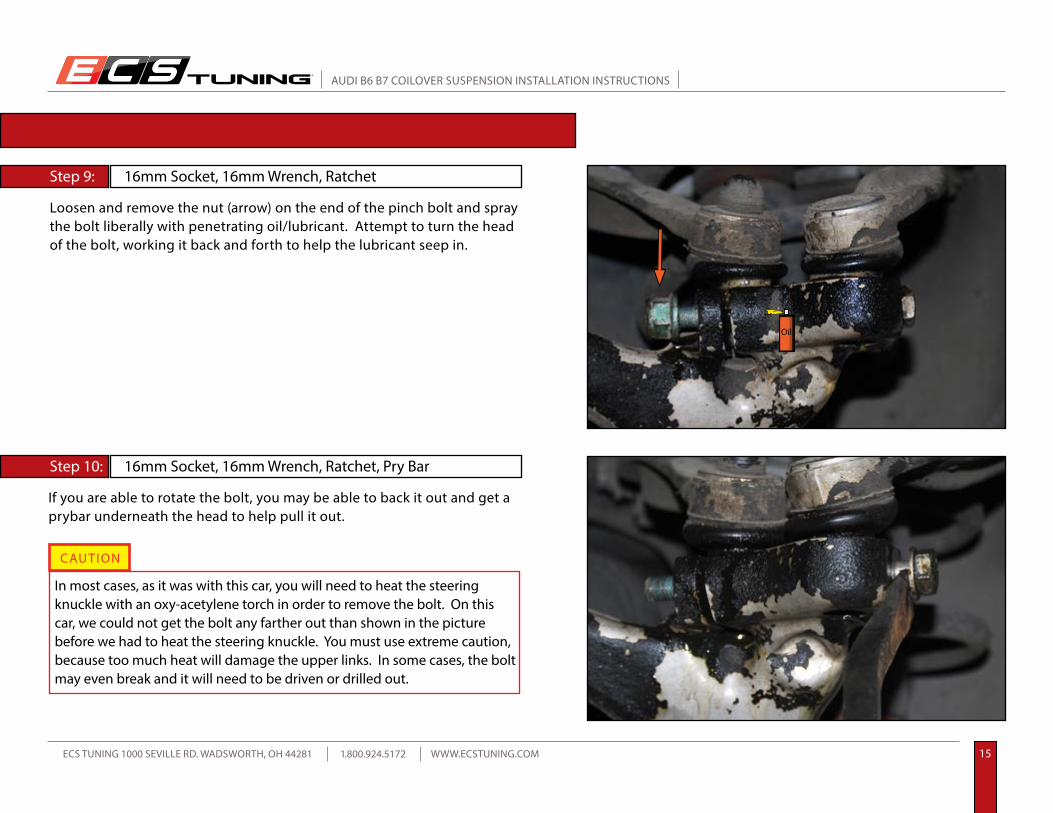
Loosen and remove the nut (arrow) on the end of the pinch bolt and spray the bolt liberally with penetrating oil/lubricant. Attempt to turn the head of the bolt, working it back and forth to help the lubricant seep in.
Step 9:
Step 10:
REMOVING THE ORIGINAL FRONT STRUTS
If you are able to rotate the bolt, you may be able to back it out and get a prybar underneath the head to help pull it out.
16mm Socket, 16mm Wrench, Ratchet
16mm Socket, 16mm Wrench, Ratchet, Pry Bar
In most cases, as it was with this car, you will need to heat the steering knuckle with an oxy-acetylene torch in order to remove the bolt. On this car, we could not get the bolt any farther out than shown in the picture before we had to heat the steering knuckle. You must use extreme caution, because too much heat will damage the upper links. In some cases, the bolt may even break and it will need to be driven or drilled out.
CAUTION
Oil

R
AUDI B6 B7 COILOVER SUSPENSION INSTALLATION INSTRUCTIONS
ECS TUNING 1000 SEVILLE RD. WADSWORTH, OH 44281 1.800.924.5172 WWW.ECSTUNING.COM 16
Step 11:
Step 12:
Once you have removed the pinch bolt, drive the upper links out of the steering knuckle from the bottom.
REMOVING THE ORIGINAL FRONT STRUTS
With both links driven out, swing the steering knuckle toward the rear of the wheel well to leave room for removing the original strut assembly.
Punch, Ball Pein Hammer
Do not spread the slots in the steering knuckle in any manner.
CAUTION
Using a wire brush or emery cloth, thoroughly clean the corrosion from the upper links and the steering knuckle
NOTE

R
AUDI B6 B7 COILOVER SUSPENSION INSTALLATION INSTRUCTIONS
ECS TUNING 1000 SEVILLE RD. WADSWORTH, OH 44281 1.800.924.5172 WWW.ECSTUNING.COM 17
Step 13:
Step 14:
Remove the lower strut wishbone bolt on each side.
Pull down slightly on the front suspension and lift the strut wishbone over the lower forward link.
REMOVING THE ORIGINAL FRONT STRUTS18mm Socket, Ratchet, 18mm Wrench

R
AUDI B6 B7 COILOVER SUSPENSION INSTALLATION INSTRUCTIONS
ECS TUNING 1000 SEVILLE RD. WADSWORTH, OH 44281 1.800.924.5172 WWW.ECSTUNING.COM 18
Open the hood, and lift the cowl panel off the RH (Passenger) side.
Remove the plug covering the outward upper strut mounting bolt.
Step 15:
Step 16:
REMOVING THE ORIGINAL FRONT STRUTS
Flat Blade Screwdriver
R
AUDI B6 B7 COILOVER SUSPENSION INSTALLATION INSTRUCTIONS
ECS TUNING 1000 SEVILLE RD. WADSWORTH, OH 44281 1.800.924.5172 WWW.ECSTUNING.COM 19
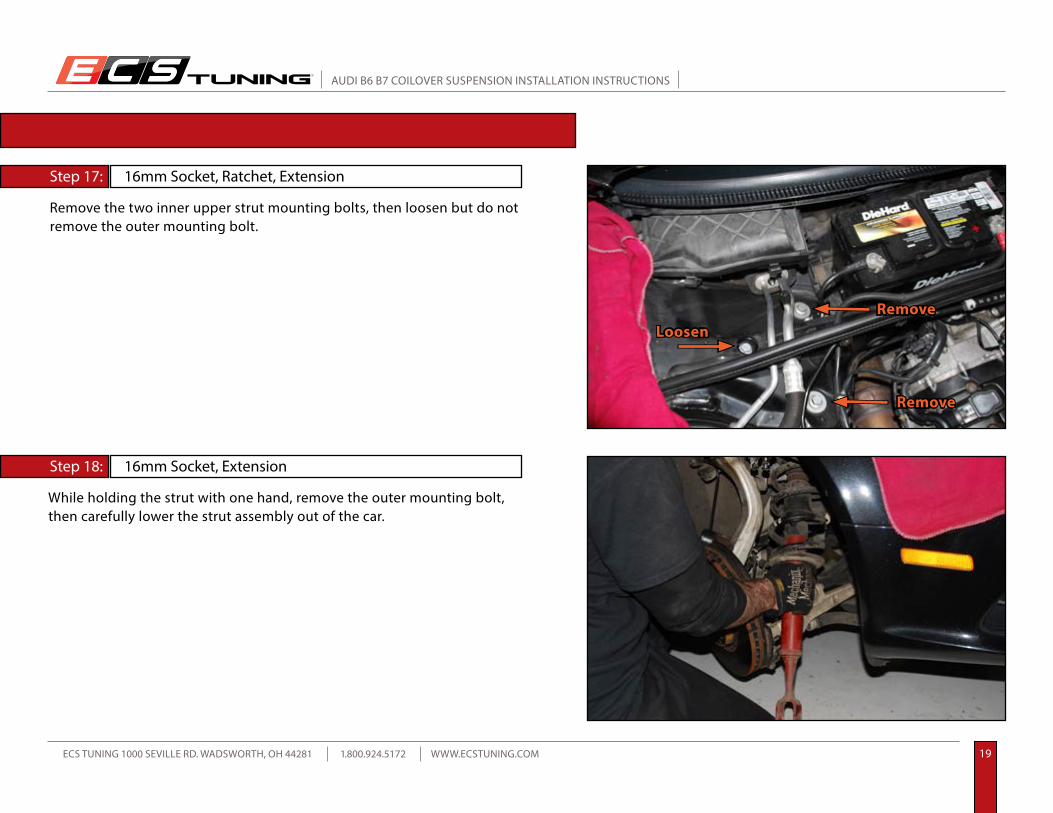
Remove the two inner upper strut mounting bolts, then loosen but do not remove the outer mounting bolt.
While holding the strut with one hand, remove the outer mounting bolt, then carefully lower the strut assembly out of the car.
Step 17:
Step 18:
REMOVING THE ORIGINAL FRONT STRUTS
Remove
RemoveLoosen
16mm Socket, Ratchet, Extension
16mm Socket, Extension

R
AUDI B6 B7 COILOVER SUSPENSION INSTALLATION INSTRUCTIONS
ECS TUNING 1000 SEVILLE RD. WADSWORTH, OH 44281 1.800.924.5172 WWW.ECSTUNING.COM 20
On the LH (Drivers) side, remove the securing screw, then lift the coolant reservoir off to the side to access the upper strut mounting bolt underneath.
Remove the plug covering the outward upper strut mounting bolt, then remove the two inner bolts, loosen the outer bolt, hold the strut, remove the outer bolt, and remove the strut assembly from the car.
Step 19:
Step 20:
REMOVING THE ORIGINAL FRONT STRUTSPhillips Screwdriver
Plug
Flat Blade Screwdriver, 16mm Socket, Ratchet, Extension

R
AUDI B6 B7 COILOVER SUSPENSION INSTALLATION INSTRUCTIONS
ECS TUNING 1000 SEVILLE RD. WADSWORTH, OH 44281 1.800.924.5172 WWW.ECSTUNING.COM 21
Install a coil spring compressor and compress the spring until the upper strut mount and bracket becomes noticeably loose, indicating that spring is compressed enough to remove the upper strut mount.
Step 1:
Step 2:
DISASSEMBLING THE ORIGINAL FRONT STRUTS
Coil Spring Compressor
Securely clamp one of the front strut assemblies into a vise.
R
AUDI B6 B7 COILOVER SUSPENSION INSTALLATION INSTRUCTIONS
ECS TUNING 1000 SEVILLE RD. WADSWORTH, OH 44281 1.800.924.5172 WWW.ECSTUNING.COM 22
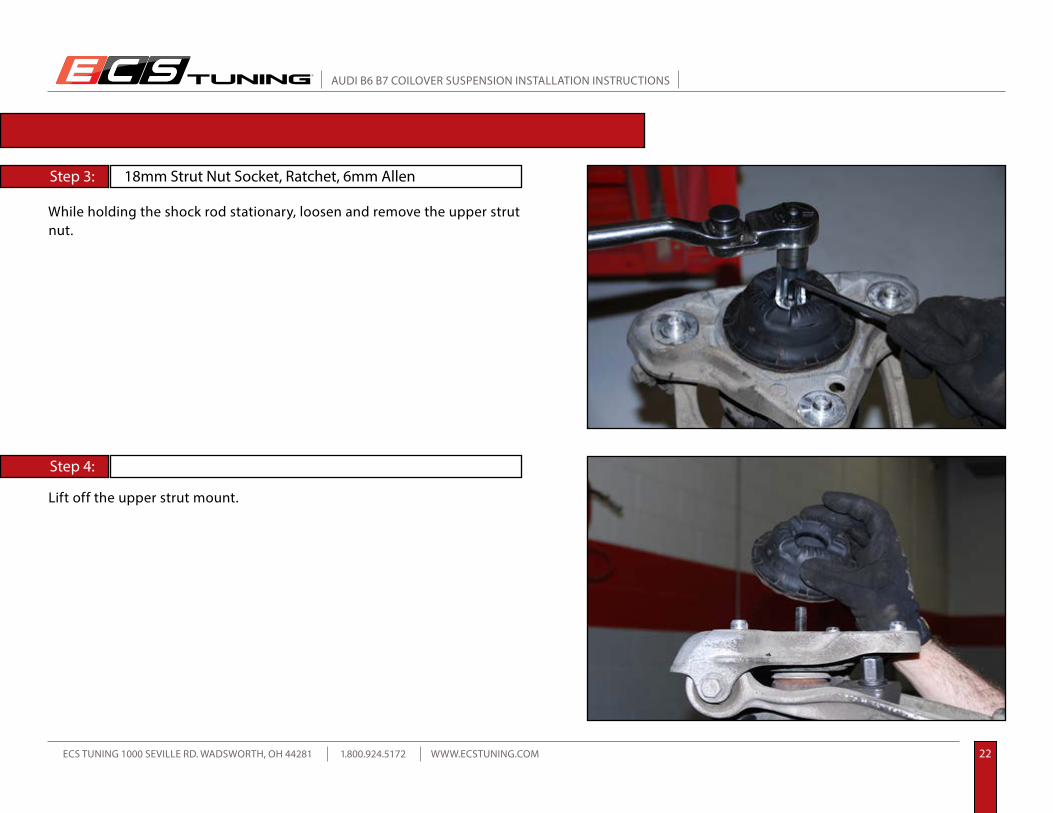
Lift off the upper strut mount.
Step 3:
Step 4:
DISASSEMBLING THE ORIGINAL FRONT STRUTS18mm Strut Nut Socket, Ratchet, 6mm Allen
While holding the shock rod stationary, loosen and remove the upper strut nut.
R
AUDI B6 B7 COILOVER SUSPENSION INSTALLATION INSTRUCTIONS
ECS TUNING 1000 SEVILLE RD. WADSWORTH, OH 44281 1.800.924.5172 WWW.ECSTUNING.COM 23
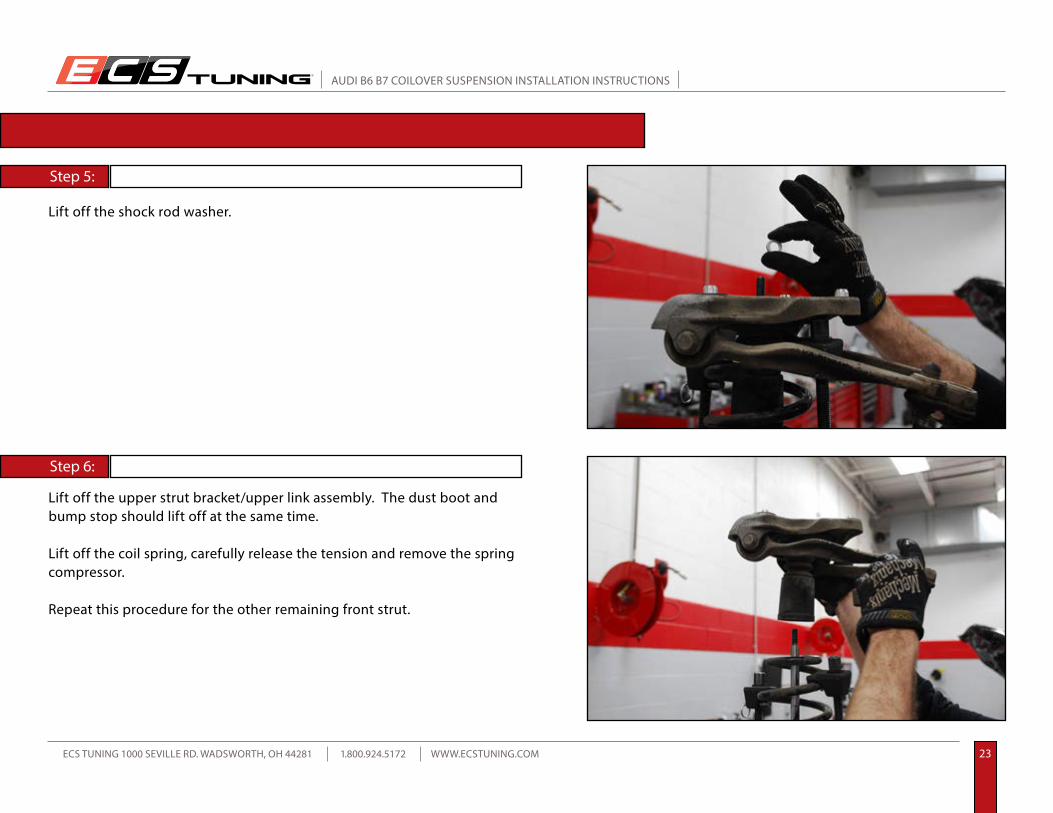
Lift off the upper strut bracket/upper link assembly. The dust boot and bump stop should lift off at the same time.
Lift off the coil spring, carefully release the tension and remove the spring compressor.
Repeat this procedure for the other remaining front strut.
Step 5:
Step 6:
DISASSEMBLING THE ORIGINAL FRONT STRUTS
Lift off the shock rod washer.
R
AUDI B6 B7 COILOVER SUSPENSION INSTALLATION INSTRUCTIONS
ECS TUNING 1000 SEVILLE RD. WADSWORTH, OH 44281 1.800.924.5172 WWW.ECSTUNING.COM 24
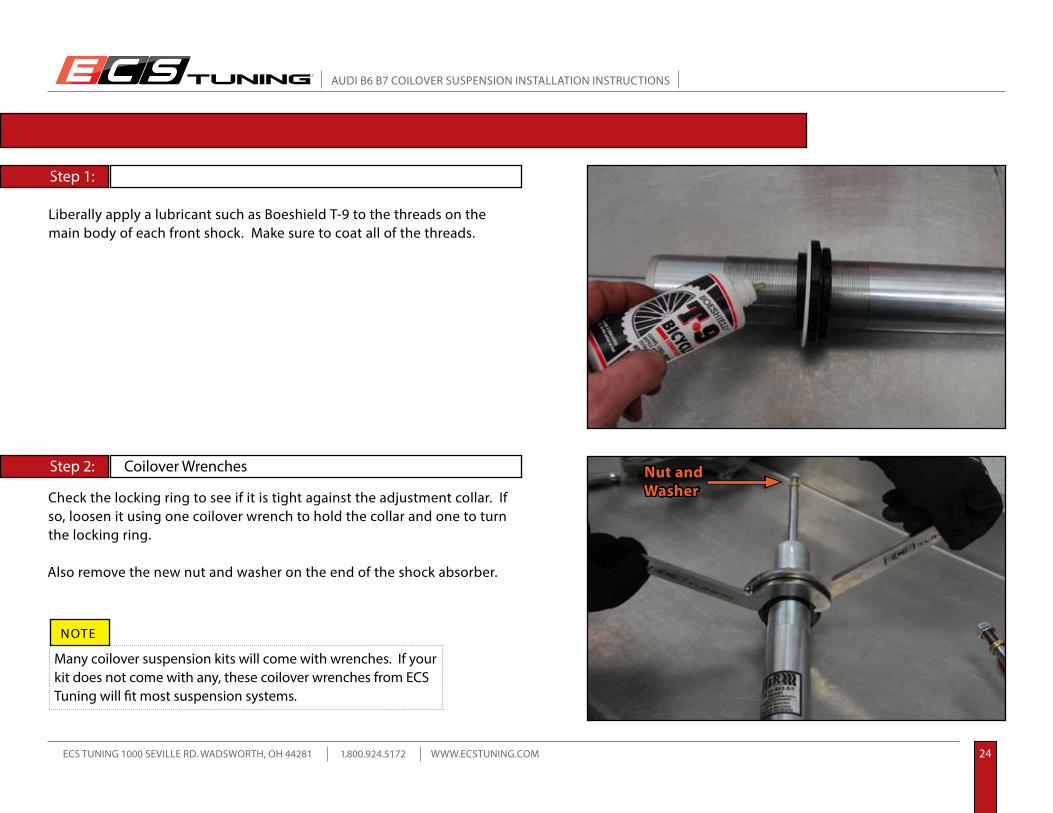
Check the locking ring to see if it is tight against the adjustment collar. If so, loosen it using one coilover wrench to hold the collar and one to turn the locking ring.
Also remove the new nut and washer on the end of the shock absorber.
Step 1:
Step 2: Coilover Wrenches
Liberally apply a lubricant such as Boeshield T-9 to the threads on the main body of each front shock. Make sure to coat all of the threads.
ASSEMBLING AND INSTALLING THE NEW FRONT COILOVERS
Many coilover suspension kits will come with wrenches. If your kit does not come with any, these coilover wrenches from ECS Tuning will fit most suspension systems.
NOTE
Nut and Washer

R
AUDI B6 B7 COILOVER SUSPENSION INSTALLATION INSTRUCTIONS
ECS TUNING 1000 SEVILLE RD. WADSWORTH, OH 44281 1.800.924.5172 WWW.ECSTUNING.COM 25
Clamp the wishbone of one of the new struts in a vise. Place the nylon seat washer onto the adjustment collar.
Place the lower spring seat onto the nylon seat washer.
Step 3:
Step 4:
ASSEMBLING AND INSTALLING THE NEW FRONT COILOVERS
R
AUDI B6 B7 COILOVER SUSPENSION INSTALLATION INSTRUCTIONS
ECS TUNING 1000 SEVILLE RD. WADSWORTH, OH 44281 1.800.924.5172 WWW.ECSTUNING.COM 26
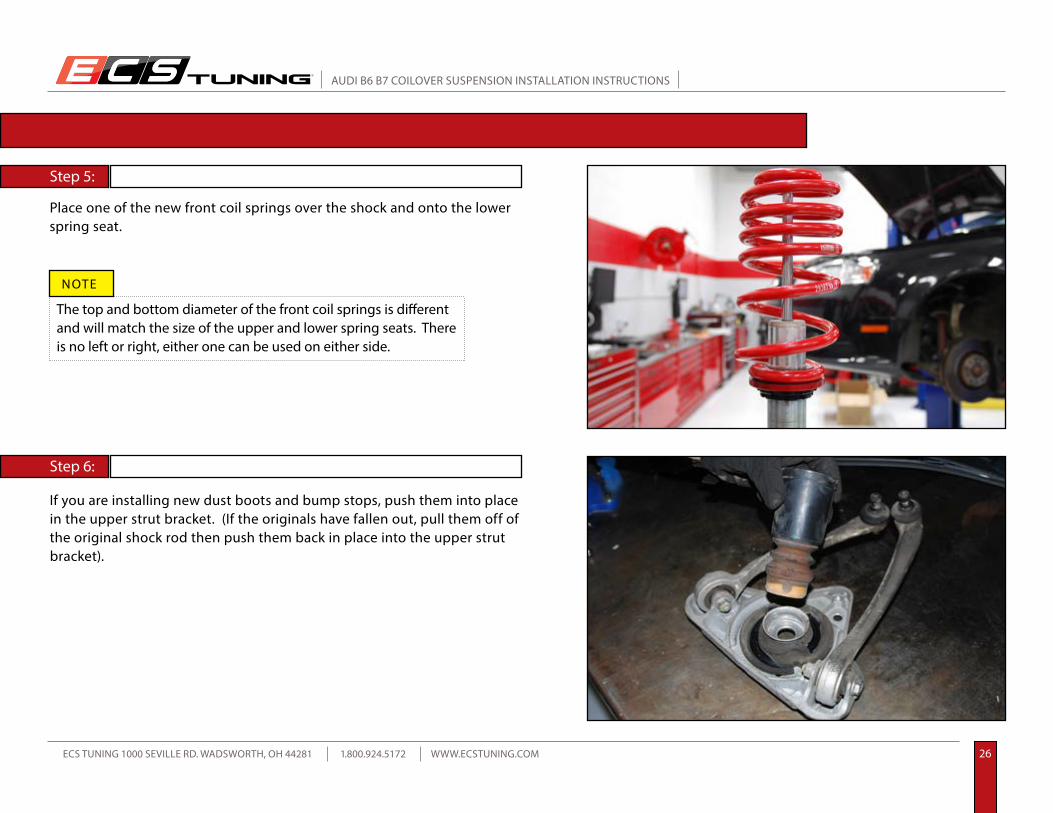
Place one of the new front coil springs over the shock and onto the lower spring seat.
Step 5:
Step 6:
If you are installing new dust boots and bump stops, push them into place in the upper strut bracket. (If the originals have fallen out, pull them off of the original shock rod then push them back in place into the upper strut bracket).
ASSEMBLING AND INSTALLING THE NEW FRONT COILOVERS
The top and bottom diameter of the front coil springs is different and will match the size of the upper and lower spring seats. There is no left or right, either one can be used on either side.
NOTE
R
AUDI B6 B7 COILOVER SUSPENSION INSTALLATION INSTRUCTIONS
ECS TUNING 1000 SEVILLE RD. WADSWORTH, OH 44281 1.800.924.5172 WWW.ECSTUNING.COM 27
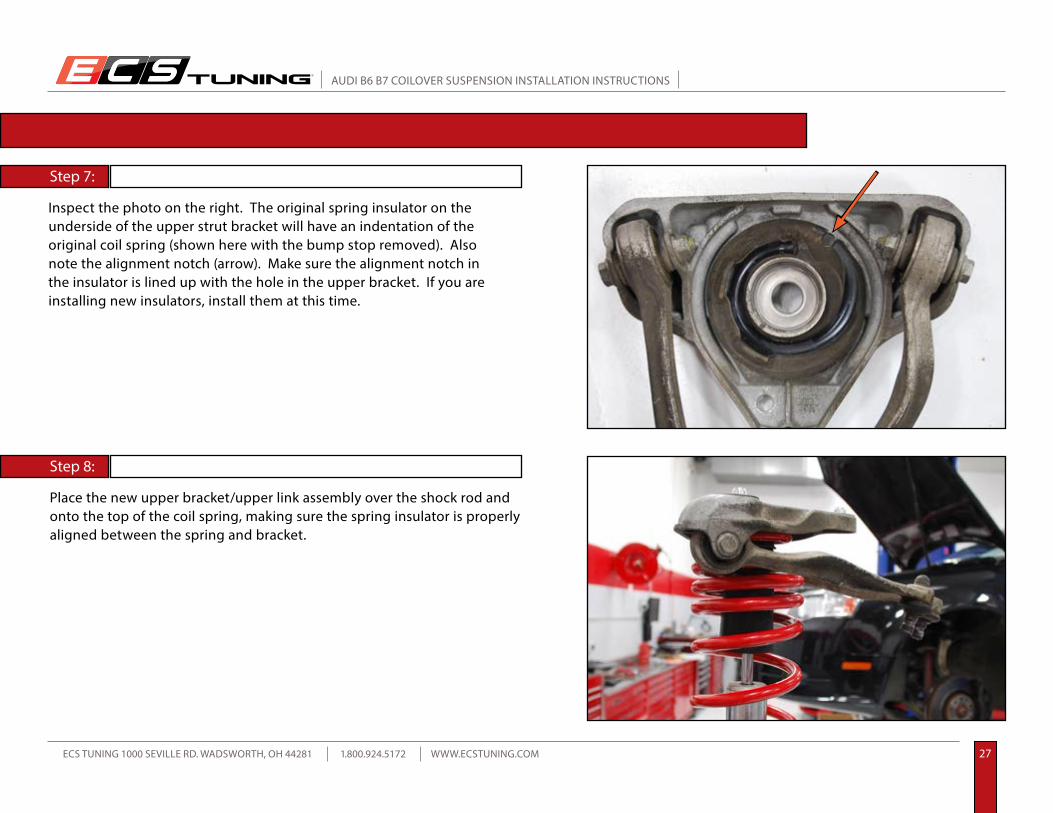
Inspect the photo on the right. The original spring insulator on the underside of the upper strut bracket will have an indentation of the original coil spring (shown here with the bump stop removed). Also note the alignment notch (arrow). Make sure the alignment notch in the insulator is lined up with the hole in the upper bracket. If you are installing new insulators, install them at this time.
Step 7:
Step 8:
Place the new upper bracket/upper link assembly over the shock rod and onto the top of the coil spring, making sure the spring insulator is properly aligned between the spring and bracket.
ASSEMBLING AND INSTALLING THE NEW FRONT COILOVERS
R
AUDI B6 B7 COILOVER SUSPENSION INSTALLATION INSTRUCTIONS
ECS TUNING 1000 SEVILLE RD. WADSWORTH, OH 44281 1.800.924.5172 WWW.ECSTUNING.COM 28
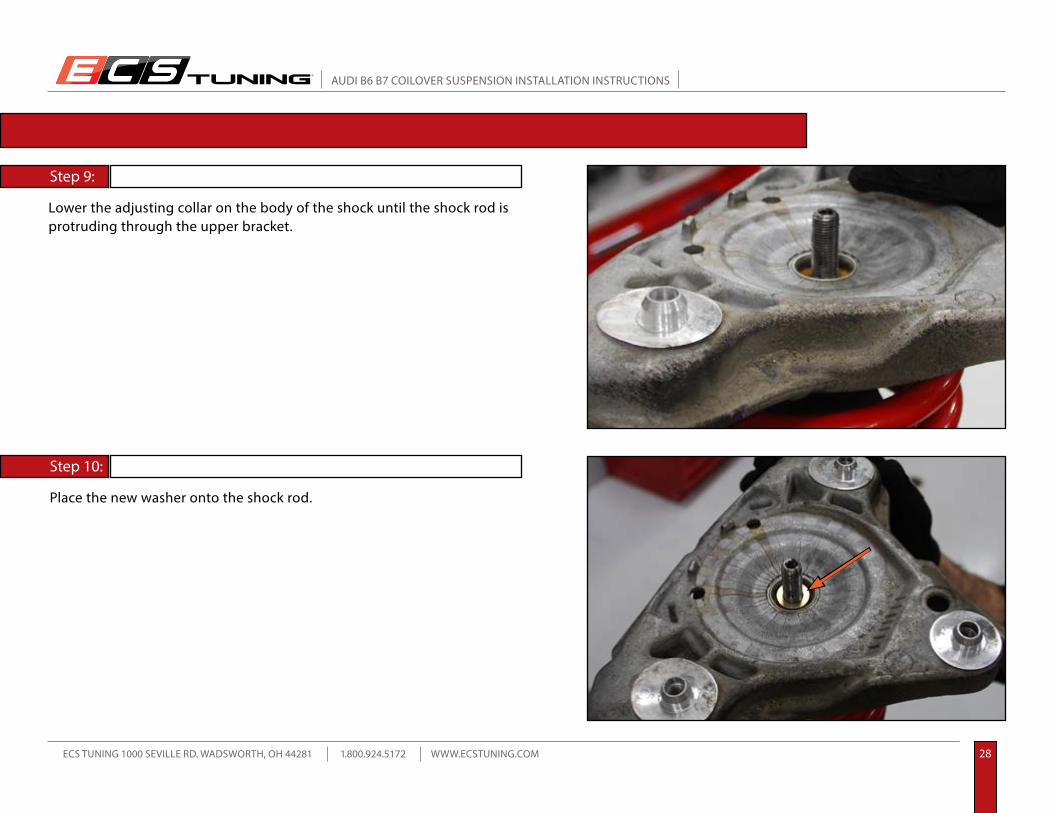
Lower the adjusting collar on the body of the shock until the shock rod is protruding through the upper bracket.
Step 9:
Step 10:
Place the new washer onto the shock rod.
ASSEMBLING AND INSTALLING THE NEW FRONT COILOVERS
R
AUDI B6 B7 COILOVER SUSPENSION INSTALLATION INSTRUCTIONS
ECS TUNING 1000 SEVILLE RD. WADSWORTH, OH 44281 1.800.924.5172 WWW.ECSTUNING.COM 29
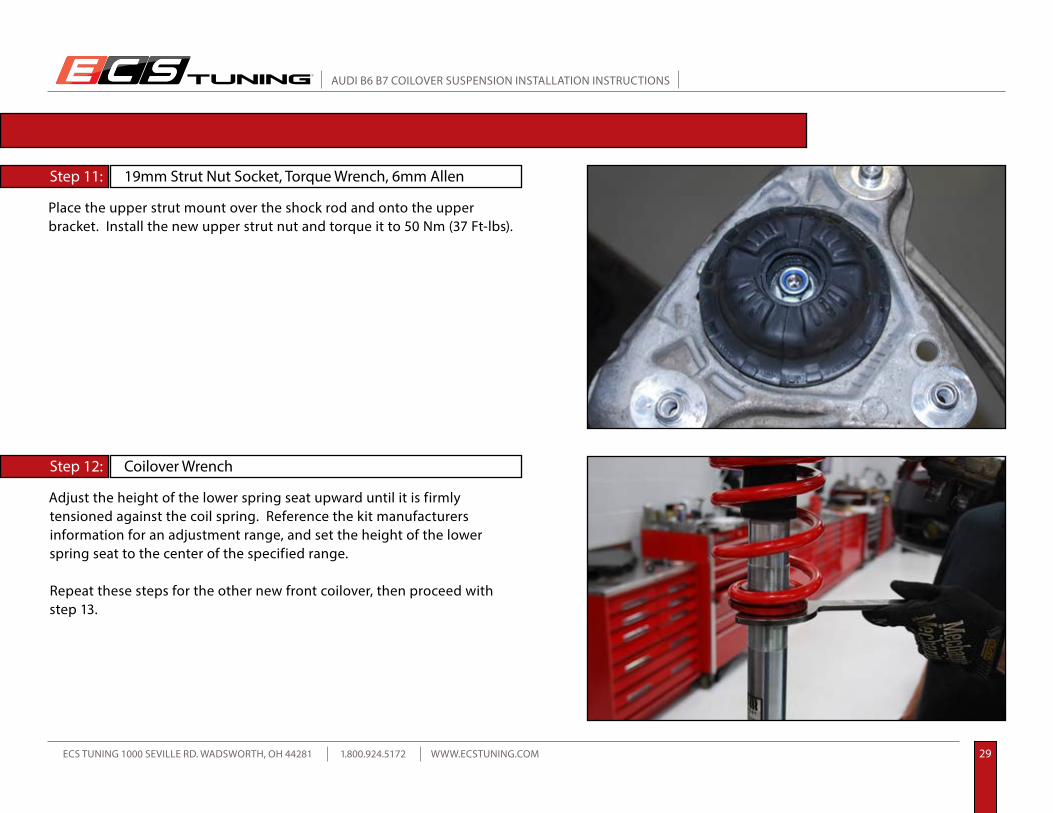
Place the upper strut mount over the shock rod and onto the upper bracket. Install the new upper strut nut and torque it to 50 Nm (37 Ft-lbs).
Step 11:
Step 12:
Adjust the height of the lower spring seat upward until it is firmly tensioned against the coil spring. Reference the kit manufacturers information for an adjustment range, and set the height of the lower spring seat to the center of the specified range.
Repeat these steps for the other new front coilover, then proceed with step 13.
Coilover Wrench
19mm Strut Nut Socket, Torque Wrench, 6mm Allen
ASSEMBLING AND INSTALLING THE NEW FRONT COILOVERS
R
AUDI B6 B7 COILOVER SUSPENSION INSTALLATION INSTRUCTIONS
ECS TUNING 1000 SEVILLE RD. WADSWORTH, OH 44281 1.800.924.5172 WWW.ECSTUNING.COM 30
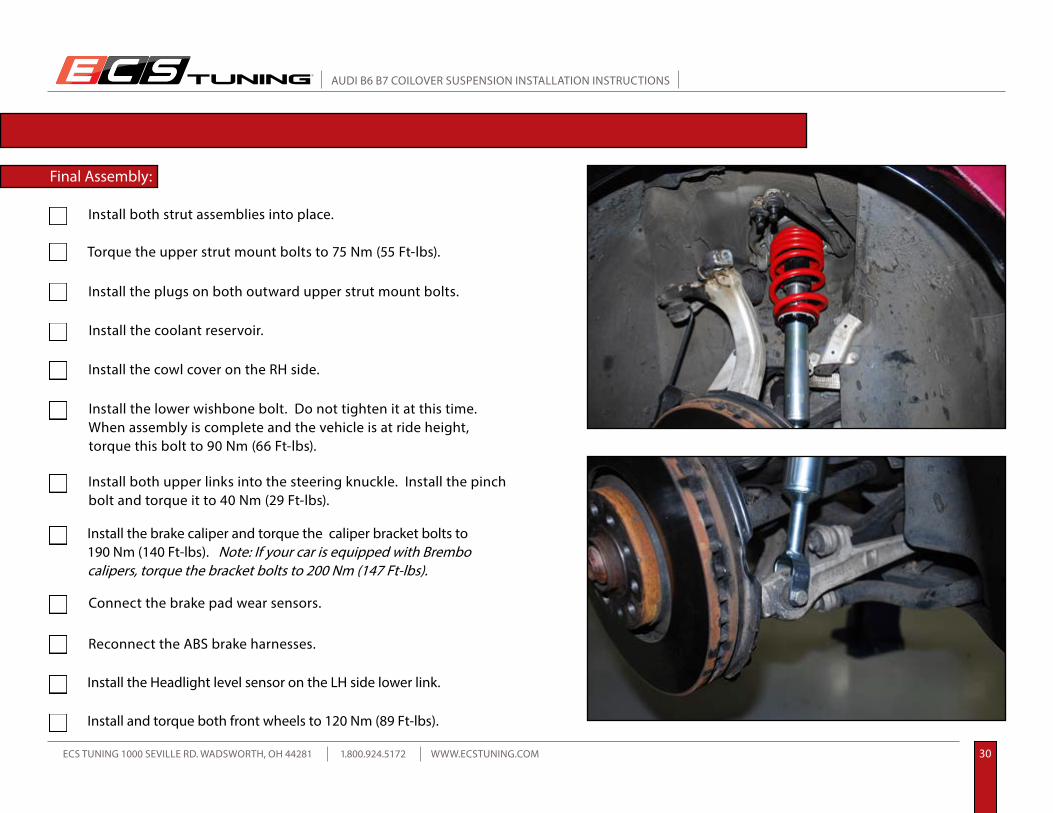
Final Assembly:
ASSEMBLING AND INSTALLING THE NEW FRONT COILOVERS
Install both strut assemblies into place.
Torque the upper strut mount bolts to 75 Nm (55 Ft-lbs).
Install the plugs on both outward upper strut mount bolts.
Install the coolant reservoir.
Install the cowl cover on the RH side.
Install the lower wishbone bolt. Do not tighten it at this time. When assembly is complete and the vehicle is at ride height, torque this bolt to 90 Nm (66 Ft-lbs).
Install both upper links into the steering knuckle. Install the pinch bolt and torque it to 40 Nm (29 Ft-lbs).
Install the brake caliper and torque the caliper bracket bolts to 190 Nm (140 Ft-lbs). Note: If your car is equipped with Brembo calipers, torque the bracket bolts to 200 Nm (147 Ft-lbs).
Connect the brake pad wear sensors.
Reconnect the ABS brake harnesses.
Install the Headlight level sensor on the LH side lower link.
Install and torque both front wheels to 120 Nm (89 Ft-lbs).
R
AUDI B6 B7 COILOVER SUSPENSION INSTALLATION INSTRUCTIONS
ECS TUNING 1000 SEVILLE RD. WADSWORTH, OH 44281 1.800.924.5172 WWW.ECSTUNING.COM 31
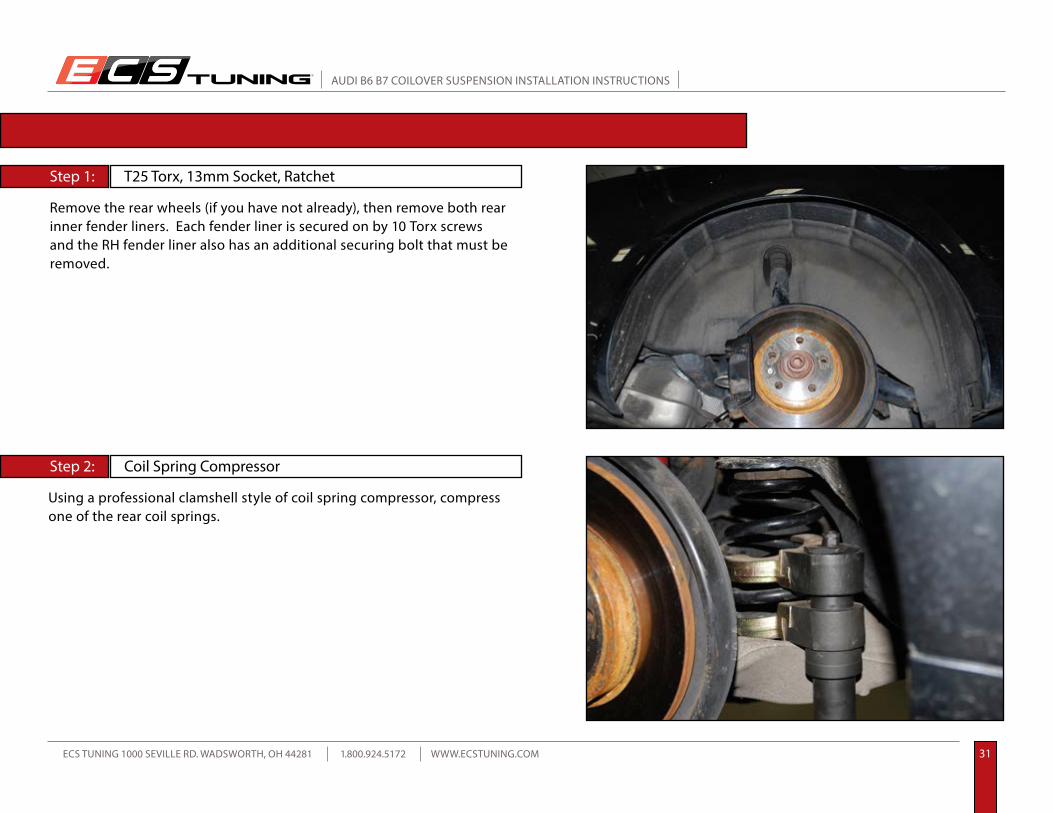
Remove the rear wheels (if you have not already), then remove both rear inner fender liners. Each fender liner is secured on by 10 Torx screws and the RH fender liner also has an additional securing bolt that must be removed.
Using a professional clamshell style of coil spring compressor, compress one of the rear coil springs.
Step 1:
Step 2:
REMOVING THE ORIGINAL REAR SHOCKS AND SPRINGS
Coil Spring Compressor
T25 Torx, 13mm Socket, Ratchet

R
AUDI B6 B7 COILOVER SUSPENSION INSTALLATION INSTRUCTIONS
ECS TUNING 1000 SEVILLE RD. WADSWORTH, OH 44281 1.800.924.5172 WWW.ECSTUNING.COM 32
Step 3:
Step 4:
REMOVING THE ORIGINAL REAR SHOCKS AND SPRINGS
Remove the two torx screws that secure the lower shield near the front of the fender liner, so the shield can be pulled downward to access the forward subframe bolt underneath.
T25 TorxSubframe Bolt
Remove the lower shock absorber bolt and separate the shock absorber from the rear knuckle assembly.
21mm Socket, Ratchet, 21mm Wrench
The lower rear shock absorber spacer will commonly get stuck into the rear knuckle. You may have to pry it out with a small angled pry bar or similar tool.
TECH TIP

R
AUDI B6 B7 COILOVER SUSPENSION INSTALLATION INSTRUCTIONS
ECS TUNING 1000 SEVILLE RD. WADSWORTH, OH 44281 1.800.924.5172 WWW.ECSTUNING.COM 33
Remove the lower subframe bolt.
Pull down on the rear suspension, then pivot the coil spring outward at the top until it clears the body and remove it.
Step 5:
Step 6:
REMOVING THE ORIGINAL REAR SHOCKS AND SPRINGS18mm Socket, Ratchet
It is helpful to request the assistance of a friend to remove and install the rear coil springs. You can also use a pry bar to lever the suspension downward for coil spring removal.
NOTE
Only remove one rear subframe bolt at a time once the coil spring is compressed. Do not remove the subframe bolt if the coil spring on the same side is not compressed.
CAUTION
R
AUDI B6 B7 COILOVER SUSPENSION INSTALLATION INSTRUCTIONS
ECS TUNING 1000 SEVILLE RD. WADSWORTH, OH 44281 1.800.924.5172 WWW.ECSTUNING.COM 34
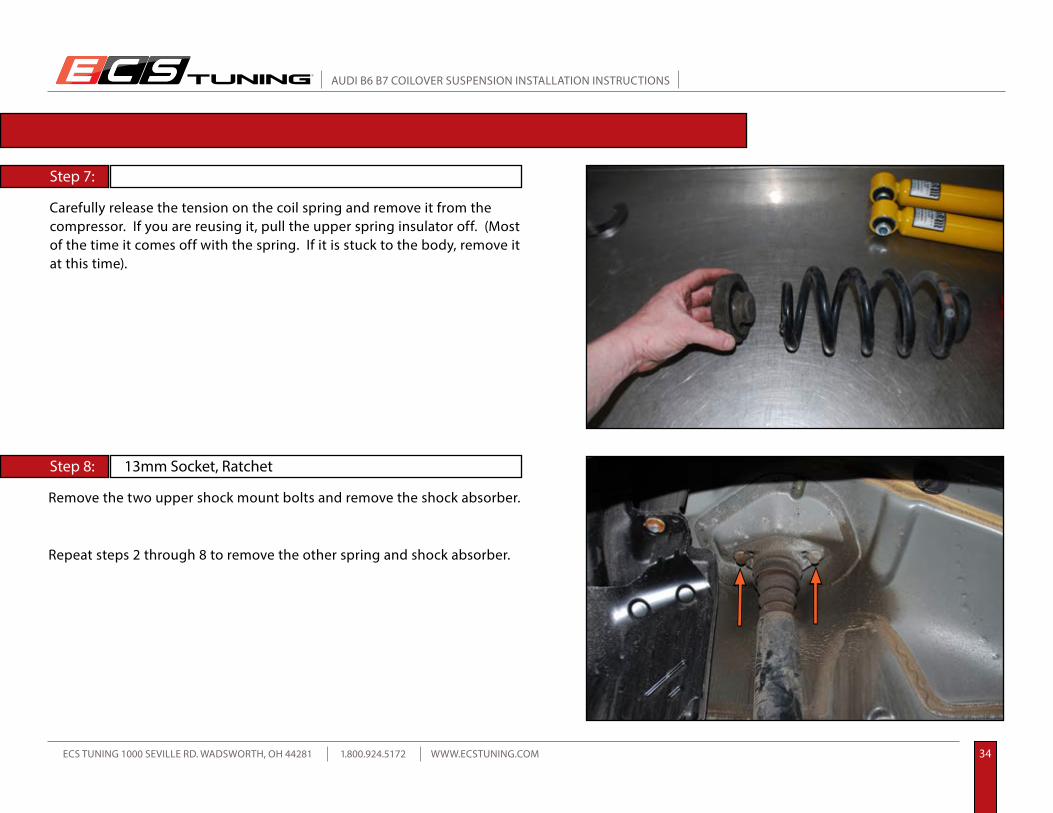
Carefully release the tension on the coil spring and remove it from the compressor. If you are reusing it, pull the upper spring insulator off. (Most of the time it comes off with the spring. If it is stuck to the body, remove it at this time).
Step 7:
REMOVING THE ORIGINAL REAR SHOCKS AND SPRINGS
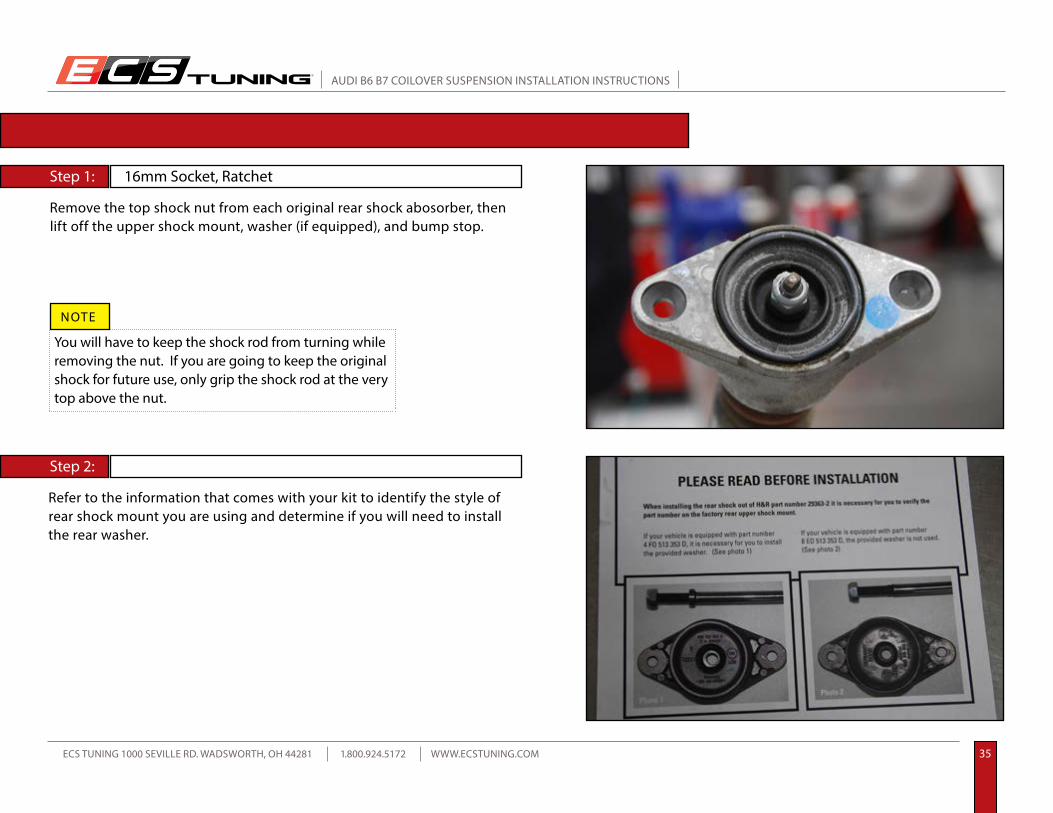
Remove the two upper shock mount bolts and remove the shock absorber.
Step 8: 13mm Socket, Ratchet
Repeat steps 2 through 8 to remove the other spring and shock absorber.
R
AUDI B6 B7 COILOVER SUSPENSION INSTALLATION INSTRUCTIONS
ECS TUNING 1000 SEVILLE RD. WADSWORTH, OH 44281 1.800.924.5172 WWW.ECSTUNING.COM 35
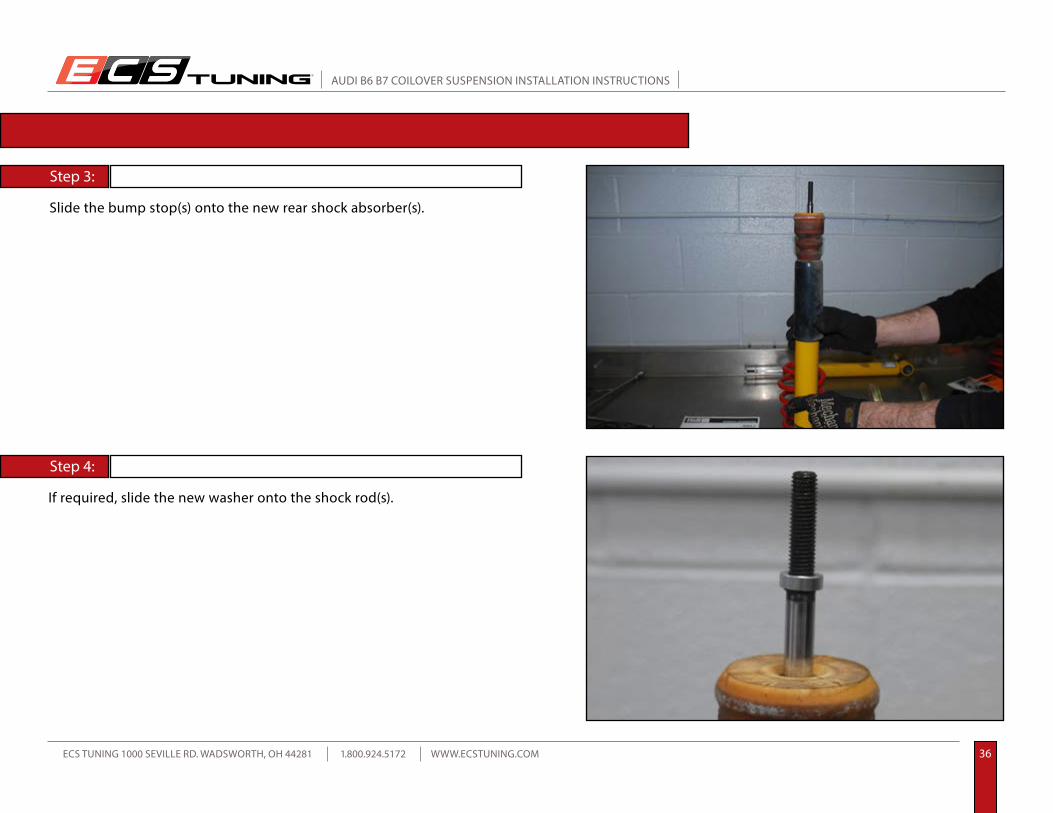
Remove the top shock nut from each original rear shock abosorber, then lift off the upper shock mount, washer (if equipped), and bump stop.
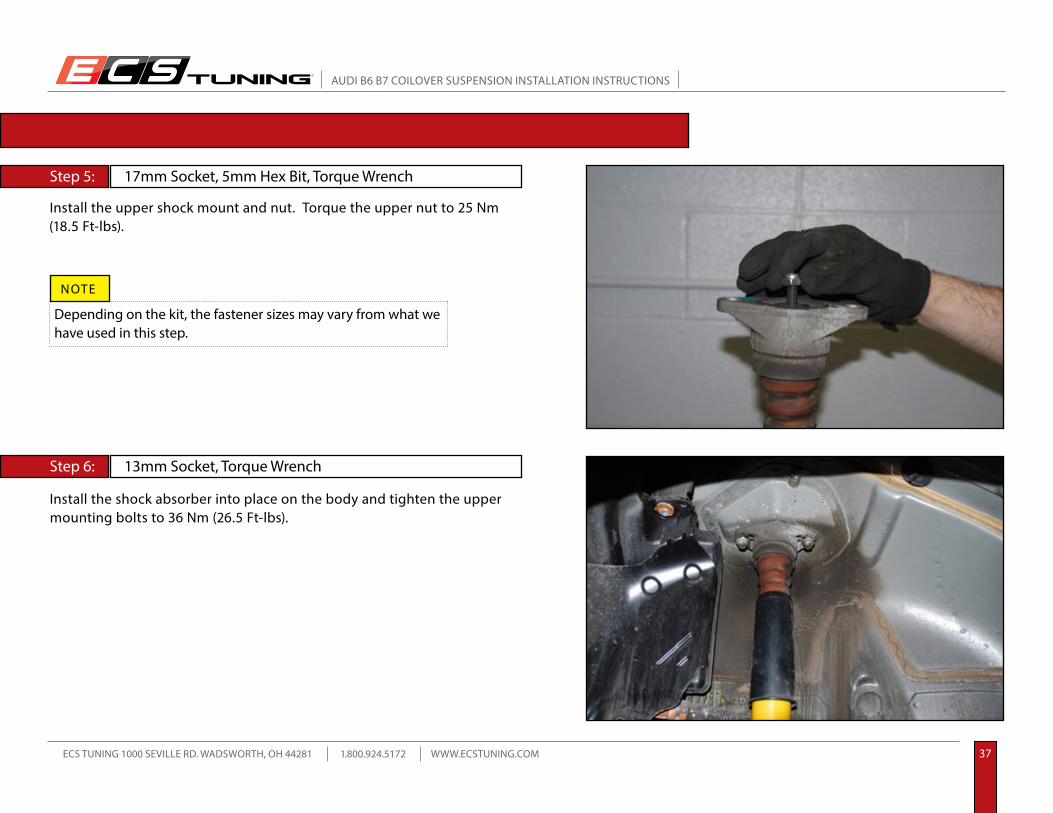
Refer to the information that comes with your kit to identify the style of rear shock mount you are using and determine if you will need to install the rear washer.
Step 1:
Step 2:
INSTALLING THE NEW REAR SHOCKS AND SPRINGS16mm Socket, Ratchet
You will have to keep the shock rod from turning while removing the nut. If you are going to keep the original shock for future use, only grip the shock rod at the very top above the nut.
NOTE
R
AUDI B6 B7 COILOVER SUSPENSION INSTALLATION INSTRUCTIONS
ECS TUNING 1000 SEVILLE RD. WADSWORTH, OH 44281 1.800.924.5172 WWW.ECSTUNING.COM 36
Slide the bump stop(s) onto the new rear shock absorber(s).
If required, slide the new washer onto the shock rod(s).
Step 3:
Step 4:
INSTALLING THE NEW REAR SHOCKS AND SPRINGS
R
AUDI B6 B7 COILOVER SUSPENSION INSTALLATION INSTRUCTIONS
ECS TUNING 1000 SEVILLE RD. WADSWORTH, OH 44281 1.800.924.5172 WWW.ECSTUNING.COM 37
Install the upper shock mount and nut. Torque the upper nut to 25 Nm (18.5 Ft-lbs).
Step 5:
Step 6:
INSTALLING THE NEW REAR SHOCKS AND SPRINGS
Install the shock absorber into place on the body and tighten the upper mounting bolts to 36 Nm (26.5 Ft-lbs).
13mm Socket, Torque Wrench
17mm Socket, 5mm Hex Bit, Torque Wrench
Depending on the kit, the fastener sizes may vary from what we have used in this step.
NOTE

R
AUDI B6 B7 COILOVER SUSPENSION INSTALLATION INSTRUCTIONS
ECS TUNING 1000 SEVILLE RD. WADSWORTH, OH 44281 1.800.924.5172 WWW.ECSTUNING.COM 38
Install the upper spring insulator onto the top of the new rear coil spring.
Step 7:
Step 8:
INSTALLING THE NEW REAR SHOCKS AND SPRINGS
NOTE
The top and bottom diameter of the rear coil springs is different and will match the size of the upper and lower spring seats, however there is no left or right, either one can be used on either side.
Remove the adjusting ring, then liberally apply a lubricant such as Boeshield T-9 to the threads on the rear coil spring perches. Make sure to coat all of the threads. Note the locations of the three hex bit set screws around the perimiter of the spring perch.
Set ScrewSet Screw

R
AUDI B6 B7 COILOVER SUSPENSION INSTALLATION INSTRUCTIONS
ECS TUNING 1000 SEVILLE RD. WADSWORTH, OH 44281 1.800.924.5172 WWW.ECSTUNING.COM 39
Remove the original lower spring insulator from the control arm.
Step 9:
Step 10:
INSTALLING THE NEW REAR SHOCKS AND SPRINGS
Clean any dirt or debris from the control arm, then install the lower spring perch and tighten the hex bit set screws.
3mm Hex Bit (Allen) Socket
R
AUDI B6 B7 COILOVER SUSPENSION INSTALLATION INSTRUCTIONS
ECS TUNING 1000 SEVILLE RD. WADSWORTH, OH 44281 1.800.924.5172 WWW.ECSTUNING.COM 40
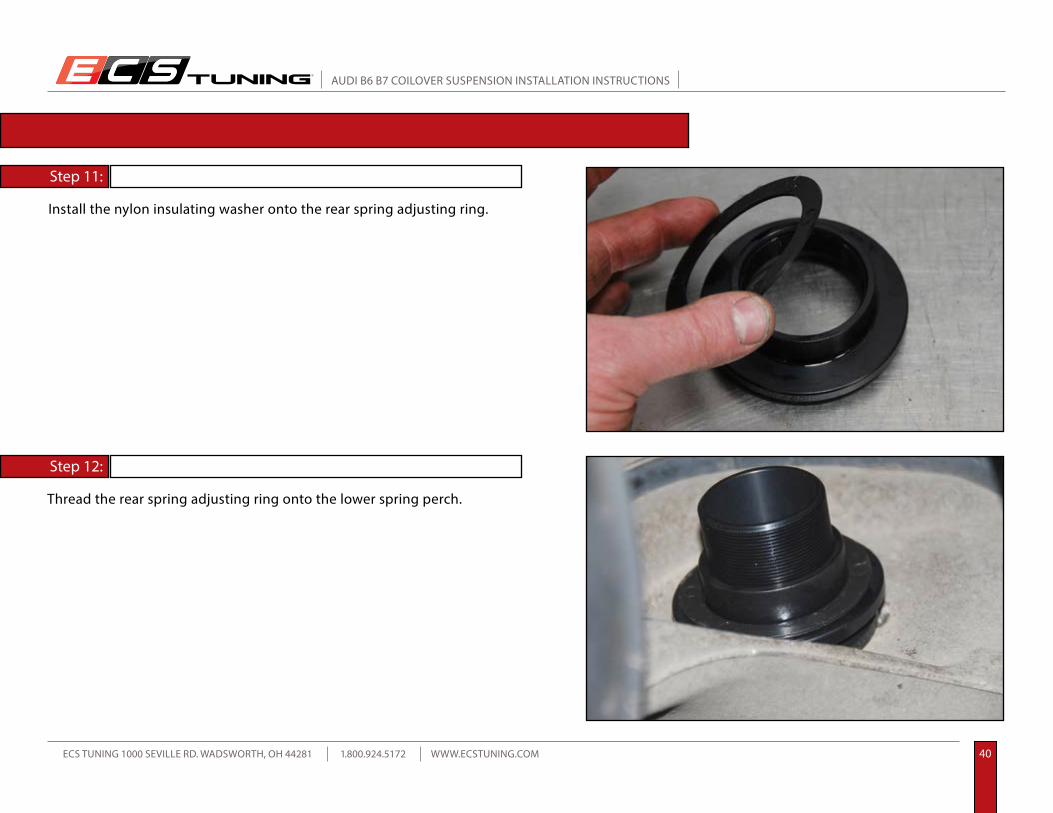
Install the nylon insulating washer onto the rear spring adjusting ring.
Step 11:
Step 12:
INSTALLING THE NEW REAR SHOCKS AND SPRINGS
Thread the rear spring adjusting ring onto the lower spring perch.
R
AUDI B6 B7 COILOVER SUSPENSION INSTALLATION INSTRUCTIONS
ECS TUNING 1000 SEVILLE RD. WADSWORTH, OH 44281 1.800.924.5172 WWW.ECSTUNING.COM 41
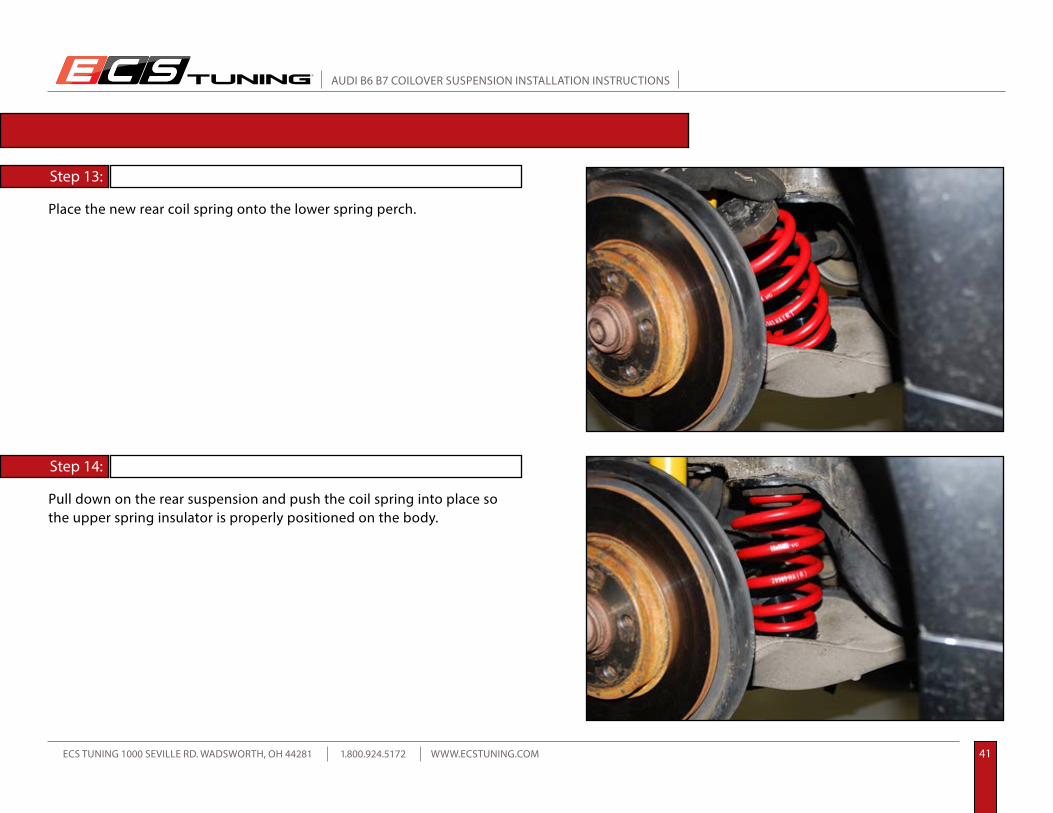
Place the new rear coil spring onto the lower spring perch.
Step 13:
Step 14:
INSTALLING THE NEW REAR SHOCKS AND SPRINGS
Pull down on the rear suspension and push the coil spring into place so the upper spring insulator is properly positioned on the body.
R
AUDI B6 B7 COILOVER SUSPENSION INSTALLATION INSTRUCTIONS
ECS TUNING 1000 SEVILLE RD. WADSWORTH, OH 44281 1.800.924.5172 WWW.ECSTUNING.COM 42
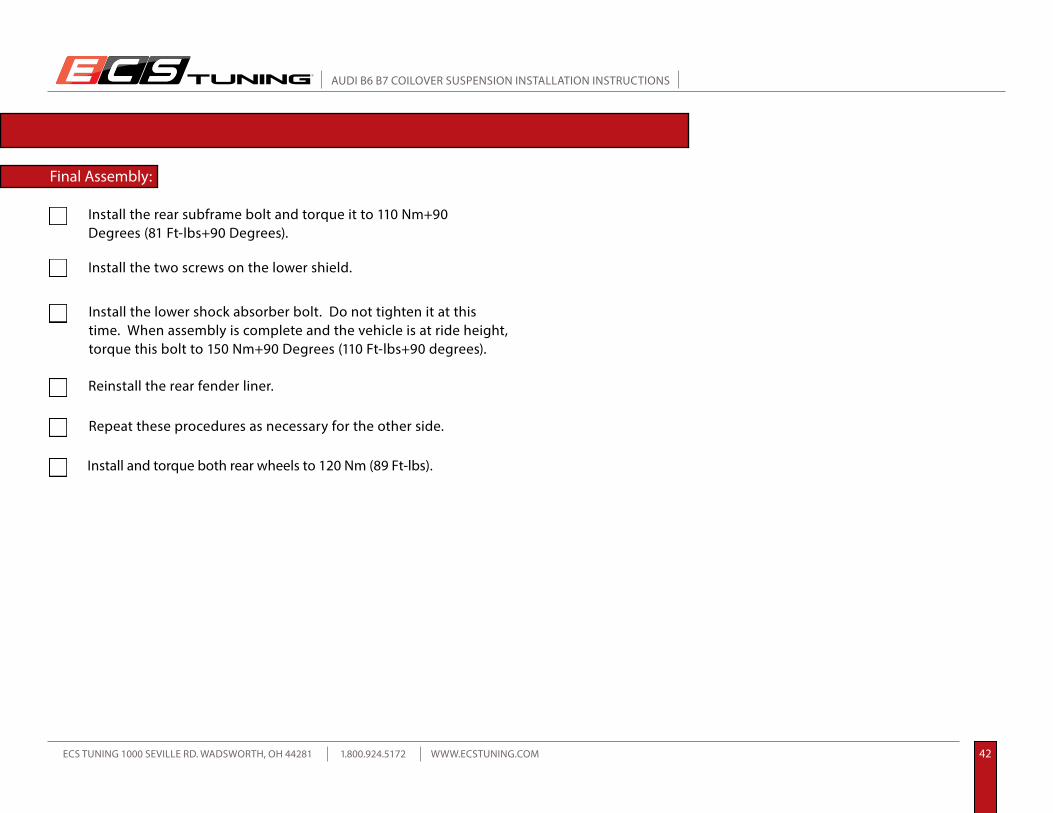
INSTALLING THE NEW REAR SHOCKS AND SPRINGSFinal Assembly:
Install the rear subframe bolt and torque it to 110 Nm+90 Degrees (81 Ft-lbs+90 Degrees).
Install the two screws on the lower shield.
Install the lower shock absorber bolt. Do not tighten it at this time. When assembly is complete and the vehicle is at ride height, torque this bolt to 150 Nm+90 Degrees (110 Ft-lbs+90 degrees).
Reinstall the rear fender liner.
Repeat these procedures as necessary for the other side.
Install and torque both rear wheels to 120 Nm (89 Ft-lbs).

R
AUDI B6 B7 COILOVER SUSPENSION INSTALLATION INSTRUCTIONS
ECS TUNING 1000 SEVILLE RD. WADSWORTH, OH 44281 1.800.924.5172 WWW.ECSTUNING.COM 43
• You must lift the vehicle so all weight is off the springs before adjusting the spring perches.
• Use the measurements you took on page nine for reference if you have a specific amount of drop in mind.
• You may have to make a number of adjustments to get everything set exactly right. Be patient and take your time.
• Securely tighten the front locking rings to the perches once ride height is set.
• Once you have the ride height adjusted to your liking, make sure there is no wheel/tire interference while turning the wheels lock to lock.
• After driving for the first time, the suspension may require readjustment.
• If you add any additional components in the future such as a sway bar or polyurethane bushings, the suspension may require minor adjustments.
ADJUSTING THE RIDE HEIGHT
Front coil spring adjusting collar
Rear coil spring adjusting collar
Front lock ring-tighten using two wrenches
Adjusting the ride height is a simple process of moving the spring perches up or down until the desired height is reached. Keep the following pointers in mind while adjusting your suspension:

R
AUDI B6 B7 COILOVER SUSPENSION INSTALLATION INSTRUCTIONS
ECS TUNING 1000 SEVILLE RD. WADSWORTH, OH 44281 1.800.924.5172 WWW.ECSTUNING.COM 44
ADJUSTING THE RIDE HEIGHT
Left Front Left RearRight Front Right Rear
Record the measurements of your new ride height:
R
AUDI B6 B7 COILOVER SUSPENSION INSTALLATION INSTRUCTIONS
ECS TUNING 1000 SEVILLE RD. WADSWORTH, OH 44281 1.800.924.5172 WWW.ECSTUNING.COM 45
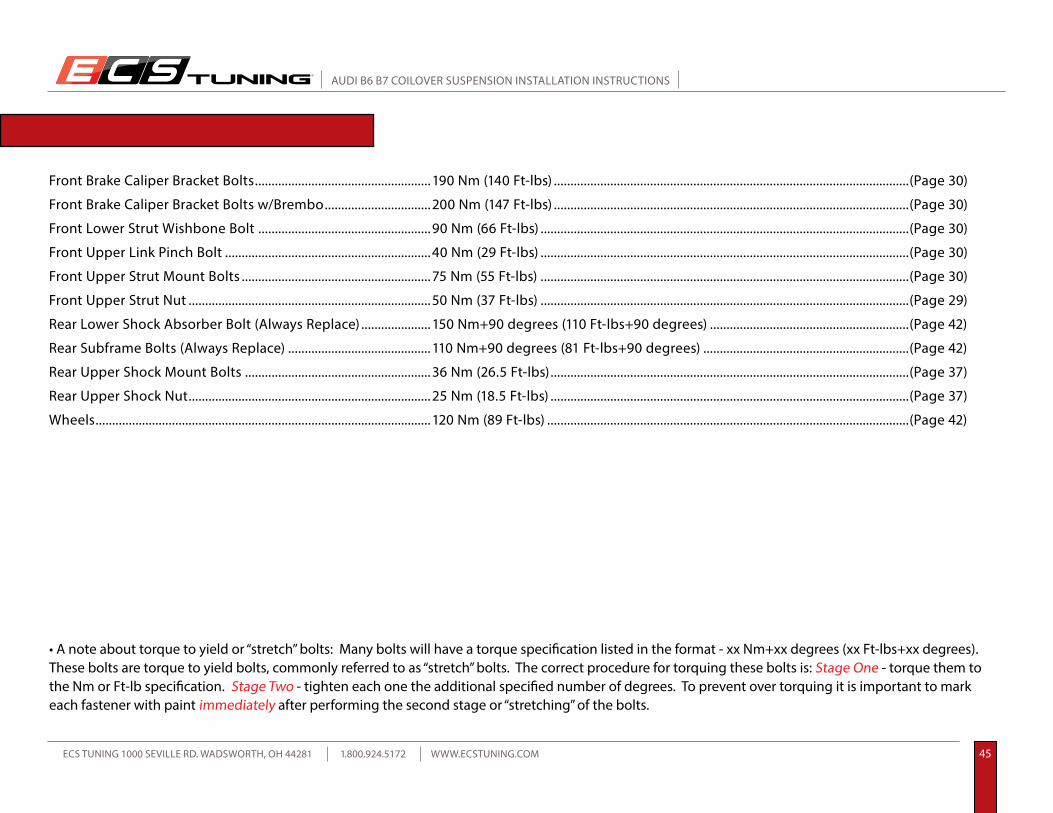
TORQUE SPECIFICATIONS
Front Brake Caliper Bracket Bolts .....................................................190 Nm (140 Ft-lbs) ...........................................................................................................(Page 30)
Front Brake Caliper Bracket Bolts w/Brembo ................................200 Nm (147 Ft-lbs) ...........................................................................................................(Page 30)
Front Lower Strut Wishbone Bolt ....................................................90 Nm (66 Ft-lbs) ...............................................................................................................(Page 30)
Front Upper Link Pinch Bolt ..............................................................40 Nm (29 Ft-lbs) ...............................................................................................................(Page 30)
Front Upper Strut Mount Bolts .........................................................75 Nm (55 Ft-lbs) ...............................................................................................................(Page 30)
Front Upper Strut Nut .........................................................................50 Nm (37 Ft-lbs) ...............................................................................................................(Page 29)
Rear Lower Shock Absorber Bolt (Always Replace) .....................150 Nm+90 degrees (110 Ft-lbs+90 degrees) ............................................................(Page 42)
Rear Subframe Bolts (Always Replace) ...........................................110 Nm+90 degrees (81 Ft-lbs+90 degrees) ..............................................................(Page 42)
Rear Upper Shock Mount Bolts ........................................................36 Nm (26.5 Ft-lbs) ............................................................................................................(Page 37)
Rear Upper Shock Nut .........................................................................25 Nm (18.5 Ft-lbs) ............................................................................................................(Page 37)
Wheels .....................................................................................................120 Nm (89 Ft-lbs) .............................................................................................................(Page 42)
• A note about torque to yield or “stretch” bolts: Many bolts will have a torque specification listed in the format - xx Nm+xx degrees (xx Ft-lbs+xx degrees). These bolts are torque to yield bolts, commonly referred to as “stretch” bolts. The correct procedure for torquing these bolts is: Stage One - torque them to the Nm or Ft-lb specification. Stage Two - tighten each one the additional specified number of degrees. To prevent over torquing it is important to mark each fastener with paint immediately after performing the second stage or “stretching” of the bolts.

These instructions are provided as a courtesy by ECS Tuning.
Your Coilover Suspension Installation is Complete!
Proper service and repair procedures are vital to the safe, reliable operation of all motor vehicles as well as the personal safety of those performing the repairs. Standard safety procedures and precautions (including use of safety goggles and proper tools and equipment) should be followed at all times to eliminate the possibility of personal injury or improper service which could damage the vehicle or compromise its safety.
Although this material has been prepared with the intent to provide reliable information, no warranty (express or implied) is made as to its accuracy or completeness. Neither is any liability assumed for loss or damage resulting from reliance on this material. SPECIFICALLY, NO WARRANTY OF MERCHANTABILITY, FITNESS FOR A PARTICULAR PURPOSE OR ANY OTHER WARRANTY IS MADE OR TO BE IMPLIED WITH RESPECT TO THIS MATERIAL. In no event will ECS Tuning, Incorporated or its affiliates be liable for any damages, direct or indirect, consequential or compensatory, arising out of the use of this material.