Embed Size (px)
Citation preview
1
ARUBAOS-CX OVA GNS3 SET UP
CONTENTS
ArubaOS-CX OVA GNS3 Set Up ............................................................................................................ 1
Requirments ............................................................................................................................................ 1
Prerequisites ........................................................................................................................................... 1
Guide Scope ........................................................................................................................................... 1
Importing the OVA to VirtualBox .............................................................................................................. 2
Importing the VM Into GNS3 ................................................................................................................... 5
Connecting to the NAE (Windows) ........................................................................................................ 20
REQUIRMENTS
GNS3 (Version 2.0 or Higher)
PC
ArubaOS-CX OVA
PREREQUISITES
GNS3 Installed
VirtualBox Installed
ArubaOS-CX OVA Downloaded
GUIDE SCOPE
This guide explains how to set up the ArubaOS-CX OVA in GNS3 and how to connect to the Network Analytics Engine (NAE) in the GNS3 environment. This guide does not cover how to obtain the OVA or how to install VirtualBox and GNS3

2
IMPORTING THE OVA TO VIRTUALBOX
Description
Preform the following steps to Import the OVA into VirtualBox.
1. Navigate to the ArubaOS-CX OVA and double click the OVA.
Note: If this is a windows virtual machine running VirtualBox and GNS3. The ESXI Server needs to
be 6.0 or higher the hardware virtualization Box needs to be checked this box is located Under the
CPU settings
2. After a few seconds, VirtualBox will open and ask to import the OVA. Select Import.

3
3. After the import, you should see a screen like the following:
4. Click the imported OVA then click Settings

4
5. Navigate to System and Check the “Hardware Clock in UTC Time”
Note: This step is critical for getting Graphs in the WebUI to show up properly

5
IMPORTING THE VM INTO GNS3
Description
Perform the following steps to connect the ArubaOS-CX OVA to GNS3 so that the OVA can be used in GNS3.
1. Open GNS3. 2. Select the first radio button and click Next.

6
3. Select Loopback Adapter and click Next.
GNS3 will indicate the local server started successfully.

7
4. Click Next.
The following error will appear if there is a problem. This is GNS3 realizing VMware isn’t installed. If it does display, select OK. This error will not break GNS3.

8
The following should display:
5. Click Cancel. For this environment the local server will work. This message is set up for a GNS3 OVA.
GNS3 will now open and be usable.
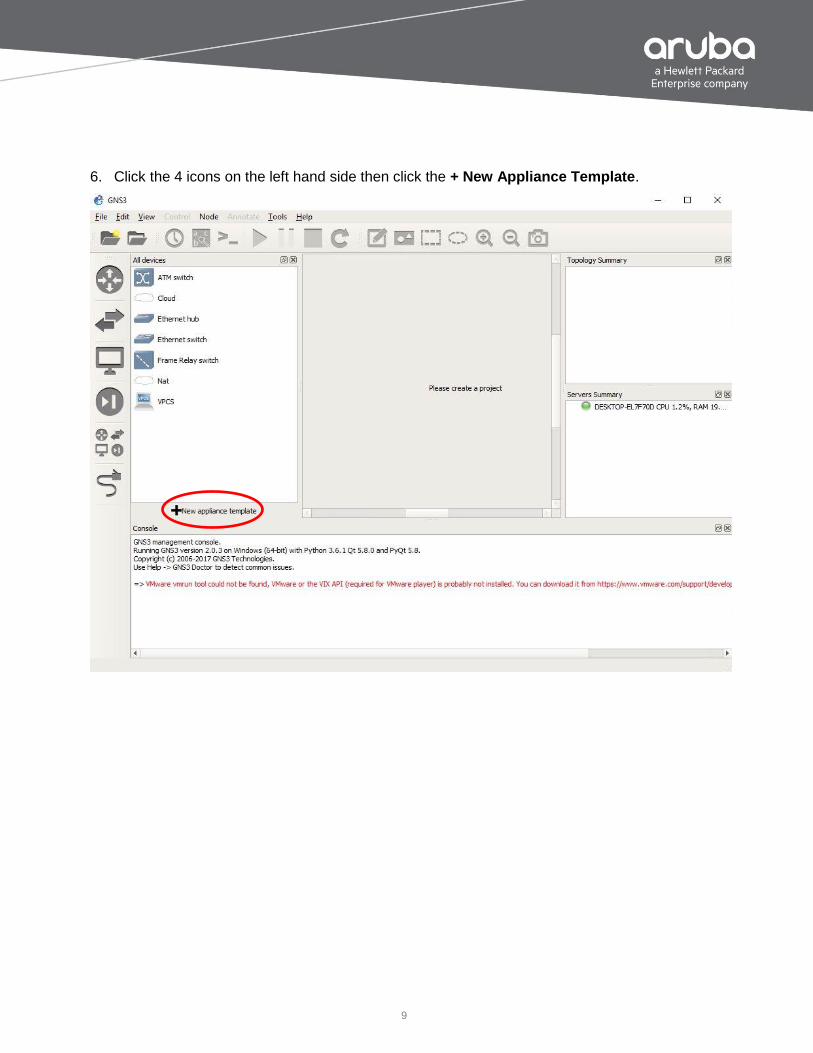
9
6. Click the 4 icons on the left hand side then click the + New Appliance Template.

10
7. Select the Add a VirtualBox virtual machine option and click OK.
GNS3 should automatically detect any virtual machines. Since there is only one VM in this setup, that VM will be automatically selected. The “Use as a linked base VM (experimental)” setting needs to be selected if it is not selected. Only one VM will be allowed in the environment.
8. Click Finish.

11
Now the ArubaOS-CX OVA will appear as a device that can be selected. However, it still isn’t usable. It needs some settings changed.
9. Right-click the device and select Configure template.

12

13
When the prompt displays, there are a few things to change:
Name
Category (so the switch shows up in the correct section in GNS3)
Headless mode
Note: The symbol can be changed if you have one. Select the browse button and navigate to the
icon.

14
10. Click the Network tab In the Template Configuration window
Network adapters is set to 8. (That is the maximum amount the VM is allowed to have.
Change the Name Format for the interfaces to 1/1{0}.
Change the type of adapter to “PCnet-PCI II Am79C970A”
Check the “Allow GNS3 to use any Configured VirtualBox adapter”

15
USING GNS3
Description
This will go over how to Create Projects and use the imported OVA in GNS3
1. Now create a project if one hasn’t been created already.

16
2. Enter a name for the project and select OK.
3. Once the project has been created, drag and drop the 8400 device into GNS3.

17
4. Use the Connector tool to connect the devices.
1/1/0 is the management interface
1/1/7 is the servers Interface which is unusable.
Connect the devices using interfaces 1/1/1 – 6
Note: If you did not rename the Interfaces to 1/1/ interfaces will show up as Ethernet

18
Now that all the devices are connected right click and Start the device one at a time then connect to the console once the device is started. This is the best way to do this because if the device take a lot longer to boot up but it is possible to start all the devices at the same time by clicking the green play button.

19
After the Devices are started login using “admin” no password

20
CONNECTING TO THE NAE (WINDOWS)
To connect to the NAE the device using the GNS3 environment has to have a loop back adapter installed. To install the adapter in the start menu search for device manager.
Open the device manager and select the network interface then Click action
21
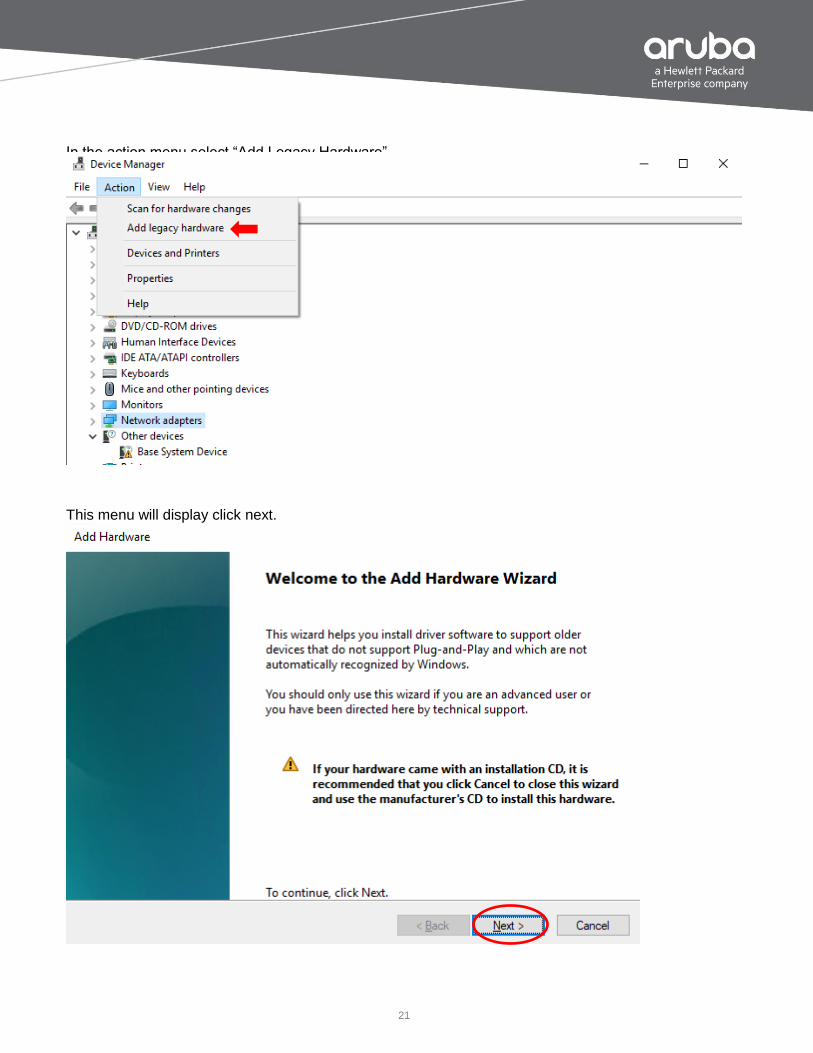
In the action menu select “Add Legacy Hardware”
This menu will display click next.

22
Choose to “install the hardware that I manually select from a list “then click next.

23
Scroll down and Select “Network adapters” then Click next
24
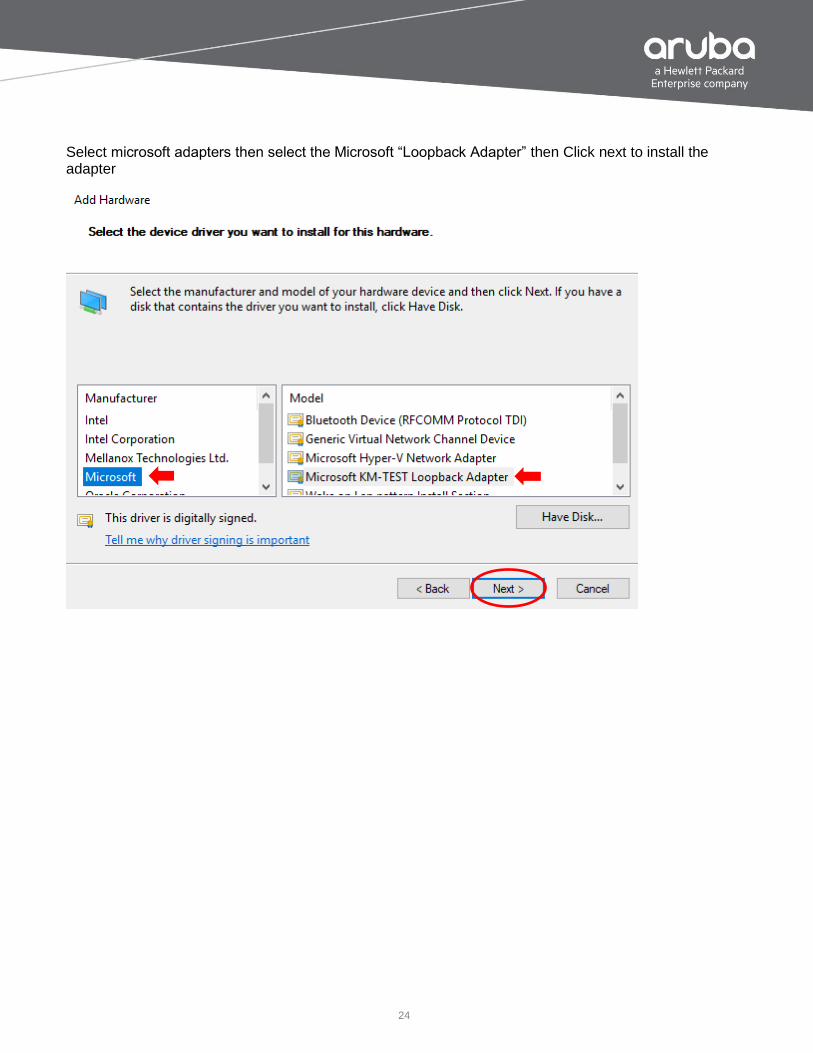
Select microsoft adapters then select the Microsoft “Loopback Adapter” then Click next to install the adapter

25
Now that the adapter is installed it needs an IP address to use, to configure an Ip on the loopback adapter. Click the Search field in the start menu and search for control panel

26
Once the control panel is ope select the network and internet
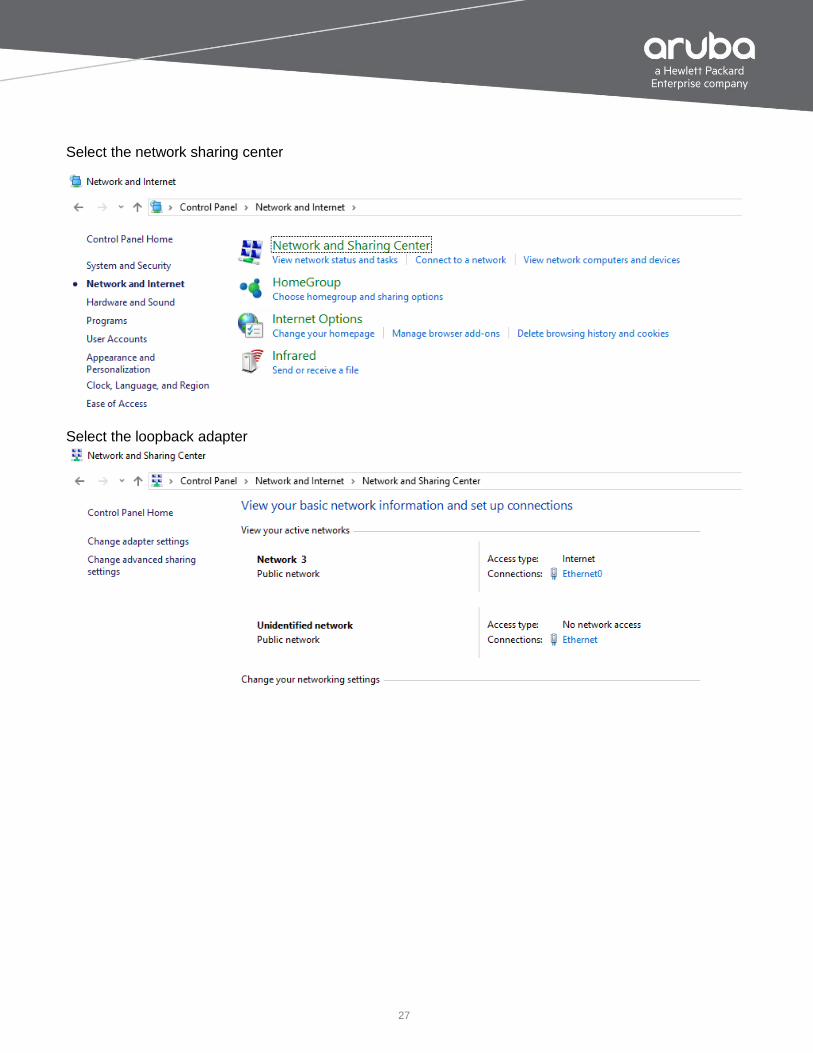
27
Select the network sharing center
Select the loopback adapter

28
Selcect properties
29
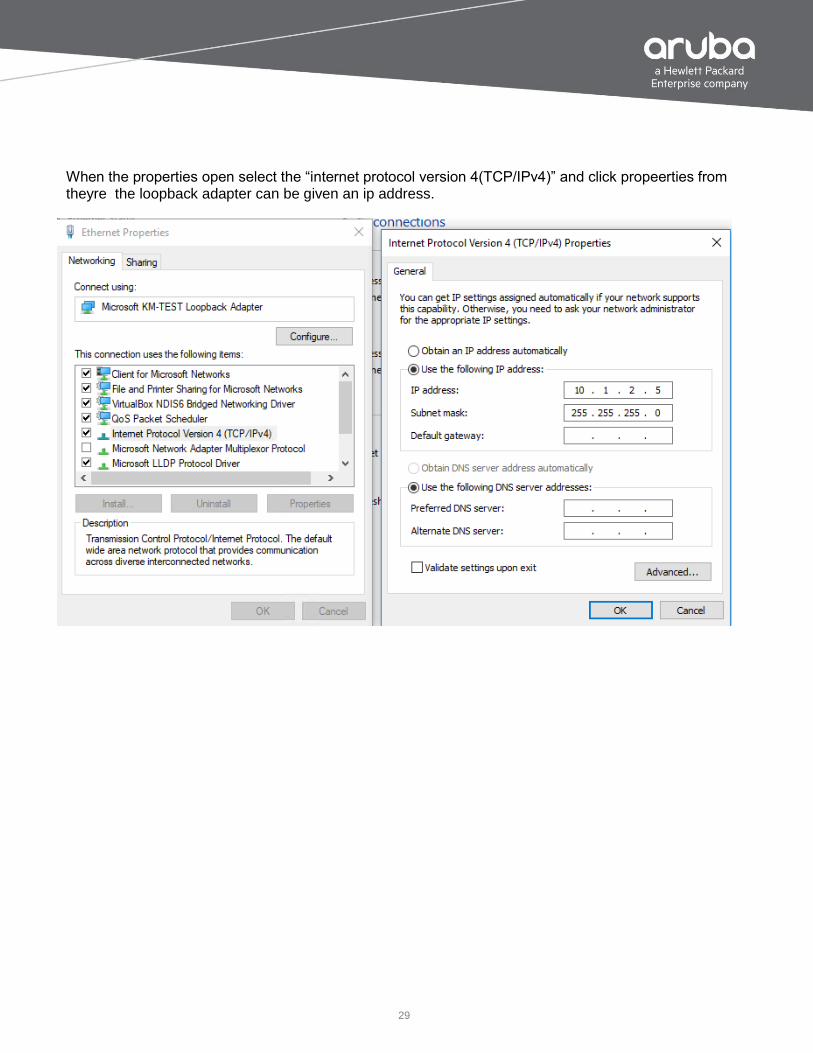
When the properties open select the “internet protocol version 4(TCP/IPv4)” and click propeerties from theyre the loopback adapter can be given an ip address.

30
Once that is done Open GNS3, then open a project then drag and drop the cloud icon into the enviroment.
Note: if GNS3 was open when the loopback adapter was installed GNS3 will have to be restarted
to use the adapter.

31
Right Click the cloud and configure the cloud.

32
In the configuration make sure the loop back adapter appears in the selection if it does not check the drop down menu and if the adapter still doesn’t show up check the box at the then navigate to the loopback adapter in this example the adapter does show up.
33
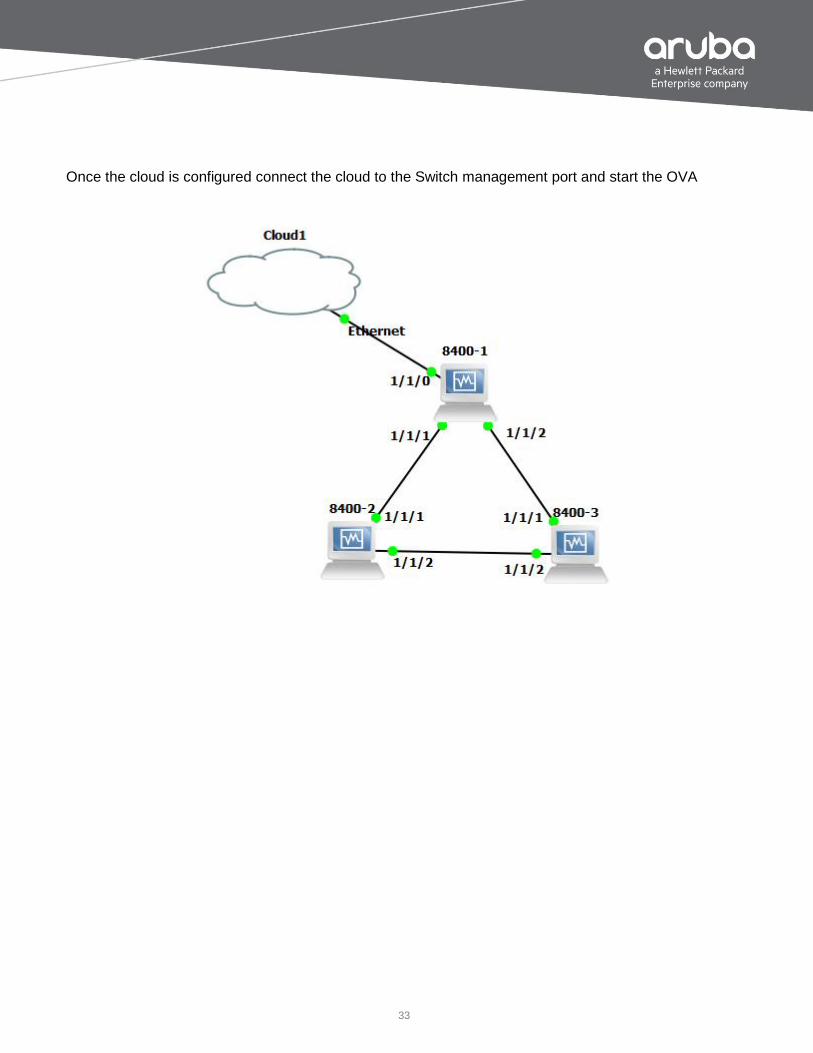
Once the cloud is configured connect the cloud to the Switch management port and start the OVA

34
Once the Switch is started the management interface needs to be on the same subnet as the loopback adapter and the web interface has to be enabled also the commands are listed here below
Int mgmt
Ip static <ip address><mask>
https-server rest access-mode read-write
https-server enable

35
Now Test the connectivity from the PC to the Virtual environment
36
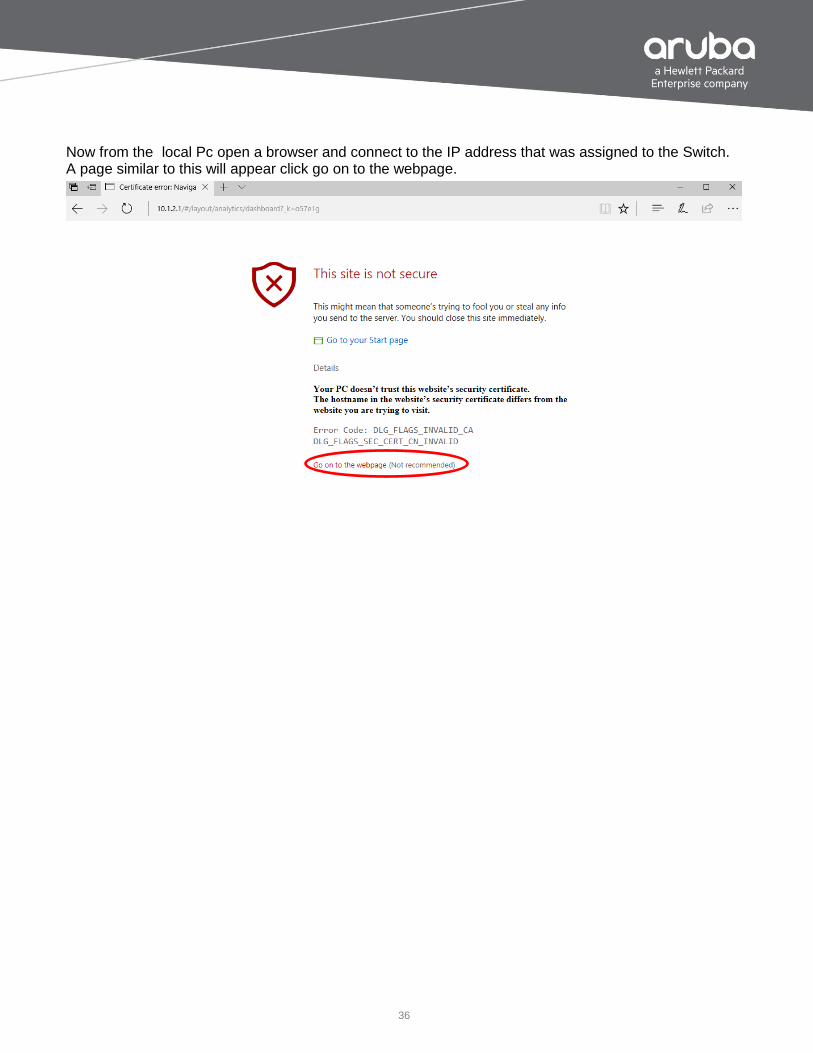
Now from the local Pc open a browser and connect to the IP address that was assigned to the Switch. A page similar to this will appear click go on to the webpage.

37
The login is Username: admin Password: admin for the page. Click login and now the WebUI is available
38
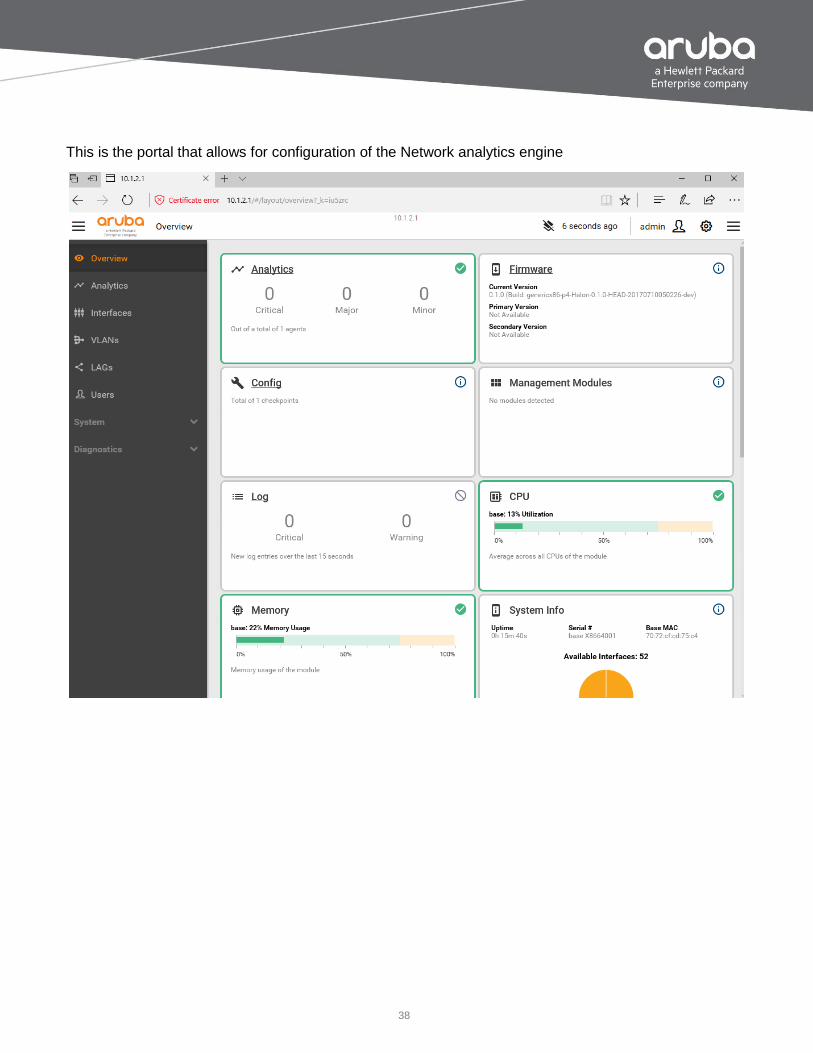
This is the portal that allows for configuration of the Network analytics engine