Embed Size (px)
Citation preview

Arctic Background
AArrccttiicc AAccttiivviittiieess
TThhee TToolleeddoo ZZoooo

Arctic Background
2
TThhee AArrccttiicc
GGeeooggrraapphhyy There are several ways that people define the region of the world known as the Arctic. Commonly, the Arctic is often described as a region of snow and ice surrounding the North Pole. This may appear to be true, especially during the winter. Yet, a large part of the Arctic is composed of forested tundra where a large number of plants and animals live. Technically, scientists define the Arctic as the region above 66 degrees, 30 minutes of North Latitude, an area known as the Arctic Circle. Within this region, the sun does not set in the summer. Other definitions rely on the extent of tundra vegetation, distribution of animals, the presence or absence of permafrost, temperature or the southern extent of pack ice. Some simply define the Arctic as a very dry, cold desert. Whatever the definition, the Arctic is large, almost equal in size to the entire continent of North America. Ironically, though most of the Arctic is made up of water it is technically a desert. Since the water is frozen most of the year, it is not accessible to plants or animals. Because of the extreme cold, the atmosphere is unable to hold enough moisture for it to snow or rain very much. In the summer, when the ice melts, water does become available in the lower Arctic regions. Since there is no drainage, it collects and pools to form huge wetlands. The layer of permafrost beneath the surface stays permanently frozen and does not allow water to percolate through the soil. EEnnvviirroonnmmeenntt There are many different species of plants and animals that live in the Arctic. South of the Arctic tree line lies the Boreal forest which is comprised primarily of coniferous trees such as spruce, fir and larch. To the north of the tree line, there are many low growing herbs, forbs and shrubs such as heath, lingonberries, bilberries, blueberries, arctic poppies, tundra grasses, lichens, mosses, birch and willow shrubs. There are also several different species of animals, including lemmings, Arctic hares, Arctic fox, polar bears, caribou, musk ox, ptarmigan, snowy owl, Arctic tern and many others.

Arctic Background
3
TThhee AArrccttiicc Land Animals
Polar bear, wolf, musk ox, Arctic fox,
snowshoe hare, wolverine, weasel,
lemming, moose, elk, reindeer.
Marine Animals
Walrus, seals, whales, sea otters.
Birds
Raven, ptarmigan, geese, ducks, swans,
phalarope, gulls, horned lark, snow
bunting, Arctic tern, skua.
Plants
Arctic willow, juniper, rhododendron,
purple saxigrage, mountain avens,
Arctic white heather, woolly
lousewort, moss campion, Arctic
lupine, cotton grass, bearberry, lichen.
Ø Area of the Arctic
Area of the Arctic
From the northern edge of the circumpolar
belt of coniferous forest (taiga) to the North
Pole.
Wildlife Notes
Most animals are year-round residents of the
Arctic. Others like the snowy owl, rough-
legged hawk and short-eared owl, may migrate
south to Ohio during the winter.
Arctic Food Web Polar bears are the top predator of the Arctic food
chain. They feed on Arctic fox and lemmings.
Arctic fox prey on lemmings and snowy owl eggs and chicks.
Lemmings feed on sparse plants. They have several litters a year - with up to nine young per litter - enabling them to withstand heavy losses from predators.
Snowy owls feed on lemmings. Polar bears and Arctic fox eat their eggs and chicks.

Arctic Background
4
TTuunnddrraa FFoooodd WWeebb
This food web shows who eats what on the Arctic tundra. For example, lemmings eat plants that are eaten by snowy owls, Arctic foxes and stoats.
Arctic Foxes Wolves
Stoats
Caribou Musk Oxen Hares Ptarmigans
Lemmings
Snowy Owls
Plants
Plants

Arctic Background
5
AArrccttiicc CCuullttuurreess The term “Eskimo” is often used to describe the Arctic cultures that live in North America and Greenland. This was a name that was given to these cultures by sub-Arctic native societies and later adopted by Europeans. “Eskimo” has several possible meanings including “one who speaks another language”, “one who is from another country”, “one who has unusual behavior” or “one who eats raw meat.” While the name “Eskimo” is used as a general name for Arctic cultures that reside in the Western Arctic, there are several inclusive societies classified as “Eskimo.” These cultures include the Inuit of northern Canada, the Kalaadlit of Greenland,, the Inupiat of Northern Alaska and the Yupik of southwestern Alaska. Besides the “Eskimos”, there are several other cultures that reside above the Arctic Circle. The Saami (formerly called the Lapps) of Scandanavia, the Nenets of Northwest Russia, the Sakha of Russia and the Chukchi of Siberia are societies that live in the Arctic. There are several modes of transportation used by Arctic peoples. The Inuit’s traditional mode of travel includes snowshoes, kayaks and skis. Today, snowmobiles and fiberglass boats are most common, though the more customary forms are still in use. The Nenet, a nomadic Arctic society of Northwest Russia, travel by sleds that are pulled by domesticated reindeer. Three to five reindeer are required to pull a single sled. It takes about 75 sleds to move a group of 19 Nenets. Arctic societies have developed two major modes to survive the harsh conditions. Archeological evidence shows that many Arctic cultures utilized large terrestrial mammals such as caribou, reindeer and musk ox for survival. Additional evidence reveals that other cultures adapted to a maritime existence by hunting marine mammals such seals, walruses and whales. Traditionally, Arctic cultures constructed their houses from natural materials including hides, whale bones, drift wood, sod and snow. Today, many Arctic societies construct their houses from materials similar to those in any Western city. The Nenets, a herding culture of Northwest Russia, domesticated reindeer nearly 2,000 years ago. Some Nenets live in towns and villages but many still live a traditional nomadic lifestyle. Their houses, called Chums (pronounced chooms), were set up at each campsite as they moved seasonally with the herd between the taiga and the tundra. The Chums were made using poles fashioned from spruce and larch trees, reindeer hides, a floor made of wood planking and a central fireplace.

Arctic Background
6
Each Chum took about an hour to erect, using 39 poles and about 30 hides. It took five sleds to transport the shelter and family belongings. A group of Chums is called a stoibizhe. Inuit villages were often situated along the ocean shore with houses made from bone, stone, sod or snow. The igloo was not the typical house of the Inuit but rather served as a temporary hunting shelter. Igloos were generally difficult to build as the snow had to be of a certain texture and consistency. Igloos were characteristically domed structures about 5m in diameter. A block of clear ice was used like a window to let light in. Traditional clothing of Arctic societies consists of tailored skin garments. The insulative nature of the skins provided excellent protection from the harsh environment. Caribou and polar bear skins were most highly prized but seal and fish skin was also used. Even the sinew of reindeer and caribou were separated into strands to form the thread used for sewing the various garments. Parkas were usually made of animal gut. Mammal intestines were dried and shown together to make a tailored parka. These coats were very lightweight and extremely water resistant. TThhrreeaattss ttoo tthhee AArrccttiicc Though much of the region is uninhabited, human activity is having a huge influence on the Arctic environment. PPoolllluuttiioonn Though the Arctic appears to be pristine and unaffected by industrialization, there are many pollutants that have been found in the region. High levels of heavy metals, such as mercury and cadmium, have been found in predators such as polar bears and seals. Radiation levels have risen due to atomic testing and industrial accidents such as Chernobyl. Chemicals such as PCB’s and pesticides have been found in fish and seals and are accumulating in the polar bear, the top predator in the Arctic food chain. OOiill DDeevveellooppmmeenntt The exploration, extraction and transportation of petroleum has had a drastic effect on the Arctic landscape, plants and animals. Operations affect the fragile permafrost, causing damage that takes years to recover.

Arctic Background
7
GGlloobbaall WWaarrmmiinngg One of the greatest threats to the Arctic is global warming. Average temperatures in the Arctic have increased by 5° C over the last 100 years resulting in a 6% decrease in sea ice over the last 20 years. The consequences could prove disastrous for Arctic wildlife. Polar bears rely on sea ice as a platform for hunting seals. The reduction means that ice will melt earlier in the spring and freeze later in the fall, reducing the opportunities for polar bears to find enough to eat to build up fat reserves. This is critical to lactating female polar bears who need the fat reserves to produce adequate milk to feed their cubs. AArrccttiicc LLiinnggoo The following is a list of Inuit words. Many of the words deal with snow, an expression of the snowy world in which the Inuit live. You can use this list in many different ways in the classroom. One suggestion is to make a matching game by writing an Inuit word on one card and the matching definition (or picture) on another. Students can also use the words to create simple acrostic or ABC poems. Anniu – falling snow Api – ground snow Igloo viga – snow house Igloo – any kind of house Imek – water Inukshuk – a pile of stones resembling a human form - used as a directional marker Kalutoganiq – an arrow shaped snow drift Kamleida – a summer waterproof hunting smock Kashim – a sod hut used by native Alaskans Kingmitokvik – the place where dogs are kept Kimoaqtruk – a snow drift Komatik – a sled pulled by dogs Kuuk – the river Leister – three pronged fishing spear Mukluks – boots
Nanuk – polar bear Oomingmak – a musk ox Qali – snow in the boughs of trees Qikirtaq – the island Quinzhee – snow shelter Seekoo – ice, glacier Tikerak – where many people arrive Tupiq – a tent Ulu – a knife used by native women Umiak – a whale hunting boat Umilik – owner and captain of a whaling boat Upsik – wind beaten snow

Arctic Lesson: Acrostic Poems
8
AArrccttiicc AAccrroossttiicc PPooeemmss
OObbjjeeccttiivvee:: Students will use Inuit words to create a vivid image of Arctic life. Students will make powerful word choices in composing the acrostic. MMaatteerriiaallss:: Writing instruments • Paper • Copy of Inuit vocabulary list PPrroocceedduurree:: Title-down poetry – The letters used to spell the subject of the poem are used for each new line of the acrostic. Example: Quietly watching as outstretched
Arms of conifers
Lie in want of
Ice and snow Name poetry – A form of poetry where the letters of a name begin each new line of the poem. Students can write a poem describing an Arctic animal (either in English or Inuit). Example: Nomad (always wandering)
Arctic (his realm)
Northern Lights (glorious)
Unique (among the animals)
King (of the northern empire) EExxtteennssiioonn:: Have the students illustrate, write and print their poems using appropriate computer software. Use color, symbols and pictures to publish a visually pleasing poem.

Arctic Lesson: Comparing Ourselves with Inuits
9
CCoommppaarriinngg OOuurrsseellvveess wwiitthh IInnuuiittss
OObbjjeeccttiivvee:: UUssiinngg aa VVeennnn ddiiaaggrraamm,, ssttuuddeennttss wwiillll lliisstt tthhee wwaayyss tthhaatt tthheeiirr lliivveess aarree ddiiffffeerreenntt ffrroomm tthhee IInnuuiittss aanndd aannootthheerr lliisstt ooff wwaayyss tthhaatt tthheeiirr lliivveess aarree ssiimmiillaarr ttoo tthhee IInnuuiittss.. MMaatteerriiaallss:: Paper • writing utensils • resource books • computers with internet access • copies with Venn Diagram (see next page) • overhead projector and transparency (if done as a group activity) PPrroocceedduurree:: This lesson can be done with students working in small groups or with the entire class. If working in small groups, pass out a copy of a Venn diagram to each group. Students can use resources such as books and the internet to assist them. As a class exercise, the teacher can use an overhead and elicit student responses. EExxtteennssiioonn:: Students can make other comparisons using a Venn diagram: § Arctic and Antarctica § Arctic animals and Antarctic animals § Seals and Sea Lions § Polar Bear and Grizzly Bear

Arctic Lesson: Comparing Ourselves with Inuits
10
CCoommppaarriinngg OOuurrsseellvveess wwiitthh IInnuuiittss
My Family Inuit Family
Both Families
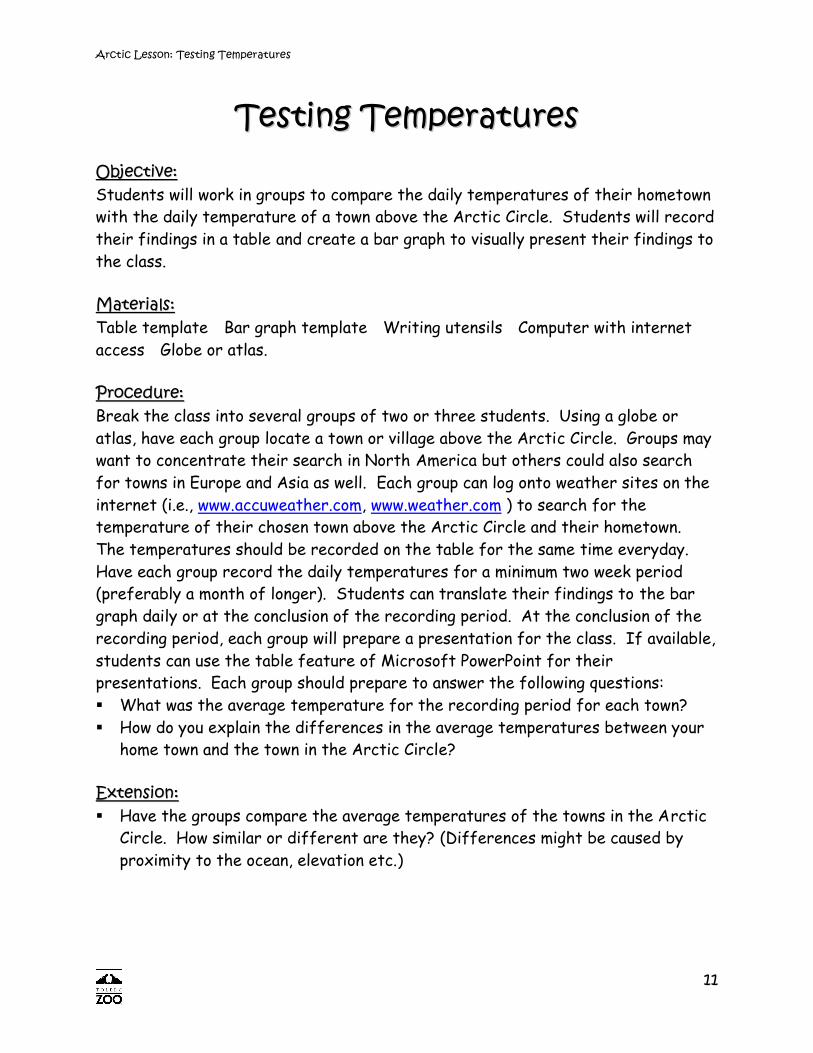
Arctic Lesson: Testing Temperatures
11
TTeessttiinngg TTeemmppeerraattuurreess OObbjjeeccttiivvee:: Students will work in groups to compare the daily temperatures of their hometown with the daily temperature of a town above the Arctic Circle. Students will record their findings in a table and create a bar graph to visually present their findings to the class. MMaatteerriiaallss:: Table template • Bar graph template • Writing utensils • Computer with internet access • Globe or atlas. PPrroocceedduurree:: Break the class into several groups of two or three students. Using a globe or atlas, have each group locate a town or village above the Arctic Circle. Groups may want to concentrate their search in North America but others could also search for towns in Europe and Asia as well. Each group can log onto weather sites on the internet (i.e., www.accuweather.com, www.weather.com ) to search for the temperature of their chosen town above the Arctic Circle and their hometown. The temperatures should be recorded on the table for the same time everyday. Have each group record the daily temperatures for a minimum two week period (preferably a month of longer). Students can translate their findings to the bar graph daily or at the conclusion of the recording period. At the conclusion of the recording period, each group will prepare a presentation for the class. If available, students can use the table feature of Microsoft PowerPoint for their presentations. Each group should prepare to answer the following questions: § What was the average temperature for the recording period for each town? § How do you explain the differences in the average temperatures between your
home town and the town in the Arctic Circle? EExxtteennssiioonn:: § Have the groups compare the average temperatures of the towns in the Arctic
Circle. How similar or different are they? (Differences might be caused by proximity to the ocean, elevation etc.)

Arctic Lesson: Testing Temperatures
12
TTeessttiinngg TTeemmppeerraattuurreess TTaabbllee
TTiimmee TTeemmppeerraattuurree RReeccoorrddeedd EEaacchh DDaayy:: Home Town:
Date
°F
Arctic Town:
Date
°F

Arctic Lesson: Testing Temperatures
13
TTeessttiinngg TTeemmppeerraattuurreess GGrraapphh –– HHoommee TToowwnn
-20
-10
0
10
20
30
40
50
1 2 3 4 5 6 7 8 9 10 11 12 13 14 15
Day
Tem
pera
ture

Arctic Lesson: Testing Temperatures
14
TTeessttiinngg TTeemmppeerraattuurreess GGrraapphh –– AArrccttiicc TToowwnn
-60-50-40-30-20-10
01020
1 2 3 4 5 6 7 8 9 10 11 12 13 14 15
Day
Tem
pera
ture

Arctic Lesson: Turning up the Heat
15
TTuurrnniinngg UUpp TThhee HHeeaatt Partly adapted from: NSF (National Science Foundation). Polar Connections: Exploring the World’s Natural Laboratories, 1997.
OObbjjeeccttiivvee:: Through guided inquiry, students will create their own experiments on heat conduction and radiation and record their observations. As a result of the experiment, students will be able to describe the differences between conduction and radiation, the ability of different materials to insulate and how polar animals are adapted to retain body heat. MMaatteerriiaallss:: Radiation Station: Four thermometers • Ball of string • Meter stick • Heat lamp • Graphing paper Conduction Junction: Containers made of various materials (i.e., Styrofoam, cardboard, plastic, glass, metal, wood) • Metal and wood meter sticks or equivalent • Ten thermometers • Insulated pot holder • Tape Convection Section: Convection heater • Metal meter stick • One thermometer • tape • Six bricks PPrreeppaarraattiioonn:: § Write the directions for the experiment on the chalkboard or on a piece of
paper to distribute to each team. § Place a thermometer in the room to record the ambient air temperature. § Create three science stations, equipping each with the materials described
above. Make sure the materials being used for the conduction experiment have been in the room at least overnight (i.e., they are at the same temperature as the room).
PPrroocceedduurree:: Engage: Split the class into 3 teams of students. Begin by showing the students the heat lamp, an electric soldering gun (or electric iron) and the convection floor heater. Demonstrate the use of each appliance to the class. Each appliance uses a different means of conducting heat. The lamp uses radiation, the soldering gun uses conduction and the heater uses convection. After the demonstration, ask the groups to explain to the best of their current understanding, the differences between radiation, conduction and convection heat.
Arctic Lesson: Turning up the Heat
16
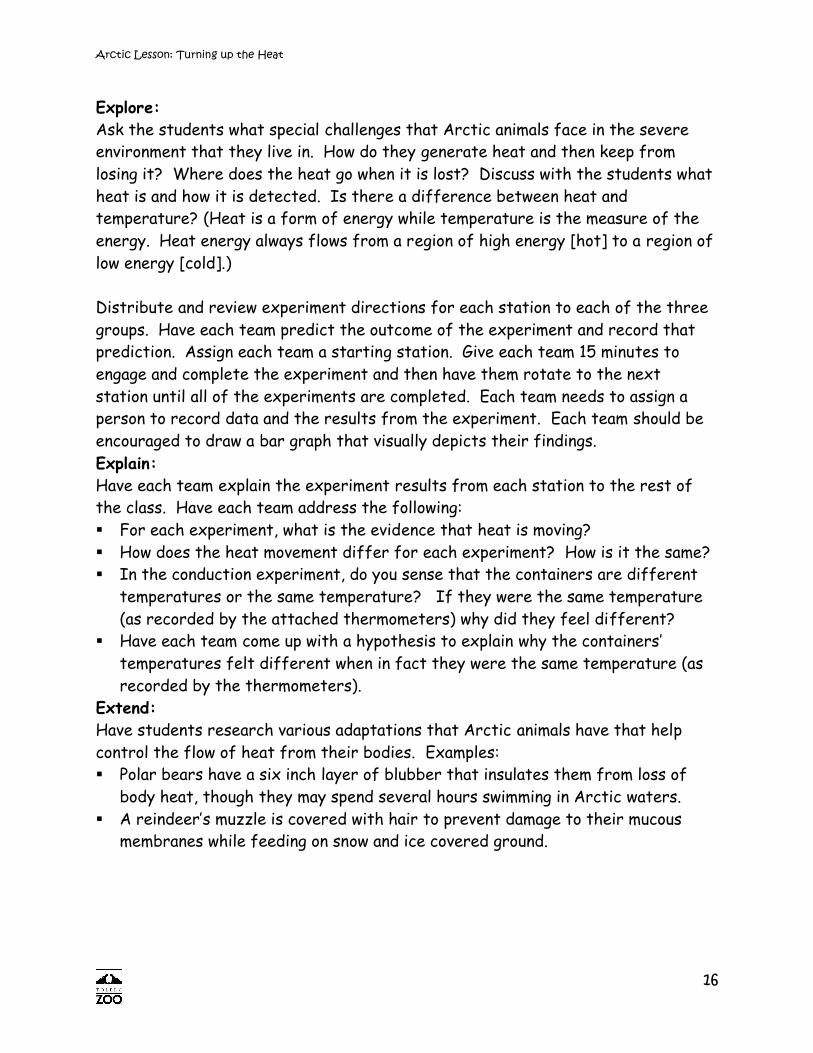
Explore: Ask the students what special challenges that Arctic animals face in the severe environment that they live in. How do they generate heat and then keep from losing it? Where does the heat go when it is lost? Discuss with the students what heat is and how it is detected. Is there a difference between heat and temperature? (Heat is a form of energy while temperature is the measure of the energy. Heat energy always flows from a region of high energy [hot] to a region of low energy [cold].) Distribute and review experiment directions for each station to each of the three groups. Have each team predict the outcome of the experiment and record that prediction. Assign each team a starting station. Give each team 15 minutes to engage and complete the experiment and then have them rotate to the next station until all of the experiments are completed. Each team needs to assign a person to record data and the results from the experiment. Each team should be encouraged to draw a bar graph that visually depicts their findings. Explain: Have each team explain the experiment results from each station to the rest of the class. Have each team address the following: § For each experiment, what is the evidence that heat is moving? § How does the heat movement differ for each experiment? How is it the same? § In the conduction experiment, do you sense that the containers are different
temperatures or the same temperature? If they were the same temperature (as recorded by the attached thermometers) why did they feel different?
§ Have each team come up with a hypothesis to explain why the containers’ temperatures felt different when in fact they were the same temperature (as recorded by the thermometers).
Extend: Have students research various adaptations that Arctic animals have that help control the flow of heat from their bodies. Examples: § Polar bears have a six inch layer of blubber that insulates them from loss of
body heat, though they may spend several hours swimming in Arctic waters. § A reindeer’s muzzle is covered with hair to prevent damage to their mucous
membranes while feeding on snow and ice covered ground.

Arctic Lesson: Turning up the Heat
17
Directions for Radiation Station § Record the room temperature on your data sheet. § Set up a standard household lamp by removing the shade, exposing the bare
bulb. Leave the harp on the lamp where the shade was attached. § Cut three lengths of string at least 40 cm long. Tie one length of string on the
left side of the harp and one length on the left side of the harp directly across from the bulb. Tie the remaining length on the top of the harp. Make sure that the string is not contacting the bulb. With the light out, measure and mark the string at 5 cm intervals away from the bulb.
§ Turn on the bulb. Without touching the bulb, have 3 students on the team hold a thermometer as close to the bulb as possible without touching it near where the strings are attached.
§ When the temperatures quit rising or noticeably slow, record the temperature on your data sheet.
§ Cool the thermometer in a dish of water at room temperature. § Repeat the temperature readings at the 5 cm marks on the strings, recording
your findings on the data sheet. § Continue the temperature readings at 5 cm intervals until the temperature
stays at room temperature. § Use the data to make a bar graph.

Arctic Lesson: Turning up the Heat
18
Directions for Conduction Junction § Record the room temperature on your data sheet. § Tape the thermometers to 4 of the containers at the station. Make sure that
the bulb at the bottom of the thermometer comes in contact with the container. Record the temperatures of the containers on your data sheet.
§ Touch each container with your hand. How does your hand feel immediately after touching it, colder, warmer or the same? Record your answers on the data sheet. Write a brief explanation for each answer.
§ In the middle of a table, clamp the shop light onto a heavy object, such as a book so that the bulb is pointing straight up. About ¾ meter to each side of the lamp, stack a pile of books to the same height as the lamp.
§ With the light off, place one end of a meter stick directly above the center of the light bulb, resting the stick on the edge of the lamp’s reflector and other end on one stack of books.
§ Use the same procedure to set up the remaining meter stick on the opposite side.
§ Tape a thermometer on each stick at 10 cm intervals to the 50 cm mark. Be sure to tape the bulb of each thermometer directly to the meter stick.
§ Turn on the lamp and wait two minutes. § USE CAUTION IN THIS PORTION OF THE EXPERIMENT. ONE OF THE
STICKS WILL BE HOT! USE POT HOLDERS TO HANDLE THE STICKS. § Record your Temperature observations on the data sheet. § Turn off the light and let the sticks cool. § Write a brief explanation of your observations. § Draw a bar graph showing the temperature over distance for each stick.

Arctic Lesson: Turning up the Heat
19
Directions for Convection Section § Record the room temperature on your data sheet. § Place the convection heater on the floor or sturdy table. § Place two stacks of 3 brick in front of the heater, one stack at ¼ meter and the
other at ¾ meter. § Place the metal meter stick on the bricks in front of the heater. § Tape a thermometer at the 10 cm mark of the meter stick. When taping, tape
the top of each thermometer to the meter stick so that the bulb does not touch the meter stick.
§ Turn on the heater and wait two minutes § USE CAUTION IN THIS PORTION OF THE EXPERIMENT. THE STICK WILL
BE HOT! USE POT HOLDERS TO HANDLE THE STICK. § Record the temperature on the data sheet. § Turn off the heater. § Repeat the above procedure at the 20, 30, 40 and 50 cm marks. § Write a brief explanation of your observations. § Draw a bar graph showing the temperature over distance.

Arctic Lesson: Turning up the Heat
20
DDaattaa SShheeeett –– RRaaddiiaattiioonn SSttaattiioonn
TTeeaamm NNaammee:: __________________________________________________________
RRoooomm TTeemmppeerraattuurree:: ____________________________________________
TTeemmppeerraattuurree DDaattaa
00 ccmm 55 ccmm 1100 ccmm 1155 ccmm 2200 ccmm 2255 ccmm 3300 ccmm 3355 ccmm 4400 ccmm
SSttrriinngg 11
SSttrriinngg 22
SSttrriinngg 33
60
70
80
90
100
110
120
130
0 5 10 15 20 25 30 35 40
String One Distance (cm)
Tem
pera
ture
(F)

Arctic Lesson: Turning up the Heat
21
60
70
80
90
100
110
120
130
0 5 10 15 20 25 30 35 40
String Two Distance (cm)
Tem
pera
ture
(F)
60
70
80
90
100
110
120
130
0 5 10 15 20 25 30 35 40
String Three Distance (cm)
Tem
pera
ture
(F)

Arctic Lesson: Turning up the Heat
22
DDaattaa SShheeeett –– CCoonndduuccttiioonn JJuunnccttiioonn
TTeeaamm NNaammee:: __________________________________________________________
RRoooomm TTeemmppeerraattuurree:: ____________________________________________
TTeemmppeerraattuurree DDaattaa iinn °°FF
10 cm 20 cm 30 cm 40 cm 50 cm Meter
Stick #1
Meter Stick #2
Meter Stick #1
60
70
80
90
100
110
120
130
10 20 30 40 50
Distance (cm)
Tem
pera
ture
(F)

Arctic Lesson: Turning up the Heat
23
Meter Stick #2
60
70
80
90
100
110
120
130
10 20 30 40 50
Distance (cm)
Tem
pera
ture
(F)
EExxppllaannaattiioonn ooff OObbsseerrvvaattiioonnss::

Arctic Lesson: Turning up the Heat
24
DDaattaa SShheeeett –– CCoonnvveeccttiioonn SSeeccttiioonn
TTeeaamm NNaammee:: __________________________________________________________
RRoooomm TTeemmppeerraattuurree:: ____________________________________________
TTeemmppeerraattuurree DDaattaa
10 cm 20 cm 30 cm 40 cm 50 cm Meter
Stick #1
Meter Stick #1
60
70
80
90
100
110
120
130
10 20 30 40 50
Distance (cm)
Tem
pera
ture
(F)
EExxppllaannaattiioonn ooff OObbsseerrvvaattiioonnss ((ccoonnttiinnuuee oonn bbaacckk))::

Arctic Lesson: Movers and Shakers
25
AArrccttiicc MMoovveerrss aanndd SShhaakkeerrss OObbjjeeccttiivvee:: Through guided inquiry, students will investigate the insulation qualities of various materials to determine which items have the best heat retention characteristics. Students will apply this knowledge to identify ways that Arctic animals retain heat to survive the harsh Arctic environment. MMaatteerriiaallss:: • Empty 35mm film canisters, enough for class working in teams of two • Knox gelatin mix (enough for class) • One cup measuring cup • Hot tap water to mix the gelatin • Thermometers for the class working in teams of two • Syringes for dispensing gelatin • Variety of insulation materials: foil, cardboard, various fabrics, Styrofoam, feathers, cork, newspaper, colored construction paper, etc. • Rubber bands • Pictures of Arctic animals • Clipboards for students to work in groups of two • Data collection sheet • Thermos bottle • One pound of lard • Two quart size Ziploc freezer bags • Small buckets, one per group • One thermometer per group • Duct tape • Bag of ice • One brick per group PPrroocceedduurree:: Engage: Preparation - Prepare the day before by making two mitts, a “blubber glove” filled with lard and another mitt without lard. Prepare the mitts as follows: Put the lard in a quart sized Ziploc freezer bag (use the one without the slide). Turn another bag inside out and insert it in the one filled with lard. Zip the bags together with the lard between them. Use duct tape to firmly tape the top of the bags together to prevent them from unzipping. Place your hand inside the mitt to evenly spread the lard. Use the same method to make another mitt but omit the lard. Before class, fill a small bucket about ¼ full with cold tap water. Add about a dozen ice cubes. Add a thermometer to the water. Following the directions on the Knox gelatin, prepare enough gelatin mixture for the class to work in groups of two using one 35mm film canister to hold the gelatin. Pour the gelatin in an insulated thermos to keep it hot for the class. Assemble the materials needed by each group in a box. These materials include: Two Ziploc quart freezer bags • Insulation materials • Brick • Thermometer • 35mm film container • Instruction/Data sheet. In addition, give each group a bucket ¼ full of cold tap water with about a dozen ice cubes added to it.

Arctic Lesson: Movers and Shakers
26
Class – Begin by asking the students how they might prevent warm water poured in an ice cube tray from freezing once it’s placed in the freezer. Students will probably mention several ways of insulating the ice cube tray. Ask the students to explain the concept of insulation. Clear up any misconceptions (i.e., insulation makes things warm vs. reducing heat flow). Remind them of the previous experiments that demonstrated heat flow. Next, demonstrate the insulating ability of fat (blubber). Explain that many Arctic animals are insulated with a thick layer of fat or blubber. The blubber is a good insulator that significantly reduces heat flow from the animal. Take the bucket of ice water that you previously prepared and place it on a table in front of the class. Remove the thermometer and read the temperature to the class. Record the temperature on the board. Ask for a student volunteer to come to the front of the class. On one hand, place the blubber mitt. On the other hand, place the mitt with no blubber. Have the student plunge their hands in the bucket. Be sure that water does not flow in the top of the mitts. Ask the student if they feel a noticeable difference between their two hands. Have a couple of other students repeat the demonstration. At the conclusion of the demonstration, ask the class if they can explain why the hand in the mitt without blubber felt colder than the hand that had the blubber mitt (i.e., blubber reduces heat flow from the hand to the ice water). Explore: Split the class into several teams of three students. Give each team a box with their experiment supplies, a data sheet and a bucket of ice water. Explain to the students that they will be conducting an experiment to see what materials are the best insulators. Each group’s challenge is to keep their gelatin “animal” from freezing to death. Explain that when gelatin, such as Jello, is hot, it is a liquid. When it gets cold, it becomes a solid. Each will be given a warm gelatin animal (a 35mm film canister with Knox gelatin) that the team has to keep from freezing (becoming solid) in a bucket of ice water. They will be given the materials to make a mitt. Instead of filling the mitt with lard, they can choose any of the materials in the box to fill the mitts. Teams cannot combine more than two materials for insulating their animal. Pass out the directions to each team. Each team will have 20 minutes to conduct their experiment.

Arctic Lesson: Movers and Shakers
27
MMoovveerrss aanndd SShhaakkeerrss IInnssttrruuccttiioonn aanndd DDaattaa SShheeeett Your challenge is to keep your gelatin “animal” from freezing in the ice water. Directions: § Choose among the materials in your box one or two that you believe will be the
best insulator(s). § In the space below, write a paragraph to explain why you chose the particular
insulator and why your team thinks it will be successful. § Take one of the Ziploc bags. Fill it about ½ full of the material that you decide
to use as the insulator. § Take the other Ziploc bag and turn it inside out. Place it inside the Ziploc that
has the insulation. “Zip” the two bags together. You may have to even out the materials to get the two bags to zip together. You may also need to remove or add insulation.
§ Obtain your gelatin “animal” from your teacher. § Carefully place your “animal” inside the inner Ziploc bag. § Seal the top of the bag with duct tape. Make sure that it is totally waterproof. § Place your insulated “animal” in the bucket of ice water. Since air is trapped
inside the bag, you may weigh it down with a brick. Be careful not to crush your “animal”.
§ Keep your “animal” submerged for 10 minutes. § Remove your “animal” from the ice water. § Open the Ziploc and examine the “animal”. If the gelatin is still a liquid, your
animal survived. If the gelatin is a solid, your animal perished. IInnssuullaattoorr((ss)):: SSttaarrtt TTiimmee:: EEnndd TTiimmee:: WWrriittee aa ppaarraaggrraapphh ttoo eexxppllaaiinn wwhhyy yyoouu cchhoossee tthhee iinnssuullaattoorr aanndd wwhhyy yyoouurr tteeaamm tthhiinnkkss iitt wwiillll bbee ssuucccceessssffuull ((wwrriittee oonn bbaacckk oorr aannootthheerr ppiieeccee ooff ppaappeerr)):: RReessuullttss:: Did your “animal” freeze or survive? DDiissccuussssiioonn:: Write a paragraph to evaluate your results – If the “animal” didn’t survive, what would you have done differently? (Write on back or another piece of paper)

Arctic Lesson: Movers and Shakers
28
EExxppllaaiinn:: At the conclusion of the experiment, have each team write down the results of their experiment. Did their animal survive or perish? Each team should write a paragraph to discuss the results of their experiment. Why did their “animal” die? Why did it survive? Teams can write their paragraphs on the back of the data sheet. EExxtteenndd:: Propose another insulation problem to solve: Would air be an effective insulator? Have the students propose an experiment to find the answer. (Students could make a mitt out of bubble wrap by folding it over and sealing it with tape. The gelatin “animal” could be added and tested against the other insulators that were used in the earlier experiment.)

Arctic Lesson: Polar Bear Aware
29
PPoollaarr BBeeaarr AAwwaarree OObbjjeeccttiivvee:: Students will observe a polar bear at the Zoo, recording the various observed behaviors on a data sheet. Students will then create a time budget pie graph to visually represent the % of time the bear spent at various activities and draw conclusions based on their observations. MMaatteerriiaallss:: Clip boards • Pencils • Data sheet • Computer PPrreeppaarraattiioonn:: Make arrangements with your principal for transporting your class to the Zoo • Make arrangements with the Zoo PPrroocceedduurree:: Engage: The day before your field trip to the Zoo, show the video The Great White Bear to the class (National Geographic Society (1998). The Great White Bear. [VHS]. Washington, D.C.: The National Geographic Society.) Ask the students to pay close attention to the daily activities of the bears: walking, swimming, hunting, etc. Explain to students that they will be conducting a scientific observation of polar bears at the Zoo the next day. Divide the class into teams of two students. Distribute a polar bear data sheet, clipboard, and directions to each team. Directions: § Make sure that your team has a watch, the polar bear data sheet, a clipboard
and a pencil with eraser. § Find a comfortable place in the Arctic/Polar Bear exhibit for observing a polar
bear for at least 20 minutes. § Fill out the top portion of the data sheet. § Review the recording portion of the data sheet with your team mate. § When you are ready to begin, write the beginning time in the space provided. § When you observe an activity, time the duration of the activity from beginning
to end. Place the time in the box next the activity description. For example, if you observed the polar bear swimming for one minute 20 seconds, record it as 1:20.
§ If there is a break between activities, record the new occurrence in the next box.
§ When complete, record the end time in the appropriate box.
Arctic Lesson: Polar Bear Aware
30
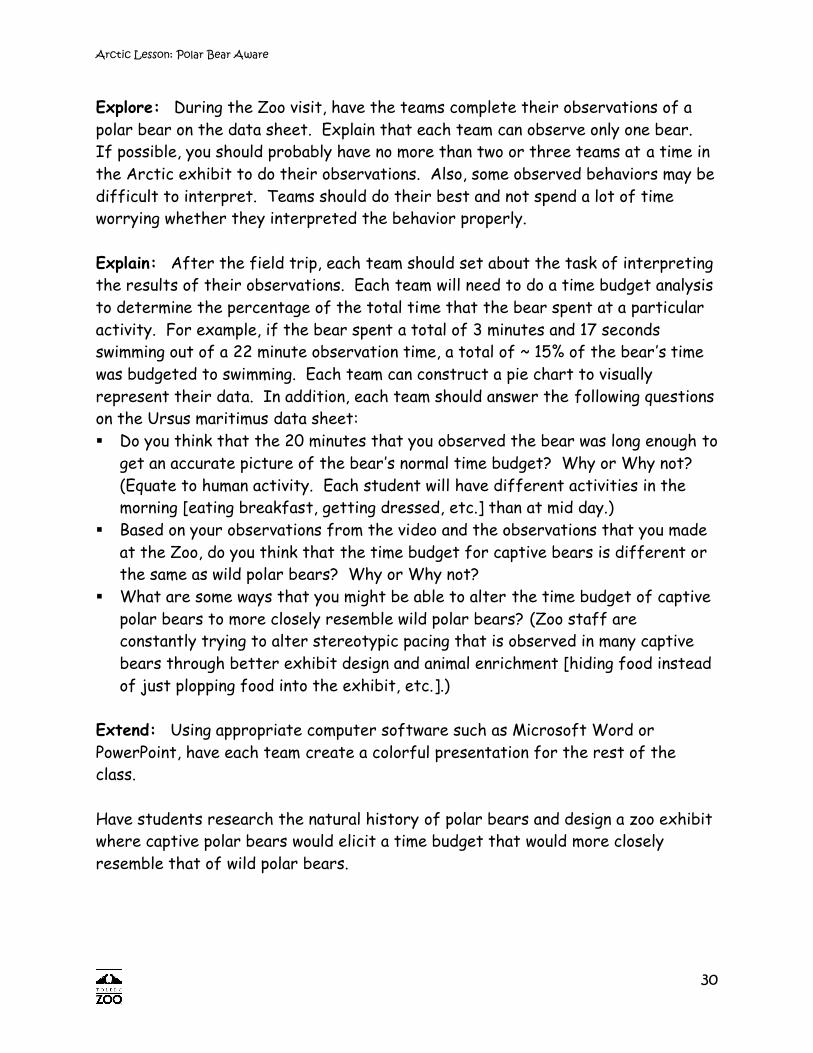
Explore: During the Zoo visit, have the teams complete their observations of a polar bear on the data sheet. Explain that each team can observe only one bear. If possible, you should probably have no more than two or three teams at a time in the Arctic exhibit to do their observations. Also, some observed behaviors may be difficult to interpret. Teams should do their best and not spend a lot of time worrying whether they interpreted the behavior properly. Explain: After the field trip, each team should set about the task of interpreting the results of their observations. Each team will need to do a time budget analysis to determine the percentage of the total time that the bear spent at a particular activity. For example, if the bear spent a total of 3 minutes and 17 seconds swimming out of a 22 minute observation time, a total of ~ 15% of the bear ’s time was budgeted to swimming. Each team can construct a pie chart to visually represent their data. In addition, each team should answer the following questions on the Ursus maritimus data sheet: § Do you think that the 20 minutes that you observed the bear was long enough to
get an accurate picture of the bear’s normal time budget? Why or Why not? (Equate to human activity. Each student will have different activities in the morning [eating breakfast, getting dressed, etc.] than at mid day.)
§ Based on your observations from the video and the observations that you made at the Zoo, do you think that the time budget for captive bears is different or the same as wild polar bears? Why or Why not?
§ What are some ways that you might be able to alter the time budget of captive polar bears to more closely resemble wild polar bears? (Zoo staff are constantly trying to alter stereotypic pacing that is observed in many captive bears through better exhibit design and animal enrichment [hiding food instead of just plopping food into the exhibit, etc.].)
Extend: Using appropriate computer software such as Microsoft Word or PowerPoint, have each team create a colorful presentation for the rest of the class. Have students research the natural history of polar bears and design a zoo exhibit where captive polar bears would elicit a time budget that would more closely resemble that of wild polar bears.

Arctic Lesson: Polar Bear Aware
31
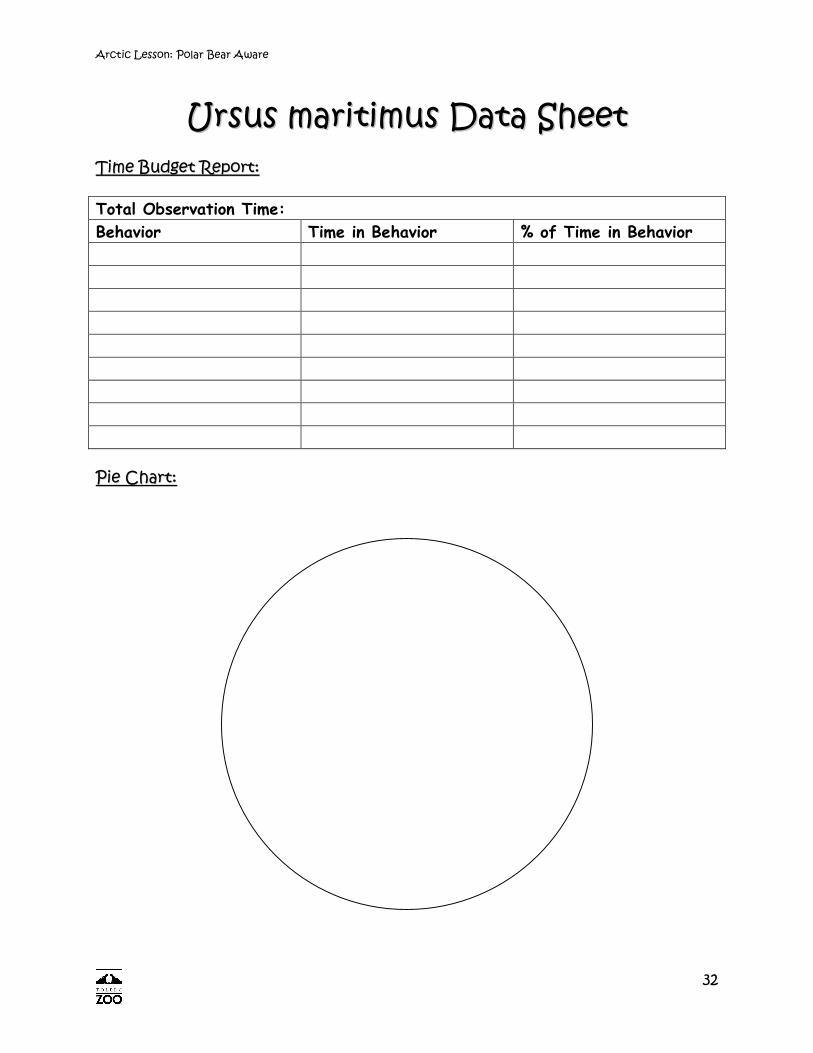
UUrrssuuss mmaarriittiimmuuss OObbsseerrvvaattiioonn SShheeeett
Date: Time Begin: Air Temperature: Time End: Weather Conditions: Subject ID (if known):
Observers: 1 2 3 4 5 6 7 8 9 10
Feed Drink
Urinate Defecate
Look Around Smell Groom Scratch
Rub Bite
Act
ivity
Dive Walk Run Pace Swim Lie Sit
Stand Erect
Post
ure
Climb Throw Lick Bite Chew Nudge Stalk
Retrieve Explor
ation
Hold-mouth/paw
Arctic Lesson: Polar Bear Aware
32
UUrrssuuss mmaarriittiimmuuss DDaattaa SShheeeett
TTiimmee BBuuddggeett RReeppoorrtt:: Total Observation Time: Behavior Time in Behavior % of Time in Behavior PPiiee CChhaarrtt::

Literacy Standards
33
LLiitteerraaccyy SSttaannddaarrddssStandards Lessons
Acrostic Poems Comparing
Turning up the Heat
Movers and
Shakers
Polar Bear
Aware Writing Process
Generate ideas for written compositions. Develop audience and purpose for self-selected and assigned writing tasks.
Use organizers to clarify ideas for writing assignments. ü Use revision strategies and resources to improve ideas and content, organization, word choice and detail.
Edit to improve sentence fluency, grammar and usage. Apply tools to judge the quality of writing. Publish writing samples for display or sharing with others, using techniques such as electronic resources and graphics. ü ü ü ü
Writing Applications Compose writings that convey a clear message and include well-chosen details. ü ü ü ü ü
Write responses to literature that demonstrate an understanding of a literary work.
Write friendly letters and invitations complete with date, salutation, body, closing and signature.
Writing Conventions Print legibly using appropriate spacing. ü ü ü ü ü Spell grade-appropriate words correctly. ü ü ü ü ü Use conventions of punctuation and capitalization in written work. ü ü ü
Use grammatical structures in written work. ü ü ü Research
Generate questions for investigation and gather information from a variety of sources. ü ü ü ü ü
Retell important details and findings. ü ü ü Communications: Oral and Visual
Use active listening strategies to identify the main idea and to gain information from oral presentations.
Connect prior experiences, insights and ideas to those of a speaker.
Follow multi-step directions. ü ü ü Speak clearly and at an appropriate pace and volume. ü ü ü Deliver a variety of presentations that include relevant information and a clear sense of purpose. ü ü ü ü ü

Science Standards
34
SScciieennccee SSttaannddaarrddss National Standards Lessons
Acrostic Poems Comparing
Turning up the Heat
Movers and
Shakers
Polar Bear
Aware Science as Inquiry Abilities necessary to do scientific inquiry
Ask a question about objects, organisms, and events in the environment. ü ü ü
Plan and conduct a simple investigation. ü ü ü Employ simple equipment and tools to gather data and extend the senses. ü ü ü
Use data to construct a reasonable explanation. ü ü ü Communicate investigations and explanations. ü ü ü
Understanding about scientific inquiry
Scientific investigations involve asking and answering a question and comparing the answer with what scientists already know about the world.
ü ü
Scientists use different kinds of investigations depending on the questions they are trying to answer. Types of investigations include describing objects, events, and organisms; classifying them, and doing a fair test (experimenting).
ü ü ü
Simple instruments, such as magnifiers, thermometers, and rulers, provide more information than scientists obtain using only their senses.
ü ü
Scientists develop explanations using observations (evidence) and what they already know about the world (scientific knowledge). Good explanations are based on evidence from investigations.
ü ü ü
Scientists make the results of their investigations public; they describe the investigations in ways that enable others to repeat the investigations.
ü ü ü
Scientists review and ask questions about the results of other scientists’ work.
Life Science The characteristics of organisms
Organisms have basic needs. For example, animals need air, water, and food; plants require air, water, nutrients, and light. Organisms can survive only in environments in which their needs can be met. The world has many different environments, and distinct environments support the life of different types of organisms.
ü ü
Each plant or animal has different structures that serve different functions in growth, survival, and reproduction. For example, humans have distinct body structures for walking, holding, seeing, and talking.
ü

Science Standards
35
SScciieennccee SSttaannddaarrddss National Standards Lessons
Acrostic Poems Comparing
Turning up the Heat
Movers and
Shakers
Polar Bear
Aware Life Science
The behavior of individual organisms is influenced by internal cues (such as hunger) and by external cues (such as a change in environment). Humans and other organisms have senses that help them detect internal and external cues.
ü
Life cycles of organisms Plants and animals have life cycles that include being born, developing into adults, reproducing, and eventually dying. The details of this life cycle are different for different organisms.
Plants and animals closely resemble their parents. Many characteristics of an organism are inherited from the parents of the organism, but other characteristics result from an individual’s interaction with the environment. Inherited characteristics included the color of flowers and the number of limbs of an animal. Other features, such as the ability to ride a bicycle, are learned through interactions with the environment and cannot be passed on to the next generation.
Organisms and environments
All animals depend on plants. Some animals eat plants for food. Other animals eat animals that eat the plants.
An organism’s patterns of behavior are related to the nature of that organism’s environment, including the kinds and numbers of other organisms present, the availability of food and resources, and the physical characteristics of the environment. When the environment changes, some plants and animals survive and reproduce, and others die or move to new locations.
ü ü
All organisms cause changes in the environment where they live. Some of these changes are detrimental to the organisms or other organisms, whereas others are beneficial.
ü
Humans depend on their natural and constructed environments. Humans change environments in ways that can be either beneficial or detrimental for themselves and other organisms.

Arctic Resources
36
AArrccttiicc RReessoouurrcceess oonn tthhee IInntteerrnneett http://www.pbs.org/wnet/nature/whitebear/
http://www.polarbearsalive.org/
http://www.allthingsarctic.com/default.aspx
http://www.defenders.org/wildlife/new/polarbears.html
http://arcticcircle.uconn.edu/
http://www.anwr.org/
http://geog.pdx.edu/oga/lessons/Canada/Inuit/InuitsoftheNunavut.pdf
http://www.kn.pacbell.com/wired/fil/pages/listtheinuimr.html
http://library.thinkquest.org/TQ0310225/arcticmenu.htm
http://www.mnh.si.edu/arctic/
http://www.museum.state.il.us/exhibits/changing/journey/hunters.html
http://nsidc.org/arcticmet/basics/arctic_definition.html
http://www.siberiagym.com/siberia_pictures_nenets_oxana_kh.htm