Embed Size (px)
Citation preview
ANCO BATCH PASTEURIZER COLLECTION
AN CO EQU IPMEN T 1070 E . GLENBROOK DRIV E
PU LAS KI , W I 54162 W W W .AN COEQUIPMEN T.COM
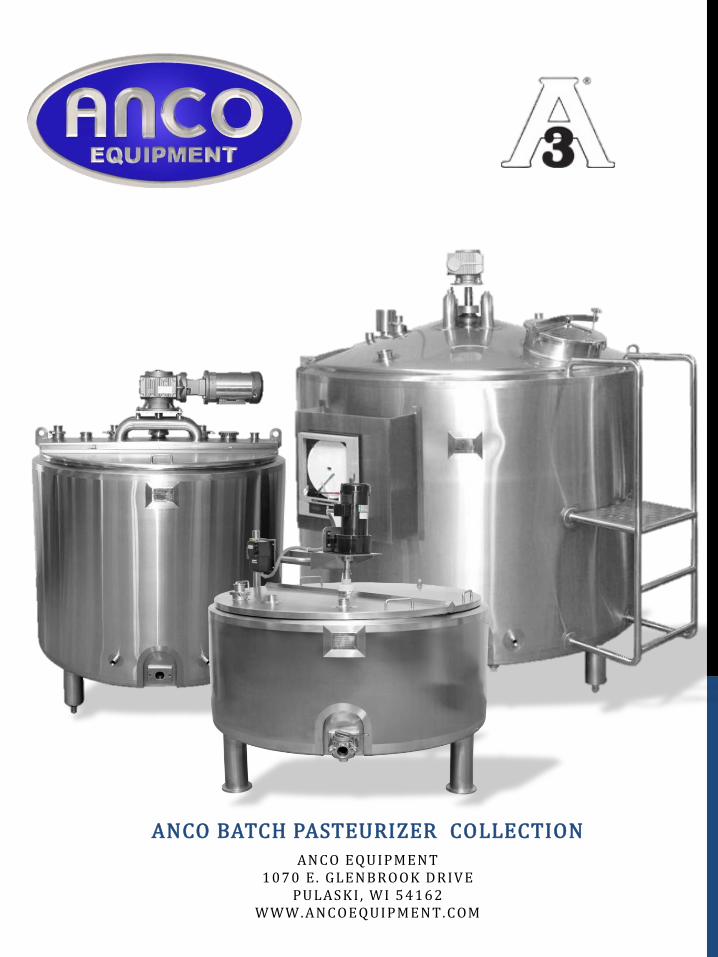
Table of Contents
About our Batch Pasteurizer 3
Tank Specifications and Options 4
Batch Pasteurizer Overview 5
Cleaning Instructions 7
Passivating your Tank 8
Sizing your Boiler 9
Jacket Port Install 10
Leak Detection Valve Install, Handling & Maintenance 13
Air Space Heater 16
Anderson Chart Recorder Overview 20
Spray Ball Maintenance and Technical Information 23
Test Run Procedure 24
Pasteurizing Procedure 25
Warranty 32
Conclusion 33
5/2/2016 2
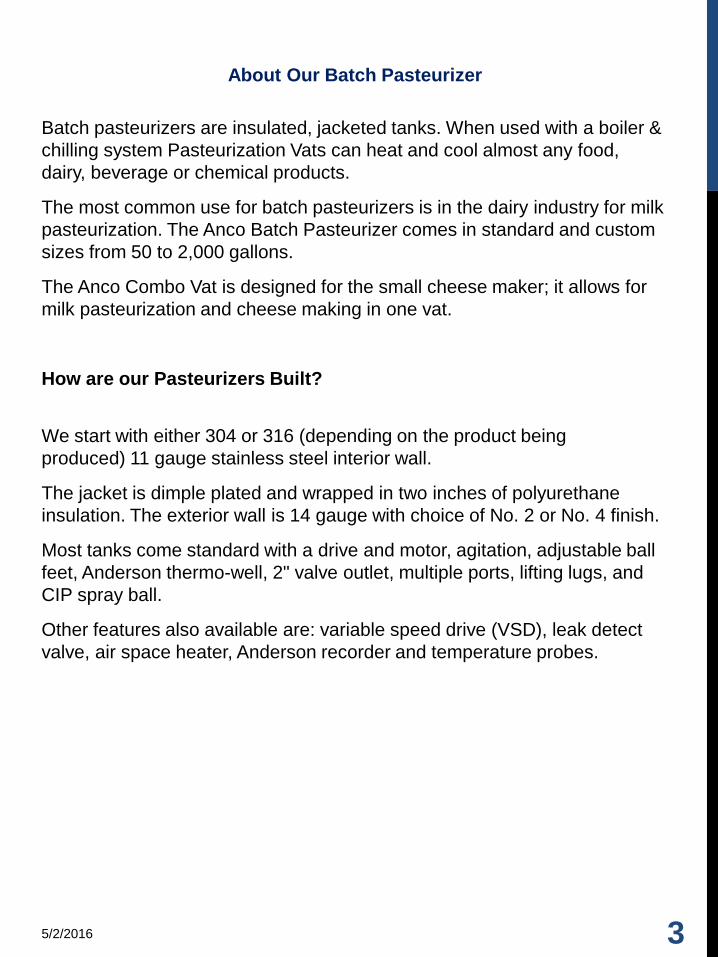
Batch pasteurizers are insulated, jacketed tanks. When used with a boiler &
chilling system Pasteurization Vats can heat and cool almost any food,
dairy, beverage or chemical products.
The most common use for batch pasteurizers is in the dairy industry for milk
pasteurization. The Anco Batch Pasteurizer comes in standard and custom
sizes from 50 to 2,000 gallons.
The Anco Combo Vat is designed for the small cheese maker; it allows for
milk pasteurization and cheese making in one vat.
How are our Pasteurizers Built?
We start with either 304 or 316 (depending on the product being
produced) 11 gauge stainless steel interior wall.
The jacket is dimple plated and wrapped in two inches of polyurethane
insulation. The exterior wall is 14 gauge with choice of No. 2 or No. 4 finish.
Most tanks come standard with a drive and motor, agitation, adjustable ball
feet, Anderson thermo-well, 2" valve outlet, multiple ports, lifting lugs, and
CIP spray ball.
Other features also available are: variable speed drive (VSD), leak detect
valve, air space heater, Anderson recorder and temperature probes.
About Our Batch Pasteurizer
5/2/2016 3
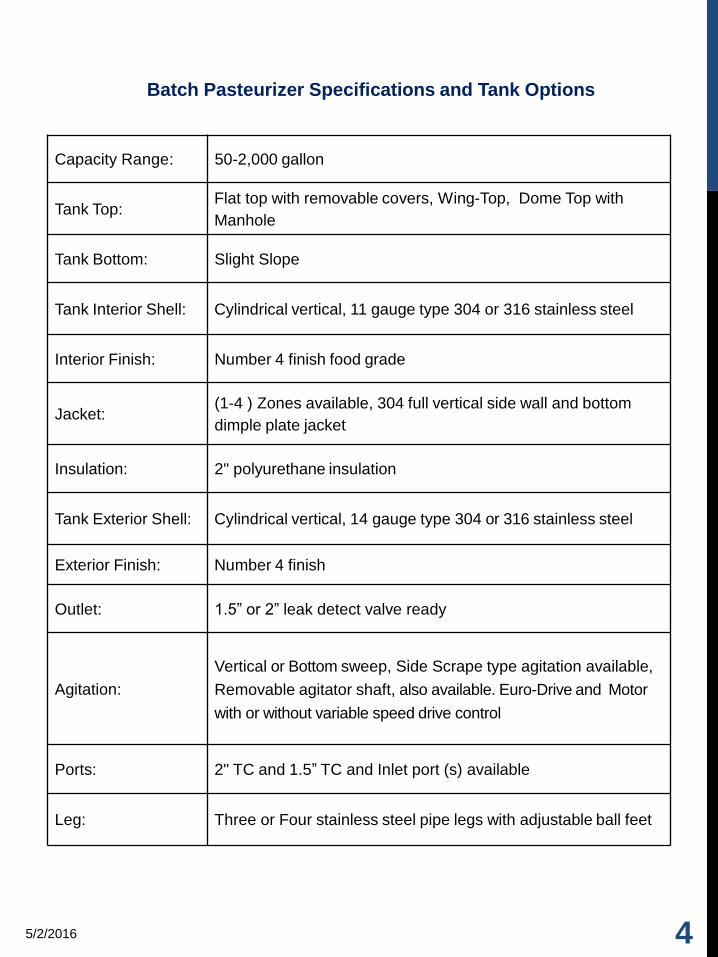
Capacity Range: 50-2,000 gallon
Tank Top: Flat top with removable covers, Wing-Top, Dome Top with
Manhole
Tank Bottom: Slight Slope
Tank Interior Shell: Cylindrical vertical, 11 gauge type 304 or 316 stainless steel
Interior Finish: Number 4 finish food grade
Jacket: (1-4 ) Zones available, 304 full vertical side wall and bottom
dimple plate jacket
Insulation: 2" polyurethane insulation
Tank Exterior Shell: Cylindrical vertical, 14 gauge type 304 or 316 stainless steel
Exterior Finish: Number 4 finish
Outlet: 1.5” or 2” leak detect valve ready
Agitation:
Vertical or Bottom sweep, Side Scrape type agitation available,
Removable agitator shaft, also available. Euro-Drive and Motor
with or without variable speed drive control
Ports: 2" TC and 1.5” TC and Inlet port (s) available
Leg: Three or Four stainless steel pipe legs with adjustable ball feet
Batch Pasteurizer Specifications and Tank Options
5/2/2016 4
Tank Inspection
• Anco Equipment preforms thorough inspection before each tank is shipped to insure every piece is in good working order. We ask all our clients to do the same.
• Immediately upon arrival of the equipment, confirm the tank has not been scratched, dented, or missing any parts during transit. Call Anco Equipment immediately if you find something wrong with your order.
Prepping Instructions
• Cleaning your vat: after the manufacturing and shipping process, it is important to thoroughly wash and degrease your vat. Please see further in this manual or contact your chemical cleaning supplier for recommendations.
• Prior to tank use: be sure to clean and sanitize the vat, pump, outlet valve, supply lines and spray balls (if present). If you decide to use a chemical based cleaning process; be sure to follow all manufacture’s instruction. To avoid pitting of your equipment NEVER let highly chlorinated water stand more than ten minutes.
• Passivation is a method of maximizing the inherent corrosion resistance of the stainless alloy we recommend using this technique to preserve the tank. Please see further instructions in this manual or contact your chemical cleaning supplier for instructions.
Boiler Installation Instructions
• Please use a licensed boiler technician or licensed Pipe Fitter when installing the tank.
• The tanks dimple plated jacket is designed to heat and/or cool with Glycol, a hot water boiler or a steam boiler system. The jacket is tested and rate for 70 maximum pounds per square inch (PSI). Low pressure boilers are recommended. If you are using a high pressure boiler confirm with your state rules and regulations that no additional stamps or documentation are required (example: ASME).
• A properly sized boiler can have your product at pasteurizing temperature within 25 minutes or less. You will need a licensed plumber or boiler technician to install your boiler system. There should be pressure valves installed to protect the tank jacket from reaching more than the maximum PSI allows. Please see further in this manual for proper boiler sizing.
• If you are heating with steam; the steam inlet is the top port of jacket on the side. If the tank has 2 or more zones the bottom zone ports are interchangeable. See diagram further in this manual.
• If you are heating or cooling with water or Glycol the inlet is the bottom or lowest port of jacket. If the tank has 2 or more zones, the bottom zone ports are interchangeable. See diagram further in this manual.
5/2/2016 5
Batch Pasteurizer Overview
Motor/Gearbox
• A licensed electrician is needed to hard wire the motor/gear and variable speed drive (if applicable).
• Frequently check the oil level plug and add oil if needed. Food grade oil is recommended.
Gaskets
• Only food grade gaskets can be used on all ports and valves. Gaskets should be inspected regularly for cracks or worn areas. The gaskets must be replaced every 18 months for moderate use or when worn or damaged.
Clean In Place-Spray Ball Cleaning Nozzles
• Unless otherwise noted, your tank is equipped with (2) Food Grade spray ball nozzles. Please see diagram further in this manual for step by step cleaning and maintenance procedure.
Leak Detection Valve Instructions and Maintenance
• Each valve purchase includes a food-grade gasket and a tube of PetroLube.
• To install; clean the area of the tank where the gasket is place. Apply PetroLube to both sides of the gasket and place on to the tank bolts. Lubricate the inner guts of valve before setting in place. The PetroLube is a food-grade lubricant and is allowed to have product contact. Please see diagram further in this manual.
• Also find video reference on YouTube under Anco Equipment.
Adjustable Ball Feet
• Any threads showing on the tank’s adjustable ball feet must be sealed with a food grade sealant.
Exterior Threaded Ports:
• When connecting any process lines or tubing to the tank’s threaded ports; use a Food Grade Anti-Seize & Lubricating Compound on the threaded area. This will help resist acid, chemical corrosion & oxidation. Follow manufactures instructions.
Electric Airspace Heater
• The electric airspace (if needed) will be installed on the lid or roof of tank. Please use a licensed electrician for proper installation.
5/2/2016
6
5/2/2016
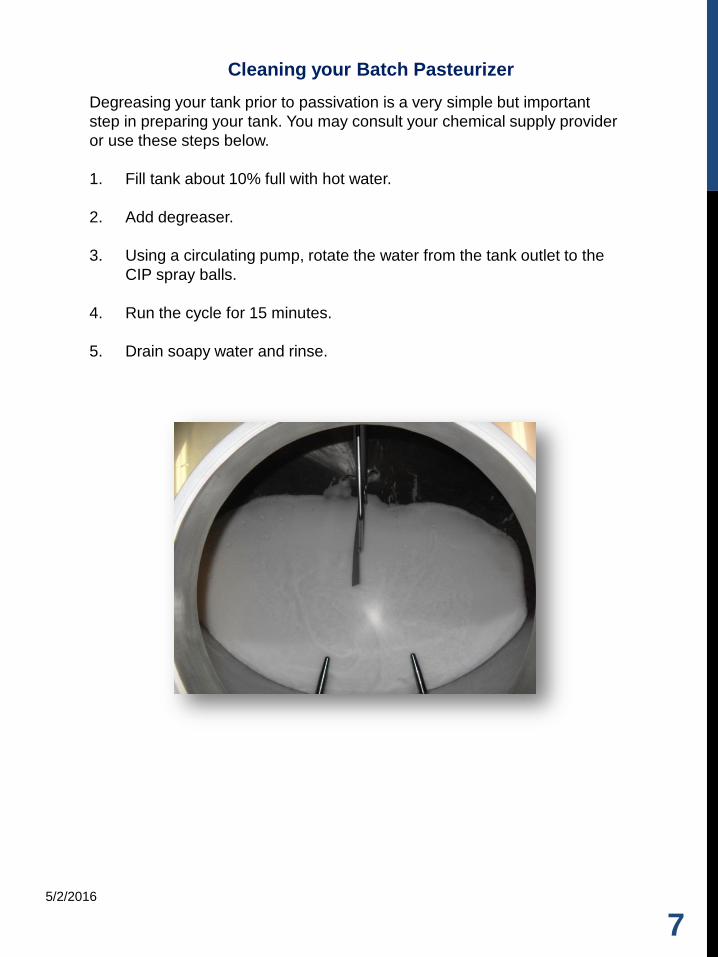
Degreasing your tank prior to passivation is a very simple but important
step in preparing your tank. You may consult your chemical supply provider
or use these steps below.
1. Fill tank about 10% full with hot water.
2. Add degreaser.
3. Using a circulating pump, rotate the water from the tank outlet to the
CIP spray balls.
4. Run the cycle for 15 minutes.
5. Drain soapy water and rinse.
7
Cleaning your Batch Pasteurizer
5/2/2016
Passivation is a chemical treating process that will maximize the longevity of the
stainless steel. We recommend completing this process to preserve the tank’s
longevity.
Below are two companies that supply the chemicals for passivation. You may also
already have a chemical provider you wish to use. We have also included their
step by step instructions either as an additional attachment (if received
electronically) or further in this pamphlet (if received as a printed document).
Stellar Solutions
4511 Prime Parkway
McHenry, IL 60050
Phone: (847) 854-2800
Fax: (847) 854-2830
www.citrisurf.com
Ecolab
Food & Beverage Processing
Customer Service: 800-392-3392
www.ecolab.com
8
Passivating your Batch Pasteurizer
5/2/2016
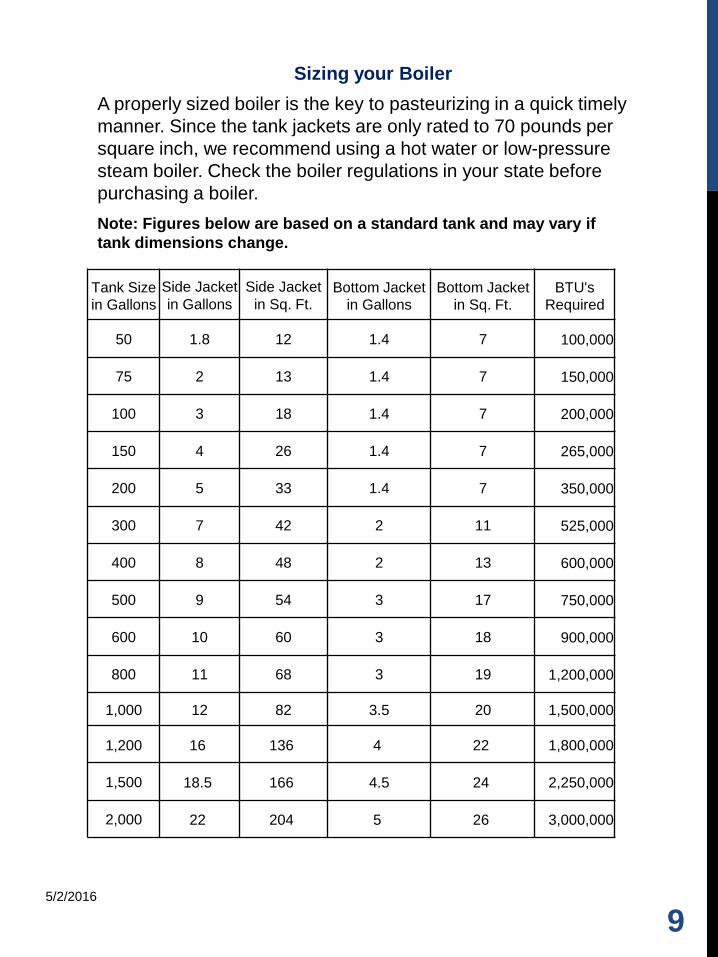
A properly sized boiler is the key to pasteurizing in a quick timely
manner. Since the tank jackets are only rated to 70 pounds per
square inch, we recommend using a hot water or low-pressure
steam boiler. Check the boiler regulations in your state before
purchasing a boiler.
Tank Size
in Gallons Side Jacket
in Gallons Side Jacket
in Sq. Ft. Bottom Jacket
in Gallons Bottom Jacket
in Sq. Ft. BTU's
Required
50 1.8 12 1.4 7 100,000
75 2 13 1.4 7 150,000
100 3 18 1.4 7 200,000
150 4 26 1.4 7 265,000
200 5 33 1.4 7 350,000
300 7 42 2 11 525,000
400 8 48 2 13 600,000
500 9 54 3 17 750,000
600 10 60 3 18 900,000
800 11 68 3 19 1,200,000
1,000 12 82 3.5 20 1,500,000
1,200 16 136 4 22 1,800,000
1,500 18.5 166 4.5 24 2,250,000
2,000 22 204 5 26 3,000,000
Note: Figures below are based on a standard tank and may vary if
tank dimensions change.
9
Sizing your Boiler
5/2/2016
10
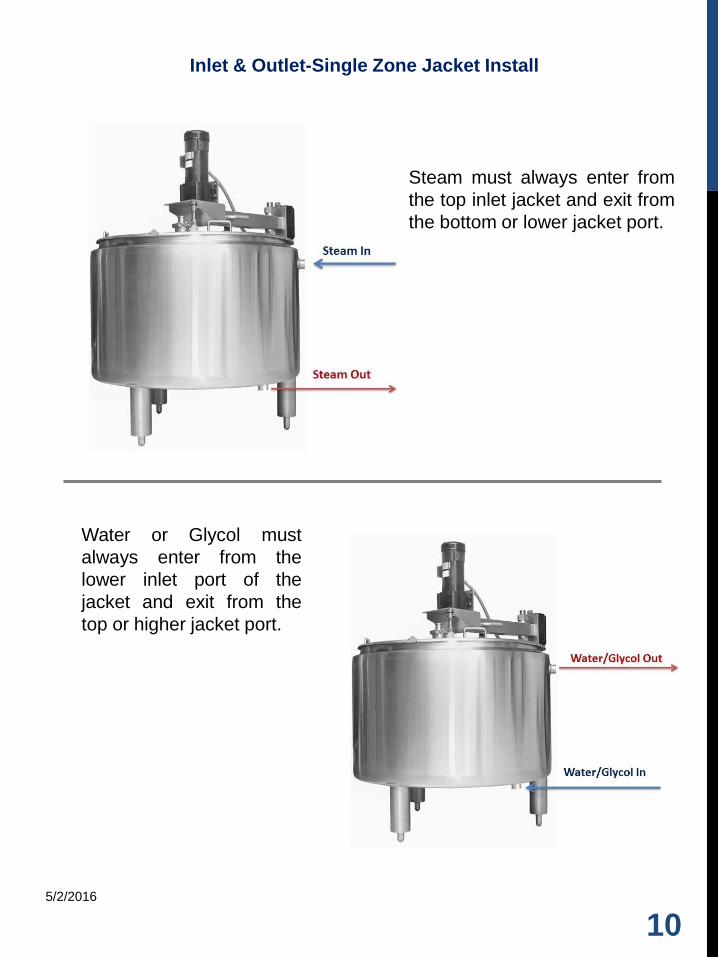
Inlet & Outlet-Single Zone Jacket Install
Water or Glycol must
always enter from the
lower inlet port of the
jacket and exit from the
top or higher jacket port.
Steam must always enter from
the top inlet jacket and exit from
the bottom or lower jacket port.
5/2/2016
11
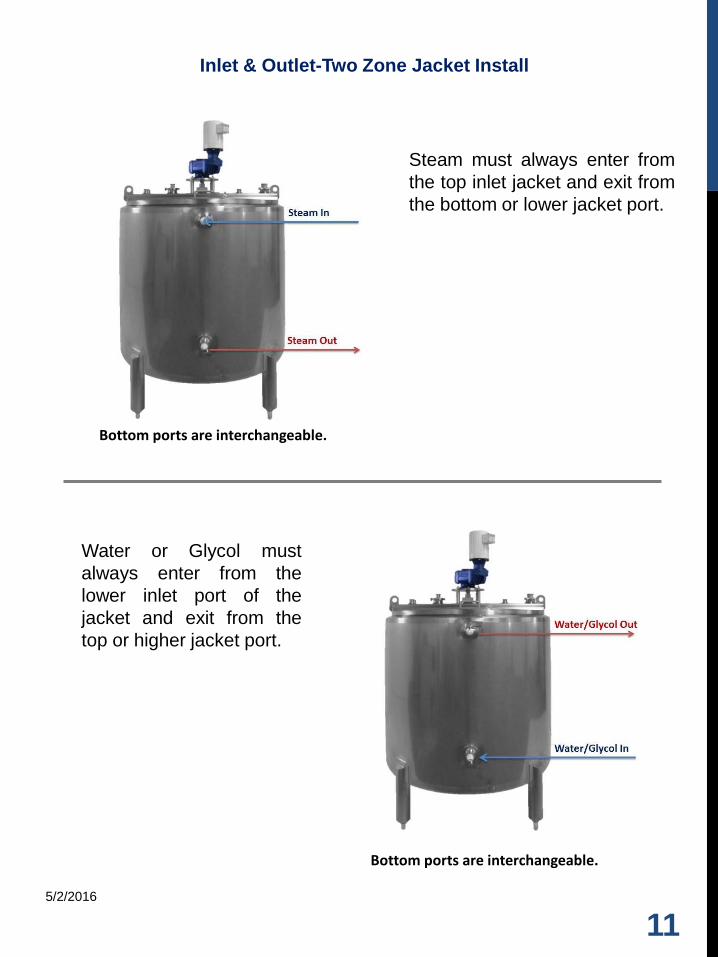
Inlet & Outlet-Two Zone Jacket Install
Water or Glycol must
always enter from the
lower inlet port of the
jacket and exit from the
top or higher jacket port.
Steam must always enter from
the top inlet jacket and exit from
the bottom or lower jacket port.
Bottom ports are interchangeable.
Bottom ports are interchangeable.
5/2/2016
12
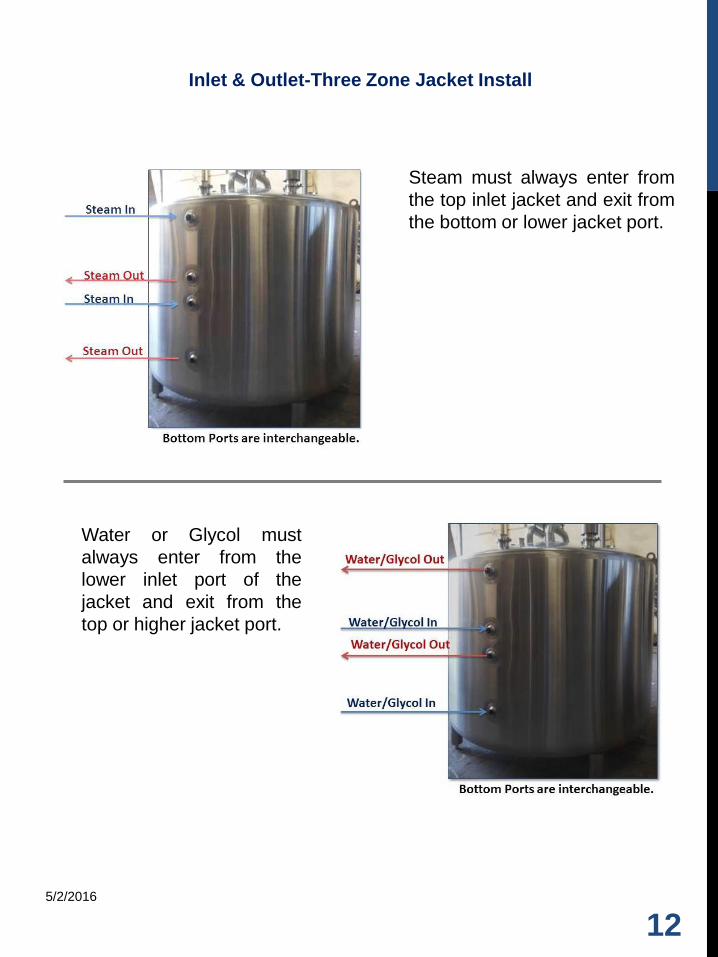
Inlet & Outlet-Three Zone Jacket Install
Water or Glycol must
always enter from the
lower inlet port of the
jacket and exit from the
top or higher jacket port.
Steam must always enter from
the top inlet jacket and exit from
the bottom or lower jacket port.
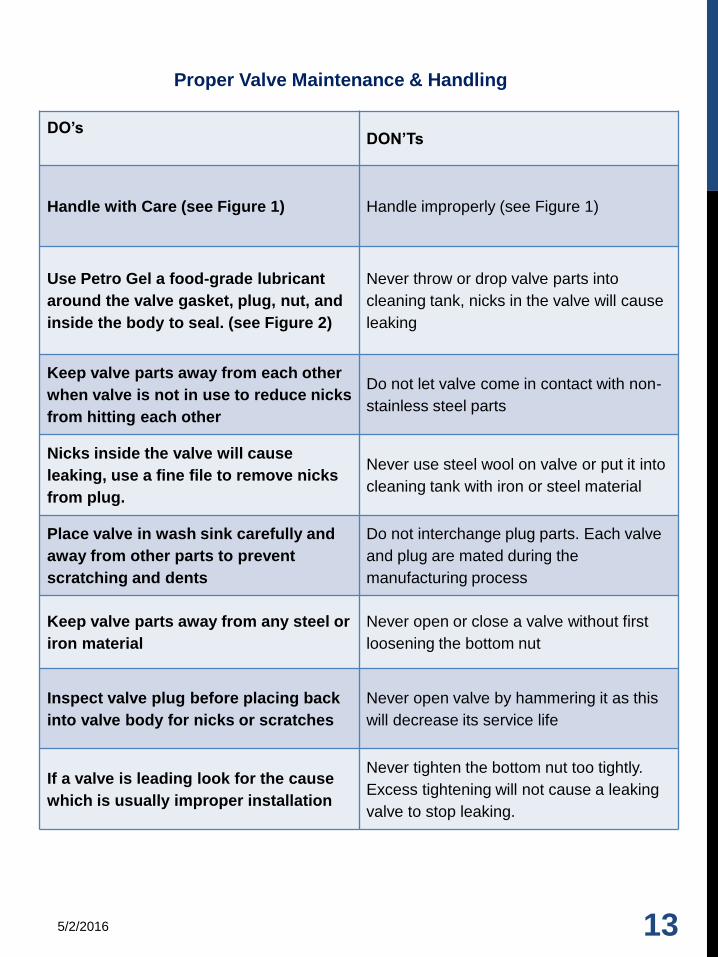
Proper Valve Maintenance & Handling
5/2/2016 13
DO’s
DON’Ts
Handle with Care (see Figure 1)
Handle improperly (see Figure 1)
Use Petro Gel a food-grade lubricant
around the valve gasket, plug, nut, and
inside the body to seal. (see Figure 2)
Never throw or drop valve parts into
cleaning tank, nicks in the valve will cause
leaking
Keep valve parts away from each other
when valve is not in use to reduce nicks
from hitting each other
Do not let valve come in contact with non-
stainless steel parts
Nicks inside the valve will cause
leaking, use a fine file to remove nicks
from plug.
Never use steel wool on valve or put it into
cleaning tank with iron or steel material
Place valve in wash sink carefully and
away from other parts to prevent
scratching and dents
Do not interchange plug parts. Each valve
and plug are mated during the
manufacturing process
Keep valve parts away from any steel or
iron material
Never open or close a valve without first
loosening the bottom nut
Inspect valve plug before placing back
into valve body for nicks or scratches
Never open valve by hammering it as this
will decrease its service life
If a valve is leading look for the cause
which is usually improper installation
Never tighten the bottom nut too tightly.
Excess tightening will not cause a leaking
valve to stop leaking.

5/2/2016
14
Figure 1
Figure 2
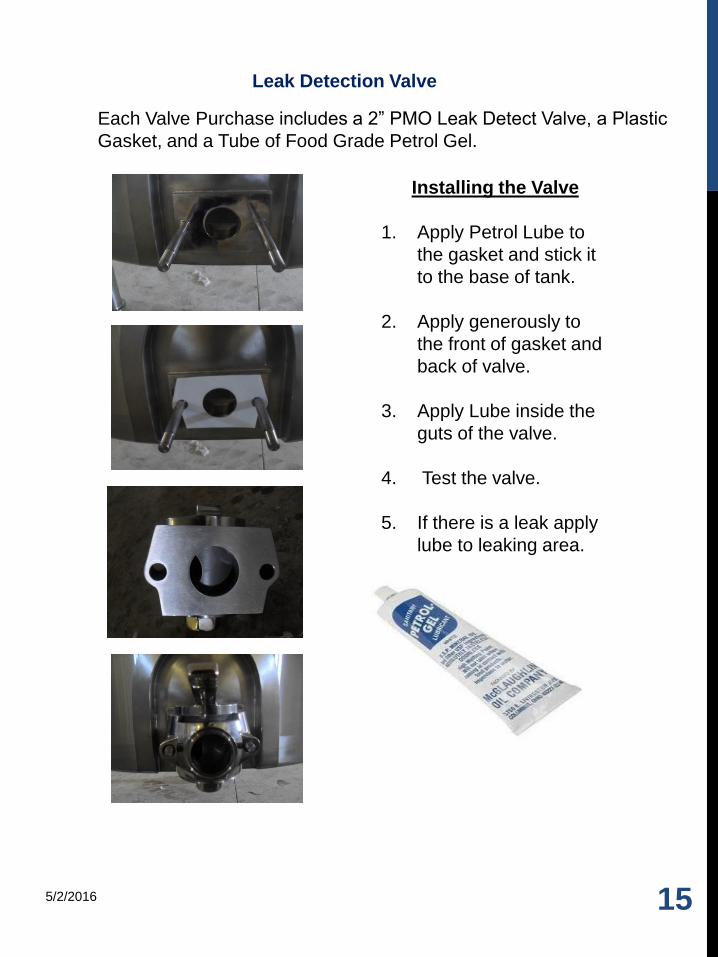
Leak Detection Valve
Each Valve Purchase includes a 2” PMO Leak Detect Valve, a Plastic
Gasket, and a Tube of Food Grade Petrol Gel.
Installing the Valve
1. Apply Petrol Lube to
the gasket and stick it
to the base of tank.
2. Apply generously to
the front of gasket and
back of valve.
3. Apply Lube inside the
guts of the valve.
4. Test the valve.
5. If there is a leak apply
lube to leaking area.
5/2/2016 15

The element needs to be wired to single phase 220v. It should be positioned
in the tank angled to the center making sure it does not interfere with the
agitator shaft or CIP spray balls.
The Rheostat control allows you to
adjust the amount of electrical
current running to the heating
element and control the heat of the
air space. The Rheostat needs to
be installed by a licensed
electrician.
The Air Space Heater fits into a 3”
sanitary ferrule and element is self
supporting. The top agitation blade
helps move the air in the head
space.
Anco Electric Air Space Heater
16

4.5
” 3” Tri-
clamp
Anco Electric Airspace Heater Package
Includes:
• Stainless Steel Electrical Element Welded to a 3” Tri-Clamp
• Rheostat Controller
Requirements:
• Single Phase 220 Volt
• 16 Amps.
• 3” Port
17

Airspace Heater Install
Connect to Power Source
Connect to Heating
Element Positive
Ground Wire
(cap it off
during use)
Gro
un
d
Positive
Negative
Temperature Control Dial On/Off Switch
*To be installed by a licensed electrician 18

Anco Airspace Heater Element
19

Anderson Chart Recorder and Temperature Probes
5/2/2016 20
*Get full Anderson manual on our website under technical information.
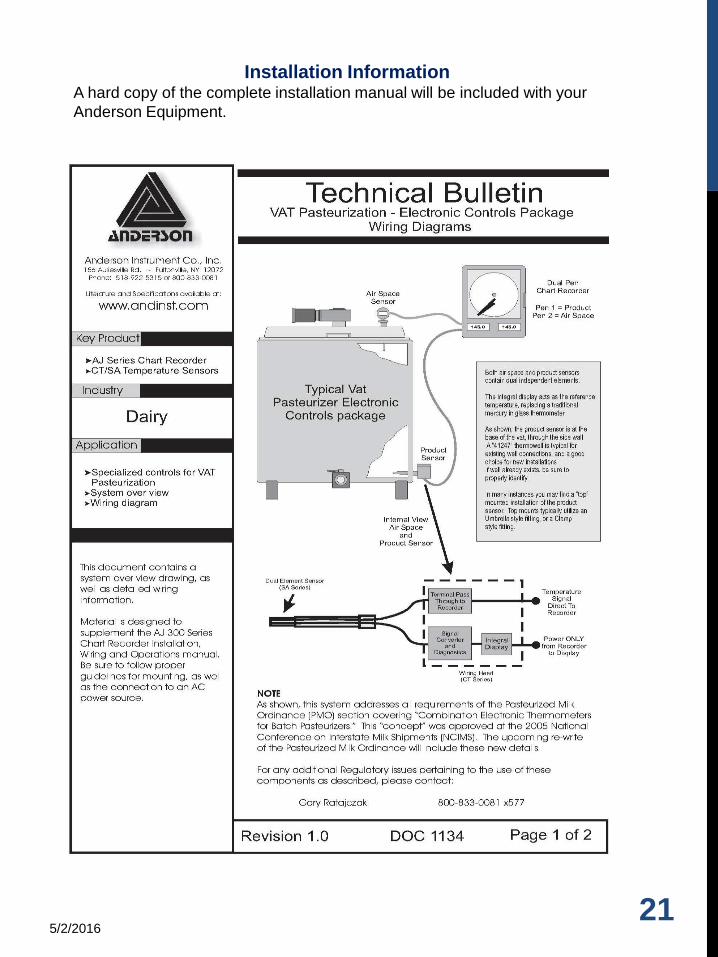
Installation Information A hard copy of the complete installation manual will be included with your
Anderson Equipment.
5/2/2016 21
5/2/2016 22
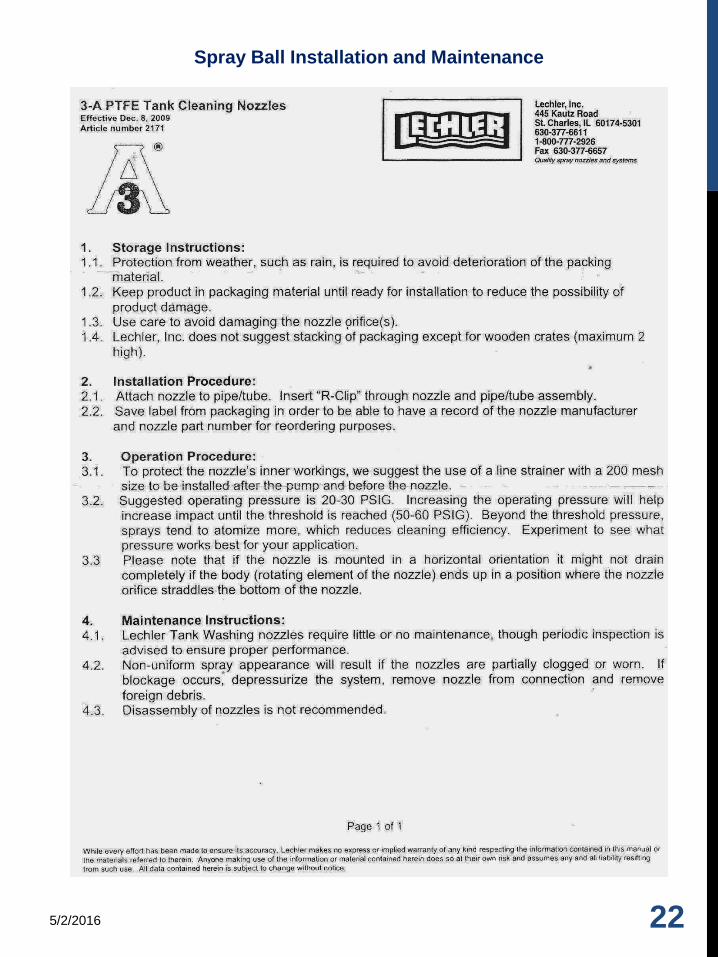
Spray Ball Installation and Maintenance

5/2/2016
23
Spray Ball Specification Sheet
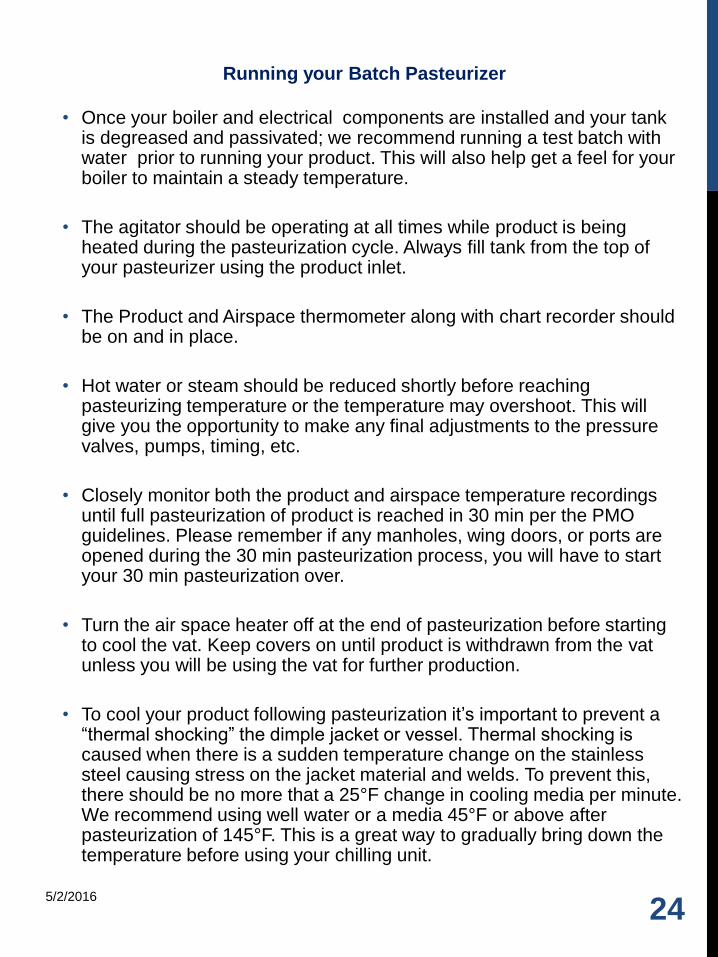
• Once your boiler and electrical components are installed and your tank is degreased and passivated; we recommend running a test batch with water prior to running your product. This will also help get a feel for your boiler to maintain a steady temperature.
• The agitator should be operating at all times while product is being heated during the pasteurization cycle. Always fill tank from the top of your pasteurizer using the product inlet.
• The Product and Airspace thermometer along with chart recorder should be on and in place.
• Hot water or steam should be reduced shortly before reaching pasteurizing temperature or the temperature may overshoot. This will give you the opportunity to make any final adjustments to the pressure valves, pumps, timing, etc.
• Closely monitor both the product and airspace temperature recordings until full pasteurization of product is reached in 30 min per the PMO guidelines. Please remember if any manholes, wing doors, or ports are opened during the 30 min pasteurization process, you will have to start your 30 min pasteurization over.
• Turn the air space heater off at the end of pasteurization before starting to cool the vat. Keep covers on until product is withdrawn from the vat unless you will be using the vat for further production.
• To cool your product following pasteurization it’s important to prevent a “thermal shocking” the dimple jacket or vessel. Thermal shocking is caused when there is a sudden temperature change on the stainless steel causing stress on the jacket material and welds. To prevent this, there should be no more that a 25°F change in cooling media per minute. We recommend using well water or a media 45°F or above after pasteurization of 145°F. This is a great way to gradually bring down the temperature before using your chilling unit.
5/2/2016
24
Running your Batch Pasteurizer
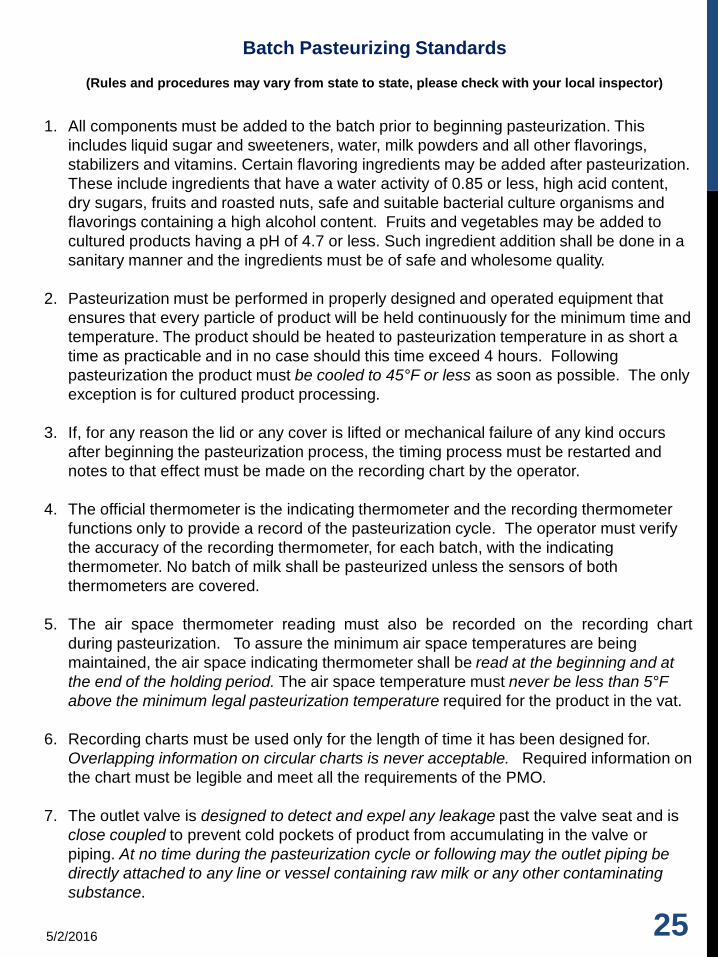
Batch Pasteurizing Standards
(Rules and procedures may vary from state to state, please check with your local inspector)
1. All components must be added to the batch prior to beginning pasteurization. This
includes liquid sugar and sweeteners, water, milk powders and all other flavorings,
stabilizers and vitamins. Certain flavoring ingredients may be added after pasteurization.
These include ingredients that have a water activity of 0.85 or less, high acid content,
dry sugars, fruits and roasted nuts, safe and suitable bacterial culture organisms and
flavorings containing a high alcohol content. Fruits and vegetables may be added to
cultured products having a pH of 4.7 or less. Such ingredient addition shall be done in a
sanitary manner and the ingredients must be of safe and wholesome quality.
2. Pasteurization must be performed in properly designed and operated equipment that
ensures that every particle of product will be held continuously for the minimum time and
temperature. The product should be heated to pasteurization temperature in as short a
time as practicable and in no case should this time exceed 4 hours. Following
pasteurization the product must be cooled to 45°F or less as soon as possible. The only
exception is for cultured product processing.
3. If, for any reason the lid or any cover is lifted or mechanical failure of any kind occurs
after beginning the pasteurization process, the timing process must be restarted and
notes to that effect must be made on the recording chart by the operator.
4. The official thermometer is the indicating thermometer and the recording thermometer
functions only to provide a record of the pasteurization cycle. The operator must verify
the accuracy of the recording thermometer, for each batch, with the indicating
thermometer. No batch of milk shall be pasteurized unless the sensors of both
thermometers are covered.
5. The air space thermometer reading must also be recorded on the recording chart
during pasteurization. To assure the minimum air space temperatures are being
maintained, the air space indicating thermometer shall be read at the beginning and at
the end of the holding period. The air space temperature must never be less than 5°F
above the minimum legal pasteurization temperature required for the product in the vat.
6. Recording charts must be used only for the length of time it has been designed for.
Overlapping information on circular charts is never acceptable. Required information on
the chart must be legible and meet all the requirements of the PMO.
7. The outlet valve is designed to detect and expel any leakage past the valve seat and is
close coupled to prevent cold pockets of product from accumulating in the valve or
piping. At no time during the pasteurization cycle or following may the outlet piping be
directly attached to any line or vessel containing raw milk or any other contaminating
substance.
5/2/2016 25
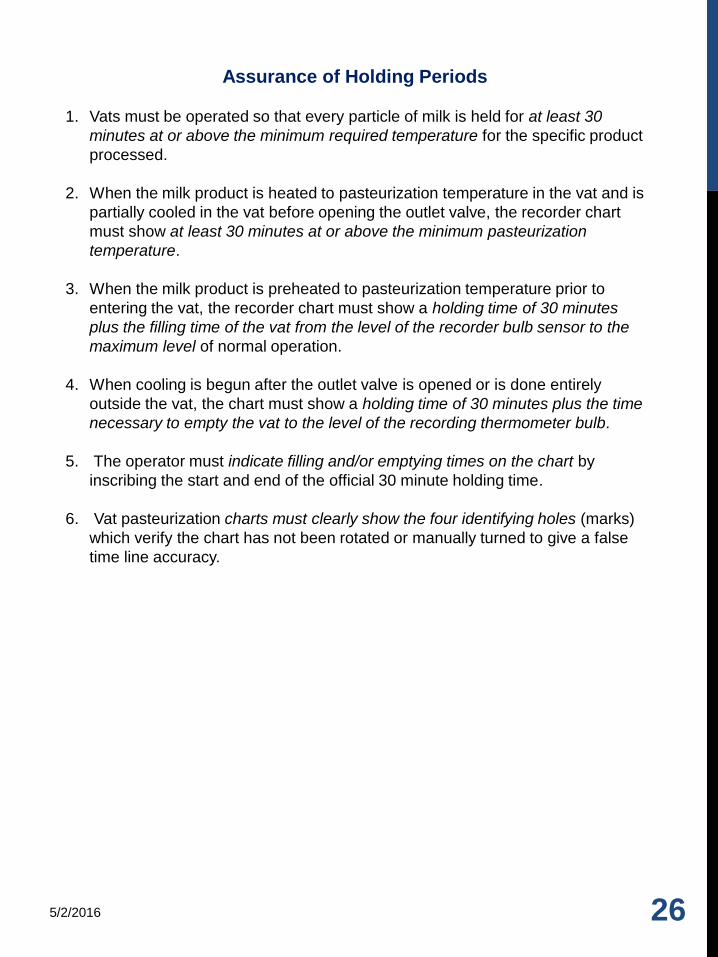
Assurance of Holding Periods
1. Vats must be operated so that every particle of milk is held for at least 30
minutes at or above the minimum required temperature for the specific product
processed.
2. When the milk product is heated to pasteurization temperature in the vat and is
partially cooled in the vat before opening the outlet valve, the recorder chart
must show at least 30 minutes at or above the minimum pasteurization
temperature.
3. When the milk product is preheated to pasteurization temperature prior to
entering the vat, the recorder chart must show a holding time of 30 minutes
plus the filling time of the vat from the level of the recorder bulb sensor to the
maximum level of normal operation.
4. When cooling is begun after the outlet valve is opened or is done entirely
outside the vat, the chart must show a holding time of 30 minutes plus the time
necessary to empty the vat to the level of the recording thermometer bulb.
5. The operator must indicate filling and/or emptying times on the chart by
inscribing the start and end of the official 30 minute holding time.
6. Vat pasteurization charts must clearly show the four identifying holes (marks)
which verify the chart has not been rotated or manually turned to give a false
time line accuracy.
5/2/2016 26
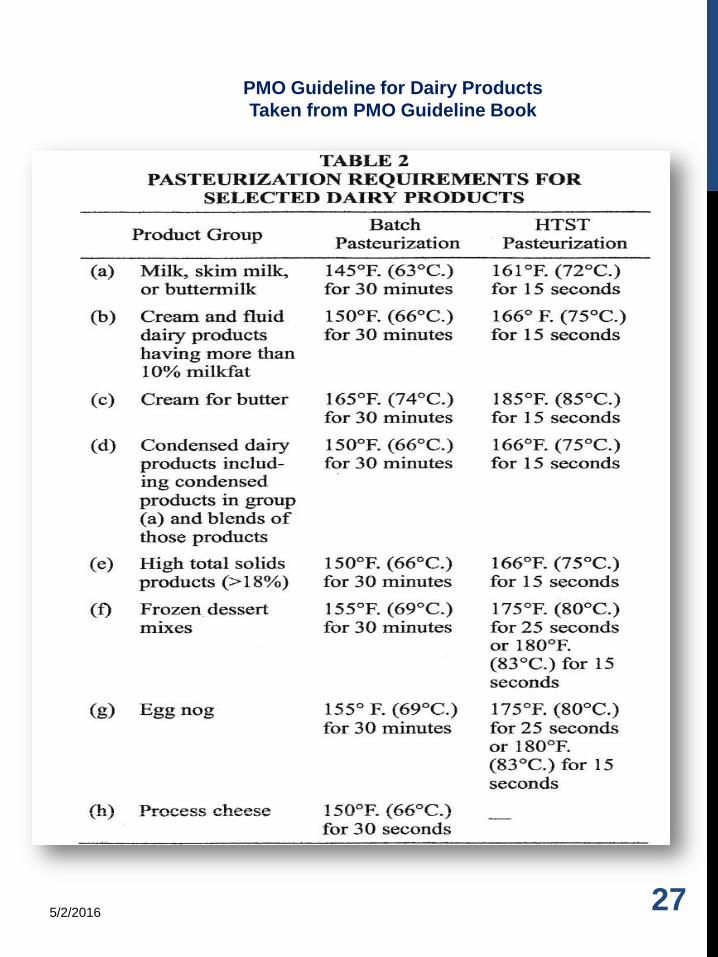
PMO Guideline for Dairy Products
Taken from PMO Guideline Book
5/2/2016 27
VAT PASTEURIZATION – CRITICAL CONTROL POINTS
1. Time and temperature requirements
2. No temperature abuse
3. Covers in place during operation
4. Vat construction within compliance
5. Agitation during operation
6. No ingredients added after pasteurization
7. Product protected after pasteurization
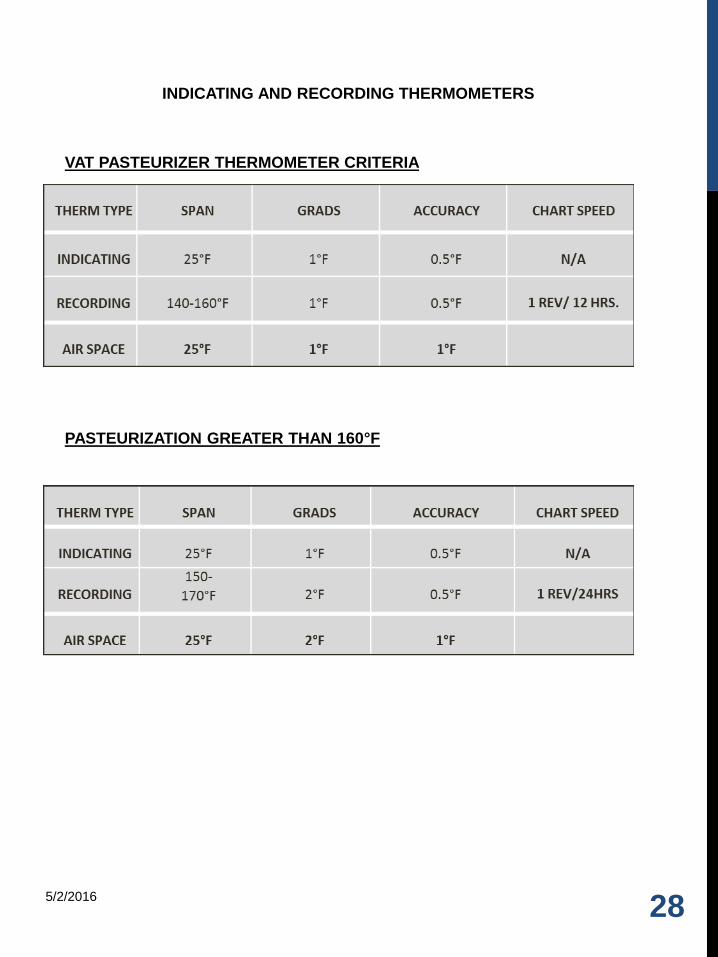
INDICATING AND RECORDING THERMOMETERS
VAT PASTEURIZER THERMOMETER CRITERIA
PASTEURIZATION GREATER THAN 160°F
5/2/2016
28
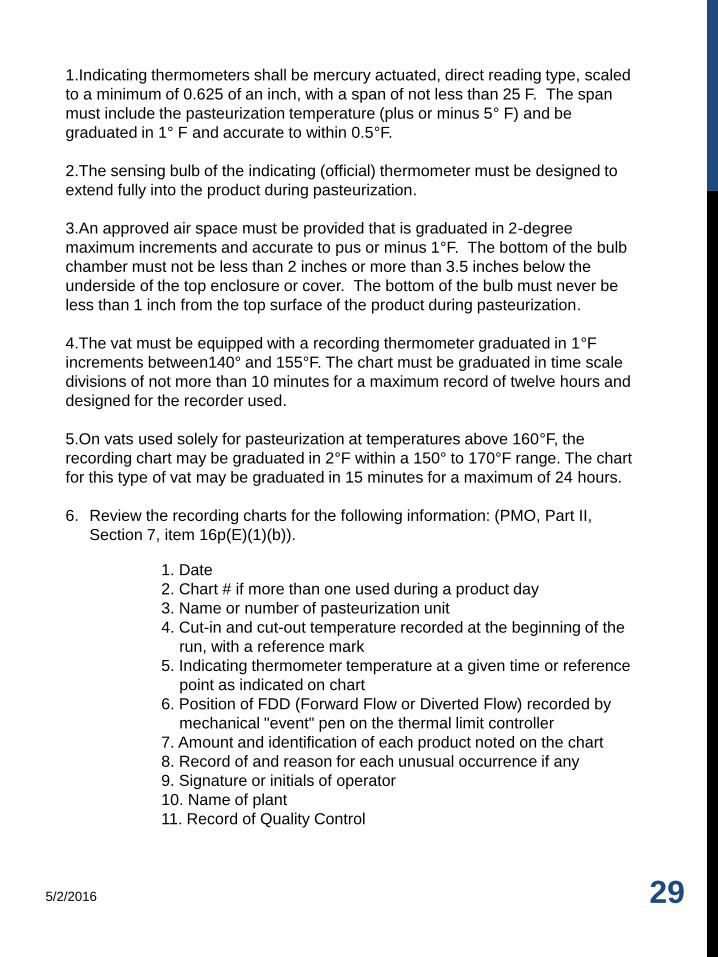
1.Indicating thermometers shall be mercury actuated, direct reading type, scaled
to a minimum of 0.625 of an inch, with a span of not less than 25 F. The span
must include the pasteurization temperature (plus or minus 5° F) and be
graduated in 1° F and accurate to within 0.5°F.
2.The sensing bulb of the indicating (official) thermometer must be designed to
extend fully into the product during pasteurization.
3.An approved air space must be provided that is graduated in 2-degree
maximum increments and accurate to pus or minus 1°F. The bottom of the bulb
chamber must not be less than 2 inches or more than 3.5 inches below the
underside of the top enclosure or cover. The bottom of the bulb must never be
less than 1 inch from the top surface of the product during pasteurization.
4.The vat must be equipped with a recording thermometer graduated in 1°F
increments between140° and 155°F. The chart must be graduated in time scale
divisions of not more than 10 minutes for a maximum record of twelve hours and
designed for the recorder used.
5.On vats used solely for pasteurization at temperatures above 160°F, the
recording chart may be graduated in 2°F within a 150° to 170°F range. The chart
for this type of vat may be graduated in 15 minutes for a maximum of 24 hours.
6. Review the recording charts for the following information: (PMO, Part II,
Section 7, item 16p(E)(1)(b)).
1. Date
2. Chart # if more than one used during a product day
3. Name or number of pasteurization unit
4. Cut-in and cut-out temperature recorded at the beginning of the
run, with a reference mark
5. Indicating thermometer temperature at a given time or reference
point as indicated on chart
6. Position of FDD (Forward Flow or Diverted Flow) recorded by
mechanical "event" pen on the thermal limit controller
7. Amount and identification of each product noted on the chart
8. Record of and reason for each unusual occurrence if any
9. Signature or initials of operator
10. Name of plant
11. Record of Quality Control
5/2/2016 29
GENERAL CLEANING AND SANITIZING OF PASTEURIZING EQUIPMENT
Milk-stone is a hard deposit or encrustation that is a combination of milk solids and
washing powder that may build on milk equipment. The minerals contained in hard
water also contribute to its formation. It is a chemical reaction that is accelerated by
heat causing more deposits on heating surfaces than elsewhere. Aside from these
contributing factors the primary cause of milk-stone is improper cleaning.
Phosphatase Test – Is a test used to determine the effectiveness of the
pasteurization process. Phosphatase is an enzyme normally present in raw milk that
is easily destroyed or inactivated by pasteurization. When milk that is contaminated
with raw product or not held at the proper temperature long enough active
phosphatase will be present in larger amounts than found in properly pasteurized
milk.
A positive coliform test is indicative of post-pasteurization contamination. Coliform
organisms are easily killed by pasteurization. The following steps can prevent post-
pasteurization contamination: Clean and sanitized equipment and containers. No
hand capping or bottling or other handling of milk equipment. Prevent exposure to
potential contaminate such as flies, dust, dirt, drip or splash.
Milk spoilage, bacterial breakdown of milk proteins:
Sour - milk held at temperature of 65-75 will allow souring type organisms grow.
Bitter - milk that is held at temperatures below 50 would more often become bitter for
the same reason.
Ropy - thermoduric spore-formers that may survive the heat process, traced to
stagnant water on the farm.
Sweet curdle - fermentation and coagulation of milk with no acid production by
organisms surviving the heat process that may destroy acid producing organisms.
Thermoduric -organisms that survive pasteurization temperatures. Thermo-philic-
organisms that grow freely in milk at temperatures above 140°F
Sanitation - mere cleaning of equipment does not remove or destroy all disease
causing organisms that may have been present. Even very small numbers remaining
may grow to dangerous proportions since many grow rapidly in milk. All milk
equipment must be treated with a sanitizing agent just prior to usage. Cleaning must
be thorough before sanitation can be effective since the presence of organic material
such as, milk-stone and soil can inactivate the sanitizer.
The number and type of bacteria present in raw milk, faulty equipment or soiled,
unsanitary contact surfaces of equipment may influence efficiency of pasteurization.
5/2/2016 30
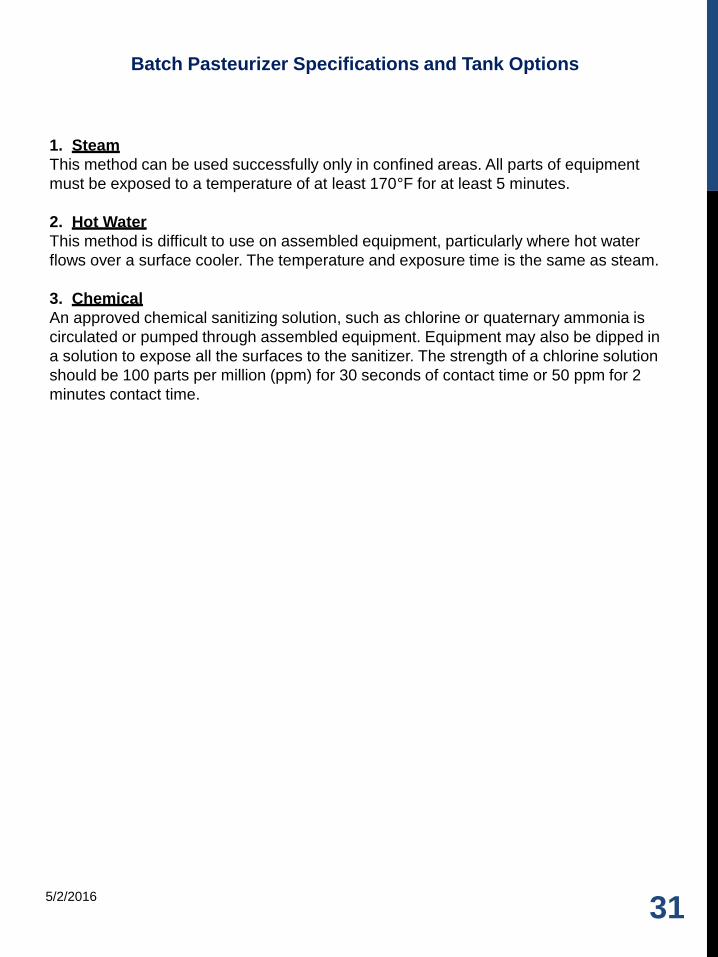
1. Steam
This method can be used successfully only in confined areas. All parts of equipment
must be exposed to a temperature of at least 170°F for at least 5 minutes.
2. Hot Water
This method is difficult to use on assembled equipment, particularly where hot water
flows over a surface cooler. The temperature and exposure time is the same as steam.
3. Chemical
An approved chemical sanitizing solution, such as chlorine or quaternary ammonia is
circulated or pumped through assembled equipment. Equipment may also be dipped in
a solution to expose all the surfaces to the sanitizer. The strength of a chlorine solution
should be 100 parts per million (ppm) for 30 seconds of contact time or 50 ppm for 2
minutes contact time.
5/2/2016
31
Batch Pasteurizer Specifications and Tank Options
5/2/2016
32
Equipment & Parts manufactured by ANCO Equipment, LLC:
ANCO Equipment, LLC warrants to the first user (the “Buyer”) that the equipment
manufactured by ANCO will be free from factory defects in materials and workmanship
under normal use and proper maintenance for a period of twelve (12) months from the
date the equipment is shipped from its facility.
Parts, Components & Materials manufactured by others:
Parts, components and materials manufactured by others are warranted only to the
extent of the warranty given to ANCO by the manufacturer of such parts, components
and materials. Said manufacturers’ sole judgment shall determine the extent of
allowance for, or replacement of, any such parts claimed defective.
ANCO Equipment, LLC does not warrant the corrosive resistance of stainless steel nor
other metal parts for any purpose whatsoever.
Company Obligation:
ANCO Equipment, LLC’s obligation under its warranty is strictly and exclusively limited
to the repair or replacement, at the company’s location in Pulaski, Wisconsin, of such
components of its manufacture as are found by the company to be defective in
materials or workmanship on the condition that the buyer gives prompt written notice to
the company of any claimed breach of warranty within such twelve (12) month period
and delivers to the company the claimed defective component within such time period
or a reasonable time thereafter. All costs of packing and shipping claimed defective
components and replacement and replacement or repaired components shall be paid
by the buyer. The company reserves the right to satisfy its warranty obligation in full by
the payment of the full purchase price upon return of the equipment to it at Pulaski,
Wisconsin. IN NO EVENT SHALL THE COMPANY BE HELD LIABLE FOR CLAIMS
(BASED ON BREACH OF EXPRESS OR IMPLIED WARRANTY, NEGLIGENCE, OR
OTHERWISE) FOR ANY OTHER DAMAGES, WHETHER DIRECT, IMMEDIATE,
INCIDENTAL, FORESEEABLE, CONSEQQUENTIAL, OR SPECIAL, INCLUDING
DAMAGES ARISING OUT OF PERSONAL INJURIES.
The Company’s warranty stated herein cannot be modified except by a writing signed
by an officer of the Company.
Warranty

Anco Equipment strives on 100% satisfaction on all their equipment. For any additional
questions or concerns please check out our website at www.ancoequipment.com or
call at (920) 569-3530.
5/2/2016 33