Embed Size (px)
Citation preview
[Not for Circulation]
Information Technology Services, UIS 1
An Introduction to the UIS Wordpress Blog Service
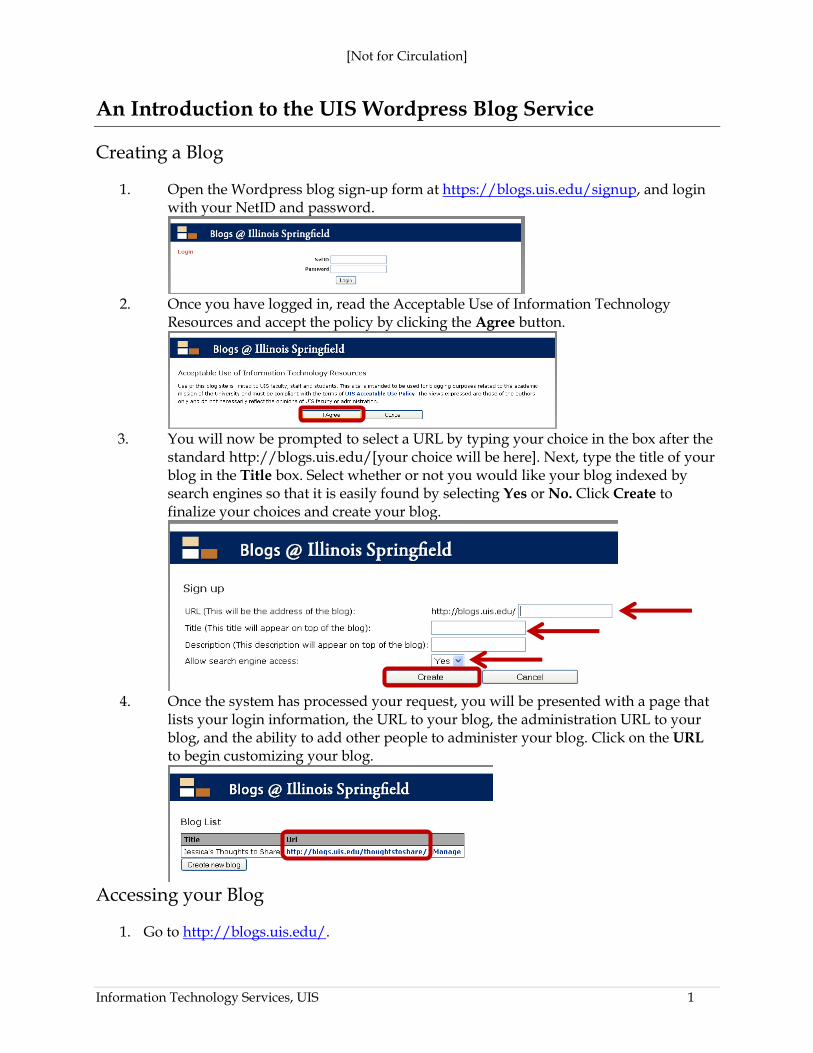
Creating a Blog
1. Open the Wordpress blog sign-up form at https://blogs.uis.edu/signup, and login with your NetID and password.
2. Once you have logged in, read the Acceptable Use of Information Technology
Resources and accept the policy by clicking the Agree button.
3. You will now be prompted to select a URL by typing your choice in the box after the
standard http://blogs.uis.edu/[your choice will be here]. Next, type the title of your blog in the Title box. Select whether or not you would like your blog indexed by search engines so that it is easily found by selecting Yes or No. Click Create to finalize your choices and create your blog.
4. Once the system has processed your request, you will be presented with a page that
lists your login information, the URL to your blog, the administration URL to your blog, and the ability to add other people to administer your blog. Click on the URL
to begin customizing your blog.
Accessing your Blog
1. Go to http://blogs.uis.edu/.
[Not for Circulation]
Information Technology Services, UIS 2
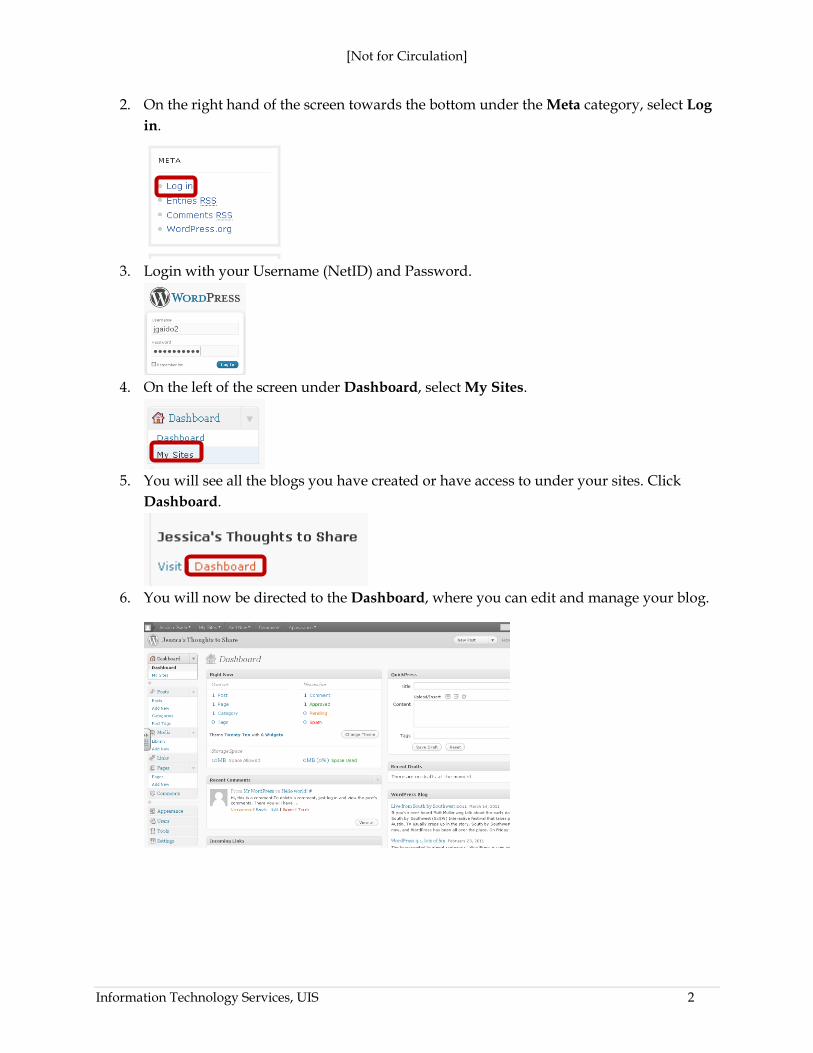
2. On the right hand of the screen towards the bottom under the Meta category, select Log
in.
3. Login with your Username (NetID) and Password.
4. On the left of the screen under Dashboard, select My Sites.
5. You will see all the blogs you have created or have access to under your sites. Click
Dashboard.
6. You will now be directed to the Dashboard, where you can edit and manage your blog.
[Not for Circulation]
Information Technology Services, UIS 3
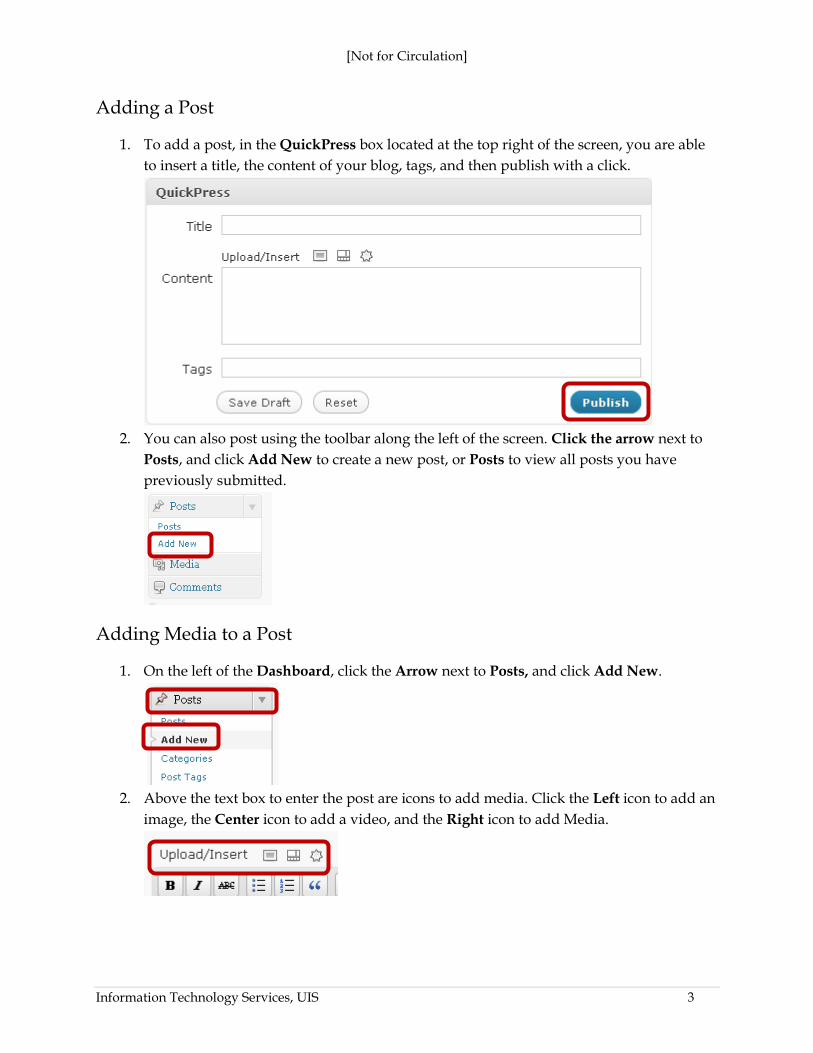
Adding a Post
1. To add a post, in the QuickPress box located at the top right of the screen, you are able
to insert a title, the content of your blog, tags, and then publish with a click.
2. You can also post using the toolbar along the left of the screen. Click the arrow next to
Posts, and click Add New to create a new post, or Posts to view all posts you have
previously submitted.
Adding Media to a Post
1. On the left of the Dashboard, click the Arrow next to Posts, and click Add New.
2. Above the text box to enter the post are icons to add media. Click the Left icon to add an
image, the Center icon to add a video, and the Right icon to add Media.

[Not for Circulation]
Information Technology Services, UIS 4
3. Users have the option to add files from their own computer or from a URL or the Media
Library. If you wish to add a YouTube video, click From URL along the top, and paste
the URL of the video with a title. The title will be a link to the video.
4. If you wish to add an image from your computer, click Select Files, then search through
your files for the image and click Open.
5. The image will appear on the screen after it is uploaded and users include additional
information as desired. After you are finished, click Insert into Post, and then Save all
changes at the bottom.
6. The image will appear in the post.
[Not for Circulation]
Information Technology Services, UIS 5
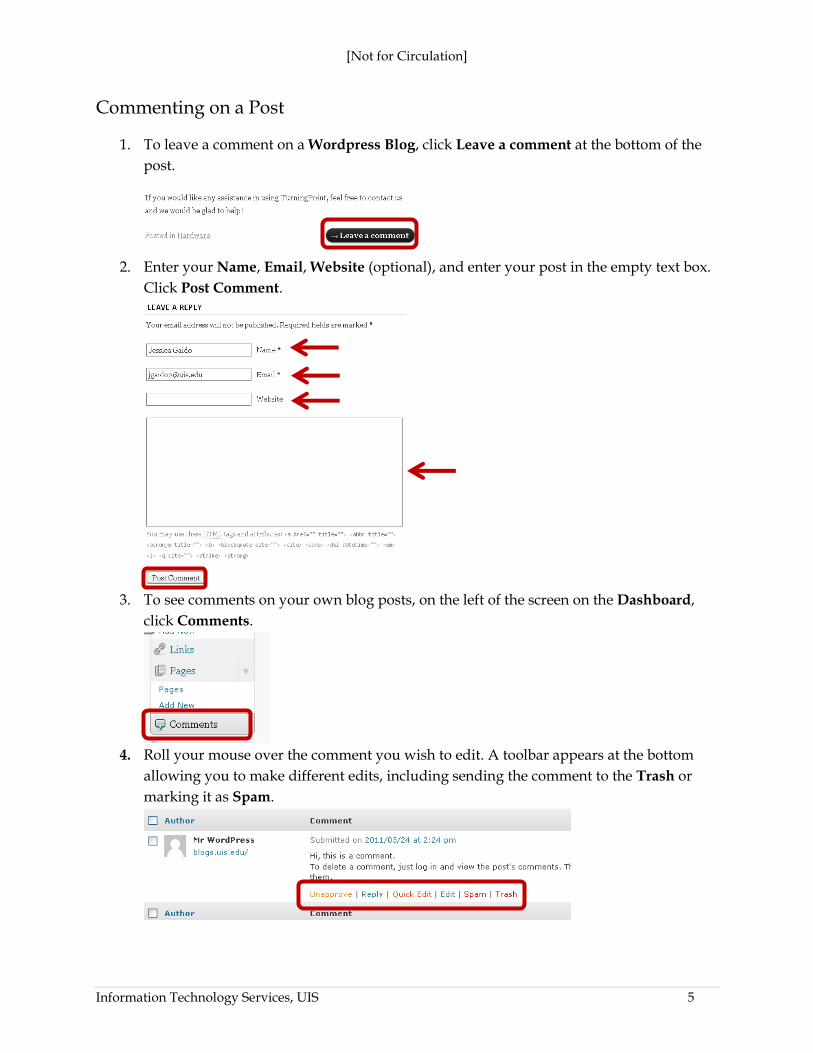
Commenting on a Post
1. To leave a comment on a Wordpress Blog, click Leave a comment at the bottom of the
post.
2. Enter your Name, Email, Website (optional), and enter your post in the empty text box.
Click Post Comment.
3. To see comments on your own blog posts, on the left of the screen on the Dashboard,
click Comments.
4. Roll your mouse over the comment you wish to edit. A toolbar appears at the bottom
allowing you to make different edits, including sending the comment to the Trash or
marking it as Spam.
[Not for Circulation]
Information Technology Services, UIS 6
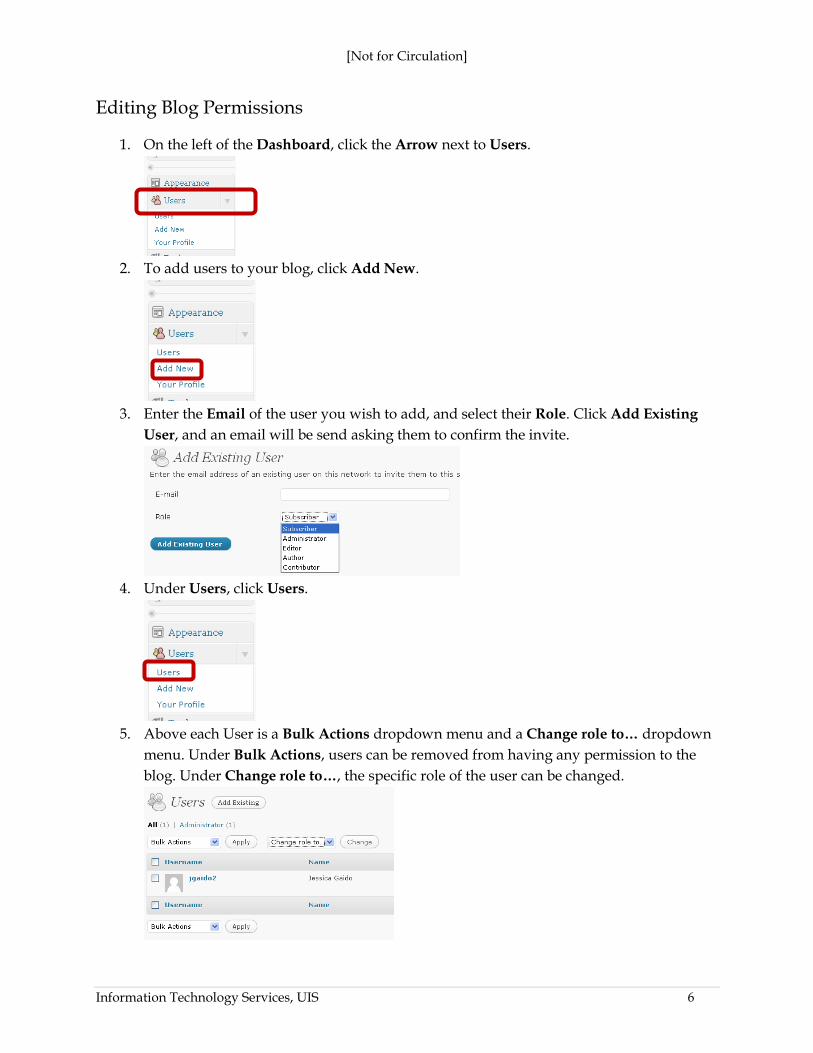
Editing Blog Permissions
1. On the left of the Dashboard, click the Arrow next to Users.
2. To add users to your blog, click Add New.
3. Enter the Email of the user you wish to add, and select their Role. Click Add Existing
User, and an email will be send asking them to confirm the invite.
4. Under Users, click Users.
5. Above each User is a Bulk Actions dropdown menu and a Change role to… dropdown
menu. Under Bulk Actions, users can be removed from having any permission to the
blog. Under Change role to…, the specific role of the user can be changed.
[Not for Circulation]
Information Technology Services, UIS 7
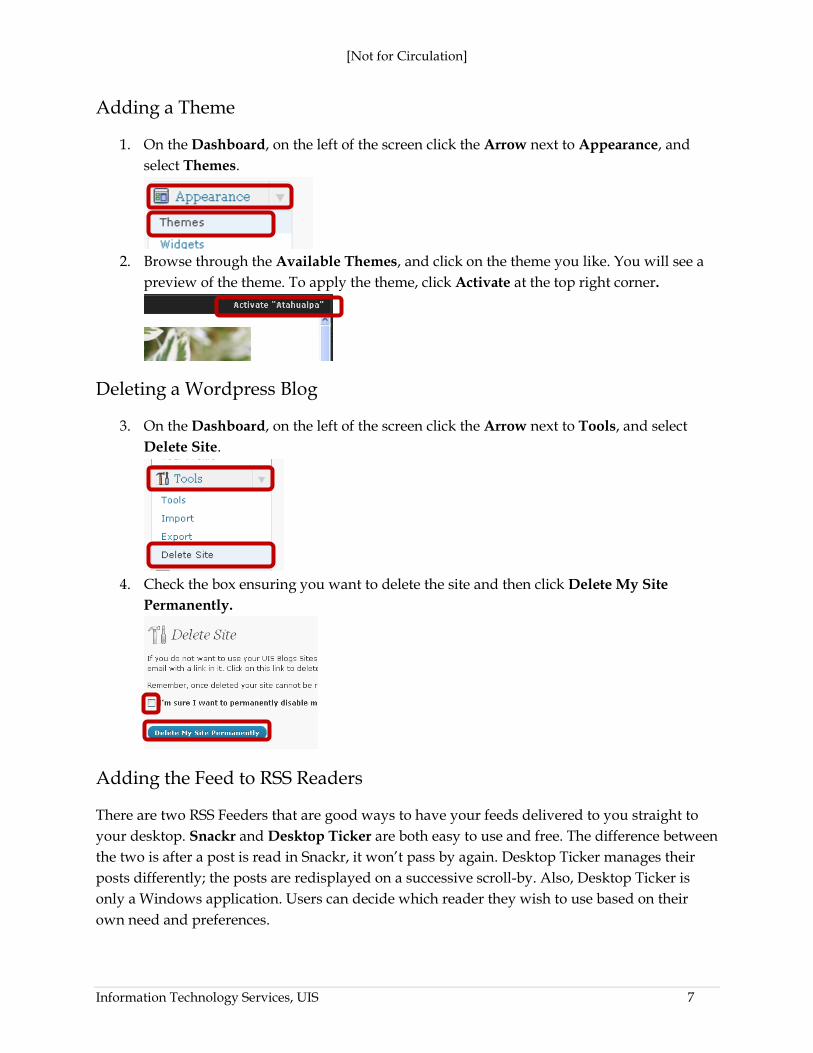
Adding a Theme
1. On the Dashboard, on the left of the screen click the Arrow next to Appearance, and
select Themes.
2. Browse through the Available Themes, and click on the theme you like. You will see a
preview of the theme. To apply the theme, click Activate at the top right corner.
Deleting a Wordpress Blog
3. On the Dashboard, on the left of the screen click the Arrow next to Tools, and select
Delete Site.
4. Check the box ensuring you want to delete the site and then click Delete My Site
Permanently.
Adding the Feed to RSS Readers
There are two RSS Feeders that are good ways to have your feeds delivered to you straight to
your desktop. Snackr and Desktop Ticker are both easy to use and free. The difference between
the two is after a post is read in Snackr, it won’t pass by again. Desktop Ticker manages their
posts differently; the posts are redisplayed on a successive scroll-by. Also, Desktop Ticker is
only a Windows application. Users can decide which reader they wish to use based on their
own need and preferences.
[Not for Circulation]
Information Technology Services, UIS 8
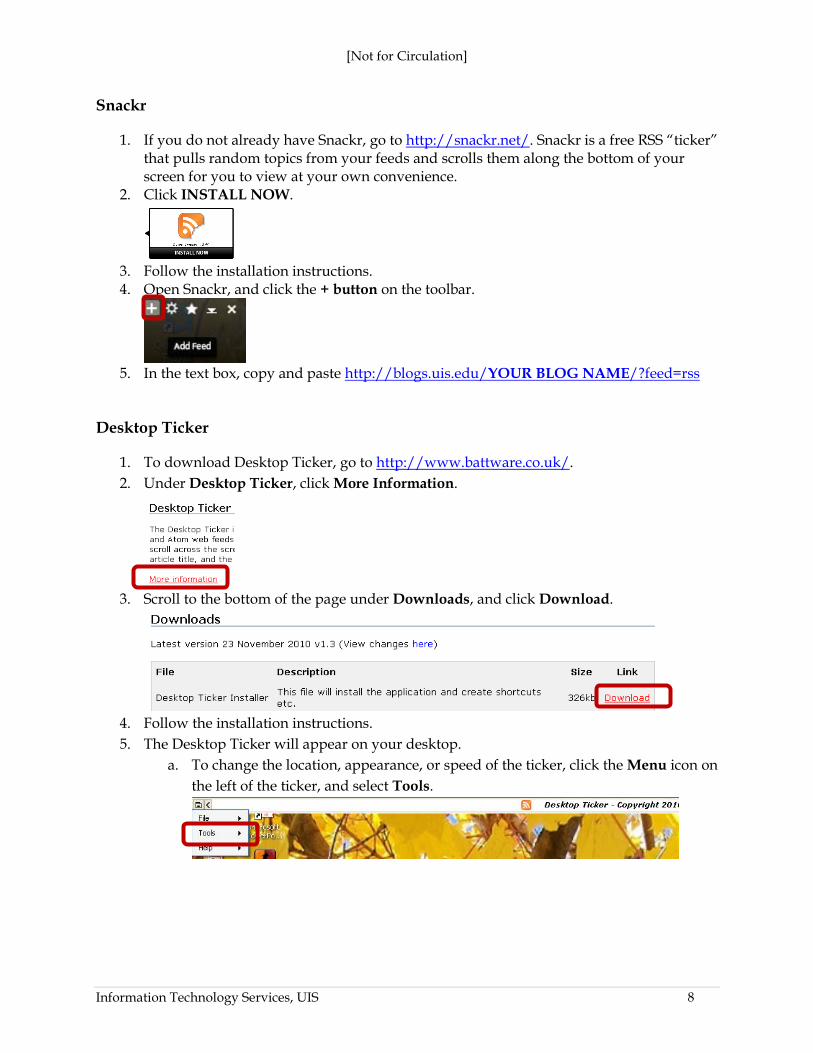
Snackr
1. If you do not already have Snackr, go to http://snackr.net/. Snackr is a free RSS “ticker” that pulls random topics from your feeds and scrolls them along the bottom of your screen for you to view at your own convenience.
2. Click INSTALL NOW.
3. Follow the installation instructions. 4. Open Snackr, and click the + button on the toolbar.
5. In the text box, copy and paste http://blogs.uis.edu/YOUR BLOG NAME/?feed=rss
Desktop Ticker
1. To download Desktop Ticker, go to http://www.battware.co.uk/.
2. Under Desktop Ticker, click More Information.
3. Scroll to the bottom of the page under Downloads, and click Download.
4. Follow the installation instructions.
5. The Desktop Ticker will appear on your desktop.
a. To change the location, appearance, or speed of the ticker, click the Menu icon on
the left of the ticker, and select Tools.
[Not for Circulation]
Information Technology Services, UIS 9
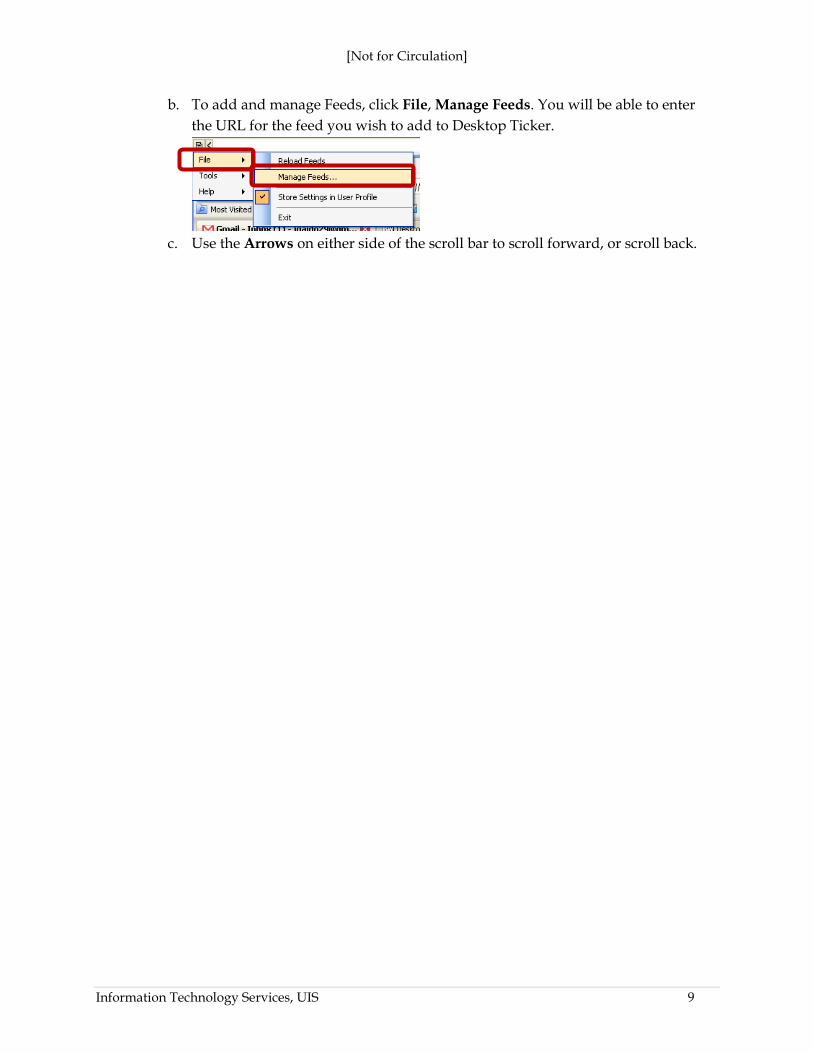
b. To add and manage Feeds, click File, Manage Feeds. You will be able to enter
the URL for the feed you wish to add to Desktop Ticker.
c. Use the Arrows on either side of the scroll bar to scroll forward, or scroll back.