Embed Size (px)
Citation preview

Study Guide for
Advanced Linux System Administration I Lab work for LPI 201
released under the GFDL by LinuxIT
February 2004

Copyright (c) 2003 LinuxIT. Permission is granted to copy, distribute and/or modify this document under the terms of the GNU Free Documentation License, Version 1.2 or any later version published by the Free Software Foundation; with the Invariant Sections being History, Acknowledgements, with the Front-Cover Texts being “released under the GFDL by LinuxIT”.
GNU Free Documentation LicenseVersion 1.2, November 2002
Copyright (C) 2000,2001,2002 Free Software Foundation, Inc.59 Temple Place, Suite 330, Boston, MA 02111-1307 USAEveryone is permitted to copy and distribute verbatim copiesof this license document, but changing it is not allowed.
0. PREAMBLE
The purpose of this License is to make a manual, textbook, or other functional and useful document "free" in thesense of freedom: to assure everyone the effective freedom to copy and redistribute it, with or without modifyingit, either commercially or noncommercially. Secondarily, this License preserves for the author and publisher away to get credit for their work, while not being considered responsible for modifications made by others.
This License is a kind of "copyleft", which means that derivative works of the document must themselves be freein the same sense. It complements the GNU General Public License, which is a copyleft license designed for freesoftware.
We have designed this License in order to use it for manuals for free software, because free software needs freedocumentation: a free program should come with manuals providing the same freedoms that the software does.But this License is not limited to software manuals; it can be used for any textual work, regardless of subjectmatter or whether it is published as a printed book. We recommend this License principally for works whosepurpose is instruction or reference.
1. APPLICABILITY AND DEFINITIONS
This License applies to any manual or other work, in any medium, that contains a notice placed by the copyrightholder saying it can be distributed under the terms of this License. Such a notice grants a world-wide, royalty-freelicense, unlimited in duration, to use that work under the conditions stated herein. The "Document", below, refersto any such manual or work. Any member of the public is a licensee, and is addressed as "you". You accept thelicense if you copy, modify or distribute the work in a way requiring permission under copyright law.
A "Modified Version" of the Document means any work containing the Document or a portion of it, either copiedverbatim, or with modifications and/or translated into another language.
A "Secondary Section" is a named appendix or a front-matter section of the Document that deals exclusively withthe relationship of the publishers or authors of the Document to the Document's overall subject (or to relatedmatters) and contains nothing that could fall directly within that overall subject. (Thus, if the Document is in part atextbook of mathematics, a Secondary Section may not explain any mathematics.) The relationship could be amatter of historical connection with the subject or with related matters, or of legal, commercial, philosophical,ethical or political position regarding them.
The "Invariant Sections" are certain Secondary Sections whose titles are designated, as being those of InvariantSections, in the notice that says that the Document is released under this License. If a section does not fit theabove definition of Secondary then it is not allowed to be designated as Invariant. The Document may containzero Invariant Sections. If the Document does not identify any Invariant Sections then there are none.
The "Cover Texts" are certain short passages of text that are listed, as Front-Cover Texts or Back-Cover Texts,in the notice that says that the Document is released under this License. A Front-Cover Text may be at most 5words, and a Back-Cover Text may be at most 25 words.
A "Transparent" copy of the Document means a machine-readable copy, represented in a format whosespecification is available to the general public, that is suitable for revising the document straightforwardly withgeneric text editors or (for images composed of pixels) generic paint programs or (for drawings) some widelyavailable drawing editor, and that is suitable for input to text formatters or for automatic translation to a variety offormats suitable for input to text formatters. A copy made in an otherwise Transparent file format whose markup,or absence of markup, has been arranged to thwart or discourage subsequent modification by readers is notTransparent. An image format is not Transparent if used for any substantial amount of text. A copy that is not"Transparent" is called "Opaque".
Examples of suitable formats for Transparent copies include plain ASCII without markup, Texinfo input format,LaTeX input format, SGML or XML using a publicly available DTD, and standard-conforming simple HTML,PostScript or PDF designed for human modification. Examples of transparent image formats include PNG, XCFand JPG. Opaque formats include proprietary formats that can be read and edited only by proprietary wordprocessors, SGML or XML for which the DTD and/or processing tools are not generally available, and themachine-generated HTML, PostScript or PDF produced by some word processors for output purposes only.
The "Title Page" means, for a printed book, the title page itself, plus such following pages as are needed to hold,legibly, the material this License requires to appear in the title page. For works in formats which do not have anytitle page as such, "Title Page" means the text near the most prominent appearance of the work's title, precedingthe beginning of the body of the text.
A section "Entitled XYZ" means a named subunit of the Document whose title either is precisely XYZ or containsXYZ in parentheses following text that translates XYZ in another language. (Here XYZ stands for a specificsection name mentioned below, such as "Acknowledgements", "Dedications", "Endorsements", or "History".) To"Preserve the Title" of such a section when you modify the Document means that it remains a section "EntitledXYZ" according to this definition.
The Document may include Warranty Disclaimers next to the notice which states that this License applies to theDocument. These Warranty Disclaimers are considered to be included by reference in this License, but only asregards disclaiming warranties: any other implication that these Warranty Disclaimers may have is void and hasno effect on the meaning of this License.
2. VERBATIM COPYING
You may copy and distribute the Document in any medium, either commercially or noncommercially, providedthat this License, the copyright notices, and the license notice saying this License applies to the Document arereproduced in all copies, and that you add no other conditions whatsoever to those of this License. You may notuse technical measures to obstruct or control the reading or further copying of the copies you make or distribute.However, you may accept compensation in exchange for copies. If you distribute a large enough number ofcopies you must also follow the conditions in section 3.
You may also lend copies, under the same conditions stated above, and you may publicly display copies.
3. COPYING IN QUANTITY
If you publish printed copies (or copies in media that commonly have printed covers) of the Document,numbering more than 100, and the Document's license notice requires Cover Texts, you must enclose the copiesin covers that carry, clearly and legibly, all these Cover Texts: Front-Cover Texts on the front cover, and Back-Cover Texts on the back cover. Both covers must also clearly and legibly identify you as the publisher of thesecopies. The front cover must present the full title with all words of the title equally prominent and visible. You mayadd other material on the covers in addition. Copying with changes limited to the covers, as long as they preservethe title of the Document and satisfy these conditions, can be treated as verbatim copying in other respects.
If the required texts for either cover are too voluminous to fit legibly, you should put the first ones listed (as manyas fit reasonably) on the actual cover, and continue the rest onto adjacent pages.
If you publish or distribute Opaque copies of the Document numbering more than 100, you must either include amachine-readable Transparent copy along with each Opaque copy, or state in or with each Opaque copy acomputer-network location from which the general network-using public has access to download using public-standard network protocols a complete Transparent copy of the Document, free of added material. If you use the

latter option, you must take reasonably prudent steps, when you begin distribution of Opaque copies in quantity,to ensure that this Transparent copy will remain thus accessible at the stated location until at least one year afterthe last time you distribute an Opaque copy (directly or through your agents or retailers) of that edition to thepublic.
It is requested, but not required, that you contact the authors of the Document well before redistributing any largenumber of copies, to give them a chance to provide you with an updated version of the Document.
4. MODIFICATIONS
You may copy and distribute a Modified Version of the Document under the conditions of sections 2 and 3 above,provided that you release the Modified Version under precisely this License, with the Modified Version filling therole of the Document, thus licensing distribution and modification of the Modified Version to whoever possessesa copy of it. In addition, you must do these things in the Modified Version:
• A. Use in the Title Page (and on the covers, if any) a title distinct from that of the Document, and fromthose of previous versions (which should, if there were any, be listed in the History section of theDocument). You may use the same title as a previous version if the original publisher of that versiongives permission.
• B. List on the Title Page, as authors, one or more persons or entities responsible for authorship of themodifications in the Modified Version, together with at least five of the principal authors of the Document(all of its principal authors, if it has fewer than five), unless they release you from this requirement.
• C. State on the Title page the name of the publisher of the Modified Version, as the publisher. • D. Preserve all the copyright notices of the Document. • E. Add an appropriate copyright notice for your modifications adjacent to the other copyright notices. • F. Include, immediately after the copyright notices, a license notice giving the public permission to use
the Modified Version under the terms of this License, in the form shown in the Addendum below. • G. Preserve in that license notice the full lists of Invariant Sections and required Cover Texts given in the
Document's license notice. • H. Include an unaltered copy of this License. • I. Preserve the section Entitled "History", Preserve its Title, and add to it an item stating at least the title,
year, new authors, and publisher of the Modified Version as given on the Title Page. If there is no sectionEntitled "History" in the Document, create one stating the title, year, authors, and publisher of theDocument as given on its Title Page, then add an item describing the Modified Version as stated in theprevious sentence.
• J. Preserve the network location, if any, given in the Document for public access to a Transparent copyof the Document, and likewise the network locations given in the Document for previous versions it wasbased on. These may be placed in the "History" section. You may omit a network location for a work thatwas published at least four years before the Document itself, or if the original publisher of the version itrefers to gives permission.
• K. For any section Entitled "Acknowledgements" or "Dedications", Preserve the Title of the section, andpreserve in the section all the substance and tone of each of the contributor acknowledgements and/ordedications given therein.
• L. Preserve all the Invariant Sections of the Document, unaltered in their text and in their titles. Sectionnumbers or the equivalent are not considered part of the section titles.
• M. Delete any section Entitled "Endorsements". Such a section may not be included in the ModifiedVersion.
• N. Do not retitle any existing section to be Entitled "Endorsements" or to conflict in title with any InvariantSection.
• O. Preserve any Warranty Disclaimers.
If the Modified Version includes new front-matter sections or appendices that qualify as Secondary Sections andcontain no material copied from the Document, you may at your option designate some or all of these sections asinvariant. To do this, add their titles to the list of Invariant Sections in the Modified Version's license notice. Thesetitles must be distinct from any other section titles.
You may add a section Entitled "Endorsements", provided it contains nothing but endorsements of your Modified

Version by various parties--for example, statements of peer review or that the text has been approved by anorganization as the authoritative definition of a standard.
You may add a passage of up to five words as a Front-Cover Text, and a passage of up to 25 words as a Back-Cover Text, to the end of the list of Cover Texts in the Modified Version. Only one passage of Front-Cover Textand one of Back-Cover Text may be added by (or through arrangements made by) any one entity. If theDocument already includes a cover text for the same cover, previously added by you or by arrangement made bythe same entity you are acting on behalf of, you may not add another; but you may replace the old one, on explicitpermission from the previous publisher that added the old one.
The author(s) and publisher(s) of the Document do not by this License give permission to use their names forpublicity for or to assert or imply endorsement of any Modified Version.
5. COMBINING DOCUMENTS
You may combine the Document with other documents released under this License, under the terms defined insection 4 above for modified versions, provided that you include in the combination all of the Invariant Sections ofall of the original documents, unmodified, and list them all as Invariant Sections of your combined work in itslicense notice, and that you preserve all their Warranty Disclaimers.
The combined work need only contain one copy of this License, and multiple identical Invariant Sections may bereplaced with a single copy. If there are multiple Invariant Sections with the same name but different contents,make the title of each such section unique by adding at the end of it, in parentheses, the name of the originalauthor or publisher of that section if known, or else a unique number. Make the same adjustment to the sectiontitles in the list of Invariant Sections in the license notice of the combined work.
In the combination, you must combine any sections Entitled "History" in the various original documents, formingone section Entitled "History"; likewise combine any sections Entitled "Acknowledgements", and any sectionsEntitled "Dedications". You must delete all sections Entitled "Endorsements."
6. COLLECTIONS OF DOCUMENTS
You may make a collection consisting of the Document and other documents released under this License, andreplace the individual copies of this License in the various documents with a single copy that is included in thecollection, provided that you follow the rules of this License for verbatim copying of each of the documents in allother respects.
You may extract a single document from such a collection, and distribute it individually under this License,provided you insert a copy of this License into the extracted document, and follow this License in all otherrespects regarding verbatim copying of that document.
7. AGGREGATION WITH INDEPENDENT WORKS
A compilation of the Document or its derivatives with other separate and independent documents or works, in oron a volume of a storage or distribution medium, is called an "aggregate" if the copyright resulting from thecompilation is not used to limit the legal rights of the compilation's users beyond what the individual works permit.When the Document is included in an aggregate, this License does not apply to the other works in the aggregatewhich are not themselves derivative works of the Document.
If the Cover Text requirement of section 3 is applicable to these copies of the Document, then if the Document isless than one half of the entire aggregate, the Document's Cover Texts may be placed on covers that bracket theDocument within the aggregate, or the electronic equivalent of covers if the Document is in electronic form.Otherwise they must appear on printed covers that bracket the whole aggregate.
8. TRANSLATION
Translation is considered a kind of modification, so you may distribute translations of the Document under theterms of section 4. Replacing Invariant Sections with translations requires special permission from their copyrightholders, but you may include translations of some or all Invariant Sections in addition to the original versions ofthese Invariant Sections. You may include a translation of this License, and all the license notices in theDocument, and any Warranty Disclaimers, provided that you also include the original English version of thisLicense and the original versions of those notices and disclaimers. In case of a disagreement between the

translation and the original version of this License or a notice or disclaimer, the original version will prevail.
If a section in the Document is Entitled "Acknowledgements", "Dedications", or "History", the requirement (section4) to Preserve its Title (section 1) will typically require changing the actual title.
9. TERMINATION
You may not copy, modify, sublicense, or distribute the Document except as expressly provided for under thisLicense. Any other attempt to copy, modify, sublicense or distribute the Document is void, and will automaticallyterminate your rights under this License. However, parties who have received copies, or rights, from you underthis License will not have their licenses terminated so long as such parties remain in full compliance.
10. FUTURE REVISIONS OF THIS LICENSE
The Free Software Foundation may publish new, revised versions of the GNU Free Documentation License fromtime to time. Such new versions will be similar in spirit to the present version, but may differ in detail to addressnew problems or concerns. See http://www.gnu.org/copyleft/.
Each version of the License is given a distinguishing version number. If the Document specifies that a particularnumbered version of this License "or any later version" applies to it, you have the option of following the termsand conditions either of that specified version or of any later version that has been published (not as a draft) bythe Free Software Foundation. If the Document does not specify a version number of this License, you maychoose any version ever published (not as a draft) by the Free Software Foundation.
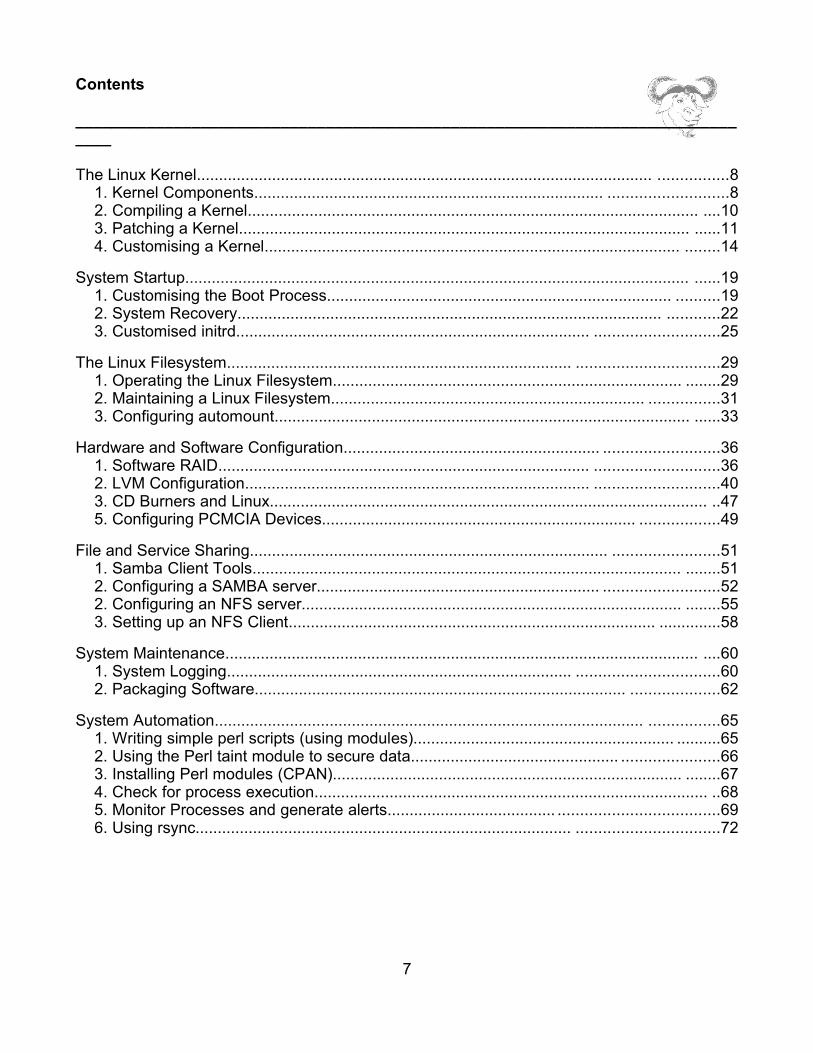
Contents
______________________________________________________________________________
The Linux Kernel....................................................................................................... ................81. Kernel Components............................................................................... ...........................82. Compiling a Kernel...................................................................................................... ....103. Patching a Kernel...................................................................................................... ......114. Customising a Kernel.............................................................................................. ........14
System Startup.................................................................................................................. ......191. Customising the Boot Process.............................................................................. ..........192. System Recovery................................................................................................ ............223. Customised initrd................................................................................ ............................25
The Linux Filesystem.............................................................................. ................................291. Operating the Linux Filesystem............................................................................... ........292. Maintaining a Linux Filesystem....................................................................... ................313. Configuring automount.............................................................................................. ......33
Hardware and Software Configuration.......................................................... ..........................361. Software RAID.................................................................................... ............................362. LVM Configuration.............................................................................. ............................403. CD Burners and Linux................................................................................................... ..475. Configuring PCMCIA Devices....................................................................... ..................49
File and Service Sharing................................................................................. ........................511. Samba Client Tools................................................................................................. ........512. Configuring a SAMBA server................................................................ ..........................522. Configuring an NFS server...................................................................................... ........553. Setting up an NFS Client................................................................................... ..............58
System Maintenance........................................................................................................... ....601. System Logging.............................................................................. ................................602. Packaging Software.................................................................................... ....................62
System Automation................................................................................................. ................651. Writing simple perl scripts (using modules)........................................................... ..........652. Using the Perl taint module to secure data............................................... ......................663. Installing Perl modules (CPAN)............................................................................... ........674. Check for process execution......................................................................................... ..685. Monitor Processes and generate alerts...................................... ....................................696. Using rsync..................................................................................... ................................72
7

LinuxIT Technical Training Centre
The Linux Kernel
___________________________________________________________________
The Linux Kernel
This module will describe the kernel source tree and the documentation available. We willalso apply patches and recompile patched kernels. Information found in the /procdirectory will be highlighted.
1. Kernel Components
Modules
Module Components in the Source Tree
In the kernel source tree /usr/src/linux, the kernel components are stored in varioussubdirectories:
Subdirectory Description Example ./drivers contains code for different types of hardware support pcmcia./fs code for filesystem supported nfs./net code for network support ipx
These components can be selected while configuring the kernel (see 2. Compiling aKernel).
Module Components at Runtime The /lib/modules/<kernelversion>/kernel directory, has many of the samesubdirectories present in the kernel source tree. However only the modules that havebeen compiled will be stored here.
Types of Kernel Images The various kernel image types differ depending only on the type of compression used tocompress the kernel.
The make tool will read the /usr/src/linux/Makefile to compile
• A compressed linux kernel using gzip is compiled with: make zImageThe compiled kernel will be:
/usr/src/linux/arch/i386/boot/zImage
8

LinuxIT Technical Training Centre
The Linux Kernel
___________________________________________________________________
• A compressed linux kernel using better compression is compiled with: make bzImageThe compiled image will be:
/usr/src/linux/arch/i386/boot/bzImage • One can also use: make zdisk or make bzdisk to create compressed kernels on
a floppy. The compiled kernel will be written to:
/dev/fd0
Remember to put a floppy in the drive!
Documentation
Most documentation is available in the /usr/src/linux/Documentation directory. Themain files are the following:
File Description 00-INDEX Summary of the contents for each file in the Documentation
directory Configure.help Contains the help displayed when configuring a kernel
The Configure.help file also provides further information for when a kernel moduledoesn't load properly. Specific options and aliases for /etc/modules.conf are specified inthat file.
Information about compiling and documentation is available in /usr/src/linux/README.
The version of the kernel is set at the beginning of the Makefile. VERSION = 2PATCHLEVEL = 4SUBLEVEL = 22EXTRAVERSION = Make sure to add something to the EXTRAVERSION line likeEXTRAVERSION=-test
This will build a kernel called 2.4.22-testNotice: You need the “-” sign in EXTRAVERSION or else the version will be 2.4.22test
9

LinuxIT Technical Training Centre
The Linux Kernel
___________________________________________________________________
2. Compiling a Kernel
Compiling and installing a kernel can be described in three stages.
Stage 1: configuring the kernel
Here we need to decide what kind of hardware and network support needs to be includedin the kernel as well as which type of kernel we wish to compile (modular or monolithic).These choices will be saved in a single file:
/usr/src/linux/.config
Creating the .config file Command Description make config Edit each line of .config one at a time make menuconfig Edit .config browsing through menus (uses ncurses) make xconfig Edit .config browsing through menus (uses GUI
widgets)
When editing the .config file using any of the above methods the choices available formost kernel components are:
Do not use the module (n)Statically compile the module into the kernel (y)Compile the module as dynamically loadable (M)
Notice that some kernel components can only be statically compiled into the kernel. Onecannot therefore have a totally modular kernel.
When compiling a monolithic kernel none of the components should be compileddynamically.
Stage 2: compiling the modules and the kernel
The next table outlines the various 'makes' and their function during this stage. Notice thatnot all commands actually compile code and that the make modules_install has beenincluded
CompilingCommand Descriptionmake clean makes sure no stale .o files have been left over from a previous
build
10
LinuxIT Technical Training Centre
The Linux Kernel
___________________________________________________________________
make dep adds a .depend with headers specific to the kernel componentsmake build the kernelmake modules build the dynamic modulesmake modules_install install the modules in /lib/modules/kernel-version/
Stage 3: Installing the kernel image
This stage has no script and involves copying the kernel image manually to the bootdirectory and configuring the bootloader (LILO or GRUB) to find the new kernel.
3. Patching a Kernel
Incremental upgrades can be applied to an existing source tree. If you have downloadedthe linux-2.4.21.tgz kernel source and you want to update to a more recent kernel linux-2.4.22 for example, you must download the patch-2.4.22.gz patch.
Applying the Patch
The patch file attempts to overwrite files in the 2.4.21 tree. One way to apply the patch isto proceed as follows:
cd /usr/src
zcat patch-2.4.22.gz | patch -p0
The -p option can strip any number of directories the patch is expecting to find. In theabove example the patch starts with:
--- linux-2.4.21/...+++ linux-2.4.22/...
This indicates that the patch can be applied in the directory where the linux-2.4.21 is.
However if we apply the patch from the /usr/src/linux-2.4.21 directory then we need tostrip the first part of all the paths in the patch. So that
--- linux-2.4.21/arch/arm/def-configs/adsagc +++ linux-2.4.22/arch/arm/def-configs/adsagc
becomes
11
LinuxIT Technical Training Centre
The Linux Kernel
___________________________________________________________________
--- ./arch/arm/def-configs/adsagc +++ ./arch/arm/def-configs/adsagc
This is done with the -p1 option of patch effectively telling it to strip the first directory.
cd /usr/src/linux-2.4.21
zcat patch-2.4.22.gz | patch -p1
Testing the Patch
Before applying a patch one can test what will be changed without making them: patch -p1 –dry-run < patchfile
Recovering the Old Source Tree
To make sure the old configuration (.config file) is saved copy the .config file to the /bootdirectory.
cp .config /boot/config-kernelversion
The patch tool has two ways of keeping track of the changed files:
1. You can apply the patch with the -b option
patch -b -p0 < patch-file
By default this option keeps all the original files and appends a “.orig” to them.
2. You can backup the old changed file to a directory of your choice
mkdir oldfiles
patch -B oldfiles/ -p0 < patch-file
This has the advantage of letting you create a backup patch that can restore the sourcetree to it's original state.
12

LinuxIT Technical Training Centre
The Linux Kernel
___________________________________________________________________
diff -ur linux-2.4.21 oldfiles/linux-2.4.21 > recover-2.4.21-patch
NOTICE
Applying this recover-2.4.21-patch will have the effect of removing the2.4.22 patch we just applied in the previous paragraph
Building the New Kernel after a patch
Simply copy the old .config to the top of the source directory.
cp /boot/config-kernelversion /usr/src/linux-kernelversion/.config
Next 'make oldconfig' will only prompt for new features.
make oldconfig
make dep
make clean bzImage modules modules_install
4. Customising a Kernel
Loading Kernel modules
Loadable modules are inserted into the kernel at runtime using various methods.
The modprobe tool can be used to selectively insert or remove modules and theirdependencies.
13

LinuxIT Technical Training Centre
The Linux Kernel
___________________________________________________________________
The kernel can automatically insert modules using the kmod module. This module hasreplaced the kerneld module.
When using kmod the kernel will use the tool listed in /proc/sys/kernel/modprobewhenever a module is needed.
Check that kmod has been selected in the source tree as a static component:
grep -i “kmod” /usr/src/linux/.config
CONFIG_KMOD=y
When making a monolithic kernel the CONFIG_MODULES option must be set to no.
The /proc/ directory The kernel capabilities that have been selected in a default or a patched kernel arereflected in the /proc directory. We will list some of the files containing useful information:
/proc/cmdlineContains the command line passed at boot time to the kernel by the bootloader
/proc/cpuinfoCPU information is stored here
/proc/meminfoMemory statistics are written to this file
/proc/filesystemsFilesystems currently supported by the kernel. Notice that by inserting a new module (e.gcramfs) this will add an entry to the file. So the file isn't a list of all filesystems supportedby the kernel!
/proc/partitionsThe partition layout is displayed with further information such as the name, the number ofblock, the major/minor numbers, etc
/proc/sys/The /proc/sys directory is the only place were files with write permission can be found(the rest of /proc is read-only). Values in this directory can be changed with the sysctl
14

LinuxIT Technical Training Centre
The Linux Kernel
___________________________________________________________________
utility or set in the configuration file /etc/sysctl.conf
/proc/sys/kernel/hotplugPath to the utility invoked by the kernel which implements hotplugin (used for USBdevices or hotplug PCI and SCSI devices)
/proc/sys/kernel/modprobePath to the utility invoked by the kernel to insert modules
/proc/sys/overflowgid/uidMaximum number of users on a system. The filesystem uses 16 bits for the user andgroup fields, so the maximum is 2^16 = 65534 which is usually mapped to the usernobody or nfsnobody more recently
/proc/modulesList of currently loaded modules, same as the output of lsmod
Example: Patch the linux-2.4.22-1.2149.nptl kernel to support Extended Attributes andPosix Access Control Lists (ACL) for ext2 and ext3 filesystems.
ACLs are beyond this course. All we need to know is that they provide a greater flexibilityfor directory and file permissions on the filesystem allowing, for example, several groupsto access resources with different permissions.
WARNING
This patch will fail on older kernel versions (e.g linux-2.4.22-1.2115.nptl )
Install the 2.4.22-1.2149.nptl kernel and point the /usr/src/linux link to the new source.Then do:
cd /usr/src/linux
15
LinuxIT Technical Training Centre
The Linux Kernel
___________________________________________________________________
bzcat /usr/src/ea+acl+nfsacl-2.4.22-0.8.65.patch.bz2 | patch -p1–dry-run
If there are no error messages then run patch with no –dry-run option. Next, we compilethe new kernel:
Add EXTRAVERSION=-acl to the Makefile
make mrproper
cp configs/kernel-2.4.22-i686.config .config
make oldconfig (answer y to all questions relative to ACLs)
make dep bzImage modules modules_install
Quick test:Once you have rebooted with the new kernel, add the acl option into /etc/fstab on anyEXT3 filesystem
LABEL=/usr /usr ext3 defaults,acl 1 2
You can then use the setfacl to add assign permissions for different groups on the samedirectory.
We first create two groups eng and sales:\
groupadd eng
groupadd sales
Then add a directory called /usrNEWS:
mkdir /usr/NEWS
The getfacl is a tool that lists ACL privileges. So before we do anything lets look at thefollowing output:
getfacl /usr/NEWS
# file: share
# owner: root
# group: root
16

LinuxIT Technical Training Centre
The Linux Kernel
___________________________________________________________________
user::rwx
group::r-x
other::r-x
Next add rwx permissions on NEWS for the group sales:
setfacl -m g:sales:rwx NEWS/
List the ACL privileges:
getfacl NEWS/# file: NEWS# owner: root# group: salesuser::rwxgroup::r-xgroup:sales:rwxmask::rwxother::r-x
Finally add r_x permissions for the group eng and list the permissions:
setfacl -m g:eng:r-x NEWS/
getfacl NEWS/
# file: NEWS
# owner: root
# group: sales
user::rwx
group::r-x
group:sales:rwx
group:eng:r-x
mask::rwx
other::r-x
17

LinuxIT Technical Training Centre
The Linux Kernel
___________________________________________________________________
The kernel patch has worked. The above tools are not in the 201 objectives.
18
LinuxIT Technical Training Centre
System Startup
___________________________________________________________________
System Startup
Customising the boot process involves understanding how startup script are called. Thechapter also describes common problems that arise at different points during the bootingprocess as well as some recovery techniques. Finally we focus our attention on the “initialram disk” (or initial root device) initrd stage of the booting process. This will allow us tomake decisions as to when new initial ram disks need to be made..
1. Customising the Boot Process
Overview of init
In order to prevent processes run by users from interfering with the kernel two distinctmemory areas are defined. These are referred to as “kernel space memory” and “userspace memory”. The init process is the first program to run in user-space.
Init is therefore the parent of all processes. The init program's configuration file is /etc/inittab
Runlevels
Runlevels determine which processes should run together. All processes that can bestarted or stopped at a given runlevel are controlled by a script (called an “init script” or an“rc script”) in /etc/rc.d/init.d
List of rc scripts on a typical system
anacron halt kudzu ntpd rusersd syslogypxfrd
apmd identd lpd portmap rwalld vncserver
atd ipchains netfs radvd rwhod xfs
autofs iptables network random sendmail xinetd
crond kdcrotate nfs rawdevices single ypbind
functions keytable nfslock rhnsd snmpd yppasswdd
gpm killall nscd rstatd sshd ypserv
Selecting a process to run or be stopped in a given runlevel is done by creating symboliclinks in the
19
LinuxIT Technical Training Centre
System Startup
___________________________________________________________________
/etc/rc.d/rcN.d/ directory, where N is a runlevel.
Example 1: selecting httpd process for runlevel 3:
ln -s /etc/rc.d/init.d/httpd /etc/rc.d/rc3.d/S85httpd
Notice that the name of the link is the same as the name of the process and is precededby an S for start and a number representing the order of execution.
Example 2: stopping httpd process for runlevel 3:
rm /etc/rc.d/rc3.d/S85httpd
ln -s /etc/rc.d/init.d/httpd /etc/rc.d/rc3.d/K15httpd
This time the name of the link starts with a K for kill to make sure the process is stoppedwhen switching from one runlevel to another.
Starting Local scripts
We want to run a script at a given run level. Our script will be called printtotty10 and willsimply print the message given as an argument to /dev/tty10.
/bin/printtotty10
#!/bin/bash
echo $1 > /dev/tty10
1. One way to have the script started at a specific run level is to add a line in /etc/inittablike
pr10:3:once:/bin/printtotty10 “Printtotty was started in inittab”
This is not always the best way to do this. What if many scripts need to be started? Theinittab file would look messy.
2. We can write a custom rc-script. We follow the usage to call the script the same nameas the actual tool we want to startup.
/etc/rc.d/init.d/printtotty10
20

LinuxIT Technical Training Centre
System Startup
___________________________________________________________________
#!/bin/sh# chkconfig: 345 85 15# description: This line has to be here for chkconfig to work ... \#The script will display a message on /dev/tty10#First source some predefined functions such as echo_success()./etc/rc.d/init.d/functions
start() { echo -n "Starting printtotty10" /bin/printtotty10 "printtotty10 was started with an rc-script " echo_success echo}
stop() { echo -n "Stopping custom-rc" /bin/printtotty10 "The custom script has stopped" echo_success echo}case "$1" in start) start;; stop) stop;;esacexit 0
3. The prittotty10 script can be started at boot time by placing the command in /etc/rc.d/rc.local. The rc.local script is the last rc-script to be run.
Notice: When setting up a linux server as a router it is possible to switch on ip-forwardingat boot time by adding the following line to rc.local:
echo 1 > /proc/sys/net/ipv4/ip_forward
However it is better to use the sysctl mechanism to switch ip-forwarding on every time thenetwork interface is started. This is done by adding the following line to /etc/sysctl.conf:
net.ipv4.ip_forward = 1
21
LinuxIT Technical Training Centre
System Startup
___________________________________________________________________
2. System Recovery
When a system crashes and fails to restart it is necessary to alter the normal bootingprocess. We will describe a few solutions here.
Overriding the INIT stage
This is necessary if the boot process fails due to a faulty init script. Once the kernelsuccessfully locates the root file system it will attempt to run /sbin/init. But the kernel canbe instructed to run a shell instead which will allow us to have access to the system beforethe services are started.
At the LILO or GRUB boot prompt add the following kernel parameter:
init=/bin/bash
At the end of the kernel boot stage you should get a bash prompt. Read-write access tothe root filesystem is achieved with the following
mount /proc
mount -o remount,rw /
Errors at the end of the kernel stage
• If the kernel can't mount the root filesystem it will print the following message:
Kernel panic: VFS: Unable to mount root fs on 03:05
The number 03 is the major number for the first IDE controller, and 05 is the 5th partitionon the disk. The problem is that the kernel is missing the proper modules to access thedisk.
We need to boot the system using an alternative method. The fix next involves creating acustom initrd and using it for the normal boot process.
Question: In the case above since the drive isn't a SCSI drive what could have caused theproblem?
• If the wrong root filesystem was parsed to the kernel by the boot loader (LILO orGRUB) then the INIT stage cannot start since /sbin/init will be missing
22

LinuxIT Technical Training Centre
System Startup
___________________________________________________________________
Kernel Panic: No init found. Try passing init= option to kernel
Again we need to boot the system using a different method, then edit the bootloader'sconfiguration file (telling the kernel to use another device as the root filesystem), andreboot.
In both scenarios above it isn't always necessary to use a rescue disk. In fact, it often is acase of booting with a properly configured kernel. But what happens if the we don't havethe option? What if the bootloader was reconfigured with the wrong kernels using no initialroot disks or trying to mount the wrong root filesystem?
This leads us to the next possible cause of booting problems.
Missconfigured Bootloaders
At this stage we need to use a rescue method to boot the system. We already know from101 that any Linux distribution CD can be used to start a system in rescue mode. Theadvantage of these CDs is that they work on any Linux system.
We next describes a preventative method which can only recover a specific system. Wewill create a floppy rescue disk which we then use in the case of an emergency (simple!)
All we need is a floppy with a Linux kernel image that can boot, and this image must betold were the root filesystem on the hard drive is.
The following creates a bootable floppy which will launch a linux kernel image
dd if=/boot/vmlinuz of=/dev/fd0
Finally rdev is used to tell the kernel where the root filesystem is. The next command mustbe run on the system we wish to protect and the floppy with the kernel must be in the drive
rdev /dev/fd0 /dev/hda2
Bootloader Kernel Parameters
load_ramdisk=n If n is 1 then load a ramdisk, the default is 0
prompt_ramdisk=n If n is 1 prompt to insert a floppy disk containing a ramdisk
23

LinuxIT Technical Training Centre
System Startup
___________________________________________________________________
nosmp ormaxcpus=N
Disable or limit the number of CPUs
apm=off Disable APM, sometime needed to boot from yet unsupportedmotherboards
init= Defaults to /sbin/init but may also be a shell or an alternativeprocess
root= Set the root filesystem device (can be set with rdev*)
mem= Assign available RAM size
vga= Change the console video mode (can be changed with rdev*)
*The rdev manual pages say; “The rdev utility, when used other than to find a name forthe current root device, is an ancient hack that works by patching a kernel image at amagic offset with magic numbers. It does not work on architectures other than i386. Itsuse is strongly discouraged. Use a boot loader like SysLinux or LILO instead”
Troubleshooting LILO
When installing LILO the bootloader mapper, /sbin/lilo, will backup the existingbootloader.
For example if you install LILO on a floppy, the original bootloader will be save to/boot/boot.0200
Similarly when changing the bootloader on an IDE or a SCSI disk the files will be calledboot.0300 and boot.0800 respectively. The original bootloader can be restored with:
lilo -u
By default the second stage LILO is called /boot/boot.b and when it is successfullyloaded it will prompt you with a “boot: ”.
Here the possible errors during the boot stage (taken from the LILO README)
• nothing LILO is either not installed or the partition isn't active
• L The first stage loader has been loaded but the second stage has failed
• LI The second stage boot loader has loaded but was unable to execute
24
LinuxIT Technical Training Centre
System Startup
___________________________________________________________________
This could be cause if /boot/boot.b moved and /sbin/lilo wasn't rerun
• LIL The second stage boot loader has been started, but it can't load the descriptortable from the map file or the second stage boot loader has been loaded at anincorrect address
This could be cause if /boot/boot.b moved and /sbin/lilo wasn't rerun.
• LIL- The descriptor table is corrupt
This could be cause if /boot/map moved and /sbin/lilo wasn't rerun.
3. Customised initrd
In most cases a “customised initrd” requires running mkinitrd which will determine thekernel modules needed to support block devices and filesystems used on the root device.
The mkinitrd script
The following are methods used in the mkinitrd script to determine critical informationabout the root device and filesystem.
-The root filesystem type:
Using /etc/fstab the script determines which filesystem is used on the root device andthe corresponding module (for example ext3 or xfs).
-Software RAID:
Using /etc/raidtab the mkinitrd script deduces the names of the raid arrays to start allthe devices (even non root).
-LVM root device
Once the root device $rootdev is determined in /etc/fstab the major number isobtained from the following line:
root_major=$(/bin/ls -l $rootdev | awk '{ print $5 }')
If this corresponds to a logical volume, the logical volume commands are copied onto theram disk.
25
LinuxIT Technical Training Centre
System Startup
___________________________________________________________________
The mkinitrd script will transfer all the required tools and modules to a file mounted as aloop device on a temporary directory. Once unmounted, the file is compressed and canbe used as an initrd.
Example: As an example we will copy the content of an existing initrd to a new initrd and change theroot filesystem type form ext3 to ext2..
1. Uncompress the current initrdcp /boot/initrd-your-kernel-version.img /tmp/initrd.img.gz
gunzip /tmp/initrd.img.gz
2. Mount the current initrd using a loop devicemkdir /mnt/current
mount -o loop /tmp/initrd.img /mnt/current
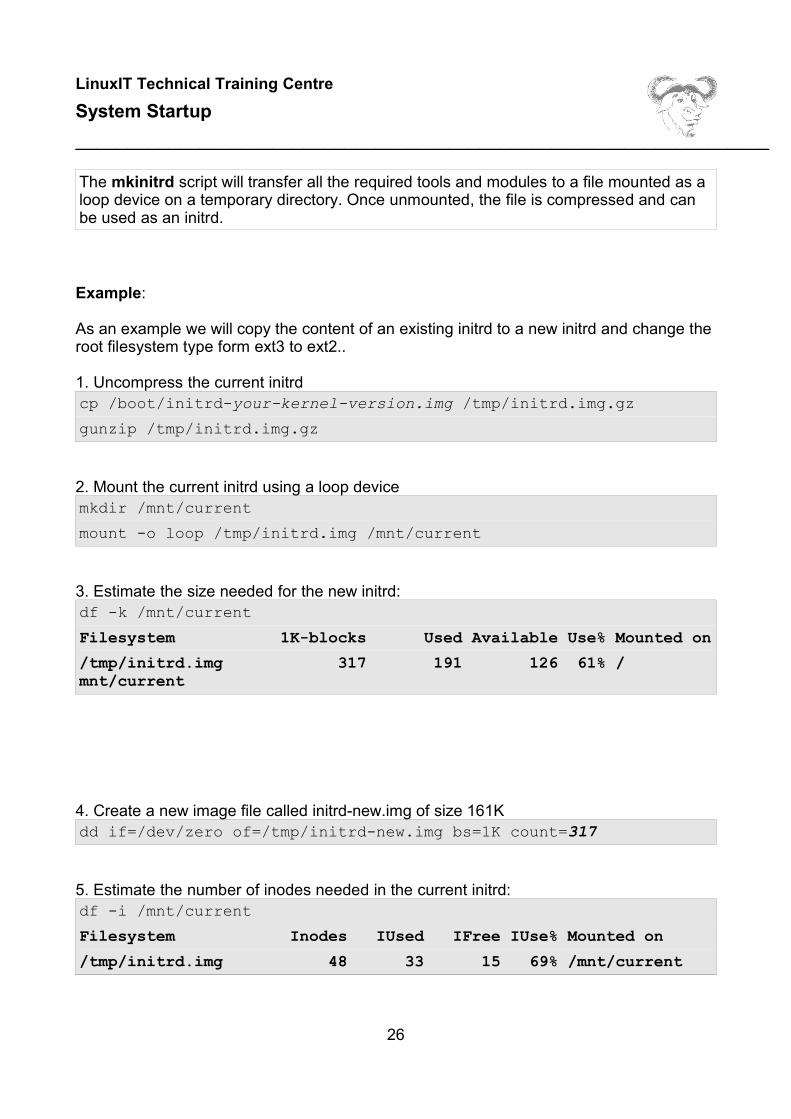
3. Estimate the size needed for the new initrd:df -k /mnt/current
Filesystem 1K-blocks Used Available Use% Mounted on
/tmp/initrd.img 317 191 126 61% /mnt/current
4. Create a new image file called initrd-new.img of size 161Kdd if=/dev/zero of=/tmp/initrd-new.img bs=1K count=317
5. Estimate the number of inodes needed in the current initrd:df -i /mnt/current
Filesystem Inodes IUsed IFree IUse% Mounted on
/tmp/initrd.img 48 33 15 69% /mnt/current
26

LinuxIT Technical Training Centre
System Startup
___________________________________________________________________
6. Create a filesystem on the file /tmp/initrd-new.img with 48 inodes mke2fs -F -m 0 -N 48 /tmp/initrd-new.img
7. Mount the file on a new directory and copy across all the files of the current initrd to thenew one:mkdir /mnt/new
mount -o loop /tmp/initrd-new.img /mnt/new
(cd /mnt/current/; tar cf - .) | (cd /mnt/new; tar xf -)
8. Edit the /mnt/new/linuxrc file and delete the line where the ext3 module is inserted. Alsoreplace the ext3 option by ext2 at the mount command.
9. Finally, unmount the /tmp/initrd-new.img then compress and rename it.gzip /tmp/initrd-new.img ; mv /tmp/initrd-new.img.gz /boot/initrd-test.img
Or
gzip < /tmp/initrd-new.img > /boot/initrd-test.img
10. Create a new kernel entry in /etc/lilo.conf or /boot/grub/grub.conf instructing thebootloader to use the new initrd.
Sample grub.conf :
title linux (2.4.22) root (hd0,1) kernel /vmlinuz-2.4.22 ro root=LABEL=/ initrd /initrd-2.4.22.img
title broken? root (hd0,1) kernel /vmlinuz-2.4.22-1.2115.nptl ro root=LABEL=/ initrd /initrd-new.img
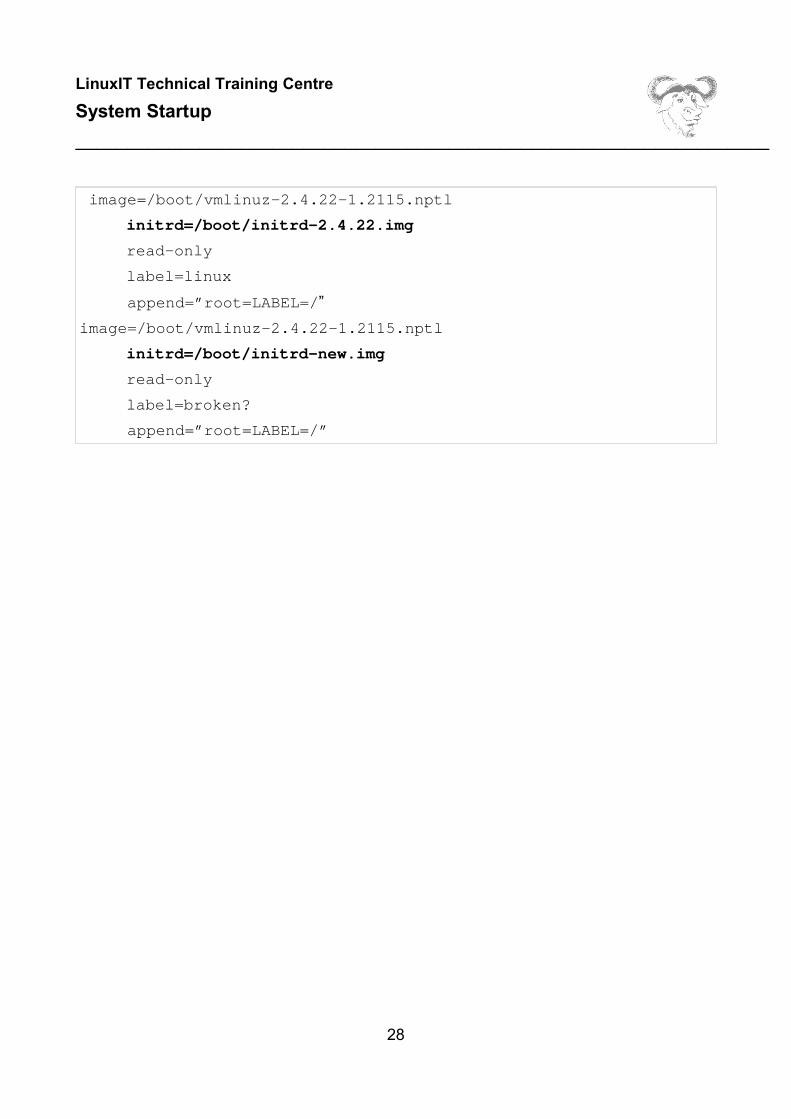
Sample lilo.conf :
27
LinuxIT Technical Training Centre
System Startup
___________________________________________________________________
image=/boot/vmlinuz-2.4.22-1.2115.nptl
initrd=/boot/initrd-2.4.22.img
read-only
label=linux
append=”root=LABEL=/”
image=/boot/vmlinuz-2.4.22-1.2115.nptl
initrd=/boot/initrd-new.img
read-only
label=broken?
append=”root=LABEL=/”
28

LinuxIT Technical Training Centre
The Linux Filesystem
___________________________________________________________________
The Linux Filesystem
This objective covers most points seen in LPI 101. Configuring automount is a newfeature where special attention has to be payed to the syntax.
1. Operating the Linux Filesystem
When adding new filesystems to the existing root filesystem the key file involved is /etc/fstab which assigns a mount point, a mount order and global options per device.
/etc/fstab options
ro or rw Read only or read write
noauto Do not respond to mount -a. Used for external devices CDROMs ...
noexec Executables cannot be started from the device
nosuid Ignore SUID bit throughout the filesystem
nodev Special device files such as block or character devices are ignored
noatime Do not update atimes (performance gain)
owner The device can be mounted only by it's owner
user Implies noexec, nosuid and nodev. A single user's name is added tomtab so that other users may not unmount the devices
users Same as user but the device may be unmounted by any other user
Mount will also keep track of mounted operations by updating /etc/mtab. The content ofthis file is similar to another table held by the kernel in /proc/mounts.
Regular local filesystems
When the system boots all local filesytems are mounted from the rc.sysinit scrpt. Themount command will mount every thing in /etc/fstab that has not yet been mounted andthat is not encrypted or networked:
mount -a -t nonfs,smbfs,ncpfs -O no_netdev,noloop,noencrypted
When shutting down, all filesystem are unmounted by the halt script by scanning the /proc/mounts file with the help of some awk commands!
29

LinuxIT Technical Training Centre
The Linux Filesystem
___________________________________________________________________
Swap Partions and SWAP files
At boot time, swap partitions are activated in /etc/rc.d/rc.sysinit
swapon -a
Similarly when the system shuts down swap is turned off in the halt rc-script:
SWAPS=`awk '! /^Filename/ { print $1 }' /proc/swaps`
[ -n "$SWAPS" ] && runcmd "Turning off swap: " swapoff $SWAPS
Example 1: Making a swap file of 10MB
1.
dd if=/dev/zero of=/tmp/SWAPFILE bs=1k count=10240
2.
mkswap /tmp/SWAPFILE
3.
swapon /tmp/SWAPFILE
5.
cat /proc/swaps
Filename Type Size Used Priority
/dev/hda6 partition 522072 39744 -1
/tmp/SWAPFILE file 10232 0 -2
Example 2: Making a swap partition of 16MB
1. Make a new partition (e.g /dev/hda16) of type swap (82) and size 16MB. Reboot
2. Make a swap filesystem on the devices
30

LinuxIT Technical Training Centre
The Linux Filesystem
___________________________________________________________________
mkswap /dev/hda16
3. Add the following to /etc/fstab
/dev/hda16 swap swap pri=-1 0 0
4. Make the swap partition available with swapon -a
Notice that if two swap partition are defined the kernel will automatically access them in“striped”mode, provided they have been mounted with the same priority determined by thepri= option in /etc/fstab
2. Maintaining a Linux Filesystem
This section covers a list of commands related to filesystem maintenance.
fsck - check and repair a Linux file system
Main options:
-b use alternative superblck
-c check for bad blocks
-f force checking even when partition is marked clean
-p automatic repair
-y answer yes to all question
sync - flush filesystem buffers
Updates modified superblocks and inodes and executes delayed writes. The operatingsystem keeps data in RAM in order to speed up operations. This may cause data to belost in the event of a crash unless sync is executed. Sync will simply call the 'sync' systemcall. Another way of doing this is to use the 'ALT+sysreq+s' key combination
badblocks - search a device for bad blocks
31

LinuxIT Technical Training Centre
The Linux Filesystem
___________________________________________________________________
It is recommended NOT to use badblocks directly but to use the -c flag with fsck or mkfs.
Main options:
-b block size
-c number of blocks tested at a time
-i file with a list of known bad blocks, these blocks will be skipped
-o output file, passed to mkfs
mke2fs - create an ext2/3 filesyste
Main options:
-b blocksize
-i number of bytes between consecutive inodes 'bytes-per-inode'
-N number of inodes
-m Percentage of blocks reserved for user root
-c Check for bad blocks
-l Read bad blocks from file
-L Set a volume LABEL
-j/-J Create journal (ext3)
-T Optimise filesystem “type”, values are:
news one inode per 4kb blocklargefile one inode per megabytelargefile4 one inode per 4 megabytes
dumpe2fs - dump filesystem information
dumpe2fs prints the super block and blocks group information for the filesystem presenton a device
debugfs - ext2 file system debugger
debugfs is used to test and repair an ext2 filesystem. The main options are:
-w open the filesystem as writeable
-b blocksize
tune2fs - adjust tunable filesystem parameters on second extended filesystems
32
LinuxIT Technical Training Centre
The Linux Filesystem
___________________________________________________________________
Main options:
-l read the superblock
-L set the device's volume LABEL
-m change the filesystems reserved blocks for user root
-j or -J set a journal
3. Configuring automount
Mounting can be automated using a mechanism called automount or autofs.
The /usr/sbin/automount is invoked with the rc-script /etc/init.d/autofs.
service autofs start
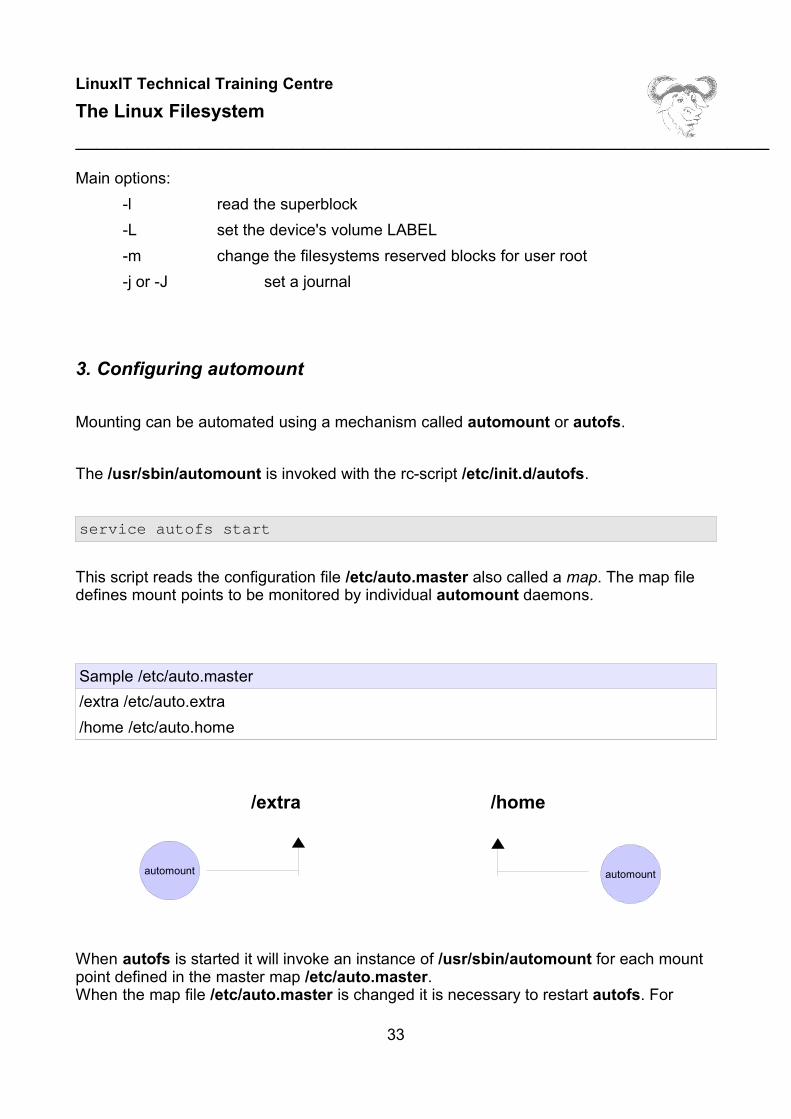
This script reads the configuration file /etc/auto.master also called a map. The map filedefines mount points to be monitored by individual automount daemons.
Sample /etc/auto.master
/extra /etc/auto.extra
/home /etc/auto.home
/extra /home
When autofs is started it will invoke an instance of /usr/sbin/automount for each mountpoint defined in the master map /etc/auto.master. When the map file /etc/auto.master is changed it is necessary to restart autofs. For
33
automount automount

LinuxIT Technical Training Centre
The Linux Filesystem
___________________________________________________________________
example if mount points have been deleted, then the associated automount daemon isterminated. Likewise, new daemons are started for newly defined mount points.
Multiple filesystems can be mounted on a single mount point. These filesystems as well asthe mount options needed (filesystem type, read-write permissions, etc) are defined in aseparate file.
Sample /etc/auto.extra
cdrom -fstype=iso9660,ro,user,exec,nodev,nosuid : /dev/cdrom
nfs -fstype=nfs,soft,intr,rsize=8192,wsize=8 192 192.168.3.100:/usr/local
/extra
cdrom
nfs
The CDROM will automatically be accessible in /extra/cdrom and the NFS share ismounted as soon as the /extra/nfs directory is accessed
NOTICE
In the above example:
The directories /extra/cdrom and /extra/nfs must not be created
New entries in /etc/auto.extra are immediately made available: adding 'new -fstype=ext3:/dev/hda2' to the file will automatically make /extra/new available
By default a mounted device will stay mounted for 5 minutes: if we uncomment the'cdrom' device in the map file /etc/auto.extra shortly after the CDROM has beenaccessed, then the device will still be available for approximately 5 minutes in /extra/cdrom
34

LinuxIT Technical Training Centre
Hardware and Software Configuration
___________________________________________________________________
Hardware and Software Configuration
This module will cover the configuration of components which need both kernel support andsoftware tools.
1. Software RAID
RAID stands for “Redundant Array of Inexpensive Disks” and was originally designed tocombine cheap hard disks together. RAID can either increase speed or reliability dependingon the RAID level used.
RAID Levels
RAID-Linear RAID-0 (stripe) RAID-1 (mirror)
1 5 1 2 1 1
2 6 3 4 2 2
3 7 5 6 3 3
4 8 7 8 4 4
read write redundancy read write redundancy read write redundancy 0 0 no + + no + - yes
RAID-4 RAID-5
1 2 p 1 2 p
3 4 p p 3 4
5 6 p 5 p 6
7 8 p 7 8 p
read write redundancy read write redundancy + - yes + 0 yes
Spare Disks
35
LinuxIT Technical Training Centre
Hardware and Software Configuration
___________________________________________________________________
If spare disks are configured they will be used in the RAID array as soon as one of the arraydisks fail.
Kernel and software components
Software raid is handle by the following kernel module:
RAID0 raid0.o
RAID1 raid1.o
RAID4 or RAID5 raid5.o
The raidtools package will provide these most common tools:
/sbin/lsraid query raid devices/sbin/mkraid create md devices from instructions given in /etc/raidtab/sbin/raidstart and raidstop start and stop the md devices
Once a meta device has been successfully created the information can be found in
/proc/mdstats
Booting from a RAID root device (exercise)
1. Make two new partitions of the same size as the root device of type “Linux raid autodetect”.
One can make a smaller new root partition by checking the actual used space on the currentroot device
df -h /
Filesystem Size Used Avail Use% Mounted on
/dev/hda7 286M 71M 201M 27% /
Use fdisk to create the new partions (e.g /dev/hda14 and /dev/hda15) Reboot.
2. Configure software RAID 1 on these partitions
36
LinuxIT Technical Training Centre
Hardware and Software Configuration
___________________________________________________________________
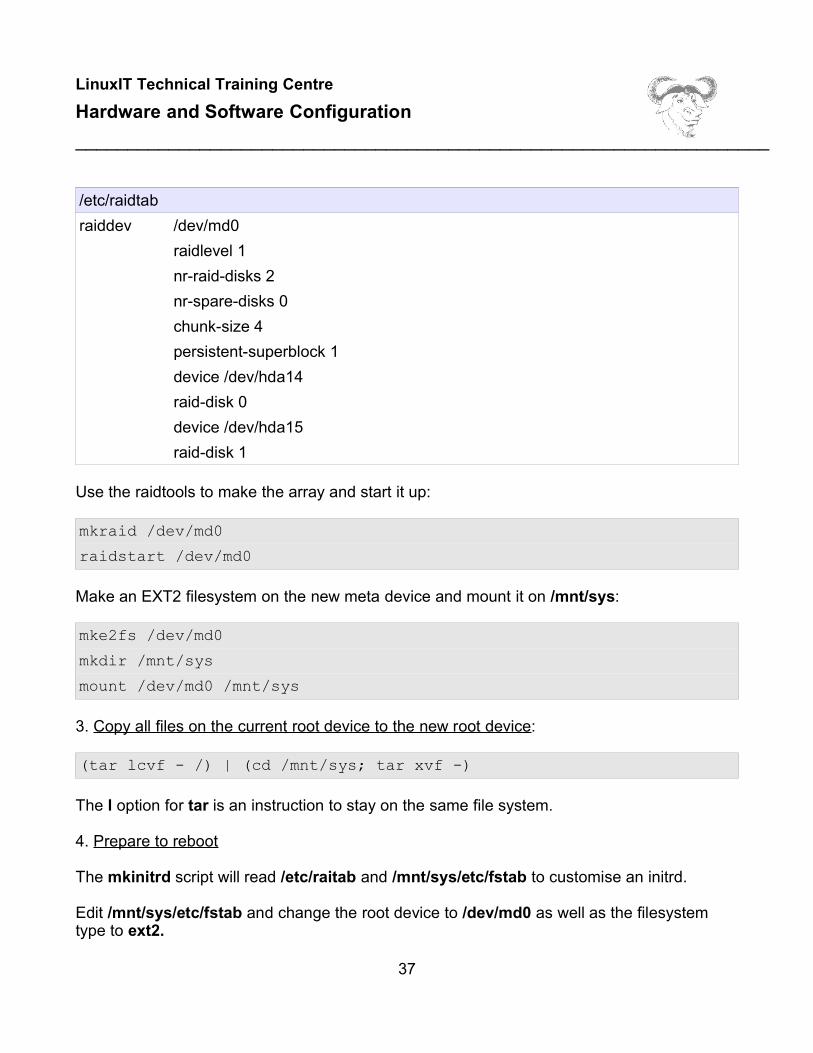
/etc/raidtab
raiddev /dev/md0
raidlevel 1
nr-raid-disks 2
nr-spare-disks 0
chunk-size 4
persistent-superblock 1
device /dev/hda14
raid-disk 0
device /dev/hda15
raid-disk 1
Use the raidtools to make the array and start it up:
mkraid /dev/md0
raidstart /dev/md0
Make an EXT2 filesystem on the new meta device and mount it on /mnt/sys:
mke2fs /dev/md0
mkdir /mnt/sys
mount /dev/md0 /mnt/sys
3. Copy all files on the current root device to the new root device:
(tar lcvf - /) | (cd /mnt/sys; tar xvf -)
The l option for tar is an instruction to stay on the same file system.
4. Prepare to reboot
The mkinitrd script will read /etc/raitab and /mnt/sys/etc/fstab to customise an initrd.
Edit /mnt/sys/etc/fstab and change the root device to /dev/md0 as well as the filesystemtype to ext2.
37
LinuxIT Technical Training Centre
Hardware and Software Configuration
___________________________________________________________________
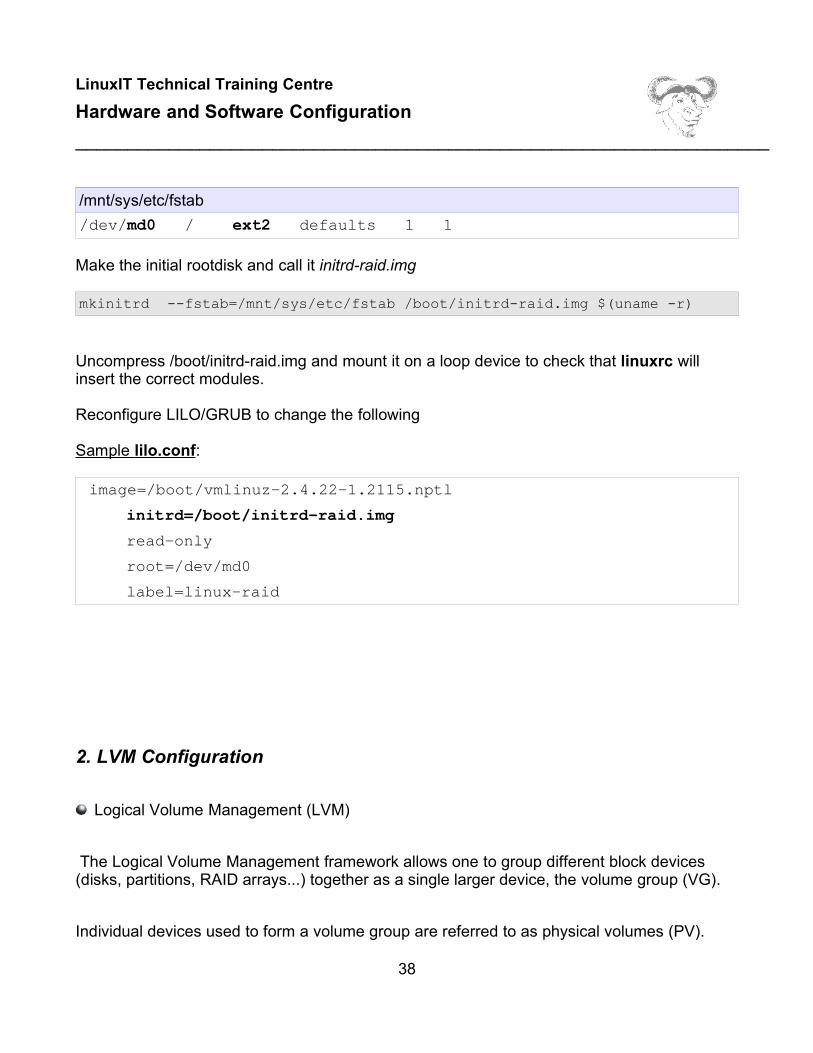
/mnt/sys/etc/fstab
/dev/md0 / ext2 defaults 1 1
Make the initial rootdisk and call it initrd-raid.img
mkinitrd --fstab=/mnt/sys/etc/fstab /boot/initrd-raid.img $(uname -r)
Uncompress /boot/initrd-raid.img and mount it on a loop device to check that linuxrc willinsert the correct modules.
Reconfigure LILO/GRUB to change the following
Sample lilo.conf :
image=/boot/vmlinuz-2.4.22-1.2115.nptl
initrd=/boot/initrd-raid.img
read-only
root=/dev/md0
label=linux-raid
2. LVM Configuration
Logical Volume Management (LVM)
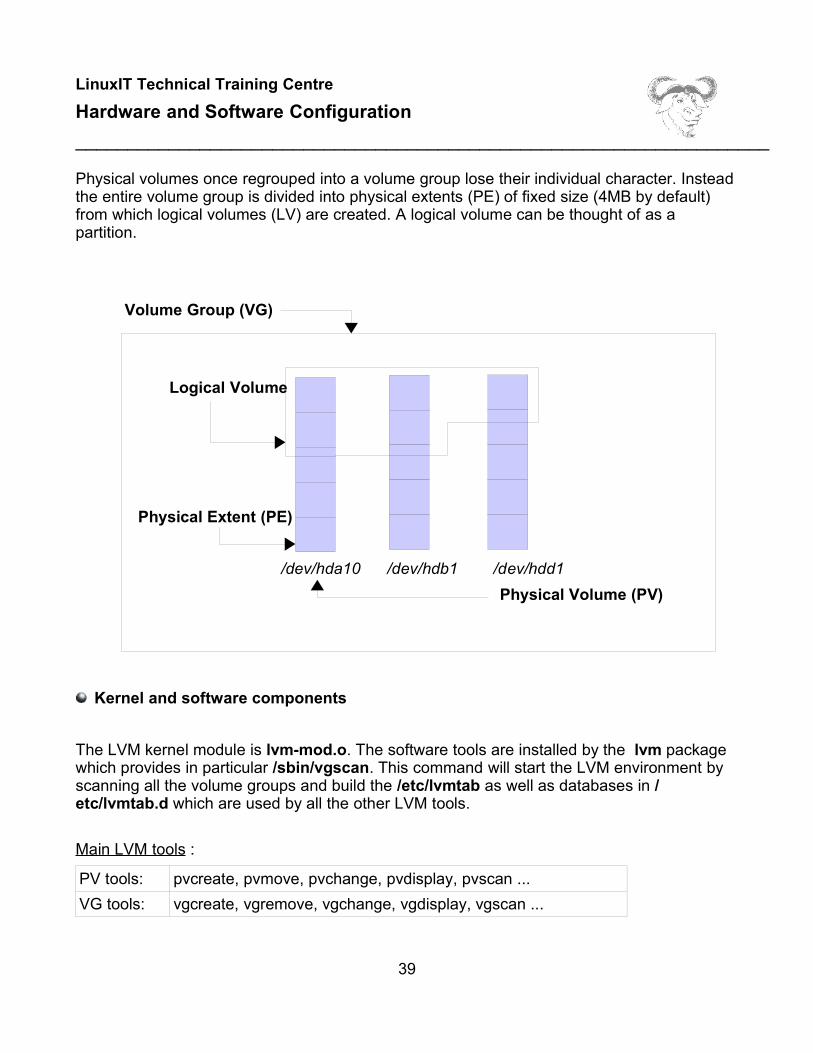
The Logical Volume Management framework allows one to group different block devices(disks, partitions, RAID arrays...) together as a single larger device, the volume group (VG).
Individual devices used to form a volume group are referred to as physical volumes (PV).
38
LinuxIT Technical Training Centre
Hardware and Software Configuration
___________________________________________________________________
Physical volumes once regrouped into a volume group lose their individual character. Insteadthe entire volume group is divided into physical extents (PE) of fixed size (4MB by default)from which logical volumes (LV) are created. A logical volume can be thought of as apartition.
Volume Group (VG)
Logical Volume
Physical Extent (PE)
/dev/hda10 /dev/hdb1 /dev/hdd1
Physical Volume (PV)
Kernel and software components
The LVM kernel module is lvm-mod.o. The software tools are installed by the lvm packagewhich provides in particular /sbin/vgscan. This command will start the LVM environment byscanning all the volume groups and build the /etc/lvmtab as well as databases in /etc/lvmtab.d which are used by all the other LVM tools.
Main LVM tools :
PV tools: pvcreate, pvmove, pvchange, pvdisplay, pvscan ...
VG tools: vgcreate, vgremove, vgchange, vgdisplay, vgscan ...
39
LinuxIT Technical Training Centre
Hardware and Software Configuration
___________________________________________________________________
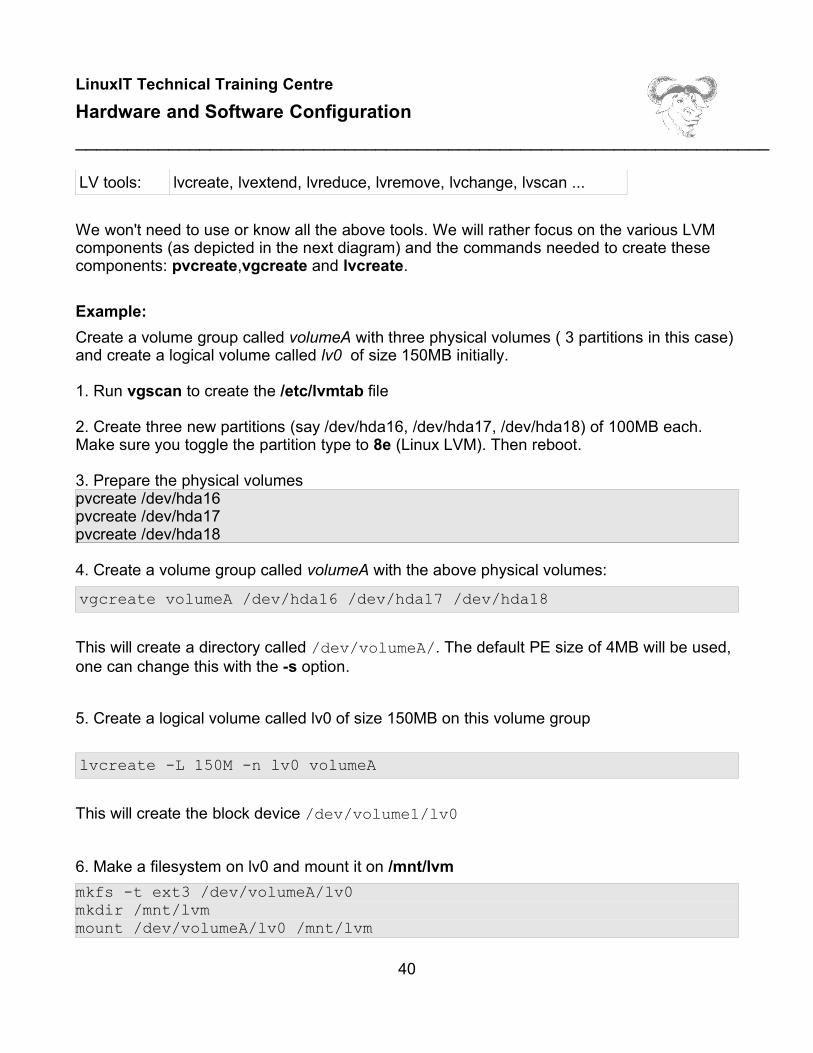
LV tools: lvcreate, lvextend, lvreduce, lvremove, lvchange, lvscan ...
We won't need to use or know all the above tools. We will rather focus on the various LVMcomponents (as depicted in the next diagram) and the commands needed to create thesecomponents: pvcreate,vgcreate and lvcreate.
Example:
Create a volume group called volumeA with three physical volumes ( 3 partitions in this case)and create a logical volume called lv0 of size 150MB initially.
1. Run vgscan to create the /etc/lvmtab file
2. Create three new partitions (say /dev/hda16, /dev/hda17, /dev/hda18) of 100MB each.Make sure you toggle the partition type to 8e (Linux LVM). Then reboot.
3. Prepare the physical volumespvcreate /dev/hda16pvcreate /dev/hda17pvcreate /dev/hda18
4. Create a volume group called volumeA with the above physical volumes:
vgcreate volumeA /dev/hda16 /dev/hda17 /dev/hda18
This will create a directory called /dev/volumeA/. The default PE size of 4MB will be used,one can change this with the -s option.
5. Create a logical volume called lv0 of size 150MB on this volume group
lvcreate -L 150M -n lv0 volumeA
This will create the block device /dev/volume1/lv0
6. Make a filesystem on lv0 and mount it on /mnt/lvm
mkfs -t ext3 /dev/volumeA/lv0mkdir /mnt/lvmmount /dev/volumeA/lv0 /mnt/lvm
40

LinuxIT Technical Training Centre
Hardware and Software Configuration
___________________________________________________________________
This wouldn't be very different from other partition types if it weren't for the possibility tochange the logical volume's size at anytime. Let's first show how to reduce the existing150MB logical volume lv0 with the esfsadm tool installed by the lvm package.
umount /mnt/lvm
e2fsadm -L 25 /dev/volumeA/lv0
NOTICE
The -L option refers to size in megabytes. The is the case with most LVM tools. The -loption can be used to specify logical extents (LE) instead. The default size of an LE is 4MB..
The next section will show how to add a new physical volume (a disk) to a volume group anddemonstrates how an existing logical volume can be made larger by including physicalextents available in the volume group to itself. Once this is done the e2fsadm tool will resizethe filesystem across the logical volume.
Extending the Volume Group with a RAID 0 device
So far we have:
VG = /dev/hda16 + /dev/hda17 + /dev/hda18
and we would like to add a RAID0 device tothis
1. Create three more partitions (e.g /dev/hda19, /dev/hda20 and /dev/hda21) of size 50MBand of type “Linux raid autodetect” (fd) – reboot!
2. Edit /etc/mtab to add the following RAID 0 device:
raiddev /dev/md1
raid-level 0 nr-raid-disks 3
41
LinuxIT Technical Training Centre
Hardware and Software Configuration
___________________________________________________________________
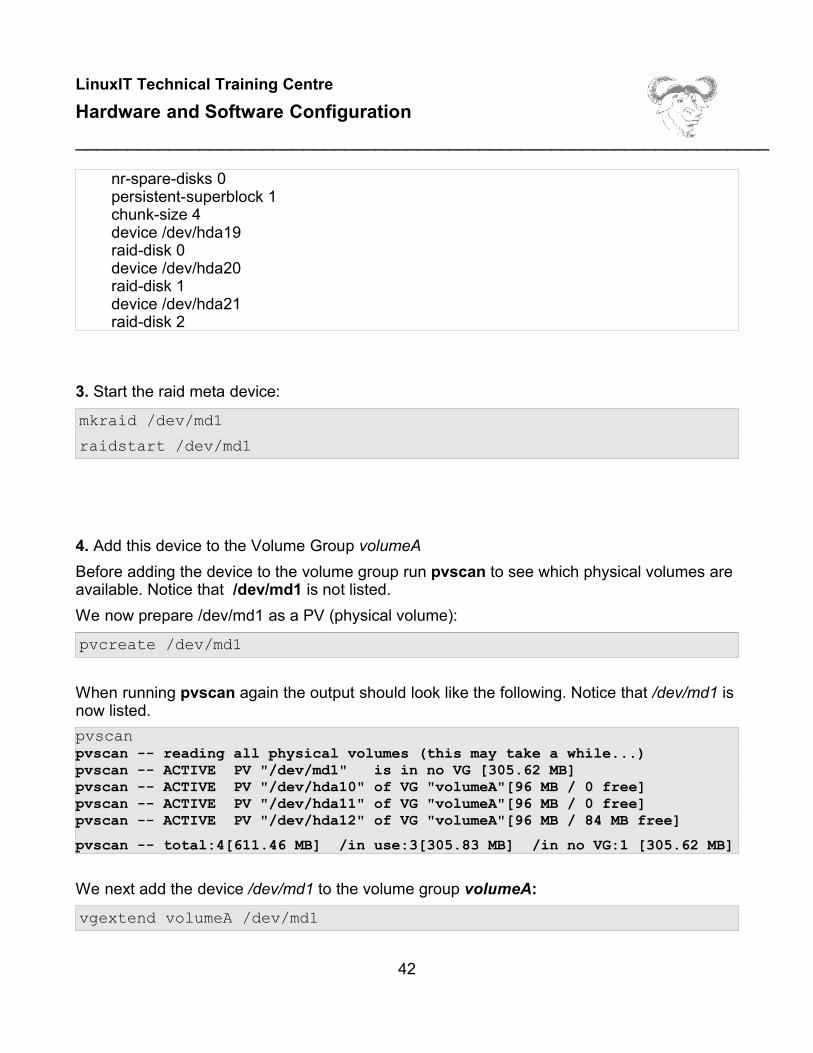
nr-spare-disks 0 persistent-superblock 1 chunk-size 4 device /dev/hda19 raid-disk 0 device /dev/hda20 raid-disk 1 device /dev/hda21 raid-disk 2
3. Start the raid meta device:
mkraid /dev/md1
raidstart /dev/md1
4. Add this device to the Volume Group volumeA
Before adding the device to the volume group run pvscan to see which physical volumes areavailable. Notice that /dev/md1 is not listed.
We now prepare /dev/md1 as a PV (physical volume):
pvcreate /dev/md1
When running pvscan again the output should look like the following. Notice that /dev/md1 isnow listed.
pvscanpvscan -- reading all physical volumes (this may take a while...)pvscan -- ACTIVE PV "/dev/md1" is in no VG [305.62 MB]pvscan -- ACTIVE PV "/dev/hda10" of VG "volumeA"[96 MB / 0 free]pvscan -- ACTIVE PV "/dev/hda11" of VG "volumeA"[96 MB / 0 free]pvscan -- ACTIVE PV "/dev/hda12" of VG "volumeA"[96 MB / 84 MB free]
pvscan -- total:4[611.46 MB] /in use:3[305.83 MB] /in no VG:1 [305.62 MB]
We next add the device /dev/md1 to the volume group volumeA:
vgextend volumeA /dev/md1
42

LinuxIT Technical Training Centre
Hardware and Software Configuration
___________________________________________________________________
At this stage the volume group has four devices:
VolumeA = /dev/hda10 + /dev/hda11 + /dev/hda12 + /dev/md1
We can take 50MB from /dev/md1 and add them to lv0 (unmount the volume first)
lvextend -L +50 /dev/volumeA/lv0 /dev/md1
The original lv0 volume had 150 megabytes. The + flag in front of the requested size hasadded 50MB to the logical volume, making it about 200 megabytes. But we haven't extendedthe filesystem across the entire logical volume yet.
The output of lvscan will show 80MB available. This corresponds to the 25 megabytesresizing done with e2fsadm on p. 21 plus the 50MB added by lvextend above
.
lvscanlvscan -- ACTIVE "/dev/volumeA/lv0" [80 MB]lvscan -- 1 logical volumes with 80 MB total in 1 volume grouplvscan -- 1 active logical volume
The next command will extend the filesystem to 80 megabytes:
e2fsadm -L 80 /dev/volume/lv0
If you remount this volume on /mnt/lvm you can see the new available space with df.
REBOOT WARNING
The LVM tools need the lvm-mod.o module and in our case the metadevice /dev/md1. Youneed to create a new initrd with mkinitrd or add the following lines to a new initrd:
insmod /lib/lvm-mod.o
raidautorun /dev/md1
43

LinuxIT Technical Training Centre
Hardware and Software Configuration
___________________________________________________________________
REBOOT WARNING
The volume group is then activated with vgscan from the rc.sysinit script.
Booting from a logical volume root device
As with software RAID we are going to investigate some issues we need to consider whenusing LVM on the root device.
First make sure the volume we have created previously is mounted. If it isn't then do
mount /dev/volumeA/lv0 /mnt/lvm
Next we archive the root device in the same way as we did for RAID:
tar clvf - / | (cd /mnt/lvm/; tar xvf -)
Edit /mnt/lvm/etc/fstab and enter
/dev/volumeA/lv0 / ext2 defaults 0 1
Edit /etc/lilo.conf or /etc/grub.conf to add a new entry where the kernel points to the new rootlogical volume. For a 2.4.22 kernel an additional entry in /etc/grub.conf looks like this:
title lvm-root
root (hd0,1)
kernel /vmlinuz-2.4.22 ro root=LABEL=/
initrd /initrd-2.4.22-lvm.img
All we need is the initrd initrd-2.4.22-lvm.img.
Once again we will run mkinitrd with –-fstab=<fstab> which we will use to make the scriptread our new fstab file /mnt/lvm/etc/fstab. We test this:
mkinitrd --fstab=/mnt/lvm/etc/fstab /boot/initrd-lvm.img $(uname -r)
44
LinuxIT Technical Training Centre
Hardware and Software Configuration
___________________________________________________________________
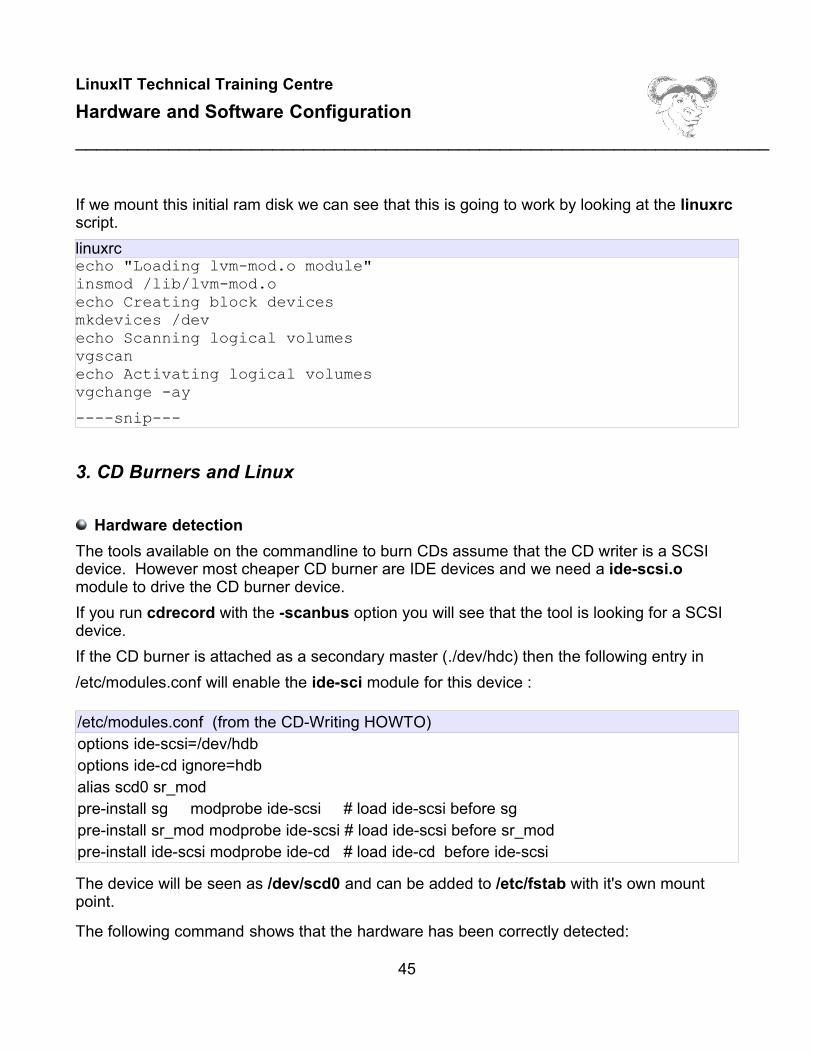
If we mount this initial ram disk we can see that this is going to work by looking at the linuxrcscript.
linuxrcecho "Loading lvm-mod.o module"insmod /lib/lvm-mod.oecho Creating block devicesmkdevices /devecho Scanning logical volumesvgscanecho Activating logical volumesvgchange -ay
----snip---
3. CD Burners and Linux
Hardware detection
The tools available on the commandline to burn CDs assume that the CD writer is a SCSIdevice. However most cheaper CD burner are IDE devices and we need a ide-scsi.omodule to drive the CD burner device.
If you run cdrecord with the -scanbus option you will see that the tool is looking for a SCSIdevice.
If the CD burner is attached as a secondary master (./dev/hdc) then the following entry in
/etc/modules.conf will enable the ide-sci module for this device :
/etc/modules.conf (from the CD-Writing HOWTO)options ide-scsi=/dev/hdboptions ide-cd ignore=hdbalias scd0 sr_modpre-install sg modprobe ide-scsi # load ide-scsi before sgpre-install sr_mod modprobe ide-scsi # load ide-scsi before sr_modpre-install ide-scsi modprobe ide-cd # load ide-cd before ide-scsi
The device will be seen as /dev/scd0 and can be added to /etc/fstab with it's own mountpoint.
The following command shows that the hardware has been correctly detected:
45

LinuxIT Technical Training Centre
Hardware and Software Configuration
___________________________________________________________________
cdrecord -scanbusCdrecord 2.0 (i686-pc-linux-gnu) Copyright (C) 1995-2002 Jrg SchillingLinux sg driver version: 3.1.24Using libscg version 'schily-0.7'cdrecord: Warning: using inofficial libscg transport code version (schily - RedHat-scsi-linux-sg.c-1.75-RH '@(#)scsi-linux-sg.c 1.75 02/10/21 Copyright1997 J. Schilling').scsibus0: 0,0,0 0) 'PHILIPS ' 'CDRW48A ' 'P1.3' Removable CD-ROM 0,1,0 1) * 0,2,0 2) * 0,3,0 3) * 0,4,0 4) * 0,5,0 5) * 0,6,0 6) * 0,7,0 7) *
Iso9660 Filesystem and burning CDs
Store all the data that need to be copied in a separated directory (e.g backups/). We nextneed to create an isoimage of this directory as follows:
mkisofs -o baskups-image.iso backups/
Check the image file by mounting it as a loop device:
mount -o loop backups-image.iso /mnt
ls /mnt
umount /mnt
Finally, burn the CD with cdrecord. From the output of cdrecord -scanbus on theprevious page we see that the CD writer device is seen as dev=0,0,0 so we type:
cdrecord -v dev=0,0,0 backups-image.iso
Copying Bootable CDs
This is useful for example when copying the first disk for a Linux distribution.
46

LinuxIT Technical Training Centre
Hardware and Software Configuration
___________________________________________________________________
Put the bootable CD into the CDROM tray. Do not mount the disk! Then type:
dd if=/dev/cdrom of=distro-inst1.iso
Once this is done you can update the image with rsync before burning it, this will fix datacorruptions that could have been copied from the CD:
rsync -av ftp.somesite.org::/path-to-iso/distro-inst1.iso .
5. Configuring PCMCIA Devices
The cardmgr utility monitors the PCMCIA slots. It will scan the /proc/devices file searchingfor the pcmcia entry. If this entry isn't there then cardmgr will exit.
In order to get the kernel to write an entry into /proc/devices it is necessary to load therelevant modules. Only once kernel support is enabled will cardmgr work properly. Themodule names are kept in the following configuration files:
For RedHat like distributions: /etc/sysconfig/pcmcia
For Debian like distributions: /etc/pcmcia.conf
The main module is called pcmcia_core and uses two other modules called yenta_socketand ds.
One can start cardmgr on the commandline after having inserted the above kernel modules
modprobe pcmcia_core
modprobe yenta_socket
modprobe ds
cardmgr
cardmgr[18772]: watching 2 sockets
But it is best to use the rc-script provided with the pcmcia-cs package:
47

LinuxIT Technical Training Centre
Hardware and Software Configuration
___________________________________________________________________
/etc/rc.d/init.d/pcmcia restart
The configuration file with a database of possible devices (e.g modems, wireless networkinterfaces, memory cards ...) is called /etc/pcmcia/config.
To get infornation about your pcmcia card use the cardctl utility. Put the card into the pcmciaslot and run:
cardctl info
....snip....
PRODID_1="Xircom"
PRODID_2="CardBus Ethernet 10/100 + Modem 56"
PRODID_3="CBEM56G"
....snip....
We can check that this card is listed in /etc/pcmcia/config. The next table shows theinformation relevant to this card, in particular the xircom_cb module needed.
/etc/pcmcia/config – section relevent to scanned card
card "Xircom CBEM56G-100 CardBus 10/100 Ethernet + 56K Modem"
version "Xircom", "*", "CBEM56G"
bind "xircom_cb" to 0
48
LinuxIT Technical Training Centre
File and Service Sharing
___________________________________________________________________
File and Service Sharing
This module covers SAMBA and NFS. The objectives state a few specific implementationssuch as file servers and printer shares.
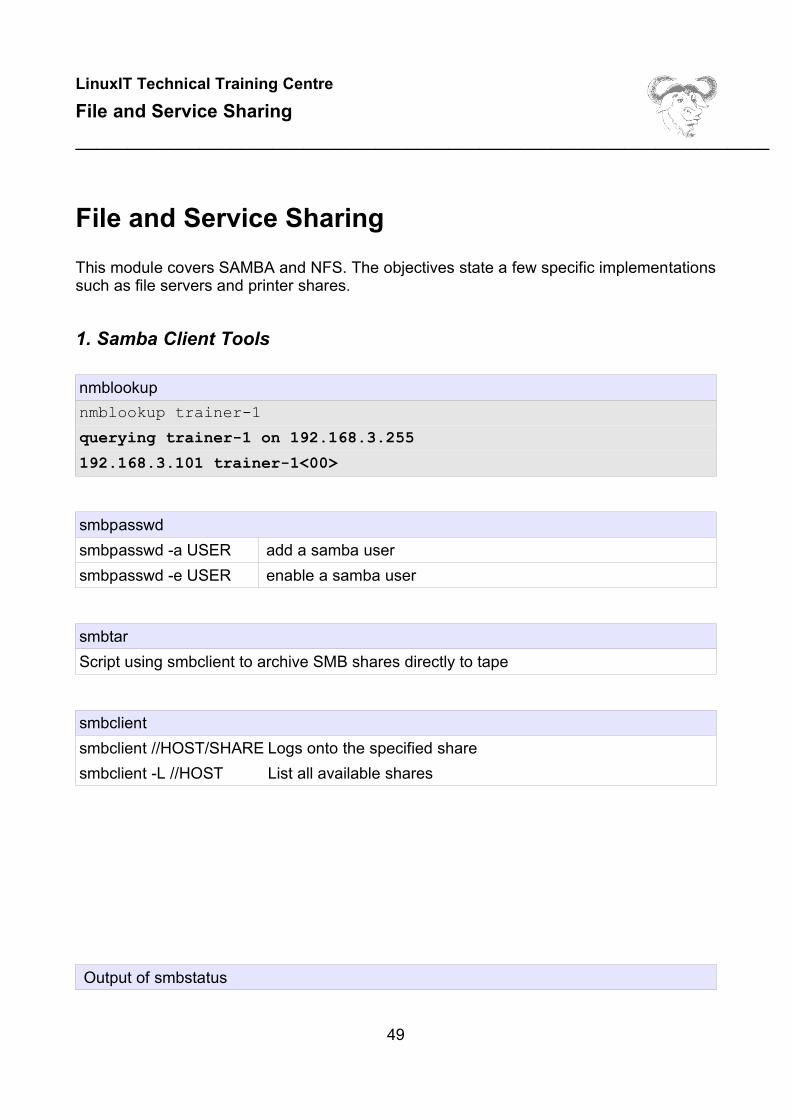
1. Samba Client Tools
nmblookup
nmblookup trainer-1
querying trainer-1 on 192.168.3.255
192.168.3.101 trainer-1<00>
smbpasswd
smbpasswd -a USER add a samba user
smbpasswd -e USER enable a samba user
smbtar
Script using smbclient to archive SMB shares directly to tape
smbclient
smbclient //HOST/SHARE Logs onto the specified share
smbclient -L //HOST List all available shares
Output of smbstatus
49

LinuxIT Technical Training Centre
File and Service Sharing
___________________________________________________________________
Samba version 2.2.7a-security-rollup-fix
Service uid gid pid machine
----------------------------------------------
dean dean dean 3106 trainer-1 (192.168.3.101) Mon Nov 26 13:34:54 2003
IPC$ nobody nogroup 3106 trainer-1 (192.168.3.101) Mon Nov 26 13:34:45 2003
IPC$ nobody nogroup 3106 trainer-1 (192.168.3.101) Mon Nov 26 13:34:53 2003
dean dean dean 3106 trainer-1 (192.168.3.101) Mon Nov 26 13:35:14 2003
netlogon dean dean 3106 trainer-1 (192.168.3.101) Mon Nov 26 13:34:54 2003
public nobody nogroup 3145 drakelap (192.168.3.100) Mon Nov 26 13:35:34 2003
IPC$ nobody nogroup 3106 trainer-1 (192.168.3.101) Mon Nov 26 13:34:54 2003
No locked files
2. Configuring a SAMBA server
The SAMBA server configuration file smb.conf is usually in /etc/samba/. Within the'[global]' options, parameters such as the 'WORKGROUP = ' can be set.
The SAMBA server uses two daemons called nmbd and smbd implementing NMB andSMB services respectively. Both daemons are started with the single rc-script:
/etc/rc.d/init.d/smb start
The LanManager host file lmhosts
This file is usually in the same directory as the smb.conf file and is read by nmbd toresolve netBIOS hostnames. The file content is similar to /etc/hosts:
10.0.0.20 accounts
Shared Directories
We will define one share called 'readshare' which is readable and another called 'rw-share' which has read-write permissions but is only accessible for user 'tux':
The smb.conf options
50
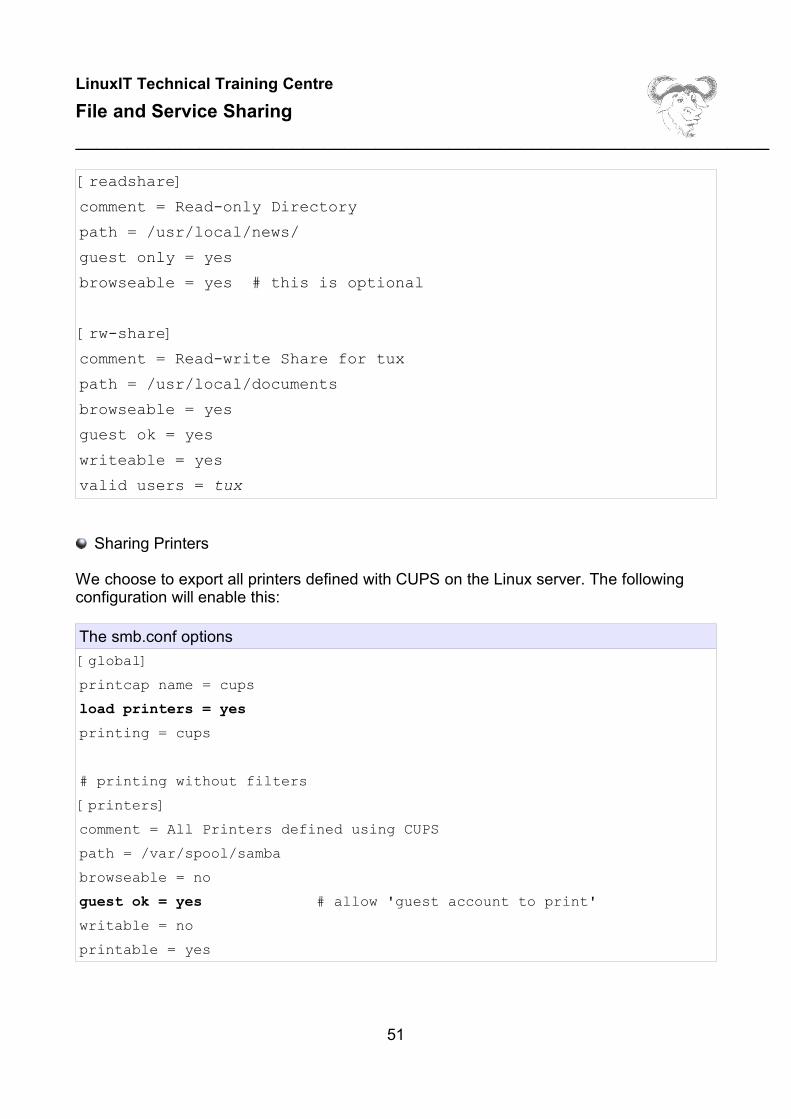
LinuxIT Technical Training Centre
File and Service Sharing
___________________________________________________________________
[readshare]
comment = Read-only Directory
path = /usr/local/news/
guest only = yes
browseable = yes # this is optional
[rw-share]
comment = Read-write Share for tux
path = /usr/local/documents
browseable = yes
guest ok = yes
writeable = yes
valid users = tux
Sharing Printers
We choose to export all printers defined with CUPS on the Linux server. The followingconfiguration will enable this:
The smb.conf options
[global]
printcap name = cups
load printers = yes
printing = cups
# printing without filters
[printers]
comment = All Printers defined using CUPS
path = /var/spool/samba
browseable = no
guest ok = yes # allow 'guest account to print'
writable = no
printable = yes
51

LinuxIT Technical Training Centre
File and Service Sharing
___________________________________________________________________
create mode = 0700# printer drivers must be on the client sideprint command = lpr-cups -P %p -o raw %s -r
Implementing WINS with Samba?
On a NetBIOS network machine names are resolved using “Windows information networkservices” or WINS. Clients can either use broadcasts to query host names or be configured to use a WINSserver. This server reduces the amount of traffic on the network due to broadcasts. SAMBA as a WINS serverTo enable WINS in SAMBA the following option is set in smb.conf
wins support = yes
Windows clients can then be configured to use the SAMBA server as a WINS server.
Second WINS serverA NetBIOS network generally only has one WINS server. If a second server is configuredthen the servers should be able to synchronise their host information. One can configureSAMBA to register on an existing network as a second WINS server by giving it theaddress of this server with the option:
wins server = <existing wins server>
NOTICE
The options 'wins support' and 'wins server' are mutually exclusive.The 'wins server' option registers the SAMBA server with an existing WINS serverand enables WINS capabilities, there is no need to set 'wins support' as well.
Samba server as a Domain Controller
Options selected in /etc/samba/smb.conf:
security = users
domain master = yes
local master
52

LinuxIT Technical Training Centre
File and Service Sharing
___________________________________________________________________
preferred master = yes
domain logon = yes
[netlogon]
path=/var/lib/samba/netlogon
writable = no
public = no
Notice: You don't need to have a logon script. This netlogon share is something theWindows client needs to connect to even if it is empty
2. Configuring an NFS server
The NFS server runs the following daemons:
rpc.nfsdrpc.mountd
These services are started with the nfs sevice:
/etc/init.d/nfs start/stop/status/restart/reload
In addition rpc.statd is used to notify the client when the NFS service is unexpectedlyinterrupted, and rpc.lockd allows clients to lock files accessed on the server.
These services are started with the nfslock service:
/etc/init.d/nfslock start/stop/status/restart
Programs using remote procedure calls (RPC) use specific program numbers listed in /etc/rpc. When a RPC service is started it will tell portmap which port number it is using aswell as its program number.
It is necessary for portmap to be running before starting any NFS service
RPC clients connect to the portmap service, although it is possible to work aroundportmap if the RPC program number is known.
53
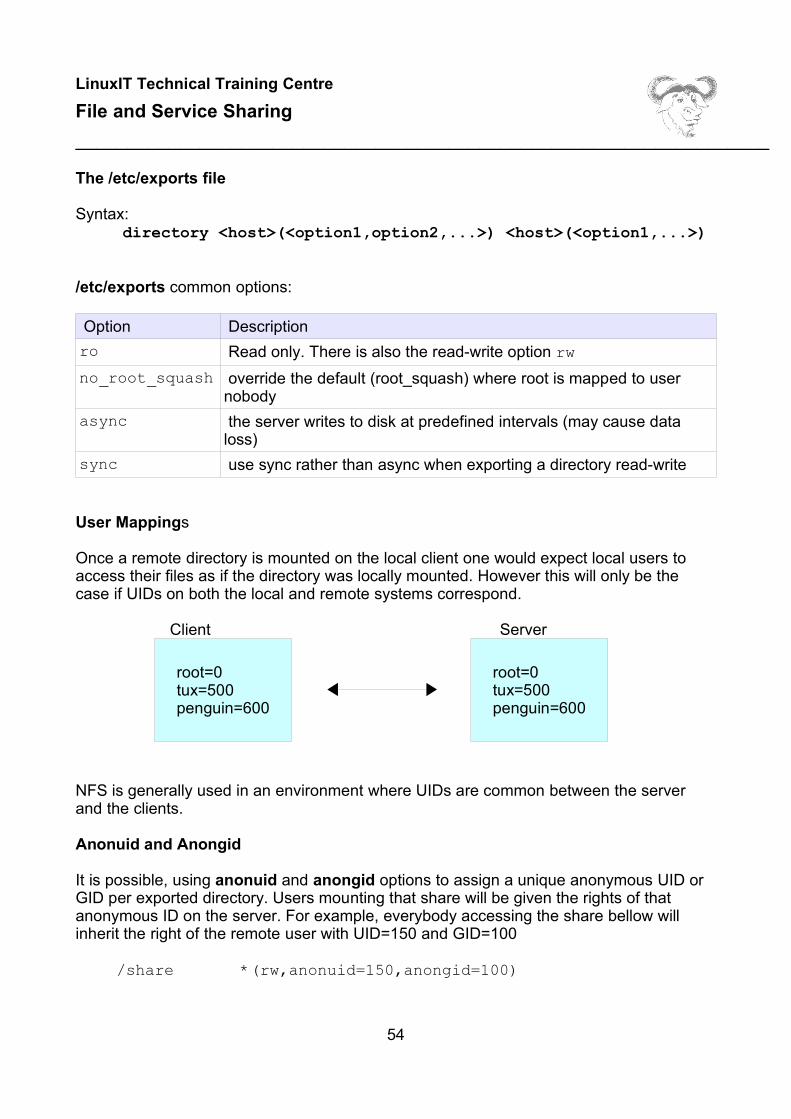
LinuxIT Technical Training Centre
File and Service Sharing
___________________________________________________________________
The /etc/exports file
Syntax:directory <host>(<option1,option2,...>) <host>(<option1,...>)
/etc/exports common options:
Option Description
ro Read only. There is also the read-write option rw
no_root_squash override the default (root_squash) where root is mapped to usernobody
async the server writes to disk at predefined intervals (may cause dataloss)
sync use sync rather than async when exporting a directory read-write
User Mappings
Once a remote directory is mounted on the local client one would expect local users toaccess their files as if the directory was locally mounted. However this will only be thecase if UIDs on both the local and remote systems correspond.
Client Server
NFS is generally used in an environment where UIDs are common between the serverand the clients.
Anonuid and Anongid
It is possible, using anonuid and anongid options to assign a unique anonymous UID orGID per exported directory. Users mounting that share will be given the rights of thatanonymous ID on the server. For example, everybody accessing the share bellow willinherit the right of the remote user with UID=150 and GID=100
/share *(rw,anonuid=150,anongid=100)
54
root=0tux=500penguin=600
root=0tux=500penguin=600

LinuxIT Technical Training Centre
File and Service Sharing
___________________________________________________________________
Root Squashing
By default the root user on the client system will be mapped to the user nobody on theserver. This option is disabled in /etc/exports with the no_root_squash option
Client Server
Finally, it is possible to map all users from any client to the user nobody with theall_squash option.
TCPwrappers
The portmap tool has been compiled with libwrap giving us the option to control accessthrough /etc/hosts.allow and /etc/hosts.deny.
strings `which portmap ` |grep hosts.allow
Using exportfs and nfsstat
The exportfs command with no arguments will show all exported directories.
exportfs options-r re-read /etc/exports and export all directories listed-u unexport all shares (until exportfs -r is called)-a applies to all exports-o specify directories not listed in /etc/exports
The nfsstat displays statistics about NFS server and client activity. The information isread from two files:
/proc/net/rpc/nfs contains information about NFS client activity/proc/net/rpc/nfsd contains information about the NFS server
nfsstat options-s show only server statistics
55
rootUID=0GID=0
UID=65534GID=65534

LinuxIT Technical Training Centre
File and Service Sharing
___________________________________________________________________
-c shpw only client statistics-n print NFS statistics only-r print RPC statistics only-o print statistics for specific utility (nfs,rpc,net,fh,rc)
3. Setting up an NFS Client
Mount optionssoft When a major timeout happens send the calling program an I/O error, rather
than retry indefinitely.hard When a major timeout happens, report “server not responding” and continues
to reconnect indefinitely unless the intr option is also specifiedbg If the first mount fails retry subsequent mounts in the background (default is
fg)intr Allows NFS requests to be interruptednolock Sometimes needed with older NFS serversrsize=nwsize=n
Set communication block sizes for read and write. The default is 1024 bytes.On a clear network the speed may be improved by setting n to 8192
ERRORS Possible causemount: RPC: Program not registered The remote NFS server is not
runningmount: IP:share failed, reason given by server:Permission denied
Wrong directory
The showmount tool can view NFS shares available on a remote host. The main optionsare:
showmount -a server lists client IP and directory mounted
showmount -e server lists the content of /etc/exports from the server
showmount -d server lists only the exported directories on the server
56
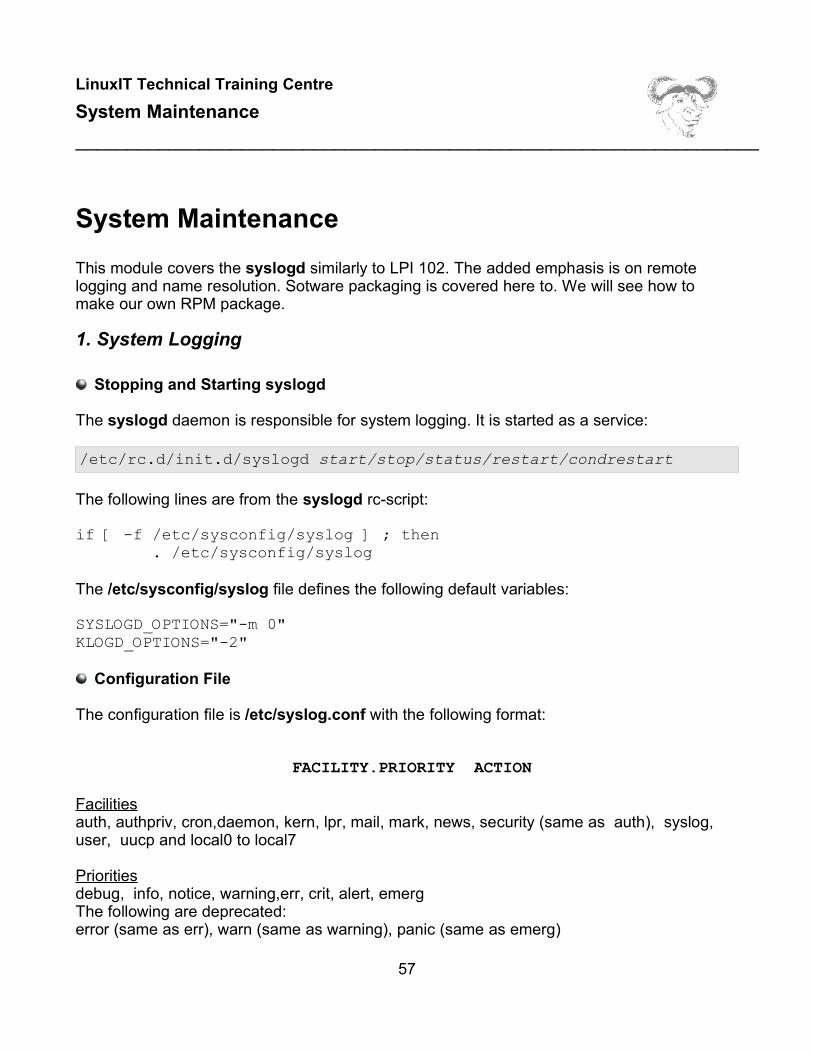
LinuxIT Technical Training Centre
System Maintenance
__________________________________________________________________
System Maintenance
This module covers the syslogd similarly to LPI 102. The added emphasis is on remotelogging and name resolution. Sotware packaging is covered here to. We will see how tomake our own RPM package.
1. System Logging
Stopping and Starting syslogd
The syslogd daemon is responsible for system logging. It is started as a service:
/etc/rc.d/init.d/syslogd start/stop/status/restart/condrestart
The following lines are from the syslogd rc-script:
if [ -f /etc/sysconfig/syslog ] ; then . /etc/sysconfig/syslog
The /etc/sysconfig/syslog file defines the following default variables:
SYSLOGD_OPTIONS="-m 0"KLOGD_OPTIONS="-2"
Configuration File
The configuration file is /etc/syslog.conf with the following format:
FACILITY.PRIORITY ACTION
Facilities auth, authpriv, cron,daemon, kern, lpr, mail, mark, news, security (same as auth), syslog,user, uucp and local0 to local7 Prioritiesdebug, info, notice, warning,err, crit, alert, emergThe following are deprecated: error (same as err), warn (same as warning), panic (same as emerg)
57
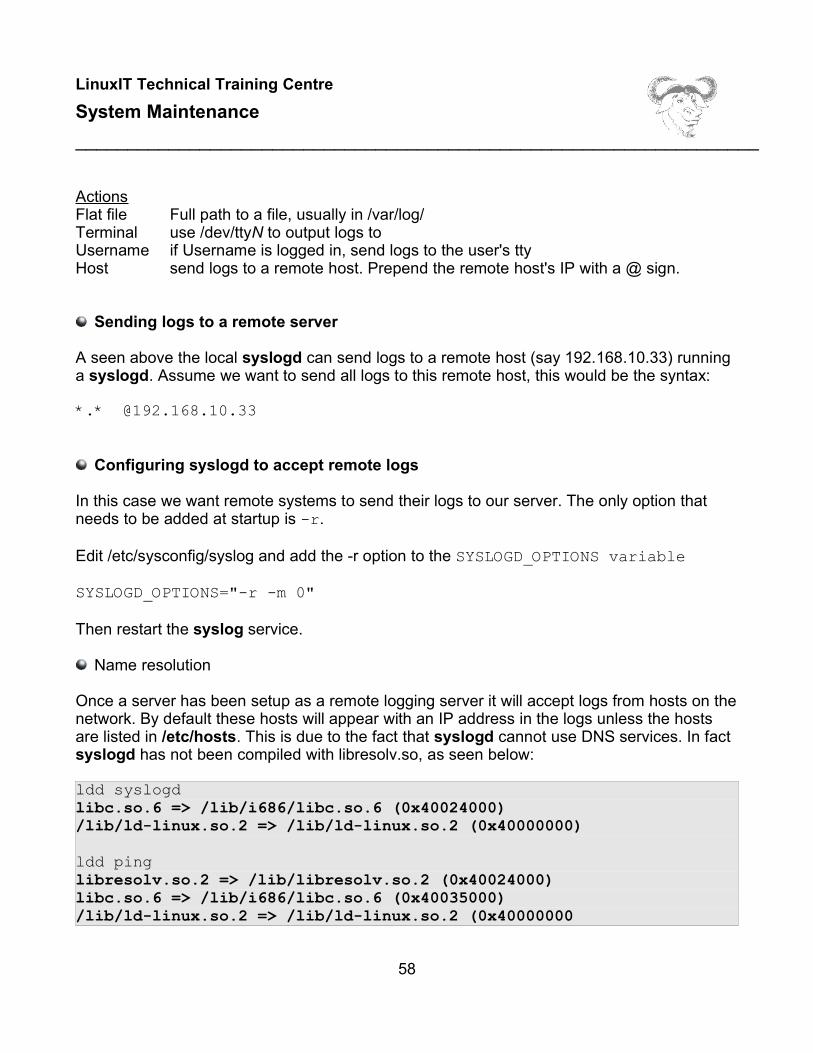
LinuxIT Technical Training Centre
System Maintenance
__________________________________________________________________
ActionsFlat file Full path to a file, usually in /var/log/Terminal use /dev/ttyN to output logs toUsername if Username is logged in, send logs to the user's tty Host send logs to a remote host. Prepend the remote host's IP with a @ sign.
Sending logs to a remote server
A seen above the local syslogd can send logs to a remote host (say 192.168.10.33) runninga syslogd. Assume we want to send all logs to this remote host, this would be the syntax:
*.* @192.168.10.33
Configuring syslogd to accept remote logs
In this case we want remote systems to send their logs to our server. The only option thatneeds to be added at startup is -r.
Edit /etc/sysconfig/syslog and add the -r option to the SYSLOGD_OPTIONS variable
SYSLOGD_OPTIONS="-r -m 0"
Then restart the syslog service.
Name resolution
Once a server has been setup as a remote logging server it will accept logs from hosts on thenetwork. By default these hosts will appear with an IP address in the logs unless the hostsare listed in /etc/hosts. This is due to the fact that syslogd cannot use DNS services. In factsyslogd has not been compiled with libresolv.so, as seen below:
ldd syslogdlibc.so.6 => /lib/i686/libc.so.6 (0x40024000)/lib/ld-linux.so.2 => /lib/ld-linux.so.2 (0x40000000)
ldd pinglibresolv.so.2 => /lib/libresolv.so.2 (0x40024000)libc.so.6 => /lib/i686/libc.so.6 (0x40035000)/lib/ld-linux.so.2 => /lib/ld-linux.so.2 (0x40000000
58

LinuxIT Technical Training Centre
System Maintenance
__________________________________________________________________
2. Packaging Software
Here is an overview of the specfile and its sections
Desciption Summary A summary of what the package provides Name Name of the package Version Package version Release Package release Copyright Copyright agreement under which the package is released Group The package group (Amusement, Documentation ...) Source Path to the archive containing source and files BuildRoot Path to the temporary (fake) root filesystem
Macros and Section%define Define a variable that can be referenced later in the SPEC file%description Paragraph type description for the package (usually longer than Summary
%prep The preparation section, includes unpacking the source archive and patching%setup Unpack the source archive%patch Apply patches if needed
%build The build section, includes commands to run in the BUILD directory andexecute the next commands (make, ...)
%install The install section, includes command to copy files from the BUILD directoryto the fake $RPM_BUILD_ROOT directory
%clean Delete all files in $RPM_BUILD_ROOT
%files List of files in the package%doc List which files are part of the documentation %config List which files are configuration files
59

LinuxIT Technical Training Centre
System Maintenance
__________________________________________________________________
Example: Copy fstab to /tmp/etc/fstab
We can build a simple RPM package that installs an fstab file into /tmp/etc/. The spec file willlook like this:
#This is the Header sectionSummary: Installs a fstab file to /tmp/etc%define name tmp-fstab%define version 0.2%define release 1Name: %{name}Version: %{version}Release: %{release}Copyright: Freely distributableGroup: DocumentationSource: %{name}-%{version}.tar.gzPackager: Adrian Thomasset <[email protected]>
#The BuildRoot directory is a temporary replacement for root (/) while the package is being built.BuildRoot: /var/tmp/rpm-%{name}/
%descriptionThis package copies a file called fstab to /tmp/etc/
%prep#The %setup macro simply opens the archived files from SOURCES into BUILD and changes #directory to it(/../../BUILD/%{name}-%{version}/ %setup
#All the work is done here: $RPM_BUILD_ROOT is a reference to the variable defined using the %BuildRootcommand earlier %install
rm -rf $RPM_BUILD_ROOTmkdir -p $RPM_BUILD_ROOT/tmp/etc/install -m 644 fstab $RPM_BUILD_ROOT/tmp/etc/fstab
%clean rm -rf $RPM_BUILD_ROOT#Define which files must be copied to the binary RPM package. The $RPM_BUILD_ROOT is #taken as the rootdirectory%files /tmp/etc/fstab%defattr(-,adrian,adrian)
60

LinuxIT Technical Training Centre
System Maintenance
__________________________________________________________________
All that is left to do is to prepare the source. In this case we need to create a directory calledtmp-fstab-0.2 containing fstab. Notice that the name and the version correspond to the nameand version defined in the SPEC file
mkdir tmp-fstab-0.2
cp /etc/fstab tmp-fstab-0.2/
Next we archive the directory and copy this to the SOURCES directory
tar cvzf tmp-fstab-0.2.tar.gz tmp-fstab/
cp tmp-fstab-0.2.tar.gz /path/to/SOURCES/
61

LinuxIT Technical Training Centre
System Automation
___________________________________________________________________
System Automation
This module covers most scripting objectives for LPI 201. You do not need to learn a newlanguage such as perl or bash. All that is expected is to accurately describe what a script isdoing. Knowing the exact syntax for a specific scripting language is not expected.
The best way to train for this is to go through a few examples. For this we will implement thesuggested automated tasks in the LPI objectives.
1. Writing simple perl scripts (using modules)
The online documentation for perl is contained in the perldoc package. The man pages aresplit into sections. For example the perlintro section can be accessed with:
man perlintro
or
perldoc perlintro
Here is a summary of this perldoc.
Perl scripts must be readable and executable. The first line of the script must point to theinterpreter.For example if which perl returns /usr/bin/perl, then the first line in a script shouldbe:#!/usr/bin/perl
There are three variable types which can be declared and referenced as in the followingscript:
# Scalars my $VARIABLE = “value”; #declare VARIABLE print (“$VARIABLE \n”); #print VARIABLE
62
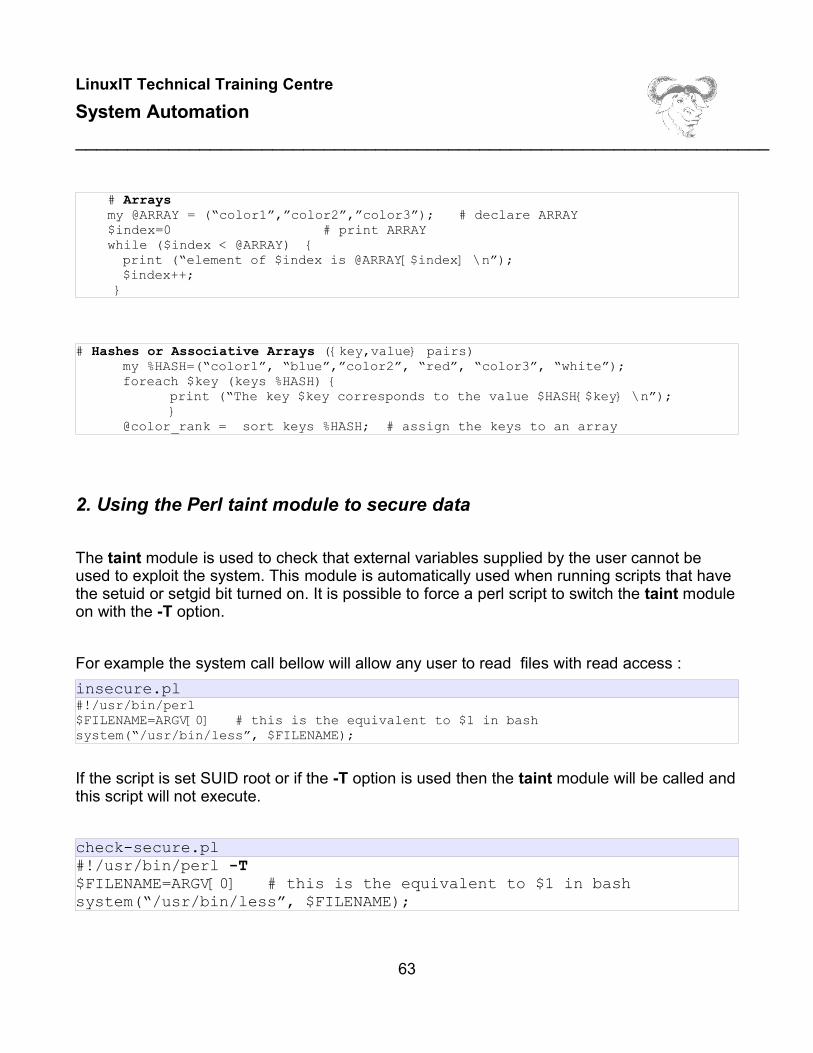
LinuxIT Technical Training Centre
System Automation
___________________________________________________________________
# Arrays my @ARRAY = (“color1”,”color2”,”color3”); # declare ARRAY $index=0 # print ARRAY while ($index < @ARRAY) {
print (“element of $index is @ARRAY[$index] \n”);$index++;
}
# Hashes or Associative Arrays ({key,value} pairs)my %HASH=(“color1”, “blue”,”color2”, “red”, “color3”, “white”);foreach $key (keys %HASH) {
print (“The key $key corresponds to the value $HASH{$key} \n”); }
@color_rank = sort keys %HASH; # assign the keys to an array
2. Using the Perl taint module to secure data
The taint module is used to check that external variables supplied by the user cannot beused to exploit the system. This module is automatically used when running scripts that havethe setuid or setgid bit turned on. It is possible to force a perl script to switch the taint moduleon with the -T option.
For example the system call bellow will allow any user to read files with read access :
insecure.pl#!/usr/bin/perl$FILENAME=ARGV[0] # this is the equivalent to $1 in bashsystem(“/usr/bin/less”, $FILENAME);
If the script is set SUID root or if the -T option is used then the taint module will be called andthis script will not execute.
check-secure.pl#!/usr/bin/perl -T$FILENAME=ARGV[0] # this is the equivalent to $1 in bashsystem(“/usr/bin/less”, $FILENAME);
63

LinuxIT Technical Training Centre
System Automation
___________________________________________________________________
In fact the check-secure.pl script isn't secure, it simply won't run with SUID root or the -Toption. Here is a version of insecure.pl which works around the taint mechanism and is VERYINSECURE !!
if (open (FILE,"$FILENAME")) { $line = <FILE>; while ($line ne "") { print ($line); $line = <FILE>; }}
3. Installing Perl modules (CPAN)
Read the following perldoc pages for information on perl modules
man perlmod
A set of specific functions such as file or array manipulations can be written as modules andimported into new scripts with the directive:
use module
The modules can be downloaded from www.cpan.org and build as follows:
Unpack the archive and type
perl Makefile.plmake make testmake install
This can also be done with the commandline
64

LinuxIT Technical Training Centre
System Automation
___________________________________________________________________
perl -MCPAN -e “install MODULENAME”
Modules are installed in subdirectories of /usr/lib/perl. One can check if a specific module isinstalled with:
perl -MMODULENAME -e 1
For an example application using perl modules see the Appendix.
4. Check for process execution
Searching through the output of ps for a process using grep will sometimes return a positivestatus even though the process is not running!
This is due to the fact that the grep process itself is sometimes printed out by ps. As in theexample below:
ps au|grep junkroot 13643 0.0 0.2 1724 600 pts/1 S 11:22 0:00 grep junk
Needless to say, there aren't any pre-installed tools called junk in general, so the above linewould return a positive evaluation in a script!
There is a work around for this problem.
Use pgrep
This tool will search the output of ps for the PIDs of all processes that match the searchcriteria. For example:
ps aux | pgrep -u root httpd
65

LinuxIT Technical Training Centre
System Automation
___________________________________________________________________
will match all httpd processes run by user root. One can also use pgrep like grep with asingle keyword.
Use |grep -v grep
By piping the output of ps into grep -v grep one can prevent grep from matching itself. Thiswill not work however if the process you are monitoring contains the string grep.
ps aux | grep smbd | grep -v grep
5. Monitor Processes and generate alerts
This objective gives us the opportunity to use bash's control flow capabilities to makedecisions when checking for the status of a given process.
Say we want to check that the smbd daemon is running, then restart it and send a messageif it is stoped and do nothing if it is still running. The following script will do this:
#!/bin/bashPROCESS=smbif ps aux | grep "$PROCESS" | grep -v grep >/dev/null ; then echo Process $PROCESS is runningelse echo Process $PROCESS is stopped – Restarting it ... /etc/rc.d/init.d/smb start > /dev/nullfi
Checking the response from a host using ping
#!/bin/bashwhile (true)do
#get the times from 10 ping outputs x=$(ping -c 10 $1 | cut -d"=" -f4 | tail +2|head | sed "s/ms//")
#loop through the times to check which ones are longer than 14ms
66

LinuxIT Technical Training Centre
System Automation
___________________________________________________________________
for times in $x do dectimes=$(echo $times | cut -d. -f1) # get an integer if [ $(($dectimes-14)) -gt 0 ]; then echo Time exceeded 14ms: $times fi donedone
Schedule scripts that parse log files and email them
We can use a perl script to run last in order to read /var/run/utmp and get it to search for thestring still which will match all logged users and mail the line to root.
#!/usr/bin/perl
$LOGFILE="/tmp/lastlog";$line="0";system("last> $LOGFILE");
open (MAIL, "| mail root");
if (open (FILE,"$LOGFILE")) { while ($line ne "") { $line=<FILE>; if ($line =~ still) { print MAIL $line; } }}
close MAIL;
If this script needs to run every hour and it is called /usr/bin/last-log.pl, then you can create asymbolic link in /etc/cron.hourly pointing to it.
Monitor changed files and generate email alert
A 128-bit fingerprint (or “message-digest) for a file can be computed with md5sum.
67

LinuxIT Technical Training Centre
System Automation
___________________________________________________________________
The foillowing script will check the MD5 checksums for all the files in /etc and compare theoutput from each run with diff. If there are any differences the changed files are mailed touser root
#!/bin/bashtouch /tmp/md5oldtouch /tmp/md5newmv /tmp/md5new /tmp/md5old
for files in $(find /etc -type f ) do md5sum $files >> /tmp/md5newdone x=$(diff /tmp/md5old /tmp/md5new)
if [ -z "$x" ]; then breakelse echo $x |mail rootfi
Notice that the first time you run this script all the files will be seen as changed!
Checking valid MD5 fingerprints can be done from the STDIN or from a list of pre-computedsums using md5sum -c (--check). We first compute these sums with
find /etc -type f | xargs md5sum > etc-md5.dat
We next pass the content of etc-md5.dat to md5sum -c.
If for example we delete a few blank lines in /etc/sysctl.conf we can see that something haschanged with:
md5sum -c etc-md5.dat | grep -v OK
/etc/sysctl.conf: FAILED
md5sum: WARNING: 1 of 1906 computed checksums did NOT match
68
LinuxIT Technical Training Centre
System Automation
___________________________________________________________________
Write a script that notifies administrators when somebody logs in or out
It may not be a good idea to mail all this information but it is possible to gather it and possiblyformat it using XML or HTML.
Here we read from a list of users we wish to monitor /etc/checks and send an email as soonas they are logged in.
This can run through a cron every minute. This does imply that when somebody from the listis logged in, an email every minute would be sent!
#!/bin/bashfor luser in $(cat /etc/checks) do x=$(last |grep $luser|grep still) if [ -n "$x" ]; then echo User $luser is logged in | mail root; fi done
6. Using rsync
Rsync works like an optimised rcp or scp command. It will copy to the destination directoryonly the files that are missing or have been changed in the source directory. Even withchanged files rsync will send only the difference between the two files.
The syntaxes are:
rsync SRC HOST:/DEST
rsync HOST:/SRC DEST
One can change the value of the remote shell variable RSYNC_RSH used by rsync :
export RSYNC_RSH=ssh
69

LinuxIT Technical Training Centre
System Automation
___________________________________________________________________
Here is an example script using rsync to keep “Fedora Updates” updated on the local server:
#!/bin/sh
cd /var/ftp/pub/updates/fedora
(dateechoecho "=== Sync Files ==="rsync -vaz --delete --delete-excluded --exclude="*/debug/*" rsync://rsync.mirror.ac.uk:873/download.fedora.redhat.com/pub/fedora/linux/core/updates/1/ linux/core/updates/1/ 2>&1echo "=== Sync Files Done ==="echodate) | mail -s "Fedora Updates Sync Results" [email protected]
70

LinuxIT Technical Training Centre
System Automation
___________________________________________________________________
71

LinuxIT Technical Training Centre
AppendixA
__________________________________________________________________
AppendixA
Example Perl Module:
The Spreadsheet::WriteExcel perl module can generate spreadsheet files.This module is dependent on the Parse::RecDescent module. So we need the followingmodule sources:
Parse-RecDescent-1.94.tar.gzSpreadsheet-WriteExcel-0.42.tar.gz
Extract the archives and run perl Makefile.PL
make
make test
make install
Then try the following test script:
#!/usr/bin/perl -w
#
use strict;
use Spreadsheet::WriteExcel;
# vars
my($workbook,$worksheet,$format,$col,$row);
# Create a new Excel workbook
$workbook = Spreadsheet::WriteExcel->new("perl.xls");
# Add a worksheet
$worksheet = $workbook->add_worksheet();
72

LinuxIT Technical Training Centre
AppendixA
__________________________________________________________________
# Add and define a format
$format = $workbook->add_format(); # Add a format
$format->set_bold();
$format->set_color('red');
$format->set_align('center');
# Write a formatted and unformatted string, row and column notation.
$col = $row = 0;
$worksheet->write($row, $col, "Hi Excel!", $format);
$worksheet->write(1, $col, "Hi Excel!");
# Write a number and a formula using A1 notation
$worksheet->write('A3', 1.2345);
$worksheet->write('A4', '=SIN(PI()/4)');
$workbook->close();
73