Embed Size (px)
Citation preview
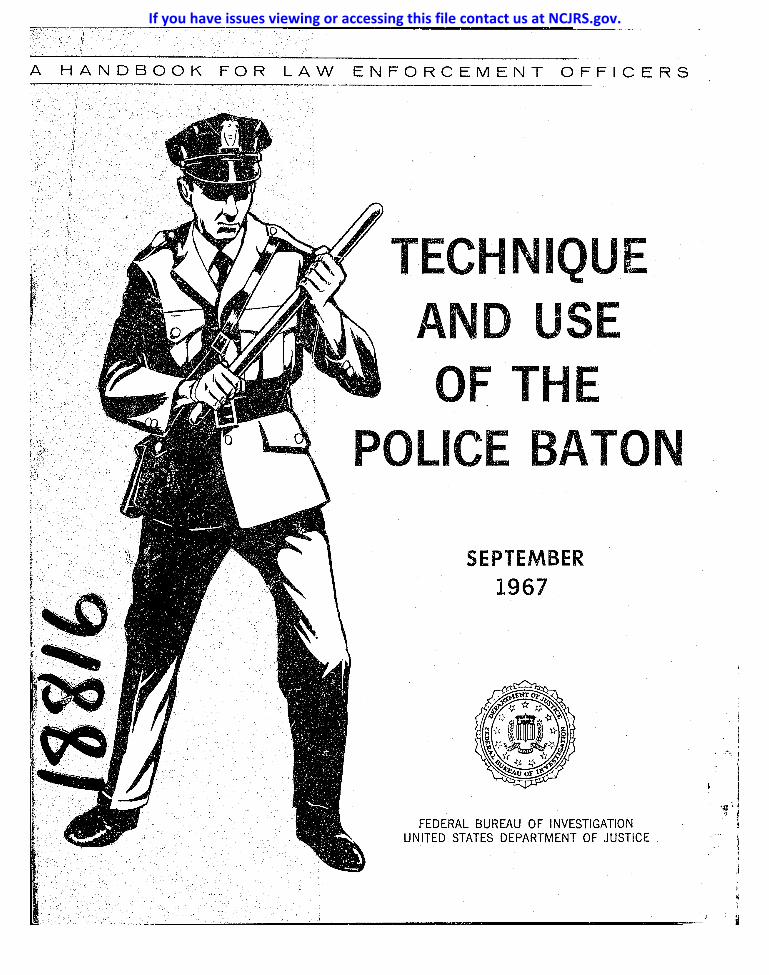
A HANDBOOK FOR LAW ENFORCEMENT OFFICERS
"
~., .. , .. ( "
,~ ". , ,
'I 11' 1, ,I
TECHNIQUE ,I\ND USE OF THE
POLICE BATON
SEPTEMBER 1967
FEDERAL BUREAU OF INVESTIGATION UNITED STATES DEPARTMENT OF JUSTICE
If you have issues viewing or accessing this file contact us at NCJRS.gov.

/'
"/
"~--
I. INTRODUCTION
The police baton, in the hands of an officer who
has been trained in its use, is a very formidable weapon
for defense and counterattack. Many law enforcement ,
officers share'the opinion that the baton, under most
circumstances, is a more versatile weapon than the officer's
revolver. It is recognized that there a~ a great many
situations in which a police officer would be justified in
using the baton, whereas he would not be justified in
using his revolver. 'l'he officer who is skilled and prac
ticed in using the baton can adequately cope with most
situations where physical force is necessary.
The officer who carries a baton as part of his
equipment must be trained to use it properly. This will
enable him to obtain the desired results when it is
necessary to use it, and at the same time avoid bringing
criticism upon himself or the agency he represents.
The purpose of this booklet is to present material
on the technique and use of the baton which meets the needs
of the police officer and yet is consistent with the
ethical standards of modern law enforcement.
A great deal of the information contained in
this manual is the result of consultations with numerous
police officers who have attended the FBI National Academy.
-1-

II. TYPES, NOMENCLATURE, FITTING THE THONG
A. J'ypes
The baton is made from hard wood or plastic. It
is 1 to 1 1/2" in diameter, rounded at both ends,
and will vary in length from 12 to 3611 •
1. Short baton (billy). -- This baton varies in
length from 12 to 18"·.
2. Medium baton (nightstick). This baton ranges
in length from 20 to 26t' , the most popular
length being 2411 • This .is the type of baton
frequently carried by the officer on the beat.
3. Long baton (riot stick). -- This baton ranges
in length from 28 to 36t~ and is used predomi
nately in the control of mobs and riots.
~: The techniques set forth in this booklet are intended
for the medium and/or long baton; however, many will also
apply to the short baton. Some of the techniques will not
apply to the short baton because of its rather limited
length.
-2-
B. Nomenclature (Medium Baton and/or Riot Stick)
~ ....... _____ iIP
\011---- BARREL
'Q)41k---- HOLE FOR THONG
\oItr- HANDLE (GROOVED)
!I
I "
Figure I
_l -3-
-------------_.----

c. Fitting the Thong
1. There should be a hole in the
baton located 6 to 81t from the
butt. One end of a leather thong
is threaded through the hole and
seoured with a strong knot.
(Figure 2).
2. The other end of the thong is
then threaded through the same
hole, but in the opposite direc
tion to adjust the length of the
thong to fit the officer!s hand.
(Figure 3).
3. To adjust the thong to fit the
hand, the loop is passed over
the thumb and across the back of
the hand with the baton hanging
do~~. The thong is then shortened
until the butt of the baton
touches the bottom of the hand.
(Figure 4).
4. After marking the proper length
of the thong, the free end of the
thong is fastened with a knot and
the remainder is cut off.
-4-
Figure 2
Figure 3
I Ii
Figure 4
~ II
jj
-~.
III. METHODS OF HOLDING, BLOCKING, AND STRIKING BLOWS
A. Control of Baton
1. Where to carry.--The baton should be carried
where it is easily accessible to the strong
hand. Many officers prefer to carry it -on
the same side as their revolver. The baton
should not be used in the weak hand in order
to reserve the strong hand for the revolver.
2. Control.--The officer must be continually
alert and have the baton under control at
all times. It should never be held in such
a manner that could enable a person to gain
control and use it against him. Alertness and
proper use of the baton insure complete
control.
-5-

B. The Long Grip
1. How to Hold. Place
the thong over the thumb
and across the back of
the hand with the baton
hanging downward. The
hand is then turned down-
ward and is closed on the
handle to grip baton.
(Figure 5).
The thumb can be
extended parallel to the
baton (Figure 6), or
curled do~m over the
index finger (Figure 7).
-6-
Figure 5
Figure 6
Figure 7
1 I
ALTERNATE METHOD.--Place the thong over
the thumb and across the front of the hand
with the baton hanging downward.
(Figure Sa).
With the left hand raise baton tip
upward causing thong to pass around
back of hand. (Figure 6a).
Place the fingers between baton handle
and thong and grasp handle.
(Figure 7a).
Figure 5a
Figure 6a
Figure 7a 11
! I)
~ _____ . _______ . __ -_7-____________ _

If gripped in either
manner, the thong aids
the officer in maintain-
ing his grip. However,
if an opponent should
seize the baton, the
officer can free himself
from the thong by merelY
relaxing the grip.
(Figure 8).
The thong should
never be looped around
the officer's wrist
because it would be
difficult to release
the baton should the
opponent succeed in
grabbing it.
(Figures 9 and 10).
-8-
Figure 8
Figure 9
Figure 10
!i ~ !l II n Ii ,I " ~1
11
II
I ~
2. The "On Guard l ! position. --Advance t~e right foot approxi
mately 12!1 and simultaneously pivot slightly on the ball
of the left foot. The knees should be slightly bent with
the weight equally distributed on the
balls of the feet. The right elbow
should be approximately 6" from the
body; the right hand should be held
"chest highlfj and the baton should be
pointed upward. (Figure 11).
NOTE: By reversing the feet and placing
the left hand on baton barrel, the officer
is f10n Guard!! for the Two-handed Grip.
(Page 23, Figure 45).
3. Footwork.--The general rule concerning
footwork is simply that the first
foot to move should be the foot near-
est the direction y.ou wish to go.
To advance from the !!on guard!!
position, move the right foot for
ward first and then bring up the
left. (Figure 12).
To retreat, move the left foot
to the rear first and then bring back
the right. (Figure 13).
-9-
Figure II
M ', .. '
Figure 12
t • /2"\ i I
\ ... !
Figure 13
. .........J....J _____________________ ------------------.j

To circle to the right,
move the right foot to the
right as you pivot on the
ball of the left foot.
(Figure 14).
To circle to the left,
move the right foot to the
left as you pivot on the ball
of the left foot. (Figure 15).
When necessary to move
sideward to the right, first
move the right foot to the right,
and then move the left.
(Figure 16).
To move sideward to the
left, first move the left foot
to the left, and then move the
right. (Figure 17).
-10-
.......... (Ot (~~/ ......
Figure 14
figure 15
, •
Figure 16 , •
Figure 11
4. How To Block Blows and
Kicks.
a. Against swinging
right - inside block.
(Fi.gure 18).
b. Against swinging
right outside
block or parry •
(F.igure 19).
c. Against swi.nging
left - inside block.
(Figure 20).
-11-
Figure 18
Figure 19
Figure 20

-------------- -----------------------~~--~~
d. Against swinging
left - outside
block or parry.
(Figure 21).
e. Against straight
left or right -
downward block
or parry.
(Figure 22).
f. Against right-foot
kiCk-downward
block. (Figure 23).
-12-
Figure 2'
Figure 22
Figure 23
g. Against left-foot kick -
downward block.
(Figure 24).
Figure 24
5. How to Strike Blows~-With the exception of the jab, all
blows should be short and snappy, utilizing the strength
of the wrist and forearm. Short, snappy biows can be
delivered quickly and accurately and are difficult to
block or parry. Also, the force of the blow can be more
easily regulated than full-swinging I1roundhouse l1 blows.
"Ro.lndhouse" blows, which use the entire arm,
should be avoided, because they are slow, inaccurate,
easily blucked, and make it practically impossible to
regulate the force of the blow.
-13-
. ______ ~ ____ ~ _____ ,~t":·
"

1 i
a. The Short Swing.-- Figure 25
This is a forehand blow
delivered sideward
or downward in a
short, snappy manner.
(Figures 25, 26, 27).
Figure 26
Figure 27 ,
-14-
I i
J
b. The Backswing.-
This blow is similar
to and delivered in
much the same manner
as the short swing
except it is a back-
han~ blow. (Figures
28 and 29).
An excellent procedure
for using this type blow
would be to feint a short
swing to the opponent's
head and strike a backswing
blow to his left or right
knee. (Figure 30).
-15-
Figure 28
Figure 29
Figure 30

c. The Jab.--This blow is de
livered by quickly extend
ing the baton forward
striking the opponent
with the tip. (Figure
31).
figure 31
The baton should be extended and returned
quickly to the "on guard" position. This permits
the officer to strike additional blows and makes
it difficult for the opponent to seize the baton.
O. Where to Strike Blows.--As a general rule, short-
swing and backswing blows &hould be directed to those
places on the body where bone is close to the skin,
excluding the head and face. Shortswing and back
swing blows can also be directed to the ~hick muscle
groups of the buttocks, thigh, and calf.
When jabbing with the baton, blows are delivered
to the soft tissue areas of the trunk and back.
-16-;
J
Blows to the head and face should be avoided
for the following reasons:
a. The opponent could be killed instead of merely
being brought under control. The officer has
no way of determining the thickness of his
opponent's skull. A blow to the head of one
opponent might kill him, whereas fue same blow
to the head of another could have little or
no effect.
b. The head is an elus~ve target and difficult to
c.
hit. Without moving his feet the opponent can
duck, bob, or slip ~he head causing the baton
to miss completely or to hit only a glancing
blow.
Most individuals believe the blows will be
aimed at the head; therefore, they will usually
raise the hands and arms in an effort to protect
the head.
-17-

d. Blows delivered to the
head place the baton in
a position which is vul
nerable to counterattack
or a disarming movement.
The opponent could very
well seize the baton.
The police officer
should have a thorough
knowledge of the vulner
able areas of the body
and avoid striking those
blows which produce death
or permanent injury.
Figures 32, 33, and
34 show vulnerable areas
of the body and possible
fatal points of impact.
7. When to use.--The long grip is
best employed when defending
against an opponent armed with
a knife, club, bottle, etc. This
grip should not be used in the
control of crowds or mobs.
-18-
POINTS OF IMPACT fRONT VIEW
Figure 32
POINTS OF IMPACT BAC~ VIEW
Figure 33
POSSIBLE FATAL POINTS OF IMPACl
Figure 34
c. The Short Grip
1. How to hold.--Place the thong
over the thumb and across the
front of the hand and then up
and across the back of the hand
as depicted in Figures Sa and
6a on page 7. Rotate the ba-
ton counterclockwise with the
left hand and place it beneath
and parallel to the right hand
with the handle pointing toward
the fingers. (Figure 35).
Grasp the baton by the upper
portion of the handle with
your index finger extended
downward on the handle.
Approximately 2 inches of the
butt end should extend beyond
the index finger. (Figure 36).
The baton barrel should be
held firmly against the under
side of the forearm. (Figure
37) •
-19-
Figure 35
Figure 36
Figure 31

2. The "On GuardVl position. --This
position is practically the
same as the lI,on guard" position
f.or the long grip.
B-2) page 9).
(See item
3. Footwork.--When using the
short grip the footwork is
the same as for the long
grip. (See item B-3, pages
9-10).
4. How to Parry and Block.-
When using the short grip,
the baton should be considered
to be Ilan extension of the
forearm. "
a. Against swinging right
inside block. (Figure 38).
b. Against swinging left
inside block. (Figure 39).
c. Against straight right
d,ownward block. (Figure 40).
-20 ....
FigIJre 38
Figure 39
Figure 40
If
~:
5. How to strike blows
a. The Jab.--Step forward with the
right foot as you extend the
right arm forward striking the
opponent with the butt end.
(Figure 41). After striking the
blow, return quickly to the "on
guard tt position.
b. The Short Swing.--Step forward
with the right foot; the extended
right index finger is placed around
the handle of the baton and the
right elbow is raised and pointed
i~ the direction of the opponent.
The blow is delivered by using the
wrist to flip the baton in a for
ward-sideward arc. (Figure 42).
Return the baton to the "on guard"
position for the short grip.
The short-swing blow can also
be delivered upward. (Figure 43).
The power for the short-swing
blow is derived primarily from the
wrist.
-21-
Figure 41
Figure 42
Figure 43

D.
6. When to use.--The short grip can be used while the
officer is questioning a person, such as a witness at
the scene of a crime or an individual who appears sus
picious. This grip can also be used when the officer
is working in a congested area or moving through a
crowd. The baton is protected better with the short
grip than the long grip.
The Two-Handed Gri£
1. How to hold.--The baton
is gripped in the right
hand in the same manner
as in the long grip.
(See Figures 5-10,
pages 6-8.) The
left hand grips the barrel
of the baton approximately
2 to 3" from the tip (or close Figure 44
enough to prevent a person from grasping it) with the
knuckles of the left hand turned downward. (Figure
44) .
An alternate method of gripping the baton is to
have the knuckles of the left hand turned upward.
This is a particularly effective grasp in crowd con
trol when it is necessary to hold a crowd from surging
forward or to push them back..
-22-
, I I
2. The t~On Guard tt Position.--
Advance the left foot approxi-
mately 12tt and simultaneously
pivot slightly on the ball of
the right foot. The knees
should be slightly bent with
the weight equally distributed
on the balls of the feet. The
baton is he Id approximate ly 6n
in front of the body at a 45-
degree angle with the long
axis of the body_ (Figure 45).
3. Footwork.--To advance ±rom the
lion guard" position, move the
left foot forward and then
bring up the right foot.
(Figure 46).
To retreat, move the· right
foot to the rear and then bring
back the left. (Figure 47).
-23-
Figure 45
/;') \ .. i r", ~ ..... '
f .. ;'j • t'~'/
, .. '
.1 Figure 46 ,
• l-\ .' 12 ; \.J i.::J
# ••••• )
i/' ...• :: ........ \ .. l
Figure 41
'"

----- ~-- -~C_ -- ~--~- ~- - -- --- - ----~~------.-,...-Il -Ii
To circle to the left,
mOlle the left foot to the
left as you pivot on the
right foot. (Figure 48).
To circle to the right,
move the left foot to the right
as you pivot on the right foot.
(Figure 49).
When necessary to move
sideward to the left, move the
left foot to the left and
then move the right. (Figure
50).
'ro move sideward to the
right, move the right foot to
the right and then move the
left. (Figure 51).
-24-
)
Figure 48
Figure 49
!,'1 ': ~ :' , i f
" : : '.~.:
Figure 50
t "
Figure 51
4. How to Parry and Block.--By
releasing the left hand, the
baton is held in the long
grip and blows and kicks can
be blocked and parried as
depicted in Figures 18 to 24.
a. Against swinging right
(Figure 52).
b. Against straight right
(Figure 53).
c. Against right uppercut
(Figure 54).
-25-
Figure 52
Figure 53
"
Figure 54

d. Agai~.kick (Figure 55).--
5. How to Strike Blows.--By
releasing the left hand, the
baton is held in the long
grip and blows can be delivered
as depicted in Figures 25 to 31.
The following blows can be
struc.k using -the two-handed
grip:
a. The Jab.--This is very
similar to the movements
used in the thrust of a
bayonet. ~tep forward
with the left foot as you
thi:'ust the baton forward,
striking the opponent with
the tip of the baton.
(Figure 56).
Step back quickly to the
Hon guard"- position to be ready
to strike another blow and to
prevent the opponent from seiz
ing the baton.
-26-
Figure 55
Figure 56
II 11 q 'J !
±
b. The Short Swing.--This is
a short, snappy blow
delivered either down-
ward or sideward, in
which that portion of
the baton barrel above
the left hand is used
to strike opponent.
(Figure 57).
c. The Butt Stro~e.--This
blow is generally delivered ,
upward or sideward using
that portion of the handl~
below the right hand or
the butt of the baton to
strike the opponent.
(Figures 58 and 59).
"
-27-
Figure 51
Figure 58
Figure 59

d. The Push.--This is not a
blow as such, but a
technique which can be
used to push or hold back
an individual. Several
officers employing this
technique can push cr
hold back a crowd.
(Figure 60). Figure 60
6. When to Dse.--This is the grip which should be used for
mob and riot control work. It should also be used when-
ever the officer is working in crowded conditions or is
confronted by more than one opponent. The two-handed
grip makes it extremely difficult for a person to seize
the baton and take it from the officer; therefore, it
is strongly recommended that this grip be used whenever
possible.
-28-
=
I V • MISOELLANE ODS TEOHNI QUE.~
A. Move-Along Techniq~es.
These are techniques which can be used to move
an individual a short distance while maintaining a
certain amount of control over him.
1.
NOTE:
Between the Legs.--There are two variations of
this technique and both are effective in movi.ng
an individual a short distance.
a. Grab opponent's left elbow with your left
hand as you push the barrel of the baton
between his legs. Baton handle should
be outside opponent's
left leg. Tilt the
tip of the baton up
ward, propel him for
ward by pushing the
baton handle forward
with your right hand as
you shove his left arm
forward with your left
hand. (Figure 61). Figure 61
Stay to the left of the opponent to avoid
being struck by his right elbow. The officer's left
hand and arm can be used to protect against opponent's
left elbow.
-29-

! ! \ ,
b. Grasp the middle of the baton
with your right hand, using
thong in same manner as for the
long grip. Insert the baton
between opponent's legs as you
grab his clothing at the neck
with your left hand. Move
the opponent forward by raising
your right arm against his groin
as you lift and push him by the
neck. (Figure 62). Figure 62
NOTE: When the baton is inserted between opponent's legs the
knuckles of the right hand should be pointed down. The arm is
in a stronger position when the knuckles are pointed down and
this position minimizes the risk of injury to the officer's arm
should the subject suddenly sit down.
2. Hand and Armpit.--Grasp opponent's
left hand with your left hand as if
shaking hands. Immediately turn his
palm upward, raising his arm shoulder
high. Place the baton tip into his
left armpit and move him forward
sideward by keeping his left arm high
as you shove the baton tip into his
armpit. (Figure 63). Figure 63
~NOTE: The armpit is a vulnerable area and caution should be
used in placing the tip of the baton in the armpit.
-30-
--.-------
3. Short-Grip - Shoulder Push.-
Grasp the baton in your right
hand,using the short grip. Ap
proach opponent from rear and jab
him in the kidney area with the
butt. (Figure 64). Immediately
push him on the back of the left
shoulder with your left hand.
(Figure 65). Continue moving him
forward witn a fast series of
baton jabs and pushes on the
shoulder.,alternating jab - push
jab - push, etc.
4. Neck and Back Push.--Grasp the
back of opponent's collar with
your left hand, keeping your left
arm fully extended as you place
the tip of the bat"on h',to his kid-,
ney area. You are able to move
him forward and keep him off bal
ance to a certain degree by pull
ing him slightly backward with
your left hand as you push him
forward with the tip of the baton.
(Figure 66).
Figure 64
fjgure 65
Figure 66
NOTE: You strengthen your right-arm position by holding the --r~gh~ elbow close to your body.
-31-
"

j I
:6.. Come -Along Techniques
These are techniques designed to
move an opponent a short distance and
to enable the officer to exercise more
control over the opponent than is
possible with the move-along~techniques.
1. Armlock.--Approach opponent from
his right side with the baton in
your right hand. Strike opponent
inside his right elbow with' the
baton barrel, moving his right arm
to the rear. (Figure 67). Push
the baton barrel through as you
move to the side of opponent, plac
ing your left arm over the baton
barrel. (Figure 68). Slide your
left arm under opponent's right
arm and grasp baton handle with
your left hand just above the right
hand. (Figure 69). Keep opponent's
right arm snug to your body and
bring him under control by forcing
the baton handle downward, thus
applying pressure on the radial
bone of the forearm with the baton
barrel.
-32-
Figure 61
Figure 68
/Figure 69
., \ I
NOTE: This technique can be made . -more effective if the opponent's
right hand is positioned so that
the knuckles are turned up. The
officer can release his right hand
from the baton and use it to turn
opponent's right hand to a knuck
les-up position. This brings the
baton barrel in direct contact
with opponent's radial bone.
( Figure 70).
2. Elbow Loc~--Approach opponent from
his left side and grasp his left
hand as if to shake hands. If you
cannot grasp his hand, grab him by
the inner side of the wrist. Raise
his left arm about shoulder high as
you turn his palm up. (Figure 71).
Step in beside him and place the
baton barrel beneath his left el
bow as you rest the tip end of the
baton in the bend of your left elbow,
(Figure 72). Bring opponent under
control by twisting his left hand
to the outside and down as you raise
the baton barrel upward, applying
pressure to the back of opponent's
elbow. -33-
_1'
Figure 10
Figure 11
Figure 12

NOTE: When usi.ng this come-along
hold, stay to the side and rear of
the opponent to minimize the effec
tiveness of a right-hand blow.
(Figure 73).
3. Behind Neck and Elbow Lock.--Ap
proach opponent from his left side
and grasp his left hand or inner
left wrist with your left hand.
Turn his palm up as you raise his
arm shoulder high. Insert the
baton underneath opponent IS left
arm and place baton barrel behind
his neck.(Figure 74). The back of
opponentls elbow should rest on the \ ,
baton barrel. Bring opponent under
control by twisting his left hand
or wrist to the outside and down-
ward, applying pressure with the
baton to the back .of his elbow.
(Figure 75).
NOTE: This technique can best
be used with a baton which is
24tt in length or longer. A
shorter baton prohibits the
effectiveness of this technique.
-34-
.'
Figure n.
Figure 14
Figure 75
-~'------
c. Using Thong as Handcuffs
The thong can be used as a
temporary restraining device,
if handcuffs are not avail
able. With opponent IS hands
placed behind him, pass the
leather thong around both
wrists (Figure 76). Tighten
the thong either by twisting
it with the bat.on (Figure 77),
or by rolling the thong onto
the baton handle (Figure 78).
Place the baton handle in the
small of opponent I s back,
grasping the barrel of the
baton with your right or
left hand. The opponent can
be temporarily held in this
position or he can be moved
by exerting pressure into the
small of his back with the
-35-
-- ---------
Figure 16
Figure 11
"
Figure 18

butt end as you grab the cloth
ing at the back of his neck and
pull him slightly backward.
(Figure 79).
ALTERNATE METHOD. --With baton
hanging downward, have subject
insert hands into the loops
which are separated by the
baton handle. (Figure 76a).
Tighten the thong by pulling
opponent's hands backward as
you raise baton tip upward
in a circular path and bring
baton tip between opponent's
hands and his back. (Figure
77a).
-36-
Figure 19
Figure 1Sa
Figure 11a
Bring baton tip downward and
continue circular path until
thong is tight. (Figure 78a).
Place baton tip between opponent's
shoulder blades as you grasp baton
handle in left hand. Opponent can be
moved under c·ontrol by raising baton
hand le as y·ou push him in the back.
with the tip of the baton. (Figure
79a) •
D. Strangles
The baton can be used quite
effectively in strangling an
opponent who has either gone
berserk or is extremely, violent.
1. Approach opponent from the
rear as you grasp bat,on in
y·our right hand using the
l·ong grip. Place baton
barrel across opponent f 6
thvoat and the tip of the
baton in the crotch of your
left elbow. (Figu~e 80).
-37-
Figure 18a
Figure 19a
Figure 80 "

Place y.our left hand on the
back ,of ,opponent t s head and
bring him under contt'ol by
pushing his head d.ownward with
your left hand as y.ou pull the
baton back with the right
hand. (Figu!'e 81).
2. Grasp bat.on with the right hand,
using the l,ong grip. Approach
.opponent from the rear and
reach act'oss with your 'right
hand,placing the baton barre~
against his throat. The knuckles
Qf your right hand are turned doOwn
and the right hand is held just
outside .opponent t s left ear.
(Figure 82). Reach act'oss
.opponent t s back and grasp batoOn
tip with your left hand, with knuckles
turned up. CoOntI'ol .opponent by
flexing both arms, thereby applying
p!'essure t,o his throat with the
barrel .of the bat'on. (Figure 8~).
NOTE: Strangles are dangerous and should be used ----as a last resort in controlling a violent opponent.
An officer must exercise good judgment in utilizing
techniqUes which strangle an opponent.
-38-
Figure 81
Figure 82
Figure 83
n
E. How to Free the Baton When
Seized by Opponent
1. From the Long Grip.--As
opponent grabs baton barrel
with either one or both
hands, step toward him
quickly with your right
foot and grasp baton bar!'el
with your left hand. (Figure
84). Pull baton barrel up
ward with your left hand as
you drive baton butt down
ward.then upward,with your
right hand. (Figure 85).
Step back quickly with your
left foot, twisting your body
to the lef.t as you drive
baton butt to the outside
with your right hand.
Free the baton by jerking
it toward you as you drive
butt of baton forcefully
to your left. (Figure 86).
~
2~ From the Two-Handed Grip.-
Opponent would be forced to
grab the center of the baton
barrel, due to position of
officer's hand~ on the
baton. Step forward with
your left foot as you
raise baton tip with your
left hand. (Figure 87}.
Drive baton tip toward
opponent's left shoulder
as you twist your body to
the right. (Figure 88).
Free the baton by ripping
it dow~ward, raising the butt
end with the right hand as
you lower the baton tip with
the left hand. (Figure 89).
NOTE: By driving baton tip
to the outside of opponent,
you c,a.use his arms to cross,
thereby placing him in a
weak position.
-40-
3.
Figure 87
Figure 88
Figure 89
,+
Free Baton by Kicking.--Whether the officer is using
the long grip or the two-handed grip, if opponent
grabs the baton, the officer can free it with a well
executed kick.
a. Snap Kick.--Place both hands
on the baton handle and pull
it toward you. Bend your
right knee slightly to assist
in maintaining balance as
you deliver snap kick to
opponent's knee. (Figure 90).
b. Thrust or Side Kick.--Place
both hands on baton handle
and pull it toward you as
you pivot to the right on
your right foot. Bend the
right knee and lean to your
right as you deliver a thrust or
side kick to opponent's
knee. (Figure 91).
NOTE: ThE snap kick and
the thrust or side kick
must be executed quickly so
the officer is not pulled
off balance.
-41-
Figure 90
Figure 91

BIBLIOGRAPHY
Applegate, Rex. Crowd and Riot Control. The Stackpole Co. 1964.
Harrisburg, Pa.
Manual for The Use of The Police Club. Prepared by the DivisiOn of Public Safety of the United States Economic Mission in Peru; Lima, Peru, 1962.
Police Baton Training Manual. Los Angeles, California, Police Department, January 1945.
Prevention and Control of Mobs and Riots. Federal Bureau of Investigation, U. S. Department of Justice, Washington, D. C., Revised April 3, 1967 '
-42- U, S, GOVERNMENT PRINTING OFFICE: ,972 0·471-346
I'
I
----------~-------------