Embed Size (px)
Citation preview
2017 – Current Ford SuperDuty HoneyBadger Rear Bumper
Installation Instructions PREPARATION
1. Disconnect the negative terminal on the battery. Park the vehicle on level ground and set the
emergency brake.
2. We recommend reading through the installation instructions in whole before performing the work.
3. Estimated Installation Time: 2 Hours
4. You will need the following tools:
a. Ratchet
b. Flat Head Screwdriver
c. 21mm Socket
d. 13mm Socket
e. 3/4” Socket & Wrench
f. 15/16” Socket
Note: this installation requires 2 people for best results
5. Included in Kit:
8 – Hex Head Bolts – 1/2”-13 x 1 1/2”
16 – Flat Washers – 1/2”
8 – Nylon Lock Nuts – 1/2”-13
2 – Bumper Mounting Brackets
REMOVAL
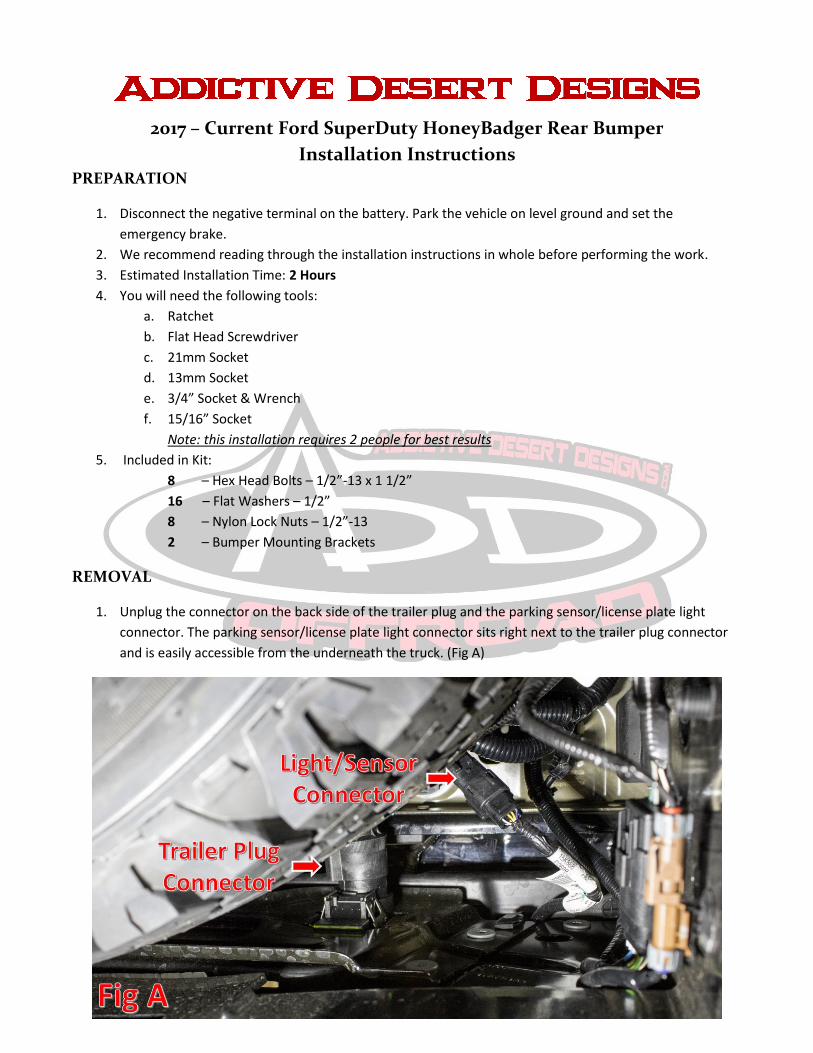
1. Unplug the connector on the back side of the trailer plug and the parking sensor/license plate light
connector. The parking sensor/license plate light connector sits right next to the trailer plug connector
and is easily accessible from the underneath the truck. (Fig A)
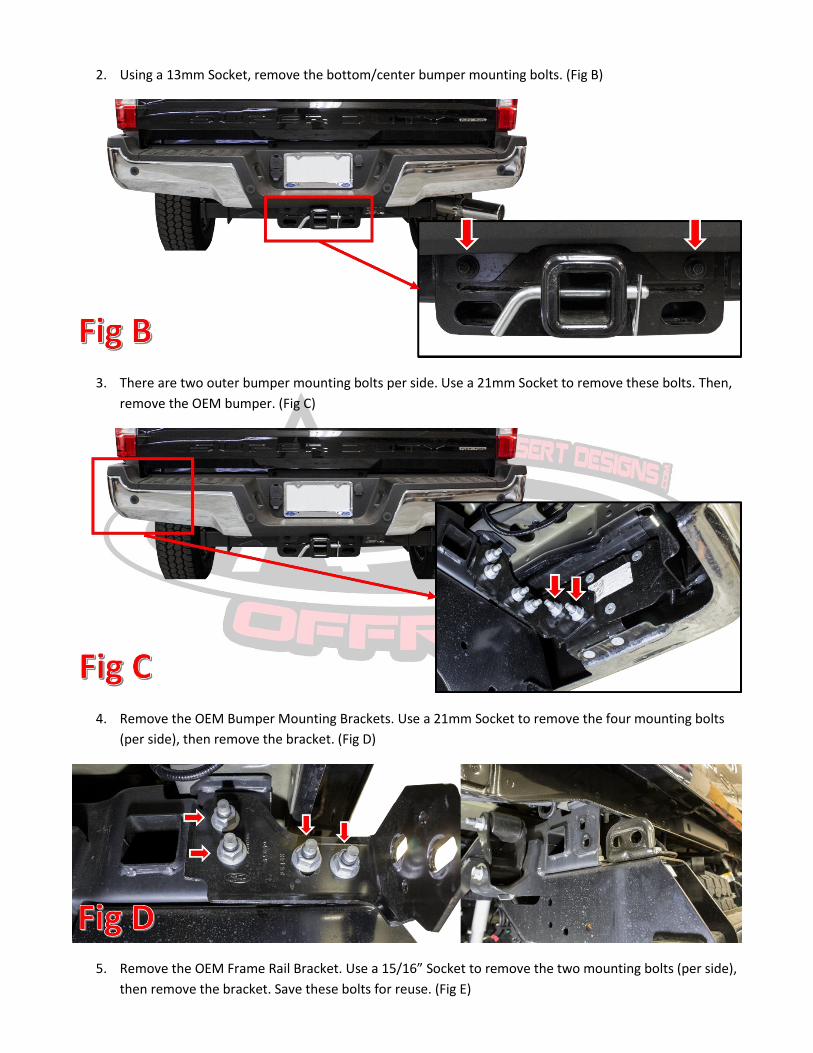
2. Using a 13mm Socket, remove the bottom/center bumper mounting bolts. (Fig B)
3. There are two outer bumper mounting bolts per side. Use a 21mm Socket to remove these bolts. Then,
remove the OEM bumper. (Fig C)
4. Remove the OEM Bumper Mounting Brackets. Use a 21mm Socket to remove the four mounting bolts
(per side), then remove the bracket. (Fig D)
5. Remove the OEM Frame Rail Bracket. Use a 15/16” Socket to remove the two mounting bolts (per side),
then remove the bracket. Save these bolts for reuse. (Fig E)
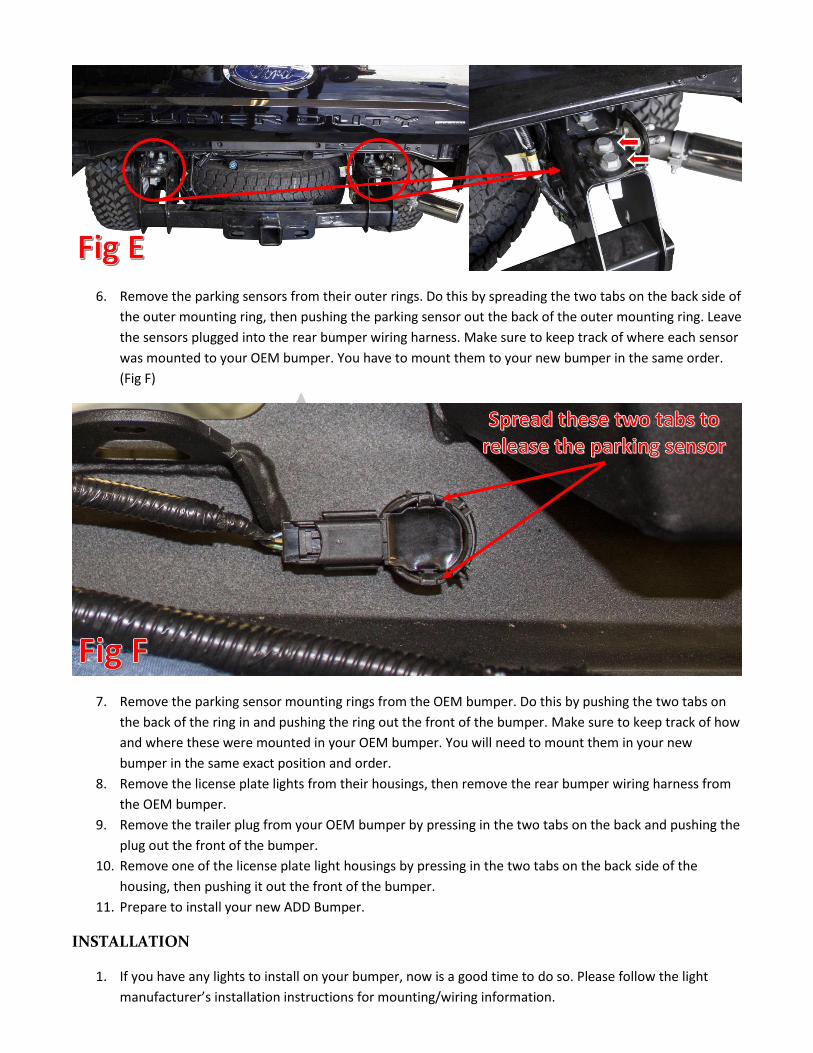
6. Remove the parking sensors from their outer rings. Do this by spreading the two tabs on the back side of
the outer mounting ring, then pushing the parking sensor out the back of the outer mounting ring. Leave
the sensors plugged into the rear bumper wiring harness. Make sure to keep track of where each sensor
was mounted to your OEM bumper. You have to mount them to your new bumper in the same order.
(Fig F)
7. Remove the parking sensor mounting rings from the OEM bumper. Do this by pushing the two tabs on
the back of the ring in and pushing the ring out the front of the bumper. Make sure to keep track of how
and where these were mounted in your OEM bumper. You will need to mount them in your new
bumper in the same exact position and order.
8. Remove the license plate lights from their housings, then remove the rear bumper wiring harness from
the OEM bumper.
9. Remove the trailer plug from your OEM bumper by pressing in the two tabs on the back and pushing the
plug out the front of the bumper.
10. Remove one of the license plate light housings by pressing in the two tabs on the back side of the
housing, then pushing it out the front of the bumper.
11. Prepare to install your new ADD Bumper.
INSTALLATION
1. If you have any lights to install on your bumper, now is a good time to do so. Please follow the light
manufacturer’s installation instructions for mounting/wiring information.
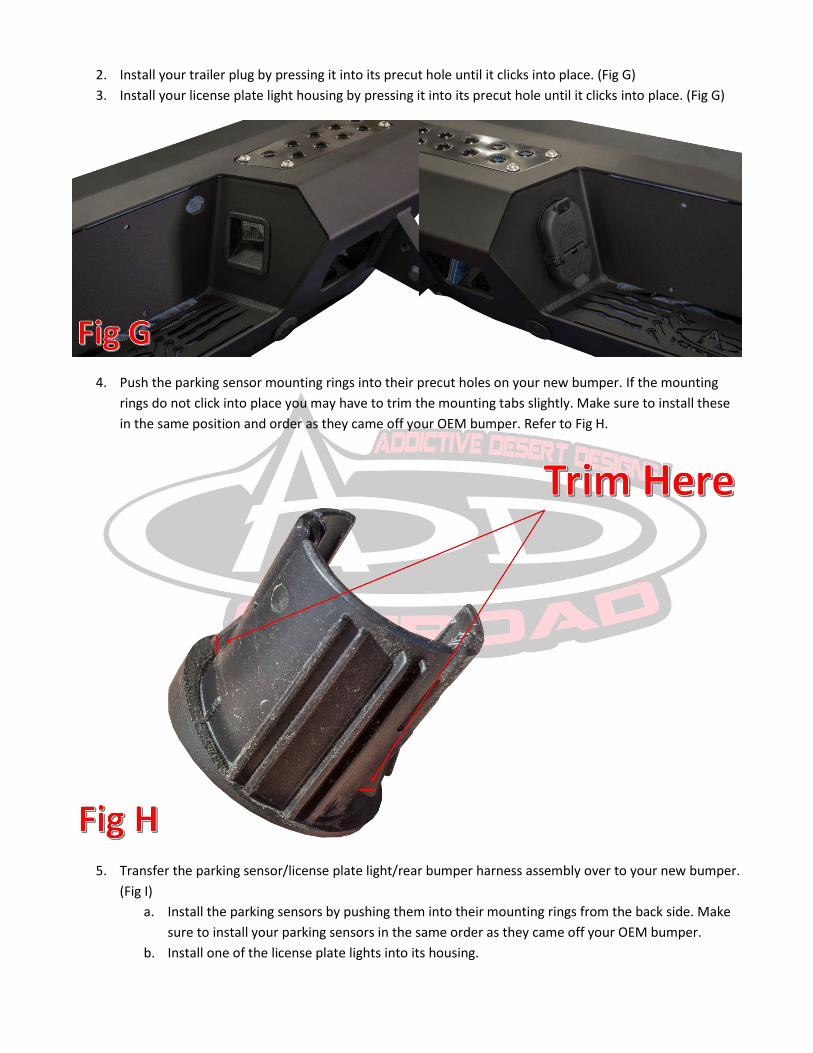
2. Install your trailer plug by pressing it into its precut hole until it clicks into place. (Fig G)
3. Install your license plate light housing by pressing it into its precut hole until it clicks into place. (Fig G)
4. Push the parking sensor mounting rings into their precut holes on your new bumper. If the mounting
rings do not click into place you may have to trim the mounting tabs slightly. Make sure to install these
in the same position and order as they came off your OEM bumper. Refer to Fig H.
5. Transfer the parking sensor/license plate light/rear bumper harness assembly over to your new bumper.
(Fig I)
a. Install the parking sensors by pushing them into their mounting rings from the back side. Make
sure to install your parking sensors in the same order as they came off your OEM bumper.
b. Install one of the license plate lights into its housing.
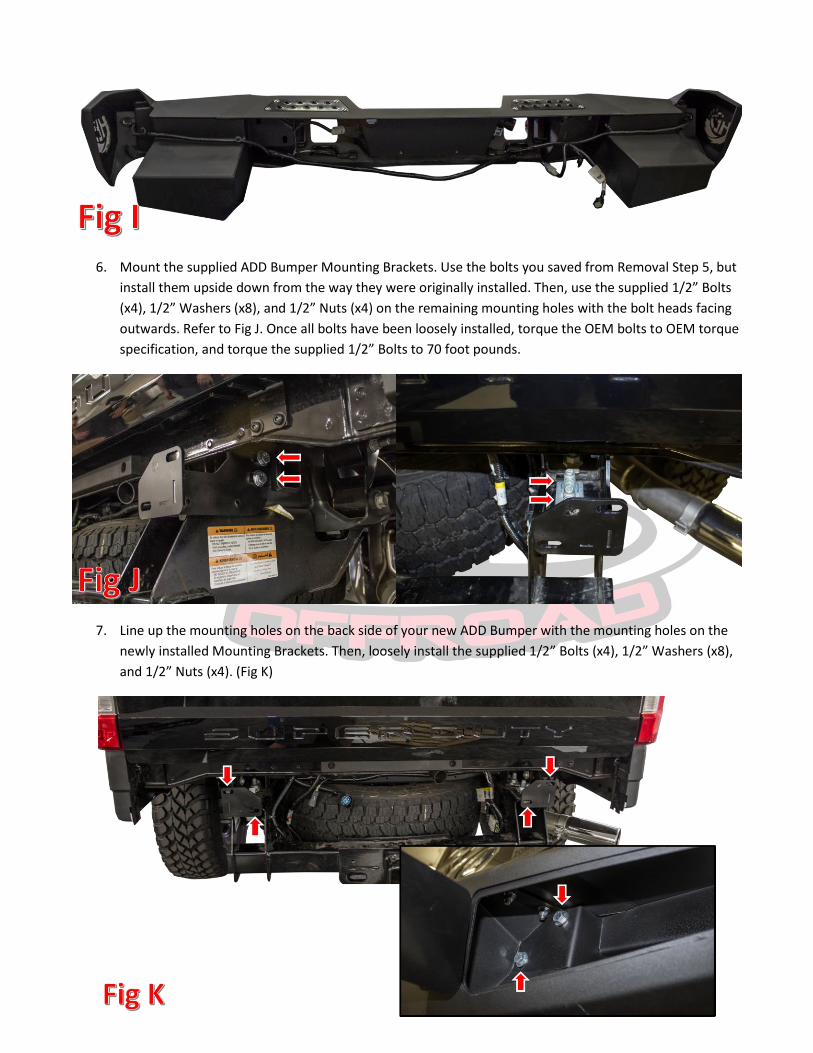
6. Mount the supplied ADD Bumper Mounting Brackets. Use the bolts you saved from Removal Step 5, but
install them upside down from the way they were originally installed. Then, use the supplied 1/2” Bolts
(x4), 1/2” Washers (x8), and 1/2” Nuts (x4) on the remaining mounting holes with the bolt heads facing
outwards. Refer to Fig J. Once all bolts have been loosely installed, torque the OEM bolts to OEM torque
specification, and torque the supplied 1/2” Bolts to 70 foot pounds.
7. Line up the mounting holes on the back side of your new ADD Bumper with the mounting holes on the
newly installed Mounting Brackets. Then, loosely install the supplied 1/2” Bolts (x4), 1/2” Washers (x8),
and 1/2” Nuts (x4). (Fig K)

8. Align your bumper so that it sits straight in relation to the tailgate. Then, tighten the 1/2” Mounting
Bolts to 70 foot pounds.
9. Plug in both connectors you unplugged in Removal Step 1.
10. Stand back and enjoy your new ADD HoneyBadger Rear Bumper.
11. Check and re-tighten if needed, all mounting bolts after 100 miles and periodically thereafter.
For Additional Support or Technical Questions,
Please Call 480.671.0820 or
Email [email protected]