Embed Size (px)
Citation preview

Vietnam: Rumor of War2
© 2019 Compass Games, LLC.
Table of Contents 2Introduction 31.0 Glossary 32.0 Game Components 4
2.1 Map 42.2 Charts and Tables 42.3 Counters 5
3.0 Sequence of Play 84.0 Movement 9
4.1 General Rules 94.2 Stacking 94.3 Zones of Control 94.4 Strategic Movement 94.5 Initial Movement 104.6 Declaring Combat Costs 104.7 Reserve Movement (Non-Phasing Player) 104.8 Exploitation Movement 10
5.0 Combat 115.1 General Rules 115.2 Declaring Combat 115.2.1 Combat Chits 115.2.2 Meeting Engagements 11
5.3 Combat Support 125.3.1 Tank, Artillery, and Air Support 125.3.2 Bombardment Support 125.3.3 Adjacent Friendly Unit Support 125.3.4 Size Difference Between Units 125.3.5 Restricted Combat Support 13
5.4 Rolling for Combat 135.4.1 Combat Dice 135.4.2 Special Rolls 135.4.3 Dice Modifiers 13
5.5 Random Events 145.6 Combat Losses and Retreat 145.7 Advance After Combat 15
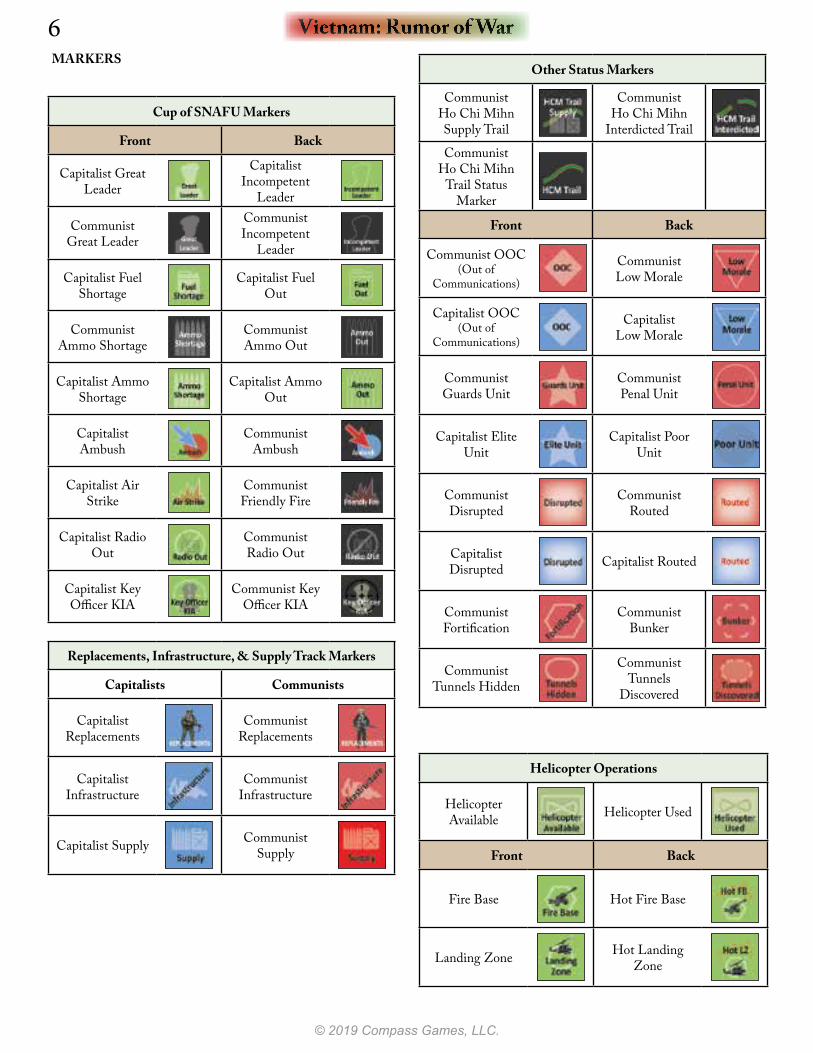
6.0 Markers 156.1 The Cup of SNAFU 156.2 Other Markers 17
7.0 Infrastructure & Supply 187.1 General Supply Costs 187.2 Paying Supply Costs 18
8.0 Support 198.1 Types and Levels of support 198.2 Tank, Artillery and Air Support Determination 19
9.0 HQs & Cadres 199.1 HQs 199.2 HQ Activation 209.3 Fresh/Spent HQs and Units 209.4 Cadres 209.5 HQ Mission 20
10.0 Air Power 2210.1 Airfields 2210.2 Air Commitment 2210.3 Strategic Missions 2310.3.1 Downtown 23
10.3.2 Infrastructure Strike 2310.3.3 Airfields/SAM Strike 2310.3.3.1 Airfield Strike 2310.3.3.2 SAM Strike 24
10.3.4 AEW Mission 2410.3.5 SAMs 2410.3.6 Aces 2410.3.7 Restricted Missions/ Unrestricted Operation 2410.3.8 POWs 2410.3.9 Monsoon (Summer Turns) 24
10.4 Tactical Missions 2410.4.1 Interdiction 2510.4.2 Ground Support 2510.4.3 Reconnaissance 2510.4.4 Special Operations 25
11.0 Naval Power 2511.1 Moving the 7th Fleet 2511.2 Bombardment 2511.3 Amphibious Ability 2611.3.1 Invasions 26
11.4 Naval Aircraft 2611.5 Riverine Units 26
12.0 Victory & Foreign Intervention 2612.1 Victory Points 2612.1.1 Tracking Victory Points 2612.1.2 Gaining (and losing) Victory Points 2612.1.3 Placing/Removing/Claiming Objective Markers 2612.1.4 POWs, Body Count, Secret Ops and Casualties 2712.1.5 Secret Capitalist Operations 27
12.2 Chinese Intervention 2713.0 Reinforcements & Replacements 27
13.1 Reinforcements 2713.1.1 Reinforcement Entry 2713.1.2 VC Recruitment 2713.1.3 Capitalist Withdrawals 28
13.2 Replacements 2814.0 Vietnam: Rumor of War Special Rules 28
14.1 US Battalions and ARVN Regiments 2814.1.1 Creating US Army & Marine Battalions; & ARVN
Regiments 2814.1.2 Helicopter Operations 2814.1.2.1 Available & Used Helicopter Points 2814.1.2.2 Moving Via Helicopter 28
14.1.3 Amphibious Operations 2914.1.4 Riverine Units 2914.1.5 Special Force Unit 29
14.2 Leaders 2914.2.1 Theater Commanders 2914.2.2 Ground Commanders 3014.2.3 Aces 30
14.3 Tunnels 3014.4 Lines of Communications 3014.4.1 Capitalist Line of Communications 3114.4.2 Communist Line of Communications 31
14.5 US Elections 3114.6 National and Corps Boundaries 3114.6.1 US Units and HQs 3114.6.2 ARVN, Capitalist Laotian, & Capitalist Cambodian units & HQs 31
Rules 3
© 2019 Compass Games, LLC.
14.6.3 PAVN and Viet Cong Forces 3114.6.4 The DMZ 31
14.7 Ho Chi Minh Trial 3214.7.1 Activating a Terminus 3214.7.2 Interdicting the Ho Chi Minh Trial 32
14.8 SOW Aircraft 3215.0 Credits 33
INTRODUCTION
Welcome to the second game in the Operational Scale Series (OSS). This series is focusing on theater wide battles in the radio era. This game is Vietnam: Rumor of War. Hopefully, we’ll also see The Doomsday Project, a game about World War III in 1985, and a game on the Arab-Israeli wars coming down the road. Generally, players use their HQs to activate their combat units to conquer and defeat their enemy. Emphasis is also placed on the air war and infrastructure to be able to adequately support their combat forces to achieve their goals. Korea, Vietnam, and the Arab-Israeli wars will also focus on the peculiarities of fighting “proxy wars”.The general mission for this series is to fill a niche that I hope is welcome: monster games designed from the ground up that are still highly playable and quick to play. This game, and those that follow, should easily be finished in a quarter of the time that is most often the case in games of this size. That being said, Vietnam was a complicated war and this game will likely be the most complex in the series.Note: A two player game on Vietnam will never be able to cover the basic dichotomy of the Vietnam War. This game focuses on the United States’ and North Vietnam’s war aims and does not consider the aims and goals of the South Vietnamese people.Players will need 5 opaque containers to randomly draw units and markers as needed for play.Game scale will vary by theater and military intensity and Vietnam: Rumor of War has the following scale:
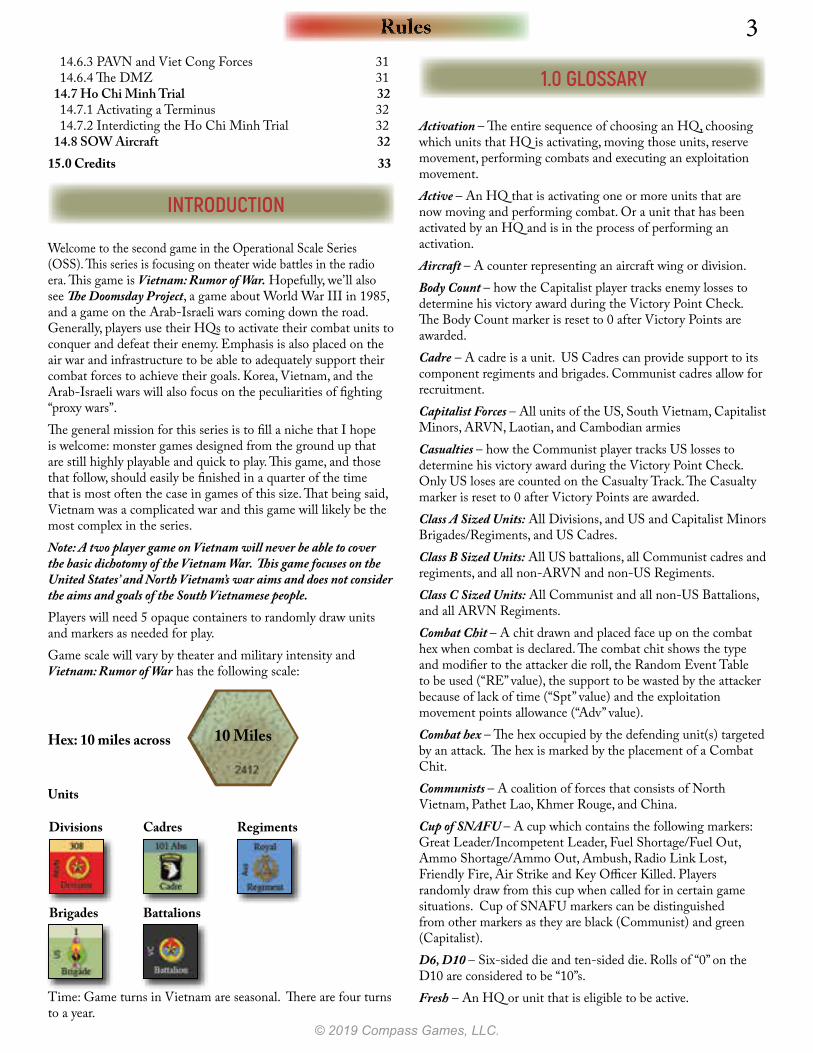
10 MilesHex: 10 miles across
Units
Divisions Cadres Regiments
Battalions Brigades
Time: Game turns in Vietnam are seasonal. There are four turns to a year.
1.0 GLOSSARY
Activation – The entire sequence of choosing an HQ, choosing which units that HQ is activating, moving those units, reserve movement, performing combats and executing an exploitation movement.Active – An HQ that is activating one or more units that are now moving and performing combat. Or a unit that has been activated by an HQ and is in the process of performing an activation.Aircraft – A counter representing an aircraft wing or division.Body Count – how the Capitalist player tracks enemy losses to determine his victory award during the Victory Point Check. The Body Count marker is reset to 0 after Victory Points are awarded.Cadre – A cadre is a unit. US Cadres can provide support to its component regiments and brigades. Communist cadres allow for recruitment.Capitalist Forces – All units of the US, South Vietnam, Capitalist Minors, ARVN, Laotian, and Cambodian armiesCasualties – how the Communist player tracks US losses to determine his victory award during the Victory Point Check. Only US loses are counted on the Casualty Track. The Casualty marker is reset to 0 after Victory Points are awarded.Class A Sized Units: All Divisions, and US and Capitalist Minors Brigades/Regiments, and US Cadres.Class B Sized Units: All US battalions, all Communist cadres and regiments, and all non-ARVN and non-US Regiments.Class C Sized Units: All Communist and all non-US Battalions, and all ARVN Regiments.Combat Chit – A chit drawn and placed face up on the combat hex when combat is declared. The combat chit shows the type and modifier to the attacker die roll, the Random Event Table to be used (“RE” value), the support to be wasted by the attacker because of lack of time (“Spt” value) and the exploitation movement points allowance (“Adv” value).Combat hex – The hex occupied by the defending unit(s) targeted by an attack. The hex is marked by the placement of a Combat Chit.Communists – A coalition of forces that consists of North Vietnam, Pathet Lao, Khmer Rouge, and China.Cup of SNAFU – A cup which contains the following markers: Great Leader/Incompetent Leader, Fuel Shortage/Fuel Out, Ammo Shortage/Ammo Out, Ambush, Radio Link Lost, Friendly Fire, Air Strike and Key Officer Killed. Players randomly draw from this cup when called for in certain game situations. Cup of SNAFU markers can be distinguished from other markers as they are black (Communist) and green (Capitalist). D6, D10 – Six-sided die and ten-sided die. Rolls of “0” on the D10 are considered to be “10”s.Fresh – An HQ or unit that is eligible to be active.
Vietnam: Rumor of War4
© 2019 Compass Games, LLC.
HQ – A counter specifically with the letters “HQ” on it. An HQ is not a unit.HQ Mission – the player strategy for that entire season.Line of Communications (LoC) – A unit has a LoC if it can trace to a supply source or can trace to an HQ that can trace to a supply source. HQs trace LoC to a supply source. Marker – Status indicator for a given HQ or unit.Non-phasing player – The player that is currently not the phasing player. The non-phasing player performs reserve movement during the phasing player’s Activations segment.Objective marker – A marker placed during play that can award players victory points.Phasing player – The player that is currently activating and moving HQs and units – but not performing reserve movement.Player-controlled hex: The Capitalist player controls all hexes that he both has units in and into which their ZoCs project, into all hexes in and adjacent to Capitalist Supply Sources, and all hexes in and adjacent to Firebases and Landing Zones that aren’t currently occupied by Communist Units. The Communist player controls all other hexes on the map.Reserve movement – A non-phasing player movement performed after the phasing player has completed his initial movement and declared attacks.Supply source – An end point for a LoC trace. Supply sources are marked hexes on the map. In addition, supply sources hexes and boxes may receive reinforcements.Support Planning Table – A letter on the combat chit (“Spt” value) that determines how much of a side’s support level will be wasted due to lack of planning.Support level – Totals for the various types of support that a side may use in combat. These include air, tank, and artillery for both sides, as well as helicopter assets and the US Navy bombardment for the Capitalist player. All are tracked on the Support Level Track.Spent – HQ or unit that has ended its activation this game turn and is no longer available to be active, until it is flipped to its fresh side (after payment of supply points or per the Sequence of Play). Shown by the HQ or unit on its “spent side”. For more convenience during play, HQs and units are flipped to their spent side at the beginning of their activation.Unit – Counter that is not a marker or HQ.Capitalist Minor Powers – The forces of South Korea, Thailand, and AustraliaZone of Control (ZoC) – The hexes adjacent to a unit that the unit could legally move into.
2.0 GAME COMPONENTS
Each game of Vietnam: Rumor of War consists of the following components:• Three 22” by 34” maps• 3 counter sheets• 1 rulebook• 1 scenario book• 2 identical Terrain Effects Charts/Rules Reminder Sheets• 1 Capitalist Player Aid• 1 Communist Player Aid• 1 Capitalist Air Display• 1 Communist Air Display• The game box• 2 six-sided dice and 2 ten-sided dice.2.1 MapVietnam: Rumor of War comes with three maps, labeled A, B, and C. There are also several charts and tables needed for play.2.2 Charts and Tables• 2 Identical Terrain Effects Charts/Rules Reminder Sheets• 1 Capitalist Player Aid and 1 Communist Player Aid• 1 Capitalist Air Display and 1 Communist Air Display
Rules 5
© 2019 Compass Games, LLC.
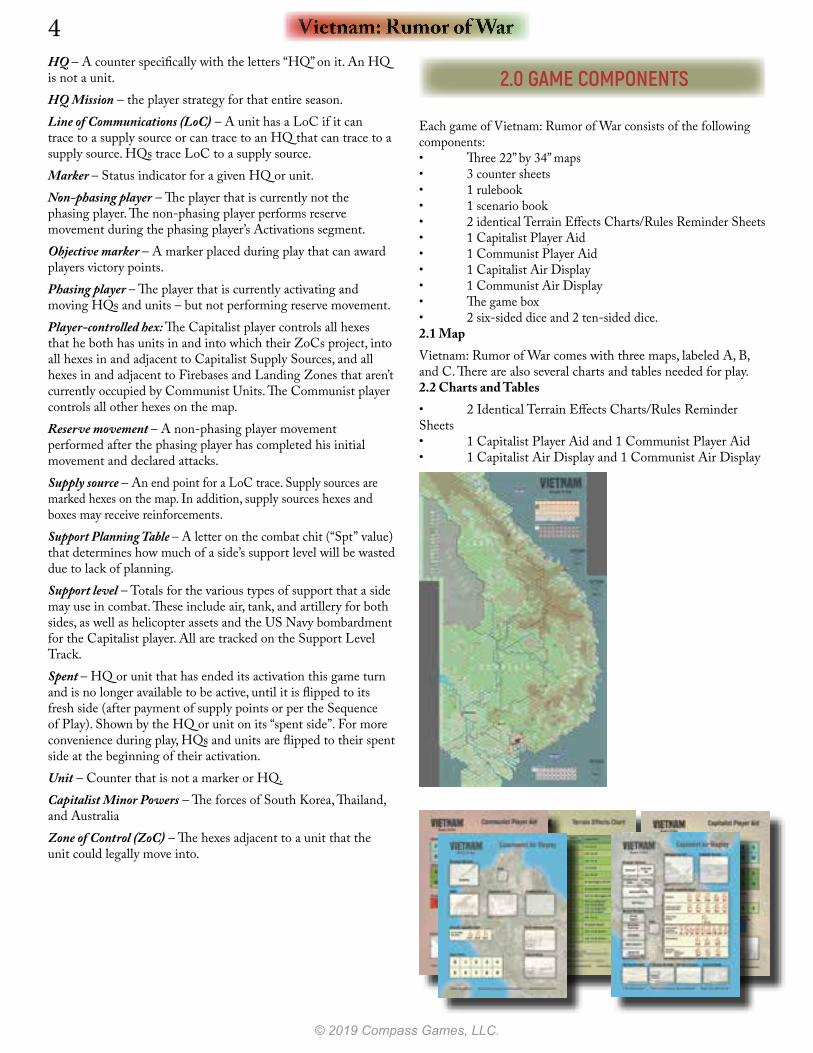
2.3 Counters
Air Unit AbbreviationsTFW: Tactical Fighter WingSW: Strategic WingSOW: Special Operations WingRW: Reconnaissance WingAEWCW: Airborne Early Warning and Control WingTRW: Training WingAD: Attack DivisionBW: Bomber WingMAW: Marine Air WingCVW: Carrier Aircraft WingFR: Fighter RegimentSAM: Surface to Air Missile
US: United States(Green Background)
ARVN: Army of the Republic of Vietnam (South Vietnam)(Yellow Background)
Laos (Bright Yellow)
Cmb: Cambodia (Light Blue)
ROK: Republic of Korea (South Korea) (Blue)
Thai: Thailand (Blue)
Aus: Australia (Blue)
UN Aircraft(All Blue Counters)
PAVN: People’s Army of Vietnam (Red)
VC: Viet Cong (Black)
PRC: People’s Republic of China (Pink)
PL: Pathet Lao (Turquoise)
KhR: Khmer Rouge (Maroon)
Com
mun
ists F
orce
sC
apita
list F
orce
s
Ready Reduced
Aces
Plane Type
AircrAft Historical Designation
Fresh
Spent
Nationality
Division or Brigade ID
Unit SizeXX: DivisionX: Brigade
Divisional Stripe (all belong to the same division).
HQs
Units & HQs
Actual Counter Size
Unit SizeIII: RegimentII: Battalion
Regiment ID
Airfield Types
Cap
italis
t Min
or P
ower
s
Note that the version of the plane is added just for historical informa-tion. All versions of a plane are treated as the same plane.
Vietnam: Rumor of War6
© 2019 Compass Games, LLC.
Other Status Markers
CommunistHo Chi Mihn Supply Trail
Communist Ho Chi Mihn
Interdicted Trail
CommunistHo Chi Mihn
Trail Status Marker
Front Back
Communist OOC(Out of
Communications)
CommunistLow Morale
Capitalist OOC(Out of
Communications)
CapitalistLow Morale
Communist Guards Unit
CommunistPenal Unit
Capitalist Elite Unit
Capitalist Poor Unit
CommunistDisrupted
Communist Routed
CapitalistDisrupted Capitalist Routed
CommunistFortification
Communist Bunker
Communist Tunnels Hidden
CommunistTunnels
Discovered
Replacements, Infrastructure, & Supply Track Markers
Capitalists Communists
Capitalist Replacements
CommunistReplacements
Capitalist Infrastructure
Communist Infrastructure
Capitalist Supply Communist Supply
MARKERS
Helicopter Operations
Helicopter Available Helicopter Used
Front Back
Fire Base Hot Fire Base
Landing Zone Hot Landing Zone
Cup of SNAFU Markers
Front Back
Capitalist Great Leader
Capitalist Incompetent
Leader
CommunistGreat Leader
CommunistIncompetent
Leader
Capitalist Fuel Shortage
Capitalist Fuel Out
Communist Ammo Shortage
Communist Ammo Out
Capitalist Ammo Shortage
Capitalist Ammo Out
Capitalist Ambush
Communist Ambush
Capitalist Air Strike
Communist Friendly Fire
Capitalist Radio Out
CommunistRadio Out
Capitalist Key Officer KIA
Communist Key Officer KIA
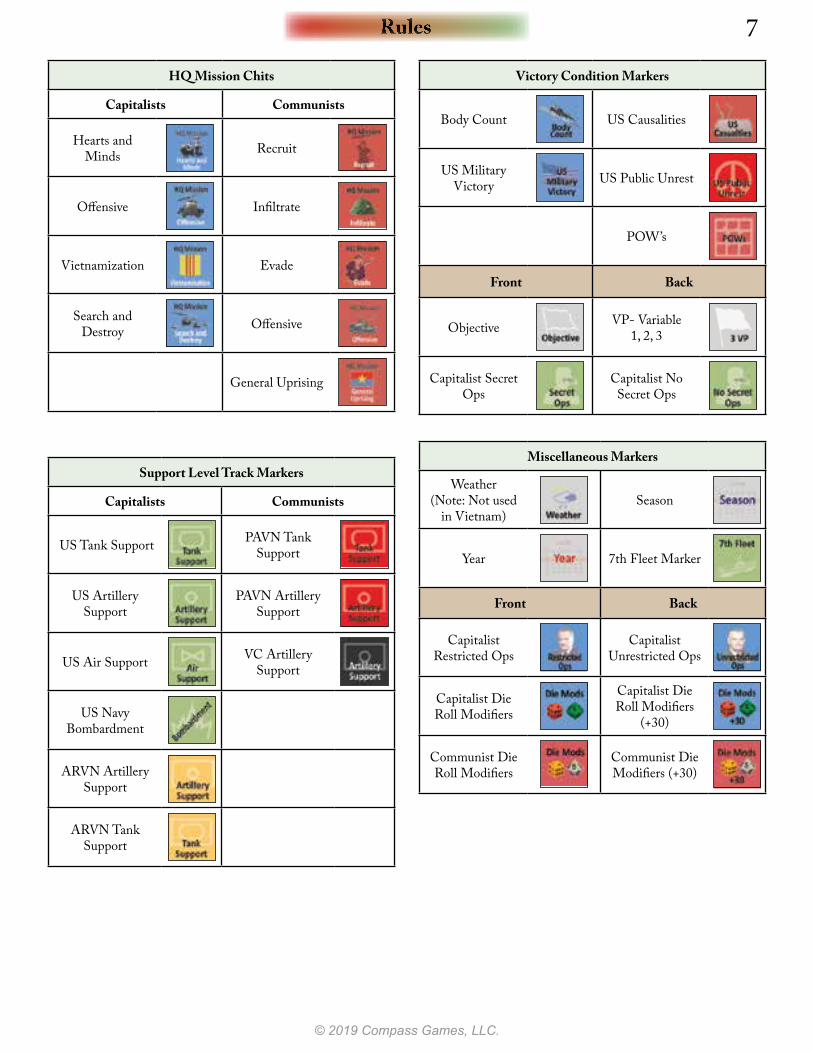
Rules 7
© 2019 Compass Games, LLC.
Support Level Track Markers
Capitalists Communists
US Tank Support PAVN Tank Support
US Artillery Support
PAVN Artillery Support
US Air Support VC Artillery Support
US Navy Bombardment
ARVN Artillery Support
ARVN Tank Support
Miscellaneous Markers
Weather(Note: Not used
in Vietnam)Season
Year 7th Fleet Marker
Front Back
Capitalist Restricted Ops
CapitalistUnrestricted Ops
Capitalist Die Roll Modifiers
Capitalist Die Roll Modifiers
(+30)
Communist Die Roll Modifiers
Communist Die Modifiers (+30)
HQ Mission Chits
Capitalists Communists
Hearts and Minds Recruit
Offensive Infiltrate
Vietnamization Evade
Search and Destroy Offensive
General Uprising
Victory Condition Markers
Body Count US Causalities
US Military Victory US Public Unrest
POW’s
Front Back
Objective VP- Variable 1, 2, 3
Capitalist Secret Ops
Capitalist No Secret Ops
Vietnam: Rumor of War8
© 2019 Compass Games, LLC.
3.0 SEQUENCE OF PLAY
Perform the following routine each game turn.A) Strategic Phase
1) Chinese Intervention check2) Infrastructure and Supply Determination
a) Move the supply markers to the current infrastructure values for the Capitalist and the Communist players. Move the Helicopter Used marker to the Current Helicopter Available marker.b) Flip spent HQs to fresh (Capitalist player goes first) – pay supply points as necessaryc) Spend any additional supply points for items listed in 7.0 (Capitalist player goes first)d) Determine Supply Status for all units.
3) Aircraft/Airfield Reinforcement (Capitalist places first); roll for any damaged aircraft in damaged aircraft boxes4) Capitalist Air Commitment5) Communist Air Commitment6) Strategic Air Mission Resolution
a) AEW Resolutionb) SAM resolutionc) Downtown Resolutiond) Strategic Bombing Resolution
7) The Capitalist player declares the Capitalist HQ Mission Chit, then the Communist player declares the Communist HQ Mission chit. Each side pays the appropriate supply cost.
B) Turn Phase1) Fleet Redeployment2) Reinforcement Placement (Capitalist performs all of the following first)
a) place any arriving reinforcements on a friendly supply source hexb) take a unit from the Replacements box and place it on any friendly controlled hex. You must spend a replacement point (from the nationality of the unit being placed as a reinforcement – unless it is an NVA or Capitalist replacement – those can be used for all forces of the respective side) – and you must move a unit (of any type or nationality) from the replacements box to the Destroyed box. You may do this as often as you have units and points to spend.c) Return HQs from the HQ routed box to a friendly supply source hexd) Recruit VC units (Communist player only)
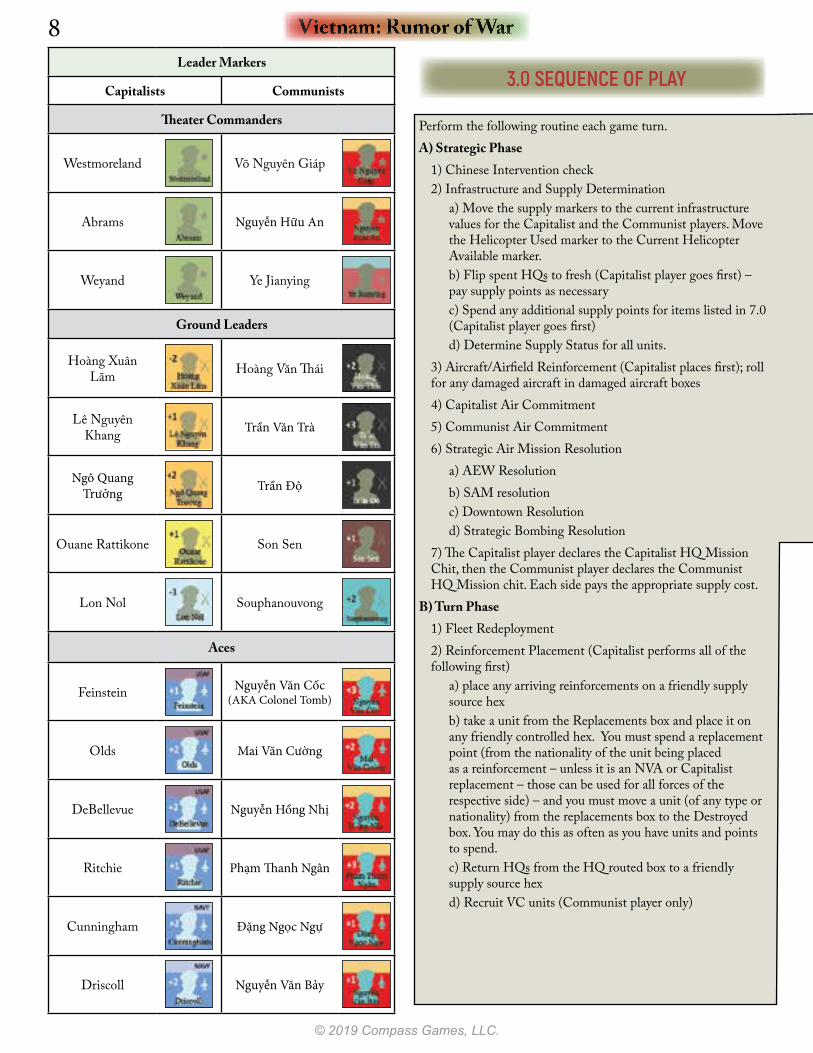
Leader Markers
Capitalists Communists
Theater Commanders
Westmoreland Võ Nguyên Giáp
Abrams Nguyễn Hữu An
Weyand Ye Jianying
Ground Leaders
Hoàng Xuân Lãm Hoàng Văn Thái
Lê Nguyên Khang Trần Văn Trà
Ngô Quang Trưởng Trần Độ
Ouane Rattikone Son Sen
Lon Nol Souphanouvong
Aces
Feinstein Nguyễn Văn Cốc(AKA Colonel Tomb)
Olds Mai Văn Cường
DeBellevue Nguyễn Hồng Nhị
Ritchie Phạm Thanh Ngân
Cunningham Đặng Ngọc Ngự
Driscoll Nguyễn Văn Bảy
Rules 9
© 2019 Compass Games, LLC.
3) Activation Phasea) Communist Player Turni) Flip all Capitalist units (not HQs) to their fresh side ii) Place OOC markers on Capitalist units that do not have a LoC iii) Communist Strategic Movementiv) Communist Activations (see 9.2)
b) Capitalist Player Turni) Flip all Communist units to their fresh sides (not HQs) ii) Place OOC markers on Communist units that do not have a LoCiii) Capitalist Activations (see 9.2)iv) Remove any remaining FB markers at the end of the Capitalist Activation Phasev) Flip any Tunnels Hidden to Tunnels Discovered side if there is a US or Capitalist Minor unit on that hex.
C) End Phasea) The Communist player may eliminate friendly units (place in the Replacements box)b) The Capitalist player may eliminate friendly units (place in the Replacements box)c) Remove any HQ interdicted markers on HQsd) Determine the winner of a US Election, if there is one this turne) Award all end of turn Victory Points and determine if either side has won the game. If not…f ) Advance the turn marker to the next turn (if it is not the final turn of the game)
4.0 MOVEMENT
4.1 General RulesCommunist units may make a strategic movement without being activated nor becoming spent (see 4.4). This movement is performed during the Strategic Movement segment, before the player’s HQ activations.In the Communist or Capitalist Activations segment, the phasing player activates a fresh HQ along with up to 4 units of the appropriate nationality (see 9.1) for movement and combat.Active units of the phasing player are allowed to move during two segments of an HQ activation. The non-phasing player has a chance to move some units with their HQs between those two segments. The following types of movement are as follows:
• The initial movement of the phasing player’s active units;• The reserve movement performed by the non-phasing player (only 1 HQ plus up to 4 units)• The exploitation movement of the phasing player’s active units in the following sequence:
1) Those that ended their initial movement not in an enemy ZoC, may spend up to 3 MP. These units may not enter an enemy ZoC throughout their movement. They execute this move before any victorious attacking units.
2) Those that won their combat and advanced into the combat hex may spend as many exploitation movement points as the combat chit “Adv” value.For all these movements, the basic rules are the same. Players move their units across the board and pay movement points according to the cost of terrain entered (see Terrain Effect Chart). Note that each side has different movement allowances for certain terrain. Movement is completed after a player moved his units, performed combats, and made any additional movement. After that, a unit has ended its activation and may not move again until it is flipped to its fresh side during the opponent’s activations segment.If desired, an active HQ may move at the very end of the activation sequence; after all activated units have finished moving and resolving combat. HQs that do not move are eligible to be flipped to their fresh side by spending supply points (see 9.3).A unit may not enter a hex unless it has sufficient movement points remaining. However, during initial movement (including advance after combat) and reserve movement – but not during exploitation movement – any unit may move one hex (no more) even if it doesn’t have enough movement points to make the move. In this case, no combat may be declared. This move must be into a hex the unit could legally enter and may not be from an enemy ZoC to another enemy ZoC.Entering an enemy ZoC costs +1 MP if not negated by a friendly unit. 4.2 StackingOnly one spent unit may be in a hex. The number of fresh units is unlimited. This stacking restriction is enforced at the end of a friendly activation. US Battalions (Marine, Army, Special Forces and Riverine units are exempt from stacking restrictions and may always stack freely). Note that during the activation in progress, stacking limits are not enforced. If stacking is violated at the end of an activation, the owning player must eliminate units until there are no stacked units in the hex. Place eliminated units from this in the replacements box. Units so eliminated do force a US Casualty or Body Count roll.4.3 Zones of ControlAll units have a Zone of Control (ZoC), unless limited by markers. The ZoC consists of the 6 hexes immediately adjacent to the unit that the unit can legally move into. Additional friendly units that also have a ZoC on a hex give no additional effect. Friendly units negate enemy ZoCs in the hex they occupy for all game rules.Enemy ZoCs cost +1 MP to enter in addition to any other terrain costs. In addition, units generally cannot retreat through them.4.4 Strategic MovementAs per the Sequence of Play, the Communist Player may move any of their fresh HQs or units using strategic movement, even if the HQ or unit has no LoC. To do so does not require an HQ activation or spending supply points. Move the HQs or units up to 10 MPs in your preferred order. HQs and units that strategic move are not spent. Strategic moving units may not start in the ZoC of an enemy unit – and may not enter any hex in the ZoC of an enemy unit throughout its strategic move.In Vietnam, only the Communist player may perform Strategic Movement.
Vietnam: Rumor of War10
© 2019 Compass Games, LLC.
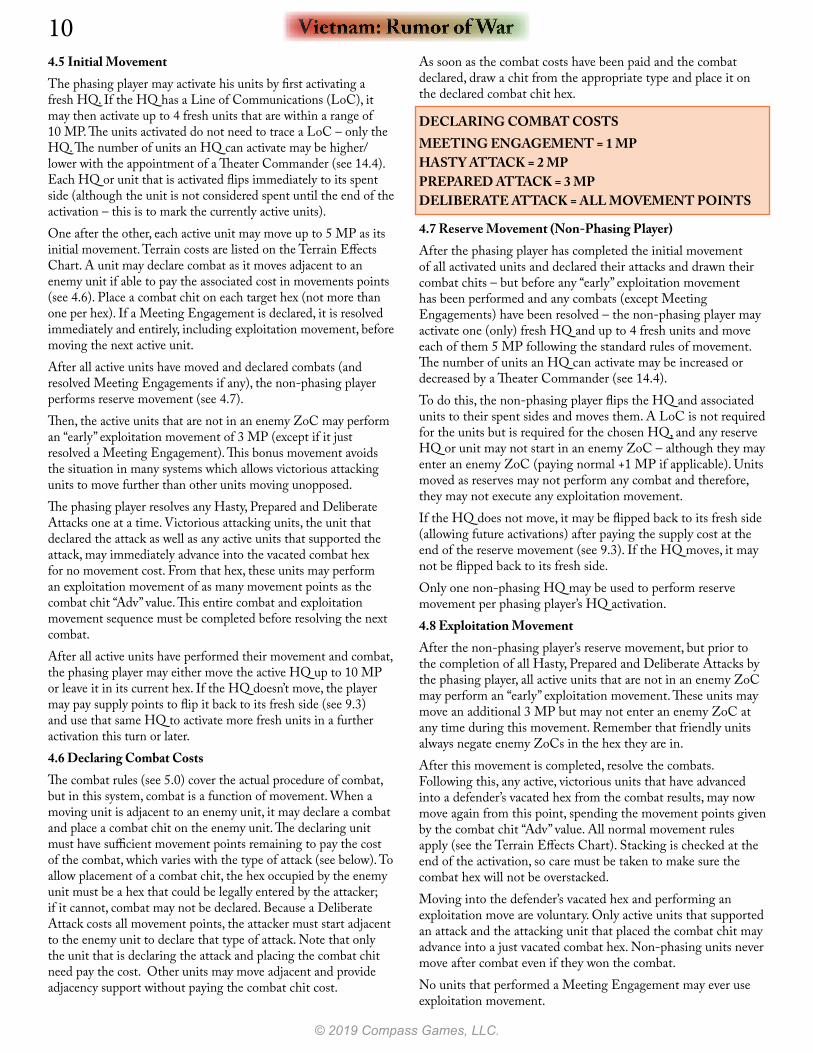
4.5 Initial MovementThe phasing player may activate his units by first activating a fresh HQ. If the HQ has a Line of Communications (LoC), it may then activate up to 4 fresh units that are within a range of 10 MP. The units activated do not need to trace a LoC – only the HQ. The number of units an HQ can activate may be higher/lower with the appointment of a Theater Commander (see 14.4). Each HQ or unit that is activated flips immediately to its spent side (although the unit is not considered spent until the end of the activation – this is to mark the currently active units).One after the other, each active unit may move up to 5 MP as its initial movement. Terrain costs are listed on the Terrain Effects Chart. A unit may declare combat as it moves adjacent to an enemy unit if able to pay the associated cost in movements points (see 4.6). Place a combat chit on each target hex (not more than one per hex). If a Meeting Engagement is declared, it is resolved immediately and entirely, including exploitation movement, before moving the next active unit.After all active units have moved and declared combats (and resolved Meeting Engagements if any), the non-phasing player performs reserve movement (see 4.7).Then, the active units that are not in an enemy ZoC may perform an “early” exploitation movement of 3 MP (except if it just resolved a Meeting Engagement). This bonus movement avoids the situation in many systems which allows victorious attacking units to move further than other units moving unopposed.The phasing player resolves any Hasty, Prepared and Deliberate Attacks one at a time. Victorious attacking units, the unit that declared the attack as well as any active units that supported the attack, may immediately advance into the vacated combat hex for no movement cost. From that hex, these units may perform an exploitation movement of as many movement points as the combat chit “Adv” value. This entire combat and exploitation movement sequence must be completed before resolving the next combat.After all active units have performed their movement and combat, the phasing player may either move the active HQ up to 10 MP or leave it in its current hex. If the HQ doesn’t move, the player may pay supply points to flip it back to its fresh side (see 9.3) and use that same HQ to activate more fresh units in a further activation this turn or later.4.6 Declaring Combat CostsThe combat rules (see 5.0) cover the actual procedure of combat, but in this system, combat is a function of movement. When a moving unit is adjacent to an enemy unit, it may declare a combat and place a combat chit on the enemy unit. The declaring unit must have sufficient movement points remaining to pay the cost of the combat, which varies with the type of attack (see below). To allow placement of a combat chit, the hex occupied by the enemy unit must be a hex that could be legally entered by the attacker; if it cannot, combat may not be declared. Because a Deliberate Attack costs all movement points, the attacker must start adjacent to the enemy unit to declare that type of attack. Note that only the unit that is declaring the attack and placing the combat chit need pay the cost. Other units may move adjacent and provide adjacency support without paying the combat chit cost.
As soon as the combat costs have been paid and the combat declared, draw a chit from the appropriate type and place it on the declared combat chit hex.
DECLARING COMBAT COSTSMEETING ENGAGEMENT = 1 MPHASTY ATTACK = 2 MPPREPARED ATTACK = 3 MPDELIBERATE ATTACK = ALL MOVEMENT POINTS
4.7 Reserve Movement (Non-Phasing Player)After the phasing player has completed the initial movement of all activated units and declared their attacks and drawn their combat chits – but before any “early” exploitation movement has been performed and any combats (except Meeting Engagements) have been resolved – the non-phasing player may activate one (only) fresh HQ and up to 4 fresh units and move each of them 5 MP following the standard rules of movement. The number of units an HQ can activate may be increased or decreased by a Theater Commander (see 14.4).To do this, the non-phasing player flips the HQ and associated units to their spent sides and moves them. A LoC is not required for the units but is required for the chosen HQ, and any reserve HQ or unit may not start in an enemy ZoC – although they may enter an enemy ZoC (paying normal +1 MP if applicable). Units moved as reserves may not perform any combat and therefore, they may not execute any exploitation movement.If the HQ does not move, it may be flipped back to its fresh side (allowing future activations) after paying the supply cost at the end of the reserve movement (see 9.3). If the HQ moves, it may not be flipped back to its fresh side.Only one non-phasing HQ may be used to perform reserve movement per phasing player’s HQ activation.4.8 Exploitation MovementAfter the non-phasing player’s reserve movement, but prior to the completion of all Hasty, Prepared and Deliberate Attacks by the phasing player, all active units that are not in an enemy ZoC may perform an “early” exploitation movement. These units may move an additional 3 MP but may not enter an enemy ZoC at any time during this movement. Remember that friendly units always negate enemy ZoCs in the hex they are in.After this movement is completed, resolve the combats. Following this, any active, victorious units that have advanced into a defender’s vacated hex from the combat results, may now move again from this point, spending the movement points given by the combat chit “Adv” value. All normal movement rules apply (see the Terrain Effects Chart). Stacking is checked at the end of the activation, so care must be taken to make sure the combat hex will not be overstacked.Moving into the defender’s vacated hex and performing an exploitation move are voluntary. Only active units that supported an attack and the attacking unit that placed the combat chit may advance into a just vacated combat hex. Non-phasing units never move after combat even if they won the combat.No units that performed a Meeting Engagement may ever use exploitation movement.

Rules 11
© 2019 Compass Games, LLC.
5.0 COMBAT
5.1 General RulesCombat is a function of movement in this system. Friendly units move and then, when adjacent to an enemy unit (or if they start out adjacent and don’t move), may declare a combat. All types of combat follow the same combat resolution procedure. However, Meeting Engagements are executed immediately at the moment of the declaration (see 5.2.2), while other attacks are executed during the combat resolution segment of the activation.When a combat is declared, the attacker draws a combat chit from the appropriate cup and places it on the combat hex. To resolve the combat, both players determine their support, add up their modifiers and roll a die (either a D10 or a D6 depending on the situation – see 5.4.1). The support modifiers available to each side depend on the support level (Support Level Track), the amount of planning time (combat chit “Spt” value) and the effect of terrain (Terrain Effect Chart), all this is explained in section 8.2. The winner of the combat is the player with the higher modified roll. The spread between the two die rolls determines the level of damage suffered by the losing side (see 5.6).If the attacker loses, he must honor the die roll spread in the same way as a defender that loses. If the attacker wins the combat and the combat hex has been vacated, any active attacking units may advance into the combat hex (see 5.7). Any inactive friendly units that supported the combat may not advance (whether fresh or not). Attacking units that advance after combat may also be eligible for exploitation movement (victorious defenders are not), Once advance after combat and exploitation movement is completed, the combat is over.Each activated unit may place only one combat chit per game turn. Once a combat is declared, it must occur – the attacker may not cancel the attack. A defending hex may be attacked multiple times during a player’s Activations segment, but not more than one combat chit may occupy a single hex at any time.5.2 Declaring CombatA moving unit that is adjacent to an enemy unit may declare a combat if it has sufficient movement points remaining to pay the cost of the combat:
• Meeting Engagement: 1 MP;• Hasty Attack: 2 MP;• Prepared Attack: 3 MP;• Deliberate Attack: all movements points.
The declaring unit ends its movement at the moment of the declaration. When a combat is declared, the attacker immediately picks a combat chit from the appropriate cup and places it on the combat hex, revealing its values (see 5.2.1). If this is a Meeting Engagement, resolve the combat completely before moving another active unit (see 5.2.2). If it is not a Meeting Engagement, finish moving all active units, let the non-phasing player perform his reserve movement (see 4.7), make your “early” exploitation movement (see 4.8), then proceed to resolve all combats (see 5.3 to 5.7).
5.2.1 Combat Chits
Deliberate AttackHasty Attack
Prepared Attack
Meeting Engagement
Random Events
Die Rolled and Modifier
Support Level Advance
Combat chits should be placed in two mugs to allow the attacker to draw a chit randomly when needed:
• One mug should have the Meeting Engagement/Hasty Attack chits.• The other mug should have the Prepared Attack/Deliberate Attack chits.
Each chit has the following information on it:• In the upper left (D10 or D6) is the type and the modifier to the attacker die roll. D6 (+1), for example, means that the attacker will roll a six-sided die and add 1 to the value rolled.• In the upper right (RE) is the Random Event Table to be used for this combat. Random events can have various effects, such as drawing from the Cup of SNAFU as listed in 5.5. A random event only occurs if the combat chit has a letter after “RE”. If it says “No”, no random event occurs. Determine the random event after all modifiers have been declared but before rolling the die to determine the result of the combat. Some random events may change the values of support offered and will reduce modifiers for the upcoming combat.• In the lower left (Spt) is a letter that designates the row in the Support Planning Table that determines how much support is deducted from the attacker support level (see 5.3.1).• In the lower right (Adv) is the number of exploitation movement points the attacker may spend after he has advanced into the combat hex (see 4.8).
Immediately after each combat has been resolved, the combat chit is returned to its original cup and is available to be drawn again.Note to Korea Fire and Ice owners: the combat chits in Vietnam may also be used in Korea. Random events are still the ones listed in the Korea rulebook but no longer does a random event occur when the same die roll is made by both players.5.2.2 Meeting EngagementUnlike other types of combat, a Meeting Engagement is completely resolved immediately after being declared and before any additional active units are moved. Follow regular combat resolution and advance (although this occurs immediately as needed). There is no “early” exploitation movement done by the attacking or supporting units and there is no reserve movement for the defender. After this combat and the subsequent advance and exploitation movement are over, and the combat chit is put back in the cup, the attacking unit is done for this activation.Additional friendly active units may move and attack after the Meeting Engagement has been resolved.

Vietnam: Rumor of War12
© 2019 Compass Games, LLC.
5.3 Combat Support 5.3.1 Tank, Artillery and Air Support
To determine the tank, artillery and air support modifiers:• Start with the support level number on the Support Level Track.• Subtract support points from the level number according to the Support Planning Table below. The amount of support to be subtracted is given, for the attacker, by a letter on the combat chit (“Spt” value) and for the defender, by the type of combat.• Apply the terrain effect (rounded down) of the combat hex, indicated on the Terrain Effects Chart.
A “Die Mods” marker is provided to keep track of the total modifiers each player has accumulated.See 8.2 for more details.Support Planning Table
Attacking Planning Time(Choose applicable line based on the “Spt” letter in the combat chit)
A Tank 4, Artillery 4, Air 4
B Tank 2, Artillery 3, Air 3
C Tank 1, Artillery 2, Air 1
D Tank 1, Artillery 1, Air 1
Defender Planning Time(Choose applicable line based on combat type)
Meeting Engagement Tank 4, Artillery 4, Air 4
Hasty Attack Tank 3, Artillery 3, Air 3
Prepared Attack Tank 3, Artillery 3, Air 3
Deliberate Attack Tank 3, Artillery 3, Air 3
To allow artillery and tank support, the combat hex must trace a LoC back to a friendly HQ or cadre, or to a Firebase. If a US unit has no division base in play (the unit is independent or its cadre has been withdrawn), it may draw support from an HQ or Firebase. Both attacker and defender use the terrain in the combat hex to determine any support terrain modifiers.If there is a road or city/town hex connecting the declared attacker’s and the combat hex, the attacking player may pay one level of tank support at the end of the combat to negate the tank support terrain effect.The road advantage may not be used if the road connecting the declared attacker and the combat chit hex crosses a river. The defender may not use a road to allow negating the terrain for tank support.Players do not have to use all of their allowed support and may choose not to since any support used may sustain losses in the combat (see 5.6).
5.3.2 Bombardment Support
Bombardment support is only available to the Capitalist player (see 11.0). Treat bombardment support as artillery support when applying the terrain effect factor. The bombardment planning value is always 2 regardless of the type of declared combat.If the Capitalist 7th Fleet is in play (see 11.2) and the combat hex is no more than 2 hexes from an all sea hex in the correct sector to allow support, the Capitalist player can always add (bombardment support level - 2) to his combat support (either defending or attacking).5.3.3 Adjacent Friendly Unit SupportAny attacking unit (fresh or spent, active or inactive) adjacent (including stacked units) to a combat hex may support the combat. The attacker gets 1 support modifier for the first unit adjacent, 2 for the second one adjacent, 3 for the third one adjacent, etc. For example, if 3 units were adjacent (1 being the combat declarer), a total of 3 support modifier would apply (for the two other units adjacent). If a Deliberate Attack is performed these modifiers are doubled. The owning player may choose not to add any adjacent units. For example, if 4 units are adjacent to a Hasty Attack combat hex (not including the one that declared the attack), the attacker adds 10 (1+2+3+4) to his die roll. If it was a Deliberate Attack, he would add 20 (!) to his die roll.For the defender, each friendly supporting unit, fresh or spent, adjacent to the combat hex adds 2 to the defender’s die roll.5.3.4 Size Difference Between UnitsUnits in the game are of three sizes. Class A for the largest, Class B for the medium sized, and Class C for the smallest units. When larger units are in combat with smaller units, there is a modifier in the larger units’ favor. Use the class rating for the largest unit present on each side in a combat.Class Sizes:Class A: All Divisions, and all US and Capitalist Minor forces Cadres, Brigades and Regiments.Class B: All Communist Regiments and Cadres, and all US BattalionsClass C: All Communist Battalions, all non-US Battalions and ARVN RegimentsIf a Class A unit is in a combat with only Class B sized units, the larger unit gains a +2 die modifierIf a Class A unit is in a combat with only Class C sized units, the larger unit gains a +4 die modifierIf a Class B unit is in a combat with only Class C sized units, the larger unit gains a +2 die modifier
Any units that support the combat are considered “in a combat”.
Rules 13
© 2019 Compass Games, LLC.
5.3.5 Restricted Combat SupportOften the Capitalist player will either choose or be forced to use “restricted” combat support. This is Artillery and/or Air Support that is prevented from using its full firepower because of political directives. If the combat is under “Restricted Ops”, halve all Artillery, Air, and Bombardment final support values (rounding down). 5.4 Rolling for Combat5.4.1 Combat DiceThe attacker rolls a die – D10 or D6 – determined by the combat chit (upper left value). The defender rolls a D10 if fresh, or a D6 if spent. If the defender is fresh, he may choose to roll a D6 anyway. Fresh defenders that use a D10 are flipped to spent.A D10 roll of 0 is always considered a roll of 10.5.4.2 Special Rolls If either or both players roll a 1 (unmodified), the owning player places a Poor/Penal Unit marker, as appropriate (Poor for Capitalist and Penal for Communist), on any fighting unit in the combat (lead or supporting unit, whether active or not, fresh or spent) of the player that rolled the 1 that does not yet carry a unit quality marker. If either or both players roll a 10 (unmodified) with a D10, or a 6 (unmodified) with a D6 as their combat die roll, the owner places an Elite/Guards Unit marker instead. If any modifiers to the final spread apply, perform all shifts due the attacker first, then apply the defender modifier. The effects of these new unit quality markers apply immediately to the upcoming combat:
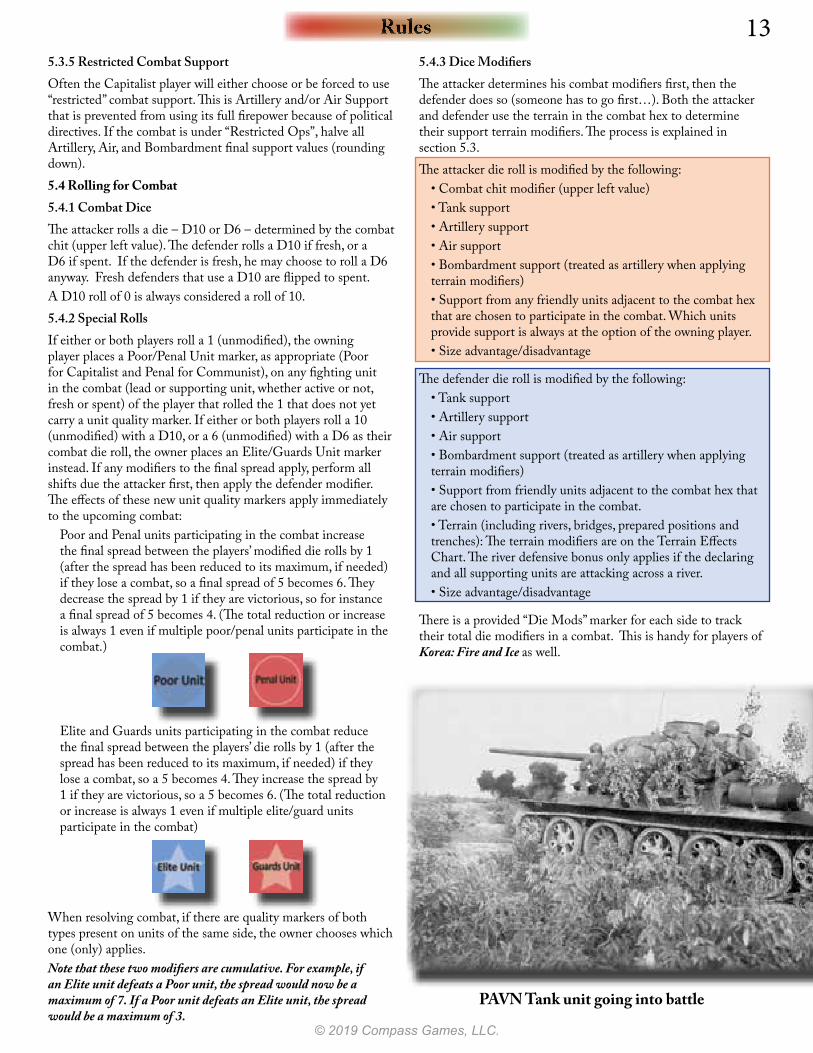
Poor and Penal units participating in the combat increase the final spread between the players’ modified die rolls by 1 (after the spread has been reduced to its maximum, if needed) if they lose a combat, so a final spread of 5 becomes 6. They decrease the spread by 1 if they are victorious, so for instance a final spread of 5 becomes 4. (The total reduction or increase is always 1 even if multiple poor/penal units participate in the combat.)
Elite and Guards units participating in the combat reduce the final spread between the players’ die rolls by 1 (after the spread has been reduced to its maximum, if needed) if they lose a combat, so a 5 becomes 4. They increase the spread by 1 if they are victorious, so a 5 becomes 6. (The total reduction or increase is always 1 even if multiple elite/guard units participate in the combat)
When resolving combat, if there are quality markers of both types present on units of the same side, the owner chooses which one (only) applies.Note that these two modifiers are cumulative. For example, if an Elite unit defeats a Poor unit, the spread would now be a maximum of 7. If a Poor unit defeats an Elite unit, the spread would be a maximum of 3.
5.4.3 Dice ModifiersThe attacker determines his combat modifiers first, then the defender does so (someone has to go first…). Both the attacker and defender use the terrain in the combat hex to determine their support terrain modifiers. The process is explained in section 5.3.The attacker die roll is modified by the following:
• Combat chit modifier (upper left value)• Tank support• Artillery support• Air support • Bombardment support (treated as artillery when applying terrain modifiers)• Support from any friendly units adjacent to the combat hex that are chosen to participate in the combat. Which units provide support is always at the option of the owning player. • Size advantage/disadvantage
The defender die roll is modified by the following:• Tank support• Artillery support• Air support • Bombardment support (treated as artillery when applying terrain modifiers)• Support from friendly units adjacent to the combat hex that are chosen to participate in the combat. • Terrain (including rivers, bridges, prepared positions and trenches): The terrain modifiers are on the Terrain Effects Chart. The river defensive bonus only applies if the declaring and all supporting units are attacking across a river.• Size advantage/disadvantage
There is a provided “Die Mods” marker for each side to track their total die modifiers in a combat. This is handy for players of Korea: Fire and Ice as well.
PAVN Tank unit going into battle
Vietnam: Rumor of War14
© 2019 Compass Games, LLC.
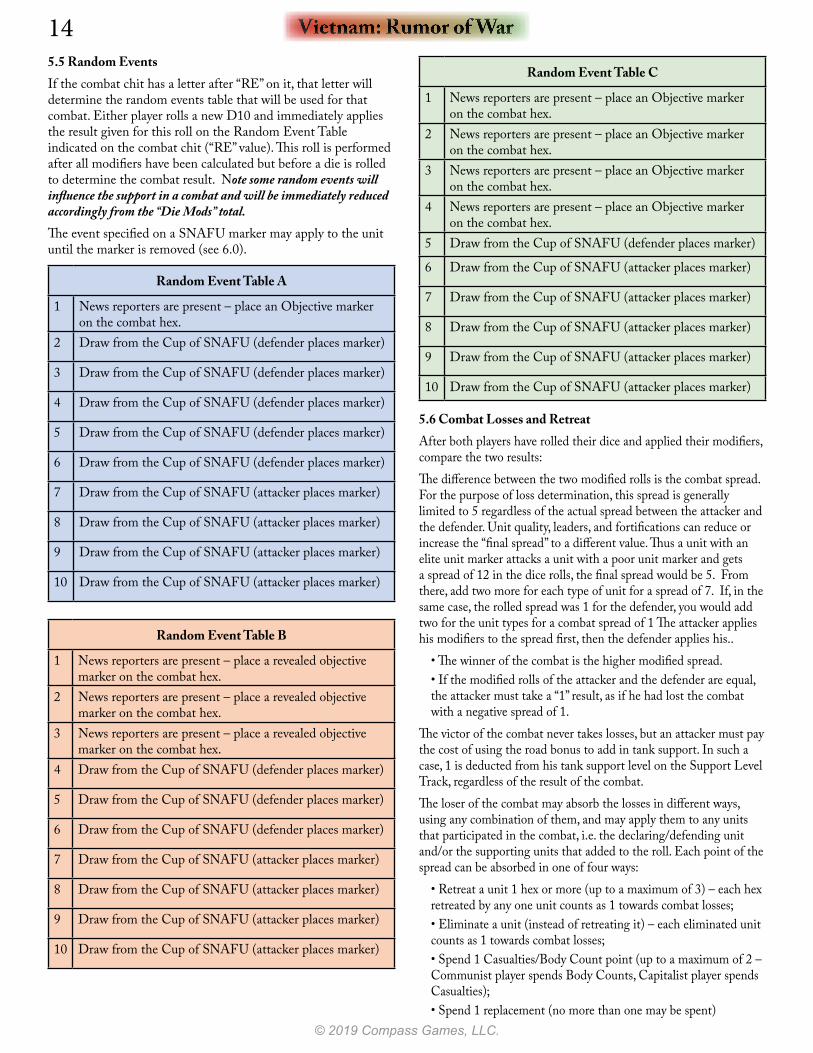
5.5 Random EventsIf the combat chit has a letter after “RE” on it, that letter will determine the random events table that will be used for that combat. Either player rolls a new D10 and immediately applies the result given for this roll on the Random Event Table indicated on the combat chit (“RE” value). This roll is performed after all modifiers have been calculated but before a die is rolled to determine the combat result. Note some random events will influence the support in a combat and will be immediately reduced accordingly from the “Die Mods” total. The event specified on a SNAFU marker may apply to the unit until the marker is removed (see 6.0).
Random Event Table A
1 News reporters are present – place an Objective marker on the combat hex.
2 Draw from the Cup of SNAFU (defender places marker)
3 Draw from the Cup of SNAFU (defender places marker)
4 Draw from the Cup of SNAFU (defender places marker)
5 Draw from the Cup of SNAFU (defender places marker)
6 Draw from the Cup of SNAFU (defender places marker)
7 Draw from the Cup of SNAFU (attacker places marker)
8 Draw from the Cup of SNAFU (attacker places marker)
9 Draw from the Cup of SNAFU (attacker places marker)
10 Draw from the Cup of SNAFU (attacker places marker)
Random Event Table B
1 News reporters are present – place a revealed objective marker on the combat hex.
2 News reporters are present – place a revealed objective marker on the combat hex.
3 News reporters are present – place a revealed objective marker on the combat hex.
4 Draw from the Cup of SNAFU (defender places marker)
5 Draw from the Cup of SNAFU (defender places marker)
6 Draw from the Cup of SNAFU (defender places marker)
7 Draw from the Cup of SNAFU (attacker places marker)
8 Draw from the Cup of SNAFU (attacker places marker)
9 Draw from the Cup of SNAFU (attacker places marker)
10 Draw from the Cup of SNAFU (attacker places marker)
Random Event Table C
1 News reporters are present – place an Objective marker on the combat hex.
2 News reporters are present – place an Objective marker on the combat hex.
3 News reporters are present – place an Objective marker on the combat hex.
4 News reporters are present – place an Objective marker on the combat hex.
5 Draw from the Cup of SNAFU (defender places marker)
6 Draw from the Cup of SNAFU (attacker places marker)
7 Draw from the Cup of SNAFU (attacker places marker)
8 Draw from the Cup of SNAFU (attacker places marker)
9 Draw from the Cup of SNAFU (attacker places marker)
10 Draw from the Cup of SNAFU (attacker places marker)
5.6 Combat Losses and Retreat After both players have rolled their dice and applied their modifiers, compare the two results:The difference between the two modified rolls is the combat spread. For the purpose of loss determination, this spread is generally limited to 5 regardless of the actual spread between the attacker and the defender. Unit quality, leaders, and fortifications can reduce or increase the “final spread” to a different value. Thus a unit with an elite unit marker attacks a unit with a poor unit marker and gets a spread of 12 in the dice rolls, the final spread would be 5. From there, add two more for each type of unit for a spread of 7. If, in the same case, the rolled spread was 1 for the defender, you would add two for the unit types for a combat spread of 1 The attacker applies his modifiers to the spread first, then the defender applies his..
• The winner of the combat is the higher modified spread.• If the modified rolls of the attacker and the defender are equal, the attacker must take a “1” result, as if he had lost the combat with a negative spread of 1.
The victor of the combat never takes losses, but an attacker must pay the cost of using the road bonus to add in tank support. In such a case, 1 is deducted from his tank support level on the Support Level Track, regardless of the result of the combat.The loser of the combat may absorb the losses in different ways, using any combination of them, and may apply them to any units that participated in the combat, i.e. the declaring/defending unit and/or the supporting units that added to the roll. Each point of the spread can be absorbed in one of four ways:
• Retreat a unit 1 hex or more (up to a maximum of 3) – each hex retreated by any one unit counts as 1 towards combat losses;• Eliminate a unit (instead of retreating it) – each eliminated unit counts as 1 towards combat losses; • Spend 1 Casualties/Body Count point (up to a maximum of 2 – Communist player spends Body Counts, Capitalist player spends Casualties);• Spend 1 replacement (no more than one may be spent)

Rules 15
© 2019 Compass Games, LLC.
As an alternative, the loser may eliminate all units that participated in the combat and not pay for the remainder of the losses if he so chooses. Eliminated units are placed in the Replacements box.If a player eliminates a unit, the following also happens:If a Class C sized unit is eliminated, roll a D6 and add that many casualties/Body Count to the current totals. If a Class B sized unit is eliminated, roll D10 and add that many casualties/Body Count to the current totals.If a Class A sized unit is eliminated, roll 2 D6s and add that many casualties to the current totals.Note that the specific unit attacking or attacked does not have to honor the combat spread if supporting units are available. The loser may satisfy the spread using any declared supporting units.RetreatingEach hex retreated to must be farther away from the combat hex than the previous hex. No unit may retreat more than 3 hexes to honor the combat spread.A retreat may pass through a friendly-occupied hex, but not through an enemy-occupied hex or an enemy ZoC (however, see “Evade” HQ Mission rule 9.5).Should a unit retreat 2 hexes it becomes disrupted – place a Disrupted marker on it. A unit that retreats 3 hexes has routed – place a Routed marker on it. Apply the following consequences:
• For each retreating unit that became disrupted reduce the tank support level by 1 if any tank support was used in the combat, and reduce the artillery support level by 1 if any artillery support was used. • For each retreating unit that became routed, reduce tank support by 2 if any tank support was used (up to the maximum committed by the retreating player) in combat, and reduce the artillery support by 2 if any artillery support was used (up to the maximum committed by the retreating player).
If a fresh unit retreats, flip it to its spent side.In addition, if a unit (or units – draw for each unit to which this applies) is disrupted or routed, draw from the Cup of Snafu as well. See 6.1 and 6.2 case f ) and case g),5.7 Advance After CombatIf the attacker won the combat and the defender has vacated the combat hex, the attacker may move any units that participated in the combat (both the declaring unit and any active – only - supporting units) into the combat hex, ignoring stacking for a moment. This happens after combat losses have been satisfied.All units that advanced into the combat hex may now spend the “Adv” movement points value allowed by the combat chit to perform an exploitation movement (see 4.8). The one-hex minimum move rule (see 4.1) applies to advance after combat. Stacking rules apply again after all exploitation movement has been performed.The defending player may never move after combat even if he has won the combat.
6.0 MARKERS
There are a lot of markers in this system to cover the various states a unit can be in. Some are placed from the “Cup of SNAFU” as a random event in combat. Others are used in specific game situations.6.1 The Cup of SNAFUThe Cup of SNAFU is used in combat (as a result of a random event), when the Capitalist traces a Line of Communication over enemy controlled hexes, and when a unit receives a disrupted or routed marker. When a random event or a special rule calls for a draw from the Cup of Snafu, randomly draw a marker from the cup and place it on a unit. This is placed before the upcoming combat in which the combat chit has a letter after “RE” and after the completion of a retreat that requires a draw. All effects of the marker will apply to the upcoming combat. The Random Event Table shows which player will place the marker or if he must place a marker at all. Markers must be placed with units of the correct side. For example, the Communist player is attacking and draws from the Cup of SNAFU. He draws a Communist Ammo Shortage/Ammo Out marker. Since the Table shows that the attacker has to place the marker he chooses the Fuel Shortage side and places it on one of his attacking units. If it showed that the defender has to place the marker then the Capitalist player would choose to place the Ammo Out marker on the Communist player as this would hurt the Communist more. In the case of drawing from a disrupted or routed unit, the drawing player “may” place the marker – so if the marker drawn applies to his side, he can ignore the marker and not place it at all.The markers placed in the Cup of SNAFU are:a) Great Leader/Incompetent Leader
-A Great Leader allows a player to re-roll his combat die. This re-roll is always voluntary. One re-roll per combat is allowed for each Great Leader unit participating in the combat.-An Incompetent Leader allows the opposing player to re-roll his opponent’s combat die. This re-roll is always voluntary. One re-roll per combat is allowed for each Incompetent Leader unit participating in the combat.
This marker can only be removed by special actions or by the reinforcement table. The marker is placed on the attacking unit that declared the combat or on any declared supporting units, or on the defending unit or on any supporting defending units in the combat. If all units applicable already have a Leader marker of either type, ignore the drawn marker and place it back in the cup.
Vietnam: Rumor of War16
© 2019 Compass Games, LLC.
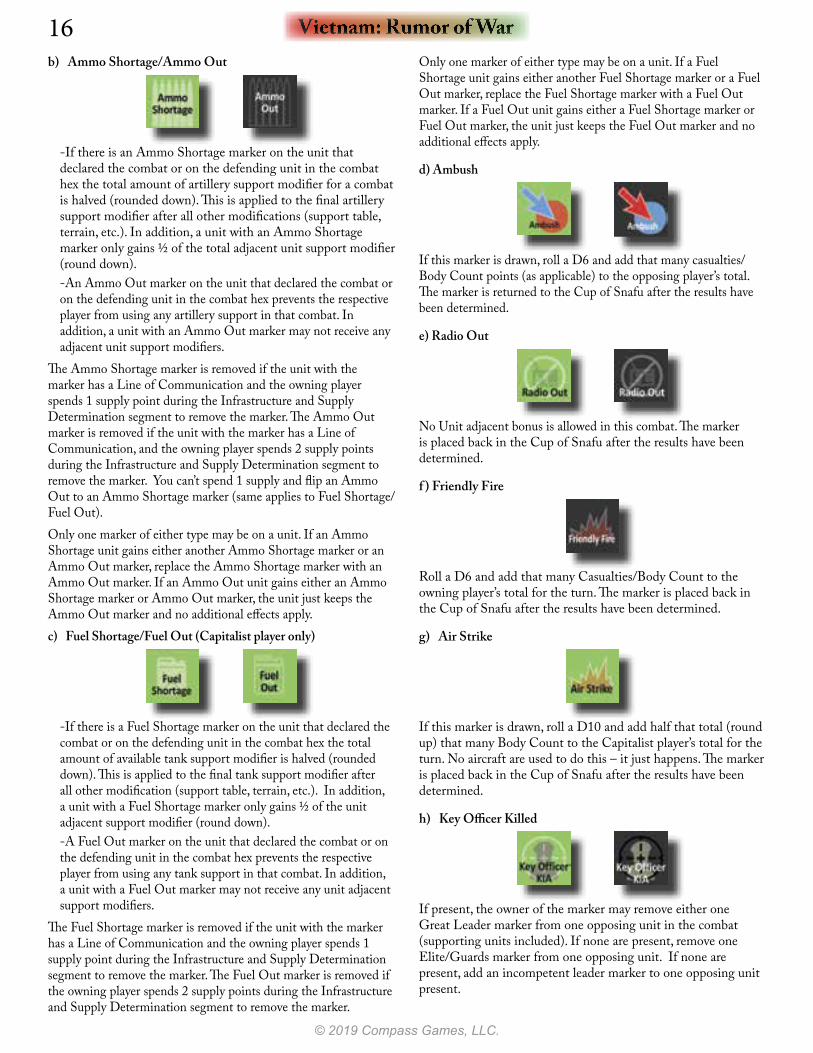
b) Ammo Shortage/Ammo Out
-If there is an Ammo Shortage marker on the unit that declared the combat or on the defending unit in the combat hex the total amount of artillery support modifier for a combat is halved (rounded down). This is applied to the final artillery support modifier after all other modifications (support table, terrain, etc.). In addition, a unit with an Ammo Shortage marker only gains ½ of the total adjacent unit support modifier (round down).-An Ammo Out marker on the unit that declared the combat or on the defending unit in the combat hex prevents the respective player from using any artillery support in that combat. In addition, a unit with an Ammo Out marker may not receive any adjacent unit support modifiers.
The Ammo Shortage marker is removed if the unit with the marker has a Line of Communication and the owning player spends 1 supply point during the Infrastructure and Supply Determination segment to remove the marker. The Ammo Out marker is removed if the unit with the marker has a Line of Communication, and the owning player spends 2 supply points during the Infrastructure and Supply Determination segment to remove the marker. You can’t spend 1 supply and flip an Ammo Out to an Ammo Shortage marker (same applies to Fuel Shortage/Fuel Out).Only one marker of either type may be on a unit. If an Ammo Shortage unit gains either another Ammo Shortage marker or an Ammo Out marker, replace the Ammo Shortage marker with an Ammo Out marker. If an Ammo Out unit gains either an Ammo Shortage marker or Ammo Out marker, the unit just keeps the Ammo Out marker and no additional effects apply.c) Fuel Shortage/Fuel Out (Capitalist player only)
-If there is a Fuel Shortage marker on the unit that declared the combat or on the defending unit in the combat hex the total amount of available tank support modifier is halved (rounded down). This is applied to the final tank support modifier after all other modification (support table, terrain, etc.). In addition, a unit with a Fuel Shortage marker only gains ½ of the unit adjacent support modifier (round down).-A Fuel Out marker on the unit that declared the combat or on the defending unit in the combat hex prevents the respective player from using any tank support in that combat. In addition, a unit with a Fuel Out marker may not receive any unit adjacent support modifiers.
The Fuel Shortage marker is removed if the unit with the marker has a Line of Communication and the owning player spends 1 supply point during the Infrastructure and Supply Determination segment to remove the marker. The Fuel Out marker is removed if the owning player spends 2 supply points during the Infrastructure and Supply Determination segment to remove the marker.
Only one marker of either type may be on a unit. If a Fuel Shortage unit gains either another Fuel Shortage marker or a Fuel Out marker, replace the Fuel Shortage marker with a Fuel Out marker. If a Fuel Out unit gains either a Fuel Shortage marker or Fuel Out marker, the unit just keeps the Fuel Out marker and no additional effects apply.
d) Ambush
If this marker is drawn, roll a D6 and add that many casualties/Body Count points (as applicable) to the opposing player’s total. The marker is returned to the Cup of Snafu after the results have been determined.
e) Radio Out
No Unit adjacent bonus is allowed in this combat. The marker is placed back in the Cup of Snafu after the results have been determined.
f ) Friendly Fire
Roll a D6 and add that many Casualties/Body Count to the owning player’s total for the turn. The marker is placed back in the Cup of Snafu after the results have been determined.
g) Air Strike
If this marker is drawn, roll a D10 and add half that total (round up) that many Body Count to the Capitalist player’s total for the turn. No aircraft are used to do this – it just happens. The marker is placed back in the Cup of Snafu after the results have been determined.
h) Key Officer Killed
If present, the owner of the marker may remove either one Great Leader marker from one opposing unit in the combat (supporting units included). If none are present, remove one Elite/Guards marker from one opposing unit. If none are present, add an incompetent leader marker to one opposing unit present.
Rules 17
© 2019 Compass Games, LLC.
6.2 Other Markersa) The US Military Victory and US Unrest markers
These markers are used to track the current victory point situation. This is more completely explained in section (12.0).
b) Fortifications
Fortifications are placed when paid for in the Supply Infrastructure Phase (see the Sequence of Play). Fortifications provide spread reductions for the defender. Fortifications are removed from play when not occupied by a friendly unit (see the Terrain Effects Chart).
c) Bunkers
Bunkers are placed when certain missions are chosen (see 9.5). Bunkers provide spread reductions for the defender. Bunkers are removed from play when not occupied by a friendly unit.
d) Tunnels
Tunnels can be hidden or not hidden and provide various benefits to the Communist player. See 14.3 for more details.
e) Objective
Objective markers determine Victory Point values for certain hexes and are explained in detail in section 12.1.3.
f ) Disrupted
Units that retreat 2 hexes become disrupted. After the retreat has finished and a disrupted marker has been placed on the unit, the opposing player draws once from the Cup of Snafu and then has the option of placing the marker he drew on the disrupted unit if it applies to that unit or discarding it. Disruptions are removed by spending a legal activation from an HQ. This does not activate
the unit; it just removes the marker. A unit must be fresh to do this and when this is done, the unit is now spent.Disrupted units cannot retreat in combat and cannot use artillery or tank support if they are the defending unit in a combat hex.Note that you can activate disrupted units normally and suffer the ill effects of disruption until the marker is removed if you wish.
g) Rout
A Rout marker is placed on a unit that retreats 3 hexes. Routed markers are a result of combat. After the retreat is finished, the enemy player draws two markers from the Cup of SNAFU and, only if he wishes and it can be applied to the retreated unit, may place one of the two markers on that unit. The other marker drawn is returned to the Cup of SNAFU. The marker placed can be removed by spending an activation from an HQ. Removing the Routed marker does not activate the unit. A unit must be fresh to do this and when this is done, the unit is now spent.A unit with a Routed marker may not retreat in combat. Units with a Routed marker may not attack or grant support to a combat hex. No support of any type may be given to a unit with a Routed marker when it is defending. Routed units have no ZoC.When the Routed marker is removed, place a Low Morale marker on the unit instead.Note that you can activate routed units normally and suffer the ill effects of rout until the marker is removed if you wish.
h) Elite/Guards units, Poor/Penal units-Elite and Guards units participating in a combat reduce the
final spread between the players’ die rolls by 1 (after the spread has been reduced to its maximum, if needed) if they lose the combat, so a 5 becomes 4. They increase the spread by 1 if they are victorious, so a 5 becomes 6. (The total reduction or increase is always 1 even if multiple elite/guard units participate in the combat.)
Poor and Penal units participating in a combat increase the final spread between the players’ modified die rolls by 1 (after the spread has been reduced to its maximum, if needed) if they lose the combat, so a final spread of 5 becomes 6. They decrease the spread by 1 if they are victorious, so a final spread of 5 becomes 4. (The total reduction or increase is always 1 even if multiple poor/penal units participate in the combat).
Vietnam: Rumor of War18
© 2019 Compass Games, LLC.
These effects are cumulative.Note that the modification for Elite/Guards and Poor/Penal units can raise the final combat spread above the normal stated by the rules.When resolving combat, if there are quality markers of both types present on units of the same side, the owner must choose which one applies.i) OOC (Out of Communications)
OOC markers are placed if a unit cannot trace a LoC of any length during step b of the Infrastructure and Supply Determination segment (see 3.0). OOC markers prevent a spent unit from becoming fresh. An OOC marker also prevents a unit from using any support of any type until removed. It is removed when the unit can trace supply in a future Infrastructure and Supply Determination segment. Draw once from the Cup of Snafu cup for each unit so marked. The opposing player may choose to place the marker or not and may determine the side of the marker to be placed.j) Low Morale
A unit marked with Low Morale adds one to all its combat chit movement costs (and may never perform a Deliberate Attack). Low Morale is removed if the unit places a combat chit and is victorious (the combat roll is in the Low Morale’s unit’s favor) in a future combat.
7.0 INFRASTRUCTURE & SUPPLY
Infrastructure is the overall ability of each side to support its combat forces. It includes the state of industry in the area and the road network. It can rise with foreign intervention and be reduced by Capitalist airstrikes and by Communist infiltration. Infrastructure provides supply to the armies. Supply is spent on many things in the game – from activating HQs to repairing damaged aircraft to removing certain markers. For any unit or HQ to be able to use supply, it must be able to trace a LoC. The Communist player must use one of two sources to spend supply - either the Ho Chi Minh trail or his main source – depending on where the Unit/HQ spending the supply is located.During the Infrastructure and Supply Determination segment, first place the Supply marker on top of the Infrastructure marker on the Replacements, Supply and Infrastructure Track. Infrastructure may be reduced by infrastructure strikes or increased through Foreign Aid thus changing the amount of Supply that each player has available in the following turn. After this is done, supply may be spent on items in group a) below. Supply can be spent on items in group b) during the Activations phase.
7.1 General Supply Costsa) During the Infrastructure and Supply Determination segment:
2 for the Capitalist player to flip a spent HQ to fresh in South Vietnam
3 for the Capitalist player to flip a spent HQ to fresh in North Vietnam, Laos or Cambodia
1 for the Communist player to flip a spent HQ to fresh in North Vietnam
1 for the Communist player to flip a spent PAVN HQ to fresh when using the Ho Chi Minh trail
0 for the Communist player to flip a spent VC HQ to fresh1 to remove an Ammo Shortage or Fuel Shortage marker2 to remove an Ammo Out or Fuel Out marker1 to repair an Airfield/Improved Airfield marker2 to upgrade an Airfield to Improved.1 to place a Hidden Tunnels marker that is adjacent to another
such marker 3 to place a Hidden Tunnels marker that is not adjacent to
another such marker Variable cost to perform an HQ mission2 to improve a Bunker to a Fortification2 for each 1 added to the Ho Chi Minh Trail supply total3 to improve the Ho Chi Minh Trail status marker by 1 (only
may be done once per turn)
b) During the Activations Phase:
2 for the Capitalist player to make a spent but not moved HQ fresh again if the HQ is in South Vietnam
3 for the Capitalist player to make a spent but not moved HQ fresh again if the HQ is in North Vietnam, Laos or Cambodia
2 for the Communist player to make a spent but not moved HQ fresh again if the HQ is in North Vietnam
3 for the Communist player to make a spent but not moved HQ fresh again when using the Ho Chi Minh trail
The Infrastructure value can never be more than 19 for either side, and never less than 2 for the Communist side.
7.2 Paying Supply CostsThere are three supply pools in Vietnam: Rumor of War from which players will pay their supply costs. They are the Communist Supply marker (colored red), the Ho Chi Minh Trail marker (colored black) and for all the Capitalists, one supply marker (colored blue). Which supply total you use depends on primarily on the location of the supply being spent.Capitalist Supply Costs:To pay for supply for all purposes in South Vietnam: pay normallyTo pay for supply for all purposes in Laos, Cambodia or North Vietnam (when not formally invading these countries): pay 2 supply points for each 1 spent.

Rules 19
© 2019 Compass Games, LLC.
To pay for supply for all purposes in countries that have been invaded by the Capitalists: pay normallyCommunist Supply Costs:To pay for supply for all purposes in North Vietnam: pay normally from the Communist Supply marker.To pay for supply for all purposes outside of North Vietnam: pay normally from the Ho Chi Minh marker. As an exception, PAVN and PRC units and HQs may pay supply costs directly from the Communist supply marker if they have a Line of Communications to a PAVN or PRC Supply Source.HQ mission costs are always paid directly from the Communist Supply marker or the Capitalist one.
8.0 SUPPORT
Each side’s tank, artillery and air support, helicopter and naval bombardment are represented by markers on the Support Level Tracks. Replacements are also represented by a marker. These various types of support are subject to situational restrictions.8.1 Types and Levels of supportThe starting level for tank and artillery support is listed in the scenario setup. These levels may only be increased through reinforcements (see 13.1) and they can decrease due to combat results and status markers (see 6.0).
The air support value is determined during the Air Commitment segment (see 10.2) and may be committed in battle (see 5.5).Bombardment and Helicopter support are only available to the Capitalist player. The starting levels are given in the scenario setup. Both values can go up or down with Capitalist reinforcements or withdrawals (see 13.0).
The replacements value is stated in the scenario setup and can only increase through reinforcements (see 13.1). In combat, replacement points can be spent to satisfy combat losses (see 5.6) or to rebuild previously lost units (see 13.2).8.2 Tank, Artillery and Air Support Determination There are some values to know here:
• Support levels: Support levels are the amounts of tank, artillery and air support indicated by their respective markers on the Support Level Track. The tracks have maximum values that the total available may not exceed. If additional artillery and tank support arrives via the reinforcement schedule, these are ignored. Air Support can be more than 19 (the maximum on the track) but only the value of 19 is counted towards the maximum that may be used to compute the values added to
the combat. These numbers are the potential support that the army may give to any combat during the game. Support levels are modified by two factors:
Planning time: Inevitably, part of the support level won’t be operational on time. The amount of support to be subtracted to account for this is given, for the attacker, by a letter on the combat chit (“Spt” value) and, for the defender, by the type of combat (see Support Planning Table in 5.3.1).Terrain effects: The terrain conditions will affect the efficiency of each type of support. The “Effect on Support” column on the Terrain Effects Chart gives the reduction factor (1/1 to 1/4) associated with each terrain type.
Subtract the support planning time from the support level to determine the available amount of tank, artillery and air support for each combat. Then apply the terrain effect. The formula is: (Support level – Planning time) x Terrain effects (rounded down)The resulting values are the tank, artillery and air support modifiers that the attacker and the defender may add to their respective combat die rolls (see 5.4.3).
9.0 HQS & CADRES
9.1 HQsHQs allow units to be activated for movement and combat. Some HQs may only activate units of their own nationality:
• Capitalist HQs (blue background) can activate any Capitalist forces (regardless of nationality and including US cadres). US HQs may only activate US forces. Laotian and Cambodian HQs may only activate those types of units.• PAVN and PRC HQs can activate any Communist units (regardless of nationality), but VC HQs activate only VC units. Pathet Lao and Khmer Rouge HQs may only activate those types of units.
To start an activation, choose a fresh HQ that has a LoC and flip it to its spent side, then choose up to 4 fresh units within 10 MP of the HQ (subject to the restrictions above) and flip those units to their spent sides. Note that the number and types of units an HQ can activate may be influenced by the current HQ Mission and by a Theater Commander (see 14.4). All the activated units and the HQ may now be moved, but the HQ is moved at the very end of the activation, after all units have completed their movement and combat. At the conclusion of the activation, if the HQ has not moved, the owning player may pay a number of supply points to flip the HQ back to its fresh side and allow it to be activated again during this turn. The number of supply points that have to be spent to do so depends on both the side the HQ belongs to and its location. In addition, a spent HQ may be flipped to its fresh side during the Infrastructure and Supply Determination segment (see 7.0).HQs cannot retreat from combat and if an enemy unit ever enters a hex with an HQ, the HQ is removed to the Routed HQ box on the player display. Routed HQs return to the game as a reinforcement during the next reinforcement phase. They return on their fresh side. HQs can never be eliminated by enemy action.
Vietnam: Rumor of War20
© 2019 Compass Games, LLC.
9.2 HQ ActivationDuring the Communist or Capitalist Activations segment, the player may activate one or more fresh HQs, one after the other. The player may also pay supply points to flip the HQ back to its fresh side if it did not move at the end if its activation (see 9.3). There is no limit to the number of times an HQ can be activated during the player’s Activations segment (as long as the supply cost is being paid and the HQ doesn’t move).The active HQ and units end their activation after the player has performed the entirety of the following activation sequence:
1. HQ activation – The phasing player activates a fresh HQ and flips it to its spent side.2. Unit activation – The active HQ may activate up to 4 fresh units of the appropriate nationality within its command range (10 MP) provided that each has a LoC. These units are flipped to their spent side. The number of units an HQ can activate may be higher or lower because various additional special rules.3. Initial movement and combat declaration – One after the other, each activated unit may move up to 5 MP as their initial movement (see 4.5). These units may declare combat as they move, if they are able to pay the associated MP cost (see 4.6). If a unit declares a combat, a combat chit is placed on the target hex and the unit has finished its movement.
3.1 Meeting Engagement resolution – If a Meeting Engagement is declared, it is resolved immediately (see step 6 below) before moving the next activated unit.
4. Reserve movement – After all activated units have moved and declared combats (and all Meeting Engagements have been resolved if any), the non-phasing player performs reserve movement (see 4.7).5. Early exploitation movement – All activated units that ended their initial movement outside an enemy ZoC may perform an “early” exploitation move of 3 MP (see 4.8).6. Combat resolution – The phasing player resolves any Hasty, Prepared or Deliberate Attacks one at a time, in the order of his choosing (see 5.0).
6.1 Advance after combat – Victorious attacking units (if applicable including other active attackers) immediately advance into a vacated combat hex (see 5.7).6.2 Exploitation movement – From the combat hex all units that advanced after combat may perform an exploitation movement of as many movement points as are shown on the combat chit “Adv” value (see 4.8). This ends the units’ activations.
Complete this entire combat sequence (6) before resolving the next combat.
7. HQ movement – The phasing player may either move the active HQ up to 10 MP or leave it in its current hex. If the HQ does not move, the player may pay supply points to flip it to its fresh side (see 9.3). This ends the HQ’s activation.8. Stacking check – The phasing player enforces stacking limits (see 4.2).
After this activation sequence is completed, the phasing player may choose any fresh HQ (including the one just used if supply was paid to flip it back to its fresh side) and activate it. If the phasing player chooses not to activate any more HQs, play proceeds to the next step of the Sequence of Play (see 3.0).
9.3 Fresh/Spent HQs and UnitsOn payment of supply points, an HQ may be flipped to its fresh side each turn at the end of its activation if it didn’t move, or during the Infrastructure and Supply Determination segment (see 7.0). The supply costs to flip an HQ to fresh are given in 7.0. VC HQs may always flip to their fresh sides in Infrastructure and Supply Determination segment and do not require a LoC to do so (and may not be interdicted).Any unit that has completed an activation becomes spent and may not be activated until it becomes fresh again, which happens during the opponent’s Activations segment. Unlike HQs, units can only move and perform combat once per game turn. However, a spent unit may support a friendly active attacker if it is adjacent to the combat hex (see 5.3). It can’t do anything else. Units are flipped to their fresh side for free at the beginning of the opponent’s Activations segment. An HQ or must have a LoC to be flipped to its fresh side. This LoC is checked at the moment the owning player wishes to pay the supply cost. 9.4 CadresCadres represent the logistic centers for US divisions and the focal point for all VC recruitment. To gain artillery, air, bombardment, or tank support, a US unit that is part of a division must be within range of one of their associated cadres from any one attacking unit (declaring unit or any supporting units); or within range of the combat hex for defenders. They may also be in range of any friendly firebase. The range for this trace is 4 hexes (regardless of enemy presence, units or terrain). Only US cadres of the same division as the units tracing range allow for support if traced to a cadre. All other units (including US units that are not part of a division or their cadre has been withdrawn) trace a normal Line of Communication to a friendly HQ to be granted support.VC Cadres allow for recruitment. See rule 13.1.3.
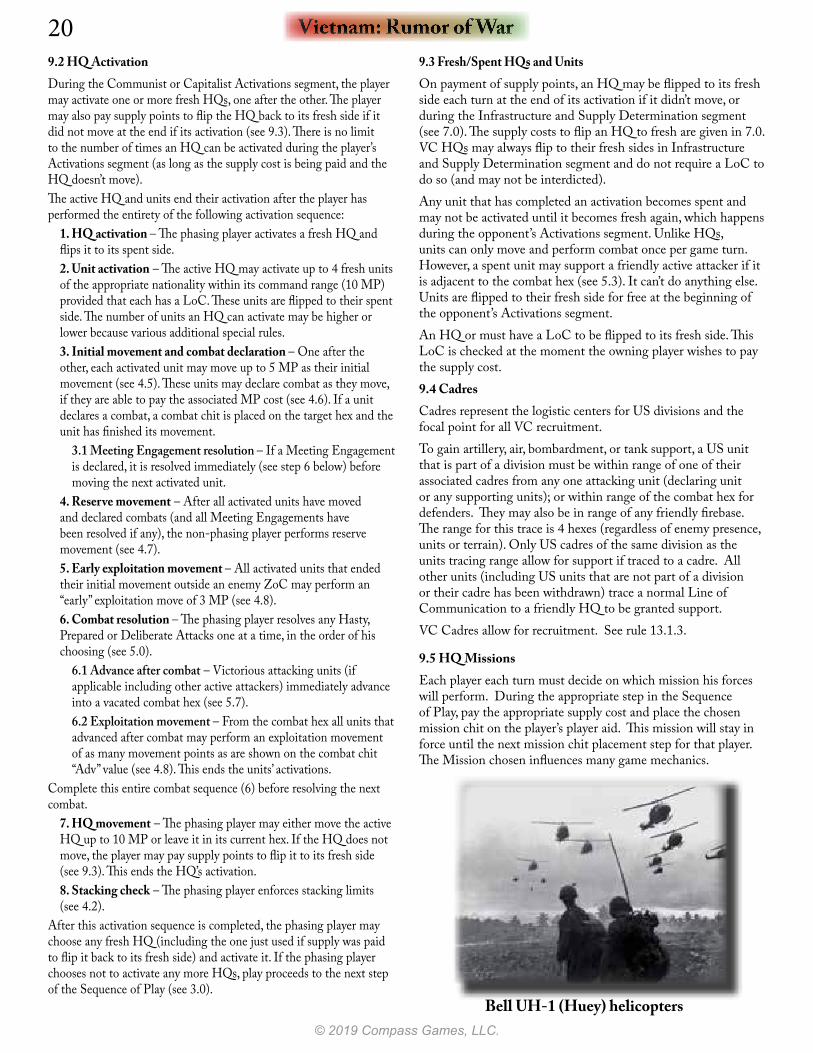
9.5 HQ MissionsEach player each turn must decide on which mission his forces will perform. During the appropriate step in the Sequence of Play, pay the appropriate supply cost and place the chosen mission chit on the player’s player aid. This mission will stay in force until the next mission chit placement step for that player. The Mission chosen influences many game mechanics.
Bell UH-1 (Huey) helicopters
Rules 21
© 2019 Compass Games, LLC.
Capitalist HQ Missions:Search and Destroy – supply cost: 3
• Only US Battalion movement is allowed for all US Forces this turn. All other Capitalist forces may move normally.• VP awards are doubled for Body Counts.• All ops are restricted• At the end of each Capitalists Activation, remove all US Battalions from the map and place any newly acquired status markers on them on any active regiments. One marker must be placed on each activated regiment/cadre before two markers are placed on any one regiment/cadre.
Offensive – supply cost: 10
• Each activated unit may move normally. Battalions may be placed on activated units if the Capitalist Player wishes (so they may use Helicopter/Amphibious movement). The battalion placed on an activated unit prevents that unit from moving.• Add one to the US Unrest total.• Artillery, Bombardment and Air Support are not restricted• The Capitalist player places 3 Objective markers on any three hexes they don’t control.• At the end of each Capitalist activation, remove all US Army and Marine Battalions and all AVRN from the map and place any newly acquired status markers on them on active regiments. One marker must be placed on each activated regiment/cadre before two markers are placed on any one regiment/cadre.
Vietnamization – Supply Cost: 0
• Only ARVN forces may place combat chits• No non-ARVN units may support any combats• Reduce the US Unrest marker by 2• VP awards for body counts are normal• Artillery, Bombardment and Air Support are restricted.• At the end of each Capitalist Activation Phase, the Capitalist player may do two of the following: add an Elite Unit or remove a Poor Unit marker on any ARVN division.
Hearts and Minds – Supply Cost: 4
• Units may move normally but may not enter a ZoC of a Communist unit.• VP awards for body counts are halved (round down)• Artillery, Bombardment and Air Support are restricted• For each Communist recruitment, roll a die – if you roll an even number, no recruitment occurs.•Reduce the US Unrest Marker by 1
Communist HQ Missions:Infiltrate - Supply Cost: 2
• Communist units may ignore enemy ZoCs for movement and Line of Communications.• The Communist Player places two objective markers on any Capitalist Controlled hex during the HQ Mission declaration.• At the end of the Communist Activation phase, the Communist Player may place one bunker on one VC unit.• At the end of the Communist Activation phase, for each VC unit in a cultivated hex, roll a D6. If a 1 is rolled, reduce the Capitalist infrastructure marker by one.• At the end of the Communist Activation phase, for each VC unit adjacent to a town or city hex or in such a hex, perform an Airfield Strike using a value of 4. (see 10.3.3).
Offensive – Supply: 8
• When this HQ mission is chosen by the Communist player, the Capitalist player may flip the Restricted Ops marker to its unrestricted side (this is done even if the Capitalist HQ Mission required a Restricted Ops marker and will likely cause a US Unrest response).• The Communist Player may place 3 Objective markers on any Capitalist controlled hexes.• Casualty VP awards are doubled • All end of turn VP awards are doubled
Once per game, the Communist player may declare a Popular Uprising Mission.
Vietnam: Rumor of War22
© 2019 Compass Games, LLC.
General Uprising – Supply: 10
• When this HQ mission is chosen by the Communist player, the Capitalist player may flip the Restricted Ops marker to its unrestricted side (this is done even if the Capitalist HQ Mission required a Restricted Ops marker and will likely cause a US Unrest response).• The Communist Player may place 6 Objective markers on any Capitalist controlled hexes.• Casualty VP awards are doubled • All territorial VP awards are doubled• All US Unrest awards are doubled• The Communist player may activate VC units with VC HQs that are within 10 hexes of the HQ regardless of any terrain or intervening Capitalist units.• For each Communist attack, the Communist player may choose three combat chits and choose which one he will use for the combat.
During the Victory Phase, the following happens:• All VC Battalions are removed from the map• All VC units that are destroyed, and routed HQs from now on are permanently eliminated from the game (they are placed in the destroyed units box). These may not be replaced.• If a leader is on a routed HQ, he is eliminated from play.
Recruit – Supply: 4
• Communist units may not attack this activation phase• All VC Cadres in South Vietnam may recruit regardless of location (see 13.1.3)• At the end of the Communist Activation phase, the Communist Player may place three bunkers on friendly units in friendly controlled hexes.
Evade – Supply: 0
• Communist units may ignore enemy ZoCs for retreats. Communists units also may not end their movement in an enemy ZoC. Communist units that retreat through enemy ZoCs must roll a D6 for Body Count for each hex retreated into.• All Communist attacks (only) suffer a -4 modifier to their die roll modifier.
10.0 AIR POWER
Players in Vietnam: Rumor of War have airpower at their disposal that they can use to influence both the strategic situation and the tactical battlefield. Additionally, as befits the air battles that occurred during this campaign, publicity about the air campaign can help and hurt each player’s victory point situation.10.1 Airfields
Airfields in the game allow planes in the Available Aircraft box to fly missions. An airfield allows one aircraft unit to be flown; an improved airfield allows two aircraft to be flown. Also, the location of the airfield determines whether or not a strategic or tactical mission may be flown. Airfields may be improved by the spending of Supply Points.Airfields arrive either via setup or as reinforcements. Airfields can be damaged through the Airfield Strike strategic mission and if the Communist player controls a hex adjacent to a Capitalist Supply Source or Capitalist controlled city hex. Airfields can be repaired and/or improved by spending supply during the Infrastructure and Supply Determination segment – a repaired Airfield is removed from the damaged box and returned to the main Airfield box. An improved Airfield is flipped to its improved side when the supply cost is paid.To fly missions, an available plane must use an airfield. Choose an aircraft unit in the Available Aircraft box and choose the airfield it is using from any airfield (regardless of location) on the Air Display. Each airfield allows one aircraft to fly. An Improved Airfield allows two planes to fly. If there are fewer airfields than can support all of a player’s aircraft, some aircraft may not be able to fly this turn. 10.2 Air CommitmentEach turn, players decide where they will commit their available aircraft. To do this the players take an aircraft and place it in the appropriate box on the Air Display. Aircraft that will fly restricted missions are placed in the restricted box of the chosen mission. All aircraft that a player wishes to use for the turn are placed at this time. While strategic missions are resolved Strategic Air Mission Resolution Phase, tactical missions are available to be used throughout the Activation Phase. At the start of the next turn, all aircraft in all mission boxes are placed back in the Available Aircraft box and may be used once again in the next turn. Aircraft can become damaged during missions and any damaged aircraft are placed in the Damaged Aircraft box throughout the turn.Damaged aircraft are placed in the Available Aircraft box if they pass the repair roll that is listed on their Air Display. This die roll is made during the Aircraft/Airfield reinforcement segment of the game turn. If they pass, they are returned to the Available Aircraft box, but if reduced, they are not flipped to their full-strength sides. If they do not pass, they remain in the Damaged Aircraft box until the next Aircraft/Airfield reinforcement
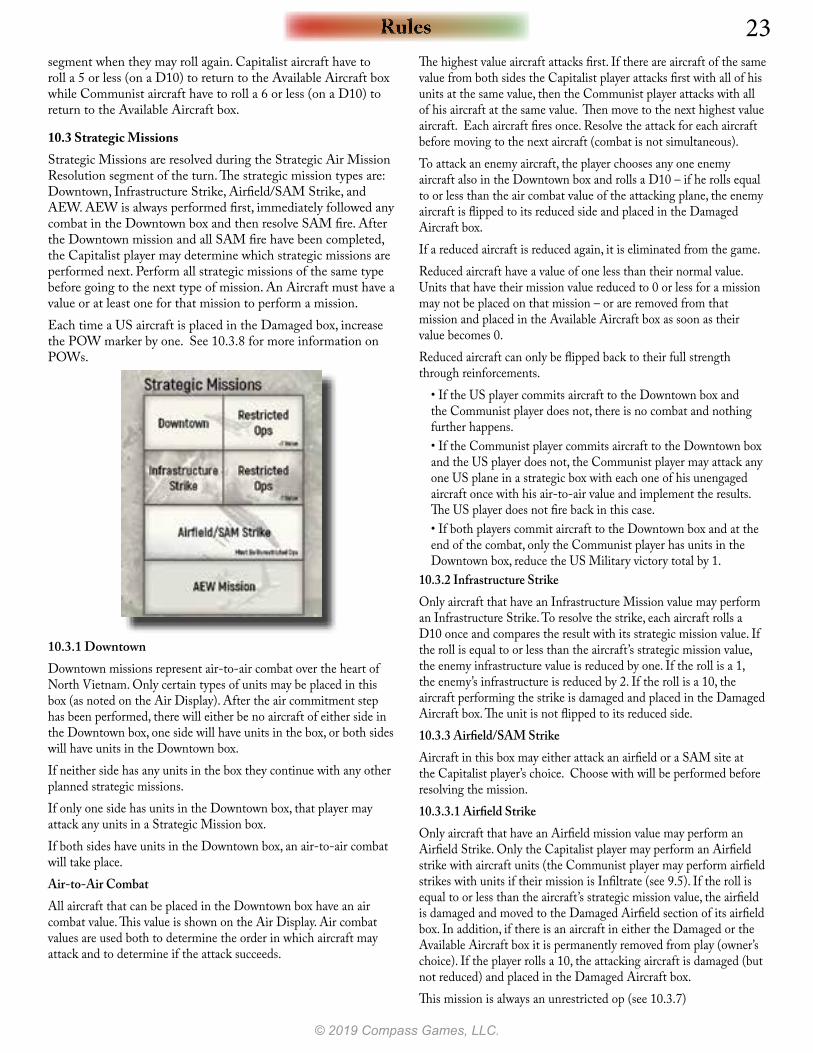
Rules 23
© 2019 Compass Games, LLC.
segment when they may roll again. Capitalist aircraft have to roll a 5 or less (on a D10) to return to the Available Aircraft box while Communist aircraft have to roll a 6 or less (on a D10) to return to the Available Aircraft box.
10.3 Strategic MissionsStrategic Missions are resolved during the Strategic Air Mission Resolution segment of the turn. The strategic mission types are: Downtown, Infrastructure Strike, Airfield/SAM Strike, and AEW. AEW is always performed first, immediately followed any combat in the Downtown box and then resolve SAM fire. After the Downtown mission and all SAM fire have been completed, the Capitalist player may determine which strategic missions are performed next. Perform all strategic missions of the same type before going to the next type of mission. An Aircraft must have a value or at least one for that mission to perform a mission.Each time a US aircraft is placed in the Damaged box, increase the POW marker by one. See 10.3.8 for more information on POWs.
10.3.1 DowntownDowntown missions represent air-to-air combat over the heart of North Vietnam. Only certain types of units may be placed in this box (as noted on the Air Display). After the air commitment step has been performed, there will either be no aircraft of either side in the Downtown box, one side will have units in the box, or both sides will have units in the Downtown box.If neither side has any units in the box they continue with any other planned strategic missions. If only one side has units in the Downtown box, that player may attack any units in a Strategic Mission box. If both sides have units in the Downtown box, an air-to-air combat will take place.Air-to-Air CombatAll aircraft that can be placed in the Downtown box have an air combat value. This value is shown on the Air Display. Air combat values are used both to determine the order in which aircraft may attack and to determine if the attack succeeds.
The highest value aircraft attacks first. If there are aircraft of the same value from both sides the Capitalist player attacks first with all of his units at the same value, then the Communist player attacks with all of his aircraft at the same value. Then move to the next highest value aircraft. Each aircraft fires once. Resolve the attack for each aircraft before moving to the next aircraft (combat is not simultaneous).To attack an enemy aircraft, the player chooses any one enemy aircraft also in the Downtown box and rolls a D10 – if he rolls equal to or less than the air combat value of the attacking plane, the enemy aircraft is flipped to its reduced side and placed in the Damaged Aircraft box.If a reduced aircraft is reduced again, it is eliminated from the game.Reduced aircraft have a value of one less than their normal value. Units that have their mission value reduced to 0 or less for a mission may not be placed on that mission – or are removed from that mission and placed in the Available Aircraft box as soon as their value becomes 0.Reduced aircraft can only be flipped back to their full strength through reinforcements.
• If the US player commits aircraft to the Downtown box and the Communist player does not, there is no combat and nothing further happens.• If the Communist player commits aircraft to the Downtown box and the US player does not, the Communist player may attack any one US plane in a strategic box with each one of his unengaged aircraft once with his air-to-air value and implement the results. The US player does not fire back in this case.• If both players commit aircraft to the Downtown box and at the end of the combat, only the Communist player has units in the Downtown box, reduce the US Military victory total by 1.
10.3.2 Infrastructure StrikeOnly aircraft that have an Infrastructure Mission value may perform an Infrastructure Strike. To resolve the strike, each aircraft rolls a D10 once and compares the result with its strategic mission value. If the roll is equal to or less than the aircraft’s strategic mission value, the enemy infrastructure value is reduced by one. If the roll is a 1, the enemy’s infrastructure is reduced by 2. If the roll is a 10, the aircraft performing the strike is damaged and placed in the Damaged Aircraft box. The unit is not flipped to its reduced side.10.3.3 Airfield/SAM StrikeAircraft in this box may either attack an airfield or a SAM site at the Capitalist player’s choice. Choose with will be performed before resolving the mission.10.3.3.1 Airfield StrikeOnly aircraft that have an Airfield mission value may perform an Airfield Strike. Only the Capitalist player may perform an Airfield strike with aircraft units (the Communist player may perform airfield strikes with units if their mission is Infiltrate (see 9.5). If the roll is equal to or less than the aircraft’s strategic mission value, the airfield is damaged and moved to the Damaged Airfield section of its airfield box. In addition, if there is an aircraft in either the Damaged or the Available Aircraft box it is permanently removed from play (owner’s choice). If the player rolls a 10, the attacking aircraft is damaged (but not reduced) and placed in the Damaged Aircraft box.This mission is always an unrestricted op (see 10.3.7)
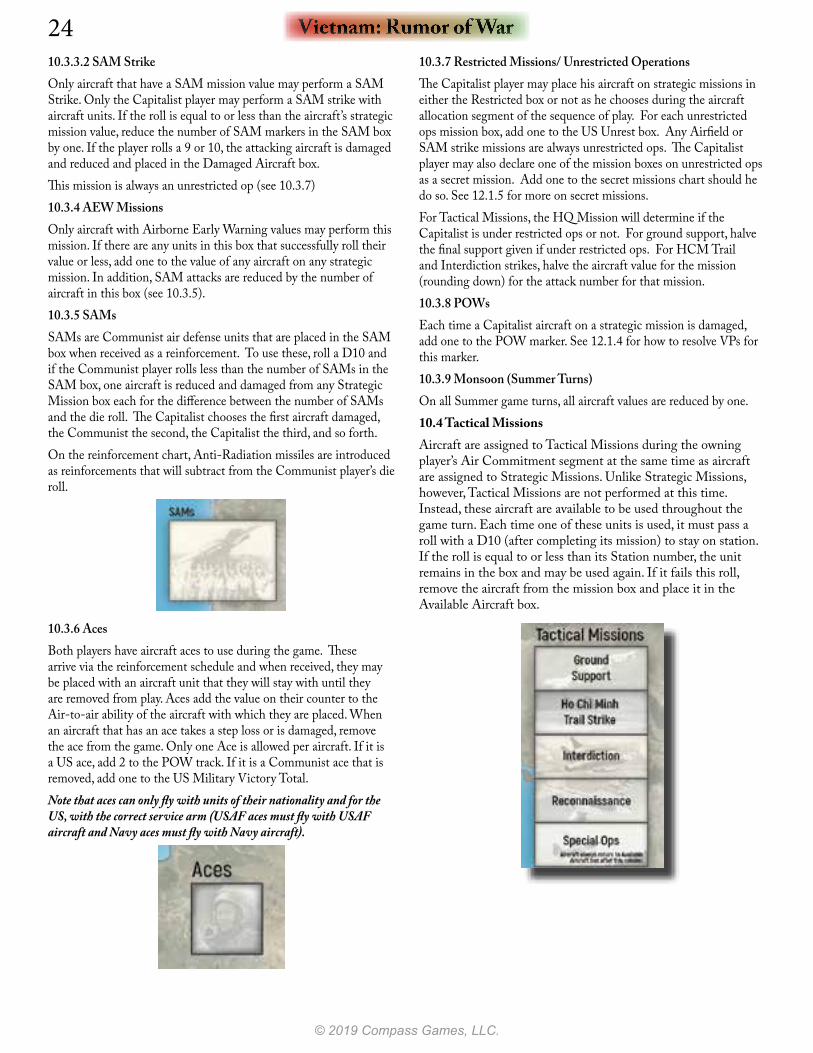
Vietnam: Rumor of War24
© 2019 Compass Games, LLC.
10.3.3.2 SAM StrikeOnly aircraft that have a SAM mission value may perform a SAM Strike. Only the Capitalist player may perform a SAM strike with aircraft units. If the roll is equal to or less than the aircraft’s strategic mission value, reduce the number of SAM markers in the SAM box by one. If the player rolls a 9 or 10, the attacking aircraft is damaged and reduced and placed in the Damaged Aircraft box.This mission is always an unrestricted op (see 10.3.7)10.3.4 AEW MissionsOnly aircraft with Airborne Early Warning values may perform this mission. If there are any units in this box that successfully roll their value or less, add one to the value of any aircraft on any strategic mission. In addition, SAM attacks are reduced by the number of aircraft in this box (see 10.3.5).10.3.5 SAMsSAMs are Communist air defense units that are placed in the SAM box when received as a reinforcement. To use these, roll a D10 and if the Communist player rolls less than the number of SAMs in the SAM box, one aircraft is reduced and damaged from any Strategic Mission box each for the difference between the number of SAMs and the die roll. The Capitalist chooses the first aircraft damaged, the Communist the second, the Capitalist the third, and so forth. On the reinforcement chart, Anti-Radiation missiles are introduced as reinforcements that will subtract from the Communist player’s die roll.
10.3.6 AcesBoth players have aircraft aces to use during the game. These arrive via the reinforcement schedule and when received, they may be placed with an aircraft unit that they will stay with until they are removed from play. Aces add the value on their counter to the Air-to-air ability of the aircraft with which they are placed. When an aircraft that has an ace takes a step loss or is damaged, remove the ace from the game. Only one Ace is allowed per aircraft. If it is a US ace, add 2 to the POW track. If it is a Communist ace that is removed, add one to the US Military Victory Total.Note that aces can only fly with units of their nationality and for the US, with the correct service arm (USAF aces must fly with USAF aircraft and Navy aces must fly with Navy aircraft).
10.3.7 Restricted Missions/ Unrestricted OperationsThe Capitalist player may place his aircraft on strategic missions in either the Restricted box or not as he chooses during the aircraft allocation segment of the sequence of play. For each unrestricted ops mission box, add one to the US Unrest box. Any Airfield or SAM strike missions are always unrestricted ops. The Capitalist player may also declare one of the mission boxes on unrestricted ops as a secret mission. Add one to the secret missions chart should he do so. See 12.1.5 for more on secret missions.For Tactical Missions, the HQ Mission will determine if the Capitalist is under restricted ops or not. For ground support, halve the final support given if under restricted ops. For HCM Trail and Interdiction strikes, halve the aircraft value for the mission (rounding down) for the attack number for that mission.10.3.8 POWsEach time a Capitalist aircraft on a strategic mission is damaged, add one to the POW marker. See 12.1.4 for how to resolve VPs for this marker.10.3.9 Monsoon (Summer Turns)On all Summer game turns, all aircraft values are reduced by one.10.4 Tactical MissionsAircraft are assigned to Tactical Missions during the owning player’s Air Commitment segment at the same time as aircraft are assigned to Strategic Missions. Unlike Strategic Missions, however, Tactical Missions are not performed at this time. Instead, these aircraft are available to be used throughout the game turn. Each time one of these units is used, it must pass a roll with a D10 (after completing its mission) to stay on station. If the roll is equal to or less than its Station number, the unit remains in the box and may be used again. If it fails this roll, remove the aircraft from the mission box and place it in the Available Aircraft box.
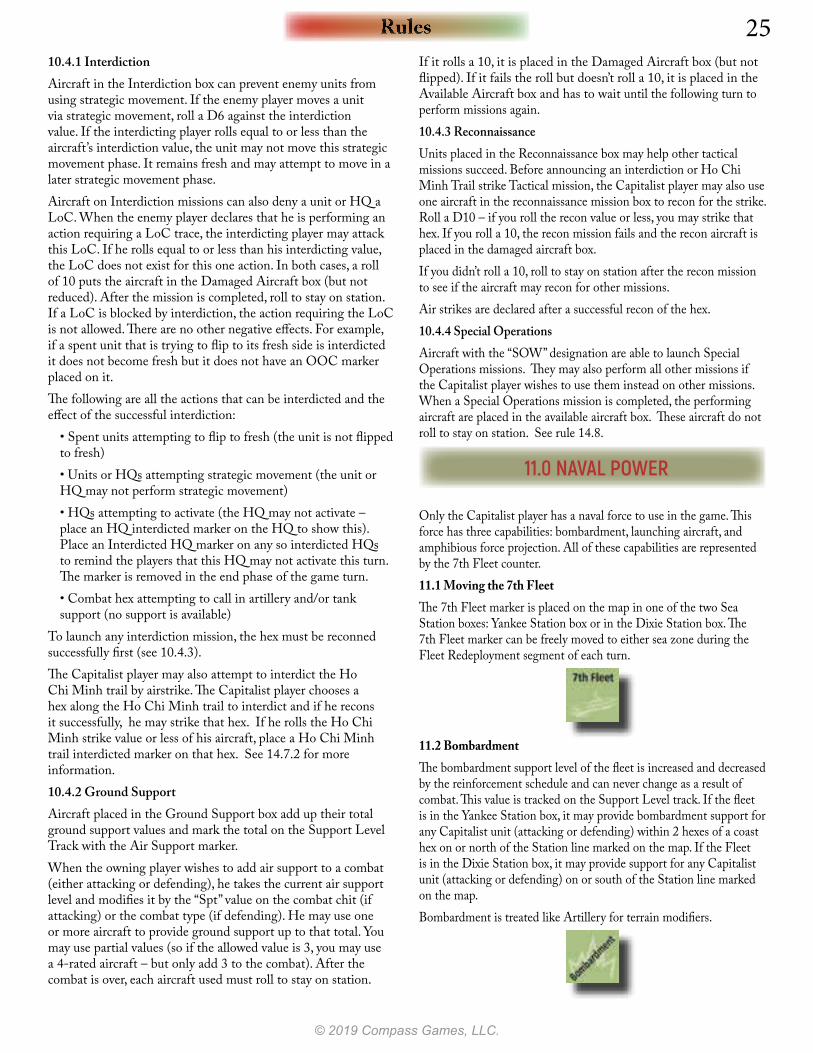
Rules 25
© 2019 Compass Games, LLC.
10.4.1 InterdictionAircraft in the Interdiction box can prevent enemy units from using strategic movement. If the enemy player moves a unit via strategic movement, roll a D6 against the interdiction value. If the interdicting player rolls equal to or less than the aircraft’s interdiction value, the unit may not move this strategic movement phase. It remains fresh and may attempt to move in a later strategic movement phase. Aircraft on Interdiction missions can also deny a unit or HQ a LoC. When the enemy player declares that he is performing an action requiring a LoC trace, the interdicting player may attack this LoC. If he rolls equal to or less than his interdicting value, the LoC does not exist for this one action. In both cases, a roll of 10 puts the aircraft in the Damaged Aircraft box (but not reduced). After the mission is completed, roll to stay on station. If a LoC is blocked by interdiction, the action requiring the LoC is not allowed. There are no other negative effects. For example, if a spent unit that is trying to flip to its fresh side is interdicted it does not become fresh but it does not have an OOC marker placed on it.The following are all the actions that can be interdicted and the effect of the successful interdiction:
• Spent units attempting to flip to fresh (the unit is not flipped to fresh)• Units or HQs attempting strategic movement (the unit or HQ may not perform strategic movement)• HQs attempting to activate (the HQ may not activate – place an HQ interdicted marker on the HQ to show this). Place an Interdicted HQ marker on any so interdicted HQs to remind the players that this HQ may not activate this turn. The marker is removed in the end phase of the game turn.• Combat hex attempting to call in artillery and/or tank support (no support is available)
To launch any interdiction mission, the hex must be reconned successfully first (see 10.4.3).The Capitalist player may also attempt to interdict the Ho Chi Minh trail by airstrike. The Capitalist player chooses a hex along the Ho Chi Minh trail to interdict and if he recons it successfully, he may strike that hex. If he rolls the Ho Chi Minh strike value or less of his aircraft, place a Ho Chi Minh trail interdicted marker on that hex. See 14.7.2 for more information.10.4.2 Ground SupportAircraft placed in the Ground Support box add up their total ground support values and mark the total on the Support Level Track with the Air Support marker. When the owning player wishes to add air support to a combat (either attacking or defending), he takes the current air support level and modifies it by the “Spt” value on the combat chit (if attacking) or the combat type (if defending). He may use one or more aircraft to provide ground support up to that total. You may use partial values (so if the allowed value is 3, you may use a 4-rated aircraft – but only add 3 to the combat). After the combat is over, each aircraft used must roll to stay on station.
If it rolls a 10, it is placed in the Damaged Aircraft box (but not flipped). If it fails the roll but doesn’t roll a 10, it is placed in the Available Aircraft box and has to wait until the following turn to perform missions again. 10.4.3 ReconnaissanceUnits placed in the Reconnaissance box may help other tactical missions succeed. Before announcing an interdiction or Ho Chi Minh Trail strike Tactical mission, the Capitalist player may also use one aircraft in the reconnaissance mission box to recon for the strike. Roll a D10 – if you roll the recon value or less, you may strike that hex. If you roll a 10, the recon mission fails and the recon aircraft is placed in the damaged aircraft box.If you didn’t roll a 10, roll to stay on station after the recon mission to see if the aircraft may recon for other missions.Air strikes are declared after a successful recon of the hex.10.4.4 Special OperationsAircraft with the “SOW” designation are able to launch Special Operations missions. They may also perform all other missions if the Capitalist player wishes to use them instead on other missions. When a Special Operations mission is completed, the performing aircraft are placed in the available aircraft box. These aircraft do not roll to stay on station. See rule 14.8.
11.0 NAVAL POWER
Only the Capitalist player has a naval force to use in the game. This force has three capabilities: bombardment, launching aircraft, and amphibious force projection. All of these capabilities are represented by the 7th Fleet counter. 11.1 Moving the 7th FleetThe 7th Fleet marker is placed on the map in one of the two Sea Station boxes: Yankee Station box or in the Dixie Station box. The 7th Fleet marker can be freely moved to either sea zone during the Fleet Redeployment segment of each turn.
11.2 BombardmentThe bombardment support level of the fleet is increased and decreased by the reinforcement schedule and can never change as a result of combat. This value is tracked on the Support Level track. If the fleet is in the Yankee Station box, it may provide bombardment support for any Capitalist unit (attacking or defending) within 2 hexes of a coast hex on or north of the Station line marked on the map. If the Fleet is in the Dixie Station box, it may provide support for any Capitalist unit (attacking or defending) on or south of the Station line marked on the map. Bombardment is treated like Artillery for terrain modifiers.

Vietnam: Rumor of War26
© 2019 Compass Games, LLC.
11.3 Amphibious Ability11.3.1 InvasionsThe Capitalist player has a limited ability to move US Marine Battalions (only) by sea during an activation. To perform an invasion, the chosen unit moves across full sea hexes at the cost of ½ movement point per hex. The unit can use any part of its movement for sea movement but must end its movement by landing on a land hex. No enemy ZoCs exist as the unit moves via sea hexes but the final hex entered, if in an enemy ZoC, does cost the additional 1 movement point if not negated by a friendly unit.The Capitalist player may only perform one invasion per game turn.11.4 Naval AircraftNaval Aircraft work almost identically to the standard air rules. Available naval aircraft are placed in the 7th Fleet Carriers box and are always considered to have an associated improved airfield provided by the carriers. Damaged Naval aircraft are placed in the Damaged Aircraft box. All other rules apply as normal to naval aircraft.Strategic air missions may only be flown if the 7th Fleet counter is in the Yankee station box. Additionally, tactical missions may only be flown above the station line (if in Yankee Station) or below the station line (if in Dixie Station).11.5 Riverine UnitsRiverine units are battalion sized US units. They may only be adjacent to river hexes for movement and retreat. They are units in all ways. See 14.1.3 for more information.
12.0 VICTORY & FOREIGN INTERVENTION
12.1 Victory PointsIn this game, both sides are accumulating Victory Points to attempt to win the game. If either player gets to 31 points, they are the winner. If both sides reach 31 points at the same time, the Communist Player is the winner. At the end of a scenario, if neither player has 31 points, the player with the higher total wins the game. If the points are tied, the Communist Player wins. For the Communist Player, he will be tracking the anti-war movement in the US using the US Unrest marker. If the point total reaches 31, it is assumed that the US population has had enough of war and the war ends in a Communist Victory. For the US player, he will be tracking the success of the war using the US Military Victory marker, and he wins either securing South Vietnam from Communist takeover, or outright defeat of the Communist forces in the region. If a player has 0 victory points and must deduct a VP cost, the amount lost is added to the opposing player’s total, at double the value. For example, if the US Military victory is at 0 and the Capitalist player loses 2 VPs, 4 would be added to the US Unrest marker.
When the Communist player receives or deducts VPs, these are added or subtracted from the US Unrest total. When the US receives or deducts VPs, these are added or subtracted from the US Military Victory total.Certain events occur when the tracks are at certain levels. See the scenario instructions for events and limitations.12.1.1 Tracking Victory PointsVPs are either awarded at the moment they are received or during the Victory Point check of the End Phase. The listing of the award in the scenario instructions will say at what time to award VPs.12.1.2 Gaining (and losing) Victory PointsVP awards are listed in each scenario for specific objectives. Once the US Unrest total is over certain values on the Victory Point track, they never reduce under those points regardless of how many US Unrest points are to be deducted. These breakpoints are at 5 VPs, 10 VPs, and 20 VPs and are listed on the VP track. Thus if the US Unrest marker is on the 7 space and the total is to be reduced by 3 points, it will go to the 5 space and not ever go lower.12.1.3 Placing/Removing/Claiming Objective MarkersObjective markers can be placed as a random event or during the mission chit assignment for HQs. They are always drawn at random and neither player knows the value of the marker until it is revealed. If placed by random event, draw an objective marker randomly and place on the combat hex with its value revealed. At the conclusion of the combat, the Capitalist player gains the VPs to the US Military Victory marker if he wins and loses the same value from the US Military Victory value if he loses. If placed during the HQ mission declaration, randomly draw a marker and place it unrevealed. Objective markers are revealed immediately if a combat chit has been placed in the hex with the objective marker. At the conclusion of the combat, the Capitalist player gains the VPs to the US Military Victory marker if he wins and loses the same value from the US Military Victory value if he loses. If no combat chit has been placed in the Objective marker hex throughout the Activation Phase, the Communist player may reveal and claim any Objective marker that is in a hex they control during the end phase. VPs gained in this way subtract from the US Military Victory total.
US Riverine Patrol

Rules 27
© 2019 Compass Games, LLC.
12.1.4 POWs, Body Counts, Secret Ops, and Casualties
POWs, Body Counts, Secret Ops, and Casualties are tracked using their own markers. As they are accumulated, track these on the appropriate chart for the owning player. The POW marker is tracked on the Hanoi Hilton track on the Communist air display. Whenever either player gains one of these types of points, add that number gained to the track and the owning player may choose to roll for a victory point. If he rolls equal to or less than the total points of the marker with a D10, add a Victory Point to his total and return the marker to the 0 space. Should he roll more than the number of accumulated points, the marker is also returned to the 0 space but no VPs are awarded. Should the marker advance past the “9” space, automatically add a VP to the owning player’s total and return the marker to the 0 space.12.1.5 Secret Capitalist OperationsSome VPs normally awarded to the Communist may be declared as secret (not publicly acknowledged). These are labeled in the scenario victory conditions section of every scenario. These VP awards are tracked using the secret VP marker. Claiming these points works exactly like claiming points in 12.1.4. Whenever Capitalist player gains one of these types of points, add that number gained to the track and the Communist player may choose to roll to see if the secret operation has been revealed to the American public. If he rolls less than or equal to the total points of the marker with a D10, add a Victory Point to the US Unrest total and return the marker to the 0 space. Flip the marker to “No Secret Ops side”. Should he roll more than the number of accumulated points, the marker is also returned to the 0 space but no VPs are awarded. Should the marker advance past the “9” space, automatically add 1 VPs to the US Unrest total and return the marker to the 0 space. The marker is flipped to its “No Secret Ops” side. Unless the Republicans win the presidency later in the game, no more secret ops are allowed.12.2 Chinese InterventionDuring the Chinese Intervention check phase, if there are any Capitalist units in North Vietnam, the Communist Player rolls a D10. If he rolls a 1 or 2, the Chinese have intervened in the war. If there are any Capitalist units in Laos but not in North Vietnam, the Communist player rolls a D10. If he rolls a 1, the Chinese have intervened.If intervention occurs, perform the following:
• Replace the current Communist theater commander with the Ye Jianyang marker.• Place all PRC units in any Communist Supply Sources on the north edge of the board.• Place the 2 PRC aircraft in the North China Airbase box.• Place an improved airfield in the China Airfields box (this airfield may be attacked).• Add 10 Infrastructure Points to the Communist Player Aid
• All US Unrest Points awarded to the Communist player for entering countries other than South Vietnam are ignored for the remainder of the game.• Deduct 10 US Unrest points (this deduction may pass the breakpoints listed on the table).• All VP awards for both players are doubled in value• The Communist player receives 3 replacement points per turn• Both players, without supply cost and regardless of other restrictions, now always use the Offensive HQ Mission. For the Capitalist player, all ops are unrestricted for the remainder of the game with no VPs awarded for the Communist player
13.0 REINFORCEMENT & REPLACEMENTS
13.1 Reinforcements13.1.1 Reinforcement EntryDuring the Reinforcement Phase, both players will place their reinforcements. Reinforcements are placed on friendly Supply Sources. US and AVRN units must be placed in Supply Sources in South Vietnam. All Cambodian and Laotian reinforcements are placed on their respective Supply Sources. PAVN Units are placed on PAVN supply sources. VC reinforcements are placed via recruitment as described below. Returning HQs from the routed box are placed the same way.Should a supply source not be available, US units (only) are placed in any friendly coastal city in their correct Corps area. PAVN units are placed in the PRC Supply Source hex. All other units, and all US or PAVN units that couldn’t be placed in alternate locations, are placed to the side and may only enter when their Supply Source is friendly controlled during a future reinforcement segment.All reinforcements enter the game on their fresh sides.13.1.2 VC RecruitmentAfter setting up the scenario, all remaining VC Regiments, Battalions and Cadres are placed in a cup. From this cup, the Communist player will randomly draw VC units that have been recruited. VC units appear in the reinforcement phase by recruitment. To recruit, all VC Cadres that are in cultivated hexes, towns, or in War Zone C or D, or in the Iron Triangle, may draw one unit from the cup containing all the VC units not in play. Cadres in city hexes may draw two units instead of one. These recruited units are placed in any hex in which there is a VC cadre - or in any hex adjacent to a VC cadre that isn’t occupied by a Capitalist unit. If the HQ mission “Recruit” has been declared, all Cadres in South Vietnam regardless of the type of hex it is now in may recruit.If the HQ Mission “Recruit” has been declared, all Cadres in South Vietnam may recruit in all hexes - not just those restricted as above .
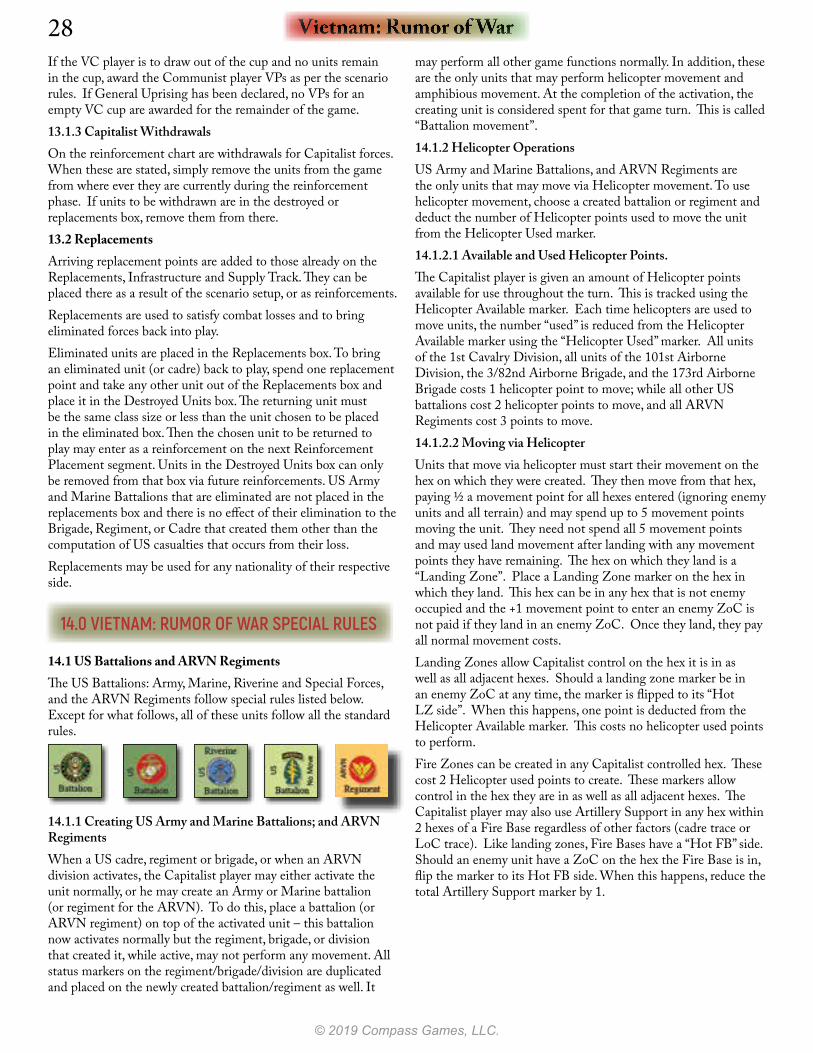
Vietnam: Rumor of War28
© 2019 Compass Games, LLC.
If the VC player is to draw out of the cup and no units remain in the cup, award the Communist player VPs as per the scenario rules. If General Uprising has been declared, no VPs for an empty VC cup are awarded for the remainder of the game.13.1.3 Capitalist WithdrawalsOn the reinforcement chart are withdrawals for Capitalist forces. When these are stated, simply remove the units from the game from where ever they are currently during the reinforcement phase. If units to be withdrawn are in the destroyed or replacements box, remove them from there.13.2 ReplacementsArriving replacement points are added to those already on the Replacements, Infrastructure and Supply Track. They can be placed there as a result of the scenario setup, or as reinforcements.Replacements are used to satisfy combat losses and to bring eliminated forces back into play.Eliminated units are placed in the Replacements box. To bring an eliminated unit (or cadre) back to play, spend one replacement point and take any other unit out of the Replacements box and place it in the Destroyed Units box. The returning unit must be the same class size or less than the unit chosen to be placed in the eliminated box. Then the chosen unit to be returned to play may enter as a reinforcement on the next Reinforcement Placement segment. Units in the Destroyed Units box can only be removed from that box via future reinforcements. US Army and Marine Battalions that are eliminated are not placed in the replacements box and there is no effect of their elimination to the Brigade, Regiment, or Cadre that created them other than the computation of US casualties that occurs from their loss.Replacements may be used for any nationality of their respective side.
14.0 VIETNAM: RUMOR OF WAR SPECIAL RULES
14.1 US Battalions and ARVN RegimentsThe US Battalions: Army, Marine, Riverine and Special Forces, and the ARVN Regiments follow special rules listed below. Except for what follows, all of these units follow all the standard rules.
14.1.1 Creating US Army and Marine Battalions; and ARVN RegimentsWhen a US cadre, regiment or brigade, or when an ARVN division activates, the Capitalist player may either activate the unit normally, or he may create an Army or Marine battalion (or regiment for the ARVN). To do this, place a battalion (or ARVN regiment) on top of the activated unit – this battalion now activates normally but the regiment, brigade, or division that created it, while active, may not perform any movement. All status markers on the regiment/brigade/division are duplicated and placed on the newly created battalion/regiment as well. It
may perform all other game functions normally. In addition, these are the only units that may perform helicopter movement and amphibious movement. At the completion of the activation, the creating unit is considered spent for that game turn. This is called “Battalion movement”.14.1.2 Helicopter OperationsUS Army and Marine Battalions, and ARVN Regiments are the only units that may move via Helicopter movement. To use helicopter movement, choose a created battalion or regiment and deduct the number of Helicopter points used to move the unit from the Helicopter Used marker. 14.1.2.1 Available and Used Helicopter Points.The Capitalist player is given an amount of Helicopter points available for use throughout the turn. This is tracked using the Helicopter Available marker. Each time helicopters are used to move units, the number “used” is reduced from the Helicopter Available marker using the “Helicopter Used” marker. All units of the 1st Cavalry Division, all units of the 101st Airborne Division, the 3/82nd Airborne Brigade, and the 173rd Airborne Brigade costs 1 helicopter point to move; while all other US battalions cost 2 helicopter points to move, and all ARVN Regiments cost 3 points to move. 14.1.2.2 Moving via HelicopterUnits that move via helicopter must start their movement on the hex on which they were created. They then move from that hex, paying ½ a movement point for all hexes entered (ignoring enemy units and all terrain) and may spend up to 5 movement points moving the unit. They need not spend all 5 movement points and may used land movement after landing with any movement points they have remaining. The hex on which they land is a “Landing Zone”. Place a Landing Zone marker on the hex in which they land. This hex can be in any hex that is not enemy occupied and the +1 movement point to enter an enemy ZoC is not paid if they land in an enemy ZoC. Once they land, they pay all normal movement costs. Landing Zones allow Capitalist control on the hex it is in as well as all adjacent hexes. Should a landing zone marker be in an enemy ZoC at any time, the marker is flipped to its “Hot LZ side”. When this happens, one point is deducted from the Helicopter Available marker. This costs no helicopter used points to perform.Fire Zones can be created in any Capitalist controlled hex. These cost 2 Helicopter used points to create. These markers allow control in the hex they are in as well as all adjacent hexes. The Capitalist player may also use Artillery Support in any hex within 2 hexes of a Fire Base regardless of other factors (cadre trace or LoC trace). Like landing zones, Fire Bases have a “Hot FB” side. Should an enemy unit have a ZoC on the hex the Fire Base is in, flip the marker to its Hot FB side. When this happens, reduce the total Artillery Support marker by 1.
Rules 29
© 2019 Compass Games, LLC.
At the completion of an activation, remove all US Army and Marine Battalions, and any ARVN Regiments from the map. These must trace a Line of Communications to be removed freely. If they cannot trace such a line, roll a D6 for US Casualties and add the number rolled to the Communist US Casualty marker. After this is complete, remove all landing zone markers from the map. Fire Bases may either be removed at the end of any activation or they may stay on the map until the end of the Capitalist turn – when they must be removed from play. Should any battalion acquire a new or changed status marker during its activation and is removed from play at the end of that activation, the Capitalist player must place the newly acquired status marker on any active (but not moved) regiment or brigade. It need not be placed with the larger unit that created it. One new marker must go on all active regiments or brigades before any unit gets a second marker. US markers must be placed with US units and ARVN markers must be placed with active ARVN Divisions. If the marker cannot be placed on a parent unit for any reason, the added marker is removed from play.14.1.3 Amphibious OperationsMarine Battalions (only) may also perform amphibious movement. Only one Marine battalion may move via amphibious movement in any one activation. To do so, the battalion must be on a coastal hex and from there move from coastal or all-sea hex to another such hex for 1/3 movement points for each hex entered. They may use this movement for any part of their movement for their activation. While moving by amphibious movement, the unit moving may ignore all terrain costs and the presence of any enemy units or ZoCs. At the end of their movement, they must be in a land or coastal hex. When they land, they do not pay the +1 movement cost to enter an enemy ZoC but once landed, they pay all movement costs normally.14.1.4 Riverine UnitsRiverine Battalions arrive via the reinforcement list and are placed normally (in a friendly supply source). They move along river hexsides exclusively (including movement and retreats). Should they not have a movement path along a river, they are eliminated. These units pay 1 movement point for each hex entered but do pay the +1 movement cost to enter an enemy ZoC.14.1.5 Special Forces UnitsThe Capitalist player has 7 Special Forces battalions to use throughout the game. These units are either placed during the setup or are placed on hexes in South Vietnam (or in invaded countries if the Capitalist has invaded a country) via the Special Ops tactical air mission. The counters provided are an absolute limit on the number of these units available. The Capitalist player may eliminate these units during the eliminate friendly units phase of the sequence of play but these units cause no casualty roll nor are they eliminated per the standard rules – but are rather now immediately available to be used in a Special Ops tactical air mission.Special Forces units are always considered to have a Line of Communications for all game purposes (including for tank and artillery support) but may never move from the hex in which they are placed.
14.2 LeadersThere are three types of leaders in the game – Theater Commanders, Ground Commanders, and Aces. These are either placed at the start of play, arrive via the reinforcement schedule, or can be relieved by the player for political reasons. Theater commanders affect all forces of their side while ground leaders and aces only assist certain units.14.2.1 Theater CommandersTheater commanders are placed in the Theater Commander box on the player aid. Theater commanders have the following effects when in command:Westmoreland
• During every victory point check, increase the US Unrest marker by one• Subtract one from the Communist die roll when rolling to reveal secret ops• No ARVN forces may receive any support in combat other than adjacency support if there is not a US unit adjacent to a combat hex• HQ Mission “Vietnamization” may not be used• If the US gains a victory point for Body Count, add one additional Victory Point to the total.• All spreads to be honored must come first from US Casualties, then you may use replacements or hexes retreated as the owner wishes.
Abrams• May replace Westmoreland at any time the US Unrest marker is at 10 or higher; when put in command, reduce US Unrest marker by up to 10 (not to go below the thresholds listed on the table)• May use any HQ Mission; Offensive mission adds two to the US Unrest marker if declared• If the Communist player gains any Victory Points from casualties, add two victory points to the US Unrest total instead of one
Weyand• May replace Abrams at any time the US Unrest marker is at 15 or higher; when put in command, reduce US Unrest marker by up to 5 (not to go below the thresholds listed on the table); may not replace Abrams if it is in the 1974 or 1975 year.• May not use Offensive HQ Mission• If the Communist player gains any Victory Points from casualties, add two victory points to the US Unrest total instead of one• The Capitalist player does not receive any victory points for Body Count• May not be replaced
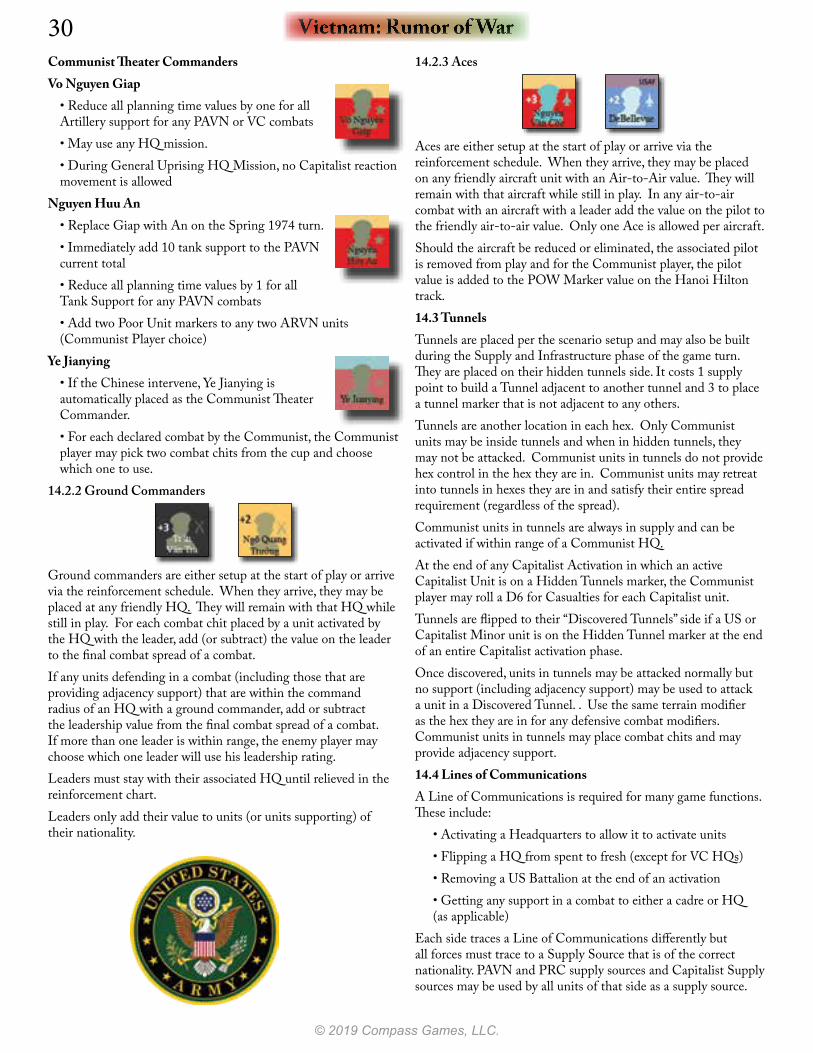
Vietnam: Rumor of War30
© 2019 Compass Games, LLC.
Communist Theater CommandersVo Nguyen Giap
• Reduce all planning time values by one for all Artillery support for any PAVN or VC combats• May use any HQ mission.• During General Uprising HQ Mission, no Capitalist reaction movement is allowed
Nguyen Huu An• Replace Giap with An on the Spring 1974 turn.• Immediately add 10 tank support to the PAVN current total• Reduce all planning time values by 1 for all Tank Support for any PAVN combats• Add two Poor Unit markers to any two ARVN units (Communist Player choice)
Ye Jianying• If the Chinese intervene, Ye Jianying is automatically placed as the Communist Theater Commander.• For each declared combat by the Communist, the Communist player may pick two combat chits from the cup and choose which one to use.
14.2.2 Ground Commanders
Ground commanders are either setup at the start of play or arrive via the reinforcement schedule. When they arrive, they may be placed at any friendly HQ. They will remain with that HQ while still in play. For each combat chit placed by a unit activated by the HQ with the leader, add (or subtract) the value on the leader to the final combat spread of a combat.If any units defending in a combat (including those that are providing adjacency support) that are within the command radius of an HQ with a ground commander, add or subtract the leadership value from the final combat spread of a combat. If more than one leader is within range, the enemy player may choose which one leader will use his leadership rating.Leaders must stay with their associated HQ until relieved in the reinforcement chart.Leaders only add their value to units (or units supporting) of their nationality.
14.2.3 Aces
Aces are either setup at the start of play or arrive via the reinforcement schedule. When they arrive, they may be placed on any friendly aircraft unit with an Air-to-Air value. They will remain with that aircraft while still in play. In any air-to-air combat with an aircraft with a leader add the value on the pilot to the friendly air-to-air value. Only one Ace is allowed per aircraft.Should the aircraft be reduced or eliminated, the associated pilot is removed from play and for the Communist player, the pilot value is added to the POW Marker value on the Hanoi Hilton track.14.3 TunnelsTunnels are placed per the scenario setup and may also be built during the Supply and Infrastructure phase of the game turn. They are placed on their hidden tunnels side. It costs 1 supply point to build a Tunnel adjacent to another tunnel and 3 to place a tunnel marker that is not adjacent to any others.Tunnels are another location in each hex. Only Communist units may be inside tunnels and when in hidden tunnels, they may not be attacked. Communist units in tunnels do not provide hex control in the hex they are in. Communist units may retreat into tunnels in hexes they are in and satisfy their entire spread requirement (regardless of the spread).Communist units in tunnels are always in supply and can be activated if within range of a Communist HQ.At the end of any Capitalist Activation in which an active Capitalist Unit is on a Hidden Tunnels marker, the Communist player may roll a D6 for Casualties for each Capitalist unit.Tunnels are flipped to their “Discovered Tunnels” side if a US or Capitalist Minor unit is on the Hidden Tunnel marker at the end of an entire Capitalist activation phase.Once discovered, units in tunnels may be attacked normally but no support (including adjacency support) may be used to attack a unit in a Discovered Tunnel. . Use the same terrain modifier as the hex they are in for any defensive combat modifiers. Communist units in tunnels may place combat chits and may provide adjacency support.14.4 Lines of CommunicationsA Line of Communications is required for many game functions. These include:
• Activating a Headquarters to allow it to activate units• Flipping a HQ from spent to fresh (except for VC HQs)• Removing a US Battalion at the end of an activation• Getting any support in a combat to either a cadre or HQ (as applicable)
Each side traces a Line of Communications differently but all forces must trace to a Supply Source that is of the correct nationality. PAVN and PRC supply sources and Capitalist Supply sources may be used by all units of that side as a supply source.
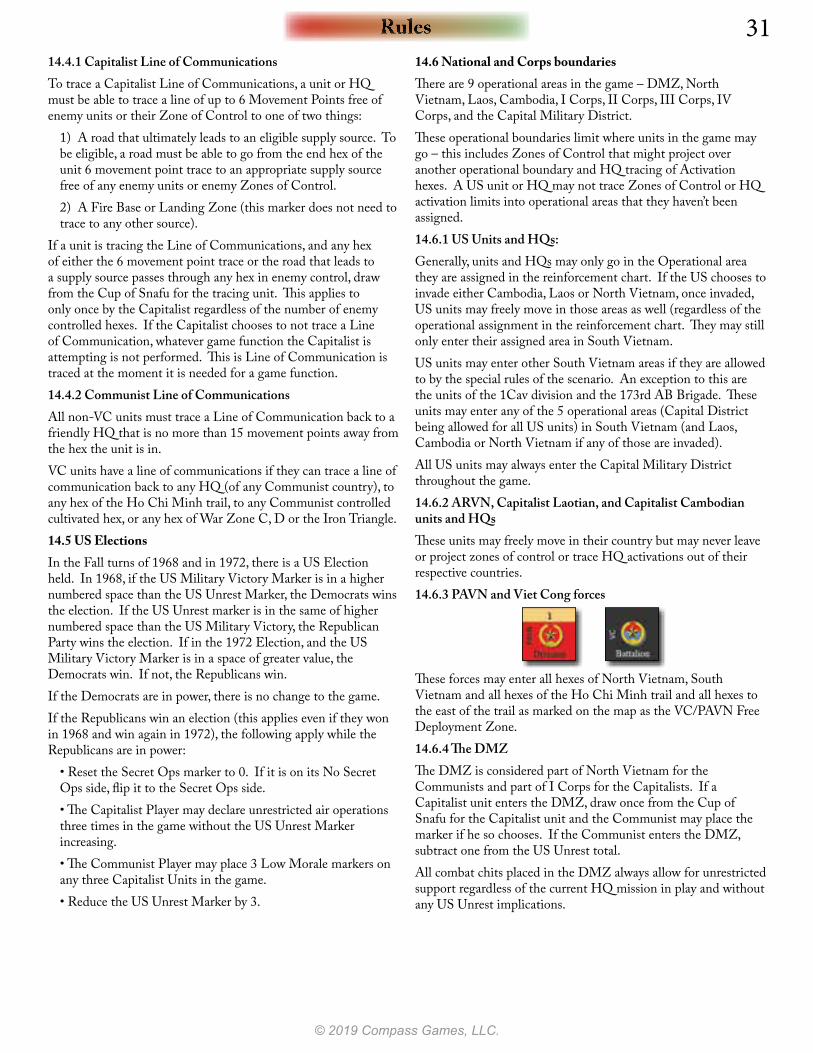
Rules 31
© 2019 Compass Games, LLC.
14.4.1 Capitalist Line of CommunicationsTo trace a Capitalist Line of Communications, a unit or HQ must be able to trace a line of up to 6 Movement Points free of enemy units or their Zone of Control to one of two things:
1) A road that ultimately leads to an eligible supply source. To be eligible, a road must be able to go from the end hex of the unit 6 movement point trace to an appropriate supply source free of any enemy units or enemy Zones of Control. 2) A Fire Base or Landing Zone (this marker does not need to trace to any other source).
If a unit is tracing the Line of Communications, and any hex of either the 6 movement point trace or the road that leads to a supply source passes through any hex in enemy control, draw from the Cup of Snafu for the tracing unit. This applies to only once by the Capitalist regardless of the number of enemy controlled hexes. If the Capitalist chooses to not trace a Line of Communication, whatever game function the Capitalist is attempting is not performed. This is Line of Communication is traced at the moment it is needed for a game function.14.4.2 Communist Line of CommunicationsAll non-VC units must trace a Line of Communication back to a friendly HQ that is no more than 15 movement points away from the hex the unit is in. VC units have a line of communications if they can trace a line of communication back to any HQ (of any Communist country), to any hex of the Ho Chi Minh trail, to any Communist controlled cultivated hex, or any hex of War Zone C, D or the Iron Triangle. 14.5 US ElectionsIn the Fall turns of 1968 and in 1972, there is a US Election held. In 1968, if the US Military Victory Marker is in a higher numbered space than the US Unrest Marker, the Democrats wins the election. If the US Unrest marker is in the same of higher numbered space than the US Military Victory, the Republican Party wins the election. If in the 1972 Election, and the US Military Victory Marker is in a space of greater value, the Democrats win. If not, the Republicans win.If the Democrats are in power, there is no change to the game.If the Republicans win an election (this applies even if they won in 1968 and win again in 1972), the following apply while the Republicans are in power:
• Reset the Secret Ops marker to 0. If it is on its No Secret Ops side, flip it to the Secret Ops side.• The Capitalist Player may declare unrestricted air operations three times in the game without the US Unrest Marker increasing.• The Communist Player may place 3 Low Morale markers on any three Capitalist Units in the game.• Reduce the US Unrest Marker by 3.
14.6 National and Corps boundariesThere are 9 operational areas in the game – DMZ, North Vietnam, Laos, Cambodia, I Corps, II Corps, III Corps, IV Corps, and the Capital Military District.These operational boundaries limit where units in the game may go – this includes Zones of Control that might project over another operational boundary and HQ tracing of Activation hexes. A US unit or HQ may not trace Zones of Control or HQ activation limits into operational areas that they haven’t been assigned.14.6.1 US Units and HQs:Generally, units and HQs may only go in the Operational area they are assigned in the reinforcement chart. If the US chooses to invade either Cambodia, Laos or North Vietnam, once invaded, US units may freely move in those areas as well (regardless of the operational assignment in the reinforcement chart. They may still only enter their assigned area in South Vietnam.US units may enter other South Vietnam areas if they are allowed to by the special rules of the scenario. An exception to this are the units of the 1Cav division and the 173rd AB Brigade. These units may enter any of the 5 operational areas (Capital District being allowed for all US units) in South Vietnam (and Laos, Cambodia or North Vietnam if any of those are invaded).All US units may always enter the Capital Military District throughout the game.14.6.2 ARVN, Capitalist Laotian, and Capitalist Cambodian units and HQsThese units may freely move in their country but may never leave or project zones of control or trace HQ activations out of their respective countries.14.6.3 PAVN and Viet Cong forces
These forces may enter all hexes of North Vietnam, South Vietnam and all hexes of the Ho Chi Minh trail and all hexes to the east of the trail as marked on the map as the VC/PAVN Free Deployment Zone.14.6.4 The DMZThe DMZ is considered part of North Vietnam for the Communists and part of I Corps for the Capitalists. If a Capitalist unit enters the DMZ, draw once from the Cup of Snafu for the Capitalist unit and the Communist may place the marker if he so chooses. If the Communist enters the DMZ, subtract one from the US Unrest total.All combat chits placed in the DMZ always allow for unrestricted support regardless of the current HQ mission in play and without any US Unrest implications.

Vietnam: Rumor of War32
© 2019 Compass Games, LLC.
14.7 Ho Chi Minh Trail
The Ho Chi Minh Trail stretches from Dong Hoi and Vinh all the way through the map and ending in hex 0970. There are 6 termini on the map which may be used as a supply source for all Communist forces. 14.7.1 Activating a Terminus
At the beginning of a scenario, the Communist Player will be given the value of the Ho Chi Minh Trail marker. This is placed on the Communist Player aid card. For a terminus to be active and to function as a Supply Source, it must be numbered the same or lower than the current status marker. Thus if the status marker is in the 4 space, the Terminus markers 1-4 are active and functioning. Higher numbered termini’ are not supply sources.Each Capitalist Interdiction markers subtract one to the Terminus number. So if the status marker is on the 6 space and 2 interdiction markers have been placed, only termini’ 1-4 are currently active.14.7.2 Interdicting the Ho Chi Minh Trail
If a Capitalist unit or Zone of Control extends into an unoccupied HCM Trail hex, place an interdicted marker on that hex. Only one marker is placed for either a Zone of Control or a Unit for each unit in such a hex.The number of HCM Interdicted markers is limited by the countermix.
14.8 SOW Aircraft
The 14 SOW, 315 SOW, 633 SOW, and 27 SOW Aircraft wings may perform all normal missions as allowed by their plane type but in addition, they may fly Special Ops air missions. These missions happen per the sequence of play and once performed, the aircraft is done for the game turn and may not roll to stay on station. To perform any of these missions, a Special Forces Battalion must be available to use (not on the map). To perform this mission, roll a D10 against the aircraft types Special Ops rating. You must roll equal to or less than your Special Ops value to succeed. If you roll greater than the Special Ops plane type value, the mission fails automatically. If the mission result is failure, use that result. If the mission is a success by die roll but greater than the value of the aircraft, the mission fails and the aircraft is placed in the available aircraft box.
If a successful recon mission is performed prior to the mission, add one to the die roll. All of these missions may be declared “secret”. If so, any US Unrest points added from the results below are instead added to the Secret Ops marker. You must declare “secret” or not before rolling the die to see the result.
These missions and results are listed below:
POW Rescue:
Die Roll:
1- Failure! Add 2 to the POW Marker.2- Failure! Add 1 to the POW Marker.3- Success! Reduce the current Hanoi Hilton track to 0.5- Success! Reduce the current Hanoi Hilton track to 0.6- Success! Reduce the US Unrest total by 1, reduce the current Hanoi Hilton track to 0.7- Decisive success! Reduce the US Unrest total by 2, reduce the current Hanoi Hilton track to 0. Yell a profanity at your opponent.8- Mission Failure! No other effects.9- Disaster! The SOW aircraft is reduced and damaged and the POWs have all been lost (add 1 VP to the US Unrest total).10- Complete Disaster! The SOW aircraft is reduced and damaged, the POWs have all been lost. Add 2 VP to the US Unrest total, add 2 to the POW marker, and the Special Forces Battalion is removed from the game.
Special Forces Insertion:
Die Roll:
1 – Failure, no Special Forces battalion is placed2-7 – Success – place the Special Forces battalion on any hex desired8-9 – Disaster! The Special Forces marker is not placed, add 1 to the US Unrest total.10 – Complete Disaster! - The Special Forces marker is not placed, add 1 to the US Unrest total, the Special Forces battalion is removed from the game. Place the Aircraft in the Damaged Aircraft box.
Modifier – if the hex is not in an enemy ZoC, subtract one from the die roll.
US Special Forces (US Army)US Marine Corps
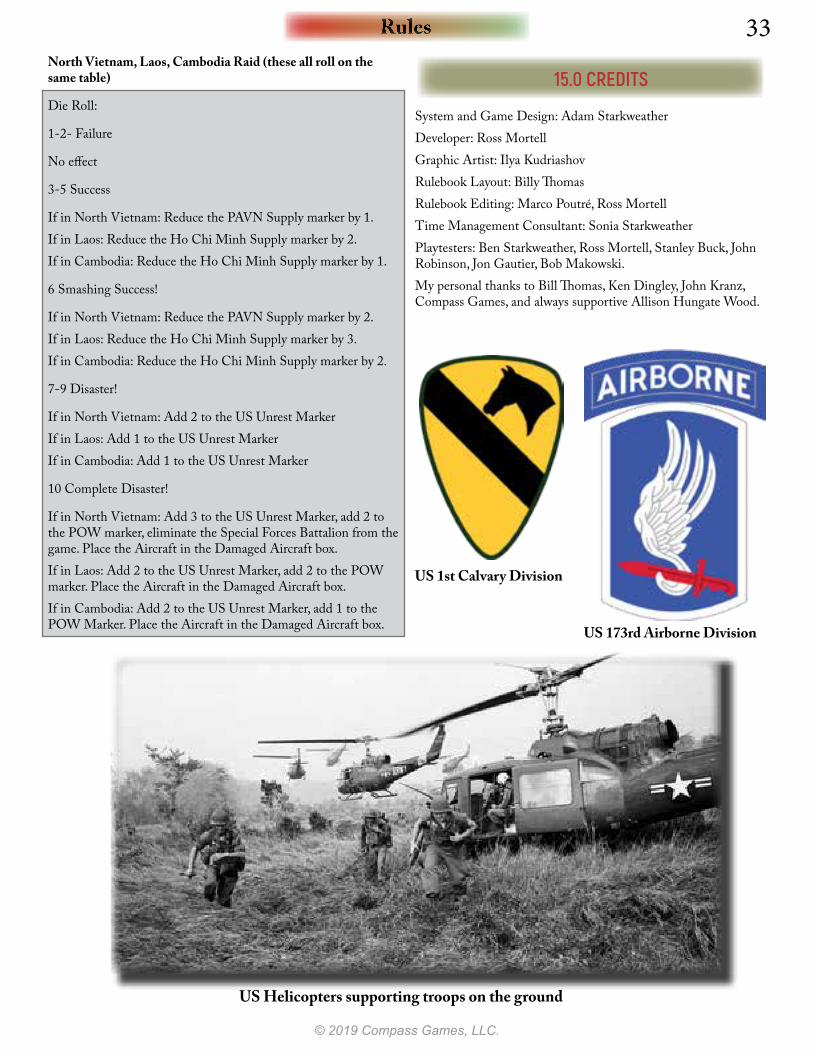
Rules 33
© 2019 Compass Games, LLC.
North Vietnam, Laos, Cambodia Raid (these all roll on the same table)
Die Roll:
1-2- Failure
No effect
3-5 Success
If in North Vietnam: Reduce the PAVN Supply marker by 1.If in Laos: Reduce the Ho Chi Minh Supply marker by 2.If in Cambodia: Reduce the Ho Chi Minh Supply marker by 1.
6 Smashing Success!
If in North Vietnam: Reduce the PAVN Supply marker by 2.If in Laos: Reduce the Ho Chi Minh Supply marker by 3.If in Cambodia: Reduce the Ho Chi Minh Supply marker by 2.
7-9 Disaster!
If in North Vietnam: Add 2 to the US Unrest MarkerIf in Laos: Add 1 to the US Unrest MarkerIf in Cambodia: Add 1 to the US Unrest Marker
10 Complete Disaster!
If in North Vietnam: Add 3 to the US Unrest Marker, add 2 to the POW marker, eliminate the Special Forces Battalion from the game. Place the Aircraft in the Damaged Aircraft box.If in Laos: Add 2 to the US Unrest Marker, add 2 to the POW marker. Place the Aircraft in the Damaged Aircraft box.If in Cambodia: Add 2 to the US Unrest Marker, add 1 to the POW Marker. Place the Aircraft in the Damaged Aircraft box.
15.0 CREDITS
System and Game Design: Adam StarkweatherDeveloper: Ross MortellGraphic Artist: Ilya KudriashovRulebook Layout: Billy ThomasRulebook Editing: Marco Poutré, Ross MortellTime Management Consultant: Sonia StarkweatherPlaytesters: Ben Starkweather, Ross Mortell, Stanley Buck, John Robinson, Jon Gautier, Bob Makowski.My personal thanks to Bill Thomas, Ken Dingley, John Kranz, Compass Games, and always supportive Allison Hungate Wood.
US Helicopters supporting troops on the ground
US 1st Calvary Division
US 173rd Airborne Division
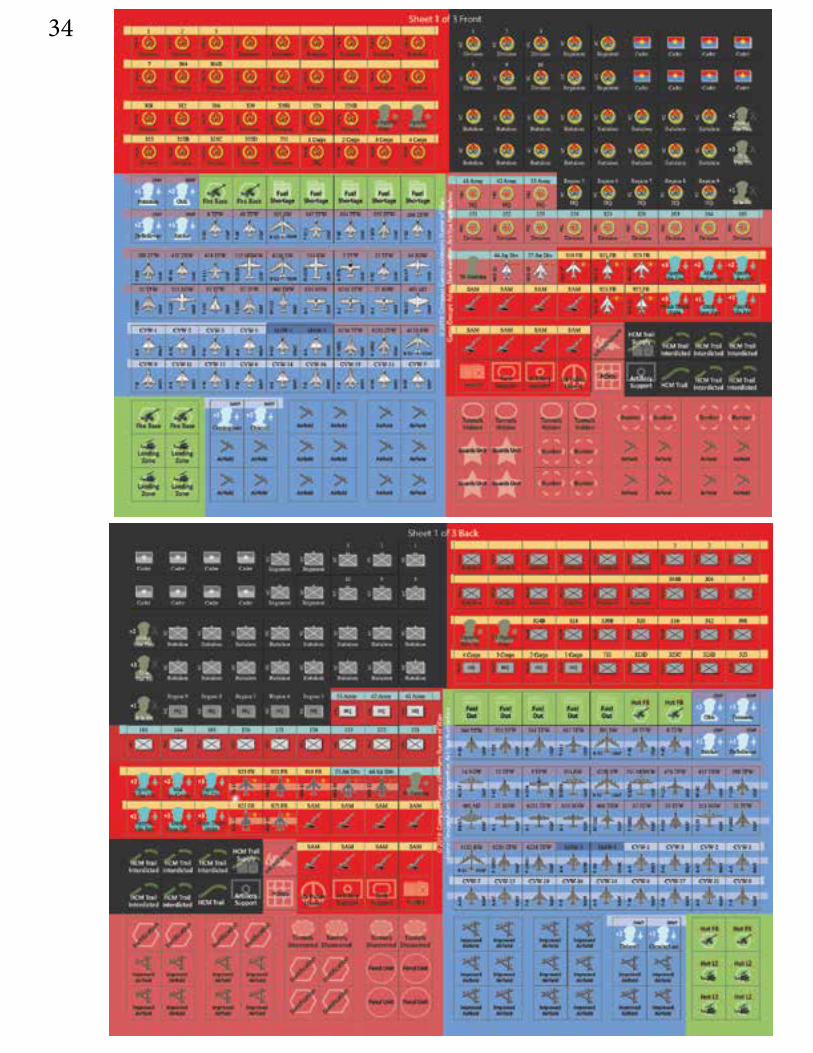
34
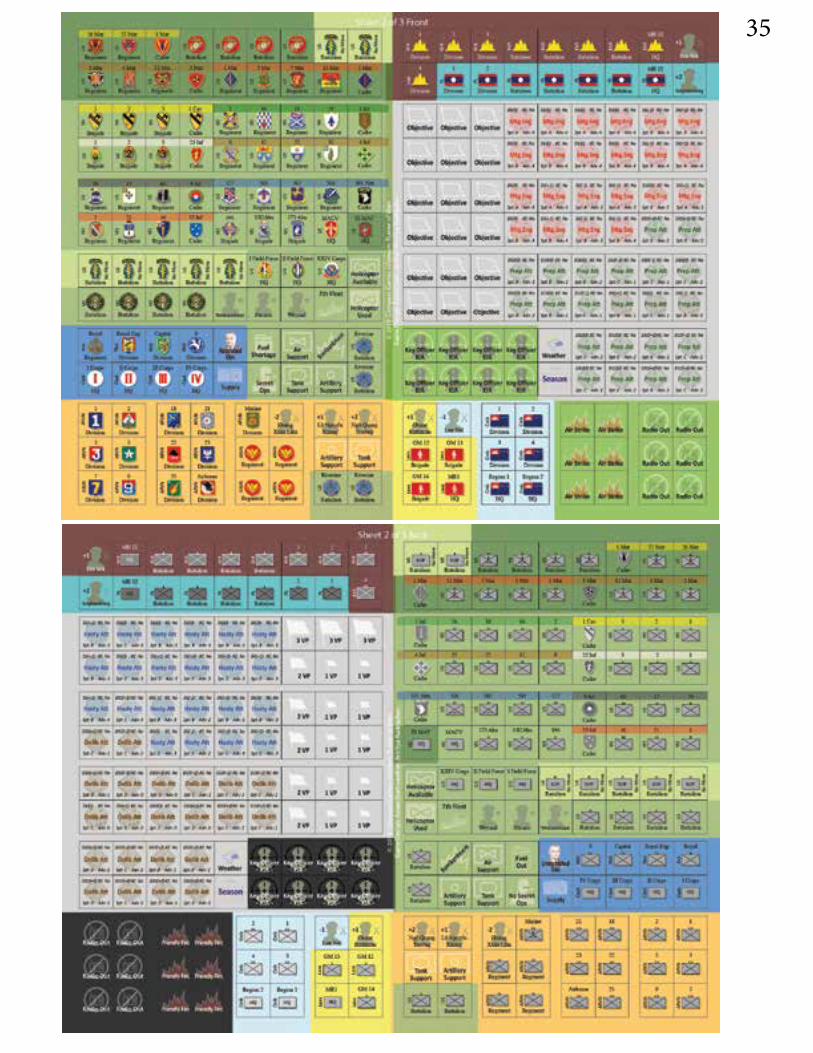
35