Embed Size (px)
Citation preview

Mini Al bum Binding Technique
You Wil l Need: • A piece of coordinating paper from your mini album • Chipboard• Strong card • Scissors or craft knife • Score board & bone folder • Scor Tape &/or Glossy Accents/glue adhesive • Black paint (optional) • Corner punch (optional) • Distress Ink in Vintage Photo (optional) • Front & back covers of your mini album (for measurements). • Hole punch (optional) • Mini album pages!

Al bum binding base front... Distress the edges of your paper...
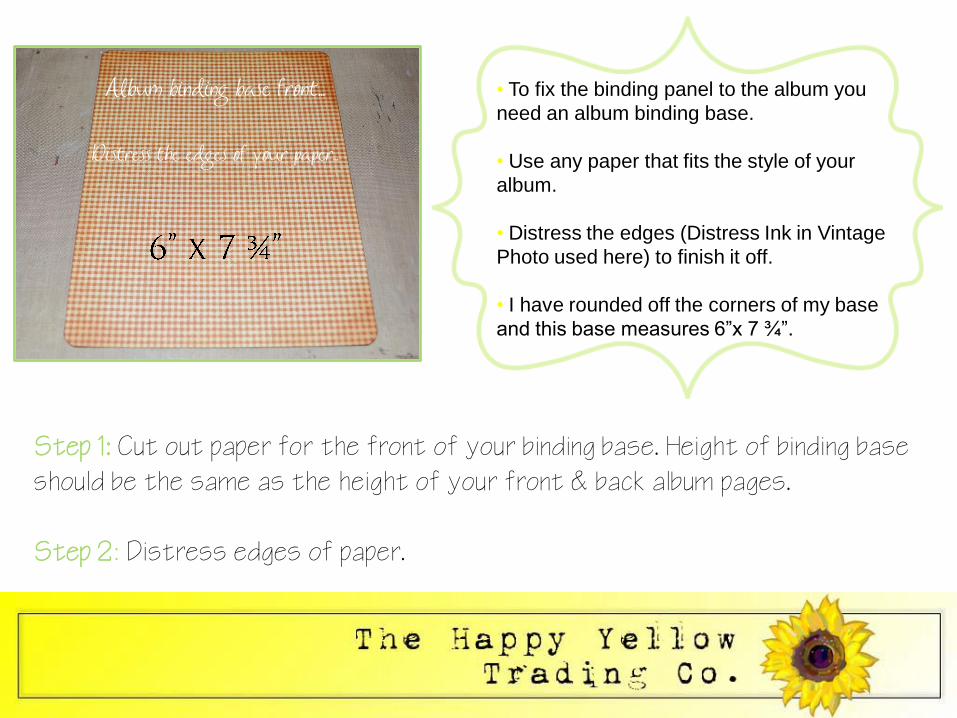
Step 1: Cut out paper for the front of your binding base. Height of binding base should be the same as the height of your front & back album pages. Step 2: Distress edges of paper.
• To fix the binding panel to the album you
need an album binding base.
• Use any paper that fits the style of your
album.
• Distress the edges (Distress Ink in Vintage
Photo used here) to finish it off.
• I have rounded off the corners of my base
and this base measures 6”x 7 ¾”.
Album binding base front...
Distress the edges of your paper...
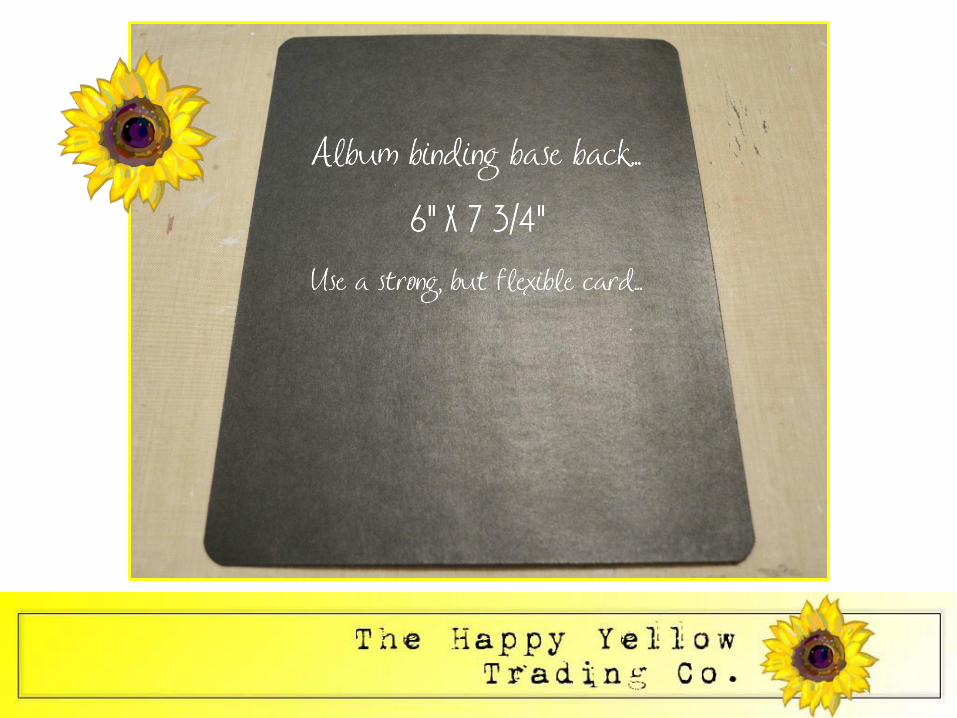
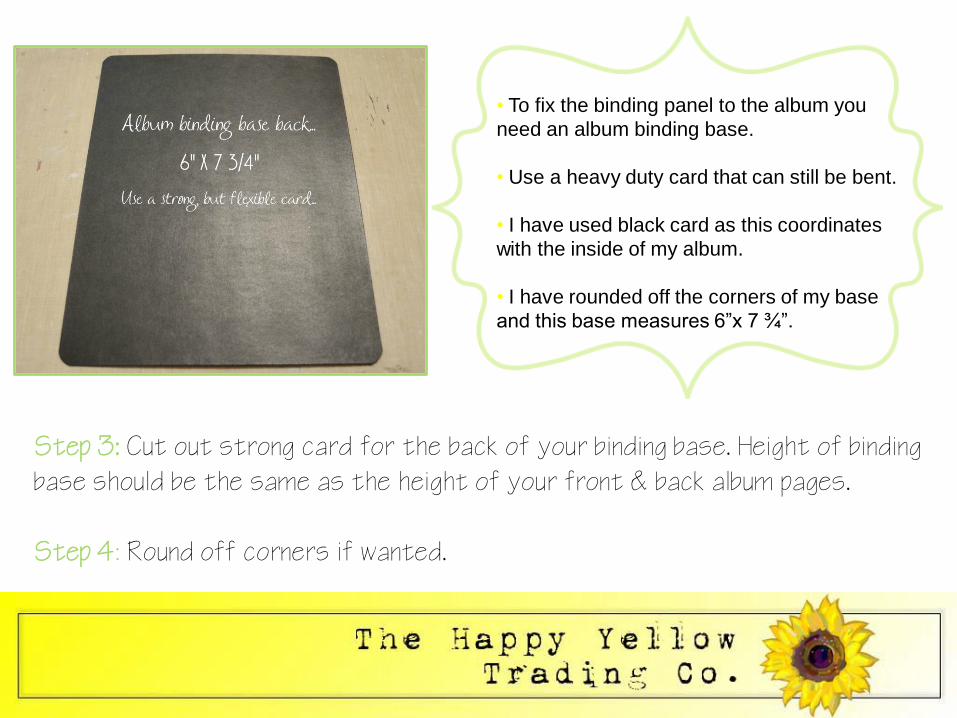
Step 3: Cut out strong card for the back of your binding base. Height of binding base should be the same as the height of your front & back album pages. Step 4: Round off corners if wanted.
• To fix the binding panel to the album you
need an album binding base.
• Use a heavy duty card that can still be bent.
• I have used black card as this coordinates
with the inside of my album.
• I have rounded off the corners of my base
and this base measures 6”x 7 ¾”.
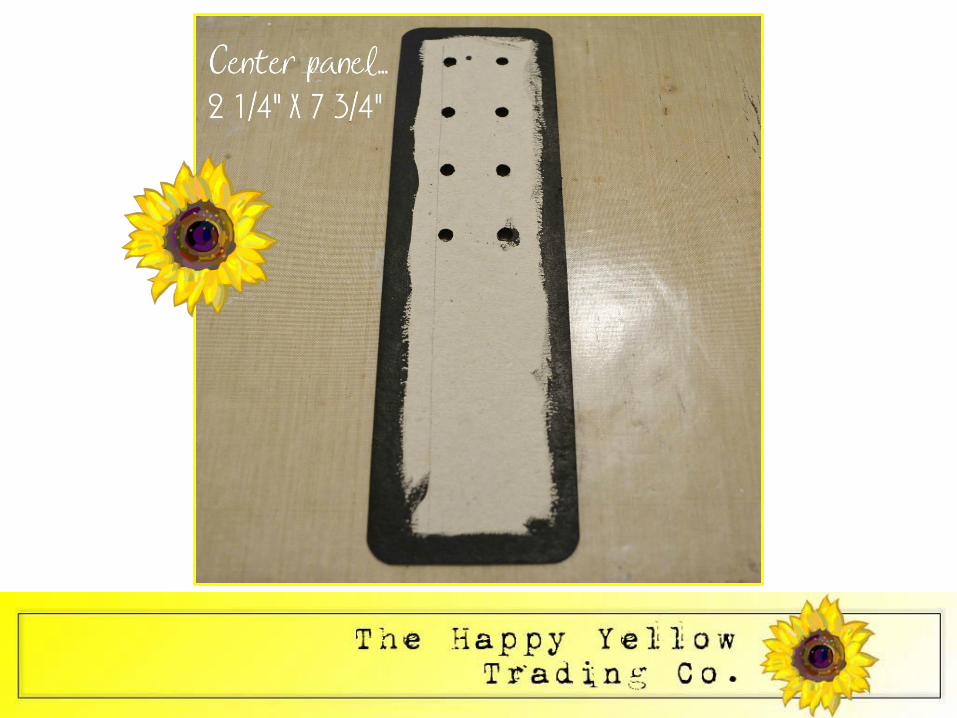

Step 5: Cut out chipboard for your centre panel. Height of centre panel should be the same as the height of your front & back album pages. Width of centre panel will be determined by how thick you want your album to be. Step 6: I have punched holes in the panel so that I can add ribbon later.
• We need a centre panel for the binding
base, which will hold the binding flaps.
• Use chipboard if possible.
• Paint the front & the back edges with black
paint.
• I have rounded off the corners of my panel
and it measures 2 ¼”x 7 ¾”.
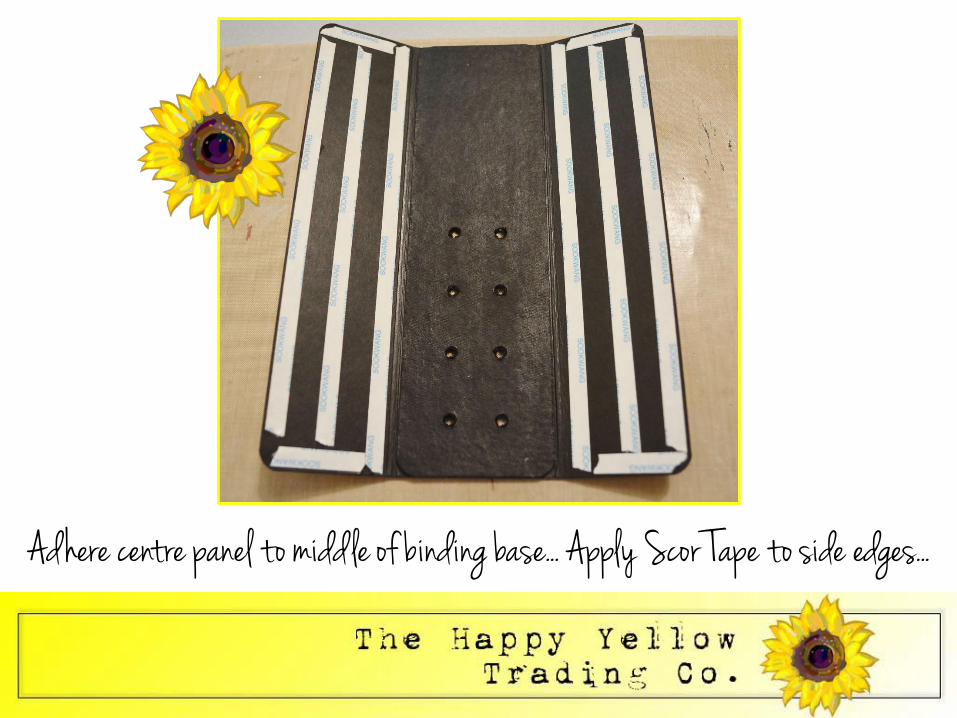
Adhere centre panel to midd le of binding base... Apply Scor Tape to side edges...

Step 7: Using a strong glue or Scor Tape adhere the centre panel to the middle of the inside of the binding base. Make sure to follow your punched holes through so they go all the way through the base. Step 8: Put Scor Tape on either side of the base, this is how we will attach it to the front & back of the album covers, creating a “book”.
• Centre panel is adhered to the middle of
the binding base
• Use a cylindrical file to push through the
punched holes so they go all the way through
the binding base.
• Score either side of the centre panel &
gently bend.
• Adhere Scor Tape to both sides of the base.
Adhere centre panel to middle of binding base....
Apply Scor Tape to side edges...
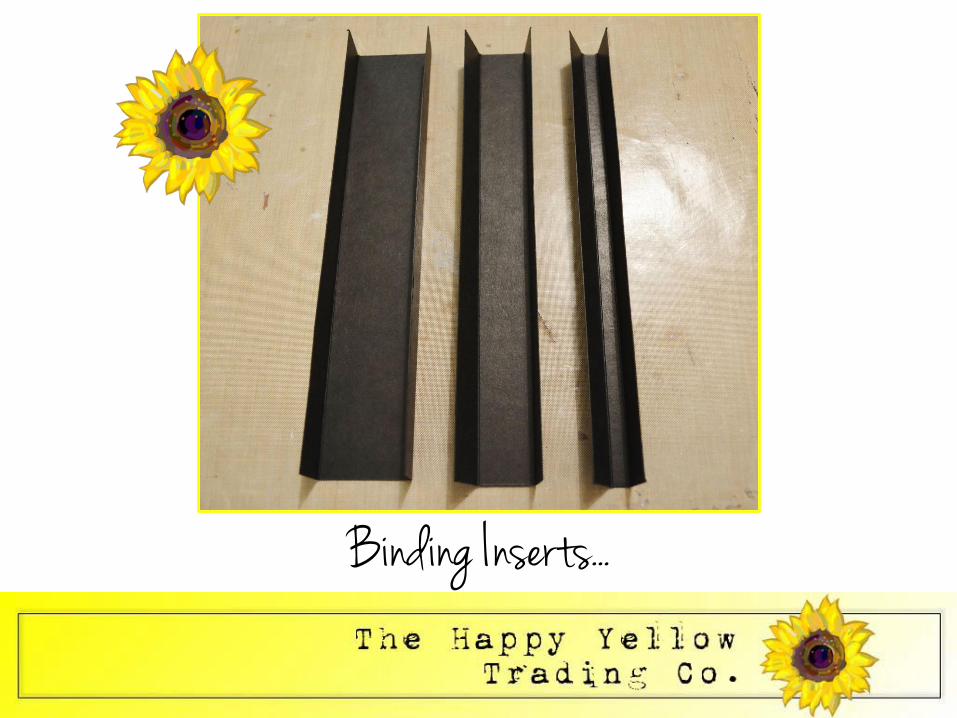
Binding Inserts...


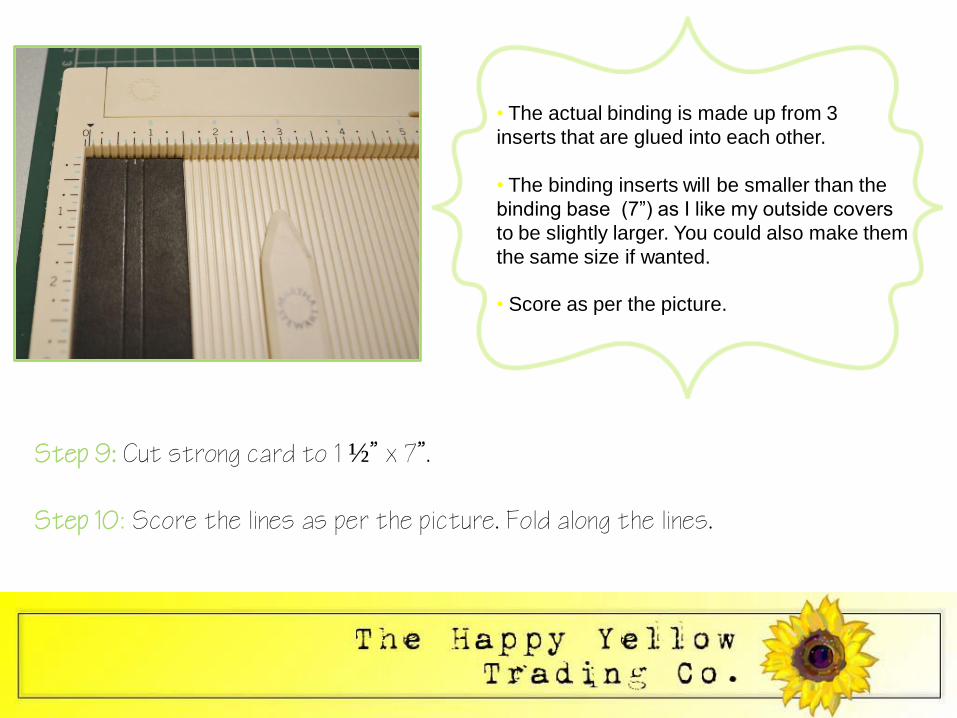
Step 9: Cut strong card to 1 ½” x 7”. Step 10: Score the lines as per the picture. Fold along the lines.
• The actual binding is made up from 3
inserts that are glued into each other.
• The binding inserts will be smaller than the
binding base (7”) as I like my outside covers
to be slightly larger. You could also make them
the same size if wanted.
• Score as per the picture.

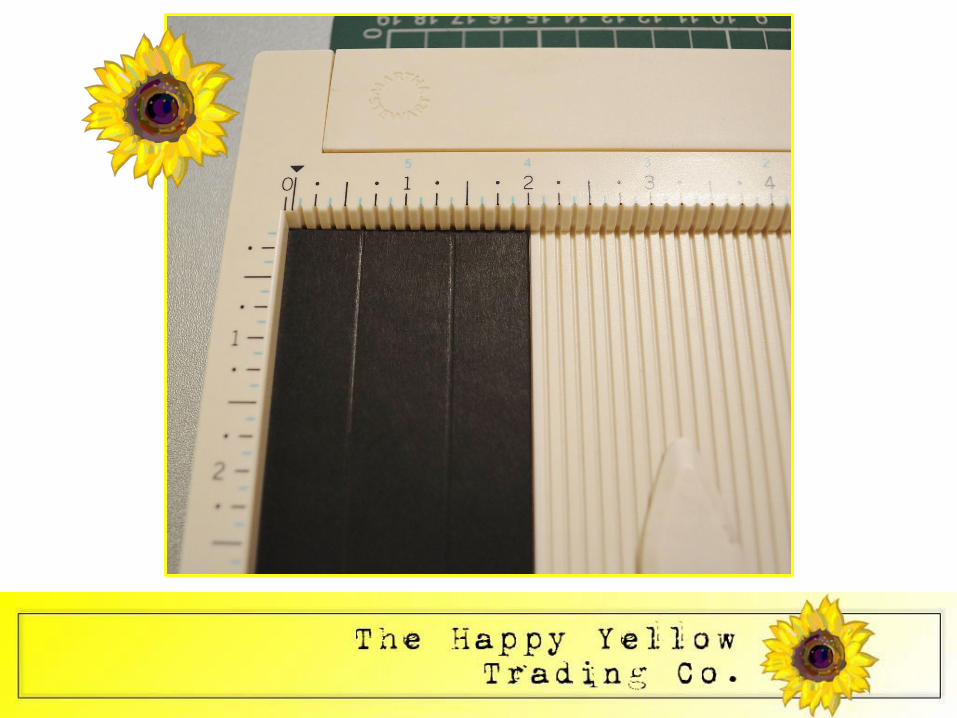
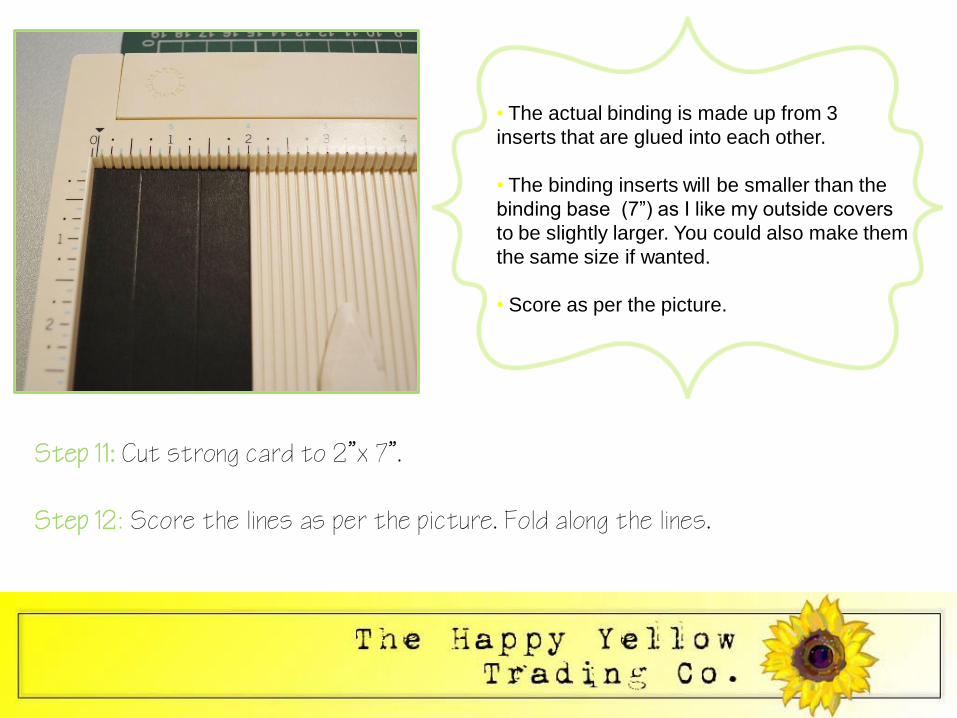
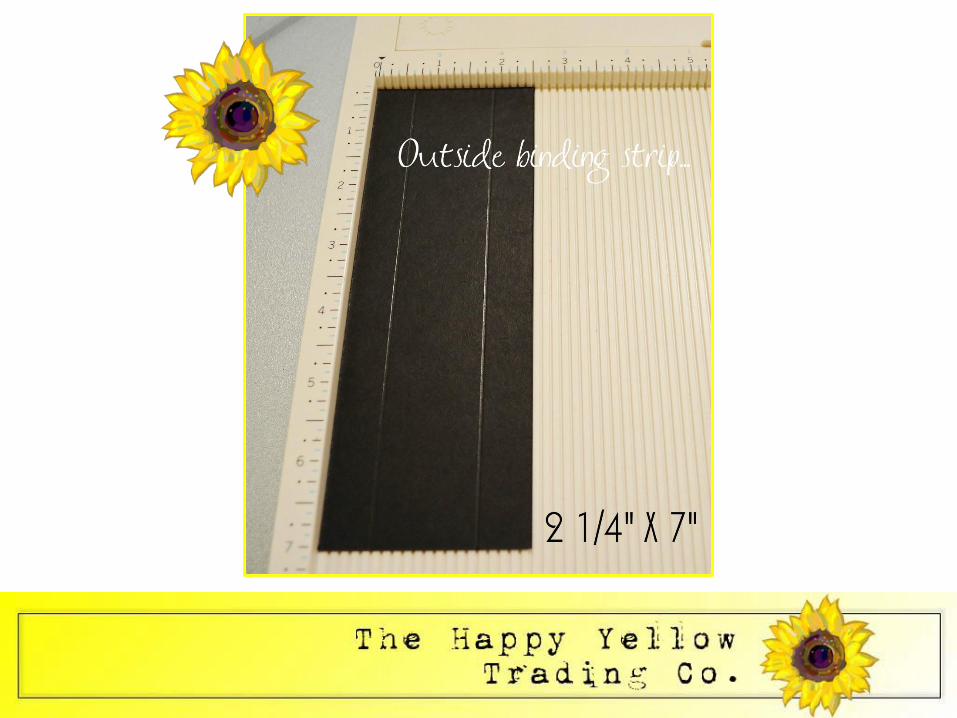
Step 11: Cut strong card to 2”x 7”. Step 12: Score the lines as per the picture. Fold along the lines.
• The actual binding is made up from 3
inserts that are glued into each other.
• The binding inserts will be smaller than the
binding base (7”) as I like my outside covers
to be slightly larger. You could also make them
the same size if wanted.
• Score as per the picture.
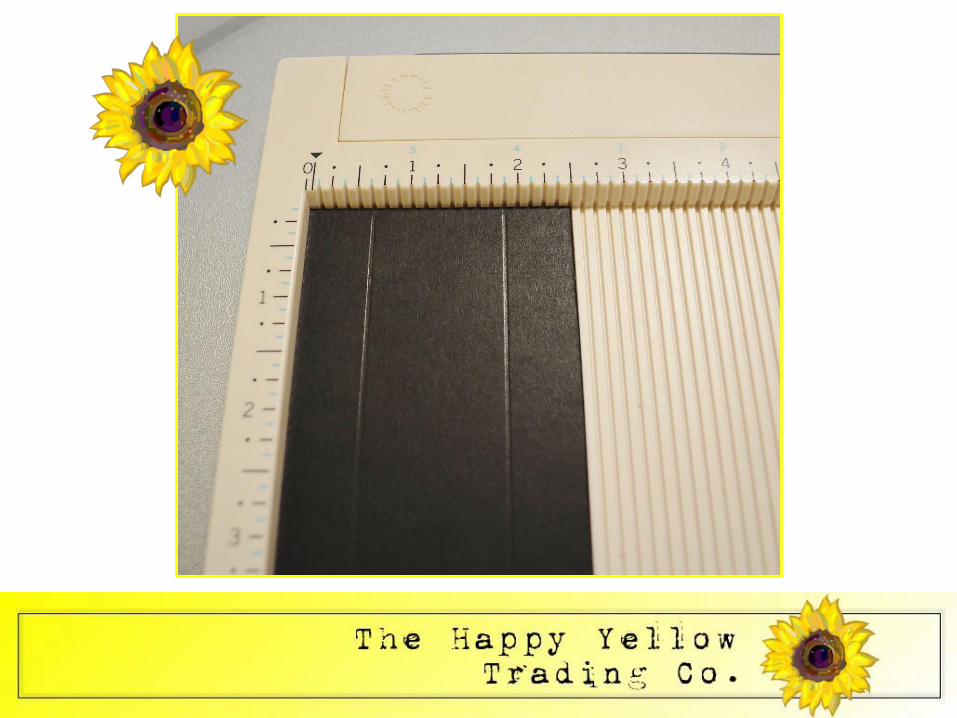
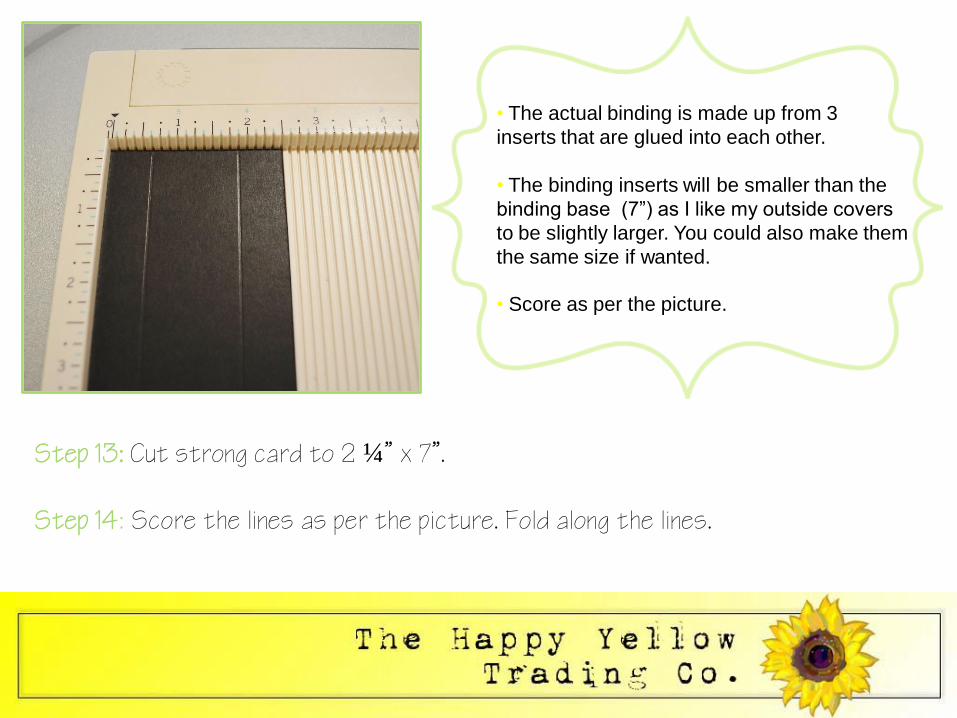
Step 13: Cut strong card to 2 ¼” x 7”. Step 14: Score the lines as per the picture. Fold along the lines.
• The actual binding is made up from 3
inserts that are glued into each other.
• The binding inserts will be smaller than the
binding base (7”) as I like my outside covers
to be slightly larger. You could also make them
the same size if wanted.
• Score as per the picture.
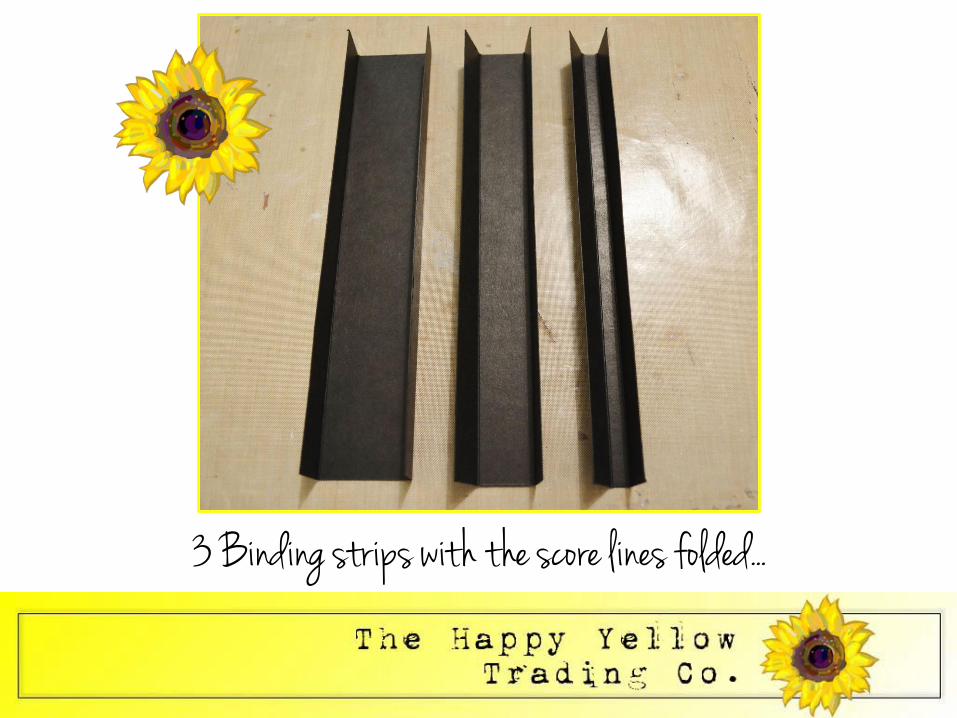
3 Binding strips with the score lines folded...
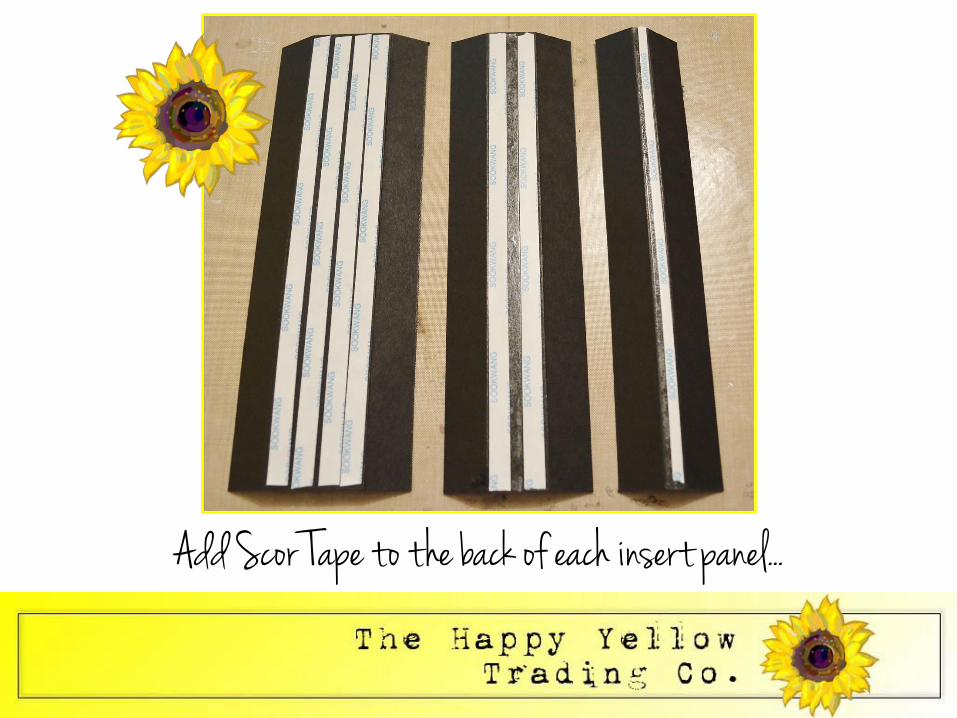
Add Scor Tape to the back of each insert panel...
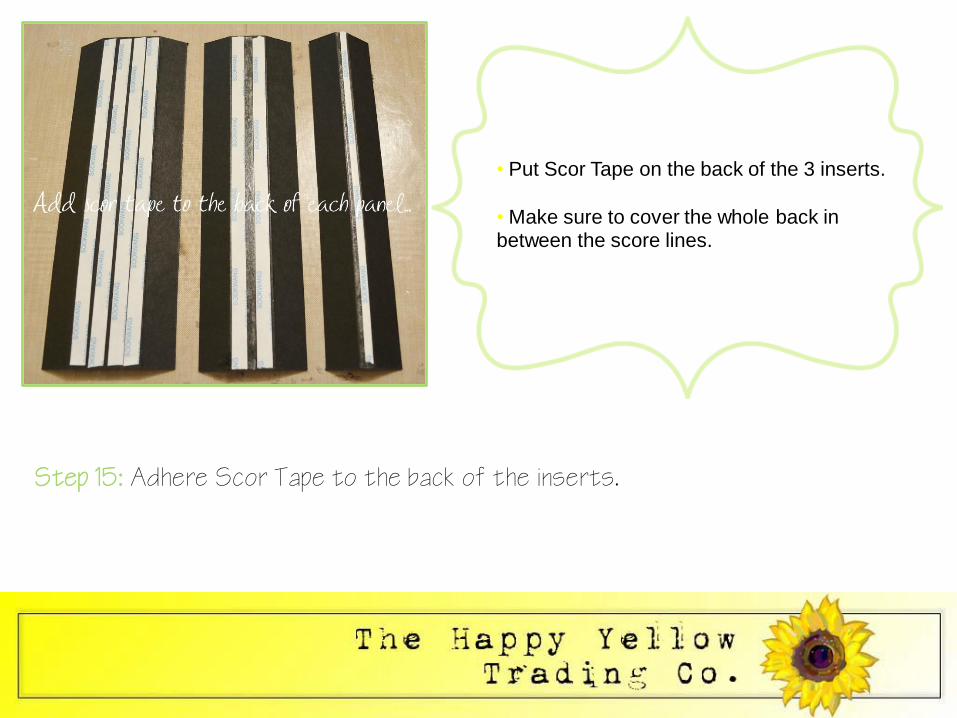
Step 15: Adhere Scor Tape to the back of the inserts.
• Put Scor Tape on the back of the 3 inserts.
• Make sure to cover the whole back in between the score lines.

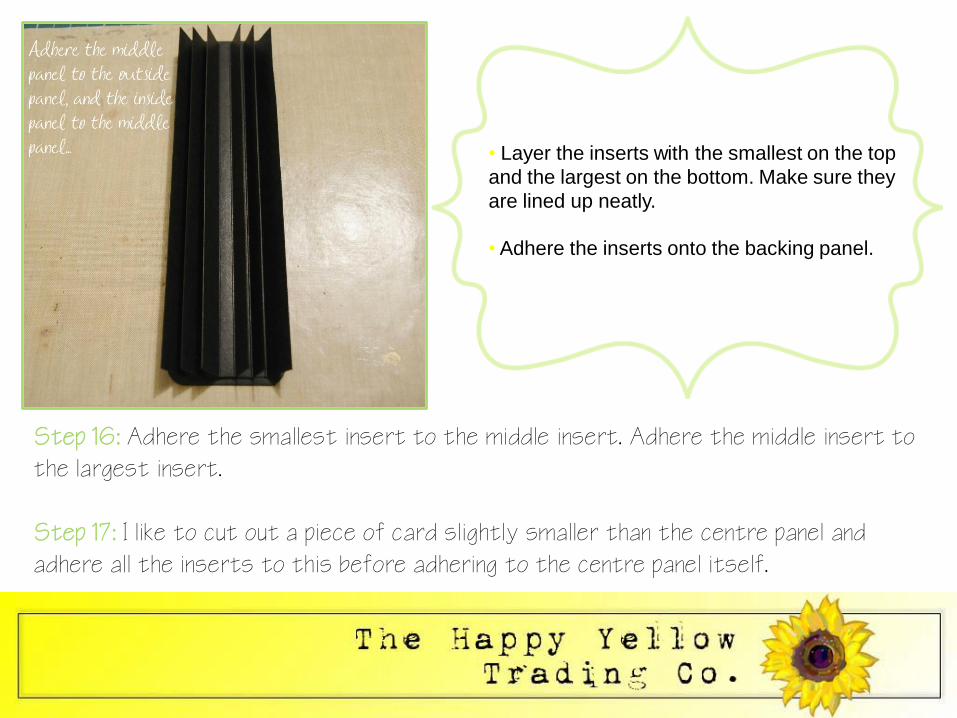
Step 16: Adhere the smallest insert to the middle insert. Adhere the middle insert to the largest insert. Step 17: I like to cut out a piece of card slightly smaller than the centre panel and adhere all the inserts to this before adhering to the centre panel itself.
• Layer the inserts with the smallest on the top
and the largest on the bottom. Make sure they
are lined up neatly.
• Adhere the inserts onto the backing panel.
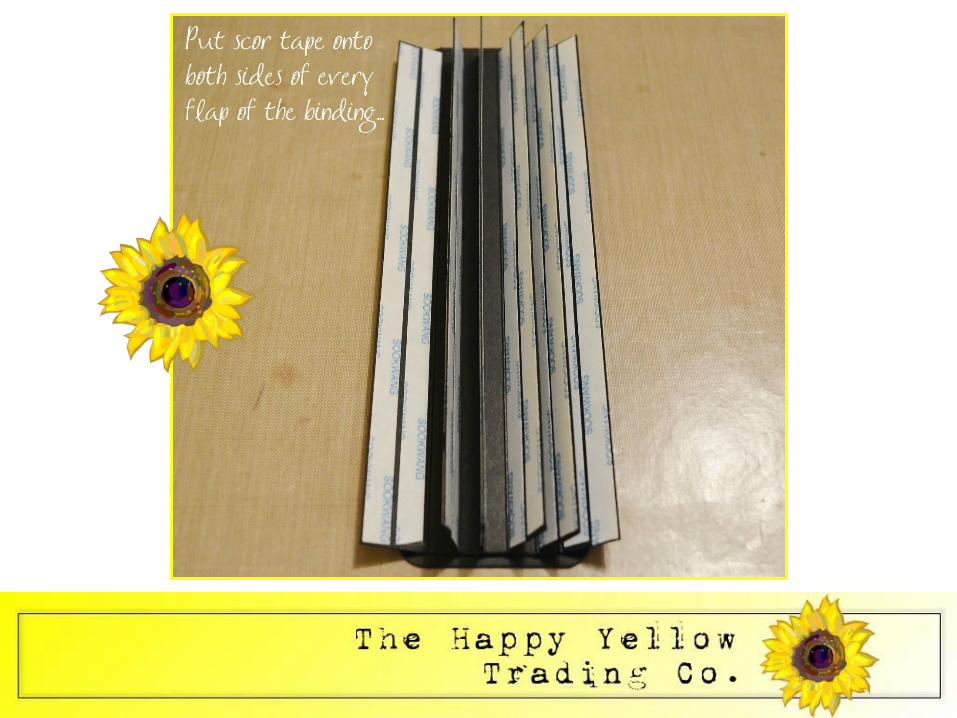

Step 18: Adhere Scor Tape to all the flaps on both sides. I like to use Scor Tape as it is really strong. You could also use Glossy Accents but it might be a bit messy!
• Add Scor Tape to each flap of the insert on both sides.

Binding base adhered to the front & back al bum pages...

Binding base with inside front & back al bum pages...
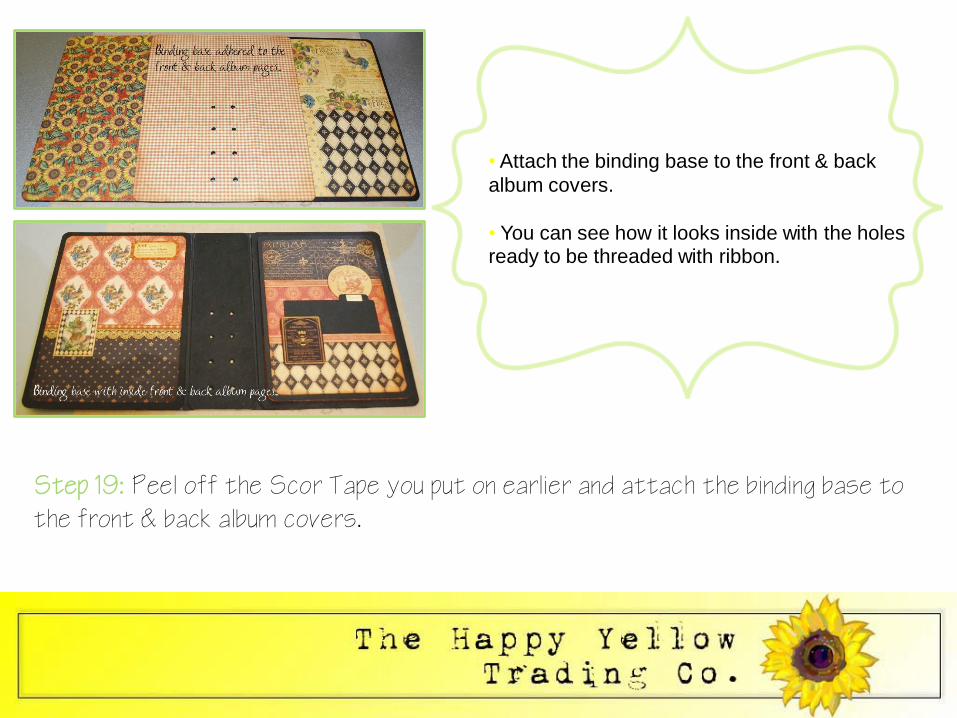
Step 19: Peel off the Scor Tape you put on earlier and attach the binding base to the front & back album covers.
• Attach the binding base to the front & back
album covers.
• You can see how it looks inside with the holes ready to be threaded with ribbon.

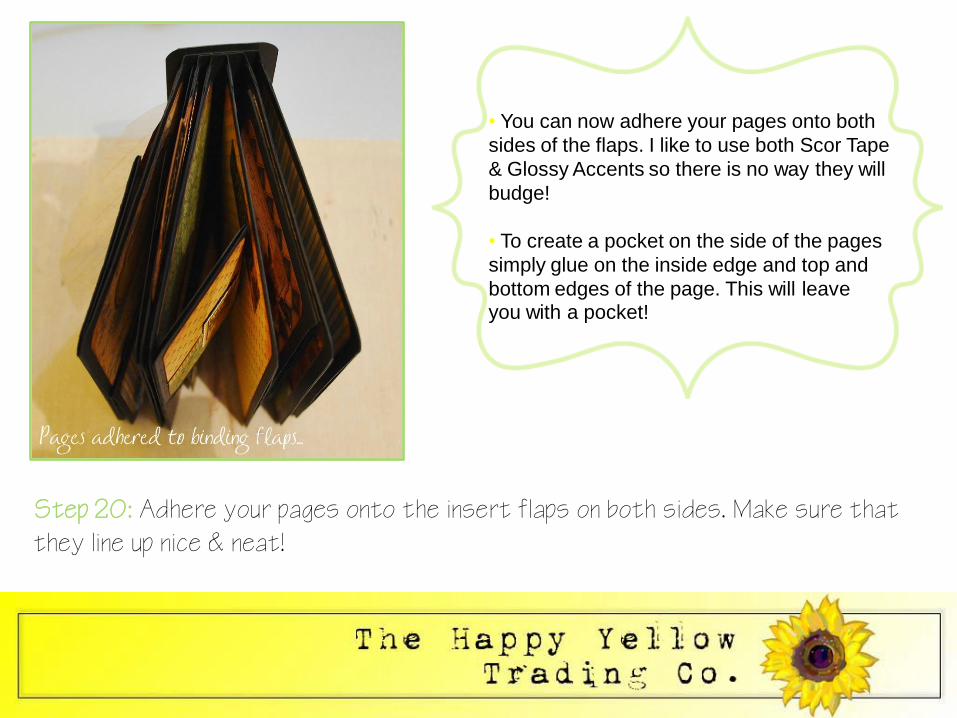
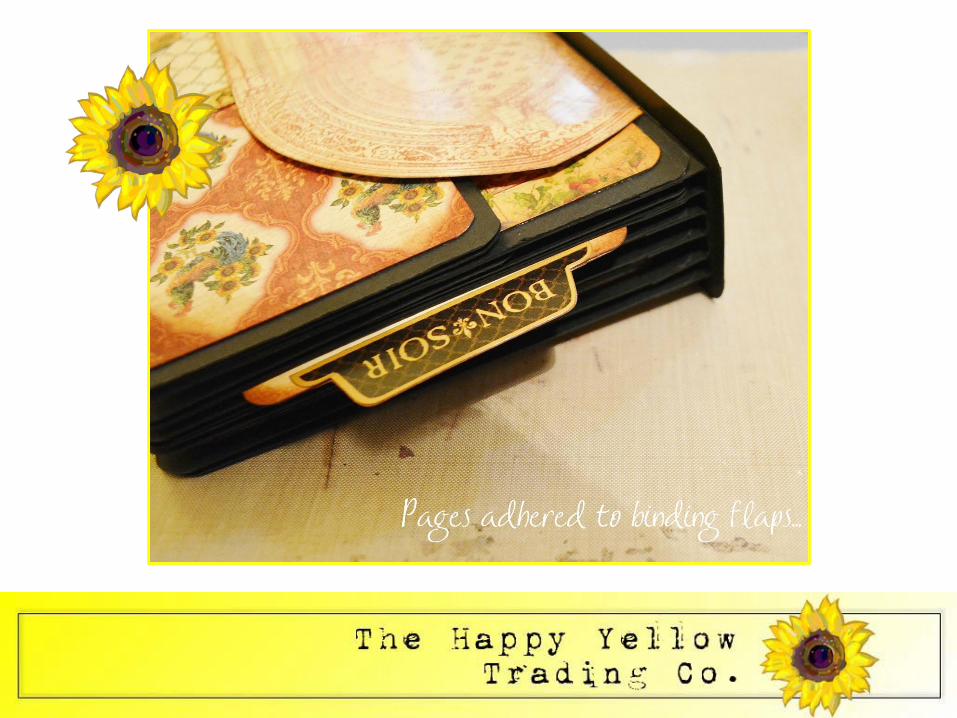
Step 20: Adhere your pages onto the insert flaps on both sides. Make sure that they line up nice & neat!
• You can now adhere your pages onto both
sides of the flaps. I like to use both Scor Tape
& Glossy Accents so there is no way they will
budge!
• To create a pocket on the side of the pages
simply glue on the inside edge and top and
bottom edges of the page. This will leave you with a pocket!

Step 21: Using Scor Tape adhere the binding inserts onto the centre panel.
• Now that your pages are bound in you
can secure the binding inserts onto the
centre panel.
• Make sure to thread your ribbon through the
holes before adhering to the panel!
• This is a great method of binding as the pages act like a book and lay really nicely!
I hope you liked this tutorial, keep an eye out as I hope to have the
Mini Al bum finished soon!